My New Cookbook is Out! Check Out Now!
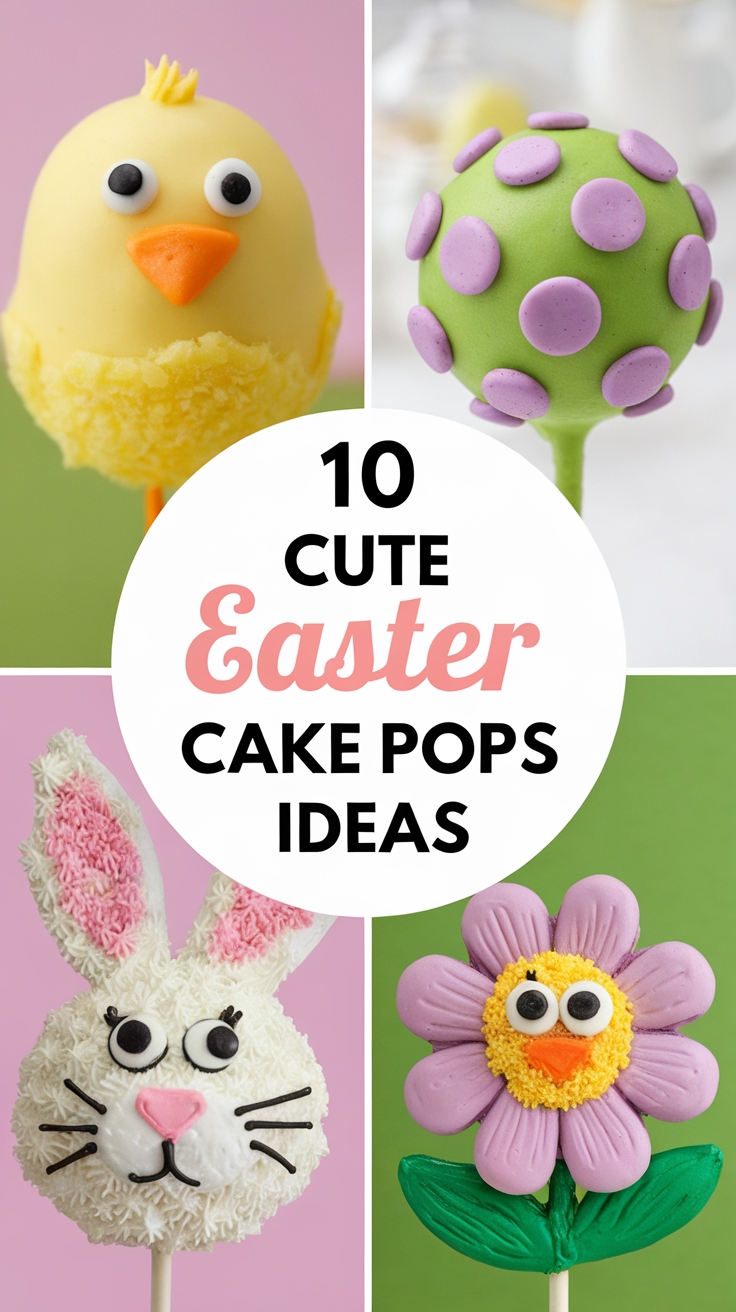
10 Cute Easter Treats That Are Almost Too Adorable to Eat
This page contains affiliate links and I earn a commission if you make a purchase through one of the links, at no cost to you.
Did you know that over 16 billion jelly beans are produced each year just for Easter? This sweet season is the perfect opportunity to brighten up your celebrations with some adorable treats!
In this collection, you’ll discover 10 cute Easter treats that are almost too adorable to eat, from Bunny Bait Marshmallow Pops to Miniature Easter Egg Cheesecakes.
Get ready to impress your friends and family with these delightful recipes that will bring a festive touch to your holiday gatherings!
Shop Our Must-Haves


1. Bunny Bait Marshmallow Pops
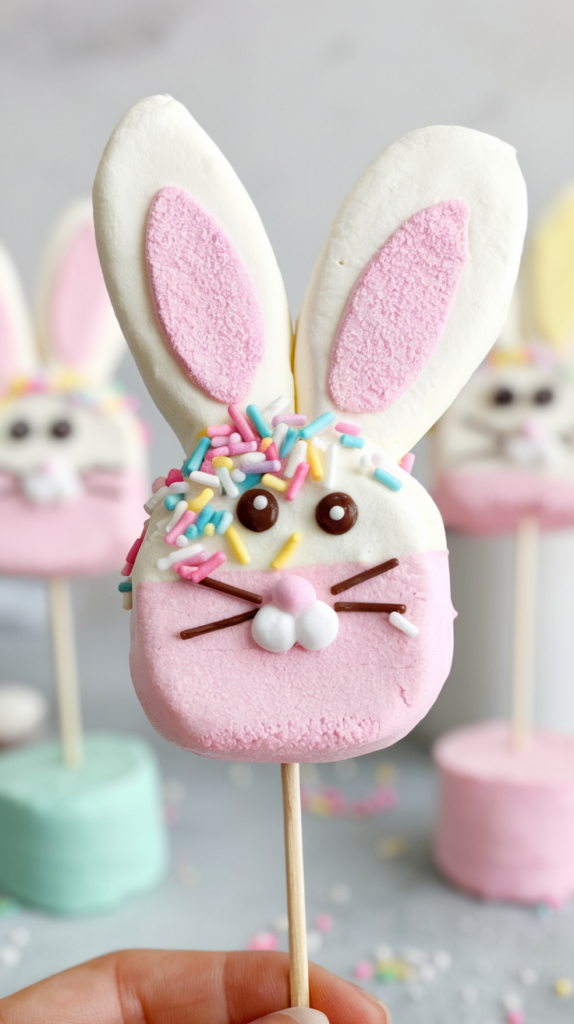
Indulge in a playful and delightful treat this Easter with Bunny Bait Marshmallow Pops! These charming marshmallow pops are not only easy to make but also irresistible with their colorful toppings and sweet flavors that everyone will love.
Prep Time: 20 minutes
Total Time: 20 minutes
Servings: 12 pops
Ingredients:
- 12 large marshmallows
- 1 cup white chocolate melts
- 1 cup crushed graham crackers
- 1 cup pastel candy sprinkles
- 12 lollipop sticks
- Mini chocolate chips or candies for decoration
- Optional: food coloring for white chocolate
Instructions:
- Start by melting the white chocolate melts in a microwave-safe bowl. Heat in increments of 30 seconds, stirring in between until completely melted and smooth. If you want to add color, mix in a few drops of food coloring until you achieve your desired shade.
- While the chocolate is melting, prepare your toppings. Set up two separate bowls with crushed graham crackers and candy sprinkles.
- Once the chocolate is melted, dip each marshmallow into the chocolate, ensuring it’s fully coated. Allow any excess chocolate to drip off.
- Immediately roll the chocolate-coated marshmallow in the crushed graham crackers or sprinkle some candy sprinkles on top while the chocolate is still wet.
- Insert a lollipop stick into the base of each marshmallow and allow them to stand upright in a glass or styrofoam block to set.
- If desired, use mini chocolate chips or other candies to create bunny faces on the marshmallows after coating them in chocolate.
- Let the pops set for about 10-15 minutes at room temperature until the chocolate hardens.
Tips:
- For an extra flavor boost, add a teaspoon of vanilla extract to the melted chocolate.
- You can also experiment with colored chocolate melts to make your Bunny Bait pops more vibrant.
Nutrition Facts:
- Calories: 150
- Total Fat: 5g
- Saturated Fat: 3g
- Cholesterol: 0mg
- Sodium: 10mg
- Total Carbohydrates: 25g
- Dietary Fiber: 0g
- Sugars: 20g
- Protein: 1g
2. Chocolate-Covered Egg Nests

Create a delightful treat this Easter with these Chocolate-Covered Egg Nests! Perfect for sharing with family and friends, these sweet little nests are easy to make and will surely impress everyone with their charming appearance.
Prep Time: 15 minutes
Total Time: 15 minutes
Servings: 12 nests
Ingredients:
- 2 cups crispy rice cereal
- 1 cup shredded coconut
- 1 cup semi-sweet chocolate chips
- 1/2 cup creamy peanut butter
- 1/4 cup honey
- 1/2 teaspoon vanilla extract
- Candy-coated chocolate eggs (for filling the nests)
Instructions:
- In a large mixing bowl, combine the crispy rice cereal and shredded coconut. Mix well and set aside.
- In a microwave-safe bowl, add the semi-sweet chocolate chips and creamy peanut butter. Heat in the microwave for 30 seconds at a time, stirring in between until fully melted and smooth.
- Stir in the honey and vanilla extract into the chocolate-peanut butter mixture until completely combined.
- Pour the melted mixture over the cereal and coconut, and gently fold until all the cereal is coated evenly.
- Using your hands or a spoon, form small nests by taking a small amount of the mixture and shaping it into a round nest with an indent in the center. Place on a parchment-lined baking sheet.
- Once all the nests are shaped, let them sit at room temperature for about 10 minutes to firm up.
- Fill each nest with a few candy-coated chocolate eggs in the center.
Tips:
- For added flavor, consider mixing in a pinch of salt to the chocolate-peanut butter mixture.
- To customize, you can use different types of chocolate for coating, such as white or milk chocolate.
- If you want a little crunch, try adding some chopped nuts or dried fruit into the mixture.
Nutrition Facts:
- Calories: 150 per nest
- Total Fat: 8g
- Saturated Fat: 3g
- Cholesterol: 0mg
- Sodium: 30mg
- Total Carbohydrates: 18g
- Dietary Fiber: 1g
- Sugars: 7g
- Protein: 3g
3. Flower Pot Cupcakes
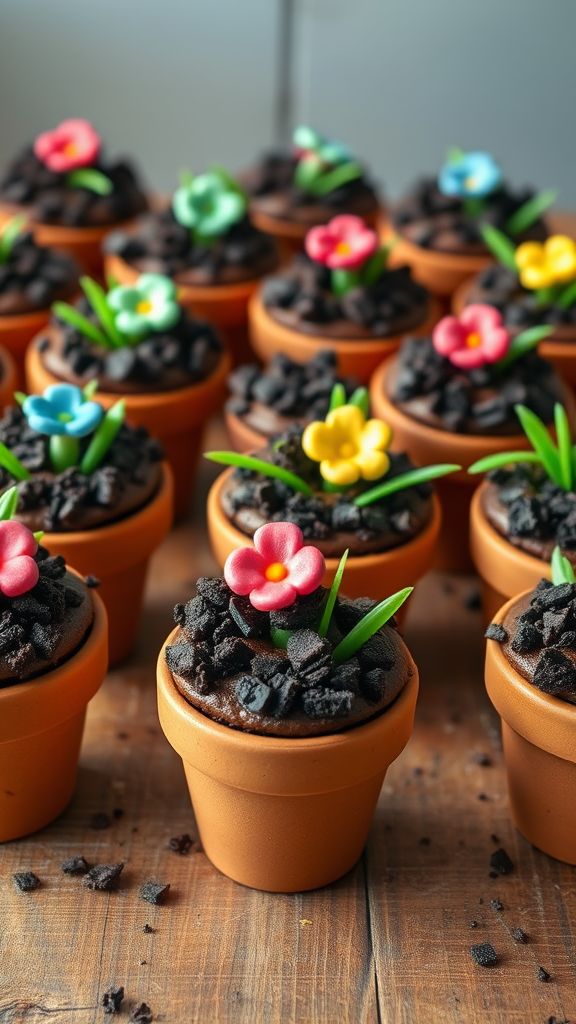
Flower Pot Cupcakes are a delightful and creative treat that is perfect for celebrating Easter! These cute cupcakes not only look fantastic but taste irresistible, making them a hit at any spring gathering.
Prep Time: 30 minutes
Total Time: 1 hour
Servings: 12
Ingredients:
- 1 box chocolate cake mix
- 3 large eggs
- 1/2 cup vegetable oil
- 1 cup water
- 1 cup chocolate frosting
- 12 mini terra cotta pots (cleaned and food-safe)
- 1 package of crushed Oreos (for soil)
- Candy flowers or gummy candies (for decoration)
- Green frosting (for added decoration)
Instructions:
- Preheat your oven to 350°F (175°C) and line a cupcake pan with cupcake liners.
- In a large mixing bowl, combine the chocolate cake mix, eggs, vegetable oil, and water. Mix well until the batter is smooth and well combined.
- Pour the batter into the cupcake liners, filling each about 2/3 full. Bake in the preheated oven for 18-20 minutes, or until a toothpick inserted in the center comes out clean.
- Remove the cupcakes from the oven and allow them to cool in the pan for 5 minutes, then transfer them to a wire rack to cool completely.
- Once the cupcakes are completely cooled, use a small knife or cupcake corer to remove a small section from the top of each cupcake.
- Fill the hole with chocolate frosting, then place the top back on and frost the entire cupcake with the remaining frosting.
- Sprinkle crushed Oreos generously on top of each frosted cupcake to mimic soil.
- Decorate your cupcakes with candy flowers or gummy candies, pressing them into the "soil" so they stand upright.
- Optional: Use the green frosting to add grass details on top for a more festive look.
Tips:
- For a burst of flavor, consider adding a teaspoon of peppermint extract to the cupcake batter.
- You can also add dried edible flowers for a more natural touch in decoration.
- Experiment with different kinds of frosting for a unique taste and appeal.
Nutrition Facts:
- Calories: Approximately 350 per cupcake
- Total Fat: 18g
- Total Carbohydrates: 47g
- Sugars: 32g
- Protein: 4g
- Fiber: 1g
4. Peep Tarts with Spring Fruit
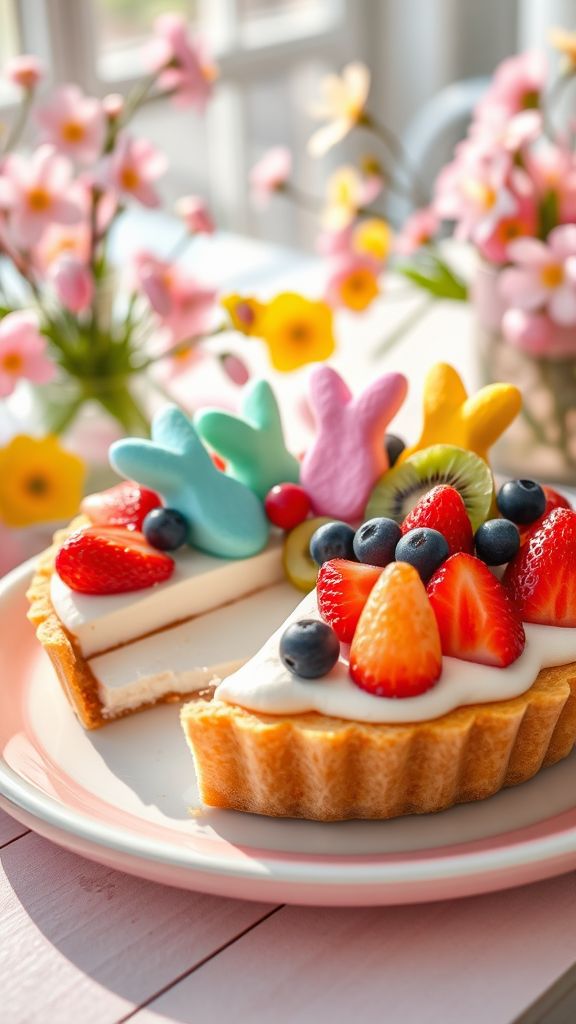
Indulge in the festive spirit of Easter with these delightful Peep Tarts with Spring Fruit! Bursting with flavors of fresh fruit and topped with adorable marshmallow peeps, they are perfect for spring gatherings and celebrations.
Prep Time: 20 minutes
Additional Time: 30 minutes
Total Time: 50 minutes
Servings: 6 tarts
Ingredients:
- 1 pre-made pie crust
- 1 cup cream cheese, softened
- 1/2 cup powdered sugar
- 1 teaspoon vanilla extract
- 1 cup mixed spring fruits (such as strawberries, blueberries, and kiwi)
- 6 Peeps (your choice of color)
- Whipped cream (for garnish, optional)
Instructions:
- Preheat your oven to 350°F (175°C).
- Unroll the pie crust and place it into a tart pan, pressing it firmly into the edges. Trim any excess crust hanging over the edges.
- Poke holes in the bottom of the crust with a fork to prevent bubbling.
- Bake the crust in the preheated oven for 15 minutes or until golden brown. Remove from the oven and allow to cool completely.
- In a medium bowl, mix the cream cheese, powdered sugar, and vanilla extract until smooth and creamy.
- Once the pie crust is cooled, spread the cream cheese mixture evenly over the bottom.
- Arrange the mixed spring fruits on top of the cream cheese layer, distributing them evenly.
- Place the Peeps on top of the fruit, gently pressing them down so they stick.
- Refrigerate the tarts for at least 30 minutes to allow the flavors to meld.
- Serve chilled and garnish with whipped cream if desired.
Tips:
- For added flavor, consider drizzling a little honey or agave syrup over the fruit before serving.
- You can replace the cream cheese with a vanilla yogurt for a lighter alternative.
- Try using different flavors of Peeps to match your theme or color preference!
Nutrition Facts:
- Calories: 250
- Fat: 12g
- Carbohydrates: 32g
- Protein: 4g
- Sugar: 20g
5. Carrot Cake Truffles
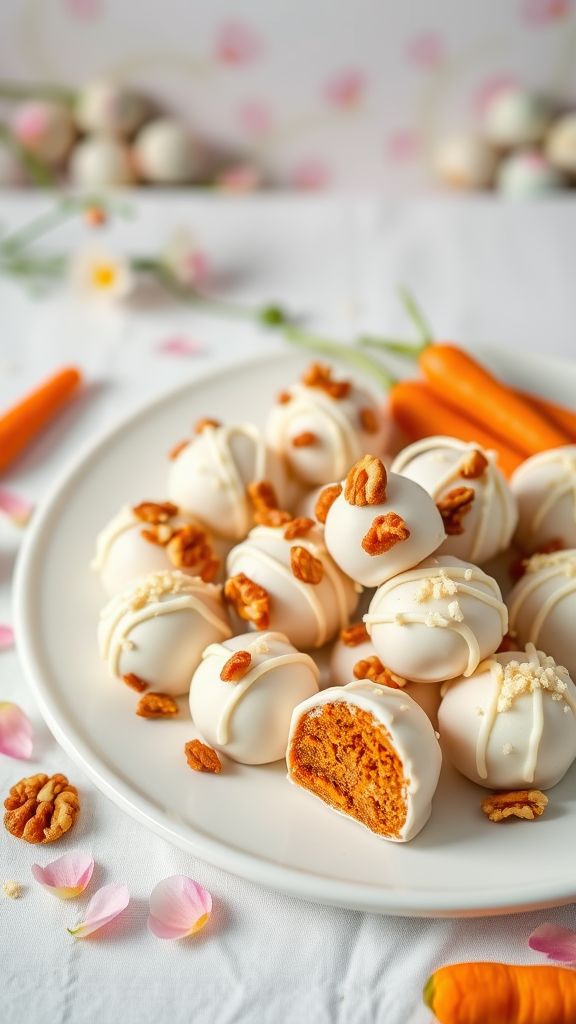
Indulge in the delightful sweetness of these Carrot Cake Truffles—a perfect treat for Easter! Packed with flavor and coated in velvety white chocolate, they’re sure to impress your friends and family.
Prep Time: 30 minutes
Additional Time: 1 hour 30 minutes
Total Time: 2 hours
Servings: 16 truffles
Ingredients:
- 1 cup grated carrots
- 1 cup crushed vanilla wafers
- 1/2 cup finely chopped walnuts or pecans
- 1/2 cup cream cheese, softened
- 1/4 cup powdered sugar
- 1 tsp vanilla extract
- 1/2 tsp ground cinnamon
- 1/4 tsp nutmeg
- 1 cup white chocolate chips
Instructions:
- In a large bowl, combine the grated carrots, crushed vanilla wafers, and finely chopped walnuts or pecans. Stir to mix well.
- In another bowl, mix the cream cheese, powdered sugar, vanilla extract, ground cinnamon, and nutmeg until smooth and creamy.
- Gradually add the cream cheese mixture to the carrot mixture, stirring until fully combined.
- Once mixed, cover the bowl with plastic wrap and chill the mixture in the refrigerator for 1 hour.
- After chilling, scoop out small portions of the mixture and roll them into 1-inch balls using your hands.
- Place the rolled truffles on a parchment-lined baking sheet.
- In a microwave-safe bowl, melt the white chocolate chips in 30-second intervals, stirring between each interval until smooth.
- Dip each truffle into the melted white chocolate, allowing the excess chocolate to drip off, and then place them back on the baking sheet.
- Refrigerate the dipped truffles for another 30 minutes until the chocolate is set.
Tips:
For an extra flavor burst, add a dash of orange zest to the truffle mixture before chilling. If you want to make them even more festive, drizzle some melted white chocolate over the top for decoration!
Nutrition Facts:
- Calories: 180
- Total Fat: 8g
- Saturated Fat: 3g
- Cholesterol: 15mg
- Sodium: 25mg
- Total Carbohydrates: 23g
- Dietary Fiber: 1g
- Sugars: 10g
- Protein: 2g
6. Egg-Shaped Sugar Cookies

Create a delightful treat for Easter with these Egg-Shaped Sugar Cookies! These cookies are not only simple to make but also a fun activity for the whole family. Decorate them with colorful icing and sprinkles for a festive touch!
Prep Time: 20 minutes
Additional Time: 1 hour (chill time)
Total Time: 1 hour 20 minutes
Servings: 24 cookies
Ingredients:
- 2 ¾ cups all-purpose flour
- 1 teaspoon baking powder
- ½ teaspoon salt
- 1 cup unsalted butter, softened
- 1 ½ cups granulated sugar
- 1 egg
- 1 teaspoon vanilla extract
- 1 teaspoon almond extract (optional)
- Royal icing (for decoration)
- Sprinkles (for decoration)
Instructions:
- In a mixing bowl, whisk together the flour, baking powder, and salt; set aside.
- In a large bowl, cream together the butter and sugar until light and fluffy, about 3-4 minutes.
- Beat in the egg, vanilla extract, and almond extract (if using) until well combined.
- Gradually add the flour mixture to the wet ingredients, mixing until just combined.
- Divide the dough into two equal parts, flatten into disks, wrap in plastic wrap, and refrigerate for 1 hour to chill.
- Preheat your oven to 350°F (175°C).
- Roll out one disk of dough on a lightly floured surface to about ¼ inch thick.
- Use an egg-shaped cookie cutter to cut out shapes, placing them on a baking sheet lined with parchment paper.
- Bake in the preheated oven for 8-10 minutes, or until the edges are lightly golden.
- Remove from the oven and let cool on the baking sheet for a few minutes before transferring to wire racks to cool completely.
- Once cooled, decorate with royal icing and sprinkles as desired.
Tips:
For an extra burst of flavor, consider adding zest from a lemon or orange to the dough. You can also experiment with different extracts like coconut or hazelnut for unique variations!
Nutrition Facts:
- Calories: 120
- Total Fat: 6g
- Saturated Fat: 4g
- Cholesterol: 15mg
- Sodium: 50mg
- Total Carbohydrates: 16g
- Dietary Fiber: 0g
- Sugars: 8g
- Protein: 1g
7. Chick Dipped Pretzel Rods
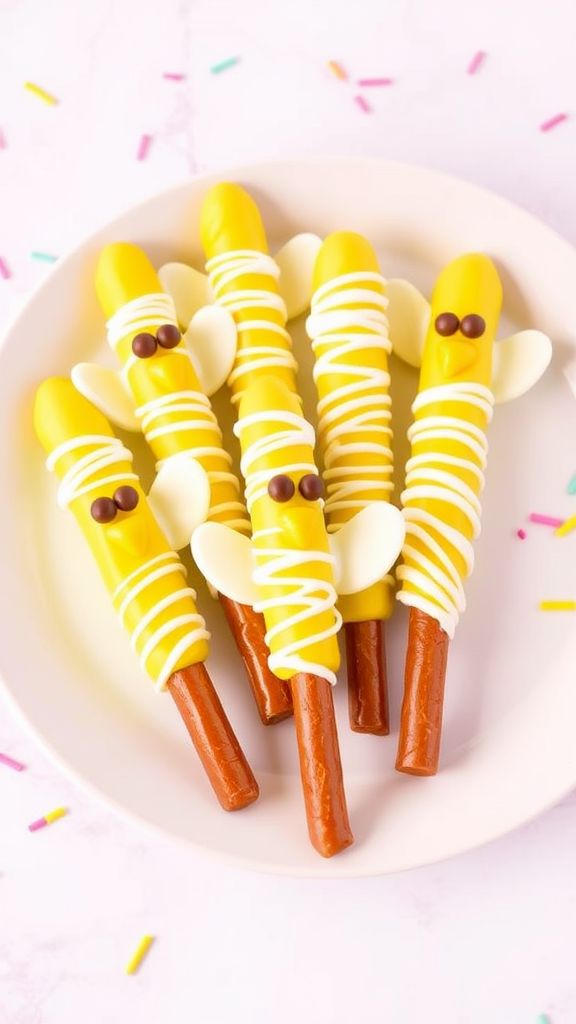
Chick Dipped Pretzel Rods are the perfect festive treat for Easter celebrations! These sweet and salty snacks are easy to make and will delight both kids and adults alike with their adorable chick designs.
Prep Time: 15 minutes
Additional Time: 30 minutes
Total Time: 45 minutes
Servings: 12 pretzel rods
Ingredients:
- 12 pretzel rods
- 1 cup yellow candy melts
- 1/4 cup white candy melts
- 2 tablespoons chocolate chips (for eyes)
- Edible black decorating gel (for the beak)
- Sprinkles (optional, for decoration)
Instructions:
- Begin by melting the yellow candy melts in a microwave-safe bowl. Heat in 30-second intervals, stirring in between, until smooth and fully melted.
- Dip each pretzel rod into the melted yellow candy melts, ensuring to cover it completely. Allow any excess to drip off.
- Place the dipped pretzel rods on a parchment-lined baking sheet.
- Before the candy coating sets, use a spoon to drizzle some white candy melts on top to create a wing effect.
- While the coating is still soft, gently press two chocolate chips into the yellow coating to form the eyes.
- Using the edible black decorating gel, add a small dot to each chocolate chip for pupils.
- To create the beak, use a small amount of the decorating gel, dabbing it just below the eyes.
- If desired, sprinkle additional sprinkles on the pretzel rods before the coating hardens.
- Place the baking sheet in the refrigerator for about 30 minutes to allow the chocolate to set.
- Once set, remove the pretzel rods from the refrigerator and serve!
Tips:
To make your Chick Dipped Pretzel Rods even more eye-catching, consider using colored sprinkles or edible glitter. You can also experiment with different colors of candy melts for a rainbow effect!
Nutrition Facts:
- Calories: 150
- Total Fat: 7g
- Saturated Fat: 3.5g
- Cholesterol: 0mg
- Sodium: 80mg
- Total Carbohydrates: 22g
- Dietary Fiber: 0g
- Sugars: 12g
- Protein: 1g
8. Springtime Rainbow Rice Krispie Treats

Springtime Rainbow Rice Krispie Treats are a vibrant twist on the classic dessert, perfect for celebrating the joys of spring and Easter. These treats are not only colorful and fun, but they’re also incredibly easy to make, making them a favorite for kids and adults alike.
Prep Time: 15 minutes
Total Time: 15 minutes
Servings: 12
Ingredients:
- 4 cups Mini Marshmallows
- 3 tablespoons Unsalted Butter
- 6 cups Rice Krispies Cereal
- 1 cup Rainbow Sprinkles
- Food Coloring (red, yellow, blue, green, purple)
Instructions:
- In a large saucepan over low heat, melt the 3 tablespoons of unsalted butter.
- Once the butter is melted, add the 4 cups of mini marshmallows and stir continuously until completely melted and smooth.
- Divide the melted marshmallow mixture evenly into five separate bowls.
- Add a few drops of different food coloring to each bowl, using the colors of a rainbow: red, yellow, blue, green, and purple. Stir until the colors are fully combined.
- In a large mixing bowl, add 6 cups of Rice Krispies cereal to each colored marshmallow mixture, then stir until the cereal is well coated with the marshmallow.
- In a greased or lined 9×13 inch baking dish, layer the colored Rice Krispie mixtures, using a spatula to spread each layer evenly. Start with one color and follow with the next.
- Once all layers are added, use your hands to gently press down the top layer to secure the treats.
- Sprinkle 1 cup of rainbow sprinkles on top while the treats are still sticky.
- Allow the treats to cool for about 10 minutes before cutting them into squares and serving.
Tips:
For an extra twist, you can add a teaspoon of vanilla extract to your melted marshmallows for added flavor. Experiment with different sprinkles or edible glitter to enhance the visual appeal of your treats.
Nutrition Facts:
- Calories: 180 per serving
- Total Fat: 4g
- Saturated Fat: 2g
- Cholesterol: 10mg
- Sodium: 50mg
- Total Carbohydrates: 32g
- Dietary Fiber: 0g
- Sugars: 12g
- Protein: 1g
9. Pastel Macaron Bunnies

These adorable Pastel Macaron Bunnies are the perfect Easter treat! Their delightful colors and cute bunny shapes will bring a smile to everyone’s face. Deliciously sweet and slightly chewy, these macarons are sure to become a holiday favorite.
Prep Time: 30 minutes
Total Time: 1 hour
Servings: 24 macarons
Ingredients:
- 1 cup almond flour
- 1 3/4 cup powdered sugar
- 3 large egg whites, at room temperature
- 1/4 cup granulated sugar
- 1/4 teaspoon cream of tartar
- Food coloring (pastel colors of your choice)
- Buttercream frosting or ganache for filling
- Edible decorations (like candy eyes or sprinkles)
Instructions:
- Preheat your oven to 300°F (150°C) and line a baking sheet with parchment paper.
- In a bowl, sift together almond flour and powdered sugar to ensure a smooth texture. Set aside.
- In a separate bowl, beat the egg whites using a handheld mixer until they become frothy.
- Add cream of tartar and continue beating until soft peaks form. Slowly add the granulated sugar, continuing to whip until stiff peaks form.
- Divide the meringue into separate bowls for each color you want, and add food coloring to achieve your desired pastel shades.
- Gently fold in the almond flour mixture, being careful not to deflate the meringue. This should create a smooth batter.
- Transfer the batter into a piping bag fitted with a round tip, and pipe bunny shapes onto the prepared baking sheet. Make sure to leave enough space between each one.
- Let the macarons rest for about 15-30 minutes until they form a dry shell on top (the tops should not stick to your finger when touched).
- Bake in the preheated oven for 15-20 minutes, until they can be easily lifted from the parchment without sticking.
- Once baked, allow the macarons to cool completely on the baking sheet before removing.
- Once cool, sandwich two macarons together with your choice of buttercream frosting or ganache filling.
- Decorate your bunnies with edible decorations for the eyes and nose for that extra special touch.
Tips:
To enhance the flavor, you can infuse the buttercream with vanilla or almond extract. Additionally, let the macarons sit in the fridge for a day to allow the flavors to mature and develop further.
For an extra festive touch, sprinkle some shredded coconut on top of the filled macarons to resemble fluffy bunny tails!
Nutrition Facts:
- Calories: 90 per macaron
- Protein: 1.5g
- Fat: 3.5g
- Carbohydrates: 15g
- Sugar: 14g
- Fiber: 0.5g
10. Miniature Easter Egg Cheesecakes

Miniature Easter Egg Cheesecakes are a delightful twist on the classic dessert, perfect for celebrating the Easter holiday! These bite-sized treats combine a creamy cheesecake filling with a crunchy crust and a fun Easter egg surprise on top.
Prep Time: 20 minutes
Total Time: 2 hours 20 minutes
Servings: 12
Ingredients:
- 1 cup graham cracker crumbs
- 1/4 cup granulated sugar
- 1/2 cup unsalted butter, melted
- 16 oz cream cheese, softened
- 1/2 cup powdered sugar
- 1 tsp vanilla extract
- 2 large eggs
- 12 miniature chocolate eggs (such as Cadbury Mini Eggs or similar)
- Whipped cream for topping (optional)
Instructions:
- Preheat your oven to 325°F (160°C).
- In a mixing bowl, combine graham cracker crumbs, granulated sugar, and melted butter. Stir until the mixture resembles wet sand.
- Line a 12-cup muffin tin with mini cupcake liners. Press a tablespoon of the graham cracker mixture into the bottom of each liner to form the crust. Bake for 5 minutes, then remove from the oven and let cool.
- In a large bowl, beat together cream cheese and powdered sugar until smooth and creamy.
- Add in the vanilla extract and eggs, one at a time, mixing well after each addition until fully incorporated.
- Pour the cheesecake filling over the cooled crusts in the muffin tin, filling each cup about 3/4 full.
- Gently press one miniature chocolate egg into the center of each cheesecake.
- Bake for 15 minutes or until the edges are set but the center still slightly jiggles.
- Turn off the oven and let the cheesecakes cool in the oven with the door slightly ajar for 1 hour.
- Once cooled, refrigerate the cheesecakes for at least 1 hour before serving. Add a dollop of whipped cream on top if desired.
Tips:
For an extra flavor boost, consider adding lemon zest or a splash of almond extract to the cheesecake filling. You can also swap out the chocolate eggs for colored candy-coated chocolates for a festive touch!
Nutrition Facts:
- Calories: 160
- Total Fat: 9g
- Saturated Fat: 5g
- Cholesterol: 40mg
- Sodium: 170mg
- Total Carbohydrates: 18g
- Dietary Fiber: 0g
- Sugars: 10g
- Protein: 2g