My New Cookbook is Out! Check Out Now!
20 Creative Super Bowl Desserts to Sweeten the Celebration
Did you know that over 1.4 billion chicken wings are consumed during the Super Bowl? While savory snacks are a must, it’s the sweet treats that truly elevate your game day experience! In this blog, we’ll explore 20 creative Super Bowl desserts that will add a delightful finishing touch to your celebration, from touchdown truffle brownies to cheerleader churro bites. Get ready to impress your guests and score big in the dessert department!
Touchdown Truffle Brownies
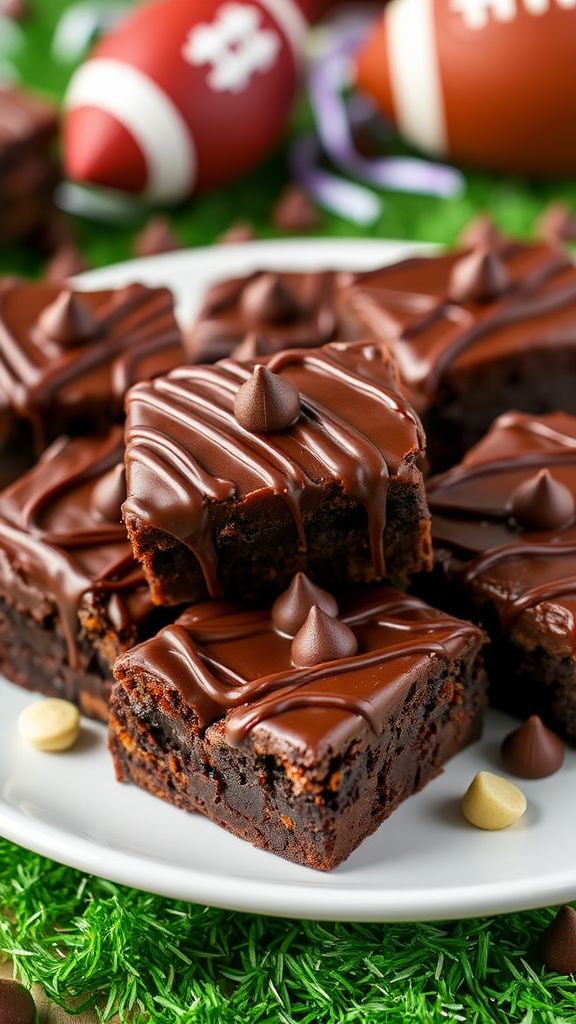
These Touchdown Truffle Brownies combine rich chocolate flavors with a delightful truffle center, making them the perfect indulgence for any game day celebration.
Ingredients:
- 1 cup unsalted butter
- 2 cups granulated sugar
- 4 large eggs
- 1 teaspoon vanilla extract
- 1 cup all-purpose flour
- 1 cup cocoa powder
- ½ teaspoon salt
- 1 cup semi-sweet chocolate chips
- ½ cup heavy cream
- 1 cup powdered sugar
Preparation Time: 15 minutes
Cooking Time: 30 minutes
Total Time: 45 minutes
Instructions:
1. Preheat your oven to 350°F (175°C) and grease a 9×13 inch baking dish.
2. In a saucepan, melt the 1 cup of butter over medium heat, then remove from heat and stir in the 2 cups of granulated sugar.
3. Add the eggs one at a time, mixing well after each addition, followed by the 1 teaspoon of vanilla extract.
4. In a separate bowl, combine the 1 cup of flour, 1 cup of cocoa powder, and ½ teaspoon of salt, then gradually add to the wet mixture.
5. Fold in the 1 cup of chocolate chips, then pour the batter into the prepared baking dish and spread evenly.
6. Bake in the preheated oven for 25-30 minutes, or until a toothpick inserted into the center comes out with a few moist crumbs.
7. While the brownies are baking, make the truffle filling by heating the ½ cup of heavy cream in a small saucepan until it just begins to simmer.
8. Remove from heat and pour over 1 cup of chocolate chips; let sit for a few minutes and then stir until smooth.
9. Once the brownies have cooled slightly, pour the truffle mixture over them and spread evenly.
10. Allow to set in the refrigerator for at least 2 hours before cutting into squares and serving.
Tips:
- For a decorative touch, drizzle additional melted chocolate over the top before serving.
- Chilling the brownies after adding the truffle layer enhances the flavor and texture.
- Store leftovers in an airtight container in the refrigerator for up to a week.
End Zone Peanut Butter Cupcakes
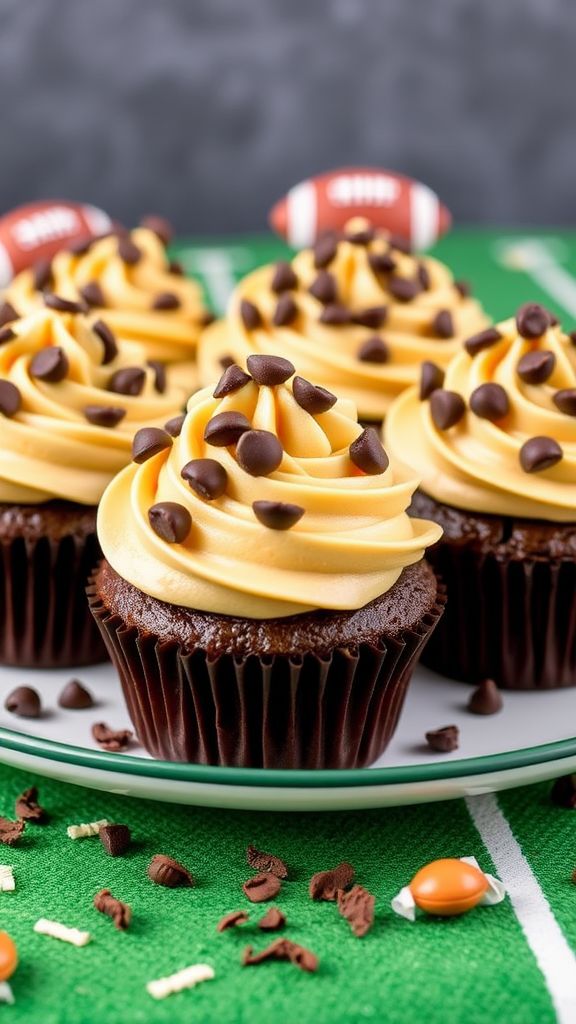
These End Zone Peanut Butter Cupcakes are a winning treat, featuring rich peanut butter flavor paired with fluffy chocolate cake, perfect for any celebration.
Ingredients:
- 1 cup creamy peanut butter
- 1 cup granulated sugar
- 1 cup packed brown sugar
- 3 large eggs
- 1 teaspoon vanilla extract
- 1 ½ cups all-purpose flour
- 1 teaspoon baking powder
- ½ teaspoon baking soda
- ½ teaspoon salt
- ½ cup unsweetened cocoa powder
- 1 cup milk
- ½ cup chocolate chips
Preparation Time: 15 minutes
Cooking Time: 20 minutes
Total Time: 35 minutes
Instructions:
1. Preheat your oven to 350°F (175°C) and line a muffin tin with cupcake liners.
2. In a large mixing bowl, cream together the peanut butter, granulated sugar, and brown sugar until smooth.
3. Add the eggs one at a time, mixing well after each addition.
4. Stir in the vanilla extract.
5. In a separate bowl, whisk together the flour, cocoa powder, baking powder, baking soda, and salt.
6. Gradually add the dry mixture to the wet ingredients, alternating with the milk, and mix until just combined.
7. Fold in the chocolate chips.
8. Fill each cupcake liner about two-thirds full with the batter.
9. Bake in the preheated oven for 18-20 minutes or until a toothpick inserted into the center comes out clean.
10. Allow the cupcakes to cool in the pan for 5 minutes before transferring to a wire rack to cool completely.
Tips:
- Make sure your ingredients are at room temperature for better mixing.
- For an extra peanut butter punch, top with a peanut butter frosting.
- Store cupcakes in an airtight container at room temperature for up to 3 days.
Hail Mary Chocolate Lava Cakes
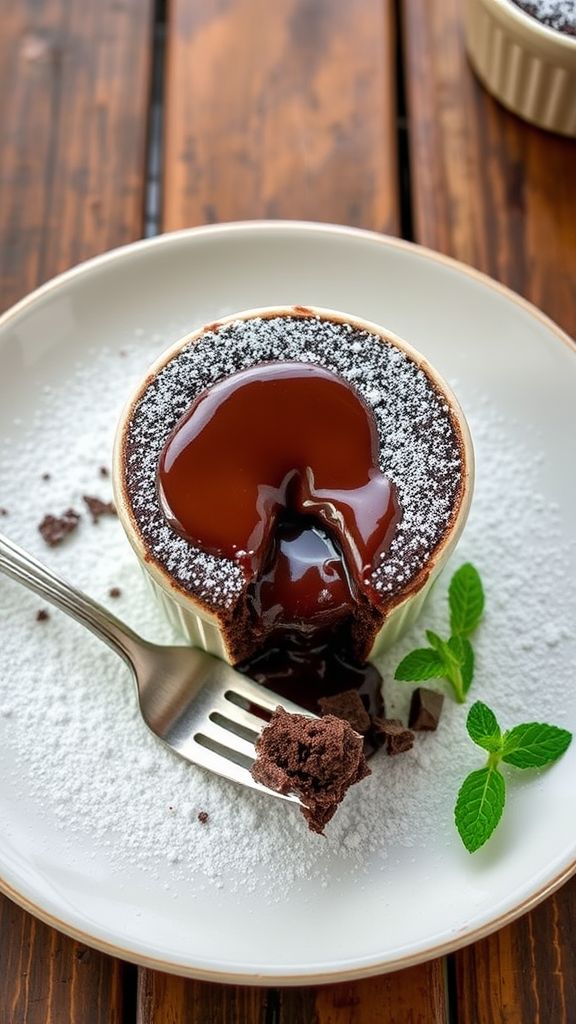
These Hail Mary Chocolate Lava Cakes feature a rich, molten chocolate center that offers an indulgent experience with every bite, perfect for chocolate lovers.
Ingredients:
- 1 cup unsalted butter
- 1 cup semi-sweet chocolate chips
- 2 large eggs
- 2 large egg yolks
- ½ cup granulated sugar
- ¼ cup all-purpose flour
- 1 teaspoon vanilla extract
- Pinch of salt
- Powdered sugar for dusting (optional)
Preparation Time: 15 minutes
Cooking Time: 12 minutes
Total Time: 27 minutes
Instructions:
1. Preheat your oven to 425°F (220°C) and grease four ramekins with butter.
2. In a microwave-safe bowl, melt the butter and chocolate chips together, stirring until smooth.
3. In a large bowl, whisk together the eggs, egg yolks, and sugar until light and frothy.
4. Add the melted chocolate mixture and vanilla extract to the egg mixture, stirring until well combined.
5. Gently fold in the flour and a pinch of salt until just combined.
6. Pour the batter evenly into the prepared ramekins and place them on a baking sheet.
7. Bake for 12 minutes, or until the edges are firm but the center is still soft.
8. Remove from the oven and let cool for 1 minute, then invert onto plates.
9. Dust with powdered sugar if desired, and serve immediately to enjoy the gooey center!
Tips:
- For a more intense chocolate flavor, use dark chocolate instead of semi-sweet.
- Feel free to add a scoop of vanilla ice cream on top for an extra treat.
- Make sure not to overbake; the center should be liquid for the lava effect.
Sideline S’mores Dip
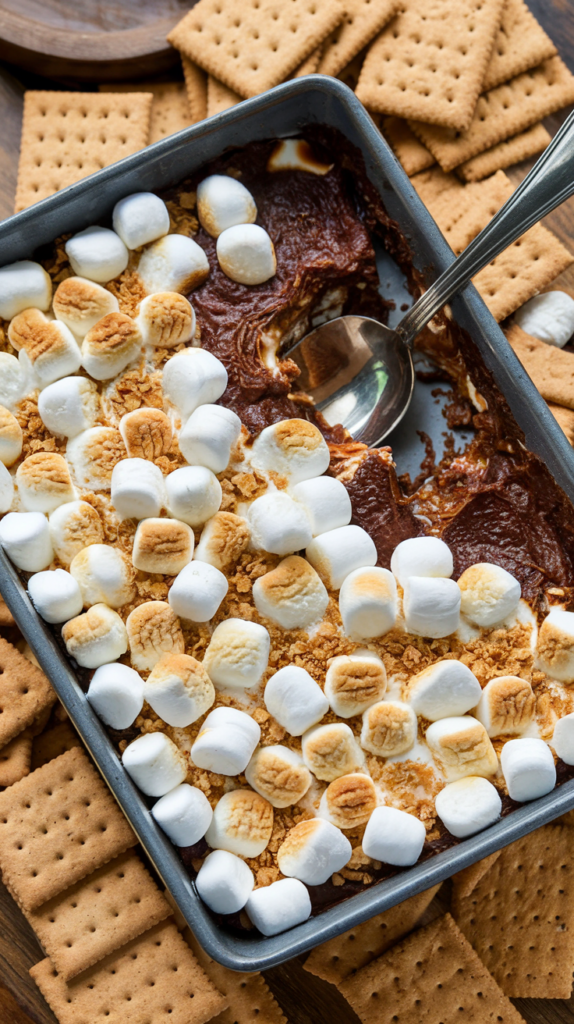
This Sideline S’mores Dip brings the beloved campfire treat to your table, combining rich chocolate, gooey marshmallows, and crunchy graham crackers in a deliciously shareable dessert.
Ingredients:
- 1 cup semi-sweet chocolate chips
- 1 cup mini marshmallows
- ½ cup graham cracker crumbs
- 2 tablespoons butter, melted
- ¼ teaspoon vanilla extract
- ¾ cup additional mini marshmallows for topping
- Graham crackers for serving
Preparation Time: 10 minutes
Cooking Time: 10 minutes
Total Time: 20 minutes
Instructions:
1. Preheat your oven to 350°F (175°C).
2. In a medium mixing bowl, combine the semi-sweet chocolate chips, mini marshmallows, melted butter, and vanilla extract.
3. Stir until all ingredients are well-mixed, and then spread the mixture evenly in a baking dish.
4. Sprinkle the graham cracker crumbs on top of the chocolate mixture.
5. Add the additional mini marshmallows on top.
6. Bake in the preheated oven for about 10 minutes, or until the marshmallows are golden brown.
7. Remove from the oven and let it cool slightly before serving with graham crackers.
Tips:
- For a richer flavor, use dark chocolate chips instead of semi-sweet.
- Keep an eye on the dip while baking to prevent the marshmallows from burning.
- Serve with assorted dippables like fruits or pretzels for added fun.
Victory Vanilla Bean Pudding Shots
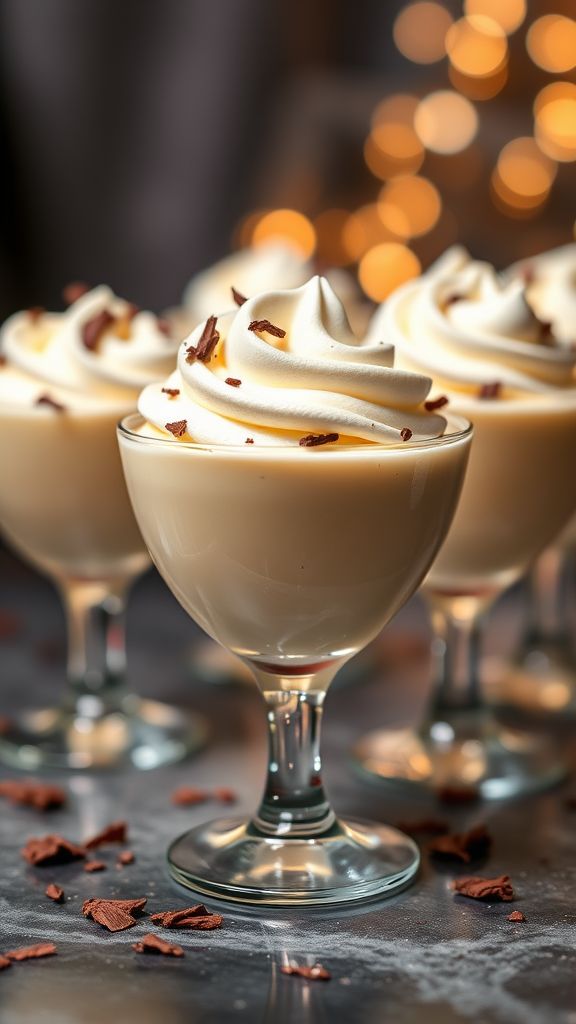
These Victory Vanilla Bean Pudding Shots are a delightful blend of creamy vanilla flavor with a playful twist, perfect for any celebration.
Ingredients:
- 1 cup instant vanilla pudding mix
- 2 cups milk
- 1 cup whipped cream
- 1/2 cup vanilla vodka
- 1/4 cup coconut rum
- 1 teaspoon vanilla extract
- 1/2 bean vanilla bean, seeds scraped out (optional)
- whipped topping for garnish
- chocolate shavings for garnish (optional)
Preparation Time: 10 minutes
Cooking Time: 0 minutes
Total Time: 10 minutes
Instructions:
1. In a large bowl, whisk together the vanilla pudding mix and milk until well combined and smooth.
2. Stir in the vanilla vodka, coconut rum, and vanilla extract until fully incorporated.
3. Gently fold in the whipped cream until the mixture is light and fluffy.
4. If using, add the vanilla bean seeds and mix gently to combine.
5. Spoon or pipe the mixture into shot glasses and refrigerate for at least 2 hours to set.
6. Before serving, top each pudding shot with whipped topping and garnish with chocolate shavings if desired.
Tips:
- For an extra kick, try using flavored vodkas.
- Make sure to refrigerate for enough time to allow the shots to set properly.
- These pudding shots can be prepared a day in advance for convenience.
Blitzed Berry Parfait Cups
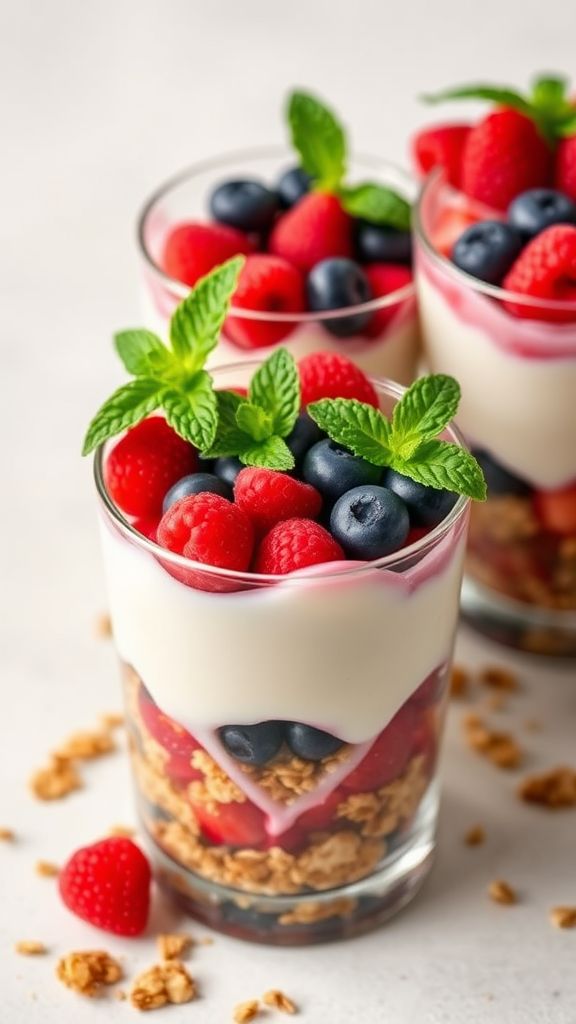
This Blitzed Berry Parfait Cups recipe combines the vibrant flavors of mixed berries with creamy yogurt, creating a delightful and refreshing treat that’s perfect for any occasion.
Ingredients:
- 2 cups mixed berries (strawberries, blueberries, raspberries)
- 1 cup Greek yogurt
- 1 tablespoon honey or maple syrup
- 1 teaspoon vanilla extract
- 1 cup granola
- 2 tablespoons chopped fresh mint (optional)
Preparation Time: 10 minutes
Cooking Time: 0 minutes
Total Time: 10 minutes
Instructions:
1. In a blender or food processor, add the mixed berries and pulse until smooth.
2. In a separate bowl, combine the Greek yogurt, honey (or maple syrup), and vanilla extract, mixing well.
3. Begin layering the parfait cups by adding a layer of the berry puree, followed by a layer of the yogurt mixture, then a layer of granola.
4. Repeat the layering process until all ingredients are used, finishing with a layer of granola on top.
5. If desired, sprinkle with chopped fresh mint for garnish.
Tips:
- For a dairy-free option, substitute Greek yogurt with coconut yogurt.
- Feel free to mix and match your favorite fruits for different flavor profiles.
- Prepare the layers in advance and assemble just before serving to keep the granola crunchy.
Game Day Cheesecake Bites
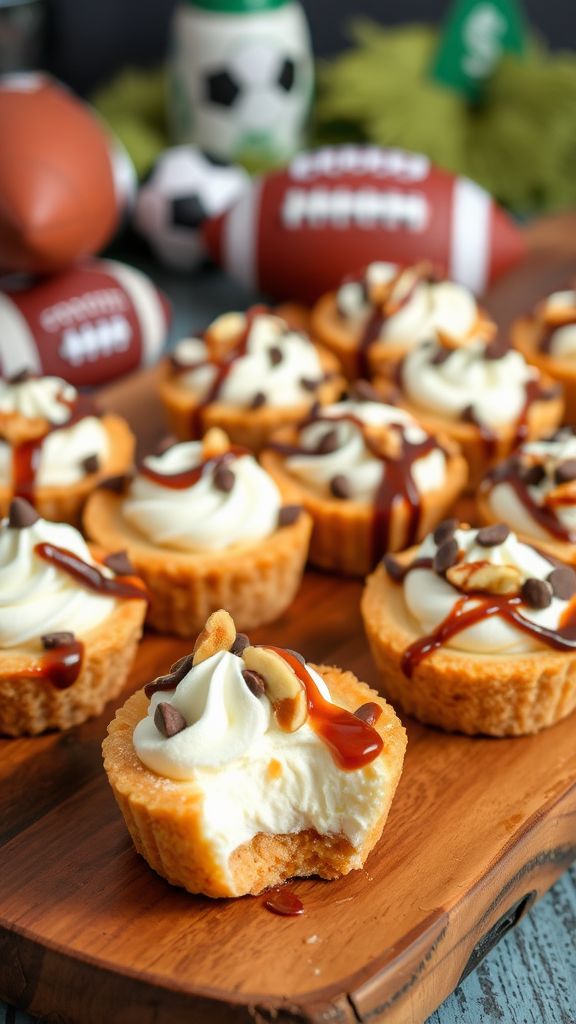
These Game Day Cheesecake Bites are a delightful combination of creamy cheesecake and a crunchy cookie crust, perfect for satisfying your sweet tooth while enjoying the big game.
Ingredients:
- 1 cup crushed graham crackers
- 1/4 cup granulated sugar
- 1/2 cup unsalted butter, melted
- 16 oz cream cheese, softened
- 1 cup powdered sugar
- 1 teaspoon vanilla extract
- 1 cup whipped topping
- 1/4 cup chocolate sauce (optional)
- 1/4 cup caramel sauce (optional)
Preparation Time: 15 minutes
Cooking Time: 15 minutes
Total Time: 30 minutes
Instructions:
1. Preheat your oven to 350°F (175°C).
2. In a medium bowl, mix the crushed graham crackers, granulated sugar, and melted butter until well combined.
3. Press the mixture into the bottom of mini muffin tins to create a crust.
4. Bake the crusts in the preheated oven for about 5 minutes, then remove and let cool.
5. In a large bowl, beat the softened cream cheese, powdered sugar, and vanilla extract until smooth and creamy.
6. Gently fold in the whipped topping until just combined.
7. Spoon the cheesecake mixture into the cooled crusts, filling them to the top.
8. Refrigerate for at least 2 hours or until set.
9. Before serving, drizzle with chocolate and caramel sauces if desired.
Tips:
- For added flavor, consider mixing in some mini chocolate chips or berries into the cheesecake mixture.
- These bites can be made a day in advance and stored in the refrigerator.
- Use silicone muffin trays for easier removal of the cheesecake bites.
Super Bowl Snack Cake Pops
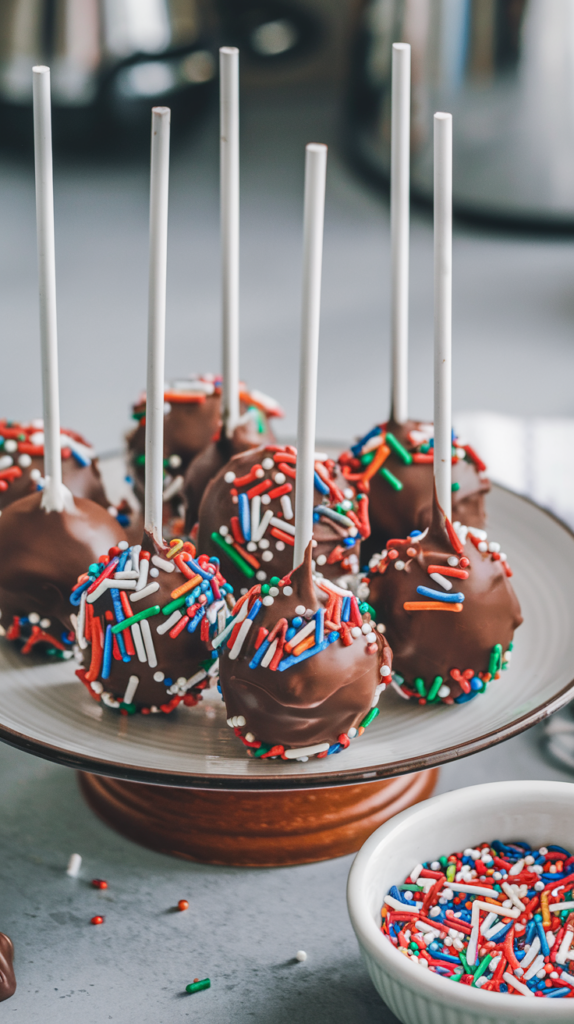
This Super Bowl Snack Cake Pops recipe combines the rich flavors of chocolate and vanilla with a fun and festive twist, making them the perfect treat for game day celebrations.
Ingredients:
- 1 box chocolate cake mix
- 3 large eggs
- 1 cup water
- 1/2 cup vegetable oil
- 1 cup vanilla frosting
- 2 cups chocolate candy melts
- sprinkles for decoration
- 10 lollipop sticks
Preparation Time: 20 minutes
Cooking Time: 30 minutes
Total Time: 50 minutes
Instructions:
1. Preheat your oven to 350°F (175°C) and prepare a 9×13 inch baking pan according to package instructions.
2. In a large bowl, mix the chocolate cake mix, eggs, water, and vegetable oil until well combined.
3. Pour the batter into the prepared baking pan and bake for 30 minutes or until a toothpick inserted in the center comes out clean.
4. Allow the cake to cool completely before crumbling it into a large bowl.
5. Add the vanilla frosting to the crumbled cake and mix until well incorporated.
6. Scoop out small amounts of the mixture and roll them into balls about the size of a golf ball.
7. Insert a lollipop stick into each ball and place them on a parchment-lined baking sheet.
8. Freeze the cake pops for about 15 minutes until firm.
9. In a microwave-safe bowl, melt the chocolate candy melts according to package instructions until smooth.
10. Dip each frozen cake pop into the melted chocolate, allowing excess to drip off.
11. Immediately sprinkle with decorations before the chocolate sets.
12. Allow the cake pops to sit until the chocolate hardens completely.
Tips:
- For variety, try using different flavors of cake mix and frosting.
- Ensure the cake pops are fully chilled before dipping to prevent melting.
- Use a block of foam or a styrofoam base to hold the pops upright while they set.
Field Goal Fruity Cupcake Cones

Field Goal Fruity Cupcake Cones are a delightful blend of fruity flavors and sweet frosting, perfect for game day celebrations!
Ingredients:
- 1 box vanilla cake mix
- 3 large eggs
- 1 cup water
- 1/3 cup vegetable oil
- 1 cup diced strawberries
- 1 cup diced kiwi
- 1 cup crushed pineapple
- 2 cups whipped frosting
- 12 ice cream cones
- 1 cup green sprinkles
- 12 mini flags for decorating
Preparation Time: 15 minutes
Cooking Time: 20 minutes
Total Time: 35 minutes
Instructions:
1. Preheat your oven to 350°F (175°C) and line a cupcake pan with cupcake liners.
2. In a mixing bowl, combine the cake mix, eggs, water, and vegetable oil; mix until well blended.
3. Gently fold in the diced strawberries, kiwi, and crushed pineapple into the batter.
4. Fill each ice cream cone about 2/3 full with the batter.
5. Place the cones in a muffin tin to keep them upright and bake for about 20 minutes or until a toothpick inserted comes out clean.
6. Once baked, allow the cones to cool completely before frosting.
7. Frost each cone generously with whipped frosting and sprinkle green sprinkles on top for a field goal effect.
8. Insert a mini flag into each cupcake cone for decoration.
Tips:
- For extra flavor, try adding a splash of vanilla extract to the batter.
- You can substitute fresh fruits with your favorite candy pieces for a fun twist.
- Store any leftover cupcakes in an airtight container at room temperature for up to 2 days.
Winning Whipped Chocolate Mousse
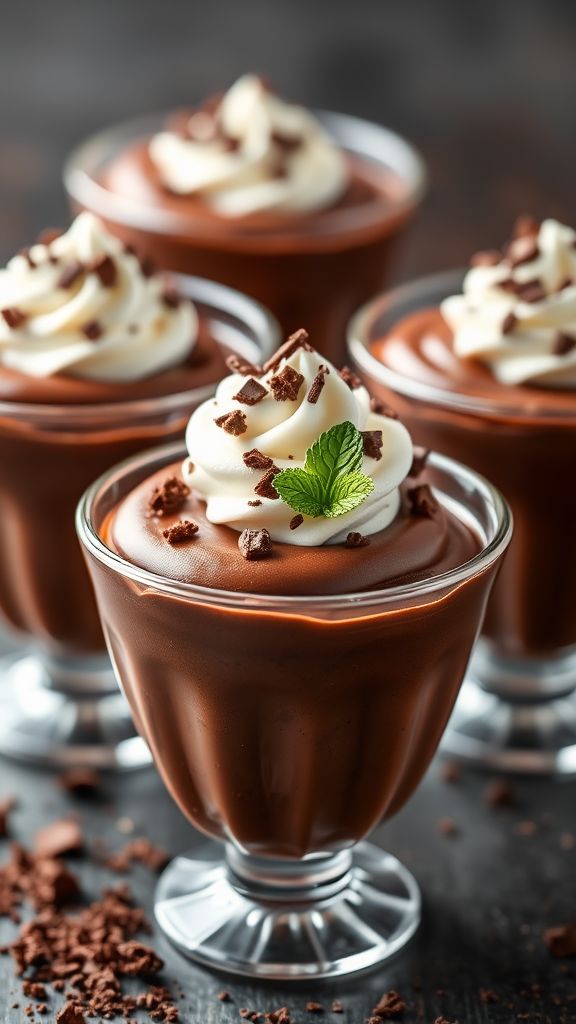
This Winning Whipped Chocolate Mousse is a delightfully rich dessert that combines the intense flavors of dark chocolate with a fluffy, airy texture that melts in your mouth.
Ingredients:
- 8 ounces dark chocolate (70% cocoa), chopped
- 3 tablespoons unsalted butter
- 1/4 cup granulated sugar
- 3 large eggs, separated
- 1 cup heavy cream
- 1 teaspoon vanilla extract
- 1/4 teaspoon salt
Preparation Time: 15 minutes
Cooking Time: 5 minutes
Total Time: 20 minutes
Instructions:
1. Melt the chocolate and butter together in a heatproof bowl over simmering water, stirring until smooth.
2. Remove from heat and let cool slightly.
3. Whisk the egg yolks and sugar together in a bowl until thick and pale.
4. Stir the melted chocolate mixture into the egg yolk mixture, then add vanilla extract and salt, mixing well.
5. In another bowl, whip the heavy cream until soft peaks form.
6. Fold the whipped cream gently into the chocolate mixture until fully combined.
7. In a clean bowl, beat the egg whites until stiff peaks form, then fold them carefully into the chocolate mixture.
8. Spoon the mousse into serving dishes and refrigerate for at least 2 hours to set.
Tips:
- For a stronger chocolate flavor, use higher cocoa content chocolate.
- Ensure egg whites are at room temperature for better whipping.
- Serve garnished with whipped cream or chocolate shavings for added elegance.
Halftime Honeycomb Crunch Bars
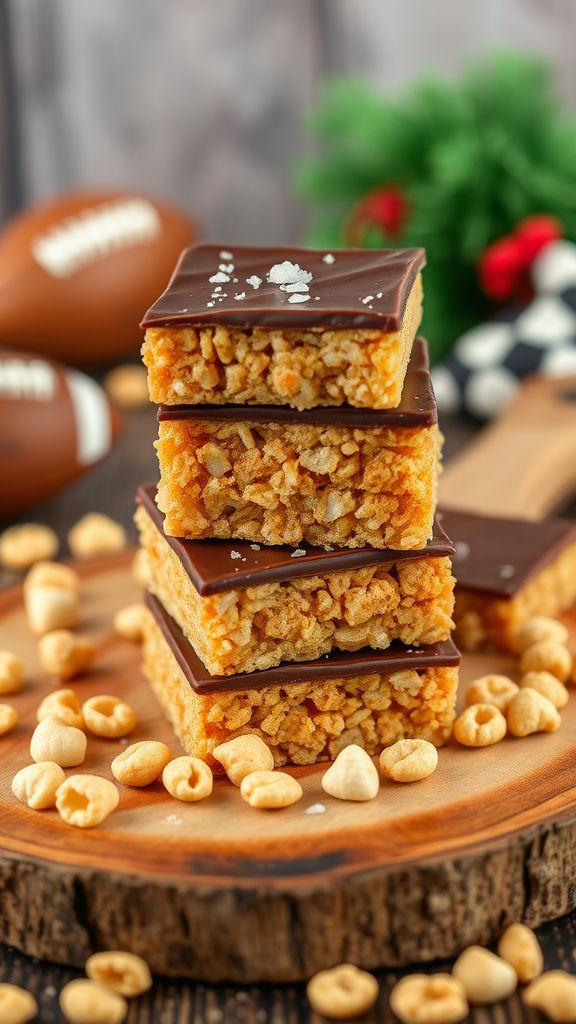
These Halftime Honeycomb Crunch Bars bring a delightful crunch with the perfect balance of sweetness and a hint of salt, making them an irresistible snack for any game day.
Ingredients:
- 1 cup honey
- 1 cup granulated sugar
- 1/4 cup unsalted butter
- 1/4 teaspoon salt
- 1 teaspoon baking soda
- 2 cups puffed rice cereal
- 1 cup semi-sweet chocolate chips
Preparation Time: 10 minutes
Cooking Time: 5 minutes
Total Time: 15 minutes
Instructions:
1. In a medium saucepan over medium heat, combine honey, sugar, butter, and salt. Stir constantly until boiling.
2. Once boiling, let it continue to boil for 1 minute without stirring.
3. Remove from heat and quickly stir in baking soda to create a foam.
4. Add the puffed rice cereal, mixing well until evenly coated.
5. Spread the mixture into a greased 9×9 inch pan, pressing down firmly.
6. Melt the chocolate chips in the microwave, stirring until smooth, then pour over the cereal mixture.
7. Allow to cool completely before cutting into bars.
Tips:
- For a healthier version, you can use dark chocolate chips instead of semi-sweet.
- Store the bars in an airtight container to maintain freshness.
- Feel free to add nuts or dried fruit for added texture and flavor.
Overtime Oreo Trifle
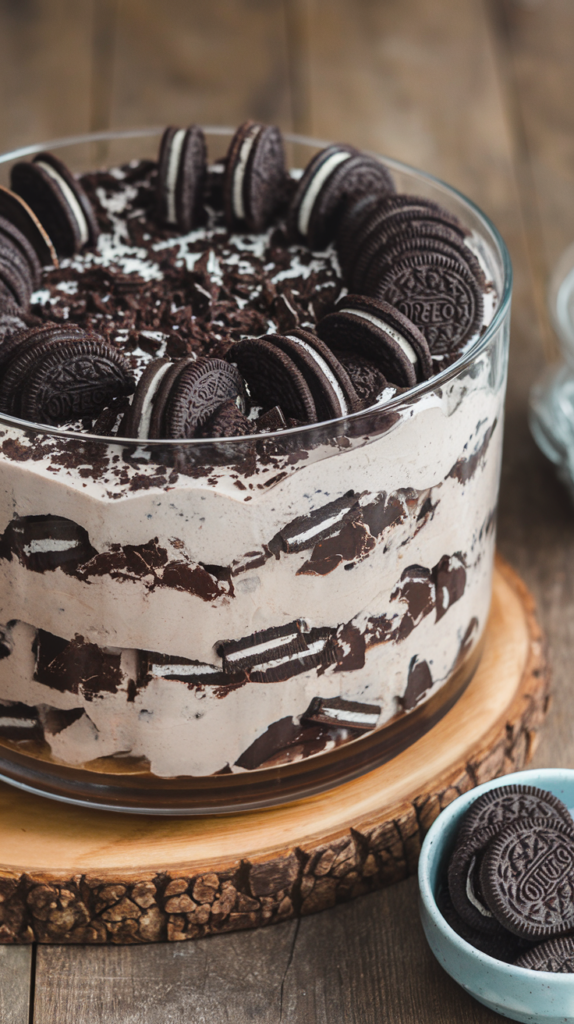
Overtime Oreo Trifle is a delightful dessert that layers rich chocolate and creamy vanilla flavors with crunchy Oreo cookies, making it a perfect indulgence for any occasion.
Ingredients:
- 2 cups heavy whipping cream
- 1 cup powdered sugar
- 1 teaspoon vanilla extract
- 8 oz cream cheese, softened
- 1 cup granulated sugar
- 1/2 cup cocoa powder
- 12 Oreo cookies, crushed
- 1 cup chocolate pudding
- 1 cup crushed Oreos for topping
Preparation Time: 20 minutes
Cooking Time: 0 minutes
Total Time: 20 minutes
Instructions:
1. In a large mixing bowl, whip the heavy cream until it begins to thicken.
2. Add the powdered sugar and vanilla extract to the whipped cream and continue to whip until stiff peaks form.
3. In another bowl, beat the softened cream cheese and granulated sugar together until smooth.
4. Add cocoa powder to the cream cheese mixture and blend until fully incorporated.
5. Gently fold in the whipped cream into the cream cheese mixture until combined.
6. In a trifle dish, layer half of the cream mixture, followed by half of the chocolate pudding, and then half of the crushed Oreos.
7. Repeat the layers with the remaining ingredients in the same order.
8. Top the trifle with the remaining crushed Oreos.
9. Refrigerate for at least 2 hours before serving to allow flavors to meld.
Tips:
- Use a clear trifle dish to showcase the beautiful layers.
- For an extra chocolate touch, drizzle chocolate syrup between the layers.
- Make sure to crush the Oreos finely for better texture.
Playoff Pumpkin Spice Whoopie Pies
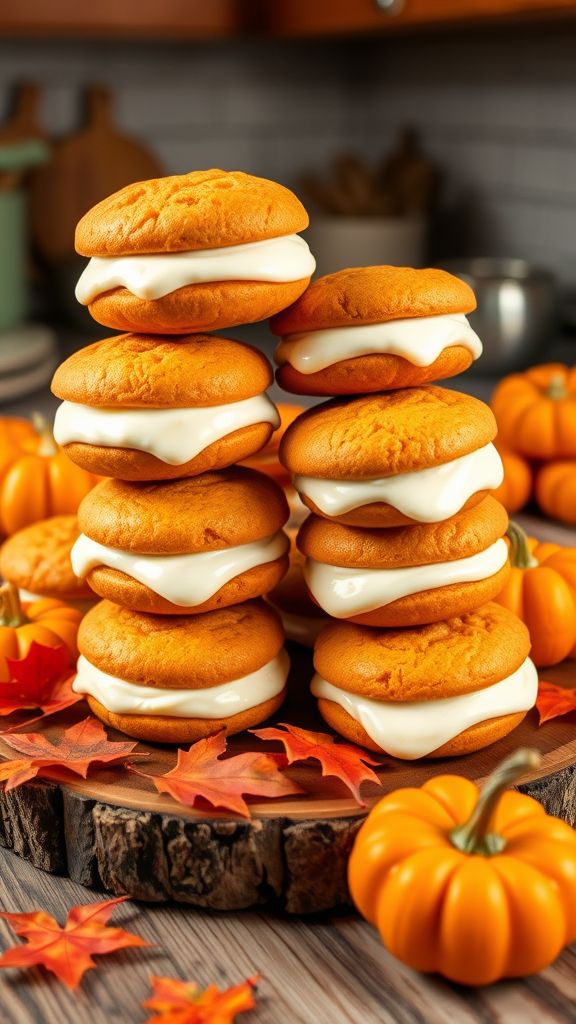
These Playoff Pumpkin Spice Whoopie Pies combine the warm essence of pumpkin and spices with creamy filling, making them the ultimate treat for game day.
Ingredients:
- 2 cups all-purpose flour
- 1 teaspoon baking soda
- 1 teaspoon baking powder
- 1 tablespoon pumpkin pie spice
- ½ teaspoon salt
- 1 cup granulated sugar
- ½ cup packed brown sugar
- 1 cup pumpkin puree
- ½ cup vegetable oil
- 2 large eggs
- 1 teaspoon vanilla extract
- 1 cup cream cheese, softened
- ½ cup powdered sugar
- 1 teaspoon vanilla extract
Preparation Time: 20 minutes
Cooking Time: 15 minutes
Total Time: 35 minutes
Instructions:
1. Preheat your oven to 350°F (175°C) and line two baking sheets with parchment paper.
2. In a medium bowl, whisk together the flour, baking soda, baking powder, pumpkin pie spice, and salt.
3. In a large bowl, beat the granulated sugar, brown sugar, pumpkin puree, and vegetable oil until well combined.
4. Add the eggs and vanilla extract, and mix until smooth.
5. Gradually add the dry ingredients to the wet ingredients, mixing until just combined.
6. Using a scoop, drop rounded tablespoons of dough onto the prepared baking sheets.
7. Bake for 12-15 minutes, or until the edges are set and the centers spring back when touched.
8. Allow the whoopie pies to cool on the baking sheets for 5 minutes before transferring to a wire rack to cool completely.
9. In a separate bowl, beat the cream cheese, powdered sugar, and vanilla extract until smooth and creamy.
10. Once the whoopie pies are cool, spread about 1 tablespoon of the cream cheese filling on the flat side of half of the cakes, then sandwich with the remaining cakes.
Tips:
- For added flavor, fold in some chopped nuts or chocolate chips into the batter.
- Store whoopie pies in an airtight container in the refrigerator for up to 3 days.
- Freeze individual whoopie pies for a quick treat; just let them thaw before enjoying.
Referee Raspberry Tartlets
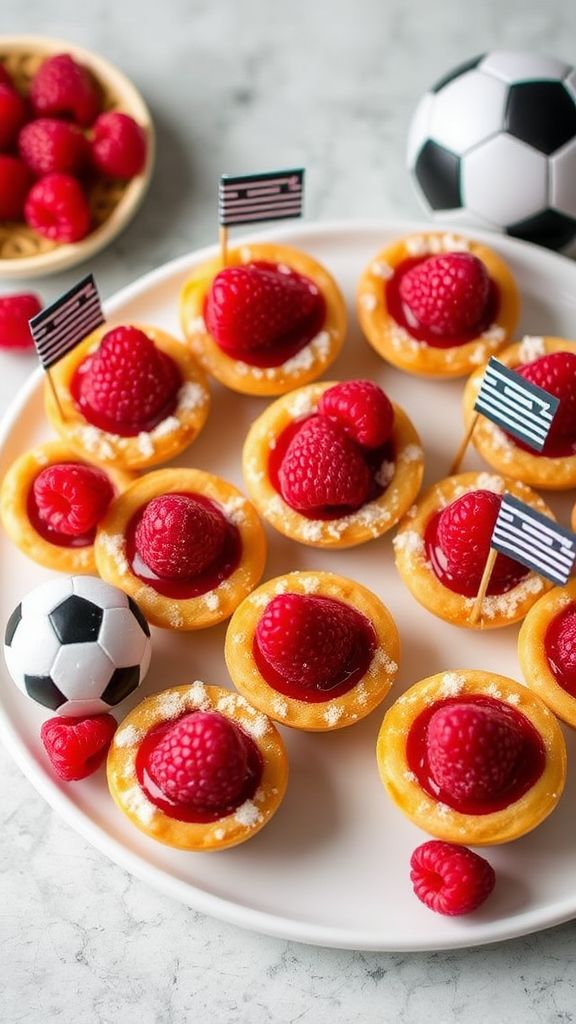
This recipe for Referee Raspberry Tartlets is special due to its delightful balance of sweet and tart flavors, making it a perfect treat for any occasion.
Ingredients:
- 1 ½ cups all-purpose flour
- ½ cup unsalted butter, softened
- ¼ cup powdered sugar
- 1 egg yolk
- 1 tablespoon cold water
- 2 cups fresh raspberries
- ½ cup granulated sugar
- 2 tablespoons cornstarch
- 1 tablespoon lemon juice
- 1 teaspoon vanilla extract
- 1 egg, beaten (for egg wash)
Preparation Time: 20 minutes
Cooking Time: 25 minutes
Total Time: 45 minutes
Instructions:
1. Preheat your oven to 375°F (190°C).
2. In a large bowl, mix together the flour, butter, and powdered sugar until crumbly.
3. Add the egg yolk and cold water; mix until the dough forms a ball.
4. Roll out the dough on a floured surface and cut into circles to fit into your tartlet pans.
5. Press the dough circles into the tartlet pans and poke the bottom with a fork to prevent bubbling.
6. In a saucepan over medium heat, combine the raspberries, granulated sugar, cornstarch, lemon juice, and vanilla extract.
7. Cook gently until the mixture starts to thicken, about 5 minutes.
8. Spoon the raspberry filling into the prepared tartlet shells.
9. Brush the edges of the tartlet shells with beaten egg for a golden finish.
10. Bake in the preheated oven for 20 minutes or until the tartlets are golden brown.
11. Allow the tartlets to cool before removing them from the pans.
Tips:
- For an extra touch, serve the tartlets with a dollop of whipped cream.
- Use a mix of different berries for varied flavors and colors.
- Make the dough ahead of time and refrigerate it for up to 24 hours before use.
Gridiron Gooey Marshmallow Bars
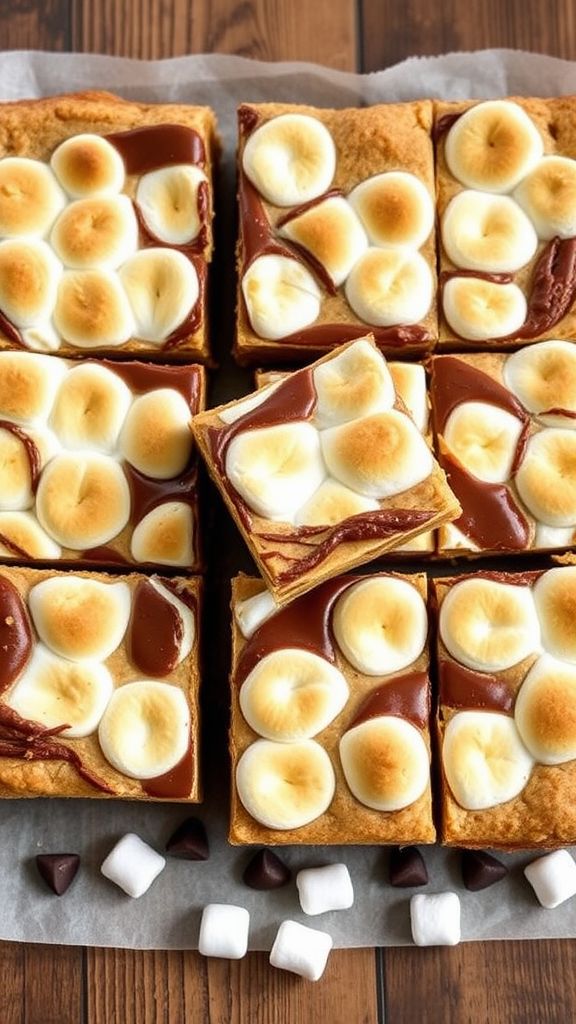
These Gridiron Gooey Marshmallow Bars are a delightful treat that combines the rich flavors of chocolate and peanut butter, making them a fan favorite at any gathering.
Ingredients:
- 1 cup unsalted butter
- 2 cups graham cracker crumbs
- 2 cups mini marshmallows
- 2 cups chocolate chips
- 1 cup creamy peanut butter
- 1 cup powdered sugar
Preparation Time: 10 minutes
Cooking Time: 15 minutes
Total Time: 25 minutes
Instructions:
1. Preheat your oven to 350°F (175°C) and grease a 9×13 inch baking pan.
2. In a large saucepan, melt the butter over medium heat.
3. Stir in the graham cracker crumbs, powdered sugar, and peanut butter until well combined.
4. Remove from heat and fold in the mini marshmallows and chocolate chips.
5. Pour the mixture into the prepared baking pan and spread evenly.
6. Bake in the preheated oven for about 15 minutes, until the marshmallows are golden.
7. Let cool completely before cutting into bars.
Tips:
- For extra flavor, sprinkle a pinch of salt over the top before baking.
- Store leftovers in an airtight container at room temperature for up to a week.
- Feel free to customize with additional toppings, such as nuts or dried fruits.
Championship Coconut Macaroons
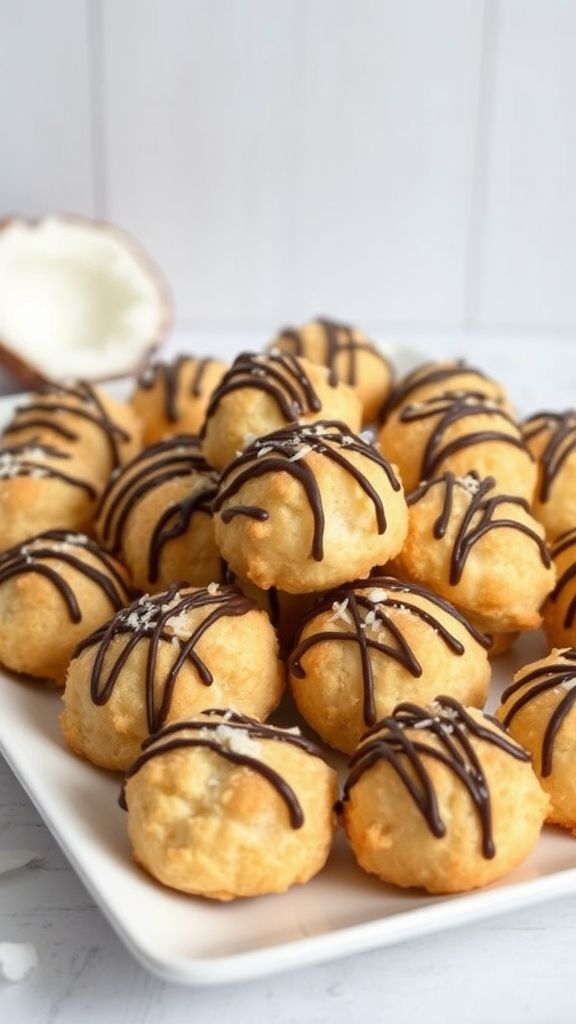
These Championship Coconut Macaroons are a delightful treat with their chewy coconut texture and rich sweetness, making them irresistible for any occasion.
Ingredients:
- 3 cups sweetened shredded coconut
- 2/3 cup granulated sugar
- 1/4 cup all-purpose flour
- 1/4 teaspoon salt
- 1/2 teaspoon vanilla extract
- 3 large egg whites
- 1/2 cup semi-sweet chocolate chips (optional)
Preparation Time: 15 minutes
Cooking Time: 20 minutes
Total Time: 35 minutes
Instructions:
1. Preheat your oven to 325°F (163°C) and line a baking sheet with parchment paper.
2. In a large bowl, mix together the shredded coconut, sugar, flour, and salt until well combined.
3. In a separate bowl, beat the egg whites and vanilla extract until soft peaks form.
4. Gently fold the egg whites into the coconut mixture until just combined.
5. Use a cookie scoop or your hands to form small mounds of the mixture and place them onto the prepared baking sheet.
6. Bake in the preheated oven for about 15-20 minutes, or until the tops are golden brown.
7. If using chocolate, melt the chocolate chips in a microwave-safe bowl and drizzle over the cooled macaroons.
Tips:
- For extra flavor, add a dash of almond extract to the mixture.
- Make sure not to overbeat the egg whites to maintain a light and airy texture.
- Store leftover macaroons in an airtight container at room temperature for up to a week.
Sideline Snickerdoodle Cookie Sandwiches
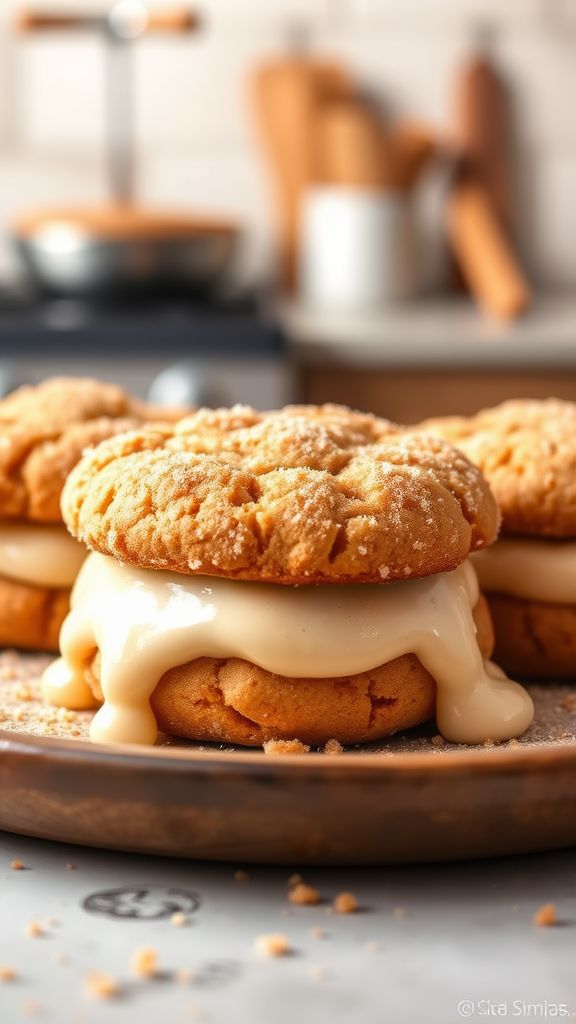
These Sideline Snickerdoodle Cookie Sandwiches combine the warm, cinnamon-sugar flavors of traditional snickerdoodles with a creamy filling for a delightful treat that will keep you coming back for more.
Ingredients:
- 2 ¾ cups all-purpose flour
- 1 teaspoon baking soda
- 1 teaspoon cream of tartar
- ½ teaspoon salt
- 1 cup unsalted butter, softened
- 1 ½ cups granulated sugar
- 2 large eggs
- 1 teaspoon vanilla extract
- 3 tablespoons cinnamon-sugar mixture (for rolling)
- 1 cup cream cheese, softened
- 2 cups powdered sugar
- 1 teaspoon vanilla extract (for filling)
Preparation Time: 15 minutes
Cooking Time: 10 minutes
Total Time: 25 minutes
Instructions:
1. Preheat your oven to 350°F (175°C) and line baking sheets with parchment paper.
2. In a bowl, whisk together the flour, baking soda, cream of tartar, and salt. Set aside.
3. In a large mixing bowl, cream the softened butter and granulated sugar until light and fluffy.
4. Beat in the eggs one at a time, then add vanilla extract and mix until combined.
5. Gradually add the dry ingredient mixture to the wet ingredients, mixing until just combined.
6. Scoop dough into balls and roll them in the cinnamon-sugar mixture before placing them on the prepared baking sheets.
7. Bake for about 8-10 minutes until lightly golden, then let them cool on the baking sheets for a few minutes before transferring to wire racks.
8. While cookies cool, make the filling by beating together the softened cream cheese, powdered sugar, and vanilla extract until smooth.
9. Once cookies are completely cool, spread the cream cheese filling on the flat side of half of the cookies and sandwich with the other half.
Tips:
- For extra flavor, consider adding a pinch of nutmeg to the dough.
- Using cold cream cheese can make it harder to achieve a smooth filling, so make sure it’s at room temperature.
- Store the sandwiches in an airtight container to keep them fresh for several days.
Cheerleader Churro Bites
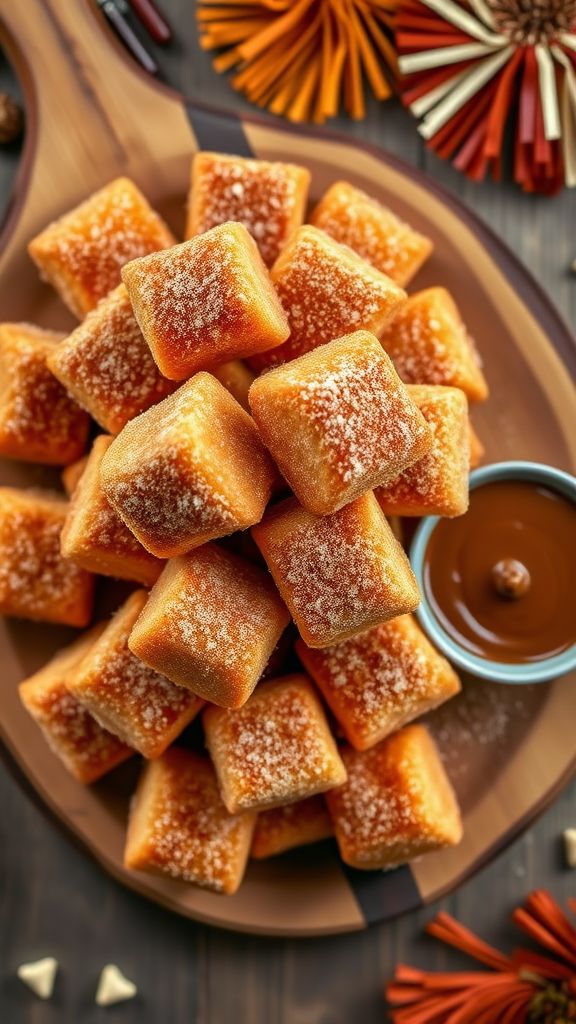
These Cheerleader Churro Bites are a delightful treat that combines the sweet flavors of cinnamon and sugar with a crispy texture, making them irresistible snacks for any occasion.
Ingredients:
- 1 cup water
- 1/2 cup unsalted butter
- 1 cup all-purpose flour
- 1/4 teaspoon salt
- 2 large eggs
- 1/4 cup granulated sugar
- 1 tablespoon ground cinnamon
- 2 cups vegetable oil (for frying)
Preparation Time: 10 minutes
Cooking Time: 5 minutes
Total Time: 15 minutes
Instructions:
1. In a medium saucepan, combine the water and unsalted butter, and bring to a boil over medium heat.
2. Once boiling, remove from heat and stir in the all-purpose flour and salt until the mixture forms a dough.
3. Let the dough cool for about 5 minutes, then stir in the eggs one at a time until fully incorporated.
4. In a separate bowl, combine granulated sugar and ground cinnamon for coating.
5. Heat the vegetable oil in a deep fryer or large saucepan to 350°F (175°C).
6. Use a piping bag to pipe small rounds of dough into the hot oil, frying them in batches until they are golden brown, about 2-3 minutes per side.
7. Remove the churro bites with a slotted spoon and drain on paper towels.
8. While they’re still warm, toss the churro bites in the cinnamon-sugar mixture until well coated.
Tips:
- For extra flavor, try adding a pinch of nutmeg to the cinnamon-sugar mix.
- Serve with chocolate sauce or caramel for dipping to enhance the delight!
- Ensure the oil is hot enough before frying; otherwise, the churros can absorb too much oil.
Tailgate Tiramisu Cups
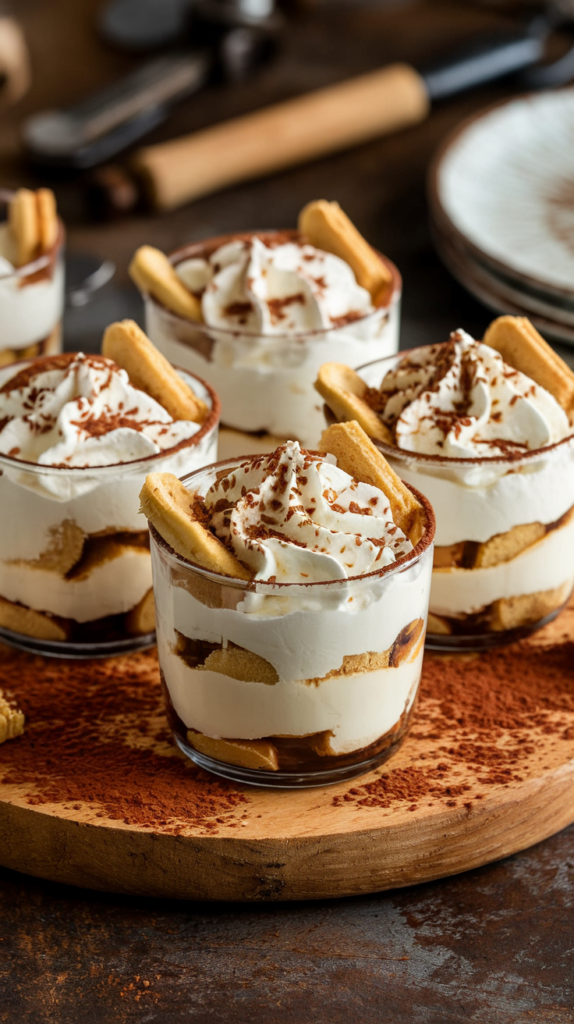
This Tailgate Tiramisu Cups recipe combines the classic flavors of coffee and mascarpone to create a perfect dessert for your outdoor gatherings.
Ingredients:
- 1 ½ cups strong brewed coffee, cooled
- ½ cup coffee liqueur (e.g., Kahlúa)
- 1 cup heavy whipping cream
- 8 ounces mascarpone cheese
- ½ cup granulated sugar
- 1 teaspoon vanilla extract
- 18 ladyfinger cookies
- 2 tablespoons cocoa powder, for dusting
Preparation Time: 15 minutes
Cooking Time: 0 minutes
Total Time: 15 minutes
Instructions:
1. In a mixing bowl, combine the cooled brewed coffee and coffee liqueur, set aside.
2. In another bowl, whip the heavy cream until soft peaks form.
3. In a separate bowl, mix together the mascarpone cheese, granulated sugar, and vanilla extract until smooth and creamy.
4. Gently fold the whipped cream into the mascarpone mixture until well combined.
5. Dip each ladyfinger into the coffee mixture for about 3 seconds and place them at the bottom of serving cups.
6. Spoon a layer of the mascarpone mixture over the ladyfingers, then repeat the process until ingredients are used up, finishing with the mascarpone layer on top.
7. Cover and refrigerate for at least 4 hours or overnight for better flavor.
8. Before serving, dust the tops with cocoa powder.
Tips:
- For a non-alcoholic version, omit the coffee liqueur and use all coffee instead.
- Make sure the coffee is cooled to avoid soggy ladyfingers.
- Consider adding chocolate shavings on top for extra indulgence.
Championship Chocolate Chip Cookie Skewers
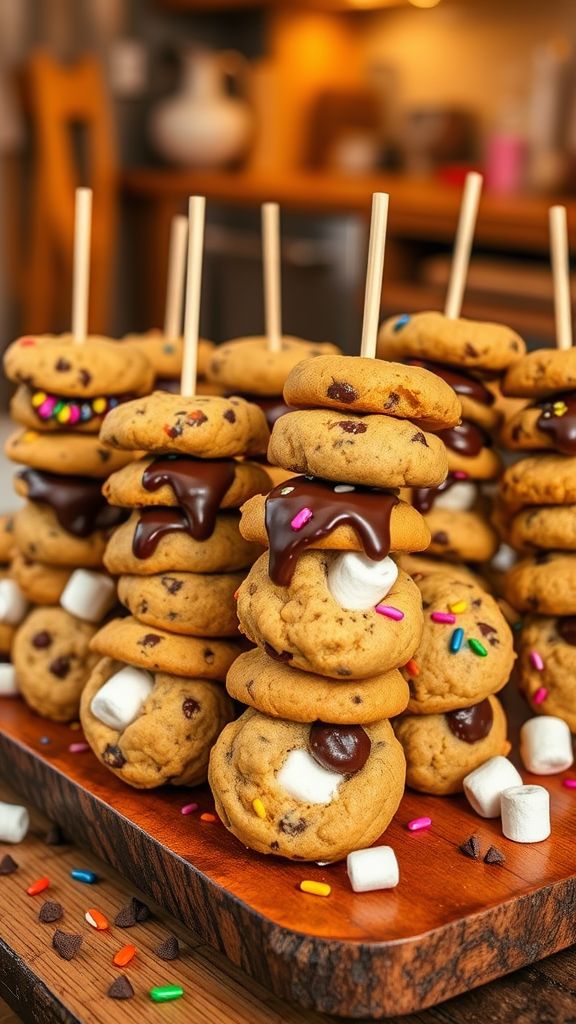
These Championship Chocolate Chip Cookie Skewers are a fun twist on the classic cookie, combining rich chocolate flavors and a playful presentation that appeals to all ages.
Ingredients:
- 2 cups all-purpose flour
- 1 teaspoon baking soda
- ½ teaspoon salt
- 1 cup unsalted butter, softened
- ¾ cup granulated sugar
- ¾ cup packed brown sugar
- 1 teaspoon vanilla extract
- 2 large eggs
- 2 cups semisweet chocolate chips
- 12 wooden skewers
- 1 cup mini marshmallows (optional)
- ½ cup chopped nuts (optional)
Preparation Time: 15 minutes
Cooking Time: 10 minutes
Total Time: 25 minutes
Instructions:
1. Preheat your oven to 350°F (175°C).
2. In a bowl, mix together the flour, baking soda, and salt; set aside.
3. In a large bowl, cream the softened butter, granulated sugar, brown sugar, and vanilla extract until smooth.
4. Add in the eggs one at a time, beating well after each addition.
5. Gradually mix in the dry ingredients until just combined. Stir in chocolate chips, and nuts if using.
6. Scoop tablespoonfuls of dough onto the prepared skewers, alternating with mini marshmallows if desired.
7. Place the skewers on a baking sheet lined with parchment paper.
8. Bake in the preheated oven for about 10 minutes, or until golden brown.
9. Allow to cool on a wire rack before serving.
Tips:
- For added flavor, use dark chocolate or white chocolate chips.
- Store any leftover skewers in an airtight container for up to a week.
- Feel free to customize the fillings between the cookies with your favorite candies.

