My New Cookbook is Out! Check Out Now!
15 Keto Snack Ideas to Satisfy Cravings
Did you know that over 50 million people worldwide are following a keto diet? If you’re one of them, you know how challenging it can be to find snacks that are both delicious and compliant with your low-carb lifestyle. In this blog, we’ll explore 15 irresistible keto snack ideas that will not only satisfy your cravings but also fuel your day, from Cheesy Cauliflower Bites to Keto Trail Mix. Get ready to indulge without the guilt!
Shop Our Must-Haves
Cheesy Cauliflower Bites

These Cheesy Cauliflower Bites are a delicious and healthy snack option that combines the rich flavors of cheddar and parmesan with the tenderness of roasted cauliflower. Perfect as an appetizer or a guilt-free treat!
Ingredients:
- 1 head cauliflower, cut into florets
- 1 cup shredded cheddar cheese
- 1/2 cup grated parmesan cheese
- 1/2 cup breadcrumbs
- 2 large eggs
- 2 cloves garlic, minced
- 1 teaspoon onion powder
- 1 teaspoon salt
- 1/2 teaspoon black pepper
- 1/4 teaspoon paprika
- 1 tablespoon chopped fresh parsley
Preparation Time: 15 minutes
Cooking Time: 25 minutes
Total Time: 40 minutes
Instructions:
1. Preheat your oven to 400°F (200°C) and line a baking sheet with parchment paper.
2. In a large pot, boil water and add the cauliflower florets. Cook for about 5 minutes until just tender, then drain and let cool.
3. In a mixing bowl, combine the cooled cauliflower, cheddar cheese, parmesan cheese, breadcrumbs, eggs, garlic, onion powder, salt, pepper, and paprika. Mix well until everything is combined.
4. Scoop small portions of the mixture and form into bite-sized balls, placing them on the prepared baking sheet.
5. Bake in the preheated oven for 20-25 minutes or until golden brown and crispy.
6. Remove from the oven and let cool for a few minutes before serving. Garnish with fresh parsley.
Tips:
- For extra flavor, consider adding some red pepper flakes for a bit of heat.
- These bites can be stored in an airtight container in the fridge for up to 3 days.
- Try serving them with your favorite dipping sauce, like ranch or marinara.
Spicy Avocado Deviled Eggs

These Spicy Avocado Deviled Eggs combine the creamy texture of avocado with a kick of heat that will tantalize your taste buds. With hints of lime and sriracha, these deviled eggs are perfect for any occasion.
Ingredients:
- 6 large eggs
- 1 ripe avocado
- 2 tablespoons mayonnaise
- 1 tablespoon lime juice
- 1 teaspoon sriracha sauce
- 1/4 teaspoon garlic powder
- 1/4 teaspoon salt
- 1/4 teaspoon black pepper
- 1 tablespoon chopped fresh cilantro (optional)
- 1 jalapeño, finely diced (optional for extra heat)
Preparation Time: 15 minutes
Cooking Time: 10 minutes
Total Time: 25 minutes
Instructions:
1. Hard boil the eggs by placing them in a saucepan and covering with water. Bring to a boil, then cover and remove from heat. Let sit for 10 minutes.
2. Transfer the eggs to a bowl of ice water to cool for a few minutes, then peel them.
3. Slice the eggs in half lengthwise and remove the yolks, placing them in a mixing bowl.
4. In the mixing bowl, mash the yolks with the avocado, mayonnaise, lime juice, sriracha, garlic powder, salt, and black pepper until smooth and creamy.
5. If desired, fold in the diced jalapeño and cilantro for extra flavor.
6. Spoon or pipe the avocado mixture back into the egg white halves.
7. Garnish with additional cilantro or a drizzle of sriracha if desired. Serve chilled.
Tips:
- For even creamier filling, use a food processor to blend the yolks and avocado.
- Adjust the amount of sriracha based on your spice preference.
- Refrigerate any leftovers in an airtight container for up to 2 days.
Crispy Pork Rind Nachos

These Crispy Pork Rind Nachos offer a delightful twist on traditional nachos, combining the irresistible crunch of pork rinds with zesty toppings. The perfect blend of flavors and texture makes them an ideal snack for game day or any casual gathering!
Ingredients:
- 5 oz pork rinds
- 1 cup shredded cheddar cheese
- 1/2 cup diced tomatoes
- 1/4 cup sliced jalapeños
- 1/4 cup sour cream
- 1/4 cup guacamole
- 2 tbsp chopped green onions
Preparation Time: 10 minutes
Cooking Time: 5 minutes
Total Time: 15 minutes
Instructions:
1. Preheat the oven to 350°F (175°C).
2. Spread the pork rinds evenly on a baking sheet.
3. Sprinkle the shredded cheddar cheese over the pork rinds.
4. Add the diced tomatoes and sliced jalapeños on top of the cheese.
5. Bake in the preheated oven for about 5 minutes, or until the cheese is melted and bubbly.
6. Remove from the oven and drizzle with sour cream and guacamole.
7. Garnish with chopped green onions before serving.
Tips:
- Feel free to customize your toppings with ingredients like black olives or diced avocado.
- For extra heat, use spicy cheese or add more jalapeños.
- Serve immediately to maintain the crispiness of the pork rinds.
Almond Butter Fat Bombs

These Almond Butter Fat Bombs are a delightful blend of creamy almond butter and rich coconut oil, making them the perfect guilt-free treat for satisfying your sweet cravings while keeping your energy levels high.
Ingredients:
- 1 cup almond butter
- 1/2 cup coconut oil, melted
- 1/4 cup unsweetened cocoa powder
- 1/4 cup sweetener of choice (e.g., stevia, erythritol)
- 1 teaspoon vanilla extract
- 1/4 teaspoon salt
Preparation Time: 10 minutes
Cooking Time: 0 minutes
Total Time: 10 minutes
Instructions:
1. In a mixing bowl, combine the almond butter, melted coconut oil, cocoa powder, sweetener, vanilla extract, and salt.
2. Mix until all ingredients are well combined and smooth.
3. Pour the mixture into silicone molds or a lined baking dish.
4. Freeze for at least 30 minutes or until solid.
5. Once frozen, pop the fat bombs out of the molds and store them in an airtight container in the refrigerator or freezer.
Tips:
- For added flavor, try mixing in some chopped nuts or seeds before freezing.
- Store these fat bombs in the freezer for a quick and easy snack option.
- If you prefer a sweeter taste, adjust the amount of sweetener to your liking.
Cloud Bread Mini Pizzas

These Cloud Bread Mini Pizzas are a delightful twist on traditional pizza, featuring a light and airy crust that perfectly balances savory toppings and vibrant flavors. Great for a low-carb option, they deliver satisfaction with every bite!
Ingredients:
- 3 large eggs
- 1/4 teaspoon cream of tartar
- 3 tablespoons cream cheese
- 1/2 teaspoon garlic powder
- 1/2 teaspoon Italian seasoning
- 1/2 cup marinara sauce
- 1 cup shredded mozzarella cheese
- 1/2 cup pepperoni slices
- 2 tablespoons fresh basil, chopped (optional)
Preparation Time: 10 minutes
Cooking Time: 15 minutes
Total Time: 25 minutes
Instructions:
1. Preheat your oven to 300°F (150°C) and line a baking sheet with parchment paper.
2. Separate the egg whites and yolks into two different bowls. Add cream of tartar to the egg whites and whip until stiff peaks form.
3. In the bowl with the yolks, add cream cheese, garlic powder, and Italian seasoning, mixing until smooth.
4. Gently fold the egg whites into the yolk mixture until combined, being careful not to deflate the egg whites.
5. Scoop the mixture onto the prepared baking sheet, forming small rounds about 3 inches in diameter.
6. Bake the cloud bread rounds in the preheated oven for about 25 minutes or until golden brown.
7. Remove from the oven and let them cool slightly before topping each with marinara sauce, shredded mozzarella, and pepperoni slices.
8. Return to the oven and bake for an additional 5-7 minutes, until the cheese is melted and bubbly.
9. Garnish with fresh basil if desired, and serve warm.
Tips:
- For a vegetarian option, replace pepperoni with your favorite vegetables.
- Keep the cloud bread base simple and experiment with different toppings.
- Ensure egg whites are free from yolk for the best whip volume.
Zucchini Chips with Ranch Dip

Zucchini Chips with Ranch Dip are a delightful and healthy snack that combines the crispiness of baked zucchini with the zingy flavors of ranch seasoning. This recipe is perfect for satisfying crunch cravings without the guilt!
Ingredients:
- 2 medium zucchinis
- 2 tablespoons olive oil
- 1/2 teaspoon garlic powder
- 1/2 teaspoon onion powder
- 1/2 teaspoon paprika
- 1/2 teaspoon salt
- 1/4 teaspoon black pepper
- 1/4 cup plain Greek yogurt
- 2 tablespoons mayonnaise
- 1 teaspoon dried dill
- 1 teaspoon ranch seasoning mix
Preparation Time: 10 minutes
Cooking Time: 20 minutes
Total Time: 30 minutes
Instructions:
1. Preheat your oven to 225°F (107°C) and line a baking sheet with parchment paper.
2. Thinly slice the zucchinis into rounds, about 1/8 inch thick.
3. In a large bowl, toss the zucchini slices with olive oil, garlic powder, onion powder, paprika, salt, and black pepper until evenly coated.
4. Lay the zucchini slices in a single layer on the prepared baking sheet, making sure they do not overlap.
5. Bake in the preheated oven for about 20 minutes or until the chips are crispy, flipping halfway through baking.
6. While the chips are baking, prepare the ranch dip by mixing Greek yogurt, mayonnaise, dried dill, and ranch seasoning in a small bowl.
7. Once the zucchini chips are done, let them cool slightly before serving with the ranch dip.
Tips:
- For extra crispiness, sprinkle the zucchini slices with a bit of cornstarch before tossing them in oil and seasonings.
- Feel free to customize the ranch dip by adding fresh herbs or a squeeze of lemon for brightness.
- Store any leftovers in an airtight container to maintain crispness, ideally consuming them within a day.
Bacon-Wrapped Asparagus Sticks
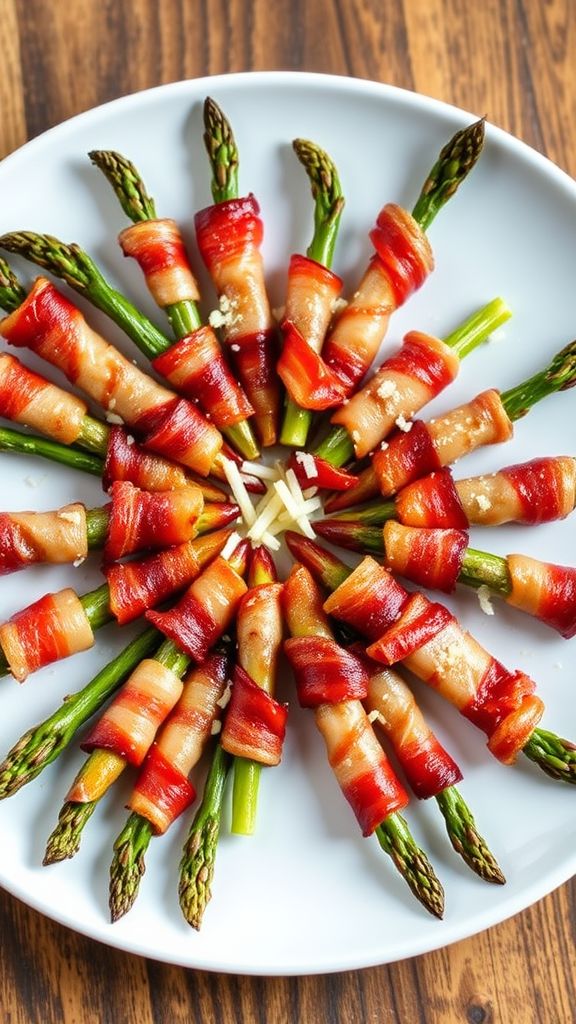
This Bacon-Wrapped Asparagus Sticks recipe combines the savory richness of bacon with the fresh, earthy flavor of asparagus, creating a delicious and satisfying appetizer that’s perfect for any gathering.
Ingredients:
- 1 pound asparagus spears
- 12 slices bacon
- 1 tablespoon olive oil
- 1 teaspoon garlic powder
- 1 teaspoon black pepper
- 1 teaspoon sea salt
- 1 tablespoon grated Parmesan cheese (optional)
Preparation Time: 10 minutes
Cooking Time: 20 minutes
Total Time: 30 minutes
Instructions:
1. Preheat your oven to 400°F (200°C) and line a baking sheet with parchment paper.
2. Wash and trim the asparagus, removing the tough ends.
3. In a mixing bowl, toss the asparagus with olive oil, garlic powder, black pepper, and sea salt until evenly coated.
4. Take a slice of bacon and wrap it around each asparagus spear, starting from the bottom and spiraling up to the tip. Place wrapped spears on the prepared baking sheet.
5. Repeat until all asparagus spears are wrapped. If desired, sprinkle grated Parmesan cheese on top.
6. Bake in the preheated oven for 15-20 minutes, or until the bacon is crispy and the asparagus is tender.
7. Remove from the oven and let cool for a few minutes before serving.
Tips:
- Use thicker asparagus spears to avoid overcooking and ensure they hold up against the bacon.
- Experiment with different seasonings like paprika or cayenne pepper for added heat.
- For extra crunch, broil the wrapped asparagus for the last 2-3 minutes of cooking.
- Pair with dipping sauces like ranch or balsamic glaze for an added flavor boost.
Garlic Parmesan Roasted Brussels Sprouts

These Garlic Parmesan Roasted Brussels Sprouts are a delightful combination of crispy edges, savory garlic, and rich parmesan, making them a must-try side dish for any meal. The key flavors of garlic and parmesan elevate these veggies to a new level of deliciousness.
Ingredients:
- 1 pound Brussels sprouts
- 3 tablespoons olive oil
- 4 cloves garlic, minced
- 1/2 cup grated parmesan cheese
- 1 teaspoon salt
- 1/2 teaspoon black pepper
- 1/2 teaspoon red pepper flakes (optional)
Preparation Time: 10 minutes
Cooking Time: 25 minutes
Total Time: 35 minutes
Instructions:
1. Preheat your oven to 425°F (220°C).
2. Trim the ends of the Brussels sprouts and cut them in half.
3. In a large bowl, toss the Brussels sprouts with olive oil, minced garlic, salt, pepper, and red pepper flakes until well coated.
4. Spread the Brussels sprouts in a single layer on a baking sheet.
5. Roast in the oven for 20 minutes, stirring halfway through.
6. Remove the baking sheet and sprinkle the grated parmesan cheese over the sprouts.
7. Return to the oven and roast for an additional 5 minutes, or until the cheese is melted and golden.
8. Remove from the oven and serve hot.
Tips:
- For extra crispiness, consider broiling the Brussels sprouts for the last 2 minutes.
- Feel free to add herbs like thyme or rosemary for additional flavor.
- Make sure the Brussels sprouts are cut evenly for consistent cooking.
- Store leftovers in an airtight container in the refrigerator for up to 3 days.
Cucumber and Cream Cheese Roll-Ups
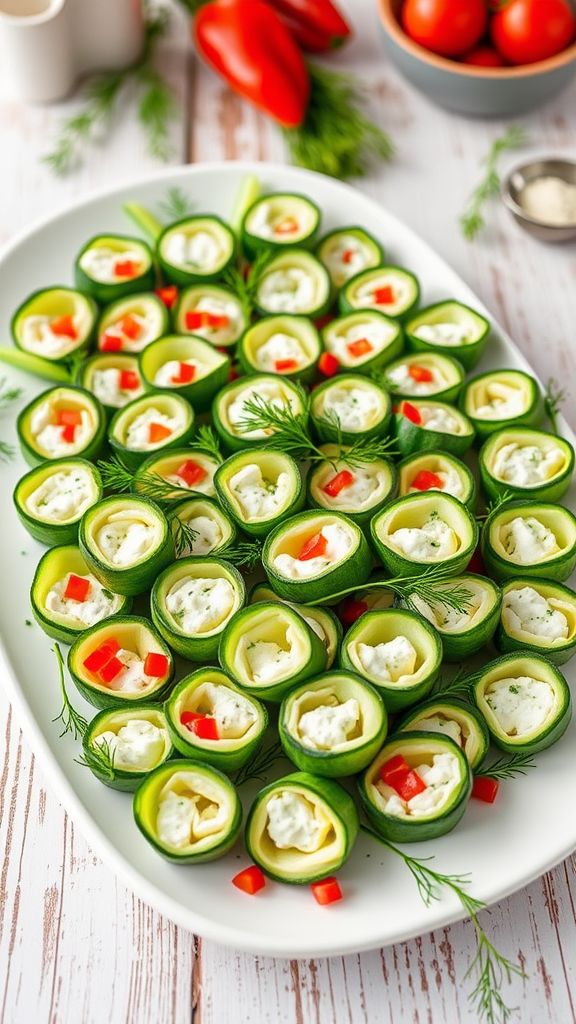
Cucumber and Cream Cheese Roll-Ups are a refreshing and delightful appetizer that combines the crispness of cucumbers with the creamy tang of cream cheese. These bite-sized treats are perfect for parties or a quick snack!
Ingredients:
- 2 large cucumbers
- 8 oz cream cheese, softened
- 2 tbsp fresh dill, chopped
- 1 tbsp lemon juice
- 1/4 tsp garlic powder
- Salt and pepper to taste
- 1/4 cup red bell pepper, finely chopped
Preparation Time: 10 minutes
Cooking Time: 0 minutes
Total Time: 10 minutes
Instructions:
1. Start by slicing the cucumbers lengthwise into thin strips using a mandoline or knife.
2. In a bowl, combine the softened cream cheese, fresh dill, lemon juice, garlic powder, salt, and pepper. Mix until smooth and well combined.
3. Spread a thin layer of the cream cheese mixture onto each cucumber slice.
4. Sprinkle a little chopped red bell pepper on top of each cucumber slice.
5. Carefully roll up each cucumber slice tightly and secure with a toothpick if needed.
6. Arrange the roll-ups on a serving platter and refrigerate until ready to serve.
Tips:
- For an added crunch, include shredded carrots or sprouts in the filling.
- Serve immediately for the best texture, or keep refrigerated for up to 2 hours before serving.
- Experiment with different herbs like chives or basil for varied flavors.
Mini Caprese Skewers

These Mini Caprese Skewers are a delightful fusion of fresh basil, juicy tomatoes, and creamy mozzarella, drizzled with balsamic glaze, making them an irresistible appetizer. Their vibrant colors and refreshing flavors are sure to impress at any gathering.
Ingredients:
- 1 pint cherry tomatoes
- 8 oz mozzarella balls
- 1 bunch fresh basil leaves
- 1/4 cup balsamic glaze
- Salt to taste
- Black pepper to taste
- 12 wooden skewers
Preparation Time: 10 minutes
Cooking Time: 0 minutes
Total Time: 10 minutes
Instructions:
1. Prepare your ingredients by washing the cherry tomatoes and basil leaves, and draining the mozzarella balls.
2. Take a wooden skewer and start threading a cherry tomato onto it.
3. Next, add a mozzarella ball and then a basil leaf. Repeat the process until the skewer is filled, leaving a bit of space at the bottom for handling.
4. Arrange the skewers on a serving platter.
5. Drizzle the balsamic glaze over the skewers and sprinkle with salt and pepper to taste.
Tips:
- For an extra flavor boost, marinate the mozzarella balls in olive oil and herbs prior to assembling the skewers.
- These skewers are best served fresh but can be prepared up to 2 hours in advance if stored in the refrigerator.
- Experiment with different cheese types like feta or goat cheese for a unique twist.
Beef Jerky and Cheese Platter

This Beef Jerky and Cheese Platter combines the savory richness of seasoned beef with the creamy texture of various cheeses, creating an irresistible snack that’s perfect for gatherings or a quiet night in.
Ingredients:
- 8 ounces beef jerky
- 4 ounces cheddar cheese, cubed
- 4 ounces gouda cheese, sliced
- 4 ounces pepper jack cheese, cubed
- 1 cup assorted crackers
- 1/2 cup mixed nuts
- 1/2 cup dried fruit (such as apricots or cranberries)
- 1 tablespoon honey (optional)
Preparation Time: 10 minutes
Cooking Time: 0 minutes
Total Time: 10 minutes
Instructions:
1. Arrange the beef jerky evenly on a large platter.
2. Cut and sprinkle the cheddar, gouda, and pepper jack cheeses around the jerky.
3. Place the assorted crackers in a cluster on the platter.
4. Add the mixed nuts and dried fruit for added crunch and sweetness.
5. Drizzle honey over the cheese if desired and serve immediately.
Tips:
- For variety, include different types of jerky such as turkey or bison.
- Pair with a selection of mustards or dips for an extra flavor boost.
- Serve with refreshing beverages like iced tea or craft beer to complement the flavors.
Ketogenic Chocolate Mug Cake
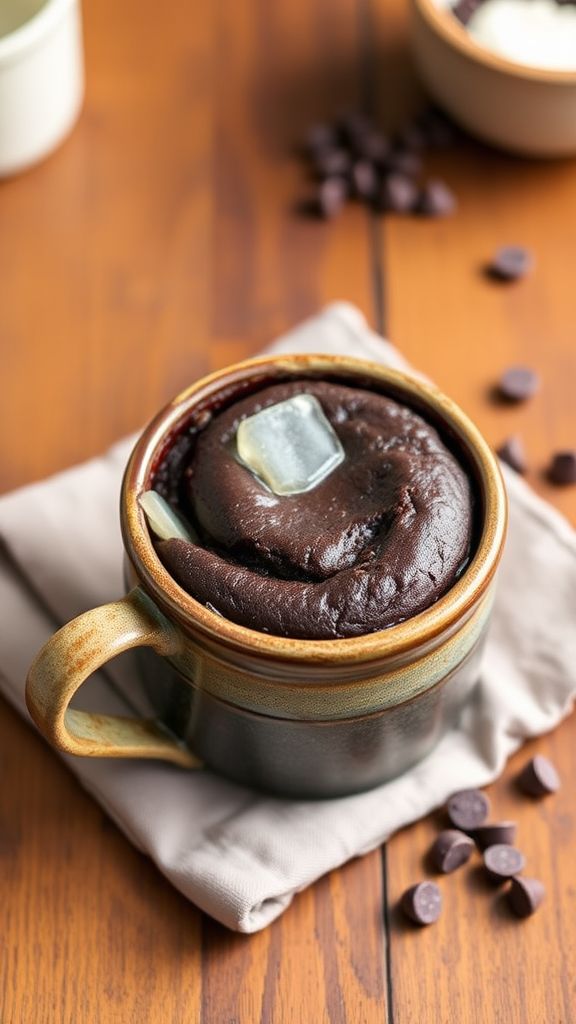
This Ketogenic Chocolate Mug Cake is a delightful low-carb treat that satisfies your chocolate cravings without derailing your diet. With rich cocoa flavor and a fluffy texture, it’s perfect for a quick dessert or snack.
Ingredients:
- 4 tablespoons almond flour
- 2 tablespoons unsweetened cocoa powder
- 2 tablespoons erythritol or your favorite sweetener
- 1/8 teaspoon baking powder
- 1 egg
- 3 tablespoons unsweetened almond milk
- 1 tablespoon melted coconut oil or butter
- 1/4 teaspoon vanilla extract
Preparation Time: 5 minutes
Cooking Time: 1 minute
Total Time: 6 minutes
Instructions:
1. In a microwave-safe mug, combine almond flour, cocoa powder, erythritol, and baking powder.
2. Add the egg, almond milk, melted coconut oil, and vanilla extract to the dry ingredients and mix well until smooth.
3. Microwave the mug for 1 minute. If needed, microwave for an additional 10-15 seconds until the cake is fully cooked but still moist.
4. Wait a minute for the mug to cool slightly before enjoying your cake directly from the mug.
Tips:
- Make sure to adjust the sweetness according to your preference.
- Try adding sugar-free chocolate chips for an extra chocolatey dessert.
- Pair with whipped cream or a dollop of almond butter for added flavor and texture.
Keto Trail Mix with Nuts and Seeds
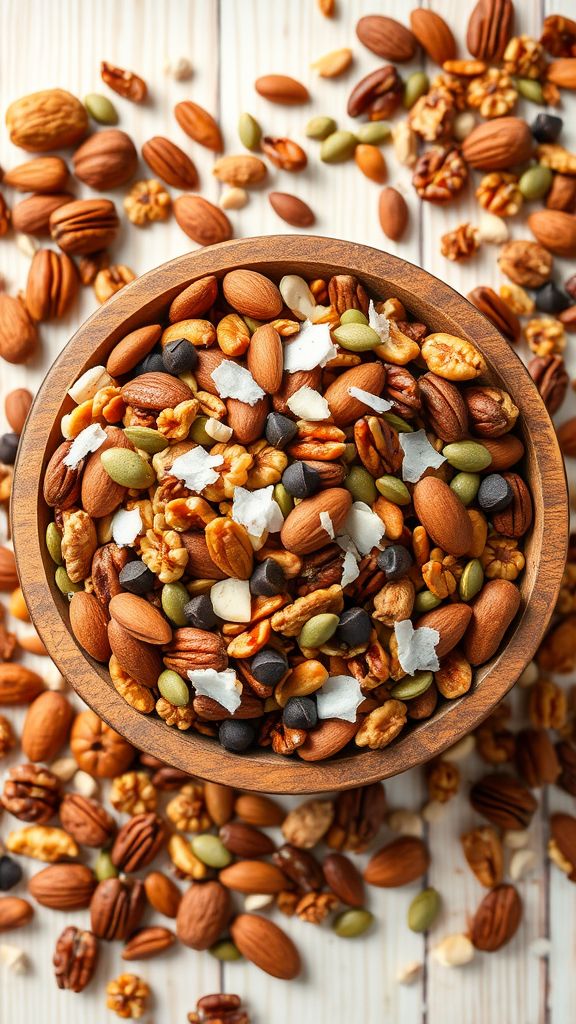
This Keto Trail Mix with Nuts and Seeds is a perfect low-carb snack that packs a punch of flavor with its rich, nutty goodness and crunchy texture. Filled with healthy fats and protein, it satisfies cravings without sabotaging your ketogenic diet.
Ingredients:
- 1 cup almonds
- 1 cup walnuts
- 1 cup pecans
- 1/2 cup sunflower seeds
- 1/2 cup pumpkin seeds
- 1/4 cup unsweetened coconut flakes
- 1/2 teaspoon sea salt
- 1/2 teaspoon cinnamon (optional)
- 1/4 cup dark chocolate chips (sugar-free, optional)
Preparation Time: 10 minutes
Cooking Time: 0 minutes
Total Time: 10 minutes
Instructions:
1. In a large mixing bowl, combine all the nuts and seeds including almonds, walnuts, pecans, sunflower seeds, and pumpkin seeds.
2. Add in the unsweetened coconut flakes, sea salt, and cinnamon if using, and mix well until everything is evenly coated.
3. If you are using dark chocolate chips, gently fold them into the mixture at this point.
4. Store the trail mix in an airtight container for up to two weeks or enjoy immediately as a nutritious snack.
Tips:
- Feel free to customize the mix with your favorite nuts and seeds, just be mindful of carb content.
- Use a combination of sweet and savory toppings to enhance flavor, like adding a touch of vanilla extract.
- For variety, you can add dried low-carb fruits like unsweetened cranberries or blueberries in moderation.
- This trail mix makes a great on-the-go snack; portion it into small bags for easy access.
Radish and Herb Cream Cheese Spread
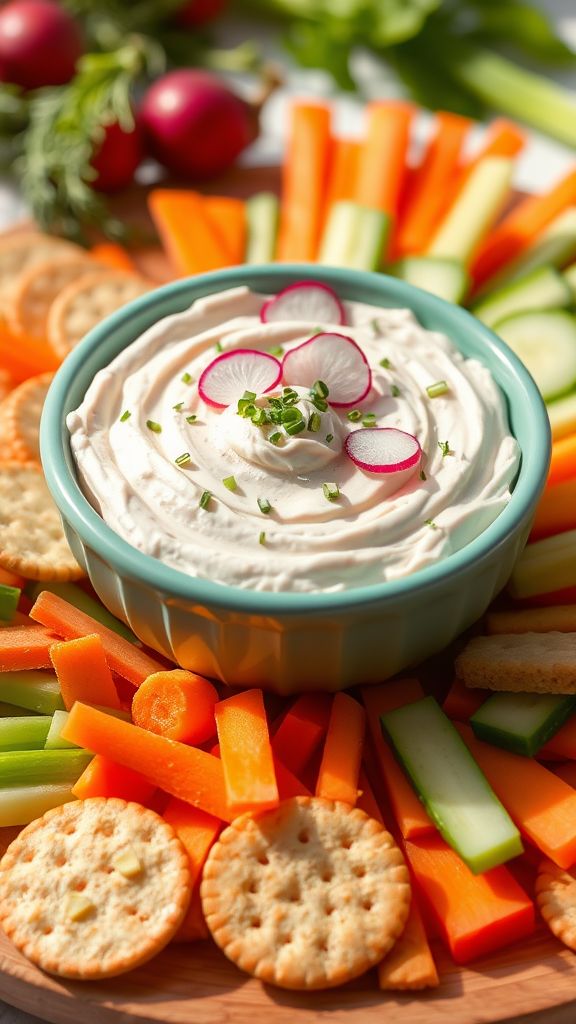
This Radish and Herb Cream Cheese Spread offers a delightful blend of fresh, zesty radish flavors paired with fragrant herbs, creating a vibrant addition to any snack or meal. Its creamy texture and tangy taste make it a crowd-pleaser for gatherings or a simple pick-me-up for your afternoon toast.
Ingredients:
- 8 oz cream cheese, softened
- 1 cup radishes, finely chopped
- 2 tbsp fresh chives, chopped
- 2 tbsp fresh dill, chopped
- 1 tsp lemon juice
- 1/2 tsp garlic powder
- Salt to taste
- Black pepper to taste
Preparation Time: 10 minutes
Cooking Time: 0 minutes
Total Time: 10 minutes
Instructions:
1. In a mixing bowl, combine the softened cream cheese and lemon juice.
2. Add in the finely chopped radishes, chives, dill, and garlic powder. Mix until well blended.
3. Season with salt and black pepper to taste, adjusting as necessary for flavor.
4. Transfer the mixture to a serving bowl and refrigerate for at least 30 minutes to let the flavors meld.
5. Serve chilled with crackers, fresh vegetables, or spread on bread.
Tips:
- For extra flavor, consider adding a pinch of smoked paprika or cayenne pepper.
- Using different herbs like basil or parsley can provide a unique twist on the spread.
- This spread can be made a day in advance for easier entertaining.
- Store leftovers in an airtight container in the refrigerator for up to one week.
Stuffed Bell Peppers with Cheese and Sausage
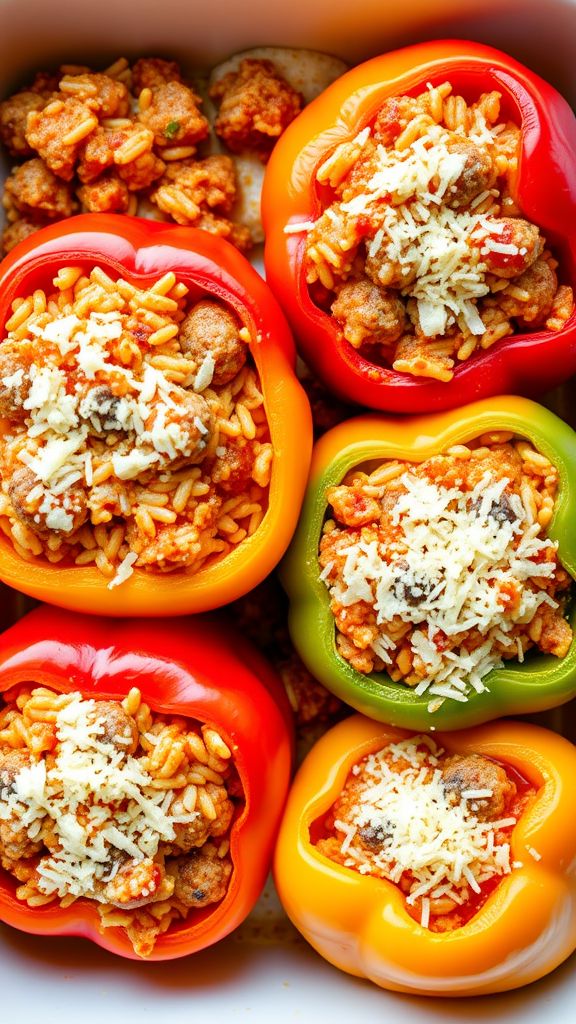
Stuffed Bell Peppers with Cheese and Sausage are a comforting dish that combines savory sausage, rich cheese, and vibrant bell peppers, creating a delightful meal that is both hearty and flavorful.
Ingredients:
- 4 large bell peppers
- 1 pound Italian sausage
- 1 cup cooked rice
- 1 cup shredded mozzarella cheese
- 1/2 cup diced onion
- 2 cloves garlic, minced
- 1 teaspoon Italian seasoning
- 1/2 teaspoon salt
- 1/4 teaspoon black pepper
- 1/2 cup marinara sauce
- 1/4 cup grated Parmesan cheese
Preparation Time: 15 minutes
Cooking Time: 30 minutes
Total Time: 45 minutes
Instructions:
1. Preheat the oven to 375°F (190°C).
2. Cut the tops off the bell peppers and remove the seeds and membranes.
3. In a skillet, cook the Italian sausage over medium heat until browned, breaking it apart as it cooks.
4. Add the diced onion and minced garlic to the skillet and sauté until the onion is translucent.
5. Stir in the cooked rice, Italian seasoning, salt, black pepper, and 1/4 cup of marinara sauce, combining everything well.
6. Remove the skillet from heat and fold in 3/4 cup of mozzarella cheese.
7. Stuff each bell pepper with the sausage and cheese mixture, then place them upright in a baking dish.
8. Pour the remaining marinara sauce over the stuffed peppers and sprinkle with the remaining mozzarella and Parmesan cheese.
9. Cover the baking dish with foil and bake for 25 minutes.
10. Remove the foil and bake for an additional 5 minutes, until the cheese is bubbly and golden.
Tips:
- Try using different types of cheese for a unique flavor.
- Add vegetables like zucchini or mushrooms to the filling for extra nutrition.
- For a spicy kick, use hot Italian sausage instead of mild.
- These stuffed peppers can be made ahead of time and frozen for later use.


