My New Cookbook is Out! Check Out Now!
15 Keto Dessert Ideas That Taste Like Heaven
Did you know that over 50 million people in the United States are currently following a keto diet? If you think going low-carb means saying goodbye to delicious desserts, think again! In this blog, we’ve rounded up 15 heavenly keto dessert ideas that will not only satisfy your sweet tooth but also keep you on track with your health goals. From luscious Chocolate Avocado Mousse to dreamy Keto Tiramisu in a Jar, get ready to indulge guilt-free with these delectable treats!
Shop Our Must-Haves
Heavenly Chocolate Avocado Mousse
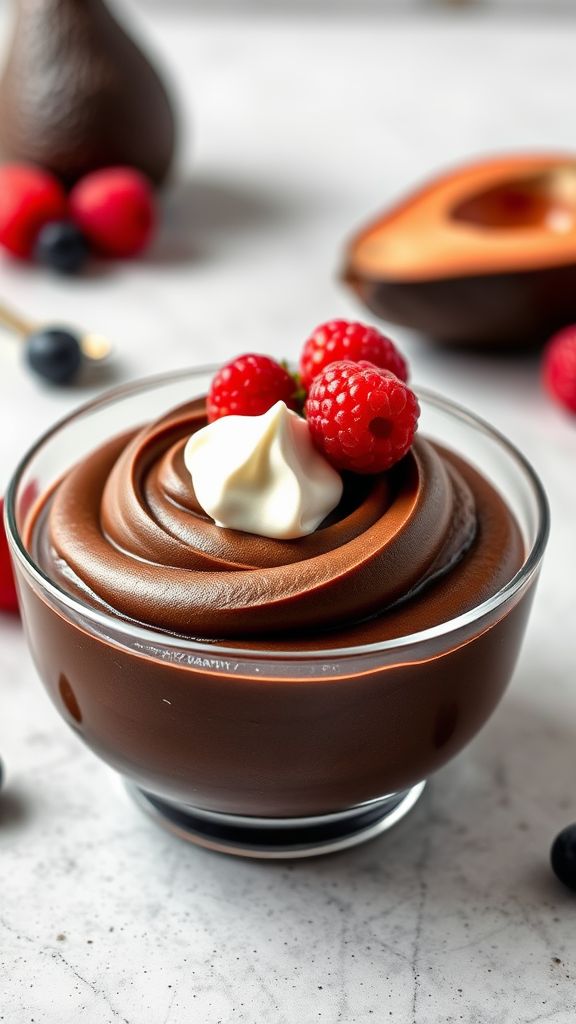
This Heavenly Chocolate Avocado Mousse is a delightful blend of creamy avocado and rich chocolate that creates an indulgent dessert without the guilt. Its unique combination of flavors results in a smooth, velvety texture that will satisfy any chocolate lover’s cravings.
Ingredients:
- 2 ripe avocados
- 1/2 cup unsweetened cocoa powder
- 1/2 cup maple syrup or honey
- 1/4 cup almond milk (or any milk of choice)
- 1 teaspoon vanilla extract
- Pinch of sea salt
Preparation Time: 10 minutes
Cooking Time: 0 minutes
Total Time: 10 minutes
Instructions:
1. Begin by cutting the avocados in half, removing the pits, and scooping the flesh into a blender or food processor.
2. Add the unsweetened cocoa powder, maple syrup or honey, almond milk, vanilla extract, and a pinch of sea salt to the blender with the avocado.
3. Blend the mixture until it is completely smooth and creamy, scraping down the sides as necessary.
4. Taste the mousse, and adjust sweetness if needed by adding more maple syrup or honey.
5. Once blended to your desired consistency, transfer the mousse into serving bowls or cups and refrigerate for at least 30 minutes to chill.
6. Serve chilled, optionally garnished with fresh berries or a dollop of whipped cream.
Tips:
- For a richer flavor, consider using dark chocolate cocoa powder.
- Make sure the avocados are ripe for optimal creaminess and sweetness.
- This mousse can be stored in an airtight container in the refrigerator for up to 3 days.
Coconut Cream Keto Pie

This Coconut Cream Keto Pie is a deliciously rich and creamy dessert that satisfies your cravings without the carbs. With its delightful coconut flavor and a buttery crust, it’s a guilt-free treat you’ll want to make again and again!
Ingredients:
- 1 ½ cups almond flour
- ¼ cup granulated erythritol
- ½ cup unsalted butter, melted
- 1 large egg
- 1 cup coconut cream
- ½ cup unsweetened shredded coconut
- ½ cup heavy whipping cream
- 2 large egg yolks
- 1 teaspoon vanilla extract
- 2 tablespoons cornstarch or keto-friendly thickeners
- ¼ teaspoon salt
Preparation Time: 15 minutes
Cooking Time: 30 minutes
Total Time: 45 minutes
Instructions:
1. Preheat your oven to 350°F (175°C).
2. In a mixing bowl, combine almond flour, erythritol, melted butter, and egg. Mix until well incorporated.
3. Press the mixture into the bottom and up the sides of a pie plate to form the crust.
4. Bake the crust for 10 minutes or until lightly golden. Remove from the oven and let it cool.
5. In a saucepan over medium heat, combine coconut cream, heavy whipping cream, egg yolks, vanilla extract, cornstarch, and salt. Whisk until smooth and cook until the mixture thickens.
6. Remove the saucepan from heat and fold in shredded coconut.
7. Pour the coconut mixture into the cooled crust and spread evenly.
8. Refrigerate for at least 2 hours before serving to allow the pie to set.
Tips:
- For a stronger coconut flavor, use coconut extract in addition to vanilla extract.
- Keep leftovers covered in the refrigerator for up to 3 days.
- Top with extra whipped cream and toasted shredded coconut before serving for garnish.
Sugar-Free Chocolate Raspberry Cheesecake

This Sugar-Free Chocolate Raspberry Cheesecake is a delightful indulgence that combines the rich flavors of chocolate and the tangy sweetness of raspberries, all while keeping it healthy. Perfect for satisfying your sweet tooth without any added sugars!
Ingredients:
- 1 ½ cups almond flour
- ¼ cup unsweetened cocoa powder
- ¼ cup melted coconut oil
- 2 tablespoons erythritol or your preferred sugar substitute
- 1 cup cream cheese, softened
- ½ cup Greek yogurt
- ½ cup unsweetened almond milk
- 1 teaspoon vanilla extract
- ½ cup fresh raspberries
- ¼ cup dark chocolate chips, sugar-free
- 2 eggs
Preparation Time: 15 minutes
Cooking Time: 30 minutes
Total Time: 45 minutes
Instructions:
1. Preheat your oven to 350°F (175°C) and grease a 9-inch springform pan.
2. In a mixing bowl, combine almond flour, cocoa powder, melted coconut oil, and erythritol until well mixed to form the crust.
3. Press the crust mixture evenly into the bottom of the prepared springform pan.
4. In another bowl, beat the softened cream cheese, Greek yogurt, almond milk, vanilla extract, and eggs until smooth and creamy.
5. Gently fold in the fresh raspberries and chocolate chips into the cream cheese mixture.
6. Pour the cheesecake filling over the crust in the springform pan.
7. Bake for 30 minutes or until the center is set but still slightly jiggly.
8. Remove from the oven and let it cool to room temperature, then refrigerate for at least 4 hours before serving.
Tips:
- Use room temperature cream cheese for easier blending.
- For added chocolate flavor, drizzle melted sugar-free chocolate on top before serving.
- Letting the cheesecake chill overnight enhances the flavors even more.
Keto Almond Joy Fat Bombs
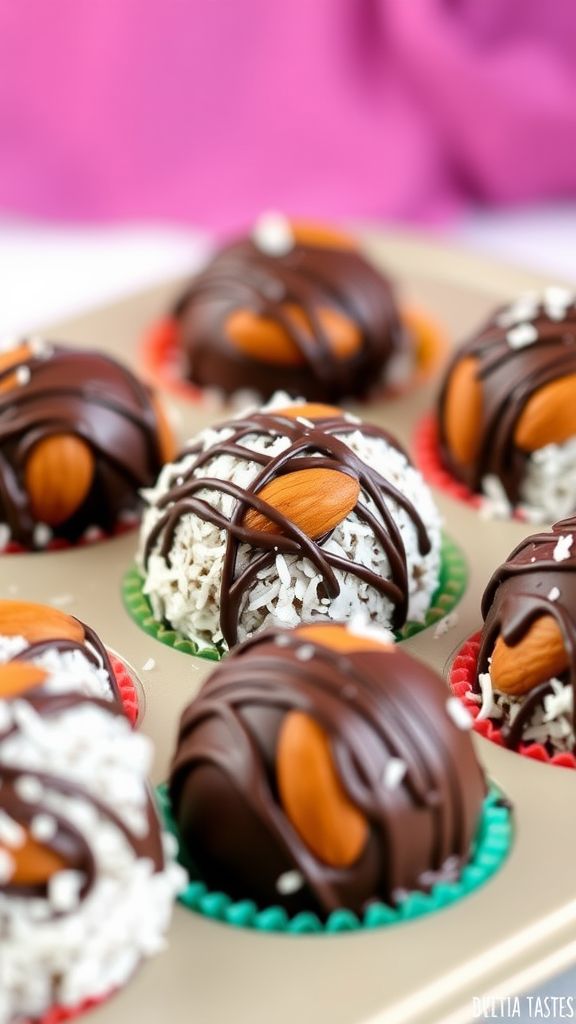
These Keto Almond Joy Fat Bombs are a delightful treat that combines rich coconut, smooth chocolate, and crunchy almonds, perfect for satisfying your sweet cravings while staying low-carb.
Ingredients:
- 1 cup unsweetened shredded coconut
- ½ cup almond butter
- ¼ cup coconut oil, melted
- 2 tablespoons sugar-free sweetener (like erythritol)
- 1 teaspoon vanilla extract
- ¼ teaspoon salt
- 12 whole almonds
- ½ cup sugar-free dark chocolate chips
Preparation Time: 10 minutes
Cooking Time: 5 minutes
Total Time: 15 minutes
Instructions:
1. In a mixing bowl, combine the shredded coconut, almond butter, melted coconut oil, sugar-free sweetener, vanilla extract, and salt. Mix until well combined.
2. Line a muffin tin with paper liners or silicone molds.
3. Fill each muffin cup about halfway with the coconut mixture and press down gently.
4. Place one whole almond on top of each filled cup, pressing it in slightly.
5. Melt the sugar-free dark chocolate chips in a microwave or double boiler until smooth.
6. Drizzle the melted chocolate over each cup, covering the almonds.
7. Refrigerate the muffins until solid, about 1 hour.
8. Once solid, remove the fat bombs from the molds and store them in an airtight container in the fridge.
Tips:
- For added flavor, try adding a pinch of sea salt on top of the chocolate before it sets.
- Feel free to substitute almond butter with your favorite nut butter.
- These fat bombs can be stored in the freezer for longer shelf life.
Lemon Blueberry Cheesecake Bars
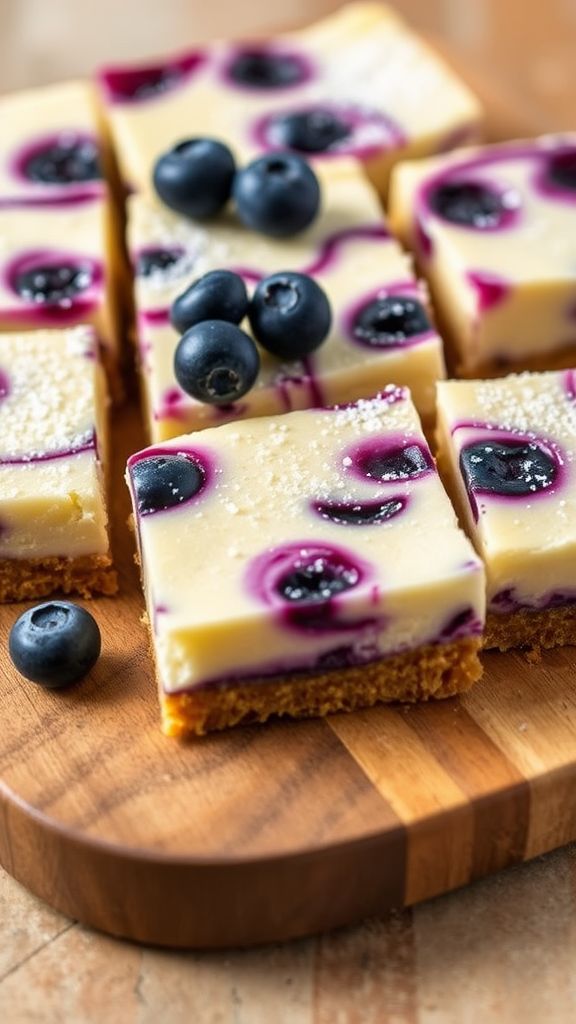
These Lemon Blueberry Cheesecake Bars are a delightful balance of tangy lemon and sweet blueberries, creating a refreshing treat perfect for any occasion. The creamy texture and vibrant flavors make them irresistible!
Ingredients:
- 1 cup graham cracker crumbs
- 1/4 cup granulated sugar
- 1/2 cup unsalted butter, melted
- 16 oz cream cheese, softened
- 3/4 cup granulated sugar
- 2 large eggs
- 1/4 cup sour cream
- 2 tablespoons lemon juice
- 1 teaspoon lemon zest
- 1 cup fresh blueberries
Preparation Time: 15 minutes
Cooking Time: 35 minutes
Total Time: 50 minutes
Instructions:
1. Preheat your oven to 350°F (175°C) and line an 8×8 inch baking pan with parchment paper.
2. In a medium bowl, combine the graham cracker crumbs, 1/4 cup sugar, and melted butter. Press the mixture firmly into the bottom of the prepared pan to form the crust.
3. In a large mixing bowl, beat the softened cream cheese with 3/4 cup sugar until smooth and creamy.
4. Add the eggs one at a time, mixing well after each addition, then mix in the sour cream, lemon juice, and lemon zest until fully combined.
5. Gently fold in the fresh blueberries into the cheesecake mixture.
6. Pour the cheesecake filling over the crust in the prepared pan, spreading it evenly.
7. Bake in the preheated oven for 35 minutes or until the center is set and the edges are lightly golden.
8. Once baked, remove from the oven and let it cool to room temperature. Then refrigerate for at least 2 hours before slicing into bars.
Tips:
- For easier slicing, use a sharp knife dipped in warm water.
- Feel free to substitute with frozen blueberries if fresh are unavailable; just thaw and drain before use.
- Adding a sprinkle of powdered sugar on top before serving enhances the presentation.
Decadent Peanut Butter Cup Brownies
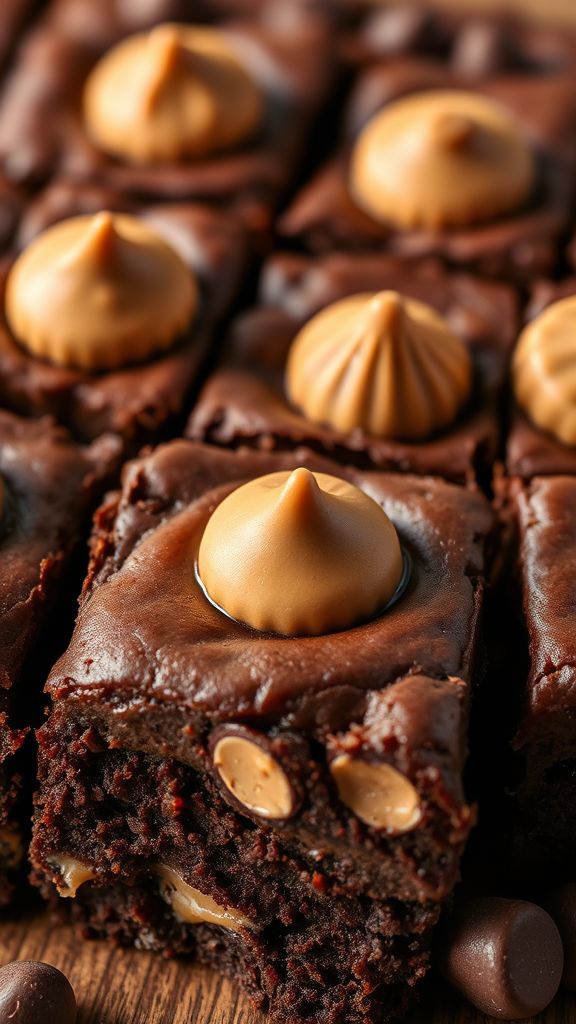
Indulge in the rich, chocolatey delight of Decadent Peanut Butter Cup Brownies, where luscious brownies meet creamy peanut butter and chocolate cups for a truly irresistible treat. The harmonious blend of sweet and nutty flavors will surely satisfy any dessert craving.
Ingredients:
- 1 cup unsalted butter
- 2 cups granulated sugar
- 4 large eggs
- 1 teaspoon vanilla extract
- 1 cup all-purpose flour
- 1 cup unsweetened cocoa powder
- 1 teaspoon baking powder
- 1/2 teaspoon salt
- 1 cup creamy peanut butter
- 1 cup mini peanut butter cups, chopped
- 1/2 cup chocolate chips
Preparation Time: 15 minutes
Cooking Time: 30 minutes
Total Time: 45 minutes
Instructions:
1. Preheat your oven to 350°F (175°C) and grease a 9×13 inch baking pan.
2. In a saucepan, melt the butter over medium heat, then remove from heat and stir in the sugar until well combined.
3. Allow the mixture to cool slightly, then mix in the eggs and vanilla extract until smooth.
4. In a separate bowl, whisk together the flour, cocoa powder, baking powder, and salt.
5. Gradually add the dry ingredients to the wet ingredients, mixing until just combined.
6. Fold in the creamy peanut butter and chocolate chips until evenly distributed.
7. Pour the batter into the prepared pan and smooth the top with a spatula.
8. Bake for 25-30 minutes, or until a toothpick inserted in the center comes out mostly clean.
9. Remove from the oven and immediately sprinkle the chopped mini peanut butter cups on top, allowing them to melt slightly into the brownies.
10. Allow the brownies to cool completely in the pan before cutting into squares.
Tips:
- For an extra chocolatey flavor, double the amount of chocolate chips.
- Store leftovers in an airtight container at room temperature for up to 3 days.
- For a fun twist, add chopped nuts or drizzle caramel sauce on top before serving.
Fluffy Vanilla Bean Keto Pudding

This Fluffy Vanilla Bean Keto Pudding is a delightful treat that combines rich vanilla flavor with a creamy texture, making it the perfect low-carb dessert. Ideal for satisfying your sweet tooth while staying keto-friendly!
Ingredients:
- 2 cups unsweetened almond milk
- 1/4 cup granulated erythritol
- 1/4 cup chia seeds
- 2 teaspoons pure vanilla bean paste
- 1/2 teaspoon salt
- 1 teaspoon vanilla extract
- 1 tablespoon coconut oil, melted
- 1/2 cup whipped heavy cream (for topping)
Preparation Time: 10 minutes
Cooking Time: 0 minutes
Total Time: 10 minutes
Instructions:
1. In a mixing bowl, combine the almond milk, erythritol, chia seeds, vanilla bean paste, salt, and vanilla extract. Whisk well until fully blended.
2. Add the melted coconut oil and mix until incorporated.
3. Pour the mixture into individual serving cups or a large bowl.
4. Cover and refrigerate for at least 2 hours or until the pudding has thickened to your desired consistency.
5. Before serving, top each serving with a dollop of whipped heavy cream for extra fluffiness and flavor.
Tips:
- For a sweeter pudding, adjust the erythritol to taste.
- Use fresh vanilla beans instead of paste for an even more intense flavor.
- Store leftovers in the refrigerator for up to 3 days.
Rich Hazelnut Chocolate Truffles

Indulge in the luxurious flavor of our Rich Hazelnut Chocolate Truffles, where velvety chocolate meets the warm, nutty essence of roasted hazelnuts. This recipe is perfect for satisfying your sweet tooth and impressing guests with its elegant, bite-sized treats.
Ingredients:
- 1 cup heavy cream
- 8 ounces dark chocolate, chopped
- 1 cup hazelnuts, toasted and chopped
- 1 teaspoon vanilla extract
- 1/4 cup unsweetened cocoa powder
- 1/2 cup powdered sugar
- 1/4 teaspoon sea salt
Preparation Time: 20 minutes
Cooking Time: 5 minutes
Total Time: 25 minutes
Instructions:
1. In a small saucepan, heat the heavy cream over medium heat until it just starts to simmer.
2. Remove from heat, and add the chopped dark chocolate, stirring until completely melted and smooth.
3. Stir in the vanilla extract, toasted hazelnuts, and sea salt until well incorporated.
4. Refrigerate the mixture for about 2 hours or until firm enough to scoop.
5. Once the mixture is firm, use a small cookie scoop to portion out the truffles, rolling each into a ball with your hands.
6. Roll the truffles in cocoa powder and powdered sugar until coated. Place them on a parchment-lined tray.
7. Refrigerate the truffles again for about 30 minutes to set before serving.
Tips:
- For a richer flavor, use high-quality dark chocolate with at least 70% cocoa content.
- Experiment with different coatings like crushed nuts or shredded coconut for variety.
- Truffles can be stored in an airtight container in the refrigerator for up to one week.
Creamy Coconut Chia Seed Pudding
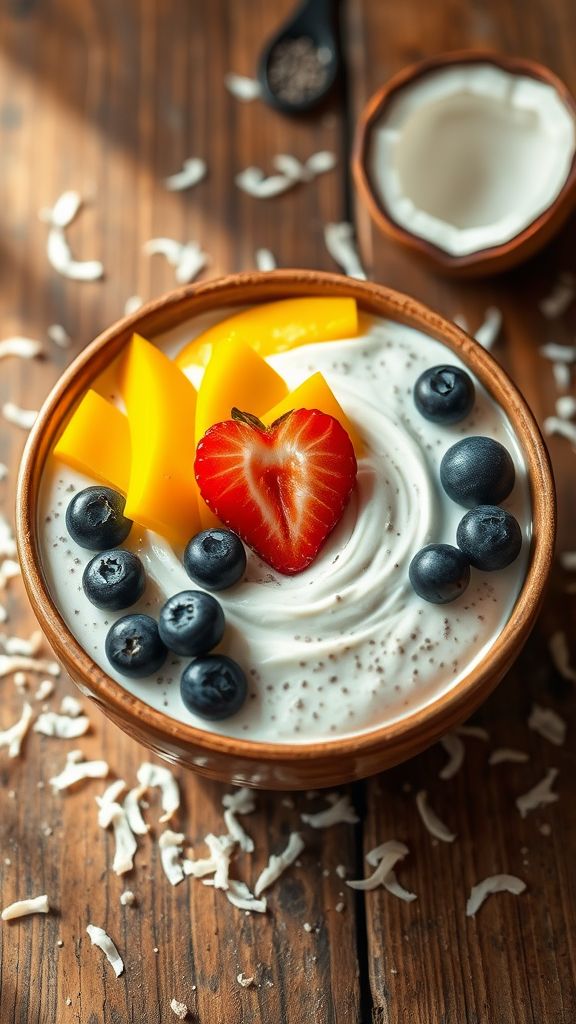
This Creamy Coconut Chia Seed Pudding is a delightful blend of tropical flavors that offers a rich, creamy texture while being packed with nutrients. Perfect for breakfast or a healthy dessert, it’s simple to make and utterly satisfying!
Ingredients:
- 1 cup coconut milk
- 1/4 cup chia seeds
- 2 tablespoons maple syrup
- 1 teaspoon vanilla extract
- 1/4 teaspoon sea salt
- 1/2 cup fresh fruit (e.g., mango, berries, or banana) for topping
Preparation Time: 10 minutes
Cooking Time: 0 minutes
Total Time: 2 hours (including chilling)
Instructions:
1. In a mixing bowl, whisk together the coconut milk, maple syrup, vanilla extract, and sea salt until well combined.
2. Add the chia seeds to the mixture and stir well to ensure they are evenly distributed.
3. Cover the bowl and refrigerate for at least 2 hours or overnight to allow the chia seeds to absorb the liquid and create a pudding-like consistency.
4. Once set, give the pudding a good stir to break up any clumps and serve in bowls or cups.
5. Top with your choice of fresh fruit and enjoy your deliciously creamy pudding!
Tips:
- For an extra creamy texture, use full-fat coconut milk.
- Experiment with different sweeteners like honey or agave syrup if desired.
- Feel free to add spices like cinnamon or nutmeg for added flavor.
- This pudding can be stored in the refrigerator for up to 5 days.
Sinful Dark Chocolate Bark with Nuts
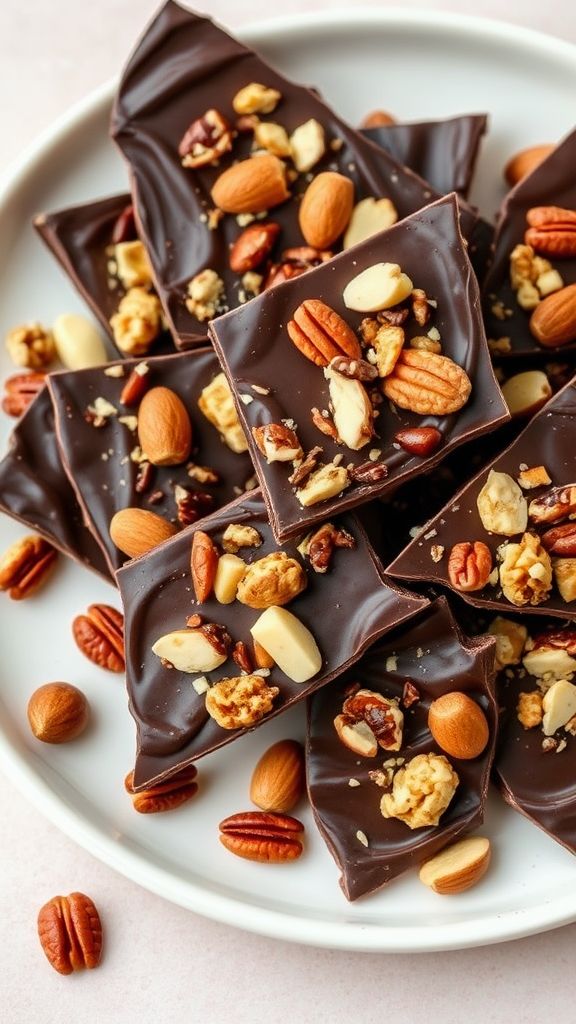
This Sinful Dark Chocolate Bark with Nuts is a delightful treat that combines rich, decadent dark chocolate with the crunch of assorted nuts, creating an indulgent snack perfect for any occasion.
Ingredients:
- 2 cups dark chocolate chips
- 1 cup mixed nuts (almonds, walnuts, pecans)
- 1/2 cup dried fruit (optional)
- 1/4 teaspoon sea salt
- 1 teaspoon vanilla extract
Preparation Time: 10 minutes
Cooking Time: 5 minutes
Total Time: 15 minutes
Instructions:
1. Line a baking sheet with parchment paper.
2. In a microwave-safe bowl, melt the dark chocolate chips in 30-second intervals, stirring in between until smooth.
3. Stir in the vanilla extract and sea salt once the chocolate is fully melted.
4. Pour the melted chocolate onto the prepared baking sheet and spread it into a thin, even layer.
5. Sprinkle the mixed nuts and dried fruit (if using) evenly over the melted chocolate.
6. Gently press the nuts and fruit into the chocolate to ensure they stick.
7. Refrigerate for about 1 hour, or until the chocolate is firm.
8. Once set, break the chocolate bark into pieces and enjoy!
Tips:
- For a touch of sweetness, consider adding a drizzle of melted white chocolate on top before chilling.
- Store any leftover bark in an airtight container at room temperature or in the fridge for freshness.
- Feel free to experiment with different nuts or add spices like cinnamon for a unique twist.
Raspberry Almond Delight Cookies

These Raspberry Almond Delight Cookies are a delightful fusion of sweet raspberries and nutty almonds, creating a chewy treat that’s perfect for any occasion. The combination of flavors will impress your taste buds and make your kitchen smell divine.
Ingredients:
- 1 cup unsalted butter, softened
- 1 cup granulated sugar
- 1/2 cup brown sugar, packed
- 2 large eggs
- 1 teaspoon vanilla extract
- 2 cups all-purpose flour
- 1 teaspoon baking soda
- 1/2 teaspoon salt
- 1 cup chopped almonds
- 1 cup fresh raspberries
- 1/2 cup almond flour
Preparation Time: 15 minutes
Cooking Time: 12 minutes
Total Time: 27 minutes
Instructions:
1. Preheat your oven to 350°F (175°C) and line a baking sheet with parchment paper.
2. In a large mixing bowl, cream together the softened butter, granulated sugar, and brown sugar until light and fluffy.
3. Beat in the eggs one at a time, followed by the vanilla extract.
4. In a separate bowl, whisk together the all-purpose flour, baking soda, salt, and almond flour.
5. Gradually add the dry ingredients to the wet ingredients, mixing until just combined.
6. Gently fold in the chopped almonds and raspberries, being careful not to crush the berries.
7. Drop tablespoons of dough onto the prepared baking sheet, spacing them a few inches apart.
8. Bake in the preheated oven for 10-12 minutes, or until the edges are lightly golden.
9. Allow the cookies to cool on the baking sheet for a few minutes before transferring them to a wire rack to cool completely.
Tips:
- For a stronger almond flavor, consider adding a few drops of almond extract to the dough.
- Make sure to use fresh raspberries to achieve the best flavor and texture.
- Store cookies in an airtight container at room temperature for up to a week.
- These cookies can also be frozen for longer storage; just thaw them at room temperature before serving.
Keto Tiramisu in a Jar
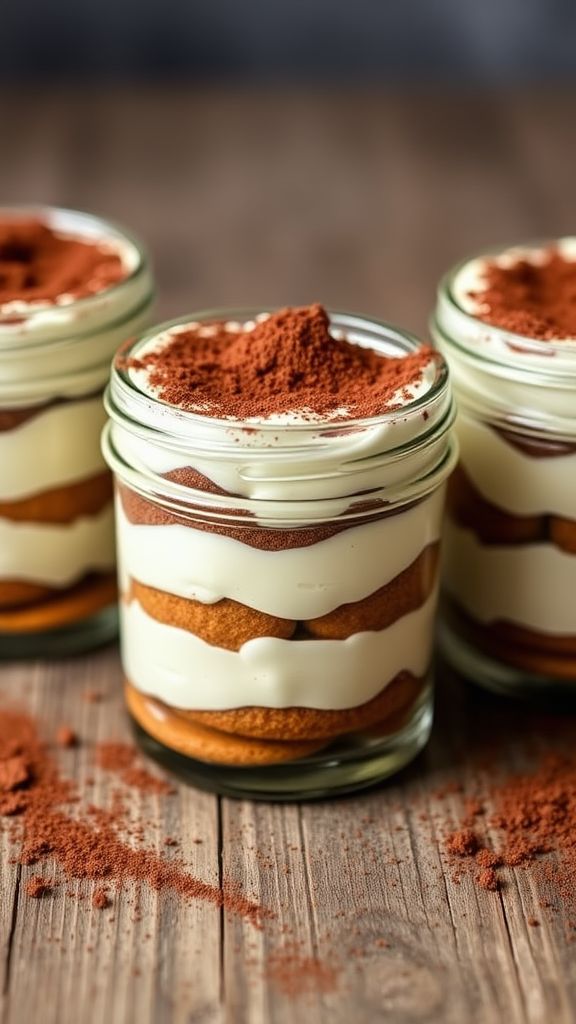
This Keto Tiramisu in a Jar is a delightful twist on a classic dessert, combining rich coffee and creamy mascarpone flavors while keeping it low in carbs. Perfect for satisfying your sweet tooth without derailing your diet!
Ingredients:
- 1 ½ cups strong brewed coffee, cooled
- ½ cup unsweetened cocoa powder
- 1 cup mascarpone cheese
- 1 cup heavy whipping cream
- ½ cup powdered erythritol
- 1 teaspoon vanilla extract
- 1 pinch sea salt
- 12 keto ladyfinger cookies (or almond flour biscuits)
Preparation Time: 15 minutes
Cooking Time: 0 minutes
Total Time: 15 minutes
Instructions:
1. In a bowl, combine mascarpone cheese, powdered erythritol, vanilla extract, and sea salt. Whisk until smooth.
2. In another bowl, whip the heavy cream until soft peaks form. Gently fold the whipped cream into the mascarpone mixture until well combined.
3. Dip each keto ladyfinger quickly into the cooled coffee, making sure not to soak them.
4. In small jars or glasses, layer the dipped ladyfingers at the bottom, followed by a layer of the mascarpone mixture. Repeat the layers until the jars are filled, finishing with the mascarpone on top.
5. Sift cocoa powder over the top layer of the mascarpone. Cover the jars and refrigerate for at least 2 hours before serving, allowing flavors to meld.
Tips:
- For a stronger coffee flavor, you can add a splash of coffee liqueur or coffee extract.
- Chill your jars overnight for an even more delicious flavor.
- Experiment with other toppings like shaved sugar-free chocolate for added appeal.
Mint Chocolate Chip Ice Cream

This Mint Chocolate Chip Ice Cream is a refreshing treat that perfectly balances the coolness of mint with rich chocolate chips. It’s a delightful homemade dessert that’s sure to impress family and friends!
Ingredients:
- 2 cups heavy cream
- 1 cup whole milk
- 3/4 cup granulated sugar
- 1 teaspoon peppermint extract
- 1/2 teaspoon green food coloring (optional)
- 1 cup chocolate chips
- 1/2 teaspoon vanilla extract
Preparation Time: 15 minutes
Cooking Time: 0 minutes
Total Time: 15 minutes (plus freezing time)
Instructions:
1. In a mixing bowl, combine the heavy cream, whole milk, granulated sugar, peppermint extract, and vanilla extract. Whisk until the sugar is fully dissolved.
2. If using, add the green food coloring and mix until you achieve your desired color.
3. Pour the mixture into an ice cream maker and churn according to the manufacturer’s instructions, usually about 20-25 minutes.
4. During the last few minutes of churning, add the chocolate chips to the mixture.
5. Transfer the ice cream to an airtight container and freeze for at least 4 hours or until firm.
Tips:
- For a creamier texture, let the heavy cream and whole milk sit at room temperature for about 10 minutes before mixing.
- Feel free to adjust the amount of peppermint extract to your taste preference.
- For a fun twist, try adding crushed mint cookies along with the chocolate chips.
Spiced Pumpkin Keto Muffins
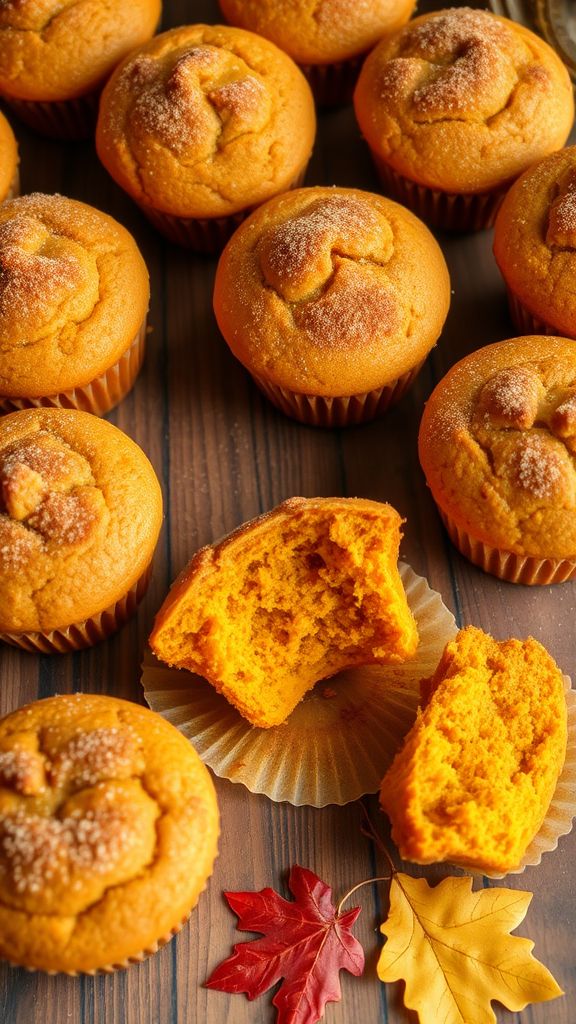
These Spiced Pumpkin Keto Muffins are a delightful combination of warm spices and pumpkin flavor, perfect for a low-carb treat. They’re moist, fluffy, and satisfyingly delicious, making them an irresistible choice for any keto follower.
Ingredients:
- 1 cup almond flour
- 1/2 cup pumpkin puree
- 1/4 cup erythritol or preferred keto sweetener
- 2 large eggs
- 1/4 cup melted coconut oil
- 1 tsp vanilla extract
- 1 tsp baking powder
- 1/2 tsp baking soda
- 1 tsp pumpkin pie spice
- 1/2 tsp cinnamon
- 1/4 tsp salt
Preparation Time: 10 minutes
Cooking Time: 25 minutes
Total Time: 35 minutes
Instructions:
1. Preheat your oven to 350°F (175°C) and line a muffin tin with paper liners.
2. In a mixing bowl, combine the almond flour, erythritol, baking powder, baking soda, pumpkin pie spice, cinnamon, and salt.
3. In another bowl, whisk together the pumpkin puree, eggs, melted coconut oil, and vanilla extract.
4. Pour the wet ingredients into the dry ingredients and mix until just combined.
5. Divide the batter evenly among the muffin cups, filling each about 2/3 full.
6. Bake for 20-25 minutes, or until a toothpick inserted into the center comes out clean.
7. Allow the muffins to cool in the pan for a few minutes before transferring to a wire rack to cool completely.
Tips:
- Store muffins in an airtight container in the fridge for up to a week.
- For added flavor, consider folding in a handful of sugar-free chocolate chips.
- These muffins freeze well; wrap them individually for a quick snack later.
Silky Espresso Chocolate Flan

This Silky Espresso Chocolate Flan is a decadent dessert that perfectly combines the rich flavors of chocolate and espresso, creating a smooth and creamy texture that will delight your taste buds. It’s an elegant treat that’s sure to impress at any gathering.
Ingredients:
- 1 cup granulated sugar
- 1/4 cup water
- 1 cup whole milk
- 1 cup sweetened condensed milk
- 1/2 cup evaporated milk
- 3 large eggs
- 2 teaspoons vanilla extract
- 2 tablespoons espresso powder
- 1/4 cup unsweetened cocoa powder
- 1/4 teaspoon salt
Preparation Time: 15 minutes
Cooking Time: 60 minutes
Total Time: 1 hour 15 minutes
Instructions:
1. Preheat your oven to 350°F (175°C).
2. In a saucepan over medium heat, combine the sugar and water, stirring until the sugar dissolves. Allow it to boil without stirring until it turns a golden caramel color. Quickly pour the caramel into a round baking dish, tilting it to coat the bottom evenly.
3. In a blender, combine whole milk, sweetened condensed milk, evaporated milk, eggs, vanilla extract, espresso powder, cocoa powder, and salt. Blend until smooth.
4. Pour the blended mixture over the caramel in the baking dish.
5. Place the baking dish in a larger baking pan filled with water (a bain-marie) to prevent the flan from drying out.
6. Bake for about 60 minutes or until set. To test for doneness, insert a knife into the center; it should come out clean.
7. Once baked, remove from the oven and let it cool at room temperature, then refrigerate for at least 4 hours before serving.
8. To serve, run a knife around the edges of the flan, invert it onto a serving plate, and enjoy!
Tips:
- For a richer chocolate flavor, add an extra tablespoon of cocoa powder.
- Ensure that your eggs are at room temperature for a creamier texture.
- To elevate the dessert, top with whipped cream and a sprinkle of cocoa powder before serving.


