My New Cookbook is Out! Check Out Now!
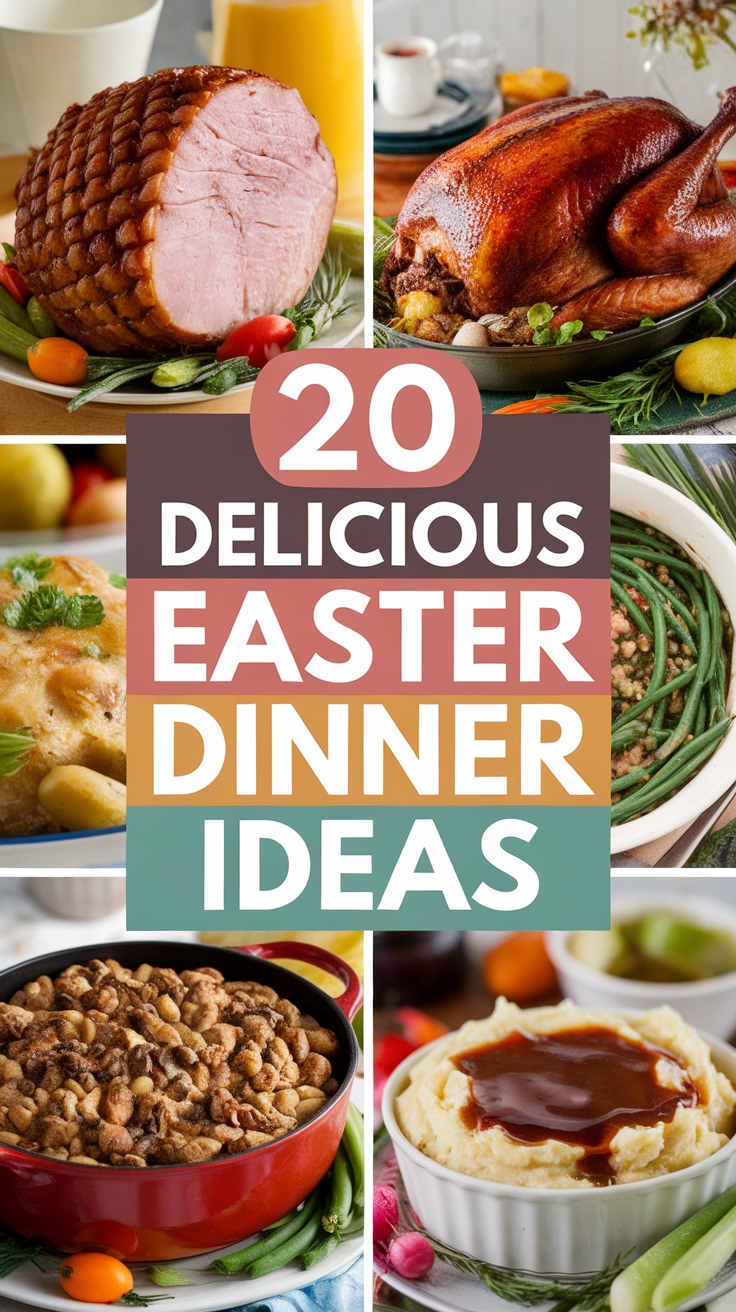
20 Best Easter Dinner Ideas with Main Dishes and Sides
This page contains affiliate links and I earn a commission if you make a purchase through one of the links, at no cost to you.
Did you know that Easter dinners are one of the most anticipated meals of the year, often bringing families and friends together to celebrate with delicious food?
Whether you’re planning a festive feast or a cozy gathering, this collection of the 20 best Easter dinner ideas will inspire you to create a memorable dining experience.
From succulent honey-glazed ham to vibrant spring vegetable medley, you’ll discover mouthwatering main dishes and delightful sides that will impress your guests and elevate your Easter celebration!
Shop Our Must-Haves


1. Honey-Glazed Ham with Pineapple
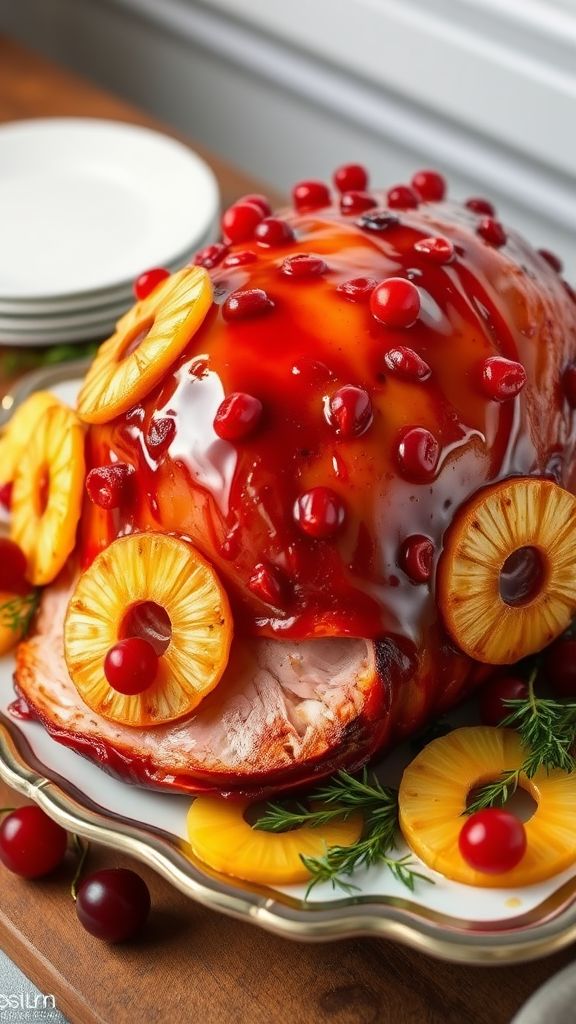
Honey-Glazed Ham with Pineapple is a delightful centerpiece for any festive occasion, especially during Easter. The combination of sweet honey and juicy pineapple creates a mouthwatering glaze that perfectly complements the savory ham.
Prep Time: 20 minutes
Cook Time: 2 hours
Additional Time: 15 minutes
Total Time: 2 hours 35 minutes
Servings: 8
Ingredients:
- 1 (8 to 10 pounds) fully cooked ham
- 1 cup honey
- 1 cup brown sugar
- 1 cup pineapple juice
- 1 teaspoon ground cinnamon
- 1 teaspoon ground cloves
- 1 can (20 ounces) sliced pineapple, drained
- Maraschino cherries for garnish (optional)
Instructions:
- Preheat your oven to 325°F (160°C).
- Place the fully cooked ham in a roasting pan, cut side down.
- In a saucepan over medium heat, combine honey, brown sugar, pineapple juice, cinnamon, and cloves. Stir until the sugar dissolves and the mixture is well blended.
- Pour half of the glaze over the ham, making sure it covers the entire surface.
- Arrange the sliced pineapple on top of the ham and secure them with toothpicks for decoration.
- Bake the ham in the preheated oven for about 2 hours, basting with the remaining glaze every 30 minutes.
- When the ham reaches a nice caramelized color, remove it from the oven and let it rest for 15 minutes before slicing.
- Garnish with maraschino cherries, if desired, and serve warm.
Tips:
For an even richer flavor, consider adding 1 tablespoon of Dijon mustard to the glaze. You can also sprinkle some crushed pecans on top of the ham before serving for an extra crunch.
Nutrition Facts:
- Calories: 350
- Total Fat: 13g
- Saturated Fat: 4g
- Cholesterol: 70mg
- Sodium: 1200mg
- Total Carbohydrates: 45g
- Dietary Fiber: 1g
- Sugars: 38g
- Protein: 20g
2. Roasted Leg of Lamb with Garlic and Rosemary

Indulge in the succulent flavors of a perfectly roasted leg of lamb, infused with aromatic garlic and fragrant rosemary. This dish is ideal for a festive occasion or a delightful family dinner.
Prep Time: 20 minutes
Cook Time: 2 hours
Additional Time: 15 minutes
Total Time: 2 hours 35 minutes
Servings: 6-8
Ingredients:
- 1 leg of lamb (about 5-6 pounds)
- 4 cloves garlic, minced
- 2 tablespoons fresh rosemary, finely chopped
- 2 tablespoons olive oil
- 1 teaspoon salt
- 1/2 teaspoon black pepper
- 1 cup beef or chicken broth
- 1 tablespoon Dijon mustard (optional)
Instructions:
- Preheat your oven to 350°F (175°C).
- In a small bowl, mix the minced garlic, chopped rosemary, olive oil, salt, and black pepper to create a paste.
- Pat the leg of lamb dry with paper towels and place it in a roasting pan.
- Rub the garlic and rosemary paste generously over the entire surface of the lamb, ensuring an even coating.
- If using, spread the Dijon mustard over the lamb for added flavor.
- Pour the broth into the bottom of the roasting pan. This will help keep the meat moist during cooking.
- Insert a meat thermometer into the thickest part of the lamb, avoiding bone.
- Roast in the preheated oven for about 1 hour and 45 minutes, or until the internal temperature reaches 130°F (54°C) for medium-rare.
- Once cooked to your desired doneness, remove the lamb from the oven and cover it loosely with aluminum foil. Let it rest for 15 minutes before carving.
- Slice the lamb and serve with pan juices drizzled over the top.
Tips:
For even more flavor, consider marinating the lamb overnight in the garlic and rosemary mixture. You can also add other herbs such as thyme or oregano for a unique twist. Serve with seasonal sides like roasted vegetables or a fresh salad for a complete meal.
Nutrition Facts:
- Calories: 330 per serving
- Protein: 40g
- Fat: 18g
- Carbohydrates: 0g
- Fiber: 0g
- Sodium: 590mg
3. Baked Lemon Herb Chicken

Baked Lemon Herb Chicken is the perfect dish to elevate your dinner table with its vibrant flavors and appealing aroma. This chicken recipe is not only easy to prepare but also deliciously satisfying, making it an excellent choice for special occasions or weeknight dinners.
Prep Time: 10 minutes
Cook Time: 30 minutes
Additional Time: 15 minutes (marinating)
Total Time: 55 minutes
Servings: 4
Ingredients:
- 4 chicken breasts
- 3 tablespoons olive oil
- Juice of **2 fresh lemons
- Zest of **1 lemon
- 2 cloves garlic, minced
- 1 teaspoon dried oregano
- 1 teaspoon dried thyme
- 1 teaspoon dried rosemary
- Salt and pepper, to taste
- Fresh parsley, for garnish
Instructions:
- In a large bowl, whisk together the olive oil, lemon juice, lemon zest, garlic, oregano, thyme, rosemary, salt, and pepper.
- Add the chicken breasts to the marinade, ensuring they are well coated. Cover the bowl and let marinate in the refrigerator for 15 minutes.
- Preheat the oven to 400°F (200°C) while the chicken marinates.
- Place the marinated chicken in a baking dish. Pour any remaining marinade over the top of the chicken.
- Bake in the preheated oven for 25-30 minutes, or until the chicken is cooked through and the internal temperature reaches 165°F (74°C).
- Once cooked, remove from the oven and let the chicken rest for a few minutes before slicing.
- Garnish with fresh parsley and serve with your favorite sides.
Tips:
For an extra burst of flavor, add a tablespoon of honey to the marinade for a touch of sweetness. You can also experiment with fresh herbs like basil or cilantro for added complexity. Serve the chicken with roasted vegetables or a fresh salad to complete the meal.
Nutrition Facts:
- Calories: 280
- Protein: 30g
- Fat: 15g
- Carbohydrates: 3g
- Fiber: 0g
- Sugar: 1g
4. Dijon Mustard Crusted Rack of Lamb
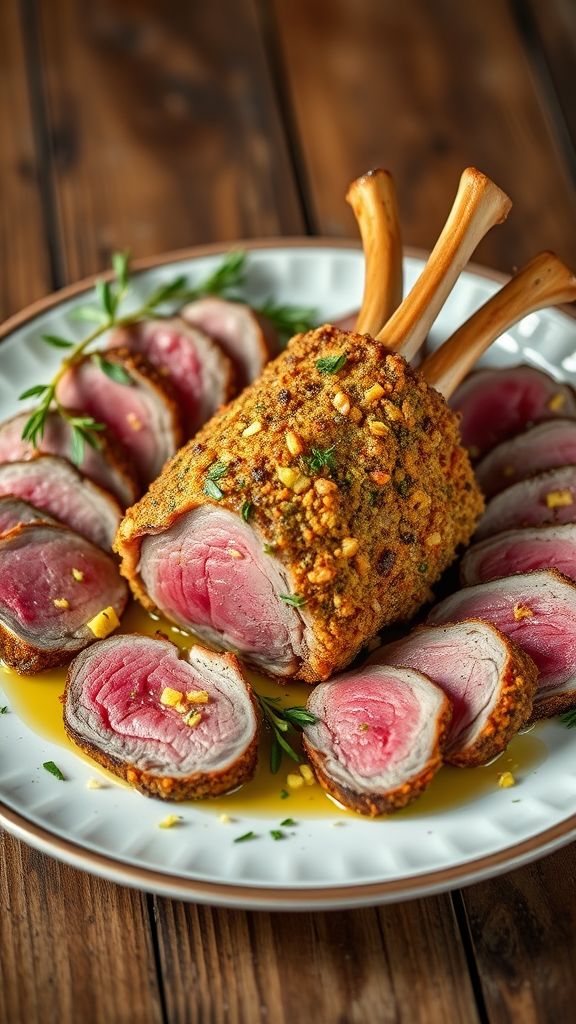
A Dijon Mustard Crusted Rack of Lamb is the perfect centerpiece for your Easter dinner. This dish combines the rich flavors of lamb with a savory mustard crust, delivering an elegant meal that will impress your guests.
Prep Time: 15 minutes
Cook Time: 25 minutes
Additional Time: 15 minutes (resting)
Total Time: 55 minutes
Servings: 4
Ingredients:
- 1 rack of lamb (8 ribs, trimmed)
- Salt and black pepper, to taste
- 1/4 cup Dijon mustard
- 1 cup fresh breadcrumbs
- 2 cloves garlic, minced
- 2 tablespoons fresh rosemary, chopped
- 2 tablespoons fresh parsley, chopped
- 2 tablespoons olive oil
- Zest of 1 lemon
Instructions:
- Preheat your oven to 400°F (200°C).
- Season the rack of lamb generously with salt and black pepper.
- In a small bowl, mix together the Dijon mustard, minced garlic, and lemon zest until well combined.
- Rub the mustard mixture evenly over the meat side of the rack of lamb.
- In another bowl, combine the fresh breadcrumbs, rosemary, parsley, and olive oil. Mix until the breadcrumbs are evenly coated.
- Press the breadcrumb mixture onto the mustard-coated side of the lamb to form a crust.
- Place the rack of lamb on a baking sheet, meat side up.
- Roast in the preheated oven for 25 minutes, or until the internal temperature reaches 130°F (54°C) for medium-rare.
- Remove from the oven and let it rest for 15 minutes before slicing between the ribs to serve.
Tips:
To enhance the flavor, consider marinating the lamb with herbs and garlic for a few hours before applying the mustard crust. Adding a sprinkle of Parmesan cheese to the breadcrumb mix can give an extra layer of richness.
Nutrition Facts:
- Serving size: 1 rack (approx. 4 oz)
- Calories: 275
- Total Fat: 20g
- Saturated Fat: 7g
- Cholesterol: 80mg
- Sodium: 320mg
- Total Carbohydrates: 7g
- Dietary Fiber: 1g
- Sugars: 0g
- Protein: 24g
5. Stuffed Portobello Mushrooms
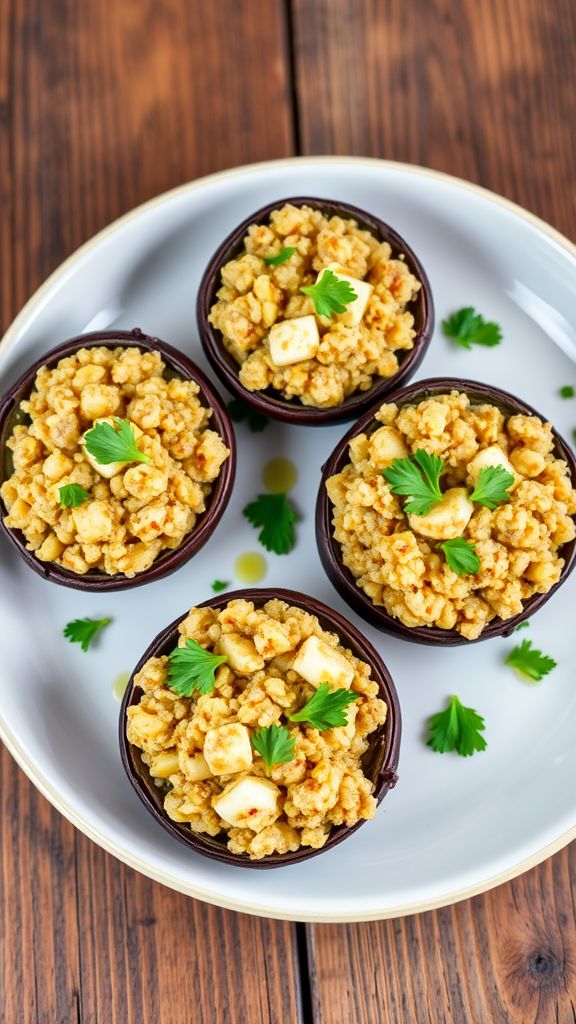
Stuffed Portobello Mushrooms are a delightful and hearty vegetarian dish that will impress your guests at any gathering. These meaty mushrooms are filled with a savory mixture of cheese, herbs, and breadcrumbs, making them an irresistible main course or side dish.
Prep Time: 15 minutes
Cook Time: 25 minutes
Total Time: 40 minutes
Servings: 4
Ingredients:
- 4 large Portobello mushrooms
- 1 cup cooked quinoa
- 1/2 cup grated Parmesan cheese
- 1/2 cup ricotta cheese
- 1/4 cup breadcrumbs
- 2 cloves garlic, minced
- 1 tablespoon olive oil
- 1 teaspoon dried oregano
- 1 teaspoon dried basil
- Salt and pepper to taste
- Fresh parsley for garnish
Instructions:
- Preheat your oven to 375°F (190°C).
- Clean the Portobello mushrooms by gently wiping them with a damp cloth. Remove the stems and set them aside.
- In a mixing bowl, combine the cooked quinoa, grated Parmesan cheese, ricotta cheese, breadcrumbs, minced garlic, olive oil, oregano, basil, and season with salt and pepper. Mix until well blended.
- Fill each Portobello mushroom cap with the stuffing mixture, pressing down gently to pack it in.
- Place the stuffed mushrooms on a baking sheet, drizzling a little extra olive oil on top if desired.
- Bake in the preheated oven for 25 minutes, or until the mushrooms are tender and the stuffing is golden brown.
- Remove from the oven and garnish with fresh parsley before serving.
Tips:
For an extra burst of flavor, try adding chopped sun-dried tomatoes or spinach to the stuffing mixture. A sprinkle of red pepper flakes can also add a delightful kick to the dish!
Nutrition Facts:
- Calories: 220
- Protein: 10g
- Carbohydrates: 28g
- Fat: 10g
- Fiber: 6g
6. Apricot and Pistachio Glazed Carrots
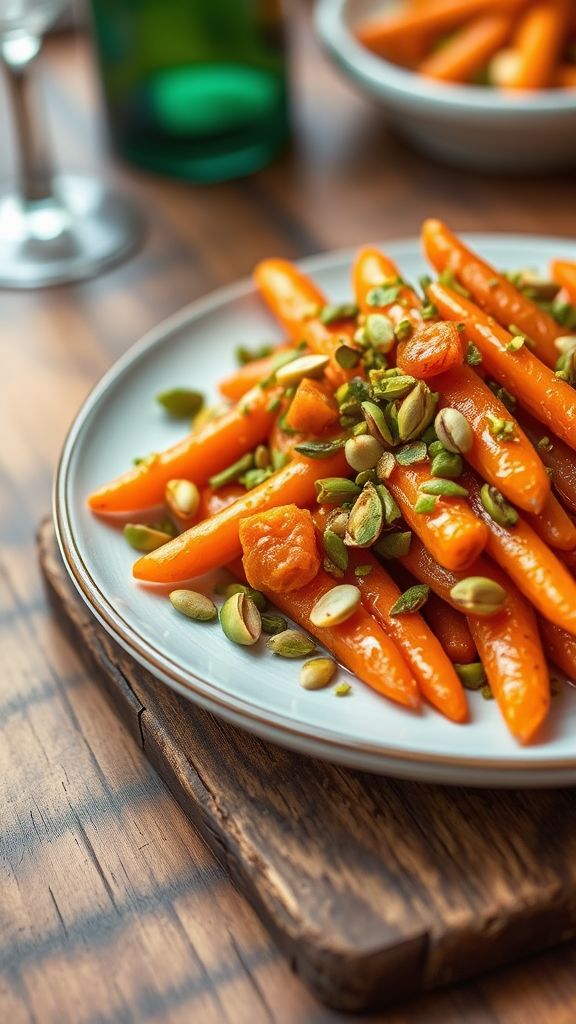
Apricot and Pistachio Glazed Carrots are a delightful side dish that brings sweetness and crunch to your dinner table. The combination of tender carrots, aromatic apricots, and crunchy pistachios creates a vibrant dish that’s both visually appealing and delicious.
Prep Time: 10 minutes
Cook Time: 20 minutes
Additional Time: 5 minutes
Total Time: 35 minutes
Servings: 4
Ingredients:
- 1 pound baby carrots
- 1/2 cup dried apricots, chopped
- 1/4 cup pistachios, roughly chopped
- 2 tablespoons honey
- 2 tablespoons unsalted butter
- 1/2 teaspoon salt
- 1/4 teaspoon black pepper
- 1 tablespoon fresh lemon juice
Instructions:
- In a medium saucepan, bring 2 cups of water to boil. Add baby carrots and cook for 5-7 minutes until tender but still crisp. Drain and set aside.
- In the same saucepan, melt 2 tablespoons of unsalted butter over medium heat.
- Add the chopped dried apricots to the melted butter and sauté for 2-3 minutes until they soften.
- Stir in the honey, salt, black pepper, and fresh lemon juice, mixing well to combine.
- Return the cooked carrots to the saucepan and toss to coat them evenly with the apricot glaze.
- Cook for an additional 3-5 minutes to allow the flavors to meld, stirring occasionally.
- Remove from heat and sprinkle the roughly chopped pistachios over the glazed carrots before serving.
Tips:
To enhance the flavor, consider adding a pinch of ground cinnamon or nutmeg to the glaze mixture. For extra texture, you can also add toasted sesame seeds along with the pistachios. Serve warm for the best experience!
Nutrition Facts:
- Calories: 190
- Total Fat: 9g
- Saturated Fat: 3g
- Cholesterol: 10mg
- Sodium: 250mg
- Carbohydrates: 27g
- Fiber: 4g
- Sugar: 12g
- Protein: 3g
7. Classic Potato Au Gratin
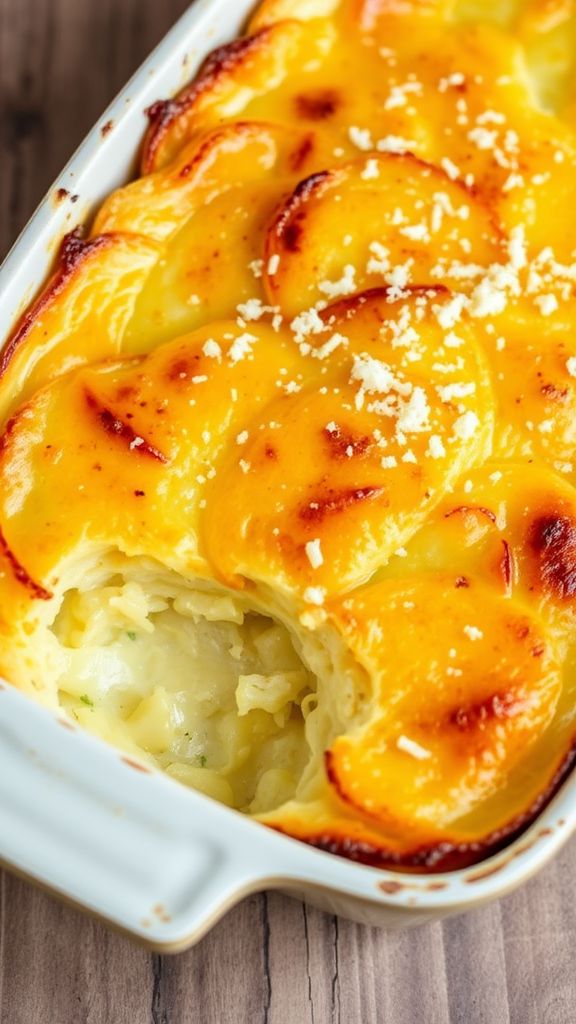
Classic Potato Au Gratin is a wonderfully creamy and delicious dish that’s perfect for any holiday table, especially during Easter dinner. With layers of tender potatoes and rich, cheesy goodness, this side dish will steal the spotlight.
Prep Time: 20 minutes
Cook Time: 1 hour
Additional Time: 5 minutes
Total Time: 1 hour 25 minutes
Servings: 6
Ingredients:
- 2 pounds Yukon Gold potatoes, thinly sliced
- 1 cup heavy cream
- 1 cup whole milk
- 2 cups shredded Gruyère cheese
- 1 cup shredded sharp cheddar cheese
- 2 cloves garlic, minced
- 1 teaspoon salt
- 1/2 teaspoon black pepper
- 1/4 teaspoon nutmeg
- 2 tablespoons butter, for greasing the baking dish
- 1/4 cup grated Parmesan cheese, for topping
Instructions:
- Preheat your oven to 375°F (190°C) and grease a 2-quart baking dish with butter.
- In a mixing bowl, combine the heavy cream, whole milk, minced garlic, salt, black pepper, and nutmeg. Whisk the ingredients together until well-blended.
- Arrange one layer of the thinly sliced potatoes in the prepared baking dish, slightly overlapping each slice.
- Sprinkle a layer of Gruyère cheese over the potatoes, followed by a drizzle of the cream mixture. Repeat this layering process until all potatoes and cheese are used up, finishing with a layer of cream on top.
- Sprinkle the sharp cheddar cheese and grated Parmesan cheese over the final layer.
- Cover the baking dish with aluminum foil and bake in the oven for 40 minutes.
- After 40 minutes, remove the foil and bake for an additional 20 minutes, or until the top is golden and bubbly.
- Once cooked, let it rest for about 5 minutes before serving to help it set.
Tips:
For an extra boost of flavor, consider adding herbs such as thyme or rosemary to the layers of potatoes. You can also experiment with different types of cheese like Monterey Jack or Fontina to create your unique blend!
Nutrition Facts:
- Calories: 380 per serving
- Protein: 15g
- Fat: 25g
- Carbohydrates: 30g
- Fiber: 2g
- Sugars: 2g
8. Spring Vegetable Medley with Garlic Butter

Fresh, vibrant, and bursting with flavor, this Spring Vegetable Medley with Garlic Butter is the perfect accompaniment to any meal. Celebrate the season with a colorful array of vegetables, all brought together by the rich taste of garlic butter.
Prep Time: 10 minutes
Cook Time: 15 minutes
Additional Time: 0 minutes
Total Time: 25 minutes
Servings: 4
Ingredients:
- 1 cup asparagus spears, trimmed
- 1 cup snap peas
- 1 cup baby carrots, halved
- 1 cup broccoli florets
- 3 tablespoons unsalted butter
- 3 cloves garlic, minced
- Salt and pepper to taste
- 1 tablespoon fresh lemon juice
- 1 tablespoon fresh parsley, chopped (for garnish)
Instructions:
- Begin by washing all the vegetables thoroughly. Trim the ends of the asparagus, and halve the baby carrots.
- Bring a large pot of salted water to a boil. Add the asparagus, snap peas, baby carrots, and broccoli to the pot. Blanch the vegetables for about 2-3 minutes until they are vibrant in color and slightly tender.
- Drain the vegetables and transfer them to a bowl of ice water to stop the cooking process. Let them cool for a few minutes, then drain again.
- In a large skillet, melt the unsalted butter over medium heat. Once melted, add the minced garlic and sauté for about 1 minute until fragrant.
- Add the blanched vegetables to the skillet and toss them in the garlic butter. Cook for an additional 5 minutes, stirring occasionally.
- Season with salt, pepper, and fresh lemon juice. Toss well to combine.
- Remove from heat and transfer the vegetable medley to a serving dish. Garnish with chopped fresh parsley before serving.
Tips:
For an extra layer of flavor, consider adding a pinch of red pepper flakes for a subtle kick. You can also sprinkle some grated Parmesan cheese on top for a cheesy twist. Mixing in some roasted nuts can add a delightful crunch as well.
Nutrition Facts:
- Calories: 150
- Total Fat: 9g
- Saturated Fat: 5g
- Cholesterol: 20mg
- Sodium: 100mg
- Total Carbohydrates: 15g
- Dietary Fiber: 5g
- Sugars: 4g
- Protein: 4g
9. Spinach and Feta Stuffed Shells

Delight your taste buds with these Spinach and Feta Stuffed Shells, a perfect blend of creamy cheese and nutritious spinach enveloped in tender pasta shells. This casserole-style dish is not only satisfying but also makes for an impressive presentation at your dinner table.
Prep Time: 20 minutes
Cook Time: 30 minutes
Additional Time: 10 minutes
Total Time: 1 hour
Servings: 4
Ingredients:
- 12-15 large pasta shells
- 2 cups fresh spinach, chopped
- 1 cup ricotta cheese
- 1 cup feta cheese, crumbled
- 1/2 cup grated Parmesan cheese
- 1/2 teaspoon garlic powder
- 1/2 teaspoon black pepper
- 1/2 teaspoon salt
- 1/4 teaspoon red pepper flakes (optional)
- 2 cups marinara sauce
- 1 tablespoon olive oil
- 1/4 cup fresh parsley, chopped (for garnish)
Instructions:
- Preheat your oven to 375°F (190°C).
- Cook the pasta shells according to the package instructions until al dente. Drain and set aside.
- In a skillet, heat olive oil over medium heat. Add the chopped spinach and sauté until wilted, about 3-4 minutes. Remove from heat and let cool slightly.
- In a mixing bowl, combine the ricotta cheese, feta cheese, Parmesan cheese, garlic powder, black pepper, salt, and red pepper flakes (if using). Stir in the sautéed spinach and mix well.
- Spread 1 cup of marinara sauce on the bottom of a baking dish.
- Stuff each cooked pasta shell with the spinach and cheese mixture, then place them in the baking dish, open side up.
- Pour the remaining marinara sauce over the stuffed shells, making sure they are well covered.
- Cover the dish with aluminum foil and bake for 20 minutes.
- Remove the foil and bake for an additional 10 minutes to allow the top to brown slightly.
- Let it rest for 10 minutes before serving. Garnish with fresh parsley.
Tips:
For an extra layer of flavor, sauté some onions and garlic with the spinach. You can also add other herbs like oregano or basil to the filling for a more aromatic taste.
Nutrition Facts:
- Calories: 360
- Protein: 18g
- Fat: 15g
- Carbohydrates: 42g
- Fiber: 3g
- Sodium: 600mg
10. Smoked Salmon Quiche
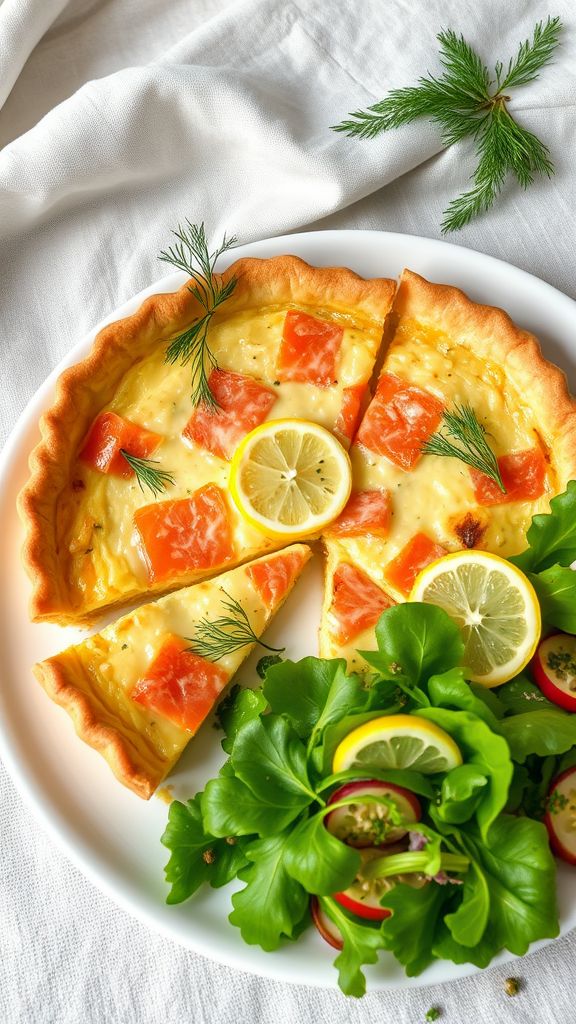
This Smoked Salmon Quiche is a delightful dish perfect for brunch or holiday gatherings. With a flaky crust and creamy filling, the smoky flavor of the salmon pairs perfectly with fresh dill and a hint of lemon. This quiche is sure to impress your guests and leave them wanting more!
Prep Time: 20 minutes
Cook Time: 35 minutes
Additional Time: 10 minutes
Total Time: 1 hour 5 minutes
Servings: 8
Ingredients:
- 1 pie crust (store-bought or homemade)
- 4 large eggs
- 1 cup heavy cream
- 1 cup milk
- 1 cup smoked salmon, chopped
- 1 cup gruyère cheese, shredded
- 1/2 cup fresh dill, chopped
- 1 tablespoon lemon juice
- 1/2 teaspoon salt
- 1/4 teaspoon black pepper
Instructions:
- Preheat your oven to 375°F (190°C).
- Roll out the pie crust and fit it into a 9-inch pie dish. Trim any excess crust hanging over the edges and poke the bottom with a fork.
- In a mixing bowl, whisk together the eggs, heavy cream, milk, salt, and black pepper until well combined.
- Stir in the smoked salmon, gruyère cheese, dill, and lemon juice into the egg mixture.
- Pour the mixture into the prepared pie crust.
- Bake in the preheated oven for 35 minutes or until the filling is set and the top is lightly golden.
- Allow the quiche to cool for about 10 minutes before slicing and serving.
Tips:
- For an extra layer of flavor, add some chopped chives or capers to the filling mix.
- Serve with a side salad for a refreshing contrast to the richness of the quiche.
Nutrition Facts:
- Serving Size: 1 slice
- Calories: 320
- Total Fat: 24g
- Saturated Fat: 12g
- Cholesterol: 150mg
- Sodium: 400mg
- Total Carbohydrates: 22g
- Dietary Fiber: 1g
- Sugars: 1g
- Protein: 12g
11. Creamy Asparagus Risotto
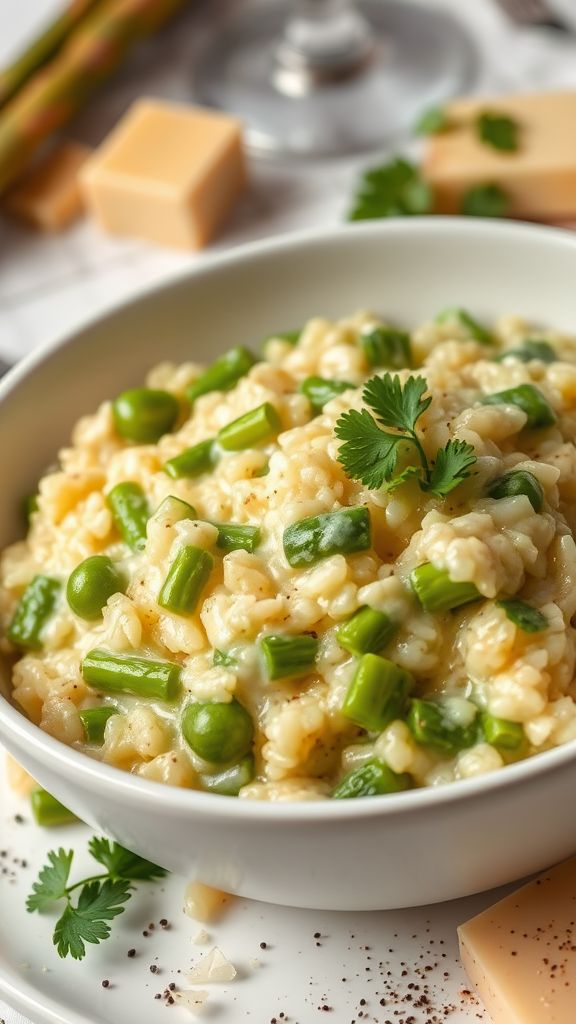
Creamy Asparagus Risotto is a delightful, comforting dish that perfectly blends the earthy flavors of asparagus with the creamy texture of Arborio rice. This elegant risotto is not only a fantastic choice for a special occasion but also makes for a satisfying main course any night of the week.
Prep Time: 10 minutes
Cook Time: 30 minutes
Additional Time: 5 minutes
Total Time: 45 minutes
Servings: 4
Ingredients:
- 1 cup Arborio rice
- 4 cups vegetable broth (or chicken broth)
- 1 tablespoon olive oil
- 1 small onion, finely chopped
- 2 cloves garlic, minced
- 1 cup asparagus, trimmed and cut into 1-inch pieces
- 1/2 cup white wine (optional)
- 1/2 cup grated Parmesan cheese
- 1/2 cup heavy cream
- Salt and pepper to taste
- Fresh parsley for garnish (optional)
Instructions:
- In a saucepan, bring the vegetable broth to a simmer and keep it warm over low heat.
- In a large skillet, heat the olive oil over medium heat. Add the onion and cook until softened, about 3-4 minutes.
- Stir in the garlic and cook for another minute until fragrant.
- Add the Arborio rice to the skillet and stir for 1-2 minutes, allowing the rice to toast slightly.
- If using, pour in the white wine and cook until it has mostly evaporated.
- Begin adding the warm broth one ladle at a time, stirring frequently. Allow the rice to absorb the liquid before adding more, continuing until the rice is creamy and al dente, about 18-20 minutes.
- In the last 5 minutes of cooking, add the asparagus pieces to the risotto.
- Once the rice is cooked, stir in the heavy cream, Parmesan cheese, and season with salt and pepper to taste.
- Remove from heat and let it sit for a couple of minutes before serving.
- Garnish with fresh parsley if desired.
Tips:
- For extra flavor, consider adding a squeeze of lemon juice just before serving.
- Use fresh, seasonal asparagus to enhance the taste and texture of your risotto.
- Stir in some fresh herbs like basil or chives for an added layer of flavor.
Nutrition Facts:
- Calories: 450
- Protein: 12g
- Carbohydrates: 60g
- Fat: 18g
- Fiber: 2g
- Sugar: 3g
12. Maple-Roasted Brussels Sprouts
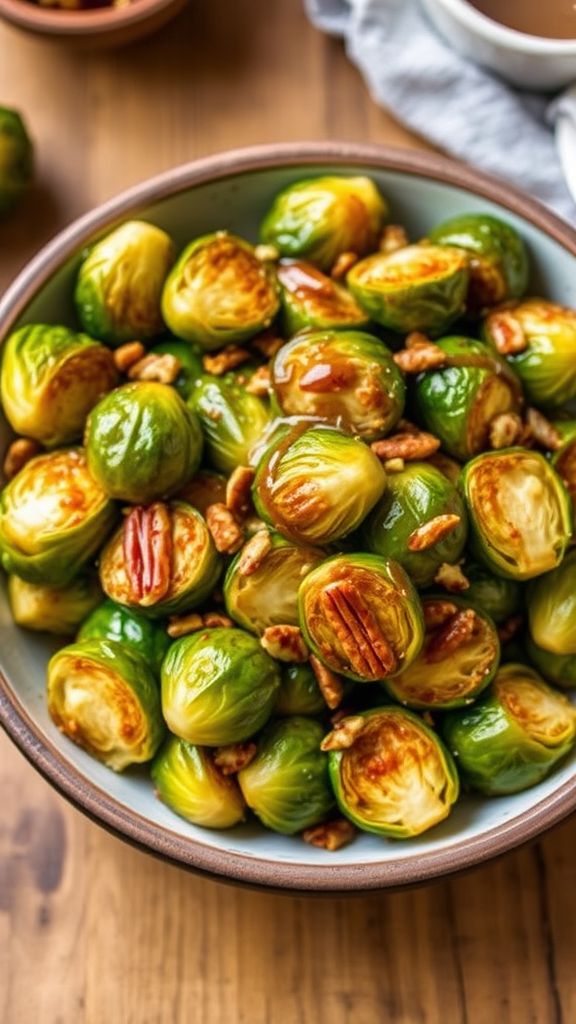
Maple-Roasted Brussels Sprouts are a delightful side dish that perfectly balances sweet and savory flavors. The caramelization from roasting brings out the natural nuttiness of the Brussels sprouts, while the maple syrup adds a touch of sweetness that enhances your holiday dinner table.
Prep Time: 10 minutes
Cook Time: 25 minutes
Total Time: 35 minutes
Servings: 4
Ingredients:
- 1 pound Brussels sprouts, trimmed and halved
- 3 tablespoons olive oil
- 3 tablespoons pure maple syrup
- Salt and pepper, to taste
- 1 teaspoon garlic powder
- 1/4 teaspoon crushed red pepper flakes (optional)
- 1/4 cup chopped pecans or walnuts (optional)
Instructions:
- Preheat your oven to 400°F (200°C).
- In a large bowl, combine Brussels sprouts, olive oil, maple syrup, salt, pepper, garlic powder, and crushed red pepper flakes (if using). Toss until the Brussels sprouts are well coated.
- Spread the Brussels sprouts in a single layer on a baking sheet lined with parchment paper for easier cleanup.
- Roast in the preheated oven for 20-25 minutes, stirring halfway through, until they are golden brown and crispy on the edges.
- In the last 5 minutes of cooking, add the chopped pecans or walnuts (if desired) to the baking sheet to toast them slightly.
- Remove from the oven and let them cool for a few minutes before serving. Drizzle with any remaining maple syrup if desired.
Tips:
To make the dish even tastier, try adding a splash of balsamic vinegar before serving for an extra tangy kick. You can also sprinkle some fresh herbs like thyme or rosemary for added flavor and aroma.
Nutrition Facts:
- Calories: 180 per serving
- Fat: 13g
- Carbohydrates: 15g
- Fiber: 4g
- Sugar: 4g
- Protein: 4g
13. Garlic Mashed Potatoes with Chives
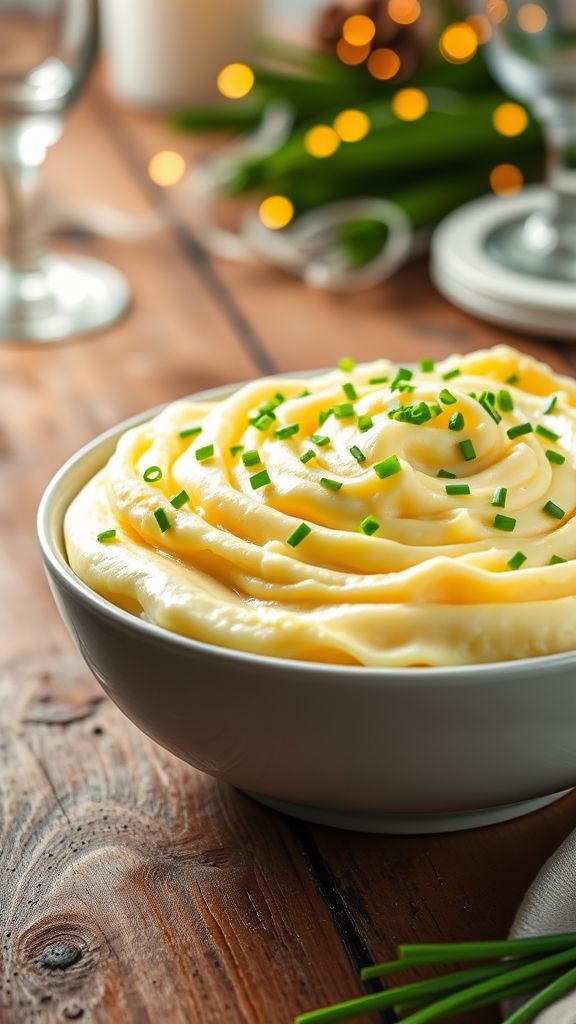
Garlic Mashed Potatoes with Chives are the perfect side dish for any gathering, especially during festive occasions like Easter. Creamy, buttery, and loaded with flavor, these mashed potatoes are elevated with the delightful addition of garlic and fresh chives.
Prep Time: 15 minutes
Cook Time: 20 minutes
Total Time: 35 minutes
Servings: 4
Ingredients:
- 2 pounds of russet potatoes, peeled and cubed
- 4 cloves of garlic, minced
- 1/2 cup of unsalted butter
- 1/2 cup of whole milk (or cream for extra richness)
- 1/4 cup of fresh chives, chopped
- Salt and pepper to taste
Instructions:
- In a large pot, add the cubed potatoes and cover them with cold water. Add a pinch of salt and bring to a boil over high heat.
- Once boiling, reduce the heat to medium and simmer for about 15-20 minutes, or until the potatoes are fork-tender.
- While the potatoes cook, in a small saucepan, melt the unsalted butter over low heat. Add the minced garlic and cook for about 1-2 minutes, stirring continuously, until fragrant but not browned.
- Once the potatoes are cooked, drain them and return them to the pot.
- Add the melted garlic butter, whole milk, and chopped chives to the potatoes.
- Using a potato masher or electric mixer, mash the potatoes until they are smooth and creamy, adjusting the milk texture as needed.
- Season with salt and pepper to taste, and mix well.
- Serve hot, garnished with additional chives if desired.
Tips:
To make these mashed potatoes even creamier, substitute half of the milk with sour cream or Greek yogurt. For an extra kick of flavor, consider adding a dash of garlic powder or some grated Parmesan cheese.
Nutrition Facts:
- Calories: 250 per serving
- Total Fat: 12g
- Saturated Fat: 7g
- Cholesterol: 30mg
- Sodium: 450mg
- Total Carbohydrates: 33g
- Dietary Fiber: 3g
- Sugars: 2g
- Protein: 5g
14. Grilled Vegetable Platter with Balsamic Glaze
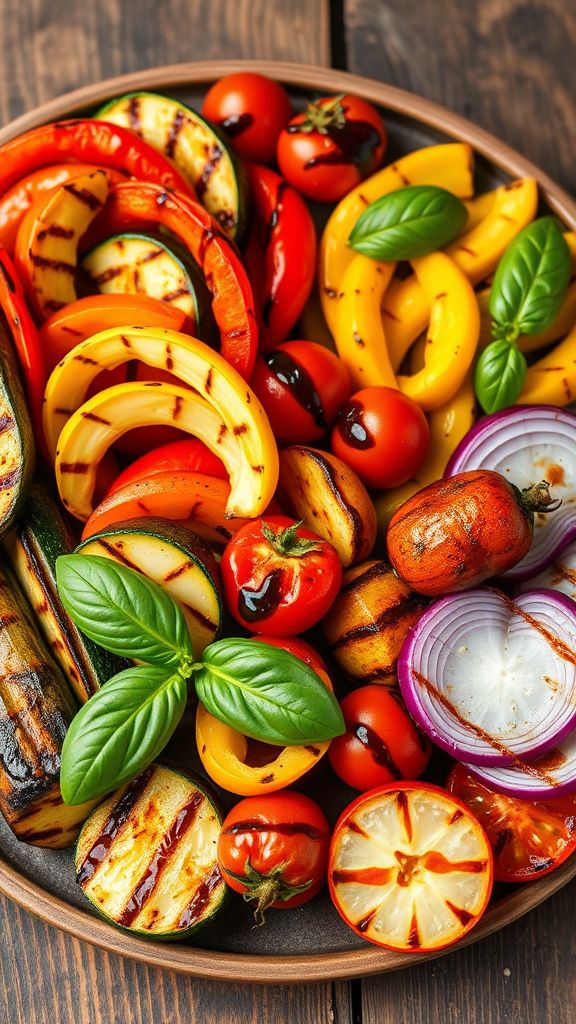
Grilled Vegetable Platter with Balsamic Glaze is a vibrant and healthy side dish that brings the flavors of spring to your Easter dinner. The combination of charred vegetables drizzled with a tangy balsamic glaze makes for an eye-catching and tasty addition to any table setting.
Prep Time: 15 minutes
Cook Time: 15 minutes
Total Time: 30 minutes
Servings: 4
Ingredients:
- 1 small zucchini, sliced
- 1 small yellow squash, sliced
- 1 red bell pepper, cut into strips
- 1 yellow bell pepper, cut into strips
- 1 cup cherry tomatoes
- 1 small red onion, cut into thick slices
- 2 tablespoons olive oil
- Salt and pepper, to taste
- 1/2 cup balsamic glaze
- Fresh basil leaves, for garnish
Instructions:
- Preheat your grill to medium-high heat.
- In a large bowl, combine the sliced zucchini, yellow squash, bell peppers, cherry tomatoes, and red onion.
- Drizzle the vegetables with olive oil and season with salt and pepper. Toss to evenly coat all the vegetables.
- Place the seasoned vegetables directly on the grill grates. Grill for about 5-7 minutes on each side, or until they are tender and have nice grill marks.
- Once grilled, remove the vegetables from the grill and arrange them on a large platter.
- Drizzle the balsamic glaze over the grilled vegetables.
- Garnish with fresh basil leaves before serving.
Tips:
- To enhance the flavor, marinate the vegetables in the olive oil, salt, and pepper for about 30 minutes before grilling.
- Experiment with different vegetables like asparagus, mushrooms, or eggplant for added variety and texture.
Nutrition Facts:
- Calories: 150
- Total Fat: 8g
- Saturated Fat: 1g
- Cholesterol: 0mg
- Sodium: 200mg
- Total Carbohydrates: 19g
- Dietary Fiber: 5g
- Sugars: 6g
- Protein: 3g
15. Lemon Dill Couscous Salad
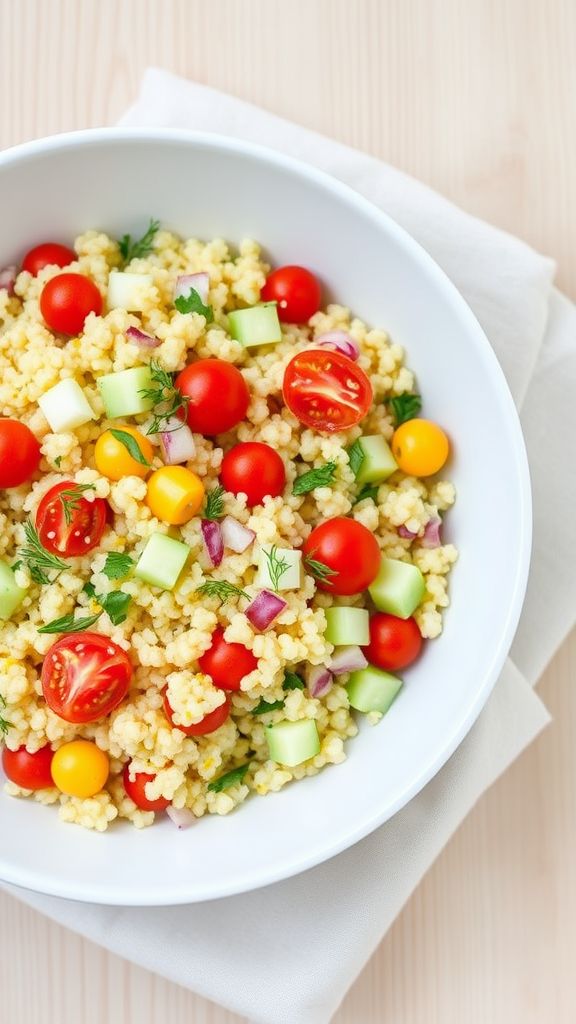
Enjoy this refreshing Lemon Dill Couscous Salad that perfectly complements any Easter dinner table. It’s light, zesty, and packed with flavor, making it an ideal side dish for spring gatherings.
Prep Time: 15 minutes
Total Time: 15 minutes
Servings: 4
Ingredients:
- 1 cup couscous
- 1 1/4 cups vegetable broth or water
- 1/4 cup fresh lemon juice
- 1 tablespoon olive oil
- 1 teaspoon lemon zest
- 1/4 cup fresh dill, chopped
- 1 cup cherry tomatoes, halved
- 1/2 cup cucumber, diced
- 1/4 cup red onion, finely chopped
- Salt and pepper, to taste
Instructions:
- In a medium saucepan, bring the vegetable broth or water to a boil.
- Stir in the couscous, cover, and remove from heat. Let it sit for about 5 minutes or until the couscous is fluffy.
- In a large bowl, whisk together the lemon juice, olive oil, lemon zest, salt, and pepper.
- Fluff the couscous with a fork and add it to the bowl with the dressing. Mix well to combine.
- Gently fold in the fresh dill, cherry tomatoes, cucumber, and red onion until everything is well mixed.
- Taste and adjust seasoning if needed.
- Serve immediately, or chill in the refrigerator for at least 30 minutes to allow flavors to meld.
Tips:
For an extra burst of flavor, add feta cheese or avocado to the salad. You can also substitute the vegetable broth with chicken broth for a richer taste. Adjust the amount of dill according to your preference; it adds a delightful freshness!
Nutrition Facts:
- Calories: 180 per serving
- Protein: 5g
- Carbohydrates: 27g
- Fat: 7g
- Fiber: 3g
- Sugar: 2g
16. Eggplant Parmesan Stacks
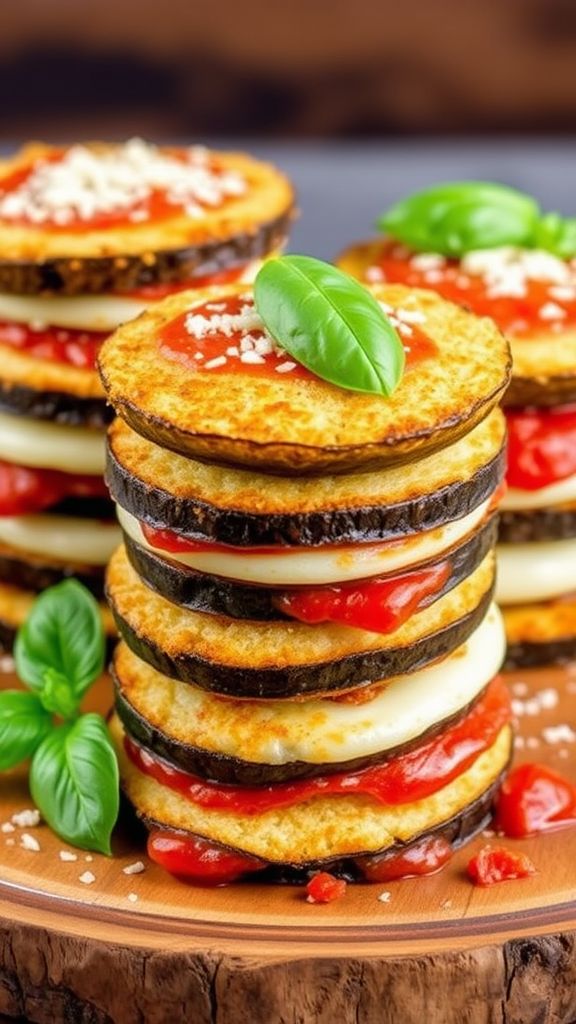
Eggplant Parmesan Stacks are a delightful twist on the classic Italian dish. These stacks feature layers of crispy, breaded eggplant, rich marinara sauce, and gooey melted cheese, all baked to perfection. They make for a perfect main course during Easter dinner or any special occasion!
Prep Time: 20 minutes
Cook Time: 30 minutes
Additional Time: 10 minutes
Total Time: 1 hour
Servings: 4
Ingredients:
- 2 medium eggplants, sliced into 1/2-inch rounds
- 1 cup all-purpose flour
- 2 large eggs, beaten
- 1 cup breadcrumbs
- 1 cup marinara sauce
- 2 cups shredded mozzarella cheese
- 1/2 cup grated Parmesan cheese
- 1 teaspoon dried oregano
- 1 teaspoon dried basil
- Salt and pepper, to taste
- Olive oil, for frying
Instructions:
- Begin by seasoning the eggplant slices with salt and pepper. Let them sit for about 15 minutes to draw out moisture, then pat dry with paper towels.
- Set up a breading station with three shallow bowls: one with flour, one with beaten eggs, and one with breadcrumbs mixed with dried oregano and dried basil.
- Dip each eggplant slice in flour, shaking off the excess, followed by the egg, and finally coat thoroughly in the breadcrumb mixture.
- In a large skillet, heat olive oil over medium-high heat. Fry the breaded eggplant slices in batches, about 3-4 minutes on each side, until golden brown. Drain on paper towels.
- Preheat your oven to 375°F (190°C). In a baking dish, spread a thin layer of marinara sauce on the bottom.
- Layer half of the fried eggplant slices in the dish, followed by half of the remaining marinara sauce, half of the mozzarella cheese, and half of the Parmesan cheese.
- Repeat the layers with the remaining eggplant, sauce, and cheese.
- Bake in the preheated oven for 20-25 minutes, or until the cheese is bubbly and golden.
- Remove from the oven and let it sit for 10 minutes before slicing into stacks.
Tips:
For extra flavor, add fresh basil leaves between the layers or sprinkle on top before serving. You can also mix in some red pepper flakes for a spicy kick! Serve with a side of garlic bread for a complete meal.
Nutrition Facts:
- Calories: 350 per serving
- Protein: 18g
- Carbohydrates: 35g
- Fat: 20g
- Fiber: 6g
- Sugar: 6g
17. Lemon Garlic Roasted Potatoes
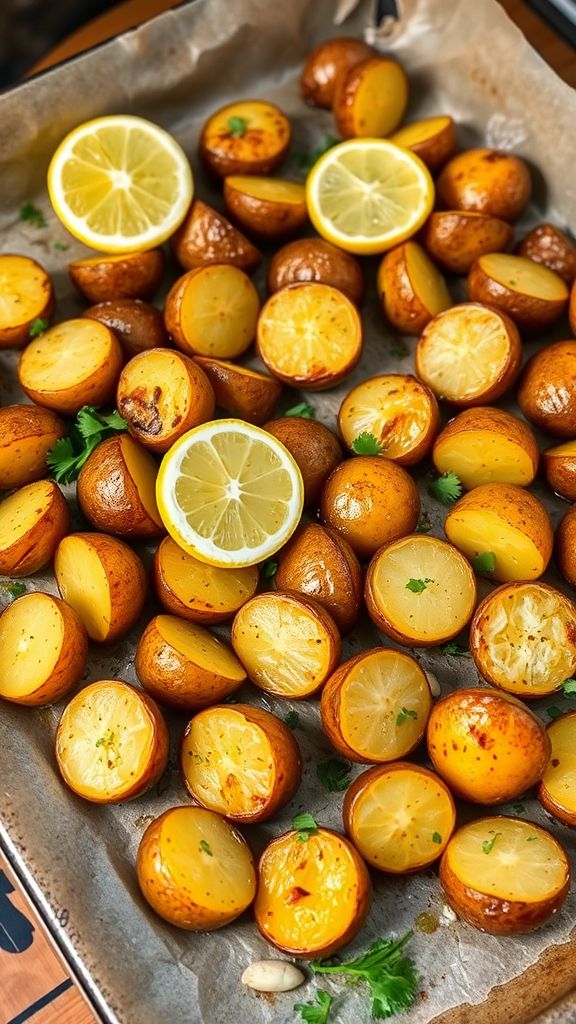
Lemon Garlic Roasted Potatoes are the perfect side dish for any meal, especially during festive gatherings. The bright flavor of lemon combined with the irresistible aroma of garlic makes these potatoes a crowd-pleaser.
Prep Time: 10 minutes
Cook Time: 30 minutes
Additional Time: 5 minutes
Total Time: 45 minutes
Servings: 4
Ingredients:
- 2 pounds baby potatoes, halved
- 3 tablespoons olive oil
- 4 cloves garlic, minced
- 1 tablespoon fresh lemon juice
- 1 teaspoon lemon zest
- 1 teaspoon dried oregano
- Salt and pepper, to taste
- Fresh parsley, chopped (for garnish)
Instructions:
- Preheat your oven to 425°F (220°C).
- In a large mixing bowl, combine the olive oil, minced garlic, lemon juice, lemon zest, dried oregano, salt, and pepper.
- Add the halved baby potatoes to the bowl and toss well until they are evenly coated with the lemon garlic mixture.
- Spread the potatoes in a single layer on a baking sheet lined with parchment paper.
- Roast in the preheated oven for 30 minutes, or until the potatoes are golden brown and fork-tender, stirring halfway through for even cooking.
- Remove from the oven and let them cool for 5 minutes.
- Garnish with fresh parsley before serving.
Tips:
For an extra kick of flavor, add some red pepper flakes to the olive oil mixture. You can also experiment with fresh herbs like rosemary or thyme for a different taste. For crispy potatoes, make sure they are spread out in a single layer on the baking sheet.
Nutrition Facts:
- Calories: 210
- Protein: 3g
- Fat: 9g
- Carbohydrates: 32g
- Fiber: 4g
- Sugar: 1g
18. Glazed Baby Carrots with Thyme
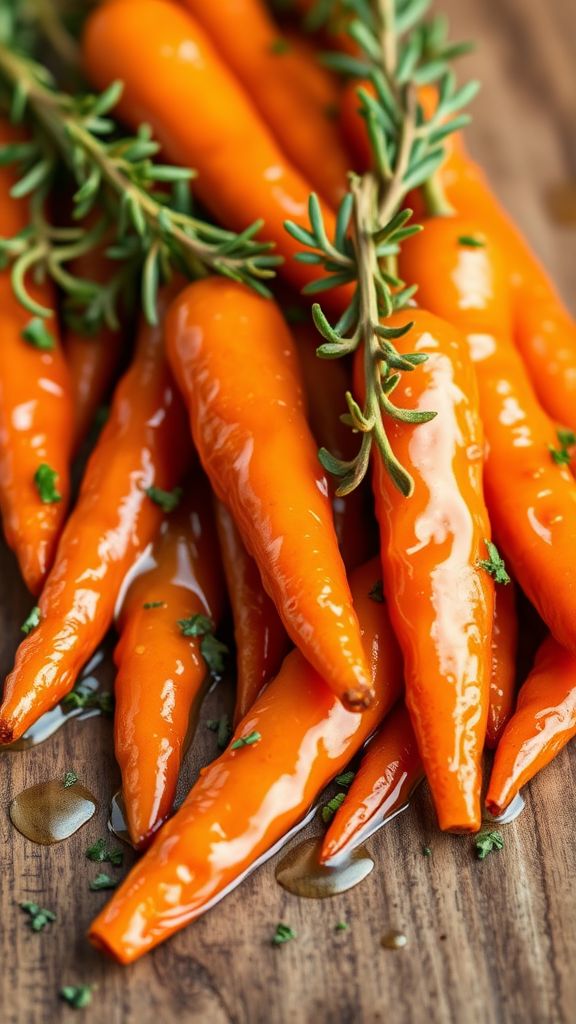
Tender and sweet, Glazed Baby Carrots with Thyme make a perfect side dish for your Easter dinner. The combination of buttery glaze and aromatic thyme elevates these vibrant veggies, making them a delightful addition to any table.
Prep Time: 10 minutes
Cook Time: 15 minutes
Total Time: 25 minutes
Servings: 4
Ingredients:
- 1 pound baby carrots
- 2 tablespoons butter
- 2 tablespoons brown sugar
- 1 tablespoon fresh thyme leaves (or 1 teaspoon dried thyme)
- Salt and pepper, to taste
- 1/4 cup water
Instructions:
- Rinse the baby carrots under cold water and trim the ends if necessary.
- In a large skillet over medium heat, melt the butter.
- Once the butter is melted, add the brown sugar and stir until dissolved.
- Add the baby carrots to the skillet and toss to coat them in the butter and sugar mixture.
- Pour in the water and bring to a simmer.
- Reduce the heat to low, cover the skillet, and cook for about 10 minutes, or until the carrots are tender.
- Uncover the skillet and increase the heat to medium-high, allowing the liquid to reduce to a glaze, stirring occasionally, about 2-3 minutes.
- Stir in the fresh thyme leaves and season with salt and pepper to taste.
- Serve warm, garnished with additional thyme if desired.
Tips:
For extra flavor, try adding a squeeze of lemon juice just before serving to brighten the dish. You can also experiment by mixing in a touch of honey for a sweeter glaze. Additionally, a sprinkle of toasted nuts can add a delightful crunch!
Nutrition Facts:
- Calories: 140
- Protein: 1g
- Carbohydrates: 19g
- Fat: 7g
- Fiber: 3g
- Sugars: 10g
19. Mediterranean Quinoa Salad
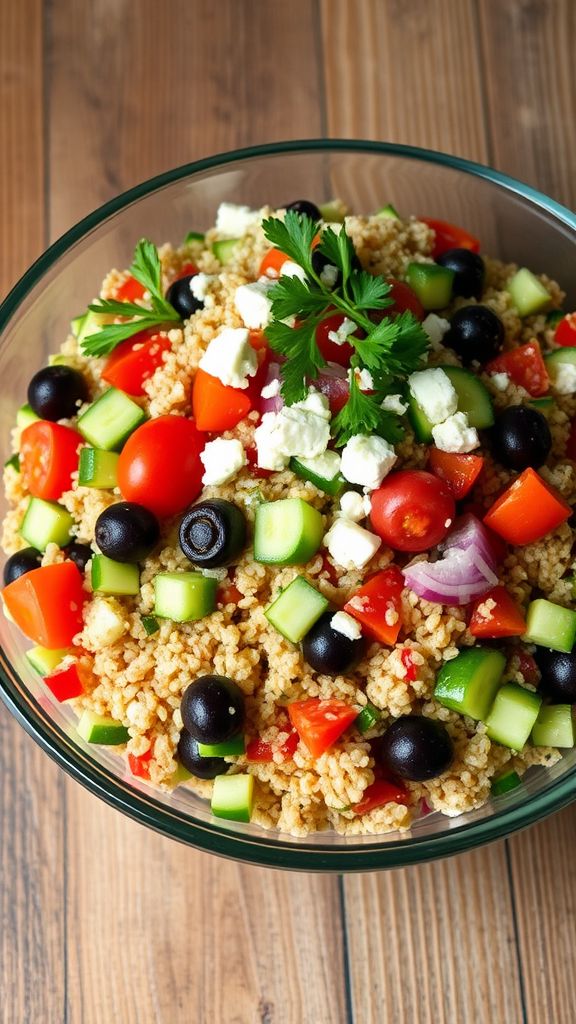
This refreshing Mediterranean Quinoa Salad is a perfect dish to serve at your Easter dinner. Bursting with vibrant colors and flavors, it’s not only visually appealing but also packed with nutrients.
Prep Time: 15 minutes
Total Time: 15 minutes
Servings: 4
Ingredients:
- 1 cup quinoa, rinsed
- 2 cups water
- 1 cup cherry tomatoes, halved
- 1 cucumber, diced
- 1 cup Kalamata olives, pitted and halved
- 1 bell pepper, diced
- 1/2 red onion, finely chopped
- 1/4 cup fresh parsley, chopped
- 1/4 cup feta cheese, crumbled
- 3 tablespoons olive oil
- 2 tablespoons red wine vinegar
- 1 teaspoon dried oregano
- Salt and pepper, to taste
Instructions:
- In a medium saucepan, combine 1 cup of quinoa and 2 cups of water. Bring to a boil over medium-high heat.
- Once boiling, reduce the heat to low, cover, and let simmer for about 15 minutes, or until the water is absorbed. Fluff the quinoa with a fork and let it cool.
- In a large mixing bowl, combine the cherry tomatoes, cucumber, Kalamata olives, bell pepper, red onion, parsley, and feta cheese.
- Once the quinoa has cooled, add it to the bowl with the vegetables.
- In a small bowl, whisk together the olive oil, red wine vinegar, oregano, salt, and pepper until well combined.
- Pour the dressing over the quinoa and vegetable mixture, tossing gently to coat everything evenly.
- Serve immediately or refrigerate for a bit to enhance the flavors.
Tips:
- For added flavor, consider marinating the quinoa in lemon juice for a zesty twist.
- You can also add grilled chicken or chickpeas for a protein boost.
- Don’t forget to adjust the seasoning to your taste; a pinch of lemon zest can elevate the freshness!
Nutrition Facts:
- Calories: 300
- Protein: 10g
- Fat: 15g
- Carbohydrates: 35g
- Fiber: 5g
- Sugars: 2g
20. Herb-Crusted Potato Wedges
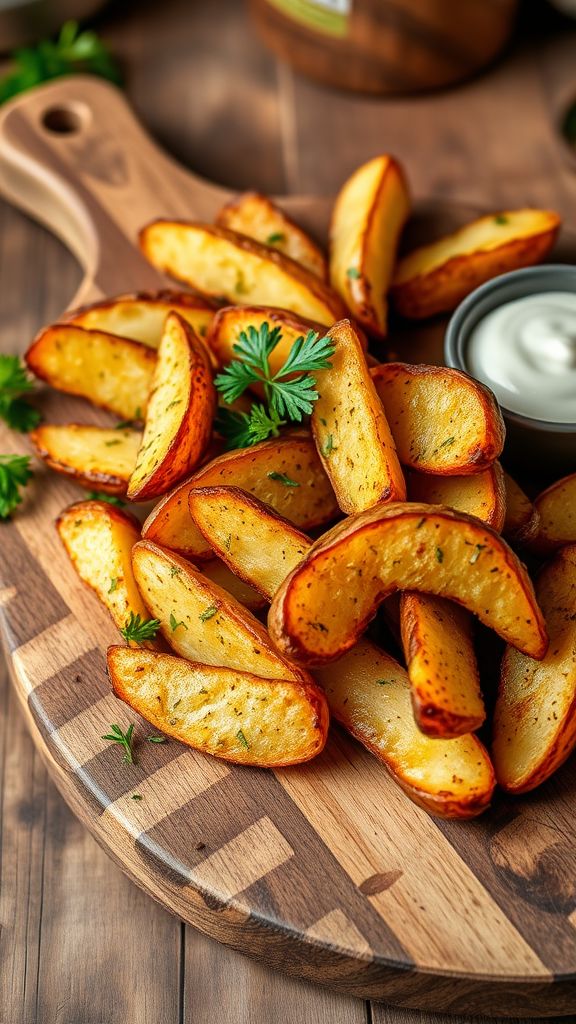
Herb-Crusted Potato Wedges are a delightful addition to any meal, bringing a perfect blend of crispy texture and herby flavor. These wedges are not only easy to prepare but also incredibly satisfying, making them a fantastic side dish for your Easter dinner.
Prep Time: 15 minutes
Cook Time: 30 minutes
Additional Time: 10 minutes
Total Time: 55 minutes
Servings: 4
Ingredients:
- 4 medium-sized potatoes
- 3 tablespoons olive oil
- 1 teaspoon garlic powder
- 1 teaspoon onion powder
- 1 teaspoon dried oregano
- 1 teaspoon dried thyme
- 1 teaspoon paprika
- Salt and pepper to taste
- 2 tablespoons fresh parsley, chopped (optional)
Instructions:
- Preheat your oven to 425°F (220°C) and line a baking sheet with parchment paper for easy cleanup.
- Wash and scrub the potatoes to remove any dirt, then cut them into wedges. Aim for uniform sizes for even cooking.
- In a large mixing bowl, combine the olive oil, garlic powder, onion powder, dried oregano, dried thyme, paprika, salt, and pepper. Stir well to create a flavorful herb mixture.
- Add the potato wedges to the bowl and toss until they are evenly coated with the herb and oil mixture.
- Spread the coated wedges in a single layer on the prepared baking sheet, ensuring they are not overcrowded for optimal crispiness.
- Bake in the preheated oven for 30 minutes, flipping halfway through to achieve an even golden-brown color.
- Once the wedges are crispy and golden, remove them from the oven and let them sit for an additional 10 minutes to cool slightly.
- If desired, sprinkle with freshly chopped parsley before serving for a pop of color and extra flavor.
Tips:
For an extra kick, add a pinch of cayenne pepper or crushed red pepper flakes to the herb mixture. Experiment with different herbs like rosemary or basil for unique flavor profiles. Serve these wedges with a side of sour cream or yogurt dip for a refreshing complement!
Nutrition Facts:
- Calories: 210 per serving
- Protein: 3g
- Fat: 9g
- Carbohydrates: 33g
- Fiber: 3g
- Sodium: 280mg