My New Cookbook is Out! Check Out Now!
25 Comfort Food Recipes To Try This Winter
Did you know that comfort food can improve your mood and even boost your immune system during the chilly winter months? In our blog, 25 Comfort Food Recipes to Try This Winter, we’ve curated a delightful collection of hearty and satisfying dishes that are sure to warm your heart and home. From creamy soups to indulgent desserts, get ready to discover scrumptious recipes that will make your winter cozy and delicious!
Cozy Creamy Mushroom Soup

Indulge in a bowl of Cozy Creamy Mushroom Soup that evokes warmth and comfort with every spoonful. This delightful recipe combines earthy mushrooms with a rich, velvety cream base, perfect for chilly evenings or as a starter for elegant dinners.
- 2 cups fresh mushrooms, sliced (such as cremini or button)
- 1 medium onion, chopped
- 2 cloves garlic, minced
- 3 tablespoons unsalted butter
- 3 tablespoons all-purpose flour
- 4 cups vegetable broth
- 1 cup heavy cream
- 1 tablespoon soy sauce
- Salt and pepper, to taste
- Fresh parsley, for garnish
To start, melt the butter in a large pot over medium heat. Add the chopped onion and garlic and sauté for about 3-4 minutes until they become translucent and fragrant. Next, stir in the sliced mushrooms and cook for an additional 5-7 minutes, allowing them to soften and release their juices.
Once the mushrooms are cooked, sprinkle the flour over the mixture and stir to coat. Cook for another 2 minutes, ensuring the flour is fully incorporated and lightly toasted. Gradually pour in the vegetable broth, stirring continuously to avoid lumps. Bring the mixture to a gentle simmer.
Reduce the heat to low and stir in the heavy cream and soy sauce. Allow the soup to simmer for about 10 minutes, stirring occasionally, until it thickens slightly. Season with salt and pepper to taste.
For an added touch, blend the soup using an immersion blender for a smoother texture, or leave it chunky if you prefer. Serve hot, garnished with fresh parsley for a burst of color and flavor. Enjoy the comforting warmth of this delightful soup!
Hearty Beef Stew with Root Vegetables
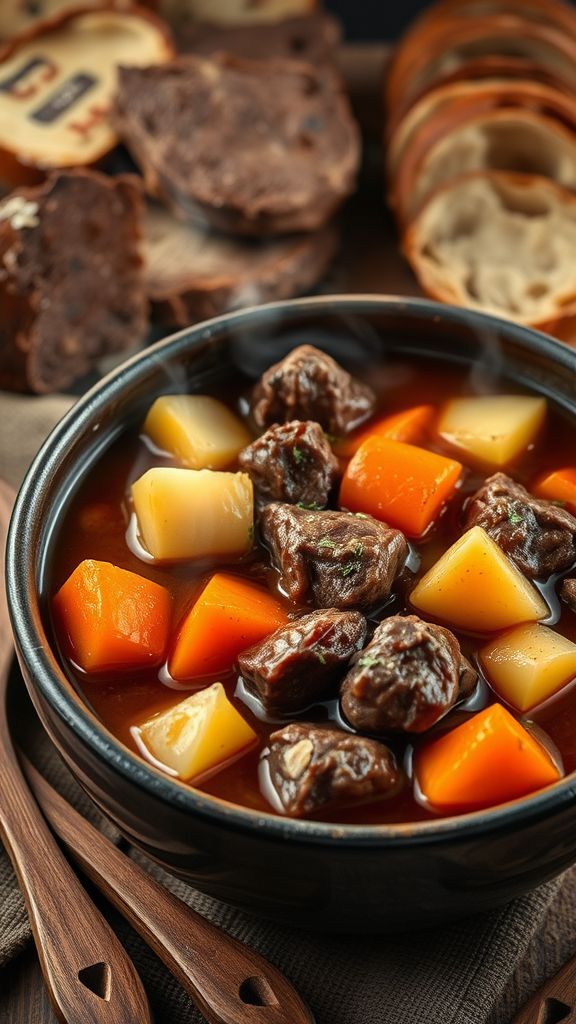
Hearty Beef Stew with Root Vegetables is the perfect comfort food for chilly evenings, brimming with flavor and nutrition. This dish combines tender beef with a medley of root vegetables, creating a warming meal that the whole family will love.
- 2 pounds of beef chuck, cut into 1-inch cubes
- 2 tablespoons of olive oil
- 1 large onion, chopped
- 3 cloves of garlic, minced
- 4 cups of beef broth
- 2 cups of carrots, sliced
- 2 cups of potatoes, diced
- 1 cup of parsnips, diced
- 2 bay leaves
- 1 teaspoon of dried thyme
- Salt and pepper, to taste
- 1 tablespoon of Worcestershire sauce
Step 1: In a large pot or Dutch oven, heat the olive oil over medium-high heat. Add the beef cubes in batches, browning them on all sides. This should take about 5-7 minutes per batch. Once browned, remove the beef from the pot and set aside.
Step 2: In the same pot, add the chopped onion and sauté for about 3-4 minutes or until translucent. Then, add the minced garlic and cook for an additional minute, stirring frequently to avoid burning.
Step 3: Return the browned beef to the pot and pour in the beef broth. Bring the mixture to a boil, then reduce heat to low. Add the carrots, potatoes, parsnips, bay leaves, thyme, Worcestershire sauce, and season with salt and pepper.
Step 4: Cover the pot with a lid and let the stew simmer for approximately 1.5 to 2 hours. Stir occasionally to ensure even cooking. The stew is ready when the beef is tender and the vegetables are soft.
Step 5: Once finished, remove the bay leaves and adjust the seasoning if necessary. Serve the hearty beef stew hot, preferably with some crusty bread for dipping.
Classic Chicken and Dumplings

Classic Chicken and Dumplings is a comforting dish that warms both the heart and the soul. This hearty recipe combines tender chicken, rich broth, and fluffy dumplings, making it the perfect meal for chilly evenings or family gatherings.
- 4 cups of chicken broth
- 1 lb boneless, skinless chicken thighs
- 1 cup carrots, sliced
- 1 cup celery, chopped
- 1 medium onion, diced
- 2 cloves garlic, minced
- 1 tsp dried thyme
- 1 bay leaf
- 1 cup all-purpose flour
- 2 tsp baking powder
- 1/2 tsp salt
- 1/2 cup milk
- 1/4 cup unsalted butter, melted
- Salt and pepper to taste
- Fresh parsley, chopped (for garnish)
Start by bringing the chicken broth to a simmer in a large pot over medium heat. Add the chicken thighs, carrots, celery, and onion to the pot, seasoning with salt and pepper to taste. Cook for about 20-25 minutes until the chicken is cooked through and tender.
Once the chicken is ready, remove it from the pot and shred it using two forks. Return the shredded chicken to the pot along with the garlic, thyme, and bay leaf. Let everything simmer while you prepare the dumplings.
In a separate bowl, combine the flour, baking powder, and salt. Stir in the milk and melted butter until just combined, being careful not to overmix. The batter should be thick and slightly sticky.
Using a spoon, drop the dumpling batter by heaping tablespoons into the simmering broth. Cover the pot tightly and let the dumplings cook for about 15 minutes without lifting the lid. This helps them steam and become fluffy.
After 15 minutes, check the dumplings for doneness; they should be cooked through and airy. Remove the bay leaf and adjust the seasoning of the soup if necessary. Serve hot, garnished with fresh parsley, and enjoy this delicious, comforting meal!
Cheesy Baked Macaroni and Cheese

Indulge in the ultimate comfort food with this rich and creamy Cheesy Baked Macaroni and Cheese. With its golden-brown crust and gooey interior, this dish is perfect for family dinners, potlucks, or simply a cozy night in.
- 8 ounces elbow macaroni
- 2 cups shredded sharp cheddar cheese
- 1 cup shredded mozzarella cheese
- 1/2 cup grated Parmesan cheese
- 3 cups milk
- 1/4 cup butter
- 1/4 cup all-purpose flour
- 1 teaspoon garlic powder
- 1 teaspoon onion powder
- 1/2 teaspoon paprika
- Salt and pepper to taste
- 1 cup breadcrumbs
Begin by preheating your oven to 350°F (175°C). In a large pot, bring water to a boil and cook the elbow macaroni according to the package instructions until it’s al dente, usually about 7-8 minutes. Drain and set aside.
In the same pot, melt the butter over medium heat. Once melted, whisk in the flour and cook for about 2 minutes to create a roux, stirring constantly. Gradually add the milk, continuing to whisk to avoid lumps, until the mixture thickens and starts to bubble, which should take around 5-7 minutes.
Reduce the heat to low, then stir in the cheddar, mozzarella, and Parmesan cheeses. Mix until all the cheeses are melted and the sauce is smooth. Season with garlic powder, onion powder, paprika, salt, and pepper to taste.
Add the cooked macaroni to the cheese sauce, stirring until the pasta is fully coated. Pour this mixture into a greased 2-quart baking dish.
In a small bowl, combine the breadcrumbs with a bit of melted butter and sprinkle this mixture evenly over the macaroni and cheese. Bake in the preheated oven for 20-25 minutes, or until the top is golden and crispy.
Remove from the oven and let it cool for a few minutes before serving. Enjoy your deliciously cheesy creation!
Rich and Creamy Potato Gratin

Indulge in the savory delight of our Rich and Creamy Potato Gratin, a classic dish that brings warmth to any table. Perfect for a cozy family dinner or a special occasion, this gratin features layers of tender potatoes enveloped in a luscious, cheesy sauce.
- 4 large Russet potatoes, peeled and thinly sliced
- 2 cups heavy cream
- 1 cup whole milk
- 2 cups shredded sharp cheddar cheese
- 1 cup grated Parmesan cheese
- 2 cloves garlic, minced
- 1 teaspoon thyme (dried or fresh)
- 1 teaspoon salt
- ½ teaspoon black pepper
- 2 tablespoons butter, for greasing the baking dish
Preheat your oven to 375°F (190°C). In a medium saucepan over medium heat, combine the heavy cream, milk, minced garlic, thyme, salt, and black pepper. Bring this mixture to a gentle simmer, stirring occasionally to prevent scorching, and let it cook for about 5 minutes to allow the flavors to meld.
While the cream mixture is simmering, grease a large baking dish with butter. Layer half of the thinly sliced potatoes into the bottom of the dish. Pour half of the warm cream mixture over the potatoes. Sprinkle with half of the cheddar cheese.
Repeat the layering process with the remaining potatoes, cream mixture, and top with the remaining cheddar cheese and then the Parmesan cheese. Cover the baking dish with aluminum foil to prevent burning.
Bake in the preheated oven for 45 minutes, then remove the foil and bake for an additional 15-20 minutes, or until the top is golden brown and the potatoes are tender when pierced with a fork. Allow the gratin to cool for a few minutes before serving to let it set.
Enjoy your Rich and Creamy Potato Gratin as the perfect side dish or a delightful main course!
Warm Butternut Squash Risotto

Indulge in the creamy richness of this Warm Butternut Squash Risotto, a comforting dish perfect for chilly evenings. With its subtle sweetness and nutty flavor, this risotto makes an ideal side dish or a satisfying main course.
- 1 cup Arborio rice
- 2 cups butternut squash, peeled and diced
- 4 cups vegetable broth
- 1 medium onion, finely chopped
- 2 cloves garlic, minced
- 1/2 cup dry white wine
- 1/2 cup grated Parmesan cheese
- 2 tablespoons olive oil
- 1 tablespoon butter
- Salt and pepper, to taste
- Fresh sage leaves, for garnish
To begin, heat the vegetable broth in a saucepan over medium heat and keep it warm. In a separate large skillet, add the olive oil and sauté the chopped onions over medium heat until they become translucent, about 5 minutes. Stir in the minced garlic and cook for an additional minute until fragrant.
Next, add the diced butternut squash to the skillet and cook for 8-10 minutes, allowing it to soften slightly. Once ready, sprinkle in the Arborio rice, stirring well to coat the grains with the oil and vegetables. Sauté for another 2 minutes until the rice starts to turn translucent.
Pour in the white wine, stirring constantly until it’s mostly absorbed by the rice. Begin adding the warm vegetable broth, one ladleful at a time, stirring frequently. Allow each addition of broth to be almost fully absorbed before adding the next. This process should take about 20-25 minutes until the rice is creamy and al dente.
Once the risotto has reached the desired consistency, stir in the butter and Parmesan cheese. Season with salt and pepper to taste. If you prefer a creamier texture, you can add an extra splash of broth or water at this stage.
Serve the risotto warm, garnished with fresh sage leaves for an aromatic finish. Enjoy this hearty dish as a main or a delightful side!
Spiced Apple Crisp with Vanilla Ice Cream

This delightful Spiced Apple Crisp is a warm and comforting dessert that perfectly combines sweet, tender apples with a crunchy topping. Topped with a scoop of vanilla ice cream, it’s an irresistible treat that’s perfect for fall gatherings or cozy evenings at home.
- 4 cups of peeled and sliced apples (such as Granny Smith or Honeycrisp)
- 1 cup of granulated sugar
- 1 teaspoon of cinnamon
- 1/2 teaspoon of nutmeg
- 1 tablespoon of lemon juice
- 1 cup of old-fashioned oats
- 1 cup of all-purpose flour
- 1/2 cup of packed brown sugar
- 1/2 cup of cold butter, cubed
- 1/2 teaspoon of salt
- Vanilla ice cream for serving
Preheat your oven to 350°F (175°C). In a large mixing bowl, combine the sliced apples with granulated sugar, cinnamon, nutmeg, and lemon juice. Toss until the apples are evenly coated, then transfer the mixture to a greased 9×13-inch baking dish.
In another bowl, mix together the oats, flour, brown sugar, and salt. Cut in the cold butter using a pastry cutter or your fingers until the mixture resembles coarse crumbs. Evenly sprinkle the oat mixture over the apples in the baking dish.
Bake in the preheated oven for 40-45 minutes, or until the apples are tender and the topping is golden brown. Remove from the oven and let it cool slightly.
Serve warm with generous scoops of vanilla ice cream on top for an extra indulgent treat. Enjoy your delicious Spiced Apple Crisp!
Savory Shepherd’s Pie
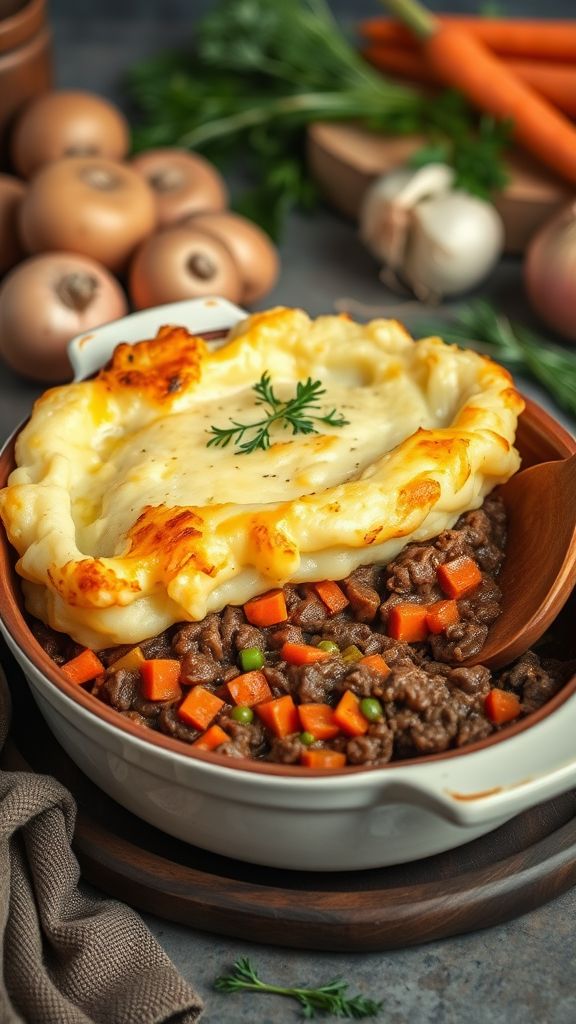
Savory Shepherd’s Pie is a comforting and hearty dish that combines a flavorful meat filling with creamy mashed potatoes on top. Perfect for family dinners or gatherings, this recipe is sure to warm hearts and satisfy appetites.
- 1 lb ground beef or lamb
- 1 medium onion, chopped
- 2 carrots, diced
- 2 cloves garlic, minced
- 1 cup frozen peas
- 2 tablespoons tomato paste
- 1 cup beef broth
- 1 tablespoon Worcestershire sauce
- 4 cups mashed potatoes (made from about 2 lbs potatoes)
- 1 teaspoon dried thyme
- 1 teaspoon dried rosemary
- Salt and pepper to taste
- 2 tablespoons olive oil
- 1 cup shredded cheese (optional, for topping)
To begin, preheat your oven to 400°F (200°C). In a large skillet, heat 2 tablespoons of olive oil over medium heat. Once hot, add the chopped onion and garlic, sautéing for about 2-3 minutes until fragrant.
Next, add the diced carrots and cook for an additional 5 minutes, stirring occasionally. Then, add the ground beef or lamb to the skillet, breaking it apart with a spoon. Cook until browned, which should take around 6-8 minutes, ensuring to drain any excess fat.
Once the meat is browned, stir in the frozen peas, tomato paste, beef broth, Worcestershire sauce, dried thyme, and dried rosemary. Season with salt and pepper to taste. Allow the mixture to simmer for about 10 minutes, until it thickens.
While the filling simmers, prepare your mashed potatoes if you haven’t already. Make sure they are creamy and well-seasoned. If you want to add an extra layer of flavor, consider mixing in 1/2 cup of shredded cheese into the potatoes.
In a greased baking dish, spread the meat filling evenly across the bottom. Top it generously with the mashed potatoes, smoothing it out with a spatula. If desired, sprinkle the top with an additional 1/2 cup of shredded cheese for a cheesy option.
Finally, bake the Shepherd’s Pie in the preheated oven for about 20-25 minutes, or until the top is golden brown. Allow it to cool for a few minutes before serving. Enjoy this delicious, hearty dish that will surely impress your friends and family!
Decadent Chocolate Lava Cake
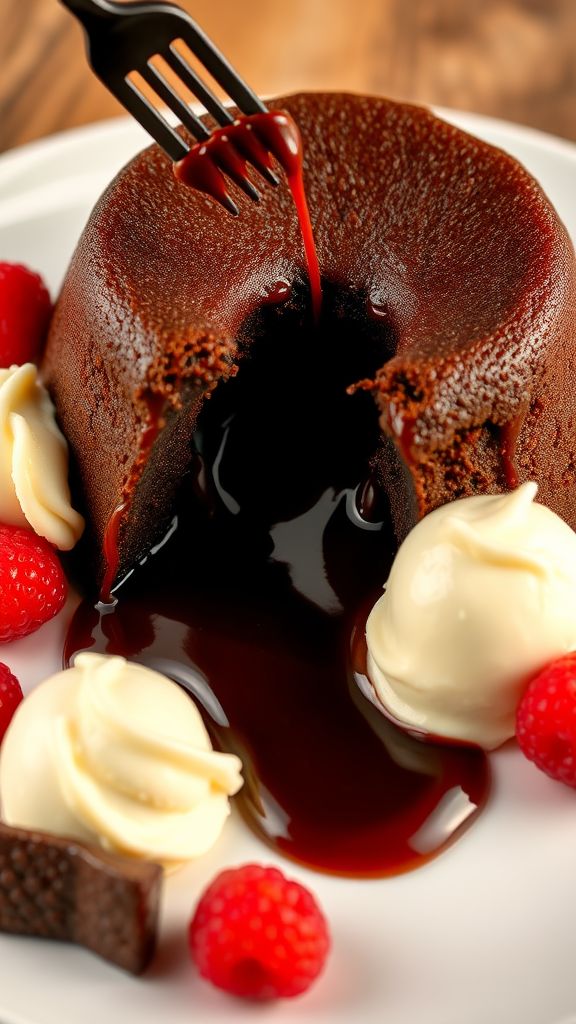
Indulge in the rich and luxurious experience of Decadent Chocolate Lava Cake, a dessert that will impress your guests and satisfy your sweet cravings. This irresistible treat features a molten chocolate center that flows out with each forkful, making it a perfect choice for special occasions or a cozy night in.
- 1/2 cup unsalted butter (plus extra for greasing)
- 1 cup semisweet chocolate chips
- 1 cup powdered sugar
- 2 large eggs
- 2 large egg yolks
- 1 teaspoon vanilla extract
- 1/2 cup all-purpose flour
- Pinch of salt
- Vanilla ice cream or fresh berries for serving (optional)
Begin by preheating your oven to 425°F (220°C). While the oven is heating, prepare your ramekins by greasing them thoroughly with butter and lightly dusting them with flour to prevent the cakes from sticking.
In a medium microwave-safe bowl, combine the butter and semisweet chocolate chips. Microwave in 30-second increments until melted, stirring between each session until the mixture is smooth and well combined. This should take about 1-2 minutes in total.
Once melted, remove the bowl from the microwave and whisk in the powdered sugar until fully incorporated. Then, add the eggs, egg yolks, and vanilla extract, mixing until everything is well combined.
Carefully fold in the all-purpose flour and a pinch of salt until just combined, taking care not to overmix. The batter should be smooth and slightly thick.
Next, divide the batter evenly among the prepared ramekins. Place the ramekins on a baking sheet for easier handling and transfer them to the preheated oven. Bake for approximately 12-14 minutes or until the edges are firm but the center remains soft. Be cautious not to overbake, as you want that delightful molten center!
After baking, remove the ramekins from the oven and let them cool for about 1 minute. Carefully run a knife around the edges and invert each ramekin onto a plate. Gently shake to release the cake.
Serve immediately, optionally topped with a scoop of vanilla ice cream or fresh berries for an extra touch of decadence. Enjoy your heavenly Chocolate Lava Cake!
Classic Tomato Basil Soup

This Classic Tomato Basil Soup is a comforting and flavorful dish that’s perfect for chilly evenings or as a soothing lunch. Its rich, velvety texture and fresh basil aroma make it a delightful treat that pairs wonderfully with grilled cheese sandwiches.
- 2 tablespoons olive oil
- 1 medium onion, chopped
- 2 cloves garlic, minced
- 1 can (28 ounces) crushed tomatoes
- 2 cups vegetable broth
- 1 teaspoon sugar
- 1 teaspoon salt
- 1/2 teaspoon black pepper
- 1/4 cup fresh basil leaves, chopped
- 1/2 cup heavy cream (optional)
- Fresh basil leaves for garnish
In a large pot, heat the olive oil over medium heat. Add the chopped onion and sauté for about 5 minutes or until it becomes translucent. Stir in the minced garlic and cook for an additional 1 minute, being careful not to let it brown.
Once the garlic is fragrant, pour in the crushed tomatoes and vegetable broth. Add the sugar, salt, and black pepper. Bring the mixture to a gentle simmer, and let it cook for about 20 minutes to allow the flavors to meld.
After the soup has simmered, remove it from heat and stir in the fresh chopped basil. For a smoother texture, use an immersion blender to puree the soup right in the pot, or carefully transfer it in batches to a countertop blender.
If you prefer a creamier soup, return the blended soup to the pot and stir in the heavy cream. Heat it gently for an additional 5 minutes while stirring. Serve hot, garnished with fresh basil leaves, and enjoy this delightful and hearty bowl of soup!
Creamy Garlic Mashed Potatoes

Indulge in the rich, comforting flavors of Creamy Garlic Mashed Potatoes, a perfect side dish for any meal. This velvety concoction combines the earthy taste of potatoes with the robust punch of garlic, making it irresistible.
- 2 pounds of potatoes (Yukon Gold or Russet)
- 4 cloves of garlic, minced
- ½ cup of heavy cream
- ¼ cup of unsalted butter
- Salt, to taste
- Pepper, to taste
- Optional: Chives or parsley for garnish
Start by preparing the potatoes. Peel the potatoes and cut them into roughly equal-sized chunks, about 1 to 2 inches. This ensures they cook evenly. Place the potatoes in a large pot and cover them with cold water, adding a pinch of salt to the water.
Bring the pot to a boil over medium-high heat, then reduce the heat to a gentle simmer. Cook the potatoes for about 15-20 minutes, or until they are fork-tender. While the potatoes are cooking, you can prepare the garlic.
In a small saucepan, melt the butter over low heat. Add the minced garlic and sauté for about 2-3 minutes, just until fragrant, being careful not to let it brown. Once the potatoes are done, drain them thoroughly and return them to the pot.
Add the sautéed garlic and butter mixture to the potatoes, along with the heavy cream. Mash the potatoes using a potato masher or a ricer until you reach your desired consistency. For incredibly creamy potatoes, opt for a ricer.
Season with additional salt and pepper to taste. If you like, you can also stir in some chopped chives or parsley for a pop of color and flavor. Serve the creamy garlic mashed potatoes warm, and enjoy this delightful dish as the perfect accompaniment to your favorite meals!
Slow-Cooked Chili con Carne

This rich and spicy Slow-Cooked Chili con Carne is the perfect dish to warm you up on a chilly day. With its hearty blend of ground beef, beans, and spices, it’s ideal for family dinners or gatherings with friends.
- 2 lbs ground beef
- 1 large onion, chopped
- 4 cloves garlic, minced
- 1 can (28 oz) crushed tomatoes
- 2 cans (15 oz each) kidney beans, drained and rinsed
- 2 tablespoons chili powder
- 1 tablespoon ground cumin
- 1 teaspoon smoked paprika
- 1 teaspoon salt
- 1/2 teaspoon black pepper
- 1 cup beef broth
- 2 tablespoons olive oil
- 1 bell pepper, chopped (optional)
Start by heating olive oil in a large skillet over medium heat. Add the chopped onion and minced garlic, sautéing until the onion becomes translucent, about 5 minutes.
Add the ground beef to the skillet, breaking it up with a spoon. Cook until browned and no longer pink, about 7-10 minutes. Drain any excess fat if necessary.
In a slow cooker, combine the cooked beef mixture with the crushed tomatoes, kidney beans, chili powder, ground cumin, smoked paprika, salt, black pepper, and beef broth. Stir until well mixed.
If you like a bit of sweetness and added texture, toss in the optional chopped bell pepper. Cover the slow cooker and set it to low for 6-8 hours or high for 3-4 hours.
Once the cooking time is complete, taste and adjust the seasonings if needed. Serve hot, and enjoy your deliciously comforting Chili con Carne with toppings like cheese, sour cream, or chopped onions.
Comforting Eggplant Parmesan

Eggplant Parmesan is a classic comfort food that brings together layers of rich flavors and textures in a baked dish that everyone loves. This recipe is perfect for family gatherings or cozy dinners, offering a delightful vegetarian option that even meat lovers will enjoy.
- 2 medium-sized eggplants
- 1 teaspoon salt
- 2 cups marinara sauce
- 2 cups shredded mozzarella cheese
- 1 cup grated Parmesan cheese
- 1 cup all-purpose flour
- 2 large eggs
- 2 cups breadcrumbs
- 1 teaspoon dried basil
- 1 teaspoon dried oregano
- 1/2 teaspoon black pepper
- Cooking oil for frying
Start by preparing the eggplants. Slice the eggplants into 1/2-inch thick rounds and sprinkle with 1 teaspoon of salt. Allow the salted slices to sit for about 30 minutes to draw out excess moisture and bitterness. After 30 minutes, rinse the eggplant slices under cold water, and pat them dry with a kitchen towel.
Next, set up a breading station. In one shallow dish, place the flour. In a second dish, whisk together the eggs. In a third dish, combine the breadcrumbs, dried basil, dried oregano, and black pepper. Dip each eggplant slice first in flour, then in the egg, and finally coat it with the breadcrumb mixture.
Heat a few inches of cooking oil in a large skillet over medium-high heat. Once the oil is hot, carefully add the breaded eggplant slices in batches, frying until they are golden brown, about 3-4 minutes on each side. Remove the fried slices and place them on a plate lined with paper towels to drain excess oil.
Now it’s time to assemble the Eggplant Parmesan. Preheat your oven to 375°F (190°C). In a baking dish, spread a thin layer of marinara sauce on the bottom. Layer half of the fried eggplant slices over the sauce, followed by half of the mozzarella cheese and half of the Parmesan cheese. Repeat the layers with the remaining eggplant, marinara sauce, mozzarella, and Parmesan.
Cover the baking dish with aluminum foil, making sure it doesn’t touch the cheese. Bake in the preheated oven for 25 minutes. Then, remove the foil and bake for an additional 15 minutes or until the cheese is bubbly and golden.
Once done, remove the Eggplant Parmesan from the oven and let it cool for about 10 minutes before serving. This allows the layers to set and makes it easier to slice. Enjoy this comforting meal with a side salad or some crusty bread!
Golden Biscuits with Honey Butter

Golden Biscuits with Honey Butter are the perfect blend of flaky goodness and sweet decadence, making them an ideal breakfast treat or snack. With a buttery flavor and a drizzle of honey, these biscuits will elevate any meal or occasion.
- 2 cups all-purpose flour
- 1 tablespoon baking powder
- 1/2 teaspoon salt
- 1/4 teaspoon baking soda
- 1/2 cup unsalted butter, cold and cubed
- 3/4 cup buttermilk
- 1 tablespoon honey (for the biscuits)
- 1/2 cup unsalted butter, softened (for honey butter)
- 1/4 cup honey (for honey butter)
Start by preheating your oven to 425°F (220°C). In a large mixing bowl, combine 2 cups of all-purpose flour, 1 tablespoon of baking powder, 1/2 teaspoon of salt, and 1/4 teaspoon of baking soda. Mix these dry ingredients together until well combined.
Next, add the 1/2 cup of cold, cubed unsalted butter to the flour mixture. Using a pastry cutter or your fingers, work the butter into the flour until the mixture resembles coarse crumbs. This step is crucial for achieving the flakiness in your biscuits.
Slowly pour in 3/4 cup of buttermilk and 1 tablespoon of honey, stirring gently until just combined. Be careful not to over-mix; a few lumps are fine. Once combined, turn the dough out onto a lightly floured surface.
Gently pat the dough into a rectangle about 1-inch thick. Use a floured biscuit cutter to cut out biscuits, placing them on an ungreased baking sheet, close together to help them rise. Gather any scraps, gently re-roll, and cut out additional biscuits until all the dough is used.
Now, bake the biscuits in your preheated oven for about 12-15 minutes, or until they are golden brown on top. While the biscuits are baking, prepare the honey butter by blending 1/2 cup of softened unsalted butter and 1/4 cup of honey together in a small bowl until smooth and creamy.
Once the biscuits are done baking, remove them from the oven and allow them to cool slightly. Serve warm, slathering each biscuit with the delicious honey butter for an extra treat. Enjoy your Golden Biscuits with Honey Butter any time of the day!
Slow-Roasted Pork Tenderloin
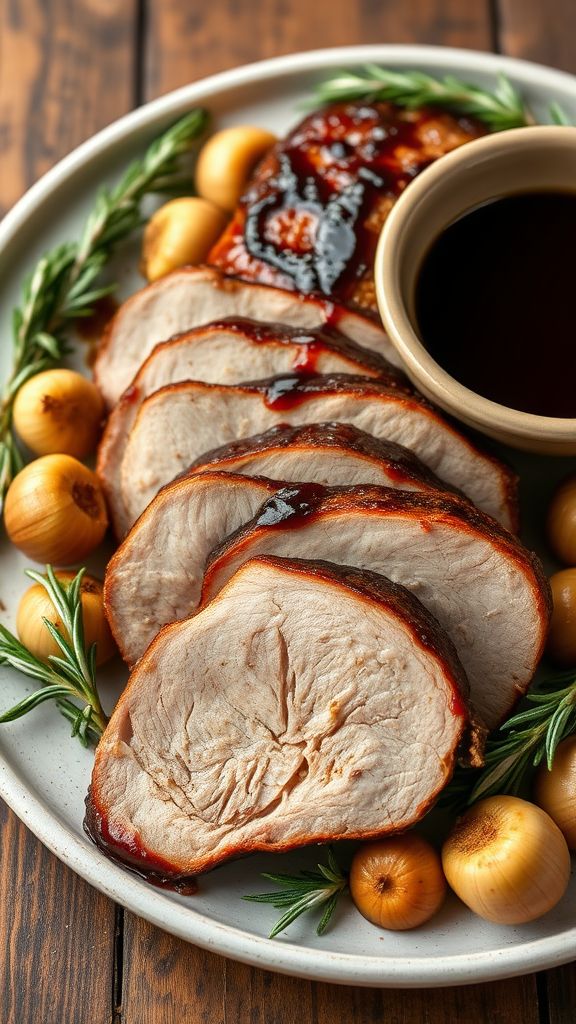
Experience tenderness and flavor like never before with this delectable Slow-Roasted Pork Tenderloin. Ideal for family gatherings or special occasions, this dish is sure to impress with its succulent texture and aromatic herbs.
- 1.5 pounds pork tenderloin
- 2 tablespoons olive oil
- 4 cloves garlic, minced
- 1 tablespoon fresh rosemary, chopped
- 1 tablespoon fresh thyme, chopped
- 1 teaspoon salt
- 1 teaspoon black pepper
- 1 cup low-sodium chicken broth
- 2 tablespoons balsamic vinegar
- Optional: fresh herbs for garnish
Preheat your oven to 275°F (135°C). While the oven is warming up, heat the olive oil in a large ovenproof skillet over medium-high heat. Once hot, season the pork tenderloin generously with salt and black pepper, then sear it in the skillet for about 2-3 minutes on each side until it achieves a golden-brown crust.
After searing, remove the skillet from the heat and add the minced garlic, rosemary, and thyme to the pan, ensuring to coat the tenderloin with these aromatic herbs. Pour in the chicken broth and stir in the balsamic vinegar. This will create a flavorful base for the slow-roasting process.
Transfer the skillet to the preheated oven and roast the pork tenderloin for approximately 1.5 to 2 hours or until the internal temperature reaches 145°F (63°C). For maximum juiciness, allow the tenderloin to rest for about 10 minutes after removing it from the oven before slicing.
Once rested, slice the pork tenderloin into medallions and serve with the pan juices drizzled over the top. Feel free to garnish with fresh herbs for an elegant touch!
Warm Spinach and Artichoke Dip

Warm Spinach and Artichoke Dip is a creamy and flavorful appetizer perfect for parties and gatherings. This dip combines the rich taste of artichokes and fresh spinach for a crowd-pleasing favorite that pairs wonderfully with tortilla chips or toasted bread.
- 1 cup of frozen spinach, thawed and drained
- 1 cup of canned artichoke hearts, drained and chopped
- 1 cup of cream cheese, softened
- 1/2 cup of sour cream
- 1/2 cup of mayonnaise
- 1 cup of shredded mozzarella cheese
- 1/2 cup of grated Parmesan cheese
- 2 cloves of garlic, minced
- 1/2 teaspoon of salt
- 1/4 teaspoon of black pepper
- 1/4 teaspoon of red pepper flakes (optional)
To begin, preheat your oven to 350°F (175°C). In a mixing bowl, combine the cream cheese, sour cream, and mayonnaise until smooth. This will create a rich and creamy base for your dip.
Next, add the thawed spinach, chopped artichoke hearts, mozzarella cheese, Parmesan cheese, and minced garlic to the bowl. Sprinkle in the salt, black pepper, and red pepper flakes if you’re using them, and mix all the ingredients together until they are evenly combined.
Transfer the mixture to a baking dish or a pie plate. Spread it out evenly to ensure it cooks uniformly. Bake in the preheated oven for approximately 25-30 minutes, or until the top is bubbly and golden brown.
Once done, remove the dip from the oven and let it cool for a few minutes before serving. Enjoy your warm spinach and artichoke dip with tortilla chips, toasted bread, or fresh vegetable sticks for dipping!
Sweet Potato and Black Bean Chili

Sweet Potato and Black Bean Chili is a hearty and nutritious dish that’s perfect for a cozy night in. Packed with flavor and wholesome ingredients, it’s a delightful option for both vegetarians and meat lovers alike.
- 2 medium sweet potatoes, peeled and diced
- 1 can (15 oz) black beans, drained and rinsed
- 1 can (14 oz) diced tomatoes, with juice
- 1 medium onion, chopped
- 2 cloves garlic, minced
- 1 bell pepper, chopped
- 2 cups vegetable broth
- 2 tablespoons olive oil
- 2 teaspoons cumin
- 2 teaspoons chili powder
- 1 teaspoon smoked paprika
- Salt and pepper to taste
- Fresh cilantro, for garnish (optional)
Begin by heating the olive oil in a large pot over medium heat. Add the chopped onion and sauté for about 3-5 minutes until it becomes translucent.
Next, stir in the minced garlic and chopped bell pepper, cooking for an additional 2 minutes until fragrant. Then, add the diced sweet potatoes and continue to cook, stirring occasionally, for about 5 minutes.
Once the sweet potatoes have started to soften, incorporate the diced tomatoes, black beans, vegetable broth, and seasonings including cumin, chili powder, smoked paprika, salt, and pepper. Bring the mixture to a boil.
Reduce the heat to low and let the chili simmer for about 20-30 minutes, or until the sweet potatoes are tender. Stir occasionally to ensure nothing sticks to the bottom of the pot.
When the chili is done, taste and adjust the seasoning if needed. Serve hot, garnished with fresh cilantro if desired. Enjoy this warm and comforting dish that’s perfect for any occasion!
Indulgent Fettuccine Alfredo
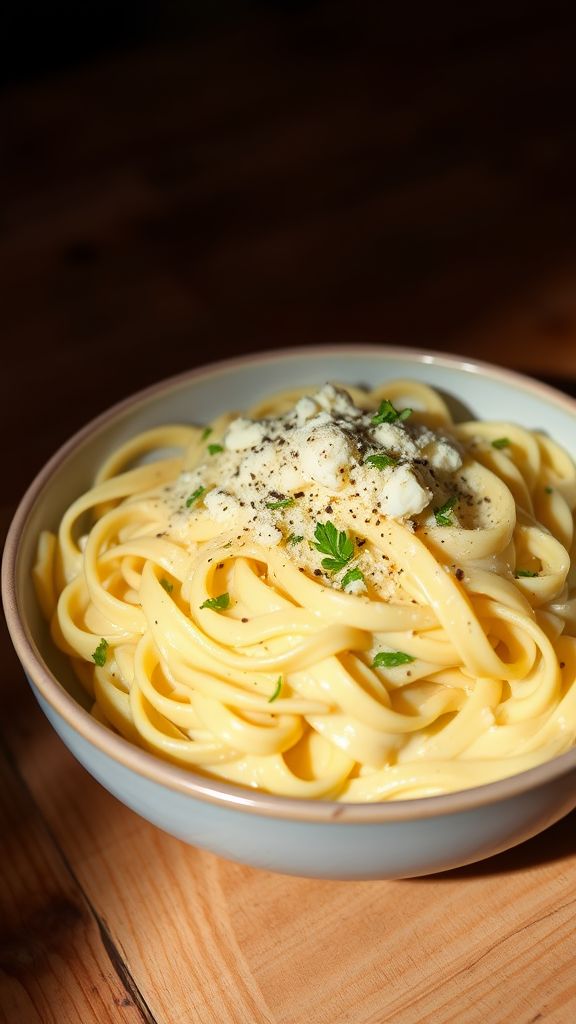
Indulgent Fettuccine Alfredo is a creamy and rich pasta dish that brings a taste of Italy right to your dinner table. Perfect for date nights or special occasions, this classic recipe combines simple ingredients for an unforgettable meal.
- 12 ounces fettuccine pasta
- 1 cup heavy cream
- 1/2 cup unsalted butter
- 1 cup freshly grated Parmesan cheese
- 2 cloves garlic, minced
- Salt and black pepper to taste
- Chopped parsley for garnish (optional)
Begin by bringing a large pot of salted water to a boil. Add the fettuccine pasta and cook according to the package instructions until al dente, usually about 8-10 minutes. Reserve about 1 cup of the pasta cooking water, then drain the pasta and set it aside.
In a separate large skillet or saucepan, melt the unsalted butter over medium heat. Once melted, add the minced garlic and sauté for about 1-2 minutes until fragrant, being careful not to let it burn.
Pour in the heavy cream and bring the mixture to a gentle simmer. Reduce the heat to low and gradually whisk in the Parmesan cheese until the sauce is creamy and smooth. Season with salt and black pepper to taste.
Add the drained fettuccine to the sauce, tossing to coat the pasta evenly. If the sauce is too thick, incorporate a little of the reserved pasta cooking water until the desired consistency is achieved.
Serve immediately, garnished with chopped parsley if desired. Enjoy your indulgent meal with a side of garlic bread or a fresh salad for the perfect dinner experience!
Rustic Chicken Pot Pie

This Rustic Chicken Pot Pie is the ultimate comfort food, blending tender chicken with fresh vegetables in a rich, savory sauce. Topped with a golden, flaky crust, this dish is perfect for family dinners or cozy gatherings.
- 2 cups cooked, shredded chicken
- 1 cup carrots, diced
- 1 cup peas (fresh or frozen)
- 1 cup potatoes, diced
- 1 cup onion, chopped
- 1/2 cup celery, chopped
- 1/2 cup butter
- 1/3 cup flour
- 2 cups chicken broth
- 1 cup milk
- 1 teaspoon dried thyme
- 1 teaspoon salt
- 1/2 teaspoon black pepper
- 1 sheet of refrigerated pie crust or homemade dough
- 1 egg, beaten (for egg wash)
To start, preheat your oven to 425°F (220°C). In a large skillet over medium heat, melt the butter. Add the onion, carrots, and celery, cooking until softened, about 5 minutes.
Next, stir in the flour and cook for an additional 2 minutes, whisking continuously to combine. Gradually pour in the chicken broth and milk, stirring until the mixture thickens and bubbles, about 5-7 minutes. Add the cooked chicken, peas, potatoes, thyme, salt, and black pepper, mixing well.
Once the filling is ready, transfer it into a large pie dish. Roll out the pie crust and place it over the filling, pressing down around the edges to seal. Cut a few slits in the top to allow steam to escape. Brush the crust lightly with the beaten egg for a beautiful golden finish.
Bake in the preheated oven for 30-35 minutes, or until the crust is golden brown. Let the pot pie cool for a few minutes before serving hot, allowing the flavors to meld beautifully.
Cinnamon Roll Casserole

Indulge in the comforting flavors of a Cinnamon Roll Casserole, perfect for brunch or a delicious breakfast treat. This easy-to-make dish combines the classic taste of cinnamon rolls with the convenience of a casserole, making it a crowd-pleaser for any occasion.
- 2 cans of refrigerated cinnamon rolls
- 4 large eggs
- 1 cup of milk
- 1 teaspoon of vanilla extract
- 1 teaspoon of ground cinnamon
- 1/2 cup of brown sugar
- 1/2 cup of chopped pecans (optional)
- 1 cup of icing (from the cinnamon roll cans)
Preheat your oven to 350°F (175°C). Begin by greasing a large casserole dish with cooking spray or butter to prevent sticking. Open the cans of cinnamon rolls and cut each roll into quarters, then place them evenly in the bottom of the prepared casserole dish.
In a mixing bowl, whisk together the eggs, milk, vanilla extract, ground cinnamon, and brown sugar until the mixture is well combined and smooth. Pour this egg mixture over the cinnamon roll pieces, ensuring that each piece is coated.
If you desire, sprinkle the chopped pecans evenly over the top for added crunch and flavor. Using a spatula, gently press down on the casserole to help the liquid soak into the rolls.
Bake in the preheated oven for approximately 25-30 minutes, or until the casserole is puffed and golden brown. A toothpick inserted in the center should come out clean.
Once done, remove the casserole from the oven and let it cool for a few minutes. Drizzle the icing from the cinnamon roll cans over the top while it’s still warm, allowing it to melt slightly and create a delicious glaze.
Serve warm and enjoy this delightful Cinnamon Roll Casserole with friends and family for an unforgettable breakfast experience!
Loaded Baked Potato Soup

Warm up on a chilly day with this creamy and delicious Loaded Baked Potato Soup. It’s the perfect comfort food, brimming with flavor and topped with all your favorite toppings!
- 4 large russet potatoes, peeled and diced
- 1 medium onion, chopped
- 3 cloves garlic, minced
- 4 cups chicken broth
- 1 cup heavy cream
- 1 cup shredded cheddar cheese
- 1/2 cup crisp bacon, chopped
- 1/4 cup green onions, sliced
- Salt and pepper to taste
- 2 tablespoons olive oil
In a large pot, heat the olive oil over medium heat. Add the chopped onion and sauté for about 5 minutes, until the onion is translucent. Stir in the minced garlic and cook for an additional 1-2 minutes, until fragrant.
Add the diced potatoes and the chicken broth to the pot. Bring the mixture to a boil, then reduce the heat to a simmer. Cook for about 15-20 minutes, or until the potatoes are tender.
Once the potatoes are cooked, use a potato masher or an immersion blender to mash the soup slightly, leaving some chunks for texture. Stir in the heavy cream and shredded cheddar cheese, mixing until the cheese is melted and combined.
Season the soup with salt and pepper to taste. Ladle the soup into bowls and top each serving with the chopped bacon and green onions. Enjoy your hearty Loaded Baked Potato Soup!
Savory Quiche Lorraine

Quiche Lorraine is a classic French dish that combines a rich custard filling with savory bacon and cheese for a delightful flavor. Perfect for brunch or a light dinner, this quiche is sure to impress your guests and satisfy your taste buds.
- 1 pre-made pie crust
- 6 slices of bacon, chopped
- 1 cup shredded Gruyère cheese
- 3 large eggs
- 1 cup heavy cream
- 1/2 teaspoon salt
- 1/4 teaspoon freshly ground black pepper
- 1/4 teaspoon nutmeg
- 1 tablespoon chopped fresh chives (optional)
To begin, preheat your oven to 450°F (230°C). While the oven is heating, place the pre-made pie crust into a pie dish and press it firmly against the bottom and sides. Use a fork to pierce the bottom of the crust to prevent it from bubbling while baking.
Next, cook the chopped bacon in a skillet over medium heat until it is crispy, which should take about 5-7 minutes. Once cooked, drain the bacon on paper towels to remove excess grease and set it aside to cool.
In a mixing bowl, whisk together the eggs, heavy cream, salt, black pepper, and nutmeg until the mixture is smooth and well combined. Once blended, stir in the shredded Gruyère cheese and cooked bacon pieces. If you’re using chives, add them to the mixture for a fresh touch.
Pour the egg mixture into the prepared pie crust, ensuring the ingredients are evenly distributed. Carefully transfer the quiche to the preheated oven and bake for 15 minutes. After that, reduce the oven temperature to 300°F (150°C) and continue to bake for an additional 30-35 minutes, or until the filling is set and the top is lightly golden.
Once baked, allow the quiche to cool for at least 10 minutes before slicing. This allows the flavors to meld beautifully and makes for easier serving. Serve warm or at room temperature, and enjoy your delicious Savory Quiche Lorraine!
Lemon-Thyme Roasted Chicken

Indulge in the delightful flavors of Lemon-Thyme Roasted Chicken, a dish that perfectly balances zesty citrus and fragrant herbs. This easy-to-follow recipe is perfect for a family dinner or to impress guests at your next gathering.
- 1 whole chicken (about 4-5 pounds)
- 2 lemons, quartered
- 4 garlic cloves, minced
- Fresh thyme sprigs (about 8-10)
- 1/4 cup olive oil
- Salt, to taste
- Black pepper, to taste
- 1 cup chicken broth or water
Preheat your oven to 425°F (220°C). Rinse the chicken under cold water and pat it dry with paper towels. This helps to achieve a crispy skin during roasting. Season the chicken generously with salt and black pepper, ensuring to rub it both inside and out.
In a small bowl, mix the olive oil with the minced garlic. Pour this mixture all over the chicken, rubbing it into the skin for maximum flavor. Take the quartered lemons and stuff them into the cavity of the chicken along with the fresh thyme sprigs. This will infuse the chicken with a wonderful aroma as it roasts.
Place the chicken breast-side up in a roasting pan. Carefully pour the chicken broth or water into the bottom of the pan to keep the chicken moist while cooking. This will also help you accumulate delicious juices for gravy later.
Roast the chicken in the preheated oven for 1 hour and 15-1 hour and 30 minutes, or until the juices run clear when a knife is inserted into the thickest part of the thigh, and the internal temperature reaches 165°F (74°C). If you notice the chicken skin browning too quickly, tent it loosely with aluminum foil.
Once fully cooked, remove the chicken from the oven and let it rest for 10-15 minutes before carving. This allows the juices to redistribute, ensuring moist and tender bites with every slice. Serve with your choice of sides and enjoy the deliciously infused flavors of lemon and thyme!
Nutty Granola Bars for a Snug Snack

Nutty Granola Bars are the perfect solution for a quick and healthy snack that is both delicious and satisfying. Packed with wholesome ingredients, these bars are easy to prepare and great for breakfast on the go or an afternoon pick-me-up.
- 2 cups rolled oats
- 1 cup mixed nuts (almonds, walnuts, pecans), chopped
- 1/2 cup honey or maple syrup
- 1/4 cup peanut butter or almond butter
- 1/2 teaspoon vanilla extract
- 1/4 teaspoon salt
- 1/2 cup dried fruit (raisins, cranberries, or apricots), chopped (optional)
- 1/4 cup chocolate chips (optional)
To begin, preheat your oven to 350°F (175°C). Line an 8×8-inch baking dish with parchment paper, allowing some overhang on the sides for easy removal later.
In a large mixing bowl, combine the rolled oats and chopped nuts. In a separate microwave-safe bowl, mix together the honey (or maple syrup), peanut butter, vanilla extract, and salt. Microwave this mixture for about 30-45 seconds until warm and easy to stir. Mix until well combined.
Pour the warm mixture over the oats and nuts, stirring to evenly coat all the dry ingredients. If you’re adding dried fruit or chocolate chips, fold those in at this stage.
Transfer the mixture into your prepared baking dish and use a spatula to press it down firmly into an even layer. This step is crucial to ensure that your granola bars hold together once baked.
Bake in the preheated oven for 20-25 minutes or until the edges are golden brown. Once baked, remove from the oven and allow it to cool in the pan for about 10 minutes before lifting it out using the parchment overhang.
After cooling completely, slice it into bars or squares as desired. Store the Nutty Granola Bars in an airtight container at room temperature for up to a week, or refrigerate for longer freshness. Enjoy your wholesome and satisfying snack!
Warm Bread Pudding with Caramel Sauce
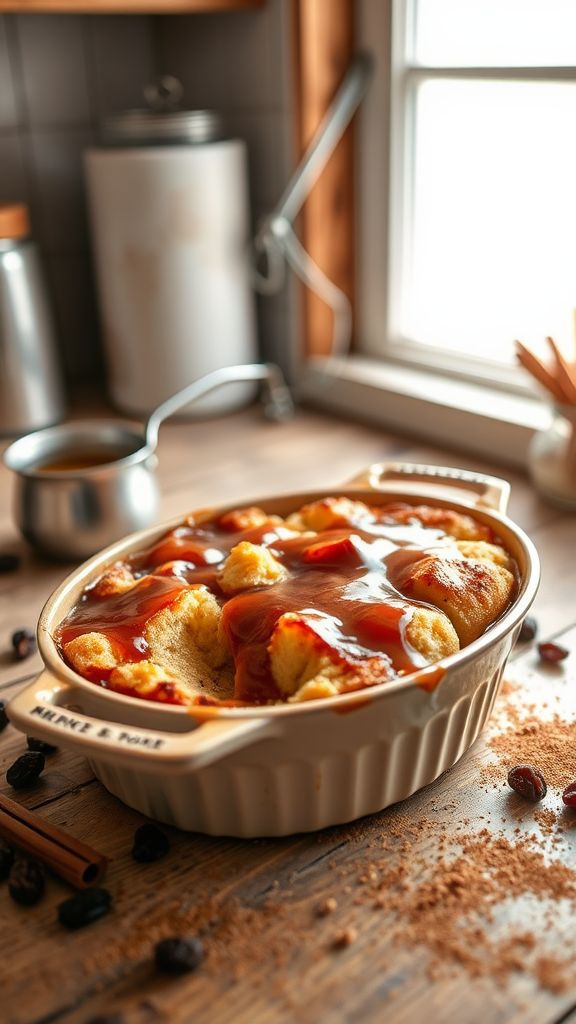
Warm Bread Pudding with Caramel Sauce is a delightful dessert that combines the comforting texture of bread pudding with a luscious homemade caramel. Perfect for a cozy family dinner or special occasion, this dessert is sure to impress your guests!
- 4 cups of stale bread, cubed
- 2 cups of whole milk
- 1 cup of heavy cream
- 3 large eggs
- 1 cup of granulated sugar
- 1 tablespoon of vanilla extract
- 1 teaspoon of ground cinnamon
- ½ cup of raisins (optional)
- ½ cup of brown sugar
- ¼ cup of unsalted butter
- 1 cup of heavy cream (for caramel sauce)
- 1 teaspoon of vanilla extract (for caramel sauce)
To begin, preheat your oven to 350°F (175°C). In a large mixing bowl, combine the stale bread cubes, whole milk, and heavy cream. Let this mixture soak for about 15 minutes to allow the bread to absorb the liquids.
While the bread is soaking, in another bowl, whisk together the eggs, granulated sugar, vanilla extract, and ground cinnamon until well combined. After the bread has soaked, gently fold in the egg mixture and, if desired, the raisins.
Transfer the bread mixture to a greased baking dish and bake in the preheated oven for 40-45 minutes, or until the top is golden brown and the custard is set. While the bread pudding is baking, you can prepare the caramel sauce.
In a saucepan over medium heat, melt the butter and then add the brown sugar. Stir continuously until the sugar dissolves and the mixture starts to bubble. Gradually mix in the heavy cream while continuously stirring until the sauce is smooth and well combined. Remove from heat and stir in the vanilla extract.
Once the bread pudding is done, let it cool slightly before serving. Drizzle the warm caramel sauce generously over each serving to elevate this already delightful dessert. Enjoy your warm bread pudding with caramel sauce!


