My New Cookbook is Out! Check Out Now!
20 Cheap Finger Food Party Appetizers
Did you know that finger foods are in high demand, with more than 70% of party hosts choosing bite-sized appetizers to delight their guests? If you’re planning a gathering and want to impress without breaking the bank, you’re in the right place! In this blog, we’ll explore 20 cheap finger food party appetizers that are not only budget-friendly but also packed with flavor, ensuring your event is a hit while keeping your wallet happy!
Shop Our Must-Haves
Savory Mini Quiches

This Savory Mini Quiches recipe is special for its delightful blends of cheeses and vegetables, making them a perfect bite-sized treat for any occasion.
Ingredients:
- 1 cup shredded cheese (cheddar, mozzarella, or your choice)
- 1 cup cooked and chopped vegetables (spinach, bell peppers, mushrooms, etc.)
- 4 large eggs
- 1/2 cup milk
- 1/2 teaspoon salt
- 1/4 teaspoon black pepper
- 1/4 teaspoon garlic powder
- 1 package refrigerated pie crusts (or make your own)
Preparation Time: 15 minutes
Cooking Time: 25 minutes
Total Time: 40 minutes
Instructions:
1. Preheat your oven to 375°F (190°C) and grease a muffin tin.
2. Roll out the pie crust and cut it into circles to fit the muffin tin.
3. Press crust circles into the bottom and up the sides of each muffin cup.
4. In a mixing bowl, whisk together the eggs, milk, salt, pepper, and garlic powder.
5. Evenly distribute the chopped vegetables and cheese among the crust-lined cups.
6. Pour the egg mixture over the cheese and vegetables, filling each cup almost to the top.
7. Bake in the preheated oven for about 20-25 minutes or until the egg is set and the tops are lightly golden.
8. Allow the mini quiches to cool slightly before removing them from the muffin tin.
Tips:
- Feel free to customize the filling based on your favorite ingredients.
- These mini quiches can be made ahead of time and reheated for quick snacks.
- For a gluten-free option, use gluten-free pie crusts or skip the crust entirely.
Spicy Chickpea Fritters

These Spicy Chickpea Fritters are a delightful blend of crunchy texture and bold flavors, perfect for a snack or appetizer.
Ingredients:
- 1 can (15 oz) chickpeas, drained and rinsed
- 1/2 cup finely chopped onion
- 2 cloves garlic, minced
- 1/2 cup bread crumbs
- 1 tsp ground cumin
- 1 tsp smoked paprika
- 1/2 tsp cayenne pepper
- 1/4 tsp salt
- 1/4 tsp black pepper
- 1/4 cup fresh cilantro, chopped
- 1 egg, beaten
- 1/4 cup vegetable oil, for frying
Preparation Time: 15 minutes
Cooking Time: 20 minutes
Total Time: 35 minutes
Instructions:
1. In a large bowl, mash the chickpeas with a fork or potato masher until mostly smooth but still slightly chunky.
2. Add the chopped onion, minced garlic, bread crumbs, cumin, smoked paprika, cayenne pepper, salt, black pepper, cilantro, and beaten egg to the mashed chickpeas. Mix until well combined.
3. Form the mixture into small patties, about 2 inches in diameter.
4. Heat the vegetable oil in a large skillet over medium heat.
5. Once the oil is hot, carefully add the patties in batches and fry for 3-4 minutes on each side, until golden brown and crispy.
6. Remove the fritters from the skillet and place them on a paper towel-lined plate to drain excess oil.
7. Serve warm with yogurt or your favorite dipping sauce.
Tips:
- For extra heat, add more cayenne pepper to the mixture.
- Make ahead and store uncooked fritters in the freezer for a quick snack option.
- Experiment with different herbs, like parsley or dill, for varied flavors.
Garlic Parmesan Breadsticks

These Garlic Parmesan Breadsticks are a delectable treat, boasting a flavorful combination of garlic and cheese that elevates any meal.
Ingredients:
- 1 cup warm water
- 2 tablespoons sugar
- 2 teaspoons active dry yeast
- 2 cups all-purpose flour
- 1 cup bread flour
- 1 teaspoon salt
- 1/4 cup unsalted butter, melted
- 3 cloves garlic, minced
- 1/2 cup grated Parmesan cheese
- 1 teaspoon dried Italian herbs
- 1/4 teaspoon black pepper
Preparation Time: 10 minutes
Cooking Time: 15 minutes
Total Time: 25 minutes
Instructions:
1. In a small bowl, combine warm water, sugar, and yeast; let sit for about 5 minutes until frothy.
2. In a large bowl, mix all-purpose flour, bread flour, and salt.
3. Add the yeast mixture and melted butter to the dry ingredients; knead until a smooth dough forms.
4. Cover the dough with a towel and let it rise in a warm place for about 15 minutes.
5. Preheat the oven to 400°F (200°C) and line a baking sheet with parchment paper.
6. Roll out the dough into a rectangle and cut it into strips to form breadsticks.
7. Place the breadsticks on the prepared baking sheet, brush with melted butter, and sprinkle with garlic, Parmesan cheese, Italian herbs, and black pepper.
8. Bake in the preheated oven for 12-15 minutes or until golden brown.
9. Allow to cool slightly before serving.
Tips:
- For extra flavor, add a pinch of red pepper flakes to the topping.
- These breadsticks can be served with marinara sauce for dipping.
- Store leftover breadsticks in an airtight container at room temperature for up to 2 days.
- Reheat them in the oven for a few minutes to restore freshness.
Crunchy Veggie Spring Rolls
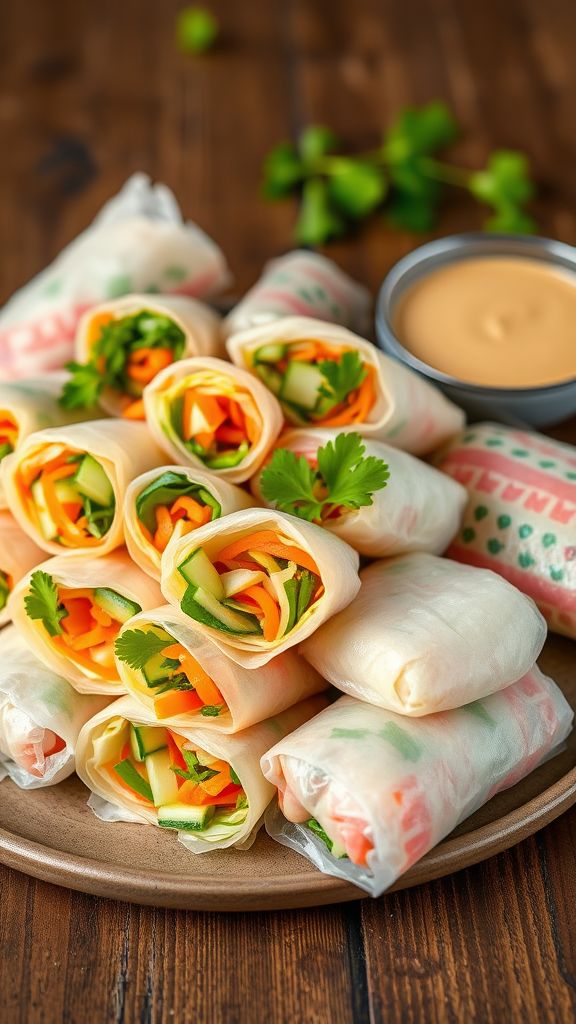
These Crunchy Veggie Spring Rolls are a delightful blend of fresh vegetables wrapped in crispy rice paper, delivering a perfect balance of crunch and vibrant flavors.
Ingredients:
- 1 cup shredded cabbage
- 1 cup shredded carrots
- 1/2 cup bell peppers, thinly sliced
- 1/2 cup cucumber, julienned
- 1/4 cup fresh cilantro, chopped
- 10 rice paper wrappers
- 1/4 cup peanut sauce for dipping
- 1 tablespoon soy sauce
- 1 teaspoon sesame oil
Preparation Time: 15 minutes
Cooking Time: 0 minutes
Total Time: 15 minutes
Instructions:
1. In a large bowl, mix together the shredded cabbage, carrots, bell peppers, cucumber, and cilantro.
2. In a separate small bowl, whisk together the soy sauce and sesame oil.
3. Add the soy sauce mixture to the vegetables and toss until evenly coated.
4. Fill a shallow dish with warm water and soak each rice paper wrapper until soft, about 10-15 seconds.
5. Lay the softened wrapper flat on a clean surface and place a small amount of the vegetable mixture in the center.
6. Fold the sides of the wrapper over the filling, then roll it tightly from the bottom to the top to seal.
7. Repeat the process with the remaining wrappers and filling.
8. Serve the spring rolls with peanut sauce for dipping.
Tips:
- Make sure to prepare all your vegetables in advance for an easy rolling process.
- For added crunch, consider adding some sliced radishes or crunchy lettuce.
- Experiment with different dipping sauces like hoisin or sweet chili sauce for variety.
Mini Caprese Skewers
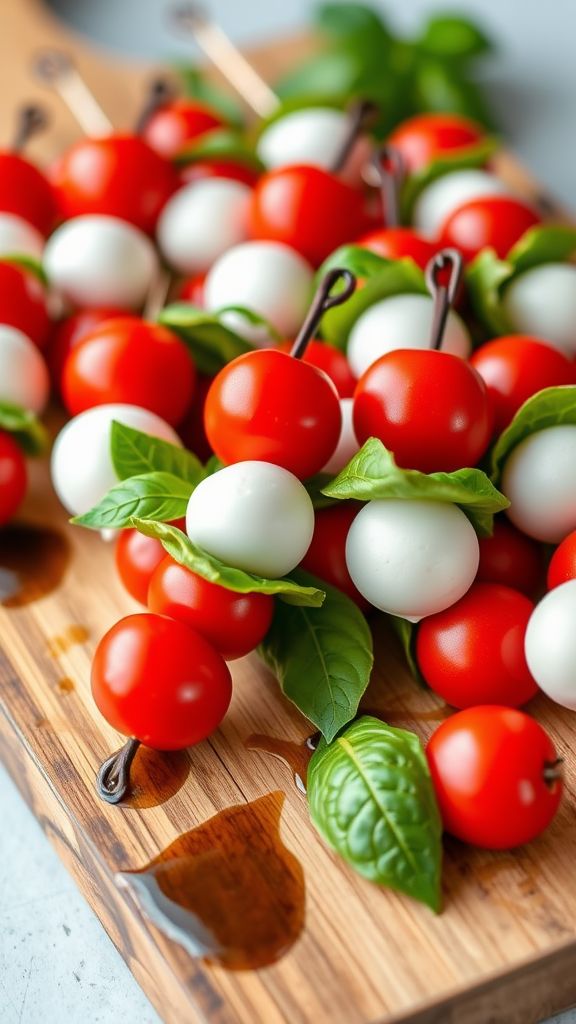
These Mini Caprese Skewers offer a delightful combination of fresh tomatoes, creamy mozzarella, and fragrant basil, making them a vibrant and tasty appetizer.
Ingredients:
- 20 cherry tomatoes
- 20 fresh mozzarella balls
- 20 fresh basil leaves
- 1/4 cup balsamic vinegar
- 2 tablespoons olive oil
- Salt to taste
- Black pepper to taste
- 20 skewers
Preparation Time: 15 minutes
Cooking Time: 0 minutes
Total Time: 15 minutes
Instructions:
1. Prepare all ingredients by rinsing the cherry tomatoes and basil leaves under cool water.
2. On each skewer, thread a cherry tomato, followed by a fresh basil leaf, and then a mozzarella ball. Repeat this process until all ingredients are used up.
3. Arrange the assembled skewers on a serving platter.
4. In a small bowl, whisk together the balsamic vinegar, olive oil, salt, and black pepper.
5. Drizzle the balsamic dressing over the skewers before serving.
Tips:
- For extra flavor, marinate mozzarella balls in olive oil and herbs a few hours before assembly.
- Serve skewers immediately for the best taste and texture.
- Feel free to add additional ingredients like prosciutto or olives for a twist.
- Use colorful cherry tomatoes for a vibrant presentation.
Cheesy Potato Bites

This Cheesy Potato Bites recipe is special because it combines creamy cheese and crispy potatoes, creating a delightful snack that is perfect for any occasion.
Ingredients:
- 2 cups mashed potatoes
- 1 cup shredded cheddar cheese
- 1/2 cup grated Parmesan cheese
- 1/4 cup green onions, chopped
- 1/2 teaspoon garlic powder
- 1/4 teaspoon black pepper
- 1/2 cup breadcrumbs
- 1 large egg, beaten
- Oil for frying
Preparation Time: 15 minutes
Cooking Time: 10 minutes
Total Time: 25 minutes
Instructions:
1. In a large bowl, mix the mashed potatoes, cheddar cheese, Parmesan cheese, green onions, garlic powder, and black pepper until well combined.
2. Shape the mixture into small bite-sized balls.
3. Dip each potato ball into the beaten egg, then roll in the breadcrumbs to coat.
4. Heat oil in a frying pan over medium heat.
5. Fry the potato bites in batches until golden brown, about 3-4 minutes per side.
6. Remove from the oil and let drain on paper towels.
7. Serve warm and enjoy your cheesy potato bites!
Tips:
- For extra flavor, add your favorite herbs such as basil or parsley.
- These potato bites can be baked instead of fried; just place them on a baking sheet and bake at 400°F for about 20 minutes.
- Feel free to experiment with different types of cheese for varied flavors.
Loaded Nacho Cups

These Loaded Nacho Cups are a perfect blend of cheesy goodness and zesty toppings, making them an irresistible party snack.
Ingredients:
- 1 package tortilla chips
- 1 cup shredded cheddar cheese
- 1 cup shredded mozzarella cheese
- 1 cup cooked ground beef
- ½ cup diced tomatoes
- ½ cup sliced jalapeños
- ½ cup sour cream
- ¼ cup chopped green onions
- ¼ cup salsa
- 1 teaspoon taco seasoning
Preparation Time: 15 minutes
Cooking Time: 10 minutes
Total Time: 25 minutes
Instructions:
1. Preheat your oven to 350°F (175°C).
2. Arrange tortilla chips on a baking sheet.
3. In a bowl, mix together the cooked ground beef with taco seasoning.
4. Spoon the seasoned beef onto each tortilla chip.
5. Sprinkle cheddar and mozzarella cheese over the beef.
6. Add diced tomatoes and jalapeños on top of each cup.
7. Bake in the preheated oven for about 8-10 minutes, or until the cheese is melted and bubbly.
8. Remove from the oven and let cool slightly.
9. Top with sour cream, salsa, and sprinkle with green onions before serving.
Tips:
- Feel free to customize with your favorite toppings such as black olives or avocado.
- Use mini muffin tins to create individual cups for easier handling.
- Make it vegetarian by substituting ground beef with black beans or lentils.
Sweet and Tangy Meatballs

These Sweet and Tangy Meatballs combine the perfect balance of sweetness and zest that will have everyone raving at your next gathering.
Ingredients:
- 1 pound ground beef
- 1 cup breadcrumbs
- 1/2 cup finely chopped onion
- 1/4 cup chopped parsley
- 1/4 cup milk
- 1 egg
- 1 teaspoon garlic powder
- 1/2 teaspoon salt
- 1/4 teaspoon black pepper
- 1 cup barbecue sauce
- 1/2 cup apricot preserves
- 2 tablespoons soy sauce
Preparation Time: 15 minutes
Cooking Time: 25 minutes
Total Time: 40 minutes
Instructions:
1. Preheat your oven to 400°F (200°C).
2. In a large bowl, combine the ground beef, breadcrumbs, onion, parsley, milk, egg, garlic powder, salt, and black pepper. Mix until well combined.
3. Form the mixture into meatballs, each about 1 inch in diameter, and place them on a baking sheet lined with parchment paper.
4. In a separate bowl, mix together the barbecue sauce, apricot preserves, and soy sauce to create the glaze.
5. Brush the glaze over the meatballs, making sure they are coated well.
6. Bake the meatballs in the preheated oven for 20-25 minutes or until cooked through.
7. Serve warm, drizzled with any remaining glaze, and enjoy!
Tips:
- For extra flavor, let the meatball mixture rest in the fridge for 30 minutes before baking.
- Serve with toothpicks for a fun appetizer at parties.
- Store leftovers in an airtight container in the fridge for up to 3 days.
Refreshing Cucumber Sandwiches
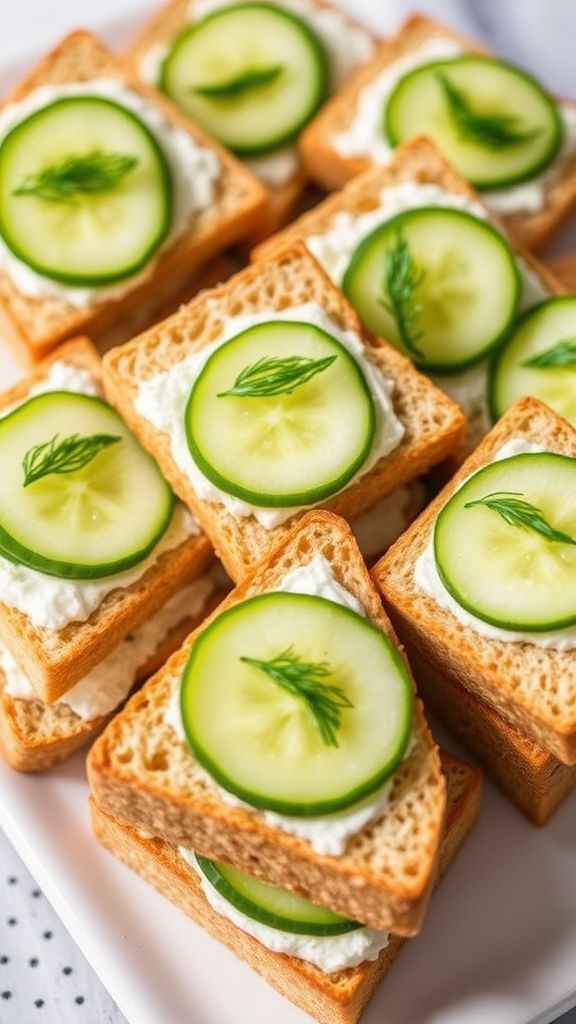
These Refreshing Cucumber Sandwiches are a delightful blend of crisp cucumbers and creamy spread, making them the perfect light snack for any occasion.
Ingredients:
- 1 large cucumber
- 8 oz cream cheese, softened
- 2 tbsp fresh dill, chopped
- 1 tsp lemon juice
- 1/4 tsp salt
- 8 slices whole grain bread
- 1/4 tsp black pepper
- 1 tbsp olive oil (optional)
Preparation Time: 10 minutes
Cooking Time: 0 minutes
Total Time: 10 minutes
Instructions:
1. Begin by washing the cucumber and slicing it thinly.
2. In a bowl, combine the softened cream cheese, fresh dill, lemon juice, salt, and black pepper until well blended.
3. Spread the cream cheese mixture evenly over one side of each slice of whole grain bread.
4. Layer the cucumber slices on top of the cream cheese on half of the bread slices.
5. Top with the remaining bread slices, cream cheese side down, to create sandwiches.
6. If desired, drizzle olive oil on the top of sandwiches before serving.
7. Cut each sandwich into quarters or halves for easy serving.
Tips:
- For added flavor, try adding a pinch of garlic powder to the cream cheese mixture.
- Use a vegetable peeler to create decorative cucumber ribbons for a more elegant presentation.
- Keep the sandwiches covered in the refrigerator until serving to maintain freshness.
Crispy Zucchini Fries
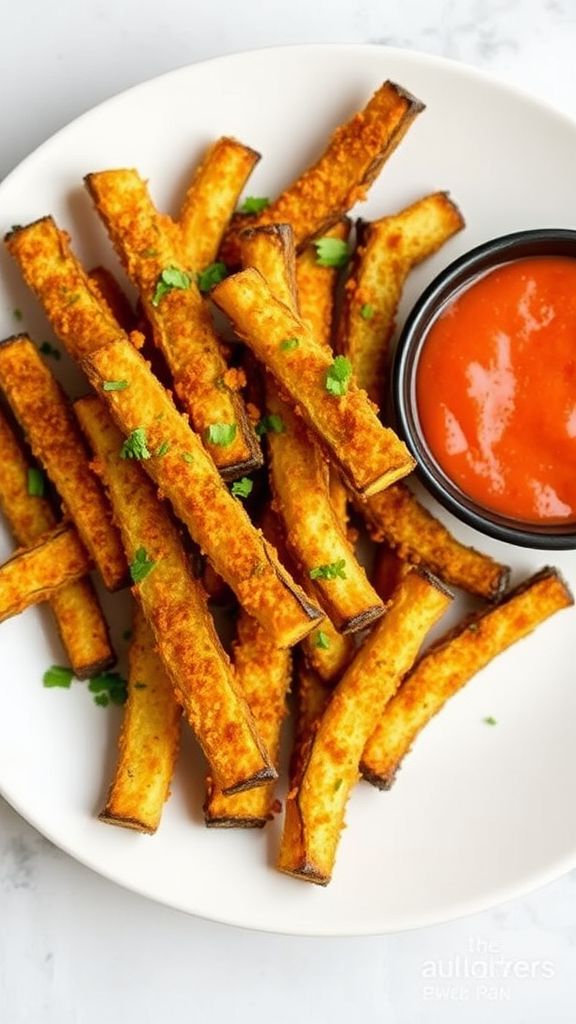
This Crispy Zucchini Fries recipe combines a crunchy coating with savory herbs, making it an irresistible snack or side dish.
Ingredients:
- 2 medium zucchinis
- 1 cup breadcrumbs
- 1/2 cup grated Parmesan cheese
- 2 large eggs
- 1 teaspoon garlic powder
- 1 teaspoon Italian seasoning
- 1/2 teaspoon salt
- 1/4 teaspoon black pepper
- 1/4 cup all-purpose flour
- 1 tablespoon olive oil
Preparation Time: 15 minutes
Cooking Time: 20 minutes
Total Time: 35 minutes
Instructions:
1. Preheat your oven to 425°F (220°C) and line a baking sheet with parchment paper.
2. Cut the zucchinis into fry shapes, about 1/4-inch thick.
3. Set up a breading station: one bowl with flour, another with beaten eggs, and a third with a mix of breadcrumbs, Parmesan, garlic powder, Italian seasoning, salt, and pepper.
4. Dredge each zucchini fry in flour, dip into the egg, and coat with the breadcrumb mixture.
5. Place the coated fries on the prepared baking sheet and drizzle with olive oil.
6. Bake for 20 minutes or until golden brown and crispy, turning halfway through.
7. Serve hot with your choice of dipping sauce.
Tips:
- For extra crunch, use panko breadcrumbs instead of regular breadcrumbs.
- Feel free to add your favorite spices to the breadcrumb mixture for additional flavor.
- Make sure the zucchini fries are in a single layer on the baking sheet for even cooking.
Tangy Buffalo Cauliflower Bites

This Tangy Buffalo Cauliflower Bites recipe offers a zesty kick and a satisfying crunch that makes it a perfect appetizer or snack for any gathering.
Ingredients:
- 1 head cauliflower, cut into bite-sized florets
- 1 cup all-purpose flour
- 1 cup water
- 1 teaspoon garlic powder
- 1 teaspoon onion powder
- 1 teaspoon smoked paprika
- 1 teaspoon salt
- 1 cup buffalo sauce
- 2 tablespoons melted vegan butter
- 1 tablespoon apple cider vinegar
- ¼ cup chopped fresh parsley (optional)
Preparation Time: 15 minutes
Cooking Time: 25 minutes
Total Time: 40 minutes
Instructions:
1. Preheat your oven to 450°F (230°C) and line a baking sheet with parchment paper.
2. In a medium bowl, whisk together the flour, water, garlic powder, onion powder, smoked paprika, and salt until smooth.
3. Dip each cauliflower floret into the batter, coating it thoroughly, and place it on the prepared baking sheet.
4. Bake the cauliflower for 20 minutes or until golden and crispy, flipping halfway through.
5. While the cauliflower is baking, mix the buffalo sauce, melted vegan butter, and apple cider vinegar in a large bowl.
6. Once the cauliflower is done baking, remove it from the oven and toss it in the buffalo sauce mixture until evenly coated.
7. Return the coated cauliflower to the baking sheet and bake for an additional 5 minutes to set the sauce.
8. Remove from the oven and garnish with chopped parsley if desired.
Tips:
- For extra crunch, you can double coat the cauliflower by dipping it in the batter twice before baking.
- Adjust the level of buffalo sauce to your taste preference, adding more for a spicier kick.
- Serve with a side of ranch or blue cheese dressing for dipping.
Simple Stuffed Mushrooms

This Simple Stuffed Mushrooms recipe is special for its savory blend of flavors and ease of preparation, making them perfect for appetizers or party snacks.
Ingredients:
- 12 large mushrooms
- 1 cup cream cheese, softened
- 1/2 cup grated Parmesan cheese
- 1/4 cup bread crumbs
- 2 cloves garlic, minced
- 1/4 cup fresh parsley, chopped
- 1 teaspoon salt
- 1/2 teaspoon black pepper
- 1 tablespoon olive oil
Preparation Time: 15 minutes
Cooking Time: 20 minutes
Total Time: 35 minutes
Instructions:
1. Preheat the oven to 375°F (190°C).
2. Clean the mushrooms and remove the stems, placing the caps on a baking sheet.
3. Finely chop the mushroom stems and sauté them in olive oil with the minced garlic until soft.
4. In a bowl, mix the sautéed stems, cream cheese, Parmesan cheese, bread crumbs, parsley, salt, and pepper until well combined.
5. Stuff each mushroom cap generously with the mixture.
6. Bake in the preheated oven for about 20 minutes or until the mushrooms are tender and the tops are golden brown.
Tips:
- For an extra kick, add crushed red pepper flakes to the filling.
- These stuffed mushrooms can be prepared ahead of time and baked just before serving.
- Experiment with different cheeses like mozzarella or feta for a unique taste.
Classic Deviled Eggs

Classic Deviled Eggs are a beloved appetizer, bursting with creamy, tangy flavors that delight at any gathering.
Ingredients:
- 6 large eggs
- 1/4 cup mayonnaise
- 1 teaspoon Dijon mustard
- 1 teaspoon apple cider vinegar
- 1/8 teaspoon salt
- 1/8 teaspoon black pepper
- 1/2 teaspoon smoked paprika
- 1 tablespoon fresh chives, chopped (optional)
Preparation Time: 10 minutes
Cooking Time: 10 minutes
Total Time: 20 minutes
Instructions:
1. Place eggs in a saucepan, cover them with cold water, and bring to a boil over medium-high heat.
2. Once boiling, remove the pan from heat and cover, letting the eggs sit for about 10-12 minutes.
3. After the time is up, transfer the eggs to a bowl of ice water to cool for about 5 minutes.
4. Once cooled, peel the eggs and slice them in half lengthwise.
5. Remove the yolks and place them in a mixing bowl; set the egg whites aside.
6. Mash the yolks with a fork and mix in mayonnaise, Dijon mustard, apple cider vinegar, salt, pepper, and half of the smoked paprika until smooth.
7. Spoon or pipe the yolk mixture back into the egg white halves.
8. Sprinkle with remaining smoked paprika and garnish with chopped chives, if desired.
Tips:
- For easier peeling, use eggs that are slightly older.
- Adjust the amount of mayonnaise based on your desired creaminess.
- Add a touch of spicy mustard for an extra kick.
Air-Fried Onion Rings
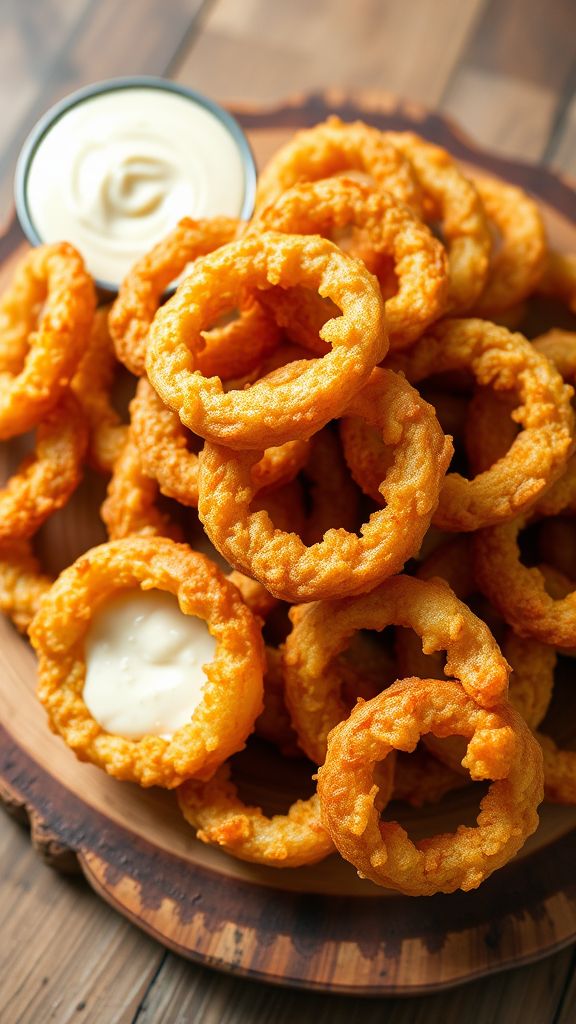
These Air-Fried Onion Rings offer a crispy texture with a savory flavor that makes them a perfect snack or side dish, all while being healthier than traditional frying.
Ingredients:
- 1 large onion, sliced into rings
- 1 cup all-purpose flour
- 2 large eggs, beaten
- 1 cup breadcrumbs
- 1 teaspoon garlic powder
- 1 teaspoon paprika
- 1/2 teaspoon salt
- 1/4 teaspoon black pepper
- 1 tablespoon olive oil
Preparation Time: 10 minutes
Cooking Time: 15 minutes
Total Time: 25 minutes
Instructions:
1. Preheat the air fryer to 400°F (200°C).
2. In a bowl, combine flour, garlic powder, paprika, salt, and pepper.
3. Dip each onion ring into the flour mixture, then into the beaten eggs, and finally coat with breadcrumbs.
4. Arrange the coated onion rings in a single layer in the air fryer basket.
5. Lightly brush the onion rings with olive oil.
6. Air fry for about 15 minutes, flipping halfway through, until golden brown and crispy.
Tips:
- For extra crunch, try using panko breadcrumbs instead of regular breadcrumbs.
- Experiment with different seasonings to customize the flavor of your onion rings.
- Serve with your favorite dipping sauce for added enjoyment.
Smoky BBQ Pulled Pork Sliders
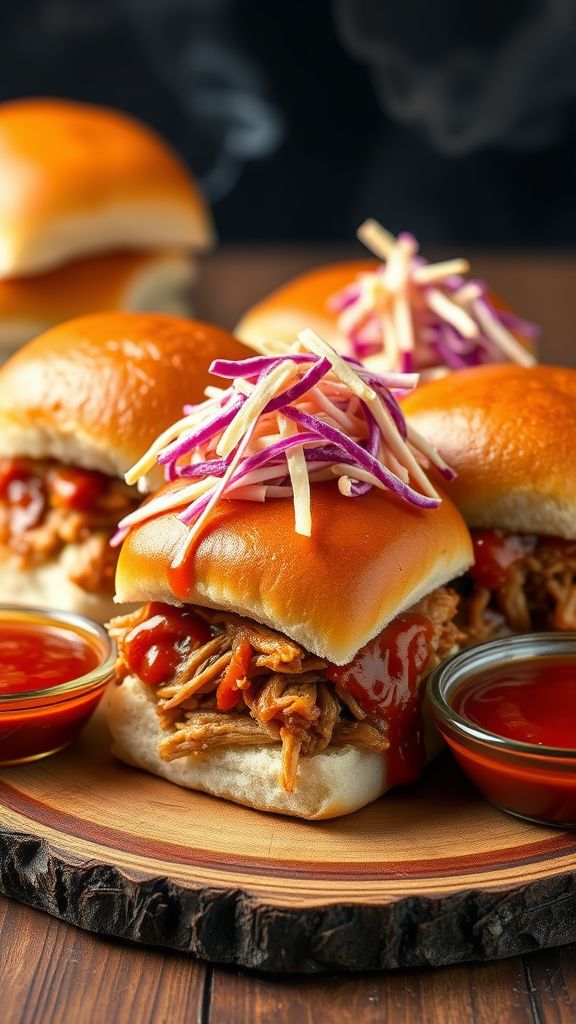
These Smoky BBQ Pulled Pork Sliders are a delightful blend of tender, flavorful pork infused with smoky BBQ sauce, perfect for any gathering.
Ingredients:
- 3 lbs pork shoulder
- 1 cup BBQ sauce
- 2 tablespoons smoked paprika
- 2 tablespoons brown sugar
- 1 tablespoon salt
- 1 teaspoon black pepper
- 1 teaspoon onion powder
- 1 teaspoon garlic powder
- 12 slider buns
- 1/2 cup coleslaw (optional)
Preparation Time: 15 minutes
Cooking Time: 8 hours
Total Time: 8 hours 15 minutes
Instructions:
1. In a bowl, mix smoked paprika, brown sugar, salt, black pepper, onion powder, and garlic powder to create a rub.
2. Rub the spice mixture all over the pork shoulder, ensuring it is well coated.
3. Place the pork shoulder in a slow cooker and pour the BBQ sauce over the top.
4. Cook on low for 8 hours until the pork is tender and easily shreds with a fork.
5. Remove the pork from the slow cooker and shred it with two forks; mix it back with the BBQ sauce in the slow cooker.
6. Serve the pulled pork on slider buns and add coleslaw if desired.
Tips:
- For extra smokiness, consider adding a few drops of liquid smoke to the BBQ sauce.
- Let the pulled pork sit for a few minutes before serving to allow the flavors to meld beautifully.
- These sliders can be made ahead of time and reheated for a quick meal option.
Roasted Red Pepper Hummus with Pita Chips
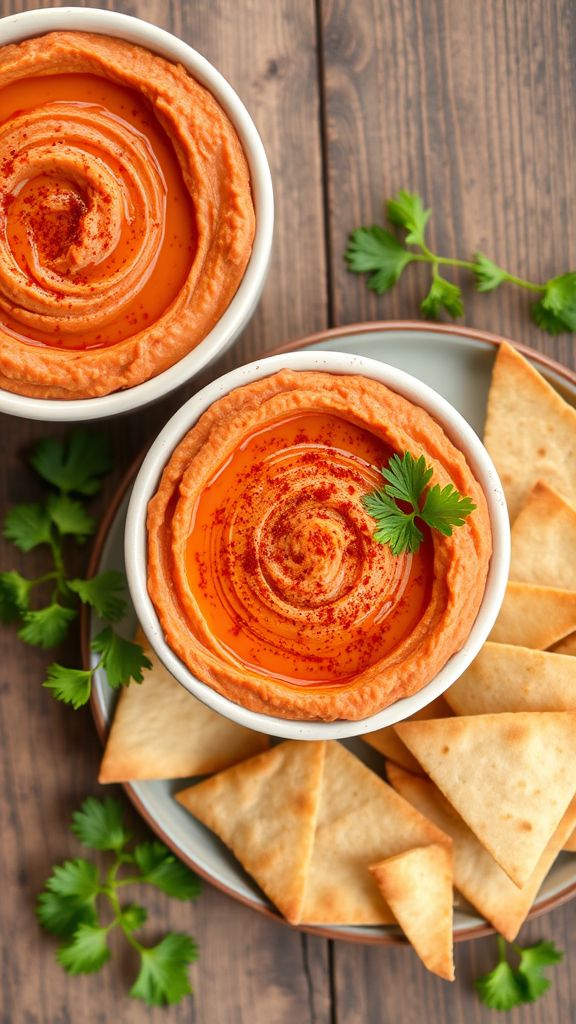
This Roasted Red Pepper Hummus with Pita Chips combines the smoky sweetness of roasted red peppers with creamy chickpeas, making it a flavorful and addictive dip perfect for any occasion.
Ingredients:
- 1 can (15 ounces) chickpeas, drained and rinsed
- 1 large roasted red pepper, peeled and chopped
- 2 tablespoons tahini
- 2 tablespoons olive oil
- 1 tablespoon lemon juice
- 1 clove garlic, minced
- 1/2 teaspoon ground cumin
- Salt to taste
- 4 whole wheat pita breads
- 1 tablespoon olive oil (for pita chips)
- 1/2 teaspoon paprika (for pita chips)
- 1/4 teaspoon salt (for pita chips)
Preparation Time: 10 minutes
Cooking Time: 10 minutes
Total Time: 20 minutes
Instructions:
1. Preheat your oven to 350°F (175°C) for the pita chips.
2. In a food processor, combine the chickpeas, roasted red pepper, tahini, olive oil, lemon juice, garlic, cumin, and salt.
3. Blend until smooth and creamy, adding a little water if necessary to reach your desired consistency.
4. For the pita chips, cut each pita bread into triangles and place them on a baking sheet.
5. Brush the pita triangles with olive oil and sprinkle with paprika and salt.
6. Bake the pita chips in the preheated oven for about 10 minutes or until golden and crispy.
7. Serve the roasted red pepper hummus with the warm pita chips.
Tips:
- For extra flavor, add some chopped fresh parsley or a drizzle of olive oil on top of the hummus before serving.
- Store leftover hummus in an airtight container in the refrigerator for up to a week.
- Feel free to customize your hummus by adding spices like cayenne or using a different type of nut butter instead of tahini.
Mini Taco Cups

These Mini Taco Cups are a delightful bite-sized treat that packs a flavorful punch with zesty seasonings and a crunchy shell.
Ingredients:
- 1 package wonton wrappers
- 1 pound ground beef
- 1 packet taco seasoning
- 1 cup shredded cheddar cheese
- 1 cup lettuce, shredded
- 1 cup diced tomatoes
- 1/2 cup sour cream
- 1/4 cup jalapeños, sliced (optional)
Preparation Time: 15 minutes
Cooking Time: 20 minutes
Total Time: 35 minutes
Instructions:
1. Preheat your oven to 375°F (190°C).
2. In a skillet over medium heat, cook the ground beef until browned.
3. Add the taco seasoning to the cooked beef, stirring well to combine, and follow package instructions for adding water if required.
4. Lightly spray a muffin tin with cooking spray and press a wonton wrapper into each cup, creating a shell.
5. Spoon the seasoned beef evenly into each wonton wrapper.
6. Sprinkle shredded cheddar cheese on top of the beef in each cup.
7. Bake in the preheated oven for about 10-12 minutes, or until the shells are crispy and the cheese is melted.
8. Remove from the oven and let cool slightly before adding toppings like lettuce, tomatoes, sour cream, and jalapeños.
Tips:
- For extra flavor, consider adding black beans or corn to the beef mixture.
- Try using ground turkey or chicken for a lighter option.
- You can make the beef mixture ahead of time and keep it refrigerated until you’re ready to assemble.
- Customize your toppings based on your preference; avocado or salsa make great additions.
Spiced Apple and Cheese Bites

These Spiced Apple and Cheese Bites combine the sweetness of apples with the creaminess of cheese, enhanced by warm spices for a delightful appetizer.
Ingredients:
- 2 large apples, cored and thinly sliced
- 1 cup shredded sharp cheddar cheese
- 1 teaspoon cinnamon
- 1/2 teaspoon nutmeg
- 1/4 teaspoon ground cloves
- 1 tablespoon honey
- 1 tablespoon olive oil
- 12 small round crackers
- Fresh thyme for garnish
Preparation Time: 15 minutes
Cooking Time: 10 minutes
Total Time: 25 minutes
Instructions:
1. Preheat your oven to 350°F (175°C).
2. In a small bowl, mix the cinnamon, nutmeg, and ground cloves together.
3. Arrange the crackers on a baking sheet and drizzle with olive oil.
4. Place a slice of apple on each cracker, then sprinkle the spice mixture over the apple slices.
5. Top each apple slice with a generous amount of shredded cheddar cheese.
6. Drizzle honey over the cheese and apples for added sweetness.
7. Bake in the oven for 10 minutes, or until the cheese is melted and bubbly.
8. Remove from the oven and garnish with fresh thyme before serving.
Tips:
- For a twist, try using different types of cheese like brie or goat cheese.
- Leave the skin on the apples for added texture and nutrients.
- Make sure to slice the apples thinly for even cooking and flavor absorption.
Herb-Infused Cheese Ball Bites

These Herb-Infused Cheese Ball Bites are a delightful combination of creamy cheese and vibrant herbs, making them the perfect appetizer for any gathering.
Ingredients:
- 8 oz cream cheese, softened
- 1 cup shredded cheddar cheese
- 1/2 cup crumbled feta cheese
- 1/4 cup fresh parsley, chopped
- 1/4 cup fresh chives, chopped
- 1/2 tsp garlic powder
- 1/4 tsp black pepper
- 1/4 cup chopped nuts (walnuts or pecans, optional)
- 1/4 cup assorted herbs for garnish (optional)
Preparation Time: 15 minutes
Cooking Time: 0 minutes
Total Time: 15 minutes
Instructions:
1. In a mixing bowl, combine the softened cream cheese, shredded cheddar cheese, and crumbled feta cheese until well blended.
2. Add the chopped parsley, chives, garlic powder, and black pepper. Mix until all ingredients are fully incorporated.
3. Using your hands, form small balls about 1 inch in diameter with the cheese mixture.
4. If desired, roll the cheese balls in chopped nuts to coat the outside for added texture and flavor.
5. Garnish with assorted herbs if using, and place the cheese ball bites on a serving platter.
Tips:
- For a more robust flavor, let the cheese mixture chill in the refrigerator for 30 minutes before forming into balls.
- Feel free to customize the herbs according to your preference; dill or thyme work wonderfully as well.
- These bites can be made a day in advance; just keep them covered in the refrigerator until serving.
Coconut Shrimp Dippers

This Coconut Shrimp Dippers recipe combines the sweetness of coconut with the crunch of panko breadcrumbs, creating a delightful snack that’s perfect for dipping.
Ingredients:
- 1 pound large shrimp, peeled and deveined
- 1 cup all-purpose flour
- 2 large eggs
- 1 cup panko breadcrumbs
- 1 cup sweetened shredded coconut
- 1 teaspoon garlic powder
- 1 teaspoon salt
- 1/2 teaspoon black pepper
- 1 teaspoon paprika
- 1 cup sweet chili sauce (for dipping)
Preparation Time: 15 minutes
Cooking Time: 10 minutes
Total Time: 25 minutes
Instructions:
1. Preheat your oven to 400°F (200°C) and line a baking sheet with parchment paper.
2. In a shallow bowl, combine the flour, garlic powder, salt, black pepper, and paprika.
3. In a second bowl, beat the eggs until well blended.
4. In a third bowl, mix the panko breadcrumbs and shredded coconut together.
5. Dip each shrimp first into the flour mixture, then into the beaten eggs, and finally into the coconut-panko mixture, ensuring it is well coated.
6. Place the coated shrimp on the prepared baking sheet in a single layer.
7. Bake for about 10 minutes or until the shrimp are golden brown and cooked through, flipping halfway through.
8. Serve warm with sweet chili sauce for dipping.
Tips:
- For extra crunch, you can briefly fry the shrimp in a skillet instead of baking.
- Feel free to add more spices to the flour mixture for an additional flavor kick.
- These can be made ahead of time and reheated in the oven for a few minutes before serving.


