My New Cookbook is Out! Check Out Now!
20 Decadent Desserts For The Perfect Winter Treat
If you think winter means saying goodbye to decadent treats, think again! The chilly season is the perfect time to indulge in comforting desserts that warm the heart and satisfy the sweet tooth. In our blog post, ’20 Decadent Desserts for the Perfect Winter Treat’, you’ll discover an array of delightful recipes—from luscious Chocolate Lava Cake to festive Spiced Pumpkin Cheesecake Bars—that will make your winter gatherings truly unforgettable!
Chocolate Lava Cake with Vanilla Ice Cream
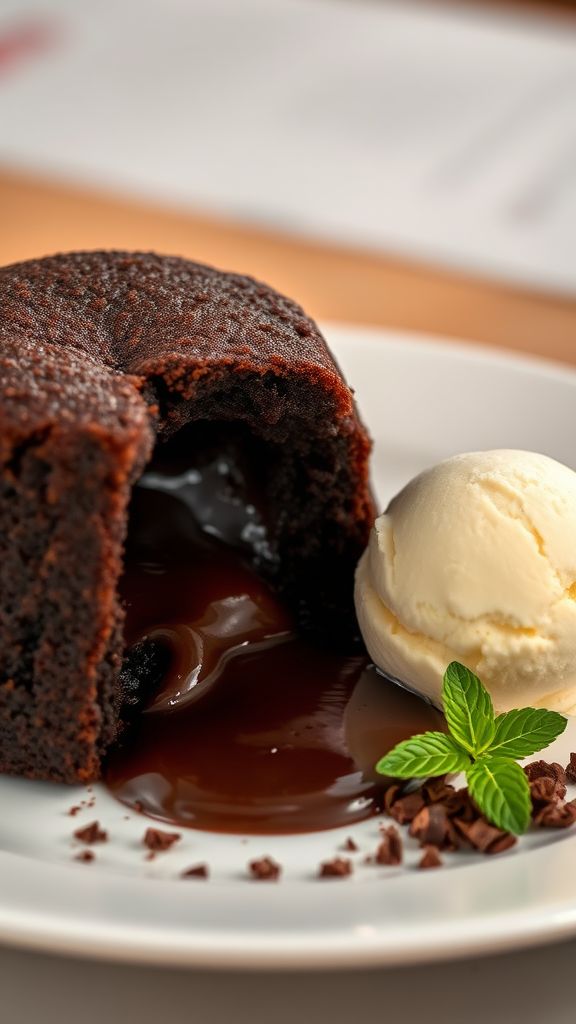
This Chocolate Lava Cake with Vanilla Ice Cream is a decadent dessert that features a rich, molten center, perfectly paired with creamy vanilla ice cream. The harmonious blend of dark chocolate and the smooth, sweet notes of vanilla creates an indulgent treat that will impress anyone.
Ingredients:
- 1 cup dark chocolate chips
- 1/2 cup unsalted butter
- 1 cup powdered sugar
- 2 large eggs
- 2 egg yolks
- 1 teaspoon vanilla extract
- 1/2 cup all-purpose flour
- 1/4 teaspoon salt
- Vanilla ice cream for serving
Preparation Time: 10 minutes
Cooking Time: 12 minutes
Total Time: 22 minutes
Instructions:
1. Preheat your oven to 425°F (220°C) and grease four ramekins with butter.
2. In a microwave-safe bowl, combine the dark chocolate chips and unsalted butter. Microwave in 30-second intervals until melted and smooth, stirring in between.
3. Stir in the powdered sugar until well combined, then add the eggs and egg yolks, mixing until smooth.
4. Add the vanilla extract, flour, and salt, gently folding until just combined.
5. Divide the batter evenly among the prepared ramekins and place them on a baking sheet.
6. Bake in the preheated oven for 12 minutes or until the edges are firm but the center remains soft.
7. Let the cakes cool for 1 minute, then carefully invert each ramekin onto a plate.
8. Serve immediately with a scoop of vanilla ice cream on the side.
Tips:
- For an extra touch, dust the ramekins with cocoa powder before adding the batter.
- To ensure the centers are molten, do not overbake the cakes.
- Try adding a pinch of espresso powder to the batter for enhanced chocolate flavor.
Spiced Pumpkin Cheesecake Bars
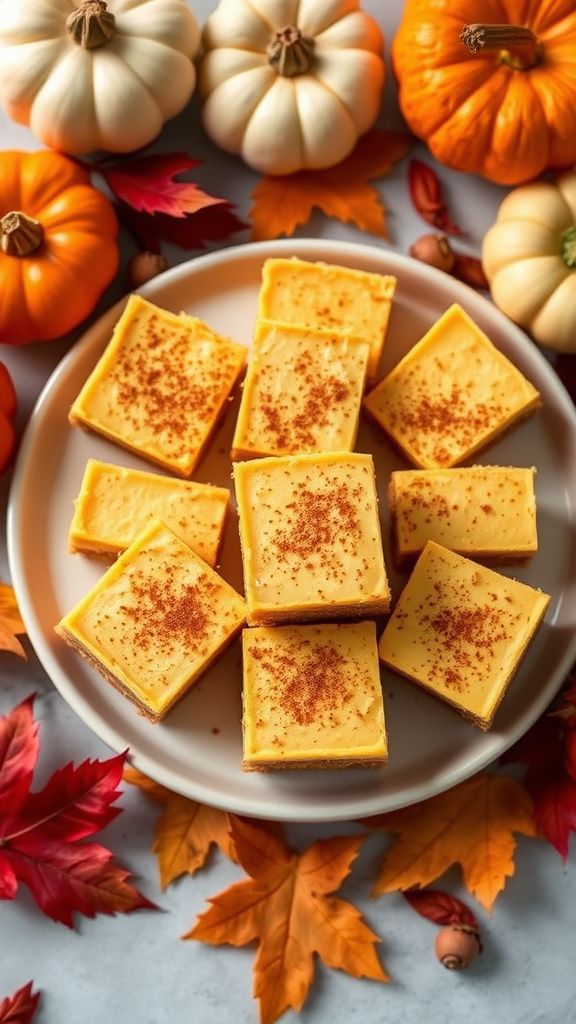
Indulge in the warm flavors of fall with these Spiced Pumpkin Cheesecake Bars, featuring a creamy pumpkin filling spiced to perfection. The delightful blend of pumpkin, cinnamon, and nutmeg creates a comforting dessert that’s perfect for the season and a hit at any gathering.
Ingredients:
- 1 ½ cups graham cracker crumbs
- ½ cup unsalted butter, melted
- 2 cups cream cheese, softened
- 1 cup canned pumpkin puree
- 1 cup granulated sugar
- ½ cup sour cream
- 3 large eggs
- 2 teaspoons vanilla extract
- 1 teaspoon ground cinnamon
- ½ teaspoon ground nutmeg
- ¼ teaspoon ground ginger
- ¼ teaspoon salt
Preparation Time: 15 minutes
Cooking Time: 45 minutes
Total Time: 1 hour
Instructions:
1. Preheat your oven to 350°F (175°C) and grease a 9×9 inch baking dish.
2. In a medium bowl, combine the graham cracker crumbs and melted butter, then press the mixture firmly into the bottom of the prepared baking dish.
3. In a large mixing bowl, beat the cream cheese until smooth, then mix in the pumpkin puree, granulated sugar, and sour cream until well combined.
4. Add the eggs one at a time, mixing well after each addition, followed by the vanilla extract, cinnamon, nutmeg, ginger, and salt.
5. Pour the pumpkin cheesecake mixture over the crust and smooth it out with a spatula.
6. Bake in the preheated oven for 45 minutes, or until the center is set and a toothpick comes out clean.
7. Allow the bars to cool completely in the pan before cutting into squares and serving.
Tips:
- For a festive touch, top the bars with whipped cream and a sprinkle of cinnamon before serving.
- Feel free to adjust the spices to suit your taste; add more cinnamon for extra warmth.
- Store leftovers in the refrigerator for up to 3 days.
Peppermint Mocha Pudding Cups
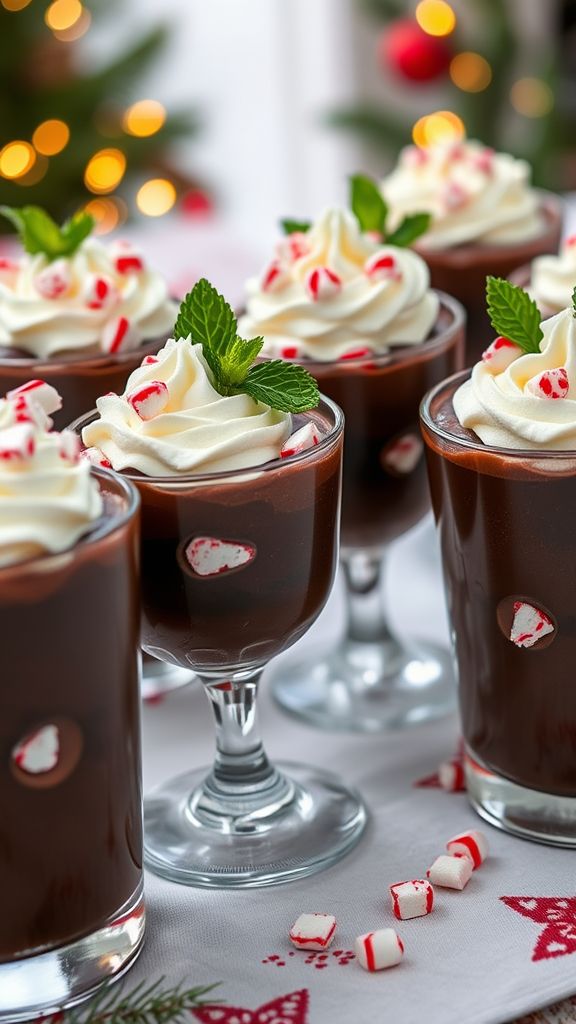
This Peppermint Mocha Pudding Cups recipe combines rich chocolate, vibrant peppermint, and a touch of coffee for an indulgent treat perfect for the holidays. Ideal for parties or cozy nights in, these creamy cups offer a festive flavor profile that will satisfy your sweet tooth.
Ingredients:
- 2 cups whole milk
- 1/2 cup granulated sugar
- 1/3 cup unsweetened cocoa powder
- 1/4 cup cornstarch
- 1/4 teaspoon salt
- 1 teaspoon instant coffee granules
- 1 teaspoon peppermint extract
- 2 tablespoons unsalted butter
- 1/2 cup whipped cream (for topping)
- 1/4 cup crushed peppermint candies (for garnish)
Preparation Time: 10 minutes
Cooking Time: 10 minutes
Total Time: 20 minutes
Instructions:
1. In a medium saucepan, whisk together the milk, sugar, cocoa powder, cornstarch, salt, and instant coffee granules over medium heat.
2. Cook, stirring constantly, until the mixture thickens and starts to boil, about 8-10 minutes.
3. Once thickened, remove the saucepan from heat and stir in the peppermint extract and butter until fully dissolved.
4. Pour the pudding into individual cups and let them cool at room temperature for a few minutes.
5. Refrigerate for at least 1 hour to set.
6. Before serving, top each cup with whipped cream and crushed peppermint candies.
Tips:
- For a stronger coffee flavor, increase the instant coffee granules to your liking.
- Make this recipe ahead of time and store the pudding cups in the fridge for up to 3 days.
- Experiment with different toppings like chocolate shavings or drizzles for added flair.
Salted Caramel Hot Cocoa Brownies
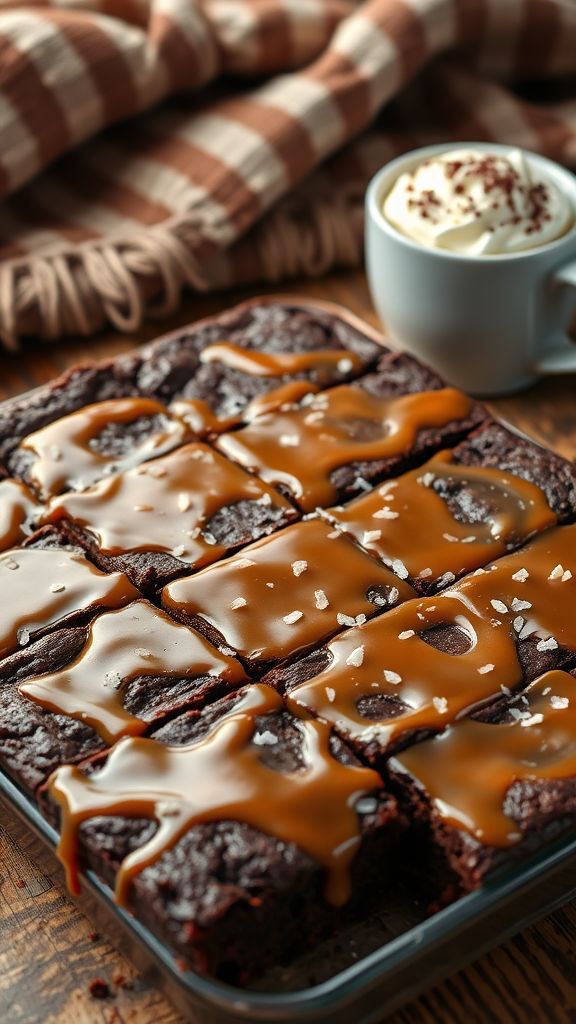
These Salted Caramel Hot Cocoa Brownies bring together the rich flavors of chocolate, warm cocoa, and indulgent salted caramel for a truly decadent treat. With a fudgy texture and a sweet, salty surprise in every bite, they are perfect for cozy evenings or as a delightful dessert for any occasion.
Ingredients:
- 1 cup unsalted butter
- 1 ¼ cups granulated sugar
- 1 cup packed brown sugar
- 4 large eggs
- 1 teaspoon vanilla extract
- 1 cup all-purpose flour
- 1 cup unsweetened cocoa powder
- ½ teaspoon salt
- 1 cup chocolate chips
- 1 cup salted caramel sauce
- 1 teaspoon sea salt flakes
Preparation Time: 15 minutes
Cooking Time: 30 minutes
Total Time: 45 minutes
Instructions:
1. Preheat your oven to 350°F (175°C) and grease a 9×13 inch baking pan.
2. In a large saucepan, melt the butter over medium heat. Once melted, remove from heat and stir in the granulated and brown sugars until well combined.
3. Allow the mixture to cool slightly, then add the eggs one at a time, stirring well after each addition. Stir in the vanilla extract.
4. Sift together the flour, cocoa powder, and salt. Gradually fold this dry mixture into the butter mixture until just combined.
5. Fold in the chocolate chips until evenly distributed throughout the batter.
6. Pour half of the batter into the prepared baking pan and spread it evenly. Drizzle half of the salted caramel sauce over the batter.
7. Pour the remaining brownie batter on top and spread it gently. Drizzle the rest of the caramel sauce and sprinkle the sea salt flakes on top.
8. Bake in the preheated oven for 30 minutes or until a toothpick inserted into the center comes out with a few moist crumbs.
9. Let the brownies cool in the pan for at least 20 minutes before cutting into squares.
Tips:
- For a richer flavor, use dark chocolate chips instead of semi-sweet.
- Let the brownies cool completely for easier cutting.
- Feel free to add nuts for added texture if you enjoy them.
Gingerbread Trifle with Cream Cheese Frosting
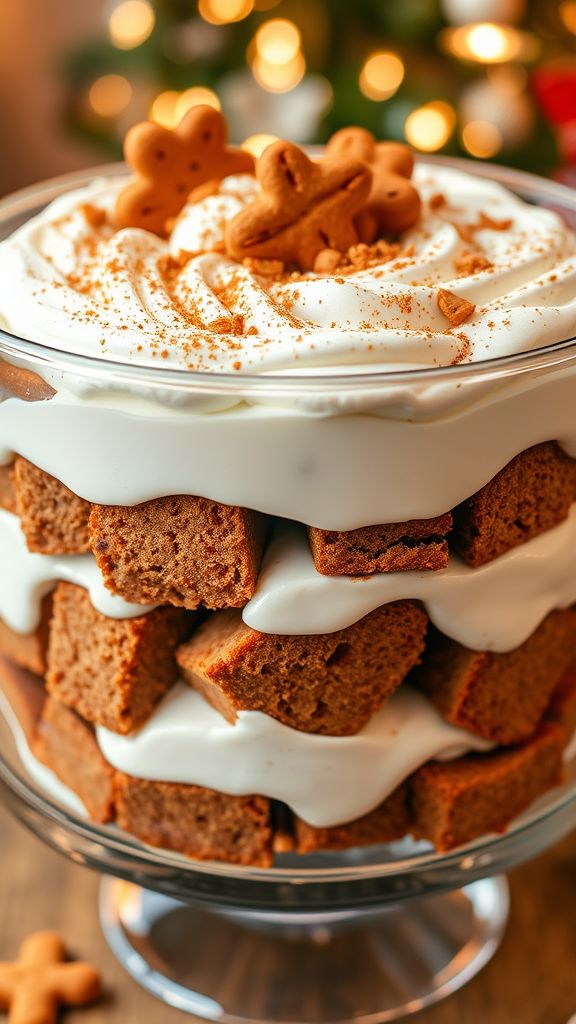
This Gingerbread Trifle with Cream Cheese Frosting combines the warm spices of gingerbread with the creamy sweetness of frosting to create a delightful dessert experience. Layers of moist gingerbread, velvety cream cheese frosting, and whipped cream create a beautiful and tempting presentation that is perfect for the holiday season.
Ingredients:
- 2 cups all-purpose flour
- 1 tablespoon ground ginger
- 1 tablespoon ground cinnamon
- 1 teaspoon baking soda
- 1/2 teaspoon salt
- 1/2 cup unsalted butter, softened
- 1 cup brown sugar, packed
- 1/2 cup molasses
- 2 large eggs
- 1 cup buttermilk
- 8 oz cream cheese, softened
- 1/2 cup powdered sugar
- 1 teaspoon vanilla extract
- 2 cups whipped cream
Preparation Time: 15 minutes
Cooking Time: 30 minutes
Total Time: 45 minutes
Instructions:
1. Preheat your oven to 350°F (175°C) and grease a 9×13 inch baking dish.
2. In a bowl, whisk together flour, ginger, cinnamon, baking soda, and salt.
3. In another bowl, cream the butter and brown sugar until light and fluffy.
4. Beat in the molasses and eggs until well combined.
5. Gradually add the dry ingredients to the wet mixture, alternating with buttermilk, and mix until well combined.
6. Pour the batter into the prepared baking dish and bake for 25-30 minutes, or until a toothpick comes out clean.
7. Let the gingerbread cool completely in the pan.
8. In a separate bowl, mix the cream cheese, powdered sugar, and vanilla extract until smooth.
9. Once the gingerbread is cool, cut it into cubes.
10. In a trifle dish, layer the gingerbread cubes, cream cheese frosting, and whipped cream. Repeat the layers until all ingredients are used, finishing with whipped cream on top.
11. Refrigerate for at least 2 hours before serving to let the flavors meld.
Tips:
- For added flavor, consider sprinkling some crushed gingerbread cookies on top.
- This trifle can be prepared a day in advance; just keep it covered in the refrigerator.
- You can also use store-bought gingerbread if you’re short on time.
Eggnog and Nutmeg Custard Tart
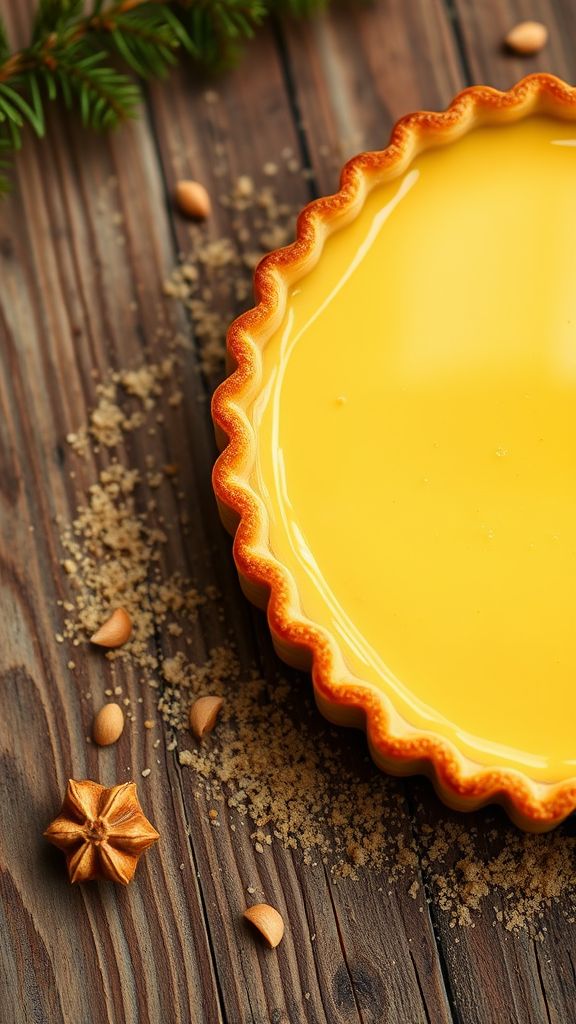
This Eggnog and Nutmeg Custard Tart combines the rich and creamy flavors of traditional eggnog with a hint of warm nutmeg, creating a festive dessert perfect for holiday gatherings. Its velvety custard filling sits atop a buttery crust, making each bite a luxurious treat that captures the essence of the season.
Ingredients:
- 1 ½ cups all-purpose flour
- ½ cup unsalted butter, softened
- ¼ cup granulated sugar
- 1 large egg yolk
- 3 tablespoons cold water
- 2 cups eggnog
- 4 large eggs
- ½ cup granulated sugar
- 1 teaspoon ground nutmeg
- 1 teaspoon vanilla extract
- ¼ teaspoon salt
Preparation Time: 20 minutes
Cooking Time: 45 minutes
Total Time: 1 hour 5 minutes
Instructions:
1. Preheat the oven to 350°F (175°C).
2. In a bowl, mix together the flour and sugar. Add the softened butter and rub it in until the mixture resembles breadcrumbs.
3. Stir in the egg yolk and cold water until the dough comes together. Wrap in plastic wrap and refrigerate for 30 minutes.
4. Roll out the dough on a floured surface and fit it into a tart pan. Trim the edges and poke the bottom with a fork.
5. Bake the crust for 15 minutes, then remove from the oven and set aside to cool.
6. In a large bowl, whisk together the eggnog, eggs, sugar, nutmeg, vanilla, and salt until well combined.
7. Pour the eggnog mixture into the baked tart shell and bake for an additional 30 minutes or until the custard is set and lightly golden.
8. Let it cool before slicing and serving. Optionally, sprinkle additional nutmeg on top before serving.
Tips:
- For an extra touch of flavor, consider adding a splash of rum or bourbon to the eggnog mixture.
- Make sure your eggs are at room temperature for best results in the custard.
- This tart can be made a day in advance and chilled in the refrigerator.
Hazelnut Chocolate Biscotti
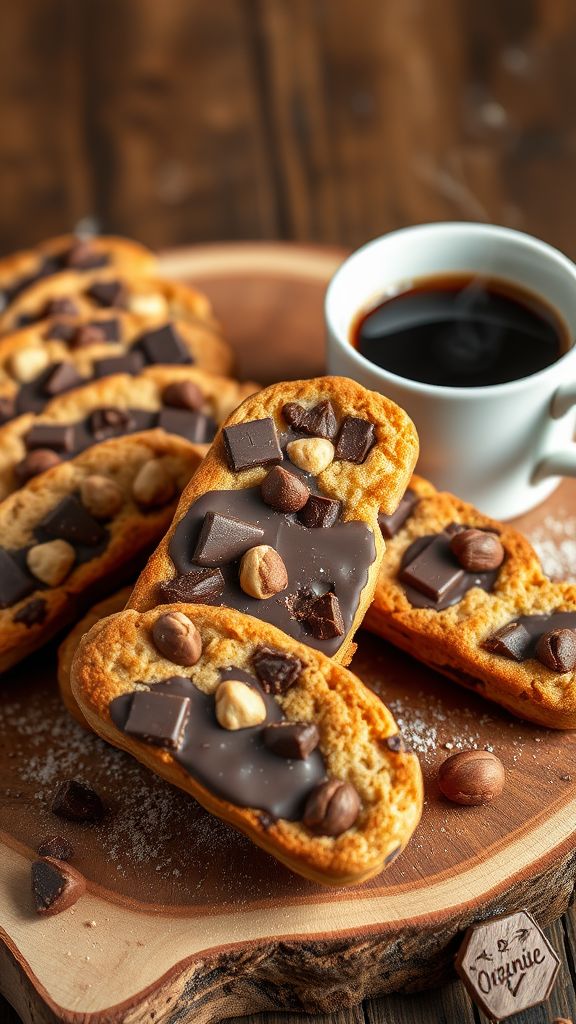
This Hazelnut Chocolate Biscotti is a delightful treat that combines the rich flavors of toasted hazelnuts and luxurious chocolate. It’s perfect for dipping into your favorite coffee or enjoying on its own, making it a wonderful addition to your cookie jar.
Ingredients:
- 2 cups all-purpose flour
- 1 cup granulated sugar
- 1/2 cup unsweetened cocoa powder
- 1 teaspoon baking powder
- 1/2 teaspoon salt
- 3 large eggs
- 1 teaspoon vanilla extract
- 1 cup chopped hazelnuts
- 1/2 cup semisweet chocolate chips
Preparation Time: 15 minutes
Cooking Time: 35 minutes
Total Time: 50 minutes
Instructions:
1. Preheat your oven to 350°F (175°C) and line a baking sheet with parchment paper.
2. In a large bowl, combine the flour, sugar, cocoa powder, baking powder, and salt.
3. In a separate bowl, whisk together the eggs and vanilla extract until well combined.
4. Gradually add the egg mixture to the dry ingredients and mix until a dough forms.
5. Fold in the chopped hazelnuts and chocolate chips until evenly distributed.
6. Divide the dough in half and shape each half into a log approximately 12 inches long and 2 inches wide on the prepared baking sheet.
7. Bake for 25 minutes, then remove from the oven and let the logs cool for 10 minutes.
8. After cooling, slice the logs diagonally into 1-inch thick pieces.
9. Place the slices back on the baking sheet and bake for an additional 10 minutes, flipping halfway through, until crispy.
10. Allow the biscotti to cool completely before serving.
Tips:
- Ensure the hazelnuts are toasted for enhanced flavor.
- Store biscotti in an airtight container to keep them fresh for longer.
- Experiment with different chocolate types for varied flavors.
Decadent Mocha Mousse Cake
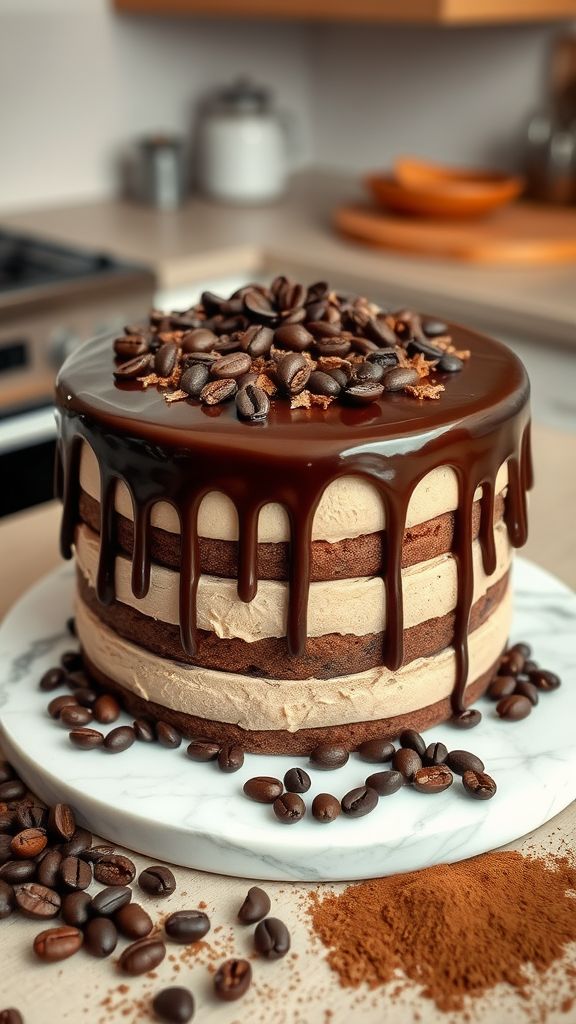
This Decadent Mocha Mousse Cake combines rich chocolate and aromatic coffee flavors to create a dessert that is simply irresistible. With a light and airy mousse layered between moist chocolate cake, it’s an elegant treat perfect for any occasion.
Ingredients:
- 1 ½ cups all-purpose flour
- 1 cup granulated sugar
- ½ cup unsweetened cocoa powder
- 1 tsp baking powder
- ½ tsp baking soda
- ¼ tsp salt
- ½ cup unsalted butter, softened
- 2 large eggs
- 1 tsp vanilla extract
- ¾ cup buttermilk
- ½ cup brewed espresso, cooled
- 1 cup heavy cream
- 8 oz bittersweet chocolate, chopped
- 2 tbsp powdered sugar
- 1 tsp instant coffee granules
Preparation Time: 20 minutes
Cooking Time: 30 minutes
Total Time: 50 minutes
Instructions:
1. Preheat your oven to 350°F (175°C) and grease two 9-inch round cake pans.
2. In a large bowl, whisk together the flour, sugar, cocoa powder, baking powder, baking soda, and salt.
3. Add the softened butter, eggs, vanilla extract, buttermilk, and brewed espresso to the dry ingredients. Mix until smooth.
4. Divide the batter evenly between the prepared pans and smooth the tops.
5. Bake in the preheated oven for 30 minutes, or until a toothpick inserted into the center comes out clean.
6. Allow the cakes to cool in the pans for 10 minutes, then transfer to wire racks to cool completely.
7. While the cakes cool, prepare the mousse by melting the bittersweet chocolate in a bowl over simmering water. Set aside to cool slightly.
8. In a separate bowl, whip the heavy cream and powdered sugar until soft peaks form, then gently fold in the melted chocolate and instant coffee granules.
9. Once the cakes are completely cooled, place one layer on a serving plate and spread half of the mousse over the top.
10. Place the second cake layer on top and spread the remaining mousse over the top and sides of the cake.
11. Refrigerate the cake for at least 2 hours before serving to allow the mousse to set.
Tips:
- For an extra kick, add a splash of coffee liqueur to the mousse.
- Use a high-quality chocolate for the mousse to enhance the flavor.
- Decorate with chocolate shavings or espresso beans for a stunning finish.
Maple Pecan Pie Cheesecake
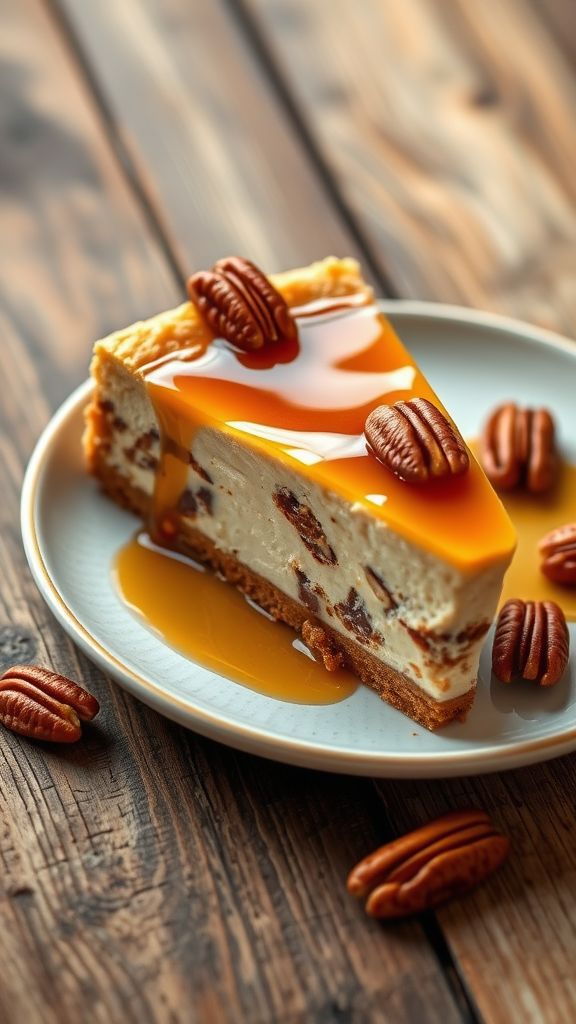
This Maple Pecan Pie Cheesecake combines the creamy richness of traditional cheesecake with the sweet and nutty flavors of maple and pecans. Each bite offers a delightful balance of textures and tastes, making it a perfect dessert for any occasion.
Ingredients:
- 1 ½ cups graham cracker crumbs
- ½ cup unsalted butter, melted
- 1 cup packed brown sugar
- 2 cups cream cheese, softened
- 1 cup sour cream
- 4 large eggs
- ¼ cup maple syrup
- 1 teaspoon vanilla extract
- 1 ½ cups pecans, chopped
- ¼ teaspoon salt
Preparation Time: 15 minutes
Cooking Time: 60 minutes
Total Time: 75 minutes
Instructions:
1. Preheat your oven to 325°F (163°C). Prepare a 9-inch springform pan by greasing the bottom and sides.
2. In a mixing bowl, combine the graham cracker crumbs and melted butter until fully combined. Press the mixture evenly into the bottom of the prepared pan to form a crust.
3. In another bowl, beat together the cream cheese and brown sugar until smooth and creamy. Add the sour cream, eggs, maple syrup, vanilla extract, and salt, mixing until everything is combined without lumps.
4. Gently fold in the chopped pecans into the cheesecake batter.
5. Pour the cheesecake filling over the crust in the springform pan, smoothing the top with a spatula.
6. Bake in the preheated oven for about 60 minutes, or until the center is set but slightly jiggly. Turn off the oven and let the cheesecake cool inside for 1 hour.
7. Remove the cheesecake from the oven and let it cool to room temperature. Chill in the refrigerator for at least 4 hours or overnight before serving.
Tips:
- For the best flavor, use high-quality maple syrup.
- Allowing the cheesecake to cool in the oven helps prevent cracking.
- Top with additional pecans and a drizzle of maple syrup before serving for an extra special touch.
Cranberry Orange Bread Pudding
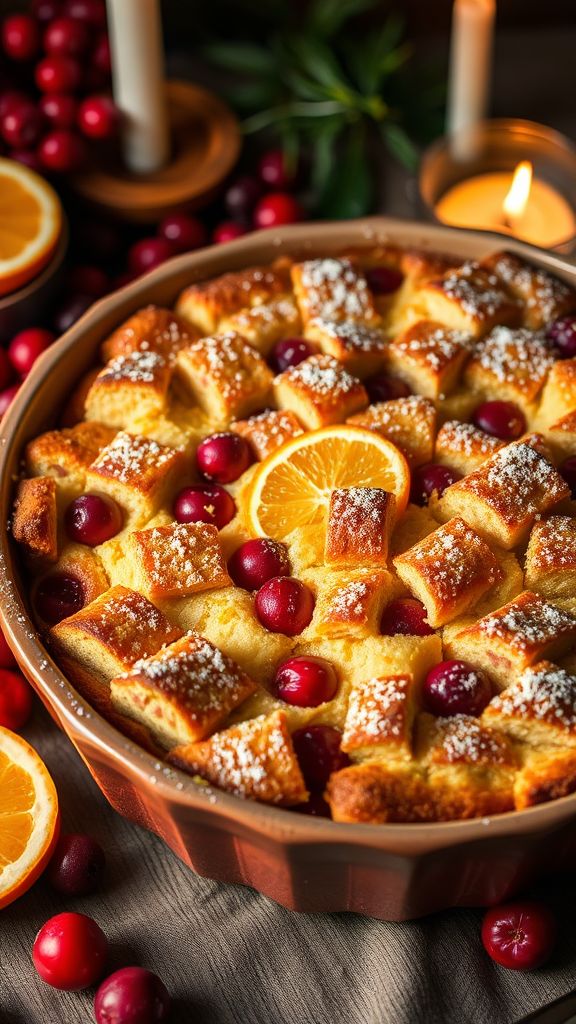
This Cranberry Orange Bread Pudding is a delightful combination of tart cranberries and zesty oranges, creating a comforting dessert that’s perfect for any occasion. The rich custard soaked into fluffy bread makes each bite a delicious experience, sure to please your taste buds.
Ingredients:
- 6 cups cubed day-old bread
- 2 cups milk
- 1 cup heavy cream
- 3/4 cup granulated sugar
- 3 large eggs
- 1 tablespoon vanilla extract
- 1 teaspoon ground cinnamon
- 1/2 teaspoon salt
- 1 cup fresh or frozen cranberries
- 1/2 cup orange juice
- 1 tablespoon orange zest
Preparation Time: 15 minutes
Cooking Time: 45 minutes
Total Time: 1 hour
Instructions:
1. Preheat the oven to 350°F (175°C) and grease a 9×13 inch baking dish.
2. In a large bowl, whisk together the milk, heavy cream, sugar, eggs, vanilla extract, cinnamon, and salt until smooth.
3. Add the cubed bread to the mixture, gently folding until all the bread is soaked.
4. Stir in the cranberries, orange juice, and orange zest.
5. Pour the mixture into the prepared baking dish and spread evenly.
6. Bake in the preheated oven for 45 minutes or until the top is golden brown and a toothpick inserted comes out clean.
7. Let the bread pudding cool for a few minutes before serving.
Tips:
- For added flavor, serve with a drizzle of orange glaze or a scoop of vanilla ice cream.
- Day-old bread works best for achieving the perfect texture, so don’t hesitate to use leftovers.
- Feel free to mix in other dried fruits or nuts for a personalized touch.
S’mores Fondue with Winter Fruits

This S’mores Fondue with Winter Fruits is a delightful twist on a classic treat, perfect for cozy gatherings. The rich chocolate and gooey marshmallows pair beautifully with the crisp freshness of winter fruits, creating a tantalizing balance of flavors. Indulge in this warm, interactive dessert that everyone will love!
Ingredients:
- 1 cup semisweet chocolate chips
- 1/2 cup heavy cream
- 1 teaspoon vanilla extract
- 1 cup mini marshmallows
- 2 ripe pears, sliced
- 1 apple, sliced
- 1 cup strawberries, hulled and halved
- 1 cup graham cracker pieces
Preparation Time: 10 minutes
Cooking Time: 5 minutes
Total Time: 15 minutes
Instructions:
1. In a small saucepan, combine the semisweet chocolate chips and heavy cream over low heat, stirring until melted and smooth.
2. Remove from heat and stir in the vanilla extract.
3. Pour the chocolate mixture into a serving bowl and top with mini marshmallows.
4. Use a kitchen torch or broiler to lightly brown the marshmallows for a few seconds until golden.
5. Arrange the sliced pears, apple, strawberries, and graham cracker pieces around the fondue bowl for dipping.
Tips:
- For added flavor, consider using flavored chocolate chips, such as caramel or peppermint.
- Keep the fondue warm by using a small candle or a fondue pot.
- Try other winter fruits like pomegranate seeds or citrus slices for variety.
Dark Chocolate Peppermint Bark
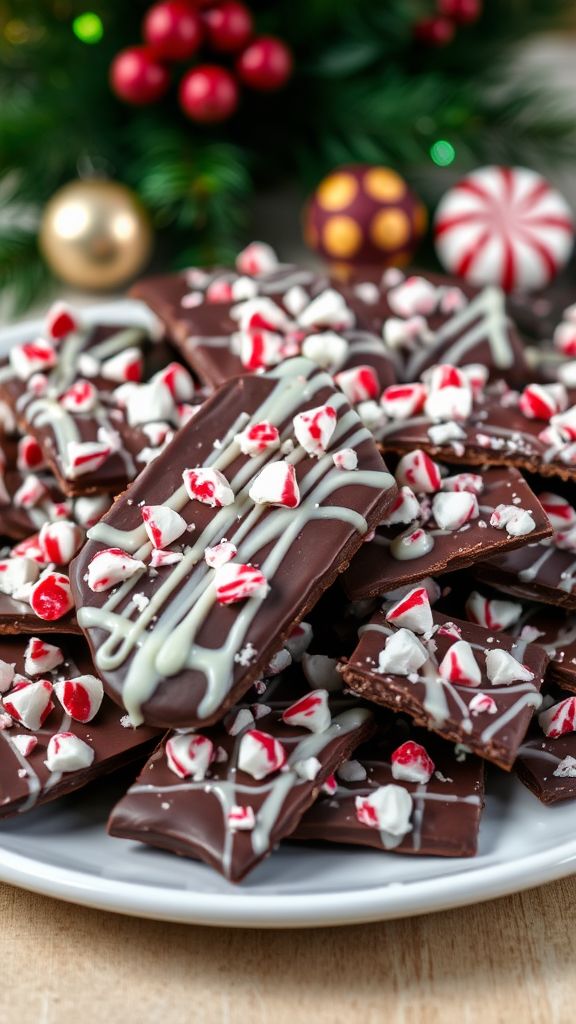
This Dark Chocolate Peppermint Bark recipe is the perfect holiday treat, combining rich, smooth dark chocolate with refreshing bursts of peppermint flavor. It’s not only delicious but also incredibly easy to make, making it a great gift or festive snack.
Ingredients:
- 12 ounces dark chocolate chips
- 2 tablespoons peppermint extract
- 1 cup crushed peppermint candies
- 8 ounces white chocolate chips
Preparation Time: 10 minutes
Cooking Time: 5 minutes
Total Time: 15 minutes
Instructions:
1. Line a baking sheet with parchment paper.
2. In a microwave-safe bowl, melt the dark chocolate chips in 30-second intervals, stirring in between until smooth.
3. Stir in 1 tablespoon of peppermint extract into the melted dark chocolate.
4. Pour the dark chocolate onto the prepared baking sheet and spread it into an even layer.
5. In another bowl, melt the white chocolate chips in a similar fashion, and stir in the remaining 1 tablespoon of peppermint extract.
6. Drizzle the melted white chocolate over the dark chocolate layer and use a toothpick to create a marbled effect.
7. Immediately sprinkle the crushed peppermint candies on top before the chocolate sets.
8. Let the bark cool at room temperature or refrigerate until completely set, then break into pieces.
Tips:
- Use high-quality chocolate for the best flavor.
- Store the bark in an airtight container in a cool, dry place.
- For a fun twist, try adding a sprinkle of sea salt on top before it sets.
Warm Apple Crisp with Cinnamon Whipped Cream
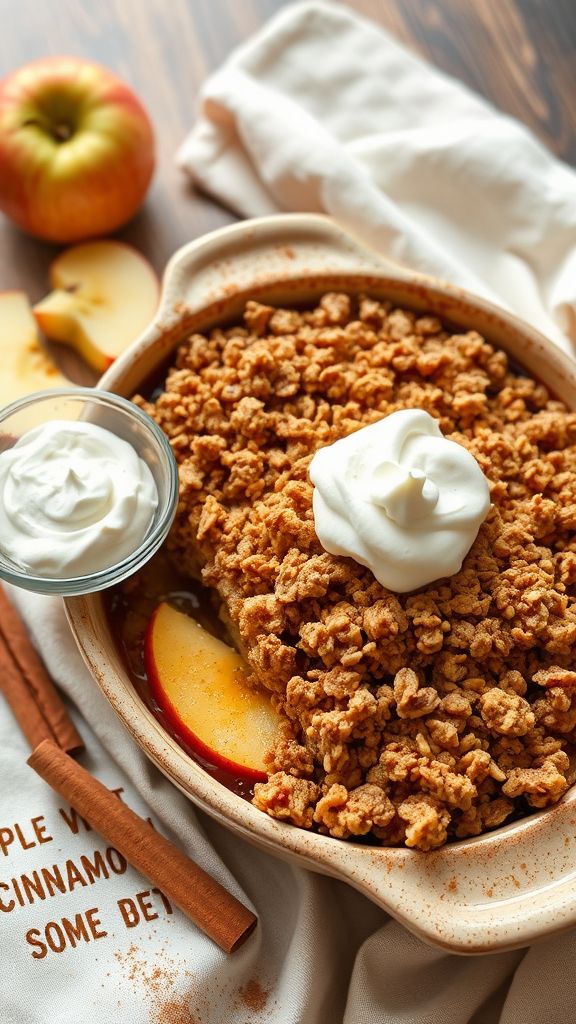
This Warm Apple Crisp with Cinnamon Whipped Cream is the perfect cozy dessert that combines the tartness of fresh apples with a sweet, crumbly topping. The addition of cinnamon-infused whipped cream elevates the dish, creating a delightful balance of flavors that will warm your heart and soul.
Ingredients:
- 6 cups sliced apples (about 6 medium apples)
- 1 tablespoon lemon juice
- 1 cup granulated sugar
- 1 tablespoon all-purpose flour
- 1 teaspoon ground cinnamon
- 1 teaspoon vanilla extract
- 1 cup rolled oats
- 1 cup brown sugar, packed
- 1/2 cup all-purpose flour
- 1/2 cup unsalted butter, melted
- 1 cup heavy cream
- 1 teaspoon ground cinnamon (for whipped cream)
- 2 tablespoons powdered sugar
Preparation Time: 15 minutes
Cooking Time: 45 minutes
Total Time: 1 hour
Instructions:
1. Preheat your oven to 350°F (175°C) and grease a baking dish.
2. In a large bowl, combine sliced apples and lemon juice, mixing well.
3. Add granulated sugar, flour, cinnamon, and vanilla extract to the apples and stir until combined.
4. Transfer the apple mixture to the prepared baking dish and spread it evenly.
5. In a separate bowl, mix rolled oats, brown sugar, flour, and melted butter until crumbly and well combined.
6. Sprinkle the oat mixture evenly over the apples in the baking dish.
7. Bake for 40-45 minutes or until the topping is golden brown and the apples are bubbling.
8. While the crisp is baking, whip together heavy cream, cinnamon, and powdered sugar until soft peaks form.
9. Serve warm apple crisp with a generous dollop of cinnamon whipped cream on top.
Tips:
- Use a mix of tart and sweet apples for a more dynamic flavor.
- Let the apple crisp cool for a few minutes before serving to allow the juices to thicken slightly.
- Store any leftovers in the refrigerator for up to three days, reheating before serving.
Raspberry Chocolate Chip Skillet Cookie
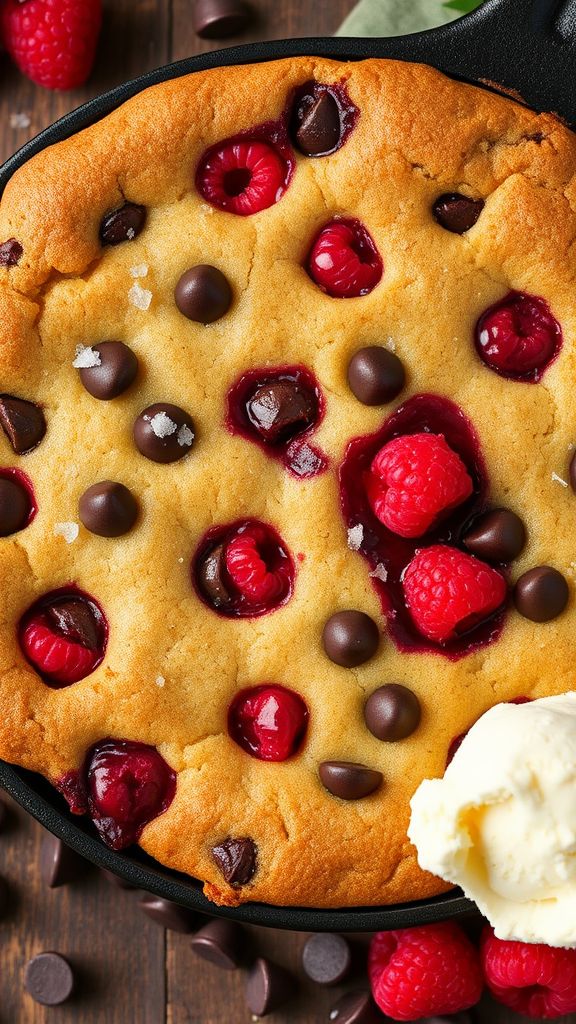
This Raspberry Chocolate Chip Skillet Cookie is a delectable treat that combines the sweetness of chocolate with the tartness of fresh raspberries. Baked in a skillet, it creates a warm, gooey center that perfectly contrasts with its golden edges, making it an irresistible dessert.
Ingredients:
- 1 cup unsalted butter, softened
- 1 cup brown sugar, packed
- 1/2 cup granulated sugar
- 1 teaspoon vanilla extract
- 2 large eggs
- 2 1/4 cups all-purpose flour
- 1 teaspoon baking soda
- 1/2 teaspoon salt
- 1 cup chocolate chips
- 1 cup fresh raspberries
Preparation Time: 15 minutes
Cooking Time: 25 minutes
Total Time: 40 minutes
Instructions:
1. Preheat your oven to 350°F (175°C) and grease a large cast-iron skillet or oven-safe skillet.
2. In a mixing bowl, cream together the softened butter, brown sugar, and granulated sugar until light and fluffy.
3. Add the vanilla extract and eggs to the mixture, mixing well until thoroughly combined.
4. In another bowl, whisk together the all-purpose flour, baking soda, and salt.
5. Gradually mix the dry ingredients into the wet ingredients until just combined.
6. Fold in the chocolate chips and fresh raspberries gently to avoid breaking the raspberries.
7. Transfer the cookie dough into the prepared skillet and spread it evenly.
8. Bake in the preheated oven for 20-25 minutes or until the edges are golden and a toothpick inserted in the center comes out clean.
9. Allow to cool for a few minutes before slicing and serving warm.
Tips:
- Pair with a scoop of vanilla ice cream for an extra indulgent dessert.
- Feel free to substitute frozen raspberries if fresh are not available, but reduce the baking time slightly.
- Store leftovers in an airtight container at room temperature for up to 3 days.
Pecan Praline Flan
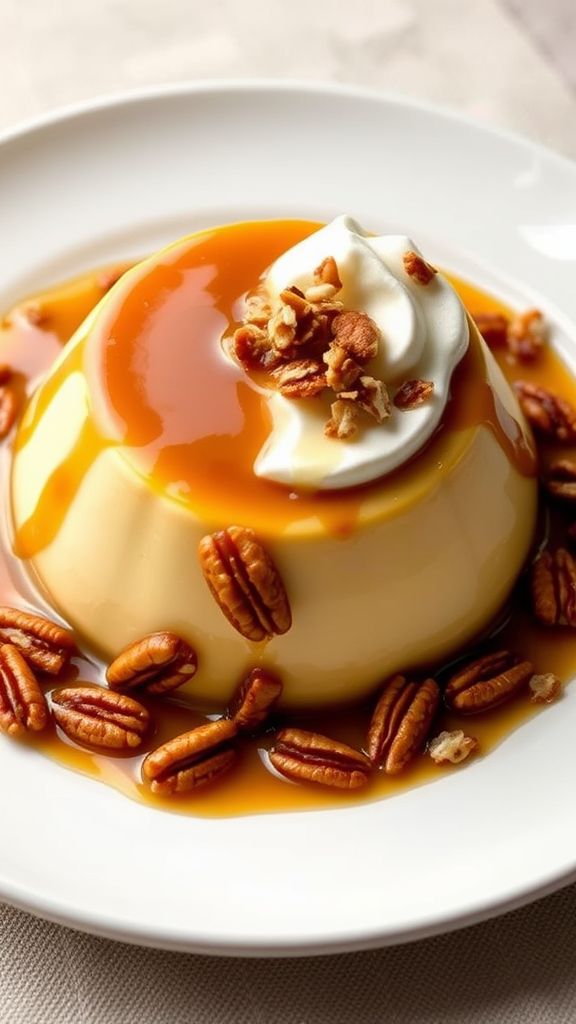
This Pecan Praline Flan is a delightful twist on the classic dessert, combining the creamy richness of flan with the nutty sweetness of pecan praline. The luxurious caramel sauce pairs perfectly with the smooth, vanilla-infused custard, creating an irresistible treat that will impress your guests and satisfy your sweet cravings.
Ingredients:
- 1 cup granulated sugar
- 1/2 cup water
- 1 cup sweetened condensed milk
- 1 cup evaporated milk
- 1 teaspoon vanilla extract
- 3 large eggs
- 1 cup pecans, chopped
- 1/2 cup brown sugar
- 2 tablespoons unsalted butter
Preparation Time: 15 minutes
Cooking Time: 50 minutes
Total Time: 1 hour 5 minutes
Instructions:
1. Preheat your oven to 350°F (175°C).
2. In a saucepan over medium heat, combine the sugar and water to make the caramel. Stir gently until the sugar dissolves, then stop stirring and let it cook until it turns a golden amber color.
3. Quickly pour the caramel into a round flan mold, tilting to coat the bottom evenly. Be careful, as the caramel is very hot.
4. In a large bowl, combine sweetened condensed milk, evaporated milk, vanilla extract, and eggs. Whisk until smooth.
5. Pour the milk mixture over the caramel in the flan mold.
6. In a small skillet, melt the butter over medium heat. Add the brown sugar and chopped pecans, stirring until the pecans are well-coated and the mixture is bubbly, about 3-5 minutes. Set aside to cool slightly.
7. Carefully sprinkle the pecan mixture on top of the custard in the mold.
8. Place the flan mold in a larger baking dish and fill the outer dish with hot water until it comes halfway up the sides of the flan mold.
9. Bake for 50 minutes or until the center is set and a knife inserted comes out clean.
10. Remove from the oven and cool to room temperature. Refrigerate for at least 4 hours or overnight.
11. To serve, run a knife along the edges of the flan, invert onto a plate, and remove the mold. Enjoy!
Tips:
- Ensure that the sugar for the caramel doesn’t burn by keeping a close watch on it as it cooks.
- If desired, you can add a pinch of salt to the pecan mixture for a salted caramel flavor.
- For a more decorative presentation, garnish with additional pecans or whipped cream before serving.
White Chocolate and Raspberry Tart
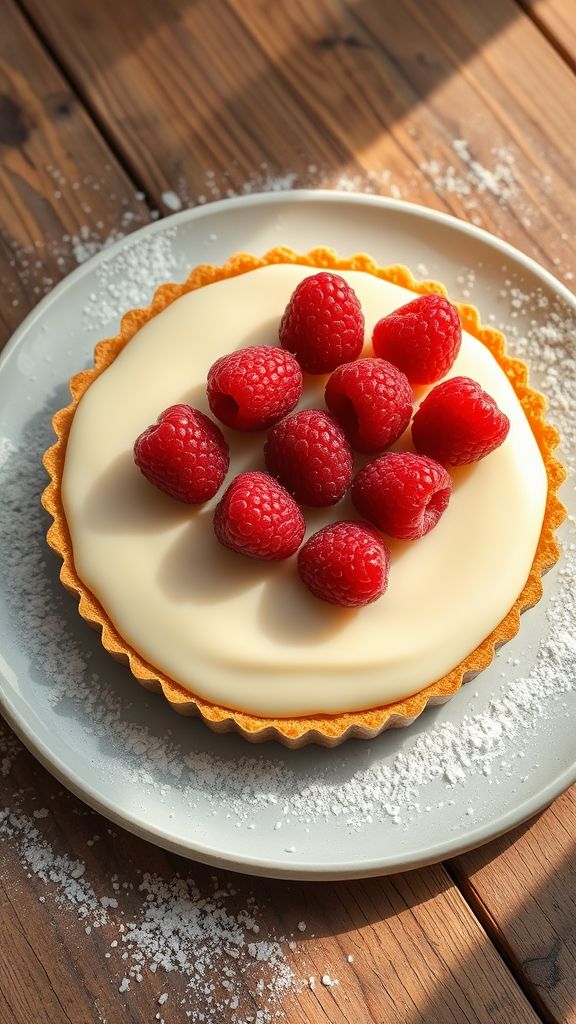
This White Chocolate and Raspberry Tart is a delightful dessert that beautifully combines the creamy richness of white chocolate with the tartness of fresh raspberries. With a buttery crust and a glossy finish, it’s perfect for special occasions or a sweet treat any day.
Ingredients:
- 1 1/2 cups graham cracker crumbs
- 1/2 cup unsalted butter, melted
- 1/4 cup granulated sugar
- 8 oz white chocolate, chopped
- 1 cup heavy cream
- 2 large eggs
- 1 teaspoon vanilla extract
- 2 cups fresh raspberries
- 1 tablespoon powdered sugar, for garnish
Preparation Time: 20 minutes
Cooking Time: 30 minutes
Total Time: 50 minutes
Instructions:
1. Preheat your oven to 350°F (175°C).
2. In a mixing bowl, combine graham cracker crumbs, melted butter, and granulated sugar. Stir until well combined.
3. Press the crumb mixture firmly into the bottom and up the sides of a 9-inch tart pan.
4. Bake the crust in the preheated oven for 10 minutes, then remove and let it cool.
5. In a small saucepan over low heat, melt the white chocolate with half of the heavy cream, stirring until smooth.
6. In a mixing bowl, whisk together the eggs, remaining heavy cream, and vanilla extract.
7. Gradually pour the melted white chocolate mixture into the egg mixture, whisking continuously until fully combined.
8. Pour the white chocolate filling into the cooled crust and smooth the top with a spatula.
9. Bake the tart for 20 minutes, or until the filling is set but still slightly wobbly.
10. Allow the tart to cool at room temperature, then refrigerate for at least 2 hours.
11. Before serving, top with fresh raspberries and dust with powdered sugar.
Tips:
- Make sure the white chocolate is finely chopped for easy melting.
- Store leftover tart in the refrigerator for up to 3 days.
- For an extra twist, add a layer of raspberry jam under the white chocolate filling.
Chai-Spiced Rice Pudding with Almonds
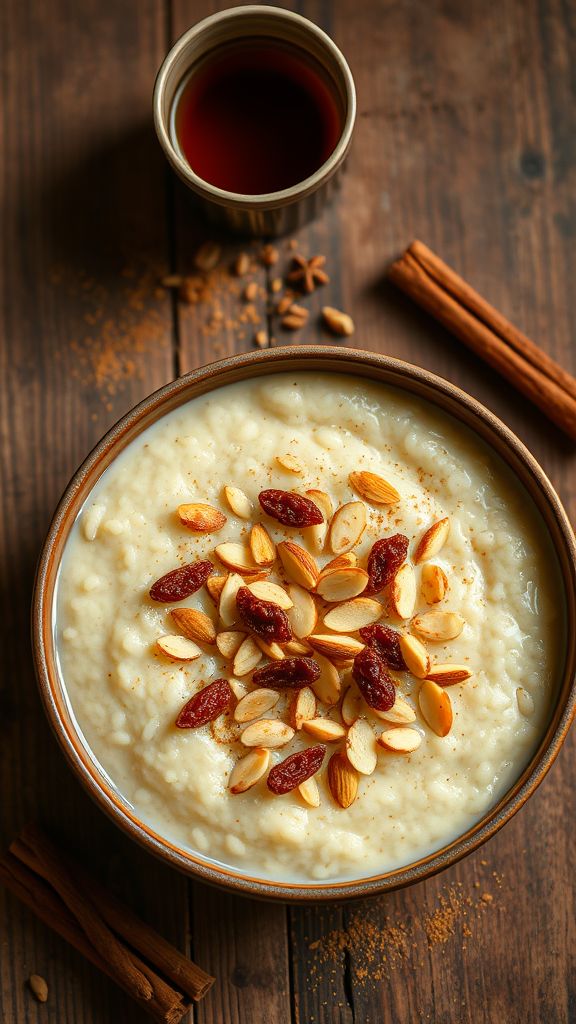
This Chai-Spiced Rice Pudding with Almonds is a delightful dessert that beautifully combines the warm spices of chai tea with creamy rice pudding. The toasted almonds add a satisfying crunch, making each bite aromatic and indulgent. This comforting dish is perfect for cozy evenings or special occasions.
Ingredients:
- 1 cup Arborio rice
- 4 cups whole milk
- 1 cup coconut milk
- 1 cup sugar
- 1 teaspoon ground cinnamon
- 1/2 teaspoon ground ginger
- 1/4 teaspoon ground cardamom
- 1/2 teaspoon vanilla extract
- 1/2 teaspoon salt
- 1/4 cup sliced almonds, toasted
- 1/4 cup raisins (optional)
Preparation Time: 10 minutes
Cooking Time: 30 minutes
Total Time: 40 minutes
Instructions:
1. Rinse the Arborio rice under cold water until the water runs clear.
2. In a large saucepan, combine the rinsed rice, whole milk, coconut milk, sugar, cinnamon, ginger, cardamom, and salt.
3. Bring the mixture to a gentle boil over medium heat, stirring occasionally.
4. Once boiling, reduce the heat to low and let it simmer, uncovered, for about 25-30 minutes or until the rice is tender, stirring often to prevent sticking.
5. Stir in the vanilla extract, toasted almonds, and raisins (if using) during the last few minutes of cooking.
6. Remove from heat and let the pudding cool slightly before serving. It will thicken as it cools.
Tips:
- For a richer flavor, substitute some of the whole milk with heavy cream.
- Experiment with different nuts, such as pistachios or walnuts, for added texture.
- Serve warm or chilled—both options are delicious!
Lemon Blueberry Winter Tart
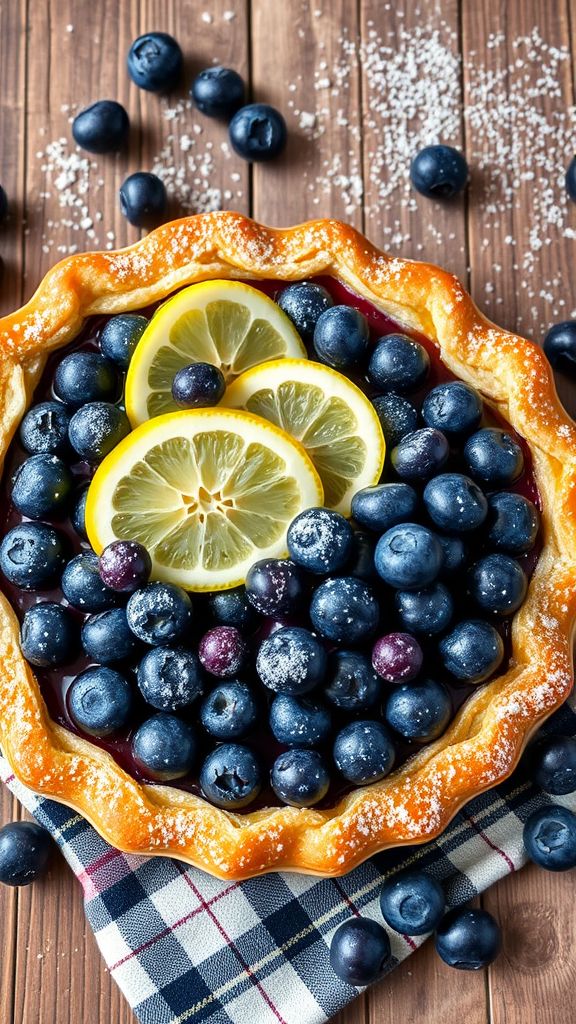
This Lemon Blueberry Winter Tart is a delightful treat that captures the essence of winter with its bright citrus notes and sweet, juicy blueberries. The combination of tangy lemon and succulent blueberries creates a refreshing flavor contrast that is sure to please your palate. Perfect for holiday gatherings or cozy nights in, this tart will warm your heart and keep you coming back for more.
Ingredients:
- 1 ½ cups all-purpose flour
- ½ cup powdered sugar
- ½ cup unsalted butter, softened
- 1 large egg yolk
- 1 tablespoon ice water
- 2 cups fresh blueberries
- 1 cup granulated sugar
- 2 large eggs
- 2 tablespoons lemon juice
- 1 tablespoon lemon zest
- ½ teaspoon vanilla extract
- ¼ teaspoon salt
- 1 tablespoon cornstarch
Preparation Time: 20 minutes
Cooking Time: 35 minutes
Total Time: 55 minutes
Instructions:
1. Preheat your oven to 350°F (175°C).
2. In a mixing bowl, combine the flour and powdered sugar, then cut in the butter until the mixture resembles coarse crumbs.
3. Add the egg yolk and ice water, mixing until the dough forms. Press the dough into a tart pan and trim the edges.
4. Bake the crust in the preheated oven for about 15 minutes or until lightly golden.
5. While the crust is baking, prepare the filling by combining blueberries, granulated sugar, eggs, lemon juice, lemon zest, vanilla extract, salt, and cornstarch in a bowl.
6. Pour the blueberry mixture into the baked tart crust and spread evenly.
7. Bake the tart for an additional 20 minutes or until the filling is set.
8. Remove from oven and allow to cool before serving.
Tips:
- For a sweeter tart, adjust the sugar based on your taste preference.
- Don’t skip the zest; it adds a wonderful depth of flavor.
- Serve with whipped cream or vanilla ice cream for an extra treat.
- Make the crust a day in advance for easier preparation.
Bourbon Maple Bread Pudding
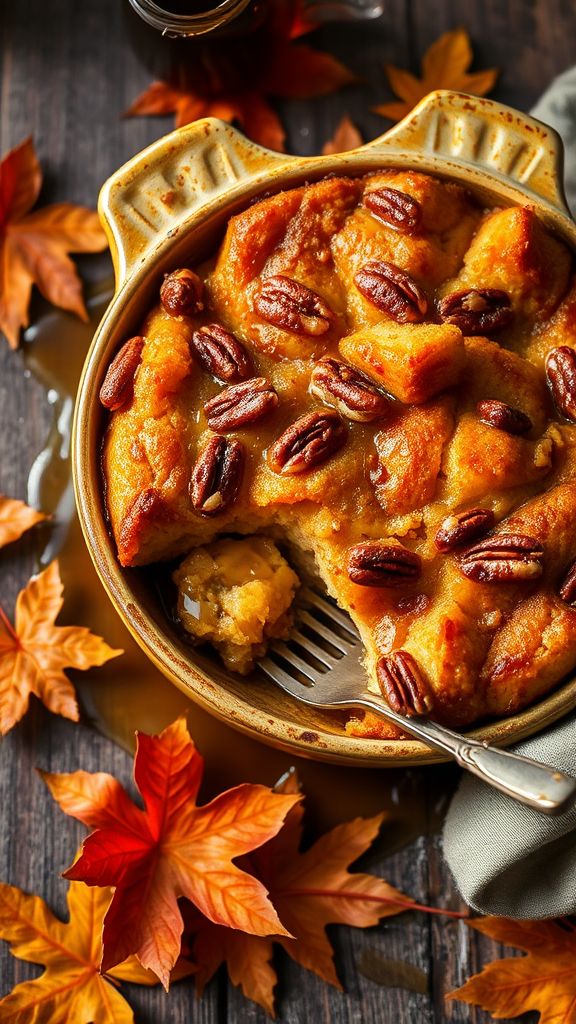
This Bourbon Maple Bread Pudding combines the rich flavors of smooth bourbon and sweet maple syrup, creating a decadent dessert that’s perfect for any occasion. Its comforting warmth and satisfying texture will delight your taste buds and leave you craving more.
Ingredients:
- 4 cups day-old bread, cubed
- 2 cups whole milk
- 1 cup heavy cream
- 4 large eggs
- 1 cup maple syrup
- 1/2 cup bourbon
- 1 teaspoon vanilla extract
- 1 teaspoon ground cinnamon
- 1/4 teaspoon salt
- 1/2 cup chopped pecans (optional)
Preparation Time: 15 minutes
Cooking Time: 50 minutes
Total Time: 1 hour 5 minutes
Instructions:
1. Preheat the oven to 350°F (175°C) and grease a 9×13 inch baking dish.
2. In a large mixing bowl, combine the milk, heavy cream, eggs, maple syrup, bourbon, vanilla extract, cinnamon, and salt. Whisk until well blended.
3. Add the cubed bread to the mixture and stir until the bread is evenly coated. Let it sit for about 10 minutes to absorb the liquid.
4. If using, fold in the chopped pecans.
5. Pour the bread mixture into the prepared baking dish, spreading it out evenly.
6. Bake for 40-50 minutes, or until the top is golden brown and the center is set.
7. Remove from the oven and allow to cool slightly before serving. Enjoy warm, optionally with a drizzle of extra maple syrup on top.
Tips:
- For added flavor, consider using brioche or challah bread instead of standard white bread.
- Pair with a scoop of vanilla ice cream for an indulgent treat.
- To make ahead, prepare the mixture the night before and refrigerate it before baking in the morning.
Molten Nutella Stuffed Cookies
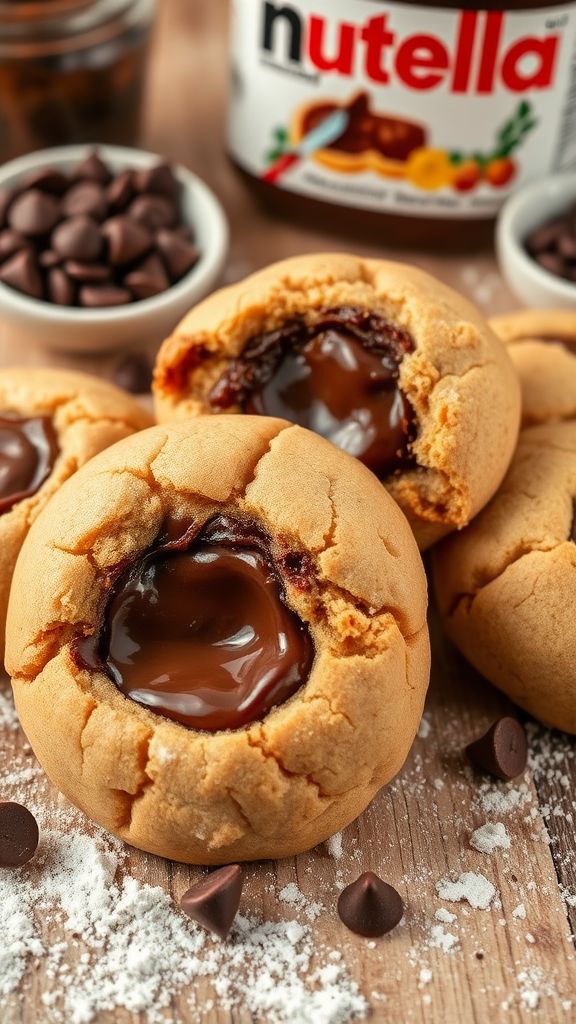
Indulge in the irresistible delight of Molten Nutella Stuffed Cookies, where soft, chewy cookie dough embraces a rich, gooey Nutella center. The harmonious blend of buttery cookies and luscious chocolate makes these treats a true experience for the senses.
Ingredients:
- 2 1/4 cups all-purpose flour
- 1 tsp baking soda
- 1/2 tsp salt
- 3/4 cup unsalted butter, softened
- 3/4 cup granulated sugar
- 3/4 cup packed brown sugar
- 1 tsp vanilla extract
- 2 large eggs
- 1 cup Nutella
- 1/2 cup chocolate chips (optional)
Preparation Time: 15 minutes
Cooking Time: 10 minutes
Total Time: 25 minutes
Instructions:
1. Preheat your oven to 350°F (175°C) and line a baking sheet with parchment paper.
2. In a bowl, whisk together the flour, baking soda, and salt. Set aside.
3. In a separate large bowl, cream the softened butter, granulated sugar, and brown sugar until light and fluffy.
4. Beat in the vanilla extract and eggs until well combined.
5. Gradually mix the dry ingredients into the wet ingredients until just combined.
6. Scoop the dough and form a small ball, then press a thumbprint into the center.
7. Add a generous spoonful of Nutella into the thumbprint and cover with another dough ball, sealing the edges.
8. Place the stuffed cookies onto the prepared baking sheet, spaced about 2 inches apart.
9. Bake for 10-12 minutes, or until the edges are lightly golden and the center looks soft.
10. Let the cookies cool on the baking sheet for a few minutes before transferring them to a wire rack.
Tips:
- For an extra chocolatey flavor, add chocolate chips to the dough.
- Chill the dough for about 30 minutes before baking if you prefer thicker cookies.
- Enjoy the cookies warm for a melty Nutella center!


