My New Cookbook is Out! Check Out Now!
21 Easy Japanese Recipes For Beginners
Did you know that Japanese cuisine is home to some of the healthiest dishes in the world, often packed with fresh ingredients and bold flavors? In this blog post, you’ll discover 21 easy Japanese recipes for beginners that will elevate your cooking game and impress your taste buds. From simple sushi rolls to no-cook seaweed salad, you’ll learn quick and delicious meals that anyone can whip up in no time!
Simple Sushi Rolls
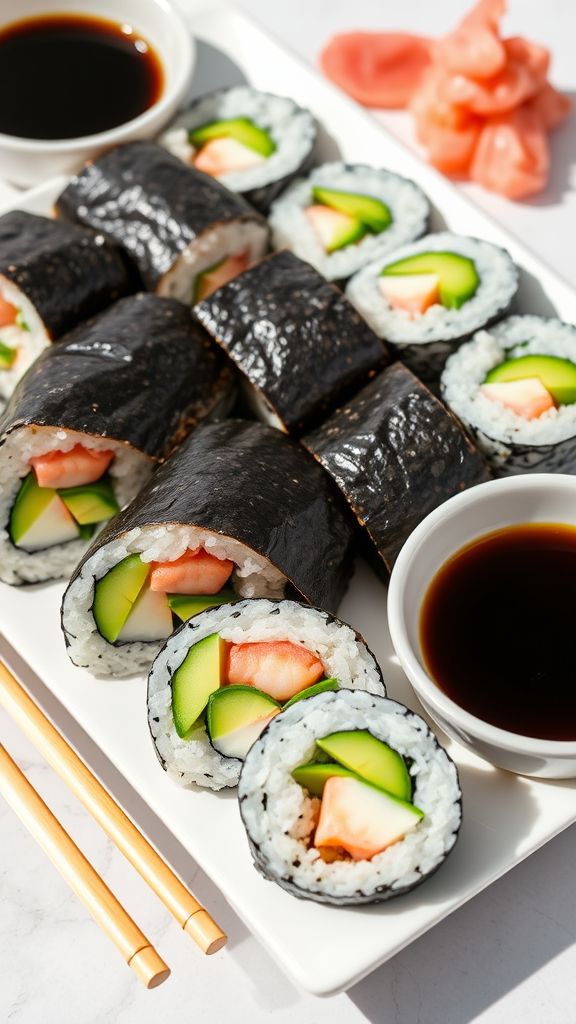
Making sushi at home has never been easier with this Simple Sushi Rolls recipe. These delicious rolls are customizable, fun to prepare, and perfect for impressing your friends and family!
- 1 cup sushi rice
- 1 1/4 cups water
- 2 tablespoons rice vinegar
- 1 tablespoon sugar
- 1/2 teaspoon salt
- 4 sheets nori (seaweed)
- 1 cucumber, julienned
- 1 avocado, sliced
- 4 ounces cooked shrimp or crab meat (optional)
- Soy sauce, for serving
- Wasabi and pickled ginger (optional)
Begin by rinsing the sushi rice under cold water until the water runs clear. This helps remove excess starch and ensures the rice cooks properly. In a medium saucepan, combine the rinsed rice with 1 1/4 cups water and bring it to a boil over medium heat.
Once boiling, reduce the heat to low, cover the pan, and let it simmer for about 15 minutes or until the rice has absorbed all the water. Remove the pan from heat and let it sit, covered, for an additional 10 minutes to steam.
While the rice is resting, prepare the seasoning by mixing 2 tablespoons rice vinegar, 1 tablespoon sugar, and 1/2 teaspoon salt in a small bowl until dissolved. Once the rice has finished steaming, transfer it to a large bowl and gently fold in the vinegar mixture while the rice is still warm. Allow the rice to cool to room temperature.
To assemble the sushi rolls, place a sheet of nori on a bamboo mat or clean surface. With wet hands, take a handful of sushi rice and spread it evenly over the nori, leaving a 1-inch border at the top. Layer your desired fillings, such as julienned cucumber, sliced avocado, and optional shrimp or crab in a line along the bottom edge of the rice-covered nori.
Carefully roll the sushi using the mat, applying gentle pressure to keep the roll tight. Once rolled, use a sharp knife to slice the sushi into 6-8 pieces. Wipe the knife between cuts to keep them neat.
Serve immediately with soy sauce, and add wasabi and pickled ginger if desired. Enjoy your homemade Simple Sushi Rolls!
Easy Teriyaki Chicken

Easy Teriyaki Chicken is a delicious and flavorful dish that brings the taste of Japan right to your kitchen. Perfect for busy weeknights, this recipe is quick to prepare and sure to please the entire family.
- 1 lb boneless, skinless chicken breasts
- 1/2 cup soy sauce
- 1/4 cup honey
- 2 tablespoons rice vinegar
- 2 tablespoons sesame oil
- 2 cloves garlic, minced
- 1 teaspoon fresh ginger, grated
- 1 tablespoon cornstarch
- 2 tablespoons water
- Cooked rice, for serving
- Chopped green onions and sesame seeds, for garnish
To start, cut the chicken breasts into bite-sized pieces. In a medium bowl, whisk together the soy sauce, honey, rice vinegar, sesame oil, minced garlic, and grated ginger until well combined. Reserve about 1/4 cup of this mixture for later use.
Next, heat a large skillet or pan over medium-high heat. Add the chicken pieces to the skillet and cook for about 5-7 minutes, stirring occasionally, until the chicken is cooked through and lightly golden. Once the chicken is fully cooked, pour the reserved teriyaki sauce over the chicken.
In a small bowl, mix the cornstarch and water to create a slurry. Add this to the skillet, stirring constantly to ensure the sauce thickens. Cook for an additional 1-2 minutes until the sauce is glossy and coats the chicken evenly.
Finally, serve the Easy Teriyaki Chicken over a bed of cooked rice. Garnish with chopped green onions and sesame seeds for added flavor and presentation. Enjoy your delicious homemade meal!
Quick Miso Soup
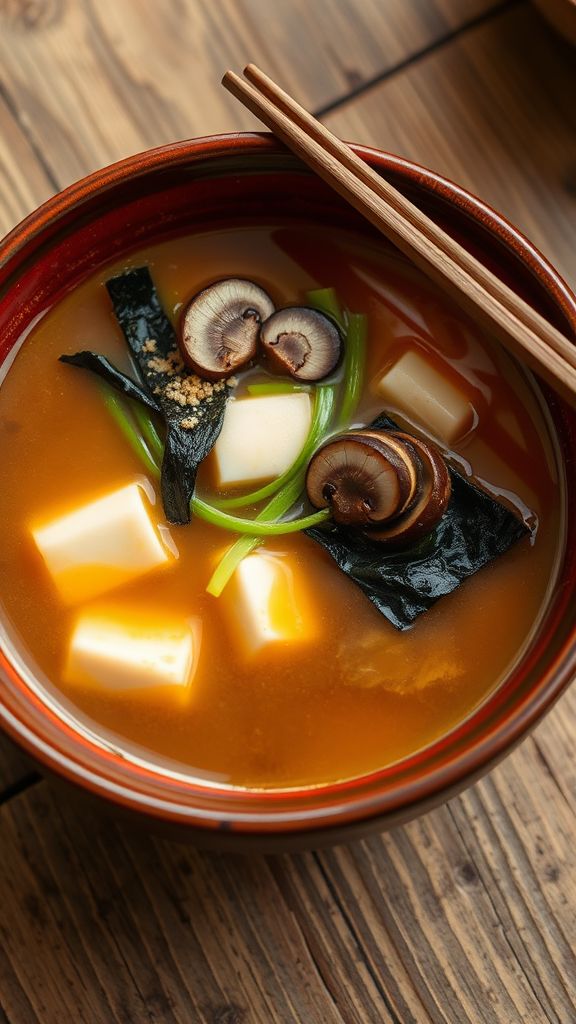
Quick Miso Soup is a comforting and nutritious dish that’s perfect for a cozy night in or as a quick lunch option. With just a few ingredients and minimal prep time, you can enjoy a delicious bowl of this traditional Japanese soup in under 15 minutes.
- 4 cups water
- 3 tablespoons miso paste (white or red)
- 1 cup tofu, cubed
- 1/2 cup green onions, chopped
- 1 cup seaweed (wakame or dulse), rehydrated if dried
- Optional: 1/2 cup mushrooms, sliced
Start by bringing 4 cups of water to a gentle boil in a medium-sized pot over medium heat. If you’re adding mushrooms, toss them in now and allow them to soften for about 3-4 minutes.
Next, reduce the heat to low and add the 3 tablespoons of miso paste. Whisk the miso into the hot water until it is fully dissolved, being careful not to let it boil, as high heat can destroy the beneficial properties of the miso.
Once the miso is incorporated, gently fold in the cubed tofu, rehydrated seaweed, and chopped green onions. Allow the soup to heat through for an additional 2-3 minutes until all ingredients are warmed but not boiling.
Serve your Quick Miso Soup immediately, and enjoy the rich umami flavors. Feel free to customize with your favorite vegetables or proteins for a heartier meal!
Beginner’s Ramen Bowl
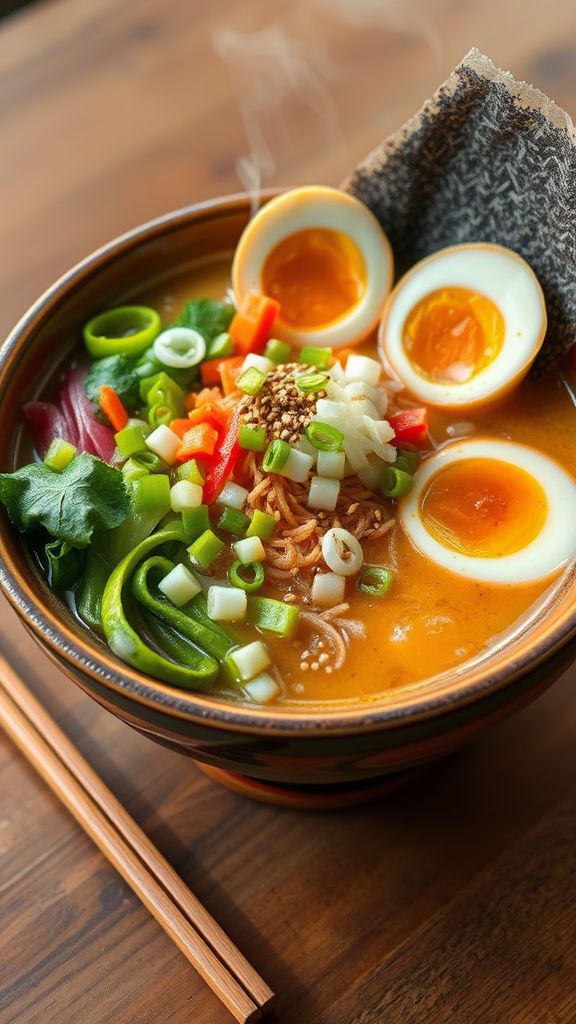
Beginner’s Ramen Bowl is a simple yet satisfying dish that brings the essence of Japanese cuisine to your home kitchen. With easy-to-follow steps and basic ingredients, it’s perfect for anyone looking to enjoy a delicious bowl of ramen without fuss.
- 2 packs of instant ramen noodles
- 4 cups of vegetable or chicken broth
- 1 tablespoon of soy sauce
- 1 teaspoon of sesame oil
- 1 cup of fresh vegetables (such as bok choy, carrots, or spinach)
- 2 green onions, chopped
- 2 eggs
- Optional toppings: nori sheets, chili flakes, or sesame seeds
Start by boiling the broth in a medium pot over medium-high heat. Once it reaches a boil, add the soy sauce and sesame oil, stirring to combine.
Next, gently add the instant ramen noodles to the pot and cook according to the package instructions, usually about 3-4 minutes. During the last minute of cooking, add the fresh vegetables to the pot to blanch them slightly.
While the ramen cooks, bring a small pot of water to a gentle boil. Carefully add the eggs and cook for about 6-7 minutes for a soft-boiled egg. Once done, place the eggs in an ice bath to cool, then peel and slice them in half.
Once the ramen and vegetables are ready, divide the soup into bowls. Top each bowl with a half of the soft-boiled egg, a sprinkle of green onions, and any optional toppings you desire like nori sheets, chili flakes, or sesame seeds.
Enjoy your delightful and comforting Beginner’s Ramen Bowl! Perfect for a cozy night in or a quick meal any time of the day.
Hassle-Free Onigiri
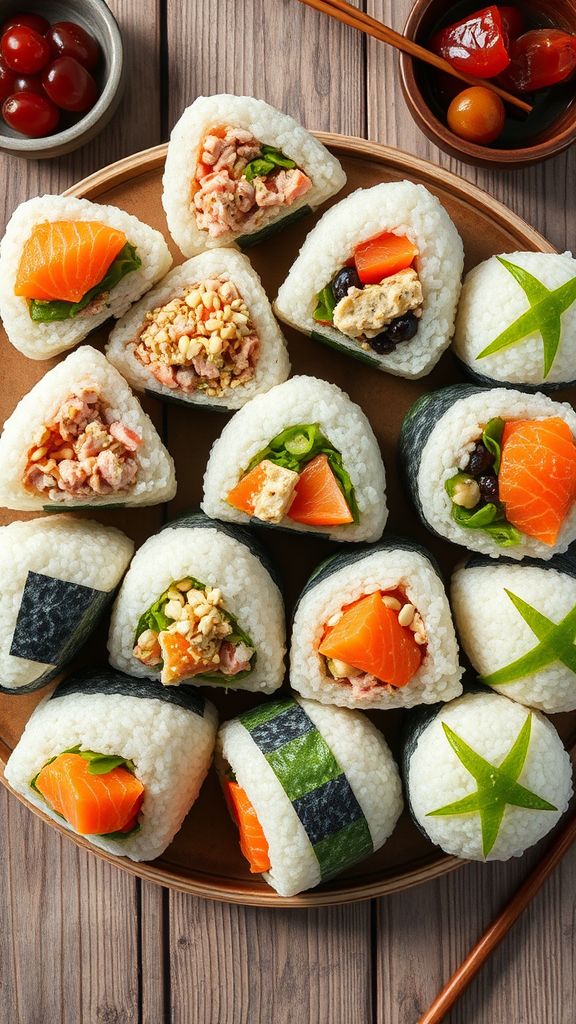
Hassle-Free Onigiri is a delightful way to enjoy rice in a portable format, making it perfect for lunch or snacks. These Japanese rice balls are easy to make and can be filled with your favorite ingredients, allowing for endless customization.
- 2 cups of cooked sushi rice
- 2 tablespoons of rice vinegar
- 1 teaspoon of sugar
- 1 teaspoon of salt
- 1 sheet of nori (seaweed), cut into strips
- Fillings (e.g., tuna salad, pickled plum, cooked salmon, or any preferred filling)
- Sesame seeds for garnish (optional)
To start, prepare your sushi rice by rinsing it under cold water until the water runs clear. Cook the rice in a rice cooker or on the stove according to the package instructions. Once cooked, let it sit covered for about 10-15 minutes to steam, making it easier to mold.
In a small bowl, mix rice vinegar, sugar, and salt until the sugar dissolves. Once the rice is ready, transfer it to a large bowl and gently fold in the vinegar mixture, ensuring the rice is coated evenly. Allow the rice to cool slightly until it’s warm but manageable to handle.
To shape the Onigiri, wet your hands with water to prevent sticking and take a handful of rice (about 1/3 cup). Make a small indent in the center and place your desired filling inside. Mold the rice around the filling into a triangular or round shape, pressing firmly but gently to hold it together.
Once shaped, wrap a strip of nori around the Onigiri for added flavor. If desired, sprinkle with sesame seeds for an extra crunch. Repeat the process for the remaining rice and fillings.
Enjoy your Hassle-Free Onigiri right away or store them in an airtight container for up to 1 day in the fridge. These tasty rice balls can be eaten cold or at room temperature, making them an ideal snack for any occasion!
Classic Japanese Fried Rice

Classic Japanese Fried Rice, or “Chahan,” is a simple yet delicious dish that transforms leftover rice into a flavorful meal. It’s versatile and can be customized with a variety of ingredients, making it perfect for any occasion.
- 2 cups cooked rice (preferably day-old)
- 2 tablespoons vegetable oil
- 2 eggs, lightly beaten
- 1 cup mixed vegetables (peas, carrots, and corn)
- 2 green onions, finely chopped
- 3 tablespoons soy sauce
- 1 tablespoon mirin (optional)
- Salt and pepper to taste
To begin, heat 1 tablespoon of vegetable oil in a large frying pan or wok over medium-high heat. Once the oil is hot, pour in the beaten eggs and scramble them until fully cooked. Remove the eggs from the pan and set them aside.
In the same pan, add the remaining 1 tablespoon of vegetable oil. Add the mixed vegetables and stir-fry for about 2-3 minutes until they start to soften. Then, add the cooked rice, breaking up any clumps, and stir-fry everything together for another 3-4 minutes.
Once the rice is heated through, return the scrambled eggs to the pan. Add the soy sauce and mirin (if using), and stir well to combine. Cook for an additional 2 minutes, allowing the flavors to meld.
Finally, stir in the chopped green onions and season with salt and pepper to taste. Serve hot, and enjoy your delicious homemade Classic Japanese Fried Rice!
Sweet and Savory Yakitori

Experience the delightful fusion of flavors with this Sweet and Savory Yakitori. Perfect for a casual dinner or a flavorful appetizer, this dish will transport your taste buds straight to Japan!
- 1 lb chicken thighs, boneless and skinless
- 1/4 cup soy sauce
- 2 tablespoons mirin
- 2 tablespoons sake
- 2 tablespoons brown sugar
- 1 teaspoon grated ginger
- 1 teaspoon minced garlic
- 8-10 bamboo skewers (soaked in water for 30 minutes)
- Chopped green onions (for garnish)
To begin, cut the chicken thighs into bite-sized pieces, ensuring they are uniform for even cooking. In a medium bowl, whisk together the soy sauce, mirin, sake, brown sugar, grated ginger, and minced garlic to create a marinade.
Add the chicken pieces to the bowl and make sure they are well coated with the marinade. Allow the chicken to marinate for at least 30 minutes in the refrigerator to enhance the flavors.
Once the chicken has marinated, preheat your grill or grill pan over medium heat. Thread the chicken pieces onto the soaked bamboo skewers, leaving a little space between each piece for even cooking.
Grill the skewers for about 5-7 minutes on each side, or until the chicken is cooked through and has a nice char. If desired, brush some additional marinade onto the chicken during the last few minutes of grilling for extra flavor.
Once cooked, remove the skewers from the grill and let them rest for a minute. Garnish with chopped green onions before serving, and enjoy your delicious Sweet and Savory Yakitori!
No-Fuss Tempura Vegetables

This easy recipe for No-Fuss Tempura Vegetables allows you to enjoy crispy, light tempura at home without the hassle. Perfect as an appetizer or side dish, these deliciously battered vegetables make for a delightful treat that complements any meal.
- 1 cup all-purpose flour
- 1/2 cup cornstarch
- 1 cup ice-cold water
- 1 teaspoon baking powder
- 1 teaspoon salt
- Vegetable oil (for frying)
- 2 cups mixed vegetables (e.g. bell peppers, zucchini, broccoli, and carrots)
To begin, prepare your mixed vegetables by cutting them into bite-sized pieces. It’s important to ensure that the vegetables are uniform in size to promote even cooking. You can use your favorite vegetables or whatever you have on hand!
In a large bowl, whisk together the all-purpose flour, cornstarch, baking powder, and salt. Gradually add the ice-cold water while stirring until the batter is just combined. Be careful not to overmix; a few lumps are okay!
Next, heat vegetable oil in a deep frying pan or pot over medium-high heat. You want the oil to reach a temperature of about 350°F (175°C). To test if your oil is ready, drop a small amount of batter into it; if it sizzles and floats to the surface, you’re good to go!
Once the oil is hot, dip each piece of your prepared vegetables into the batter, ensuring they are well coated. Carefully place them in the hot oil in batches, frying for about 2-3 minutes or until golden brown and crispy. Do not overcrowd the pan, as this can lower the oil temperature and result in soggy tempura.
After frying, use a slotted spoon to remove the tempura vegetables from the oil and place them on a paper towel-lined plate to drain excess oil. Serve the tempura hot, accompanied by soy sauce or your favorite dipping sauce for a delightful experience!
Japanese Cucumber Salad
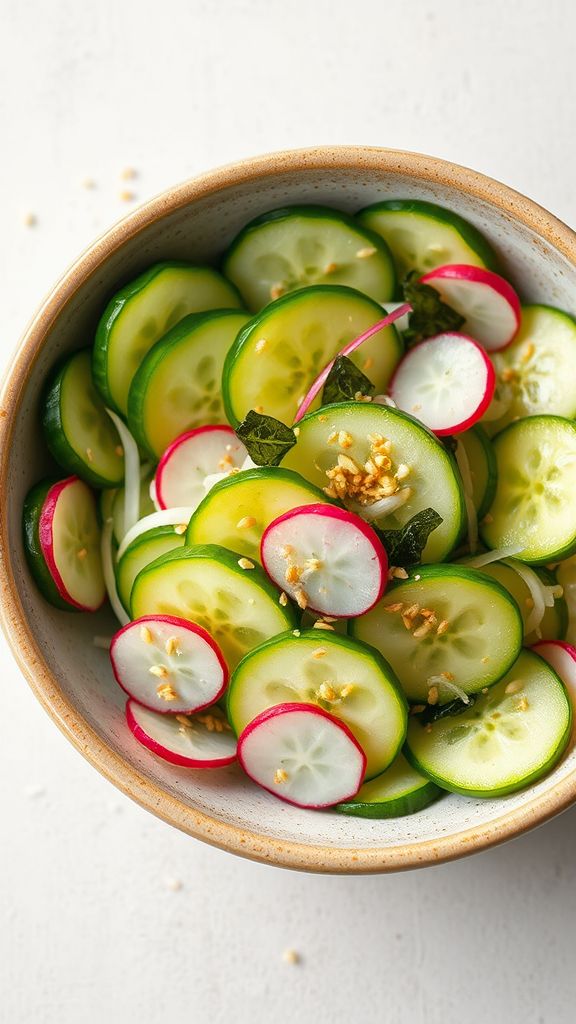
Japanese Cucumber Salad, or “Sunomono,” is a refreshing dish that balances the crispness of cucumbers with a tangy vinegar dressing. It’s perfect as a side dish for any meal and is especially popular during warmer months.
- 2 medium Japanese cucumbers
- 1 teaspoon salt
- 3 tablespoons rice vinegar
- 1 tablespoon sugar
- 1 teaspoon soy sauce
- 1 teaspoon sesame oil
- Toasted sesame seeds for garnish
- Optional: thinly sliced radishes or seaweed for added garnish
Begin by thoroughly washing the Japanese cucumbers. Cut the cucumbers in half lengthwise and use a spoon to scrape out the seeds. Then, slice the cucumbers thinly into half-moons and place them in a bowl.
Sprinkle the sliced cucumbers with salt and toss gently. Allow them to sit for about 10 minutes, which will help extract excess moisture and make the cucumbers tender.
Meanwhile, in a separate bowl, whisk together the rice vinegar, sugar, soy sauce, and sesame oil until the sugar dissolves completely. This will create a tasty dressing that will enhance the flavor of the salad.
After the cucumbers have released their moisture, rinse them under cold water to remove the excess salt. Drain well and then add them back into the bowl.
Pour the dressing over the drained cucumbers and toss gently to combine. Allow the salad to sit for another 10 minutes to absorb the flavors.
Finally, serve the salad chilled, garnished with toasted sesame seeds and any additional garnishes like thinly sliced radishes or seaweed, if desired. Enjoy your refreshing Japanese Cucumber Salad!
Fast and Flavorful Udon Noodles
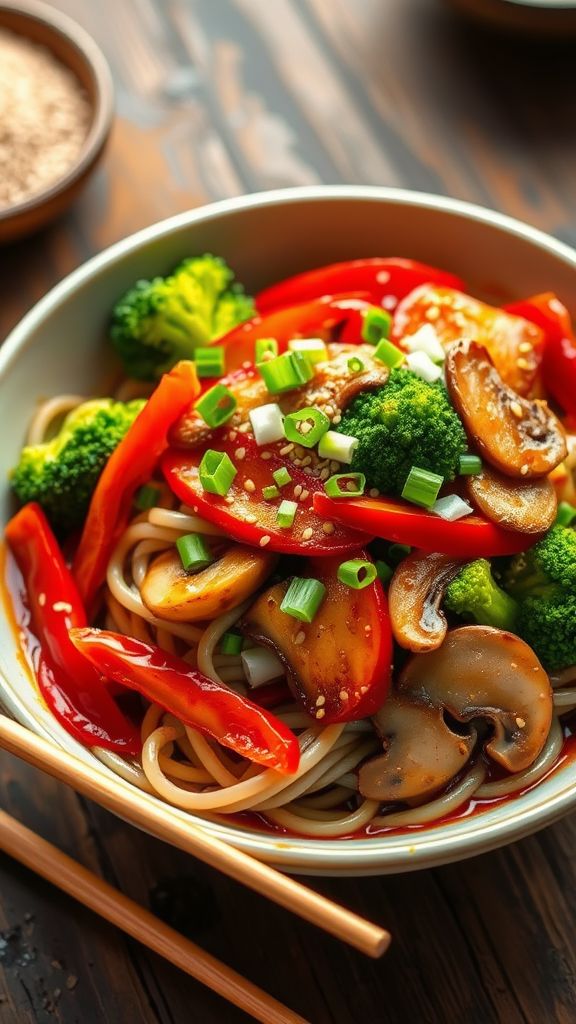
Experience the deliciousness of Fast and Flavorful Udon Noodles, a quick dish that’s perfect for busy weeknights or a delightful lunch. This recipe brings together chewy udon noodles, vibrant vegetables, and a savory sauce for a satisfying meal in under 30 minutes.
- 8 oz udon noodles
- 2 tablespoons vegetable oil
- 1 cup broccoli florets
- 1 bell pepper, sliced
- 1 cup sliced mushrooms
- 2 cloves garlic, minced
- 3 tablespoons soy sauce
- 1 tablespoon oyster sauce
- 1 teaspoon sesame oil
- 2 green onions, chopped
- Sesame seeds for garnish (optional)
Begin by cooking the udon noodles according to the package instructions. This usually takes about 8-10 minutes. Once cooked, drain the noodles and rinse them under cold water to stop the cooking process. Set aside.
In a large pan or wok, heat the vegetable oil over medium-high heat. Add the broccoli, bell pepper, and mushrooms to the pan. Stir-fry the vegetables for about 4-5 minutes or until they are just tender but still crisp.
Next, add the minced garlic to the pan and sauté for an additional 30 seconds until fragrant. Then, pour in the soy sauce, oyster sauce, and sesame oil, stirring well to combine the flavors.
Introduce the cooked udon noodles to the pan. Toss everything together gently, ensuring the noodles are well-coated with the sauce and mixed with the vegetables. Cook for another 2-3 minutes to heat the noodles through.
Finally, remove the pan from heat and stir in the chopped green onions. Serve the dish hot, garnished with sesame seeds if desired, and enjoy your tasty bowl of Fast and Flavorful Udon Noodles!
Easy Gyudon (Beef Bowl)
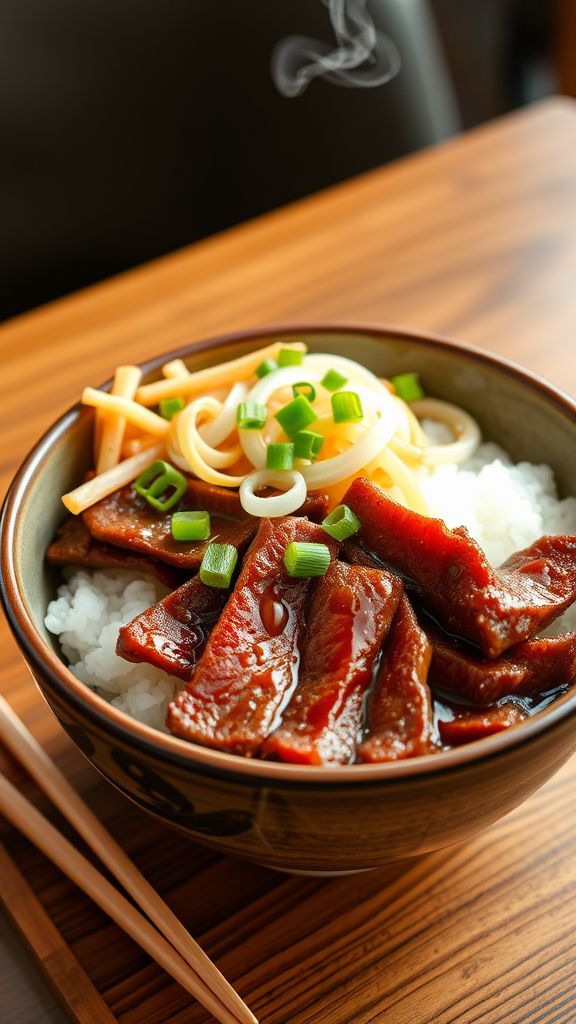
Gyudon, or Japanese beef bowl, is a comforting dish that combines tender beef with savory broth served over warm rice. This easy recipe allows you to enjoy a delicious meal in just under 30 minutes!
- 2 cups of cooked rice
- 300g of thinly sliced beef (like sirloin or ribeye)
- 1 large onion, thinly sliced
- 2 tablespoons of soy sauce
- 1 tablespoon of mirin
- 1 tablespoon of sake (optional)
- 1 tablespoon of sugar
- 1 cup of dashi stock (or beef broth)
- 2 green onions, chopped (for garnish)
- Pickled ginger (for serving, optional)
Begin by heating a large skillet over medium heat. Add the thinly sliced onion and sauté until they become translucent, about 5 minutes. This step adds a rich flavor base to your gyudon.
Next, add the thinly sliced beef to the skillet, stirring gently to combine with the onions. Cook for about 3-4 minutes, or until the beef is just browned. Be careful not to overcook the beef, as it will continue to cook slightly during the next steps.
In a bowl, combine the soy sauce, mirin, sake, and sugar, then pour this mixture over the beef and onions. Pour in the dashi stock (or beef broth) and bring the entire mixture to a gentle simmer. Allow it to cook for another 5 minutes, so the flavors meld beautifully.
While the beef simmers, prepare your serving bowls. Place a generous portion of cooked rice in each bowl. Once the beef mixture is ready, carefully spoon it over the rice.
Garnish your gyudon with chopped green onions and add a side of pickled ginger if desired. Enjoy your delicious and easy gyudon!
Simple Matcha Green Tea Ice Cream
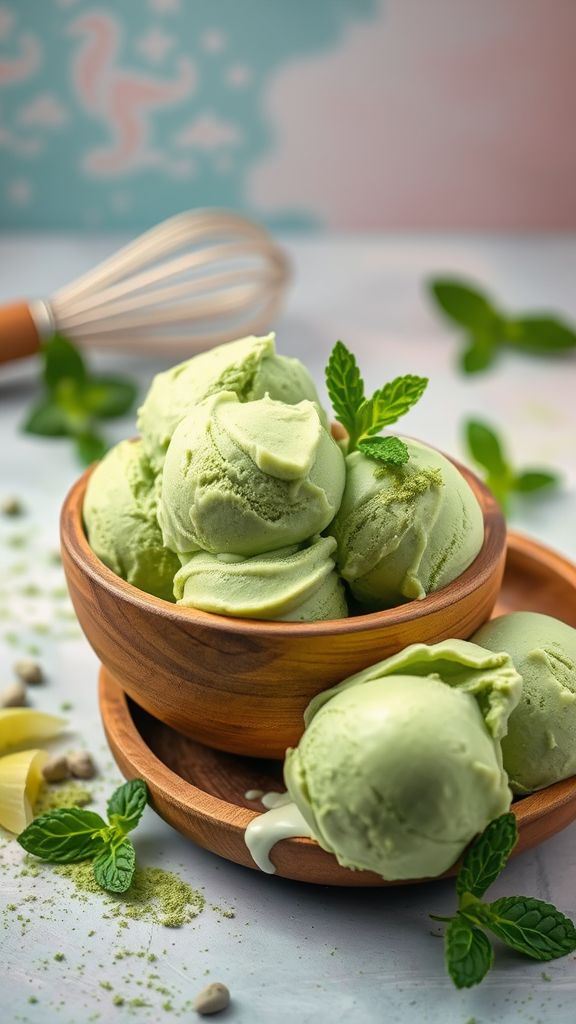
Indulge in the creamy bliss of homemade Matcha Green Tea Ice Cream, a refreshing dessert perfect for warm days. This simple recipe brings together the rich flavors of matcha with the smooth texture of creamy ice cream.
- 2 cups of heavy cream
- 1 cup of whole milk
- 3/4 cup of granulated sugar
- 4 teaspoons of culinary-grade matcha powder
- 1 teaspoon of pure vanilla extract
- 1 pinch of salt
To start, combine the heavy cream, whole milk, and granulated sugar in a mixing bowl. Whisk the ingredients together until the sugar is fully dissolved, which should take about 2-3 minutes.
Next, sift the matcha powder into the mixture to avoid lumps. Add the vanilla extract and a pinch of salt, then whisk everything together until well blended and smooth. This will help to incorporate the matcha evenly into the cream.
Once the mixture is ready, cover the bowl with plastic wrap and refrigerate for at least 2 hours to allow the flavors to meld and the mixture to chill properly.
After the chilling period, pour the mixture into your ice cream maker and churn according to the manufacturer’s instructions, usually for about 20-30 minutes, until it reaches a soft-serve consistency.
Finally, transfer the ice cream into a lidded container and freeze for an additional 4 hours to firm up further. Enjoy your homemade Matcha Green Tea Ice Cream on its own or as a delightful topping for your favorite desserts!
Instant Donburi (Rice Bowl)

Instant Donburi is a delicious and versatile Japanese rice bowl that can be quickly prepared in a matter of minutes. This recipe is perfect for weeknight dinners or a comforting meal any time of the day.
- 2 cups of cooked rice
- 1 cup of your choice of protein (chicken, beef, tofu, or shrimp)
- 1 cup of mixed vegetables (like bell peppers, carrots, and peas)
- 2 tablespoons soy sauce
- 1 tablespoon mirin (optional)
- 1 tablespoon vegetable oil
- 1 green onion, chopped
- 1 teaspoon sesame seeds (for garnish)
- Salt and pepper to taste
Start by heating the vegetable oil in a large skillet over medium-high heat. Once the oil is hot, add your choice of protein and cook until it is browned and cooked through, typically for about 5-7 minutes. If using tofu, ensure it is crispy on the edges.
Add the mixed vegetables to the skillet and stir-fry for an additional 3-4 minutes until they become tender. Season the mixture with salt and pepper to taste.
Pour in the soy sauce and mirin (if using), stirring well to combine all the ingredients. Allow the mixture to simmer for about 2 minutes so the flavors meld together.
To serve, place the cooked rice into bowls and top it with the protein and vegetable mixture. Garnish with chopped green onion and a sprinkle of sesame seeds. Enjoy your Instant Donburi hot!
Quick Japanese Pancakes

Quick Japanese Pancakes are light, fluffy, and incredibly delicious, perfect for a cozy breakfast or brunch. Their unique texture and delightful flavor will make you feel like you’re dining at a trendy café in Japan.
- 1 cup all-purpose flour
- 2 tablespoons sugar
- 2 teaspoons baking powder
- 1/2 teaspoon salt
- 1 large egg
- 3/4 cup milk
- 1 teaspoon vanilla extract
- Butter or oil for frying
- Maple syrup and fresh fruit for serving
Start by combining the dry ingredients in a medium-sized bowl: flour, sugar, baking powder, and salt. Whisk the ingredients together until thoroughly mixed.
In another bowl, whisk together the egg, milk, and vanilla extract until well combined. Gradually add the wet mixture to the dry ingredients and stir until just combined. Be careful not to over-mix; the batter should be slightly lumpy.
Heat a non-stick skillet or griddle over medium-low heat and add a small amount of butter or oil to coat the surface. Once the skillet is hot, pour about 1/4 cup of batter for each pancake onto the skillet. Cook for approximately 3-4 minutes, or until bubbles form on the surface and the edges look set.
Carefully flip the pancakes and cook for an additional 2-3 minutes, or until golden brown and cooked through. Remove the pancakes from the skillet and repeat with the remaining batter, adjusting the heat if necessary to prevent burning.
Serve the pancakes warm, topped with maple syrup and fresh fruit for a delightful finish. Enjoy your fluffy Japanese pancakes as a sweet start to your day!
Speedy Agedashi Tofu
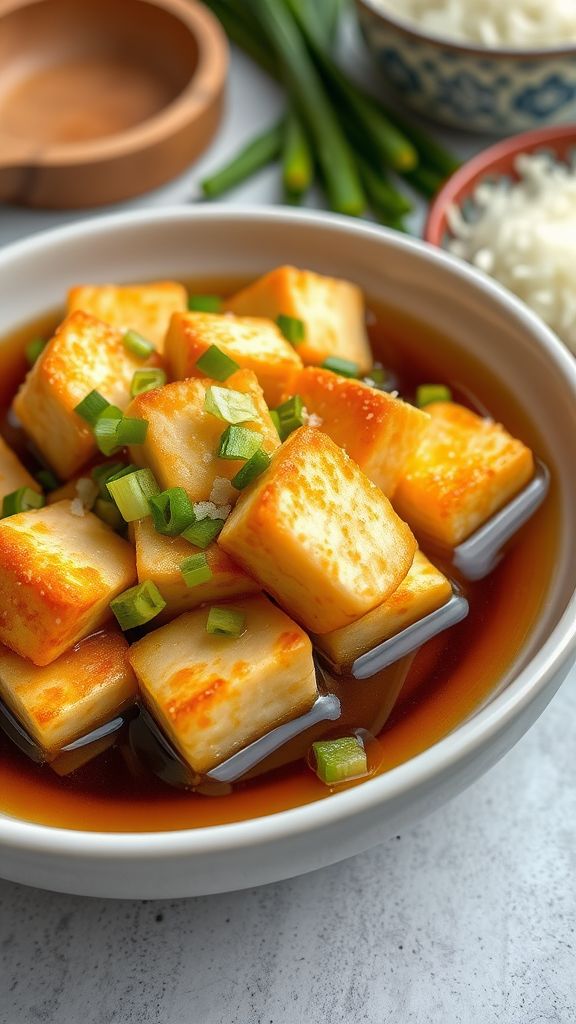
Speedy Agedashi Tofu is a quick and delicious Japanese dish that makes for an excellent appetizer or side. This recipe delivers crispy tofu paired with a savory dashi-based sauce, perfect for impressing guests or indulging in a comforting meal.
- 1 block of firm tofu
- 1/4 cup cornstarch
- Vegetable oil for frying
- 1/2 cup dashi broth (can use instant dashi)
- 2 tablespoons soy sauce
- 1 tablespoon mirin
- 1 green onion, finely chopped
- Bonito flakes for garnish (optional)
- Daikon radish for serving (optional)
Begin by carefully draining the tofu and pressing it to remove excess moisture. To do this, wrap the tofu in a clean kitchen towel and place a weight on top for about 10-15 minutes. Once pressed, cut the tofu into cubes roughly 1 inch in size.
Next, sprinkle the cornstarch evenly over the tofu cubes, ensuring they are well coated on all sides. Heat about 1 inch of vegetable oil in a frying pan over medium-high heat until it reaches about 350°F (175°C). Fry the tofu cubes in batches, ensuring not to overcrowd the pan, for approximately 2-3 minutes on each side until they are golden brown and crispy.
As the tofu fries, prepare the sauce by combining the dashi broth, soy sauce, and mirin in a small saucepan. Heat gently over low heat until just warmed through, making sure not to boil. This will create a lovely umami-rich sauce that complements the crispy tofu beautifully.
Once the tofu is ready, use a slotted spoon to transfer it to a paper towel-lined plate to drain any excess oil. To serve, place the crispy tofu in a shallow dish, then pour the warm sauce over the top. Garnish with chopped green onions and sprinkle with bonito flakes for an added layer of flavor.
If desired, serve with a side of grated daikon radish for a refreshing contrast. Enjoy your delicious and speedy Agedashi Tofu!
Basic Japanese Curry

This Basic Japanese Curry is a comforting and flavorful dish that combines tender meat and vegetables in a rich, savory sauce. Perfect for a weeknight dinner, it is simple to make and sure to be loved by the whole family.
- 2 tablespoons vegetable oil
- 1 pound (450g) chicken thighs, diced
- 1 large onion, diced
- 2 carrots, sliced
- 2 potatoes, diced
- 4 cups (1 liter) water
- 1 package (100g) Japanese curry roux (mild, medium, or hot)
- 1 tablespoon soy sauce
- Salt and pepper, to taste
Start by heating the vegetable oil in a large pot over medium heat. Add the diced chicken and season with salt and pepper. Cook for about 5-7 minutes, stirring occasionally, until the chicken is browned on all sides.
Next, add the diced onion, sliced carrots, and diced potatoes to the pot. Sauté for another 5 minutes, or until the onions are translucent.
Pour in the 4 cups of water and bring the mixture to a boil. Reduce the heat to low, cover the pot, and let it simmer for about 15-20 minutes until the vegetables are tender.
Once the vegetables are cooked, break the Japanese curry roux into pieces and stir them into the pot. Let the curry simmer for an additional 5 minutes, stirring occasionally, until the roux is fully dissolved and the sauce thickens.
Finally, stir in the soy sauce for added depth of flavor. Taste and adjust the seasoning with more salt and pepper if necessary. Serve the curry hot over steamed rice.
Flavorful Chawanmushi (Savory Egg Custard)
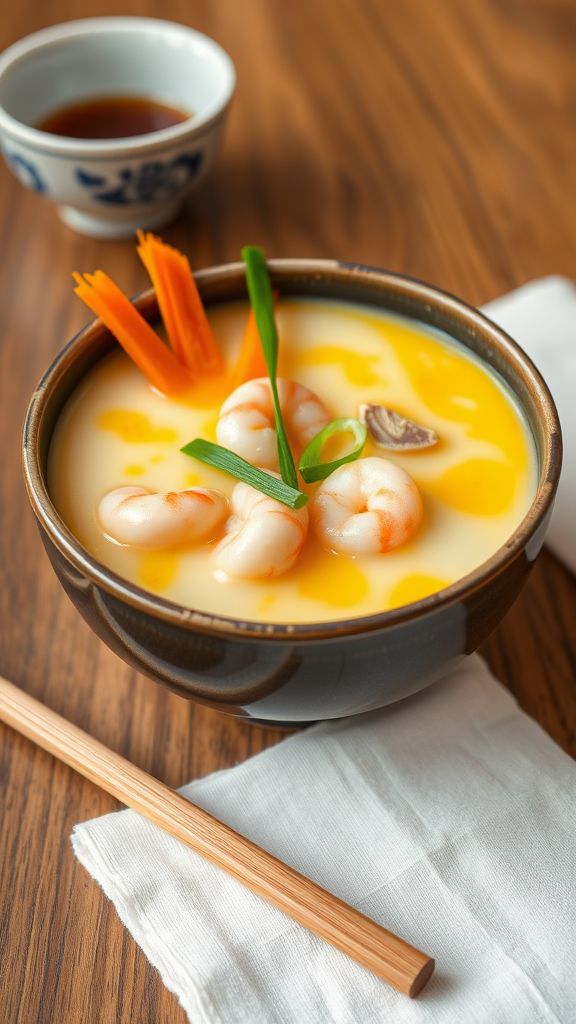
Chawanmushi, a traditional Japanese savory egg custard, is a delicate and flavorful dish that showcases the beauty of umami. Perfect as an appetizer or a side dish, its smooth texture and subtle flavors make it a favorite at any dinner table.
- 4 large eggs
- 2 cups dashi stock
- 1 tablespoon soy sauce
- 1 tablespoon mirin
- 1 teaspoon salt
- 1/2 cup cooked chicken, diced
- 1/2 cup shrimp, peeled and deveined
- 1/4 cup shiitake mushrooms, sliced
- 2 green onions, chopped
- Carrot slices for garnish (optional)
Begin by preparing the custard base. In a mixing bowl, whisk together 4 large eggs until the yolks and whites are fully combined. Gradually add in 2 cups of dashi stock, stirring gently to avoid creating bubbles, followed by 1 tablespoon soy sauce, 1 tablespoon mirin, and 1 teaspoon salt until everything is well blended.
Next, strain the mixture through a fine sieve into a large measuring cup or bowl to achieve a silky smooth texture. This step is essential to remove any lumps that may result from the eggs. Once strained, let the mixture sit for a few minutes to settle the foam.
Prepare your steaming setup by filling a steamer pot with water and bringing it to a simmer. Meanwhile, distribute the 1/2 cup cooked chicken, 1/2 cup shrimp, 1/4 cup sliced shiitake mushrooms, and 2 chopped green onions evenly among four small, heatproof cups or ramekins. Pour the egg mixture gently over the fillings, filling each cup to about 80% full.
Cover each cup with aluminum foil to prevent water from dripping into the custard during steaming. Carefully place the cups in the steamer and steam over medium-low heat for about 15 to 20 minutes, or until the custard is set but still slightly jiggly in the center.
Once done, carefully remove the cups from the steamer and let them cool slightly. Garnish with carrot slices if desired before serving. Enjoy your creamy and flavorful Chawanmushi hot or at room temperature!
Miniature Takoyaki Bites

Miniature Takoyaki Bites are a delightful twist on the classic Japanese street food, perfect for parties or as a unique appetizer. These bite-sized treats feature a crispy exterior filled with tender octopus and savory flavors that will captivate your guests.
- 1 cup all-purpose flour
- 2 large eggs
- 1 cup dashi stock (or water)
- ½ cup cooked octopus, diced
- ¼ cup green onions, finely chopped
- ¼ cup pickled ginger, chopped
- ½ cup shredded cabbage
- Oil for greasing
- Takoyaki sauce, for drizzling
- Japanese mayo, for drizzling
To begin making your Miniature Takoyaki Bites, preheat your takoyaki grill pan over medium heat. Lightly grease the pan with oil to ensure that the batter does not stick and the bites cook evenly.
In a mixing bowl, combine all-purpose flour, eggs, and dashi stock. Whisk the ingredients together until you achieve a smooth batter. It should have a slightly thick consistency, similar to pancake batter.
Once the pan is heated, pour the batter into each mold, filling it up to the brim. Quickly add a few pieces of cooked octopus, green onions, pickled ginger, and shredded cabbage into each mold, making sure to distribute them evenly.
Allow the takoyaki to cook for about 3-4 minutes on one side. When golden brown, use a skewer or a chopstick to carefully flip each bite over. This will ensure that they cook evenly on all sides and acquire that signature crispy texture.
Continue cooking for another 3-4 minutes, flipping them as needed until they are cooked through and have a nice golden color. Once done, remove the takoyaki bites from the pan and place them on a serving platter.
Lastly, drizzle the Miniature Takoyaki Bites with takoyaki sauce and Japanese mayo for extra flavor. Serve immediately and enjoy this delightful snack with your friends and family!
Simple Poke Bowl
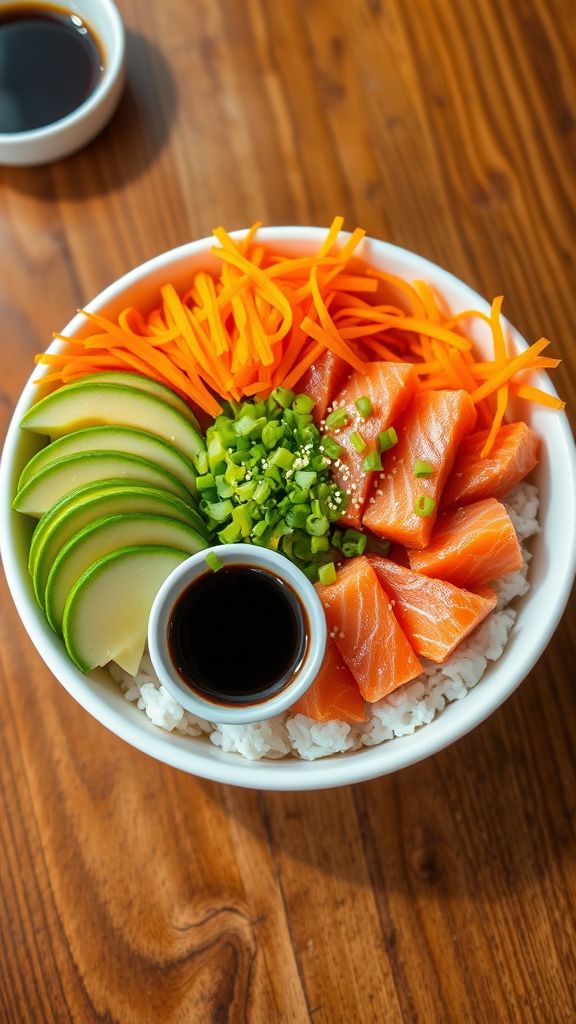
This Simple Poke Bowl is a refreshing and customizable dish that combines fresh ingredients and vibrant flavors. Perfect for a quick lunch or dinner, it’s both healthy and satisfying, making it a favorite for many.
- 1 cup sushi rice
- 1 ¼ cups water
- 1 tablespoon rice vinegar
- 1 tablespoon sugar
- ½ teaspoon salt
- 200g fresh sushi-grade fish (like salmon or tuna), diced
- ½ avocado, sliced
- ½ cucumber, thinly sliced
- 1 small carrot, julienned
- 2 green onions, chopped
- Sesame seeds, for garnish
- Optional: Soy sauce or ponzu for drizzling
Start by rinsing the sushi rice under cold water until the water runs clear. This helps to remove excess starch, ensuring your rice is fluffy. In a medium saucepan, combine the rice and water. Bring it to a boil over medium-high heat.
Once boiling, reduce the heat to low and cover the saucepan with a lid. Let it simmer for about 18-20 minutes, or until all the water has been absorbed. After cooking, remove the saucepan from heat and let it sit covered for an additional 10 minutes to allow the rice to firm up.
While the rice is resting, prepare the seasoning. In a small bowl, mix together the rice vinegar, sugar, and salt until fully dissolved. Once the rice has rested, transfer it to a large bowl and gently fold in the vinegar mixture, allowing the rice to cool to room temperature.
Next, assemble your poke bowl. Start with a generous scoop of the seasoned rice as your base. Arrange the diced fish, avocado slices, cucumber, carrot, and green onions on top of the rice, creating a colorful display.
Finally, sprinkle with sesame seeds for garnish and drizzle with soy sauce or ponzu if desired. This dish is best served immediately, allowing you to enjoy the freshness of all the ingredients!
No-Cook Seaweed Salad
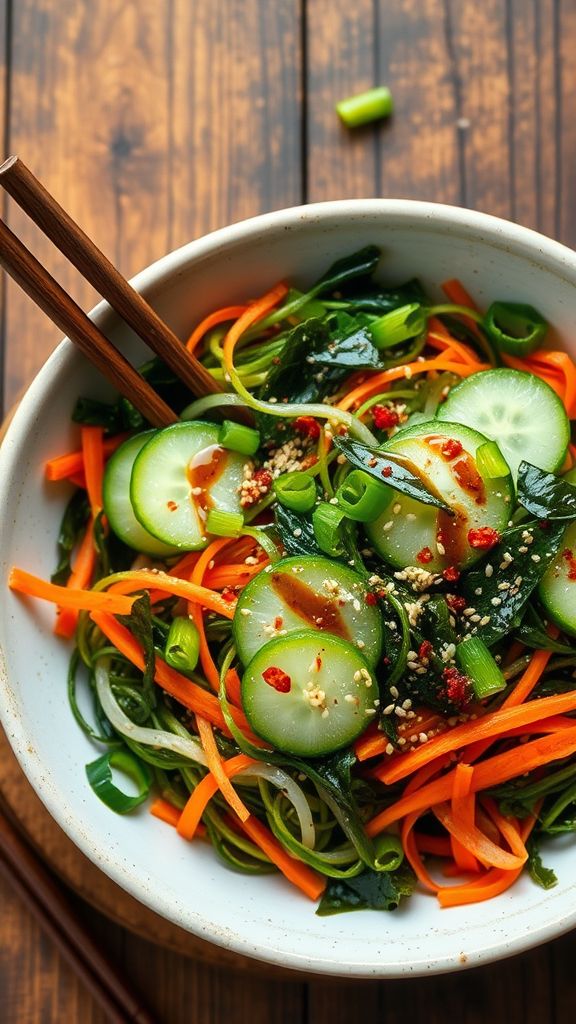
No-Cook Seaweed Salad is a refreshing and nutritious dish that brings the vibrant flavors of the ocean to your table. Perfect as an appetizer or a light side, it’s quick to prepare and packed with health benefits!
- 1 cup dried mixed seaweed (wakame, dulse, etc.)
- 1 medium cucumber, thinly sliced
- 1 medium carrot, julienned
- 2 green onions, finely chopped
- 2 tablespoons soy sauce
- 1 tablespoon rice vinegar
- 1 teaspoon sesame oil
- 1 teaspoon sugar
- 1 tablespoon sesame seeds, toasted
- Optional: chili flakes for heat
Start by rehydrating the dried seaweed. Place the seaweed in a bowl and cover it with warm water. Let it soak for about 10 minutes or until it expands and softens. Drain the seaweed and gently squeeze out any excess water.
In a large mixing bowl, combine the rehydrated seaweed, thinly sliced cucumber, julienned carrot, and chopped green onions. Toss the vegetables together to mix them evenly.
In a separate small bowl, whisk together the soy sauce, rice vinegar, sesame oil, and sugar until the sugar is dissolved. This dressing will add a delicious umami flavor to your salad.
Drizzle the dressing over the seaweed and vegetable mix. Gently toss everything together to ensure all the ingredients are coated with the dressing. For an added touch, sprinkle the toasted sesame seeds on top and, if desired, add a pinch of chili flakes for some heat.
Let the salad sit for about 5-10 minutes to allow the flavors to meld together. Serve chilled or at room temperature, and enjoy your delightful No-Cook Seaweed Salad!
Easy Soba Noodle Salad
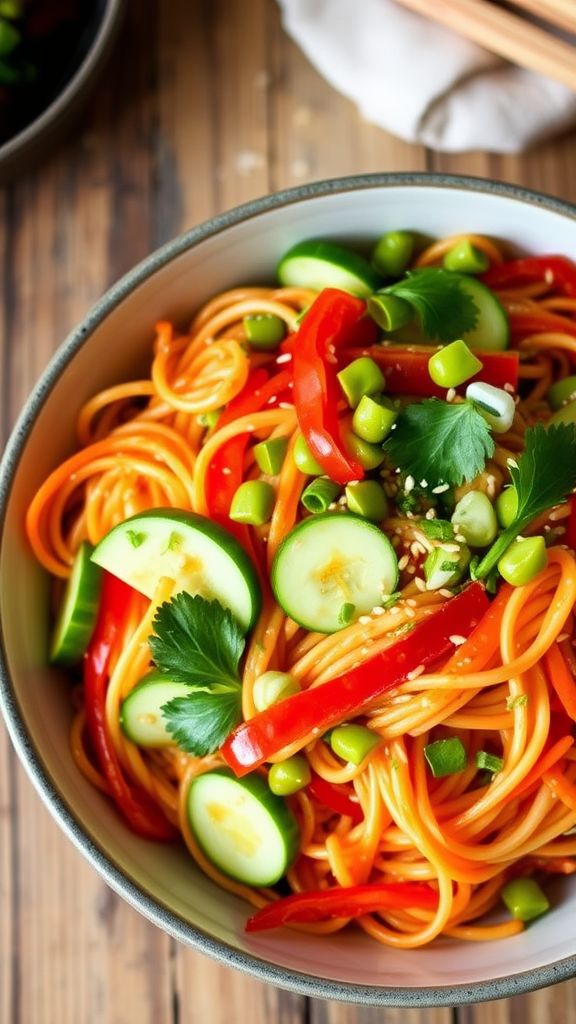
Discover the refreshing and satisfying flavors of this Easy Soba Noodle Salad, perfect for a light lunch or dinner. It’s quick to prepare and packed with nutrients, making it an ideal choice for busy weeknights or meal prepping for the week ahead.
- 8 oz soba noodles
- 1 cup edamame, shelled
- 1 cup shredded carrots
- 1 cucumber, thinly sliced
- 1 red bell pepper, thinly sliced
- ¼ cup green onions, chopped
- ¼ cup fresh cilantro, chopped
- ¼ cup soy sauce
- 2 tbsp sesame oil
- 1 tbsp rice vinegar
- 1 tbsp honey or maple syrup
- 1 tsp grated ginger
- Sesame seeds for garnish
Begin by cooking the soba noodles. Bring a large pot of water to a boil, then add the soba noodles and cook according to the package instructions, typically about 6-8 minutes. Once cooked, drain the noodles and rinse them under cold water to stop the cooking process and cool them down.
While the noodles are cooking, prepare the dressing. In a small bowl, whisk together soy sauce, sesame oil, rice vinegar, honey, and grated ginger. Adjust the sweetness by adding more honey or maple syrup based on your taste preference.
In a large mixing bowl, combine the cooked and cooled soba noodles, edamame, shredded carrots, cucumber, red bell pepper, green onions, and fresh cilantro. Drizzle the dressing over the salad and gently toss everything together to ensure the noodles and vegetables are evenly coated.
Let the salad rest for about 10 minutes to allow the flavors to meld. Before serving, sprinkle sesame seeds on top for added crunch and flavor. Enjoy your Easy Soba Noodle Salad as a refreshing and nutritious dish that can be served cold or at room temperature!

