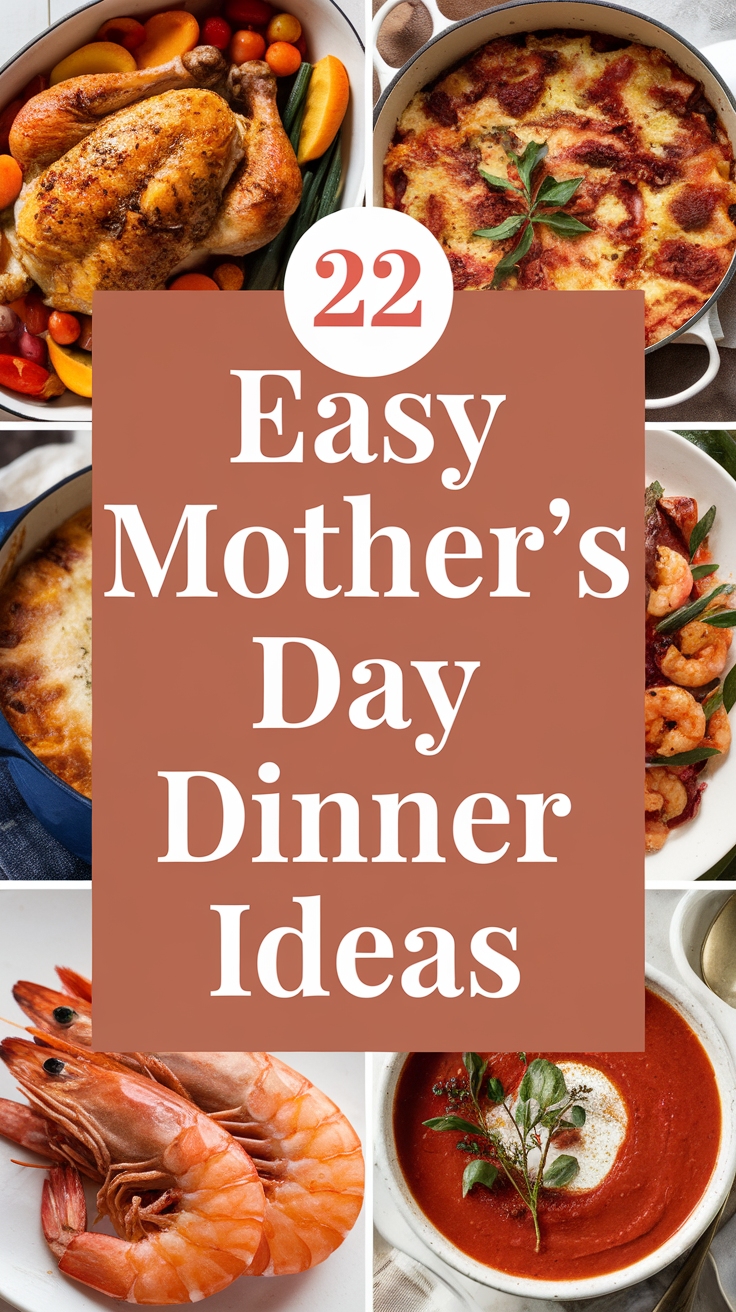
My New Cookbook is Out! Check Out Now!
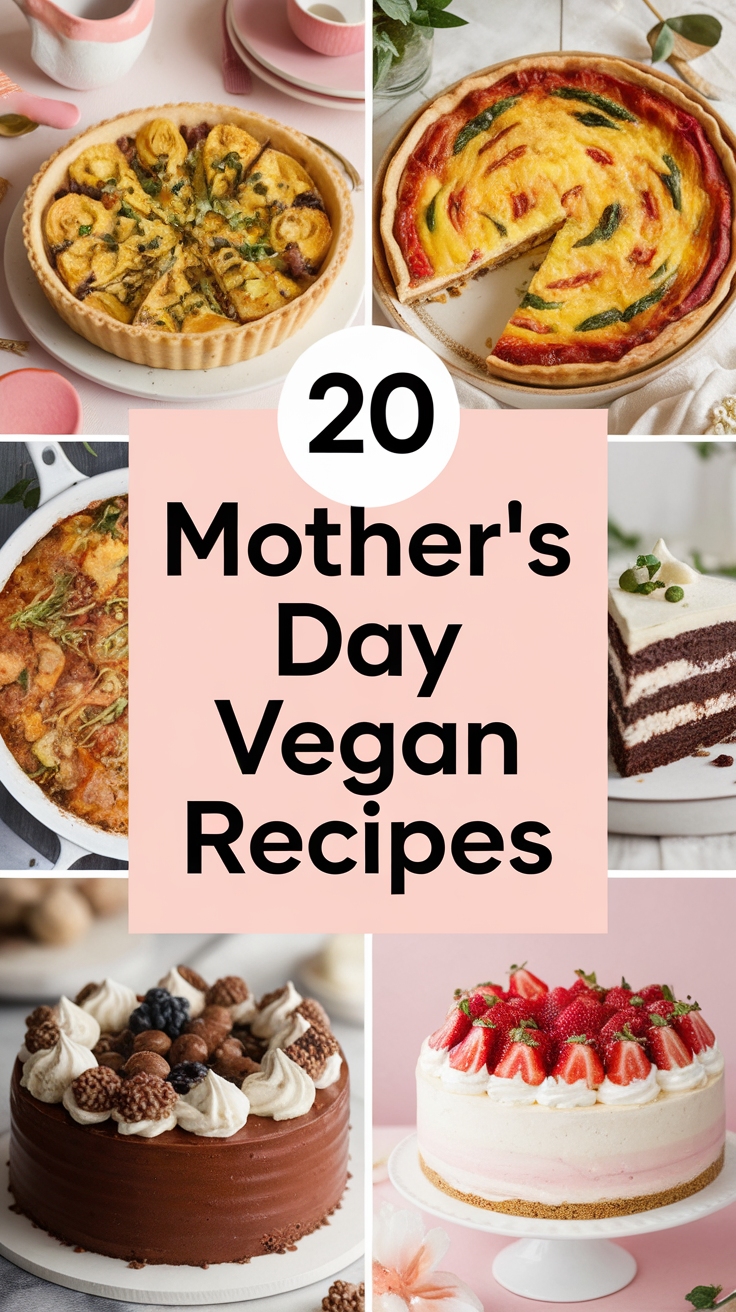
20 Vegan and Gluten-Free Recipes Perfect for Mother’s Day
This page contains affiliate links and I earn a commission if you make a purchase through one of the links, at no cost to you.
Mother’s Day is just around the corner, and you want to impress Mom with something special! Whether she’s vegan, gluten-free, or simply loves good food, it can be tricky to find the right recipes. Here, you’ll discover 20 delicious options that not only taste amazing but also show how much you care. Let’s dive in and make this day unforgettable!
Shop Our Must-Haves


1 Avocado Rose Tartine
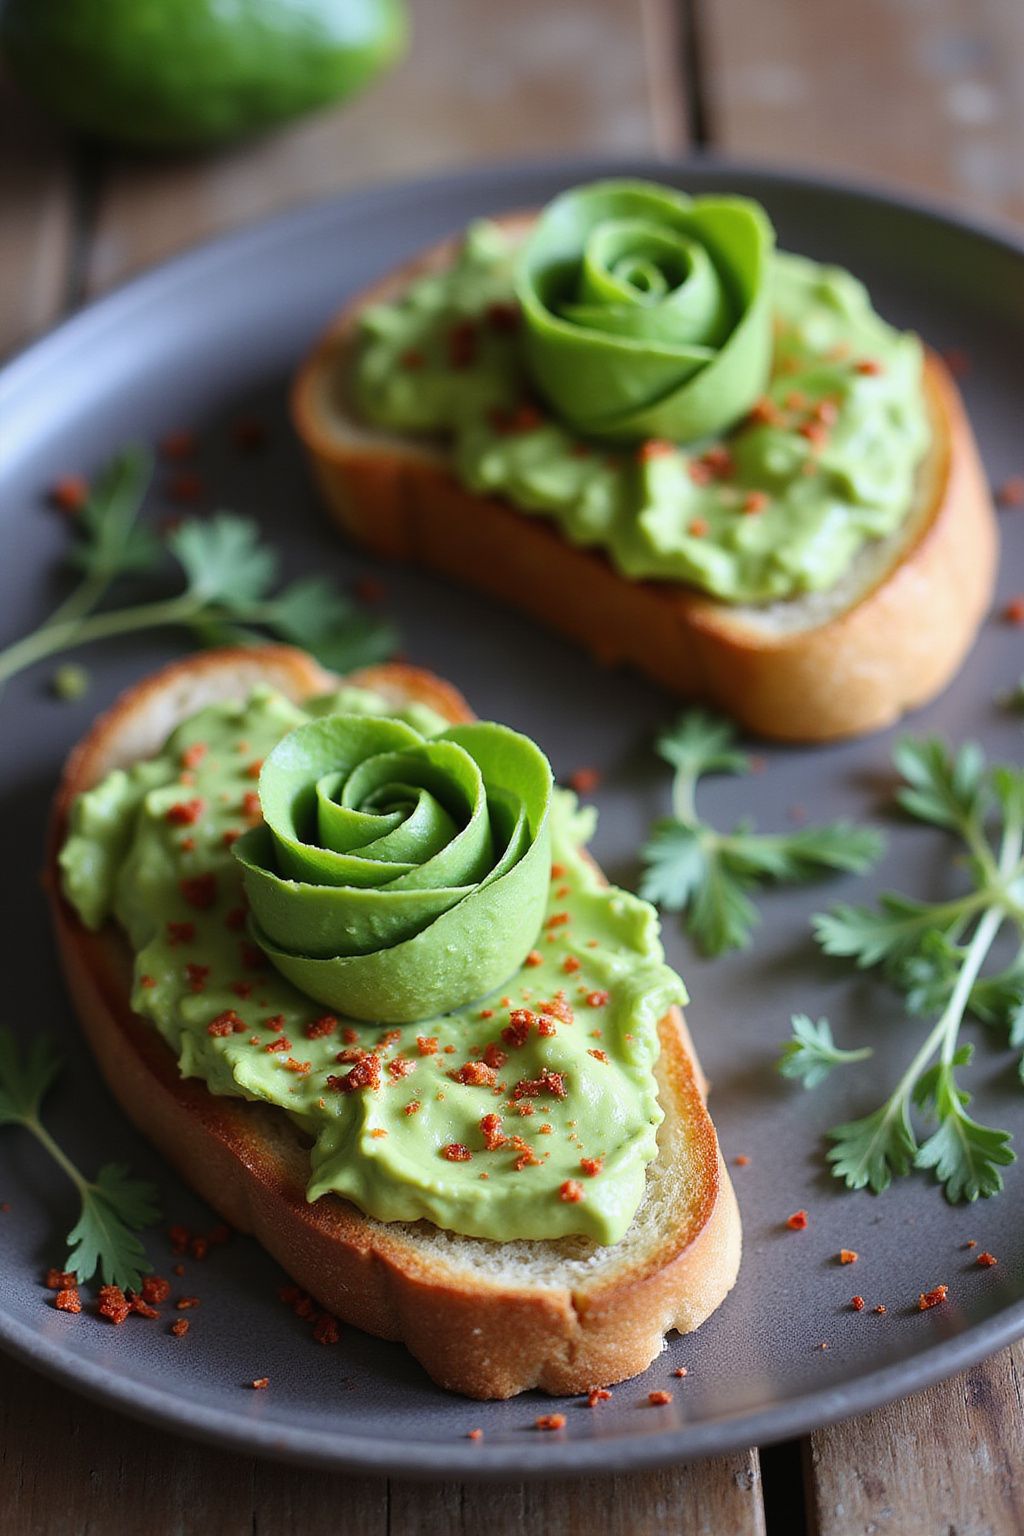
Avocado Rose Tartine is a stunning and delicious open-faced sandwich that’s not only easy to make but also healthy. The creamy avocado creates a beautiful canvas for colorful toppings, making it a perfect breakfast or snack choice. Plus, it’s vegan and gluten-free, so everyone can enjoy it!
Prep Time: 10 minutes
Total Time: 10 minutes
Servings: 2
Ingredients:
- 2 slices of gluten-free bread
- 1 ripe avocado
- 1 tablespoon of lemon juice
- Salt and pepper, to taste
- Red pepper flakes, optional
- Fresh microgreens or herbs for garnish (like cilantro or basil)
- Optional toppings: sliced radishes, cherry tomatoes, or cucumber
Instructions:
Start by toasting the gluten-free bread until it’s golden brown and crispy. This will give your tartine a nice crunch. While the bread is toasting, cut the ripe avocado in half and remove the pit.
Scoop out the avocado flesh into a bowl and mash it gently with a fork. Add in the lemon juice, and season with salt and pepper to taste. Mix well until creamy but still chunky.
Now it’s time to create the rose! Slice the avocado thinly to create beautiful, delicate strips. Begin at one end and gently roll the strips to form a rose shape.
Once your rose is ready, spread the mashed avocado on the toasted bread. Place the avocado rose on top of the spread. Sprinkle with red pepper flakes for a bit of heat if you like. Finally, add some fresh microgreens or herbs for a pop of color and extra flavor.
Tips:
- Make sure your avocado is ripe for easy mashing and beautiful slicing.
- Feel free to customize your toppings based on what you have available or your personal preferences.
- Serve immediately to enjoy the bread’s crispness.
Nutrition Facts:
- Calories: 220
- Protein: 3g
- Total Fat: 14g
- Saturated Fat: 2g
- Carbohydrates: 23g
- Fiber: 8g
- Sugar: 1g
2 Silky Coconut Chia Pudding
This Silky Coconut Chia Pudding is a delicious and healthy treat that will leave you feeling satisfied and refreshed. It’s perfect for breakfast, a snack, or even dessert! Plus, it’s super easy to make and is dairy-free and gluten-free!
Prep Time: 10 minutes
Additional Time: 4 hours (or overnight)
Total Time: 4 hours 10 minutes
Servings: 4
Ingredients:
- 1 cup coconut milk (canned or carton)
- 1/4 cup chia seeds
- 2 tablespoons maple syrup (or sweetener of choice)
- 1 teaspoon vanilla extract
- 1/4 teaspoon salt
Instructions:
Start by gathering all your ingredients for the pudding. In a mixing bowl, pour in the coconut milk. Make sure you choose creamy coconut milk for a silkier texture.
Add the chia seeds, maple syrup, vanilla extract, and salt to the bowl. Use a whisk to mix everything together well. Stir until the chia seeds are fully combined with the liquid.
Let the mixture sit for about 5 minutes. This will give the chia seeds a chance to absorb the liquid. After 5 minutes, whisk the mixture again to break up any clumps of chia seeds.
Cover the bowl with plastic wrap or transfer the mixture to individual jars. Place it in the refrigerator for at least 4 hours or overnight for the best results. The chia seeds will expand and create a pudding-like consistency.
Once ready, give the pudding a good stir before serving. You can serve it as is or add your favorite toppings like fresh fruits, nuts, or shredded coconut. Enjoy your creamy and healthy treat!
Tips:
- For a richer flavor, try using full-fat coconut milk instead of light coconut milk.
- Feel free to experiment with different sweeteners like agave syrup or honey if not strictly vegan.
- You can add spices like cinnamon or cocoa powder for a different flavor twist.
Nutrition Facts:
- Calories: 150 per serving
- Protein: 3g
- Fat: 10g
- Carbohydrates: 15g
- Fiber: 6g
- Sugar: 3g
3 Zesty Lemon Quinoa Salad
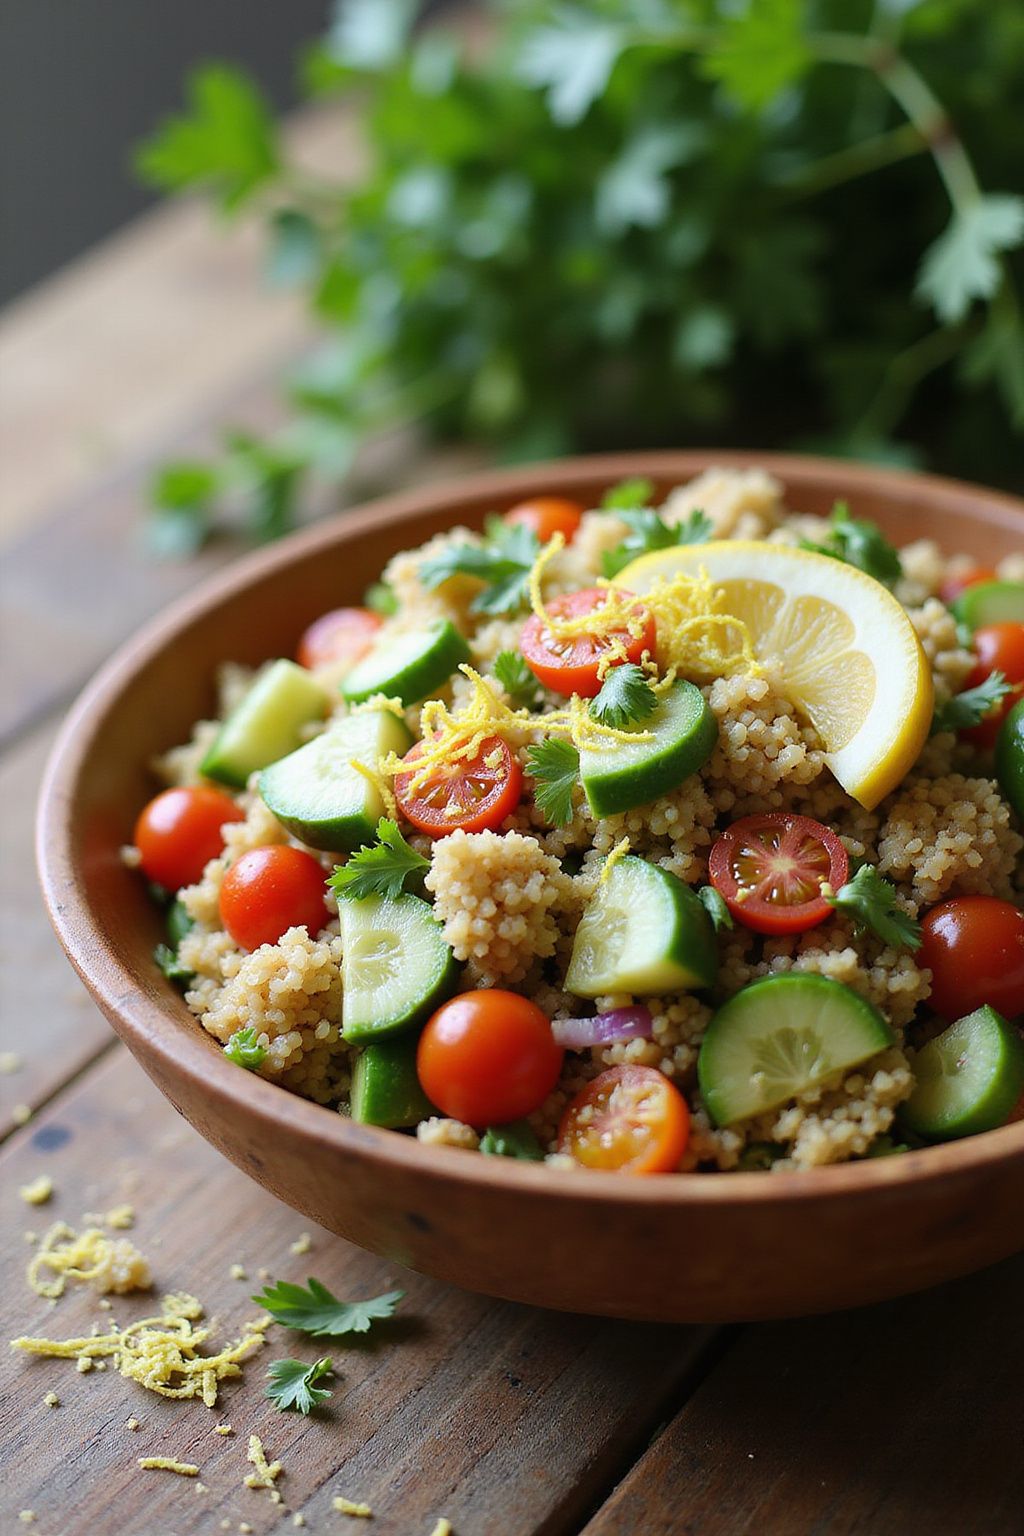
This Zesty Lemon Quinoa Salad is a refreshing and healthy dish perfect for any occasion. Packed with vibrant flavors and wholesome ingredients, it’s both vegan and gluten-free. Get ready to impress your family and friends with this colorful salad that’s easy to make!
Prep Time: 15 minutes
Total Time: 15 minutes
Servings: 4
Ingredients:
- 1 cup quinoa
- 2 cups water or vegetable broth
- 1 large lemon (zest and juice)
- 1 cup cherry tomatoes, halved
- 1 cucumber, diced
- 1 cup bell pepper, diced (any color)
- 1/4 cup red onion, finely chopped
- 1/4 cup fresh parsley, chopped
- 2 tablespoons olive oil
- Salt and pepper to taste
Instructions:
First, rinse the quinoa under cold water in a fine mesh strainer. This helps remove any bitterness. Then, combine the rinsed quinoa and water (or vegetable broth) in a medium saucepan.
Bring the mixture to a boil over medium-high heat. Once boiling, reduce the heat to low, cover, and let it simmer for about 15 minutes or until the quinoa is fluffy and water is absorbed. Once done, remove from heat and allow it to cool slightly.
In a large bowl, combine the cooked quinoa with the cherry tomatoes, cucumber, bell pepper, red onion, and parsley. In a small bowl, whisk together the lemon juice, lemon zest, olive oil, salt, and pepper. Pour this dressing over the salad ingredients.
Toss everything together until well combined. Taste and adjust the seasoning if needed. You can serve this salad right away, or let it chill in the refrigerator for about 30 minutes to let the flavors meld together.
Tips:
- For added protein, consider adding chickpeas or black beans.
- You can substitute other vegetables based on your preference like avocado or carrots.
- This salad can be stored in the fridge for up to 3 days, making it great for meal prep.
Nutrition Facts:
- Calories: 220
- Protein: 8g
- Carbohydrates: 35g
- Fat: 7g
- Fiber: 5g
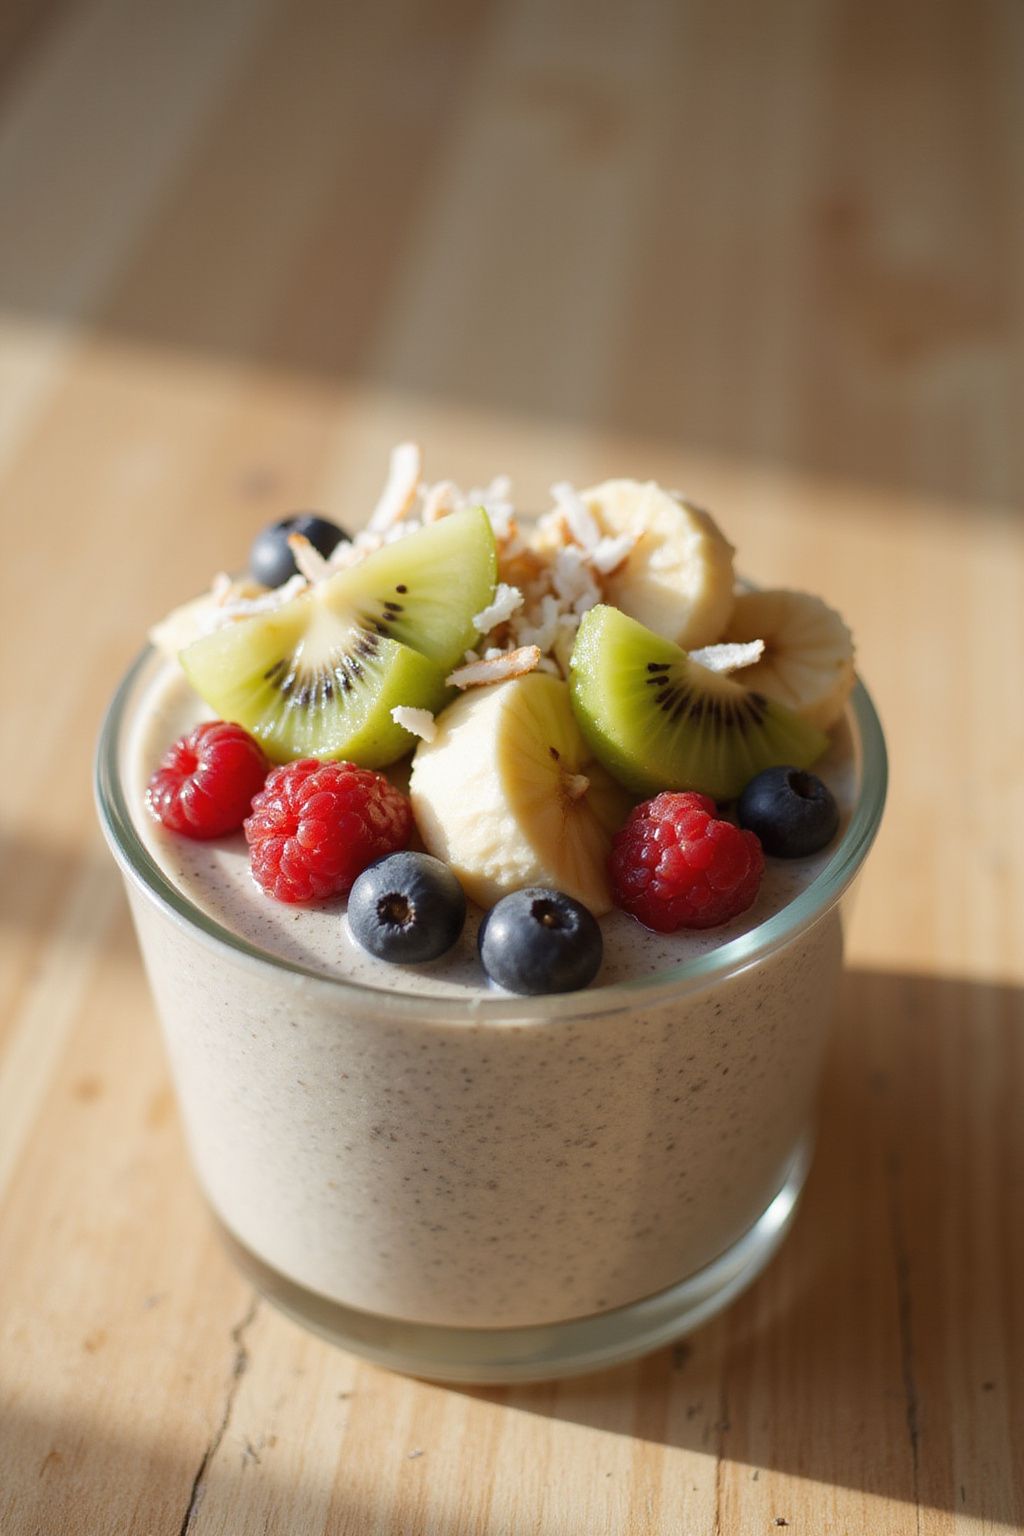
4 Berry Bliss Smoothie Bowl
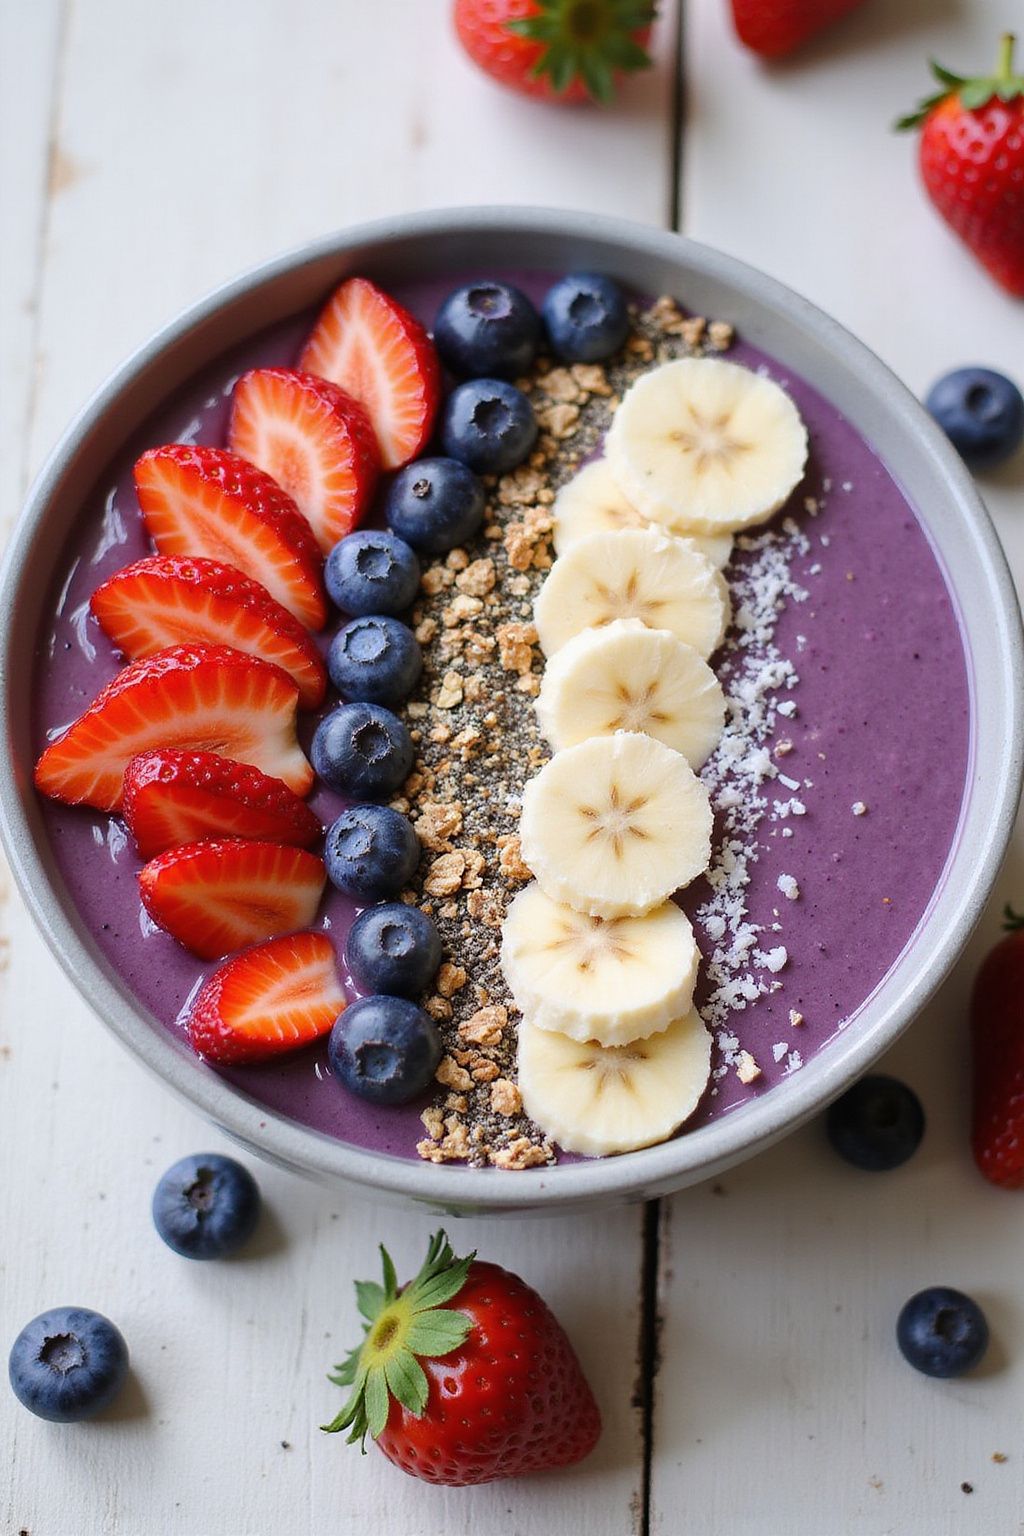
The Berry Bliss Smoothie Bowl is a delicious and refreshing treat that’s perfect for breakfast or a light snack. Packed with antioxidants and vitamins, this smoothie bowl will make you feel great inside and out. Plus, it’s super easy to make and topped with your favorite fruits and nuts!
Prep Time: 10 minutes
Total Time: 10 minutes
Servings: 2
Ingredients:
- 1 cup frozen mixed berries (strawberries, blueberries, raspberries)
- 1 ripe banana
- 1 cup almond milk (or any plant-based milk)
- 1 tablespoon maple syrup (optional for sweetness)
- 1 tablespoon chia seeds (for added fiber)
- Fresh berries for topping
- Sliced banana for topping
- Granola for crunch
- Shredded coconut (optional)
Instructions:
Start by gathering all your ingredients in one place. This will make your smoothie-making process much easier.
In a blender, add the frozen mixed berries, ripe banana, almond milk, maple syrup, and chia seeds. Blend on high until everything is smooth and creamy. You can adjust the almond milk amount if you want a thinner consistency.
Once the smoothie is blended, pour it into two bowls. This will be your delicious base.
Next, it’s time to decorate! Top each bowl with fresh berries, sliced banana, a sprinkle of granola, and some shredded coconut if you’d like. Feel free to get creative with your toppings!
Grab a spoon and dig in! Enjoy your Berry Bliss Smoothie Bowl right away to keep it fresh and tasty.
Tips:
- Try using fresh berries if they are in season for an even bolder flavor.
- You can add a scoop of your favorite protein powder for a boost.
- Freeze leftover smoothie in ice cube trays for quick smoothie prep later!
Nutrition Facts:
- Calories: 210
- Protein: 4g
- Fat: 7g
- Carbohydrates: 37g
- Fiber: 7g
- Sugar: 14g
5 Spiced Sweet Potato Waffles
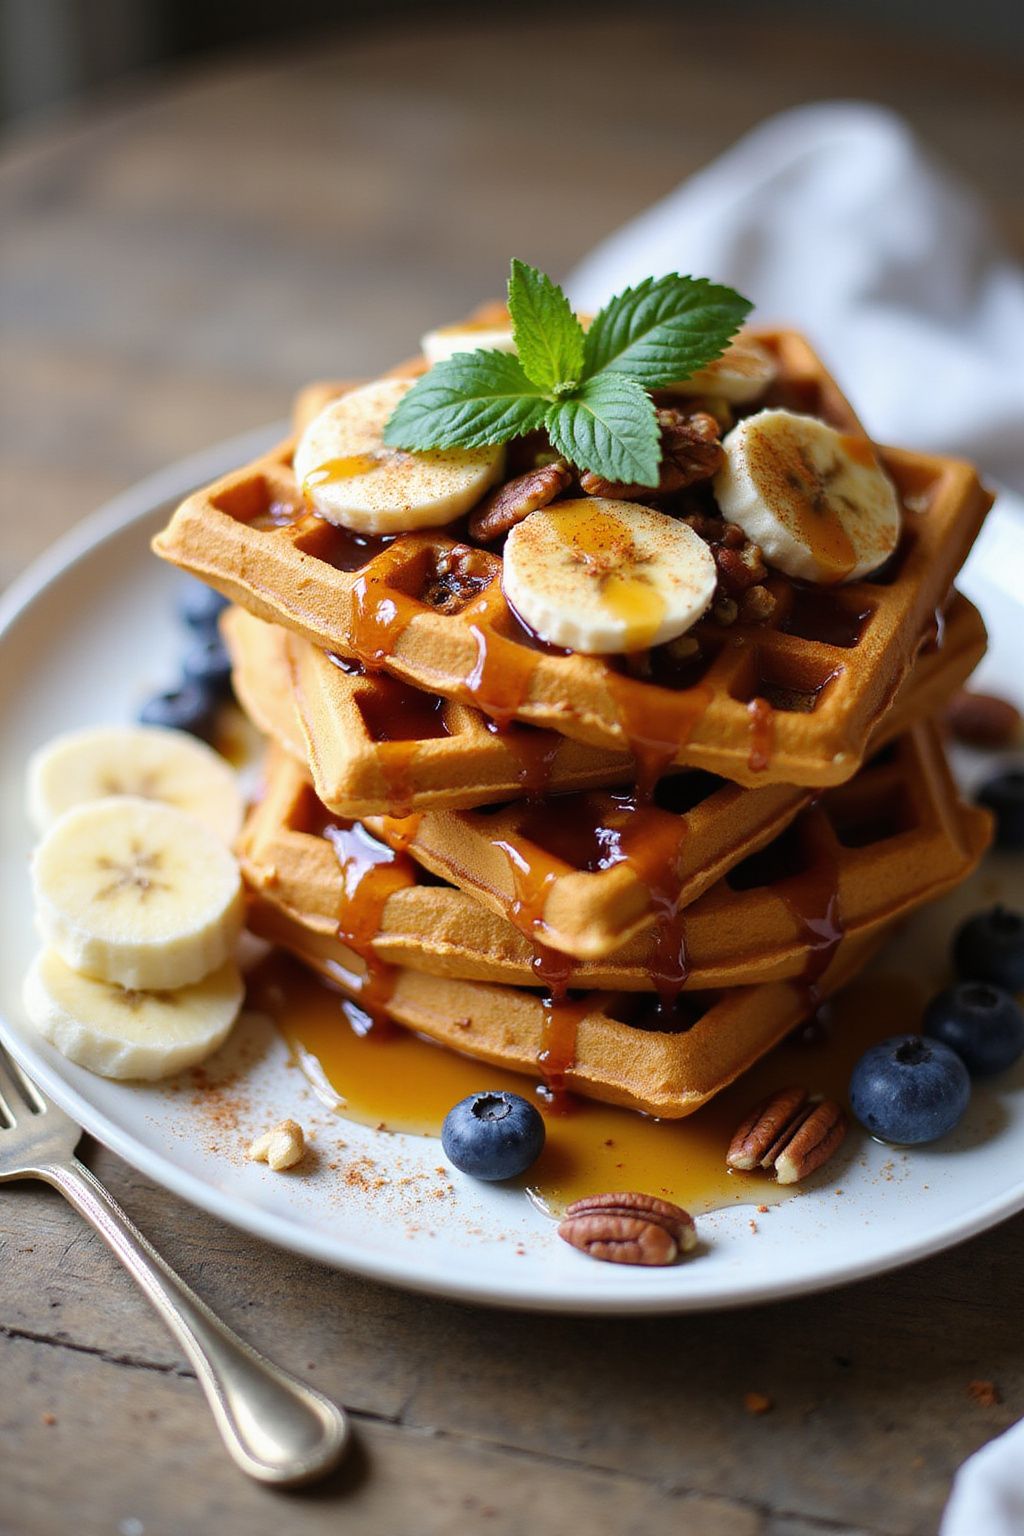
Spiced Sweet Potato Waffles are a delicious and fun way to enjoy breakfast. These waffles are not just tasty, but they are also healthy and perfect for anyone looking for a vegan and gluten-free option. The warm spices make them extra special!
Prep Time: 15 minutes
Total Time: 30 minutes
Servings: 4
Ingredients:
- 1 cup mashed sweet potatoes
- 1 cup gluten-free oats
- 1 cup plant-based milk (like almond or oat milk)
- 2 tablespoons maple syrup
- 1 teaspoon vanilla extract
- 1 teaspoon baking powder
- 1/2 teaspoon baking soda
- 1 teaspoon cinnamon
- 1/2 teaspoon nutmeg
- 1/4 teaspoon ginger
- 1/4 teaspoon salt
- Coconut oil or spray for cooking
Instructions:
Start by preheating your waffle maker according to the manufacturer’s instructions. Next, in a big bowl, combine the mashed sweet potatoes, gluten-free oats, and plant-based milk. Mix them until you have a smooth batter.
Then, add in the maple syrup and vanilla extract. Stir the mixture well so everything is blended nicely. After that, in a separate smaller bowl, whisk together the baking powder, baking soda, cinnamon, nutmeg, ginger, and salt. This helps to make sure the spices are evenly mixed.
Now, slowly add the dry ingredients to the sweet potato mixture. Stir until everything is combined, but don’t overmix. The batter should be thick and slightly lumpy.
Once your waffle maker is hot, lightly grease it with coconut oil or non-stick spray. Pour the batter into the waffle maker, making sure not to overfill. Close the lid and cook until the waffles are golden brown. This should take about 5-7 minutes, but times may vary depending on your waffle maker.
Finally, carefully remove the waffles and serve them warm. Top with your favorite toppings like fresh fruit, nuts, or more maple syrup!
Tips:
- For an extra crunch, add some chopped nuts to the batter.
- You can make the batter ahead of time and store it in the fridge for quick breakfast options.
- These waffles freeze well! Just toast them when you’re ready to eat.
Nutrition Facts:
- Calories: 150 per serving
- Protein: 3g
- Carbohydrates: 28g
- Fat: 3g
- Fiber: 4g
- Sugar: 4g
6 Chocolate Avocado Mousse Cups

Indulge in a rich and creamy dessert that’s both delicious and healthy! Chocolate Avocado Mousse Cups are perfect for satisfying your sweet tooth while still sticking to a vegan and gluten-free diet. Made with ripe avocados and cocoa powder, this dessert is easy to prepare and full of flavor.
Prep Time: 10 minutes
Additional Time: 30 minutes
Total Time: 40 minutes
Servings: 4
Ingredients:
- 2 ripe avocados
- 1/2 cup cocoa powder
- 1/2 cup maple syrup (or agave syrup)
- 1/4 cup coconut milk
- 1 teaspoon vanilla extract
- Pinch of salt
- Fresh berries (optional, for topping)
- Coconut whipped cream (optional, for serving)
Instructions:
Start by cutting the avocados in half, removing the pits, and scooping the flesh into a blender or food processor. This is where the creamy texture of your mousse will begin.
Add the cocoa powder, maple syrup, coconut milk, vanilla extract, and a pinch of salt to the blender. Blend everything together until it’s smooth and creamy. It’s essential to scrape down the sides a couple of times to get all the ingredients blended well.
Once mixed, taste your mousse. If you want it sweeter, you can add a bit more syrup. After reaching your desired flavor, spoon the mousse into small cups or bowls.
Cover the cups with plastic wrap and place them in the fridge for at least 30 minutes. Chilling allows the flavors to meld together beautifully.
When you’re ready to serve, you can add your favorite toppings like fresh berries or a dollop of coconut whipped cream for that extra touch. Enjoy your delicious and healthy mousse cups!
Tips:
- To ensure a smooth mousse, use very ripe avocados. The riper they are, the creamier your mousse will be.
- You can substitute maple syrup with honey for a non-vegan option.
- For a fun twist, try adding a tablespoon of peanut butter or almond butter to the mixture for a nutty flavor.
Nutrition Facts:
- Calories: 150 per serving
- Total Fat: 9g
- Saturated Fat: 2g
- Carbohydrates: 17g
- Fiber: 7g
- Sugar: 5g
- Protein: 2g
7 Rainbow Vegetable Sushi Rolls
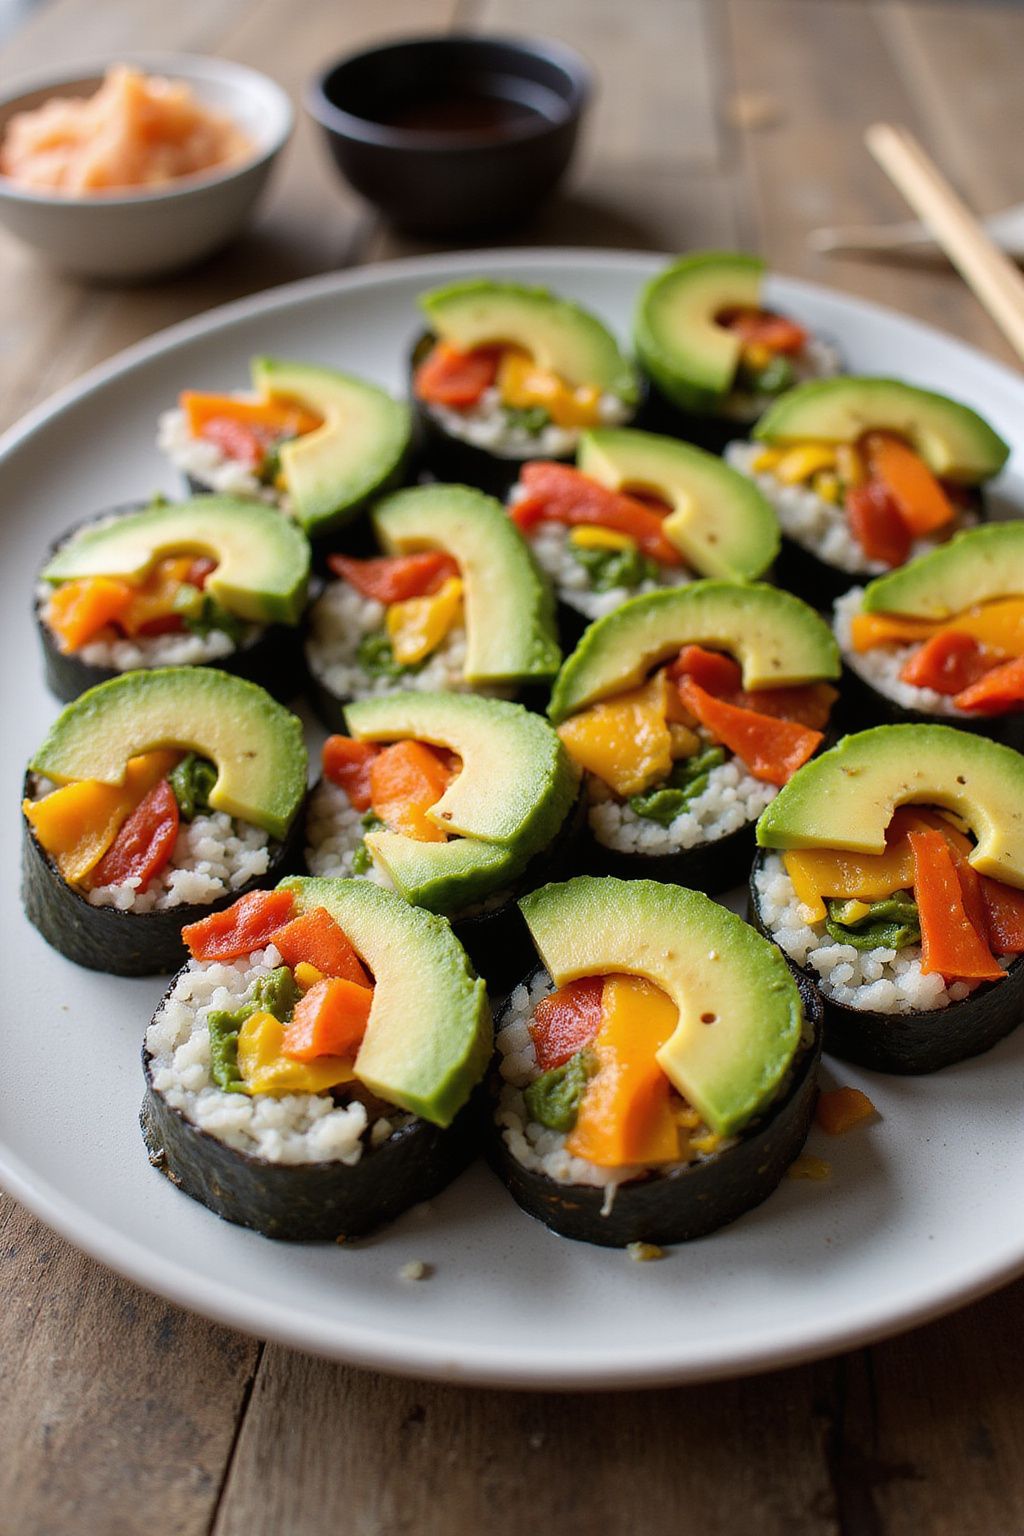
Rainbow Vegetable Sushi Rolls are a fun and colorful way to enjoy healthy veggies! This sushi is not only easy to make, but it’s also a great dish to impress your friends and family. Let’s get rolling!
Prep Time: 20 minutes
Total Time: 20 minutes
Servings: 4
Ingredients:
- 1 cup sushi rice
- 2 cups water
- 4 sheets nori (seaweed)
- 1/2 cucumber, julienned
- 1/2 bell pepper (any color), julienned
- 1/2 carrot, grated or julienned
- 1/2 avocado, sliced
- 1/4 cup pickled ginger
- Soy sauce (for dipping)
Instructions:
Start by rinsing 1 cup of sushi rice under cold water until the water runs clear. This step is important to remove excess starch. Then, combine the rinsed rice and 2 cups of water in a rice cooker or pot. Cook until the rice is tender.
Once the rice is cooked, let it cool slightly. It’s best if it is warm but not hot. While the rice cools, prepare your colorful veggies. Julienne the cucumber, bell pepper, and carrot. Slice the avocado carefully to create thin pieces.
Now it’s time to assemble the sushi rolls! Lay a sheet of nori on a bamboo sushi mat or a clean flat surface. Spread a thin layer of cooled sushi rice over the nori, leaving about an inch at the top edge.
In the center of the rice, place a small amount of each vegetable: cucumber, bell pepper, carrot, and avocado. Be careful not to overfill! Next, lift the edge of the sushi mat and start rolling the nori away from you, pressing gently but firmly. Continue rolling until you reach the exposed edge of the nori. Wet that edge with a little water to seal the roll.
Repeat this process with the remaining ingredients. Once your rolls are made, use a sharp knife to slice each roll into 6-8 pieces. Serve with pickled ginger and soy sauce for dipping. Enjoy your beautiful and tasty Rainbow Vegetable Sushi Rolls!
Tips:
- For added flavor, mix a bit of rice vinegar with your sushi rice.
- Use a wet knife to cut the rolls, which will help prevent sticking.
- Feel free to swap in your favorite veggies based on what’s in season or what you have at home.
Nutrition Facts:
- Calories: 210 per serving
- Protein: 4g
- Carbohydrates: 39g
- Fat: 5g
- Fiber: 4g
8 Herb-Infused Cauliflower Steak

Enjoy a delicious and healthy dish with this Herb-Infused Cauliflower Steak. It’s packed with flavor and perfect as a main course or a side. The fresh herbs add a wonderful aroma that will make your kitchen smell amazing!
Prep Time: 10 minutes
Cook Time: 20 minutes
Total Time: 30 minutes
Servings: 2
Ingredients:
- 1 large head of cauliflower
- 3 tablespoons olive oil
- 1 teaspoon garlic powder
- 1 teaspoon onion powder
- 1 teaspoon smoked paprika
- 1 tablespoon fresh parsley, chopped
- 1 tablespoon fresh thyme, chopped
- Salt and pepper to taste
- Lemon wedges for serving
Instructions:
Begin by preheating your oven to 425°F (220°C). While the oven warms up, prepare your cauliflower. Remove the leaves and trim the stem, then slice the cauliflower into 1-inch thick steaks. Be careful not to break them apart!
In a small bowl, mix together the olive oil, garlic powder, onion powder, smoked paprika, fresh parsley, fresh thyme, salt, and pepper. This mix will infuse your steak with fantastic flavor.
Brush the herb mixture generously onto both sides of each cauliflower steak. Make sure they are well coated for the best taste. Place the steaks on a baking sheet lined with parchment paper.
Once the oven is ready, bake the cauliflower steaks for 20 minutes, flipping them halfway through. They should be tender and slightly golden when done.
After baking, remove the steaks from the oven. Serve them warm with lemon wedges for a bright finish. Enjoy!
Tips:
- You can add other herbs like rosemary or basil for different flavors.
- For a spicy kick, sprinkle some red pepper flakes on top before baking.
- These steaks can be grilled too! Just make sure to brush them with oil to prevent sticking.
Nutrition Facts:
- Calories: 150
- Carbohydrates: 10g
- Protein: 3g
- Fat: 12g
- Fiber: 5g
- Sugar: 2g
9 Coconut Mango Fruit Salad
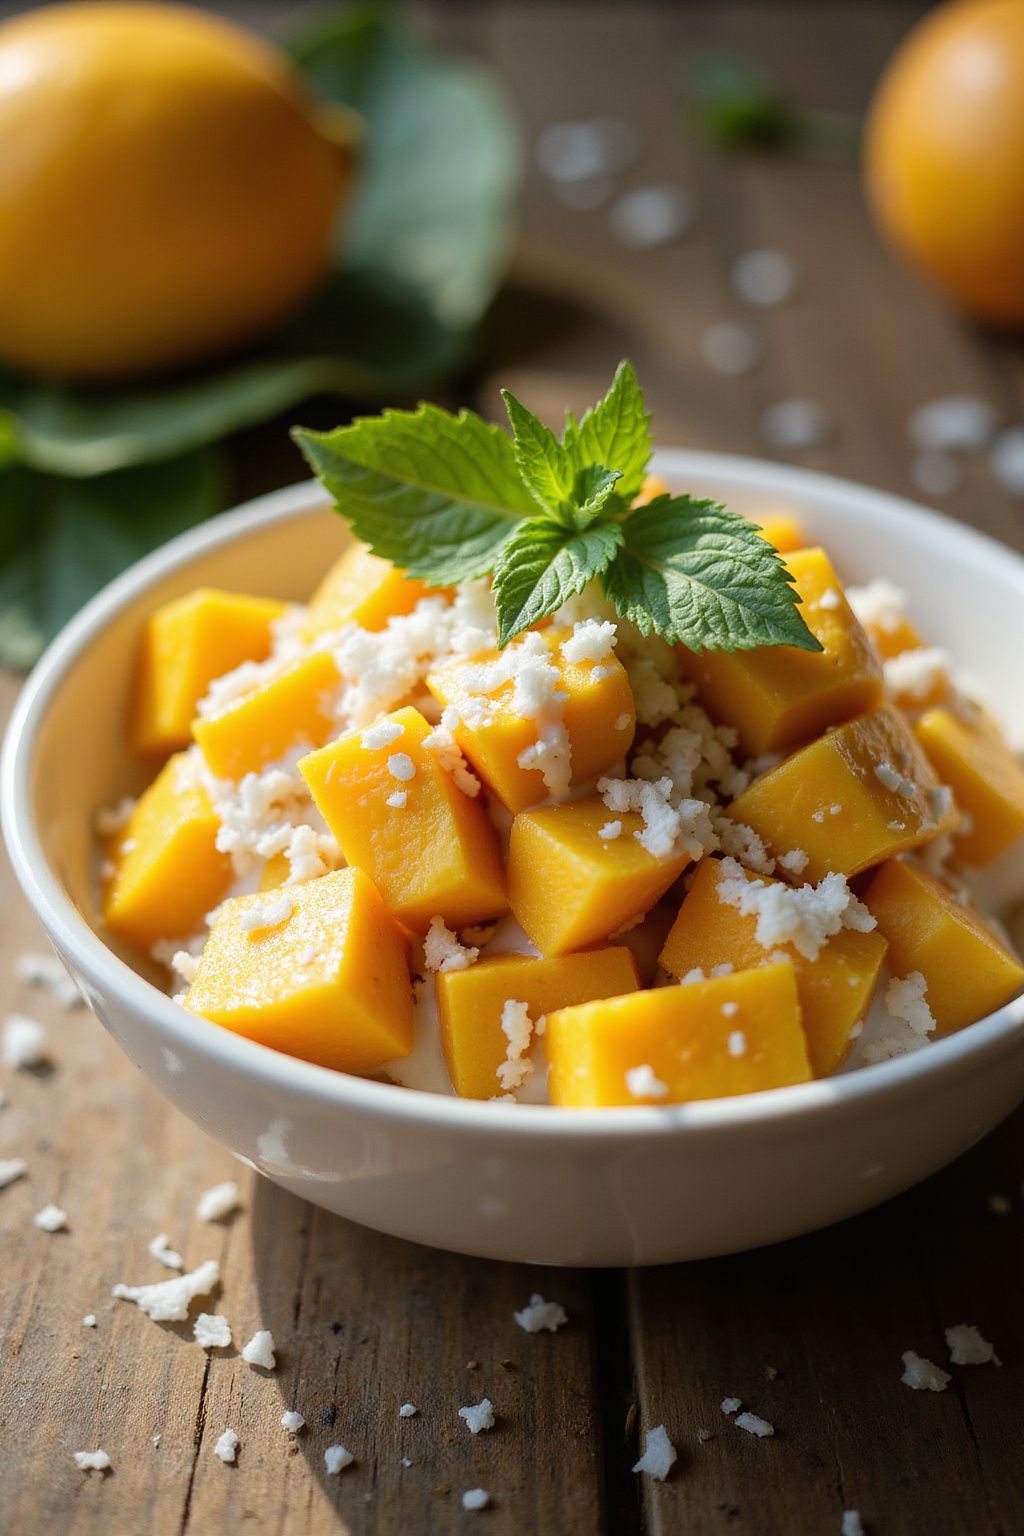
Coconut Mango Fruit Salad is a refreshing and tropical treat that’s perfect for any occasion. It combines sweet, ripe mangoes with creamy coconut for a delightful burst of flavor. This salad is not only easy to make but also vegan and gluten-free!
Prep Time: 10 minutes
Total Time: 10 minutes
Servings: 4
Ingredients:
- 2 ripe mangoes, diced
- 1 cup coconut milk
- 1 cup shredded coconut (unsweetened)
- 1 tablespoon lime juice
- 1 tablespoon agave syrup or maple syrup (optional)
- 1/4 cup fresh mint leaves, chopped
Instructions:
Start by washing the mangoes thoroughly. Peel and dice them into small cubes. Make sure the mangoes are ripe for the sweetest flavor.
In a large bowl, combine the diced mangoes with 1 cup of coconut milk. This will add creamy richness to your fruit salad.
Next, add in the 1 cup of shredded coconut. This ingredient adds a fun texture and enhances the tropical theme.
Squeeze 1 tablespoon of lime juice into the bowl to brighten up the flavors. If you like a little sweetness, drizzle in 1 tablespoon of agave syrup or maple syrup.
Gently mix everything together until it’s well combined. Be careful not to mash the mangoes; a gentle fold works best!
Finally, sprinkle the 1/4 cup of chopped mint leaves on top for a refreshing touch. Serve immediately or chill in the fridge for about 30 minutes to let the flavors meld.
Tips:
- For an extra crunch, add some chopped nuts, like cashews or almonds, before serving.
- You can also include other fruits like pineapple or kiwi for more variety.
- Make sure to use ripe mangoes for the best taste; slightly soft mangoes are ideal!
Nutrition Facts:
- Calories: 180
- Protein: 2g
- Carbohydrates: 30g
- Fat: 7g
- Fiber: 3g
- Sugar: 15g
10 Almond Flour Pancakes with Maple Syrup
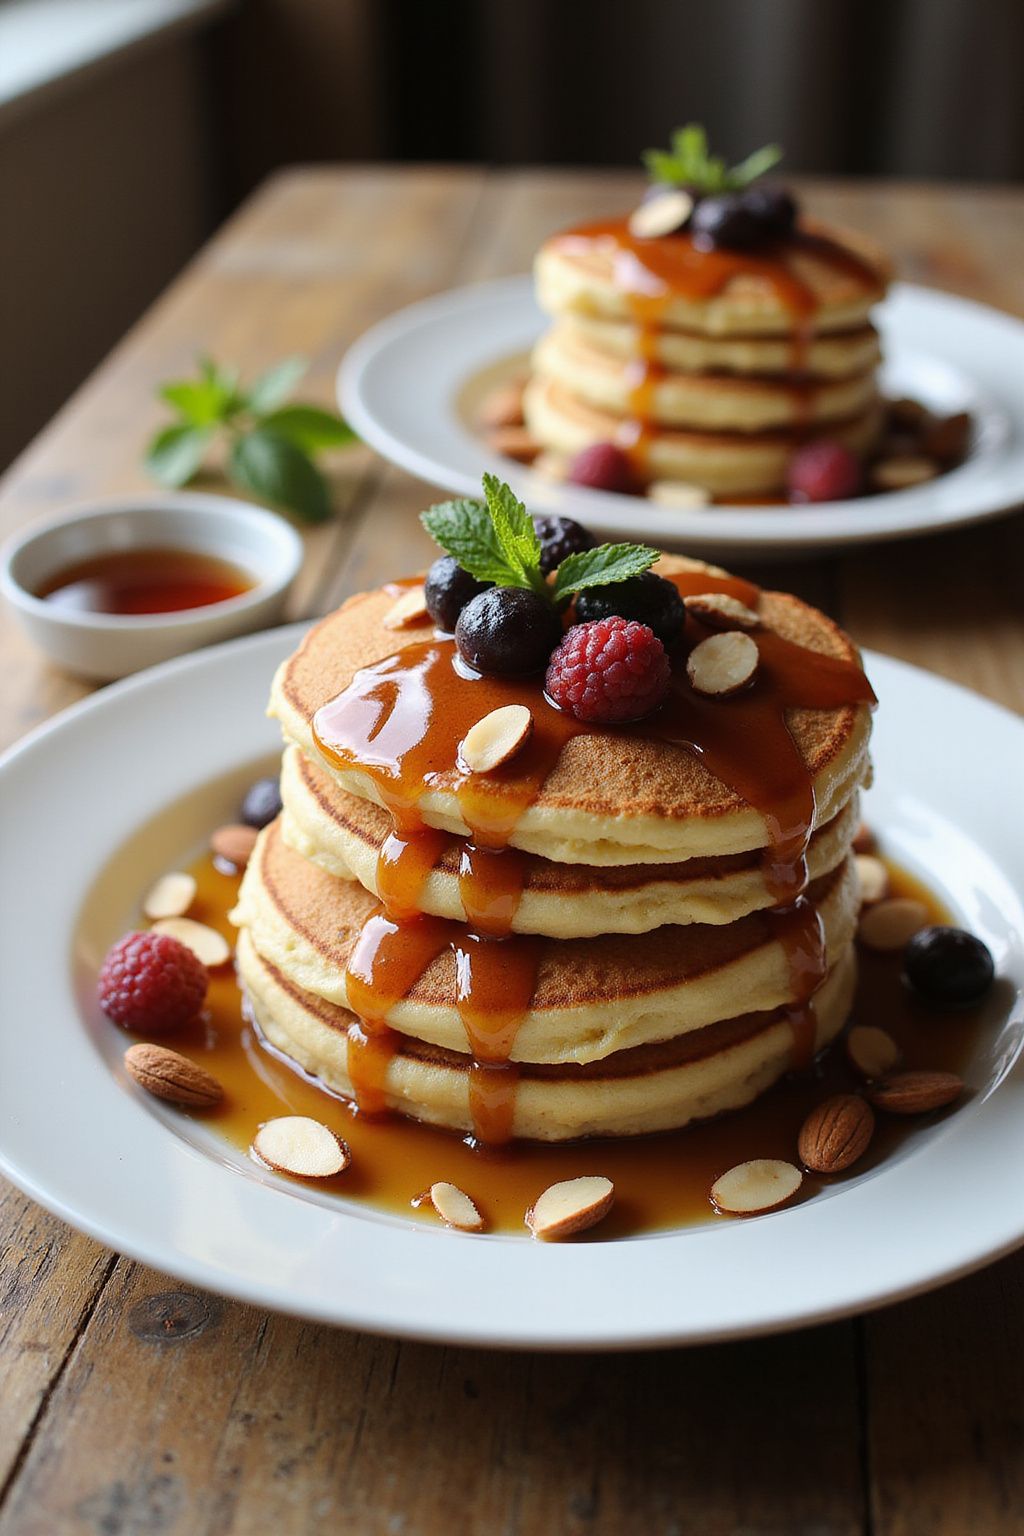
Almond Flour Pancakes are a delicious and easy breakfast choice that everyone will love! These pancakes are not only vegan and gluten-free, but they are also light, fluffy, and perfect with a drizzle of maple syrup. Enjoy them on a cozy morning or serve them to friends for a special brunch!
Prep Time: 10 minutes
Cook Time: 15 minutes
Total Time: 25 minutes
Servings: 4
Ingredients:
- 1 cup almond flour
- 1 tablespoon baking powder
- 1/4 teaspoon salt
- 1 cup almond milk (or any plant-based milk)
- 2 tablespoons maple syrup
- 1 teaspoon vanilla extract
- Coconut oil or non-stick spray (for cooking)
Instructions:
Start by mixing the almond flour, baking powder, and salt in a large bowl. This will help combine your dry ingredients evenly.
In another bowl, whisk together the almond milk, maple syrup, and vanilla extract. Make sure everything is well blended for the best flavor.
Now, pour the wet mixture into the dry ingredients. Stir gently until the batter is combined. Do not overmix; it’s okay if there are a few lumps. Let the batter rest for a few minutes.
While waiting, heat a non-stick pan or griddle over medium heat. Lightly grease it with coconut oil or non-stick spray.
Once hot, pour about 1/4 cup of batter for each pancake onto the pan. Cook for about 2-3 minutes until bubbles form on the surface. Then, flip the pancake and cook for another 2-3 minutes until golden brown.
Repeat this process until all the batter is used up. Serve your pancakes hot, drizzled with fresh maple syrup.
Tips:
- For extra flavor, add a pinch of cinnamon or a few chopped nuts to the batter.
- If you like thicker pancakes, simply add a bit more almond flour to the batter.
- These pancakes can be kept warm in a low oven while you cook the rest.
Nutrition Facts:
- Calories: 150
- Protein: 5g
- Total Fat: 6g
- Saturated Fat: 1g
- Carbohydrates: 22g
- Fiber: 3g
- Sugar: 2g
11 Moroccan Chickpea Stew
This Moroccan Chickpea Stew is a warm and flavorful dish that’s perfect for any day of the week. Packed with nutritious ingredients, it’s not only vegan but also gluten-free. You’ll love how easy it is to prepare and how delightful it tastes!
Prep Time: 15 minutes
Cook Time: 30 minutes
Total Time: 45 minutes
Servings: 4
Ingredients:
- 2 tablespoons olive oil
- 1 onion, diced
- 2 cloves garlic, minced
- 1 teaspoon ground cumin
- 1 teaspoon ground cinnamon
- 1 teaspoon paprika
- 1 can (14 ounces) diced tomatoes
- 1 can (15 ounces) chickpeas, drained and rinsed
- 2 cups vegetable broth
- 1 cup carrots, diced
- 1 cup zucchini, diced
- 1 cup spinach, chopped
- Salt and pepper, to taste
- Fresh cilantro, for garnish
Instructions:
Heat the olive oil in a large pot over medium heat. Add the diced onion and cook until it becomes soft and translucent, about 5 minutes. Stir in the minced garlic, cumin, cinnamon, and paprika, allowing the spices to become fragrant for around 1 minute.
Next, add the canned tomatoes to the pot, stirring well. Then, include the chickpeas, vegetable broth, carrots, and zucchini. Bring the mixture to a boil, and then reduce the heat to a simmer. Let it cook for about 20 minutes, or until the carrots and zucchini are tender.
Stir in the spinach and allow it to wilt, which takes just a couple of minutes. Season the stew with salt and pepper according to your taste. Once everything is well mixed and heated through, remove the pot from the heat.
Serve the stew warm, garnished with fresh cilantro on top. Enjoy this hearty and nutritious meal!
Tips:
- Feel free to add any other vegetables you have on hand, like bell peppers or sweet potatoes.
- Serve the stew with crusty bread or over rice for a complete meal.
- Store leftovers in an airtight container in the refrigerator for up to 3 days.
Nutrition Facts:
- Calories: 320
- Protein: 12g
- Fat: 9g
- Carbohydrates: 50g
- Fiber: 14g
- Sugar: 6g
12 Grilled Vegetable and Hummus Wrap
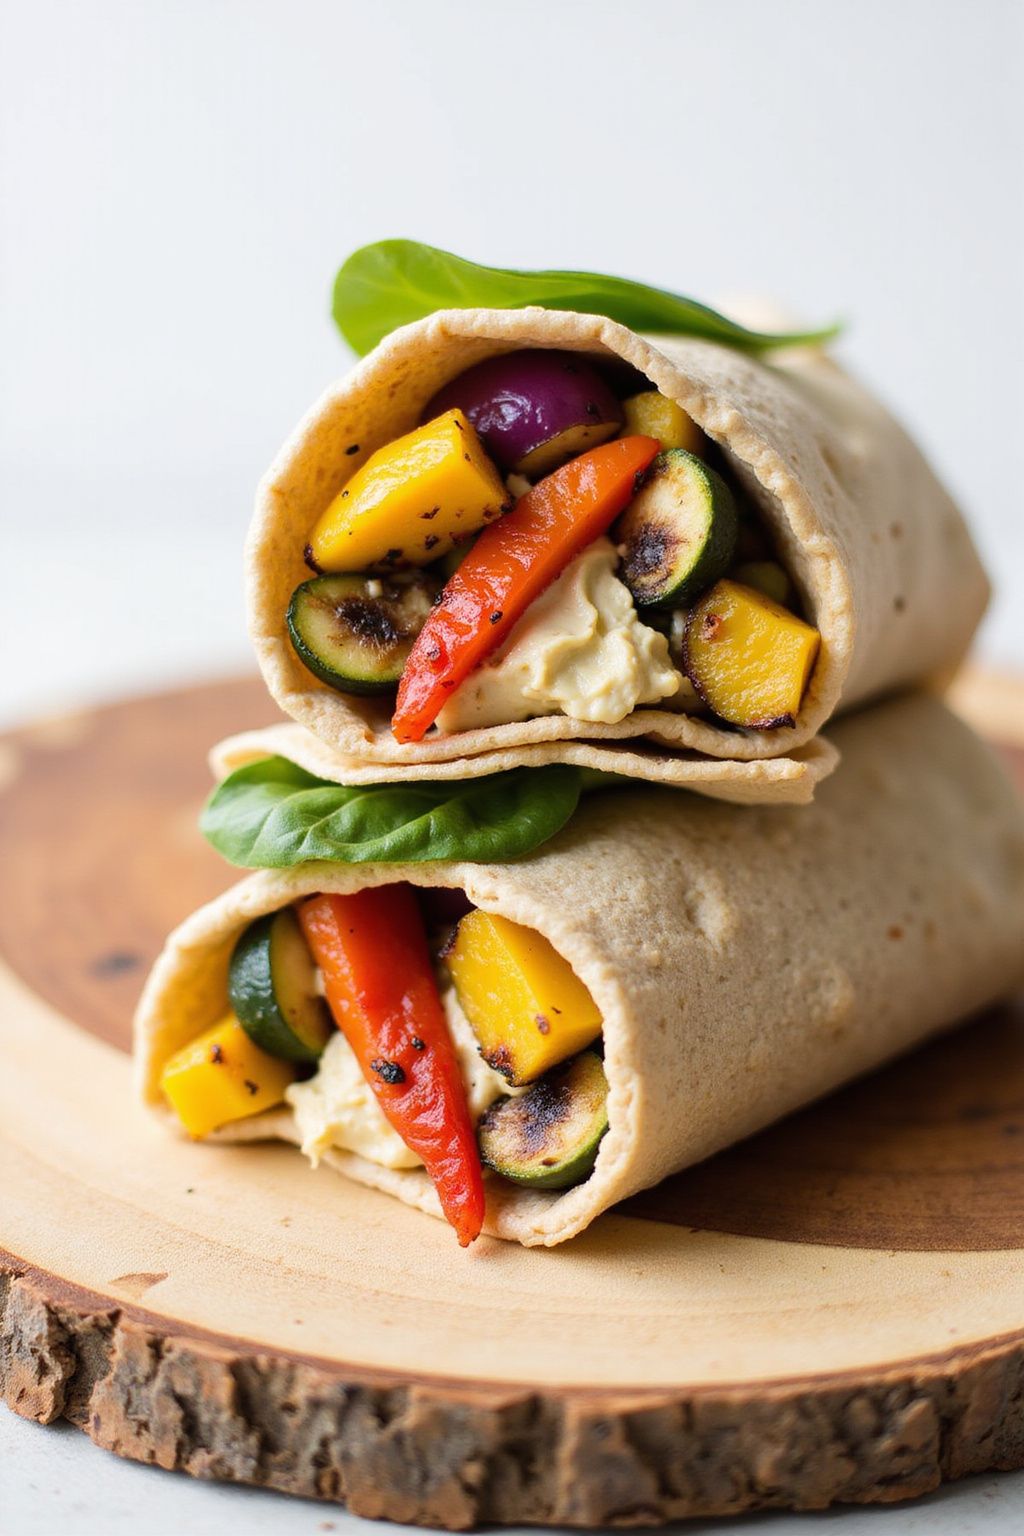
Grilled Vegetable and Hummus Wrap is a delicious, healthy, and colorful meal perfect for lunch or dinner. Packed with fresh veggies and creamy hummus, it’s a simple yet flavorful option everyone will love. Plus, you can easily customize it to include your favorite vegetables!
Prep Time: 10 minutes
Additional Time: 15 minutes
Total Time: 25 minutes
Servings: 2
Ingredients:
- 2 large whole wheat or gluten-free tortillas
- 1 cup of mixed bell peppers, sliced (red, yellow, green)
- 1 medium zucchini, sliced
- 1 small red onion, sliced
- 1 cup of mushrooms, sliced
- 2 tablespoons of olive oil
- Salt and pepper, to taste
- 1 cup of hummus
- Fresh spinach leaves (a handful)
- Optional: Feta cheese or avocado for topping
Instructions:
Start by preheating your grill or grill pan over medium heat. While it heats up, prepare your vegetables. In a mixing bowl, toss the sliced bell peppers, zucchini, red onion, and mushrooms with olive oil, salt, and pepper until everything is well-coated.
Once your grill is ready, place the vegetables on it. Grill for about 8-10 minutes, turning occasionally, until they’re tender and have nice grill marks. Remove the vegetables from the grill and set them aside to cool for a few minutes.
Next, take your tortillas and spread a generous layer of hummus on each one. Then, add a handful of fresh spinach leaves. After that, pile on the grilled vegetables evenly between the two wraps. If you like, you can also sprinkle some feta cheese or add slices of avocado on top.
Carefully wrap each tortilla tightly, folding in the sides as you roll. You can slice them in half diagonally for easier eating. Enjoy your Grilled Vegetable and Hummus Wraps right away or pack them for a healthy meal on the go!
Tips:
- Experiment with different vegetables like eggplant or asparagus for variety.
- For extra flavor, add some lemon juice or your favorite spices to the vegetables before grilling.
- These wraps can be made in advance and chilled, making them a great meal prep option!
Nutrition Facts:
- Calories: 350
- Fat: 15g
- Carbohydrates: 45g
- Fiber: 10g
- Protein: 10g
13 Matcha Energy Balls
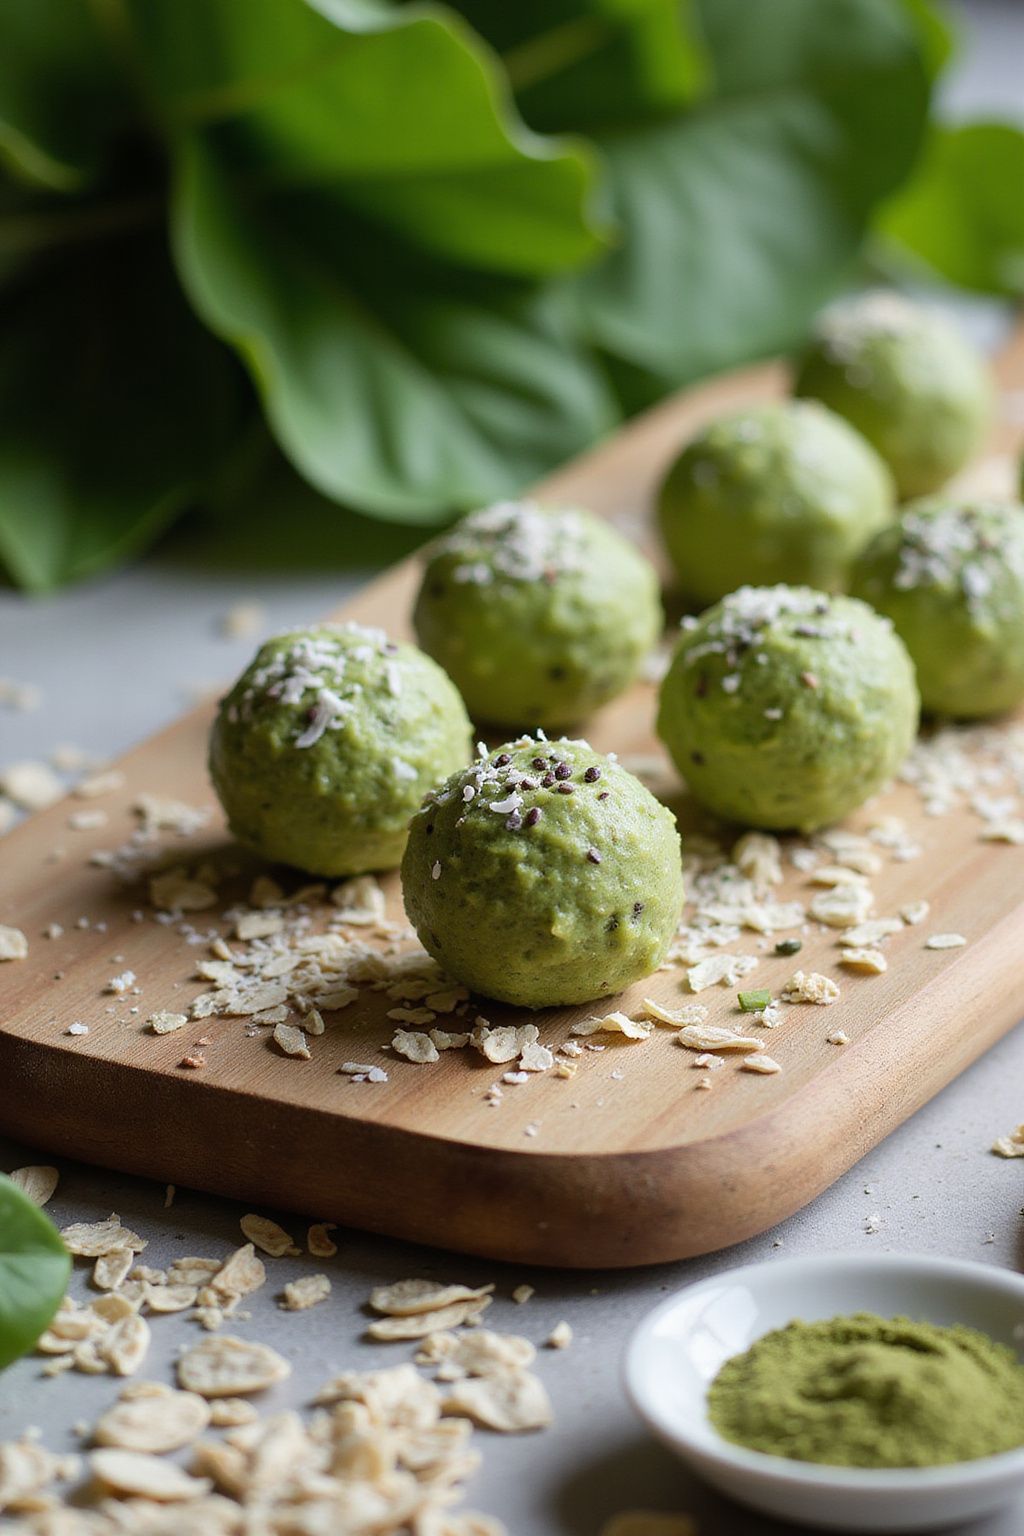
Matcha Energy Balls are delicious and packed with energy! They are a perfect snack to keep you going throughout the day. Plus, they are super easy to make with just a few ingredients.
Prep Time: 10 minutes
Total Time: 10 minutes
Servings: 12 energy balls
Ingredients:
- 1 cup rolled oats
- 1/2 cup almond butter
- 1/4 cup maple syrup
- 2 tablespoons matcha powder
- 1/4 cup shredded coconut
- 1/4 cup chia seeds
- 1/2 teaspoon vanilla extract
- Pinch of salt
Instructions:
In a large mixing bowl, combine the rolled oats, almond butter, and maple syrup. Stir these ingredients well until they are evenly mixed. The almond butter should coat the oats nicely.
Next, add in the matcha powder, shredded coconut, chia seeds, vanilla extract, and a pinch of salt. Mix everything until you have a sticky dough. Make sure all of the dry ingredients are well incorporated into the mixture.
Now, take a small amount of the mixture and roll it into a ball about the size of a tablespoon. Repeat this process until you have made about 12 energy balls. If the mixture gets too sticky, wet your hands slightly to make rolling easier.
Place the energy balls on a plate or in a container. You can enjoy them right away, or for a chilly treat, refrigerate for about 30 minutes before serving. This will help them firm up a bit!
Tips:
- For an extra crunch, consider adding some chopped nuts or seeds into the mixture.
- Store your energy balls in an airtight container in the fridge for up to one week.
- Feel free to experiment with other flavors by adding ingredients like cacao powder or dried fruit.
Nutrition Facts:
- Calories: 110
- Protein: 3g
- Fat: 6g
- Carbohydrates: 12g
- Fiber: 3g
- Sugar: 4g
14 Roasted Beet and Walnut Salad
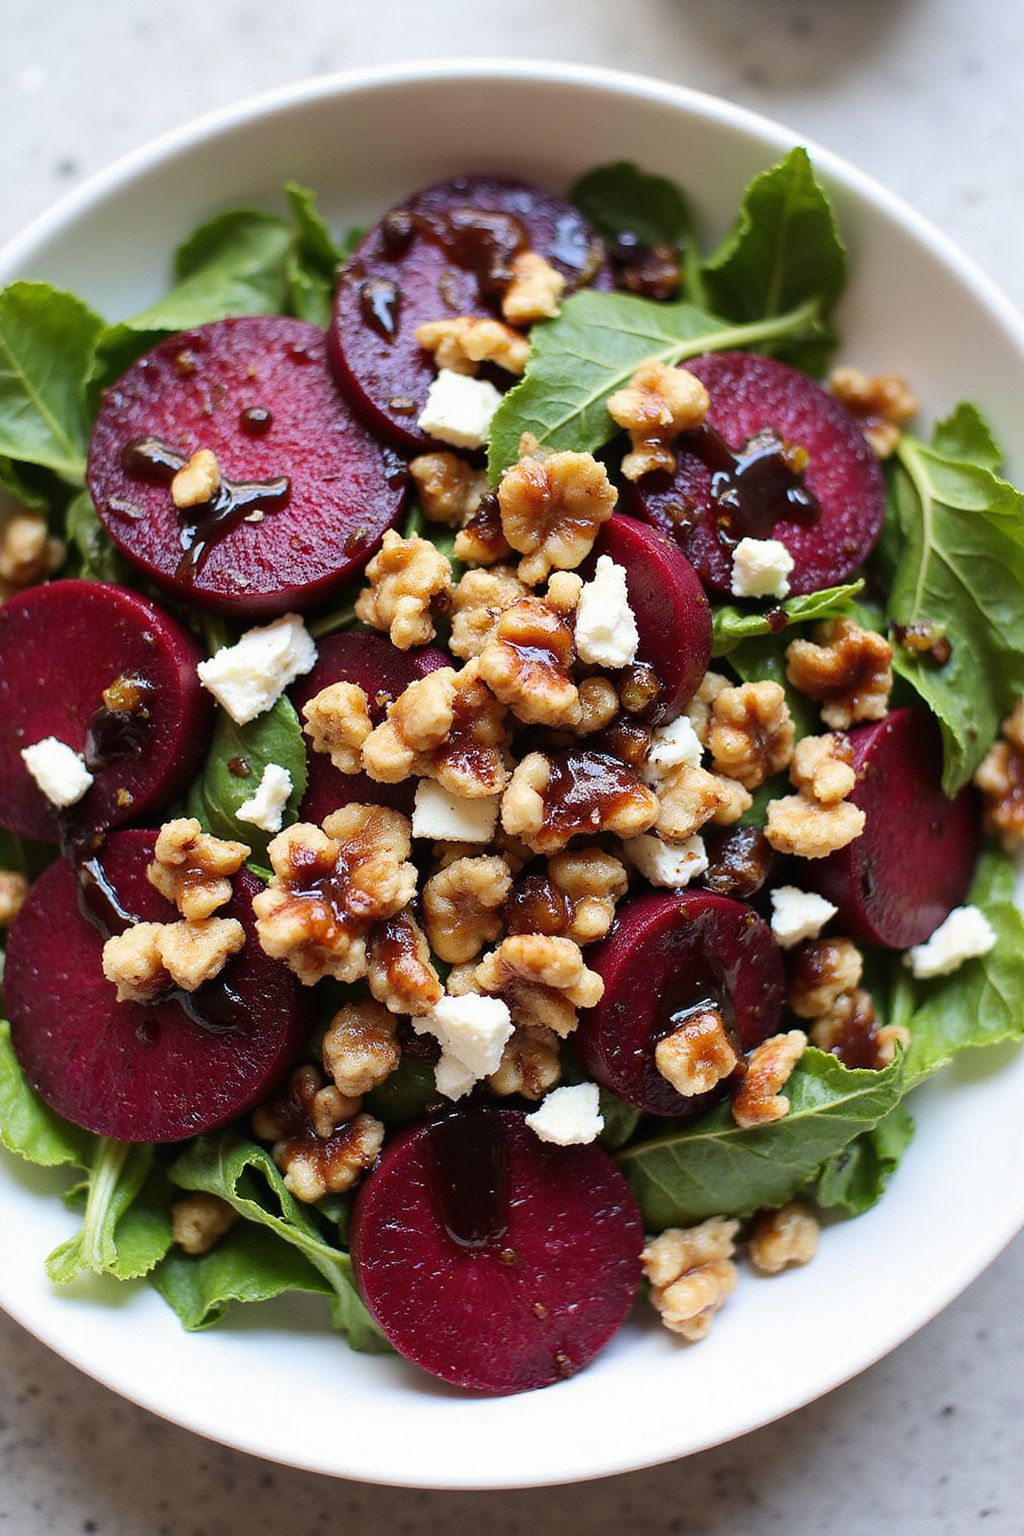
Roasted Beet and Walnut Salad is a delicious and healthy dish. The earthy sweetness of the beets pairs perfectly with crunchy walnuts. This vibrant salad is perfect for lunch or as a side dish at dinner!
Prep Time: 15 minutes
Cook Time: 45 minutes
Total Time: 1 hour
Servings: 4
Ingredients:
- 4 medium-sized beets
- 1 cup walnuts, roughly chopped
- 4 cups mixed greens (like spinach and arugula)
- 1/4 cup feta cheese (optional for a non-vegan option)
- 3 tablespoons olive oil
- 2 tablespoons balsamic vinegar
- 1 teaspoon Dijon mustard
- Salt and pepper, to taste
Instructions:
First, preheat your oven to 400°F (200°C). While the oven is heating, wash your beets thoroughly to remove any dirt or grit. Wrap each beet in aluminum foil and place them on a baking sheet.
Roast the beets in the oven for about 45 minutes, or until they are tender when pierced with a fork. Once done, let the beets cool down, then peel off the skins. You can wear gloves to prevent your hands from staining.
While the beets are roasting, toast the walnuts in a dry skillet over medium heat for about 5-7 minutes. Stir often until they become fragrant and slightly golden, then set them aside to cool.
Next, prepare the dressing by whisking together olive oil, balsamic vinegar, and Dijon mustard in a small bowl. Add salt and pepper to taste.
When the beets are cool, slice them into bite-sized pieces. In a large bowl, combine the mixed greens, roasted beets, and toasted walnuts. If you’re using feta cheese, crumble it over the top.
Drizzle the dressing over the salad and toss gently to combine all ingredients. Serve immediately or chill for a little bit in the fridge to let the flavors meld.
Tips:
- Consider adding sliced apples or oranges for an extra burst of flavor.
- You can prepare and roast the beets a day ahead to save time on busy days.
- Feel free to add your favorite nuts or seeds for added crunch.
Nutrition Facts:
- Calories: 180
- Protein: 5g
- Carbohydrates: 15g
- Fat: 13g
- Fiber: 4g
- Sugar: 6g
15 Tropical Quinoa & Black Bean Bowl
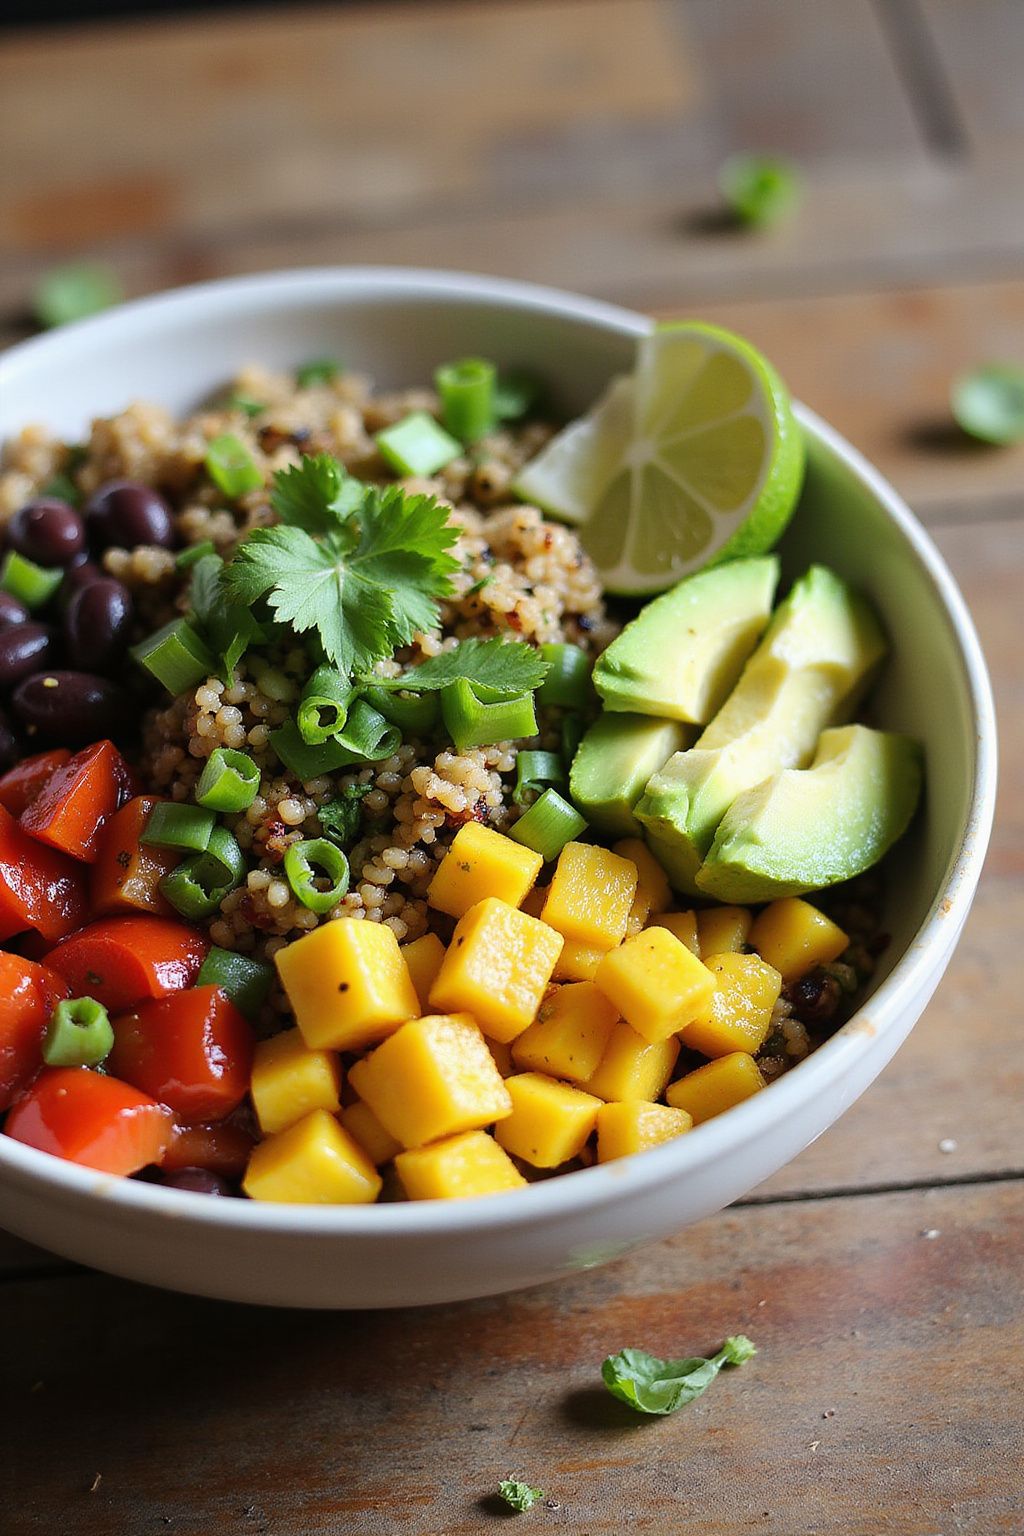
This Tropical Quinoa & Black Bean Bowl is a colorful and nutritious meal that brings the flavors of the tropics to your kitchen. Packed with protein and fiber, it’s a filling dish that’s also vegan and gluten-free. Perfect for those busy weeknights, this bowl is as easy to make as it is delicious!
Prep Time: 15 minutes
Cook Time: 20 minutes
Additional Time: 5 minutes
Total Time: 40 minutes
Servings: 4
Ingredients:
- 1 cup quinoa, rinsed
- 2 cups vegetable broth
- 1 can (15 oz) black beans, drained and rinsed
- 1 cup corn (frozen or fresh)
- 1 red bell pepper, diced
- 1 cup pineapple chunks (fresh or canned)
- 1 avocado, diced
- 2 green onions, sliced
- 1/4 cup fresh cilantro, chopped
- Juice of 1 lime
- 1 tsp cumin
- Salt and pepper to taste
Instructions:
Start by bringing 2 cups of vegetable broth to a boil in a medium saucepan. Once boiling, add 1 cup of rinsed quinoa and a pinch of salt. Reduce heat to low, cover, and simmer for about 15 minutes, or until the quinoa has absorbed all the liquid.
While the quinoa is cooking, prepare the other ingredients. In a large bowl, combine the drained black beans, corn, diced red bell pepper, pineapple chunks, diced avocado, and sliced green onions.
Once the quinoa is done, remove it from heat and let it stand, covered, for about 5 minutes. Fluff the quinoa with a fork before adding it to the large bowl of ingredients.
Now, stir in the fresh cilantro, juice of lime, and cumin. Mix everything gently to combine. Season with salt and pepper to taste.
Serve the bowl warm or at room temperature, and enjoy your delicious Tropical Quinoa & Black Bean Bowl!
Tips:
- For added crunch, top with some pumpkin seeds or toasted coconut.
- If you want a bit of heat, add some diced jalapeño or a sprinkle of chili powder.
- This bowl keeps well, so you can make it ahead of time and enjoy it for lunch throughout the week.
Nutrition Facts:
- Calories: 380 per serving
- Protein: 14g
- Carbohydrates: 63g
- Fat: 12g
- Fiber: 14g
- Sodium: 380mg
16 Creamy Avocado Pasta
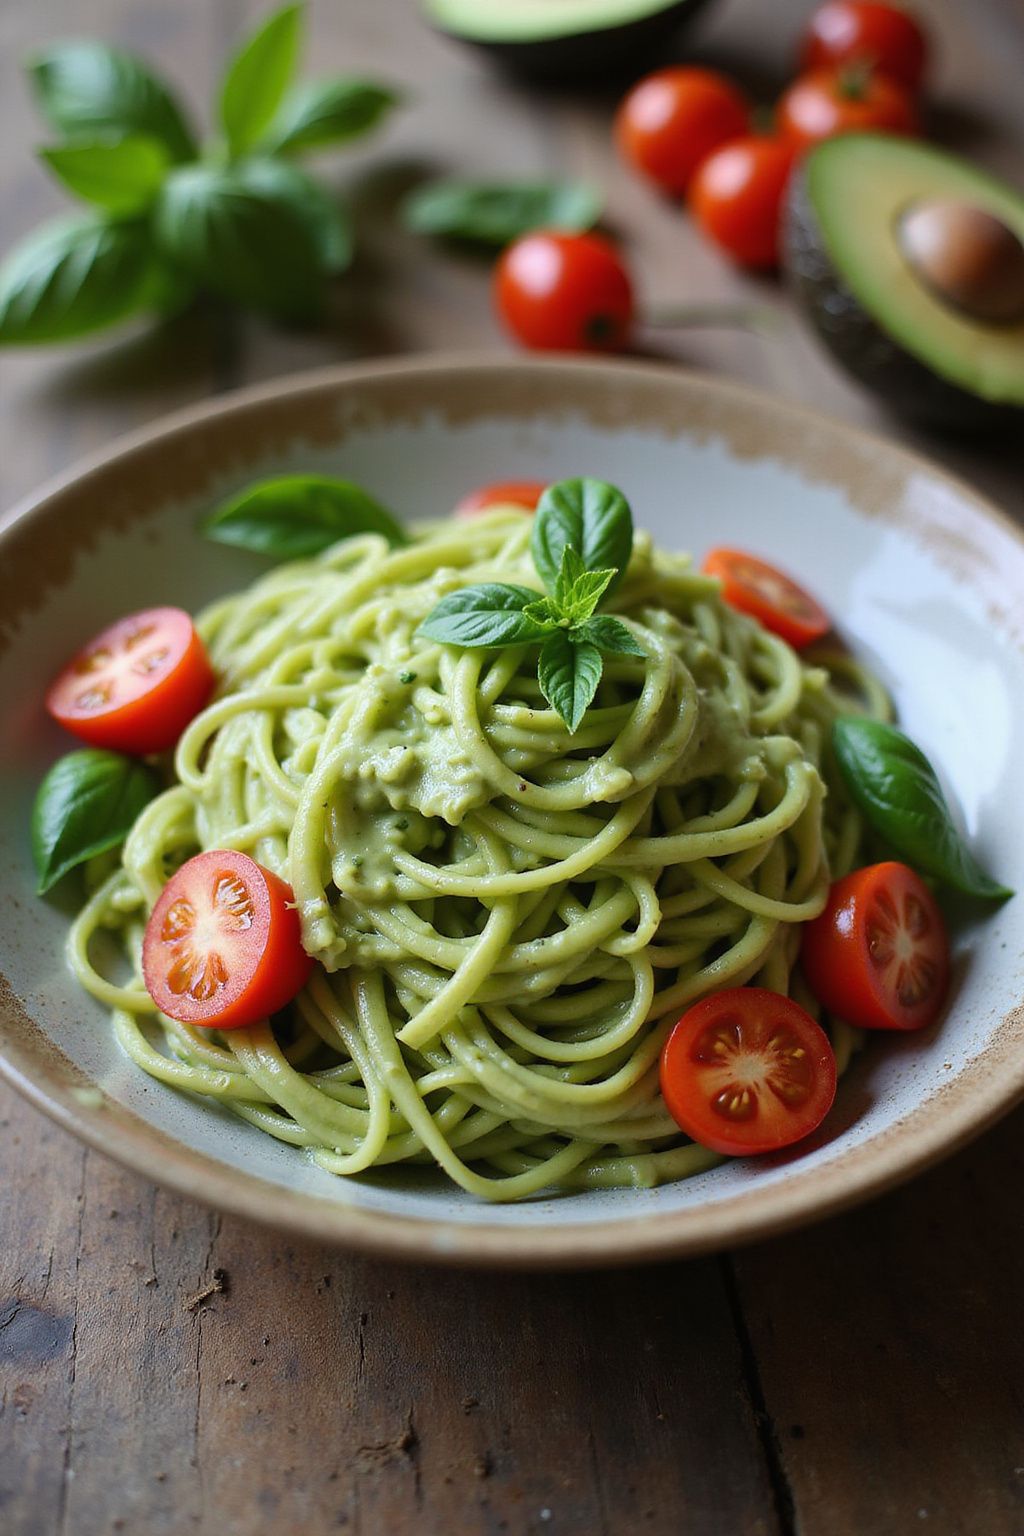
Creamy Avocado Pasta is a delicious and easy dish that’s perfect for any time of the day. It’s rich, creamy, and full of fresh flavors. Plus, it’s vegan and gluten-free, making it a great choice for everyone!
Prep Time: 10 minutes
Total Time: 10 minutes
Servings: 4
Ingredients:
- 2 ripe avocados
- 2 cloves of garlic, minced
- 2 tablespoons of fresh lemon juice
- 2 tablespoons of olive oil
- Salt and pepper to taste
- 12 oz gluten-free pasta (like penne or spaghetti)
- 1/4 cup fresh basil, chopped
- Cherry tomatoes (optional, for topping)
Instructions:
First, boil a large pot of water. Add the gluten-free pasta and cook according to the package instructions until it’s al dente. This usually takes about 8-10 minutes. Once done, drain the pasta and set it aside.
Next, in a blender or food processor, combine the ripe avocados, minced garlic, fresh lemon juice, and olive oil. Blend until the mixture is smooth and creamy. If it’s too thick, you can add a little water to get the right consistency.
Season the creamy avocado sauce with salt and pepper to taste. Mix it well so that all the flavors come together.
Now, in a large bowl, combine the cooked pasta with the avocado sauce. Toss everything gently, ensuring that all the pasta is coated well with the creamy sauce.
Finally, serve your creamy avocado pasta topped with fresh basil and cherry tomatoes if you like. Enjoy this fresh and healthy dish right away!
Tips:
- Make sure your avocados are ripe for a smoother and creamier sauce.
- You can add some nutritional yeast for a cheesy flavor, if desired.
- This pasta is best enjoyed fresh, but you can store leftovers in the fridge for a day.
Nutrition Facts:
- Calories: 400 per serving
- Protein: 8g
- Fat: 20g
- Carbohydrates: 50g
- Fiber: 10g
17 Stuffed Bell Peppers with Lentils
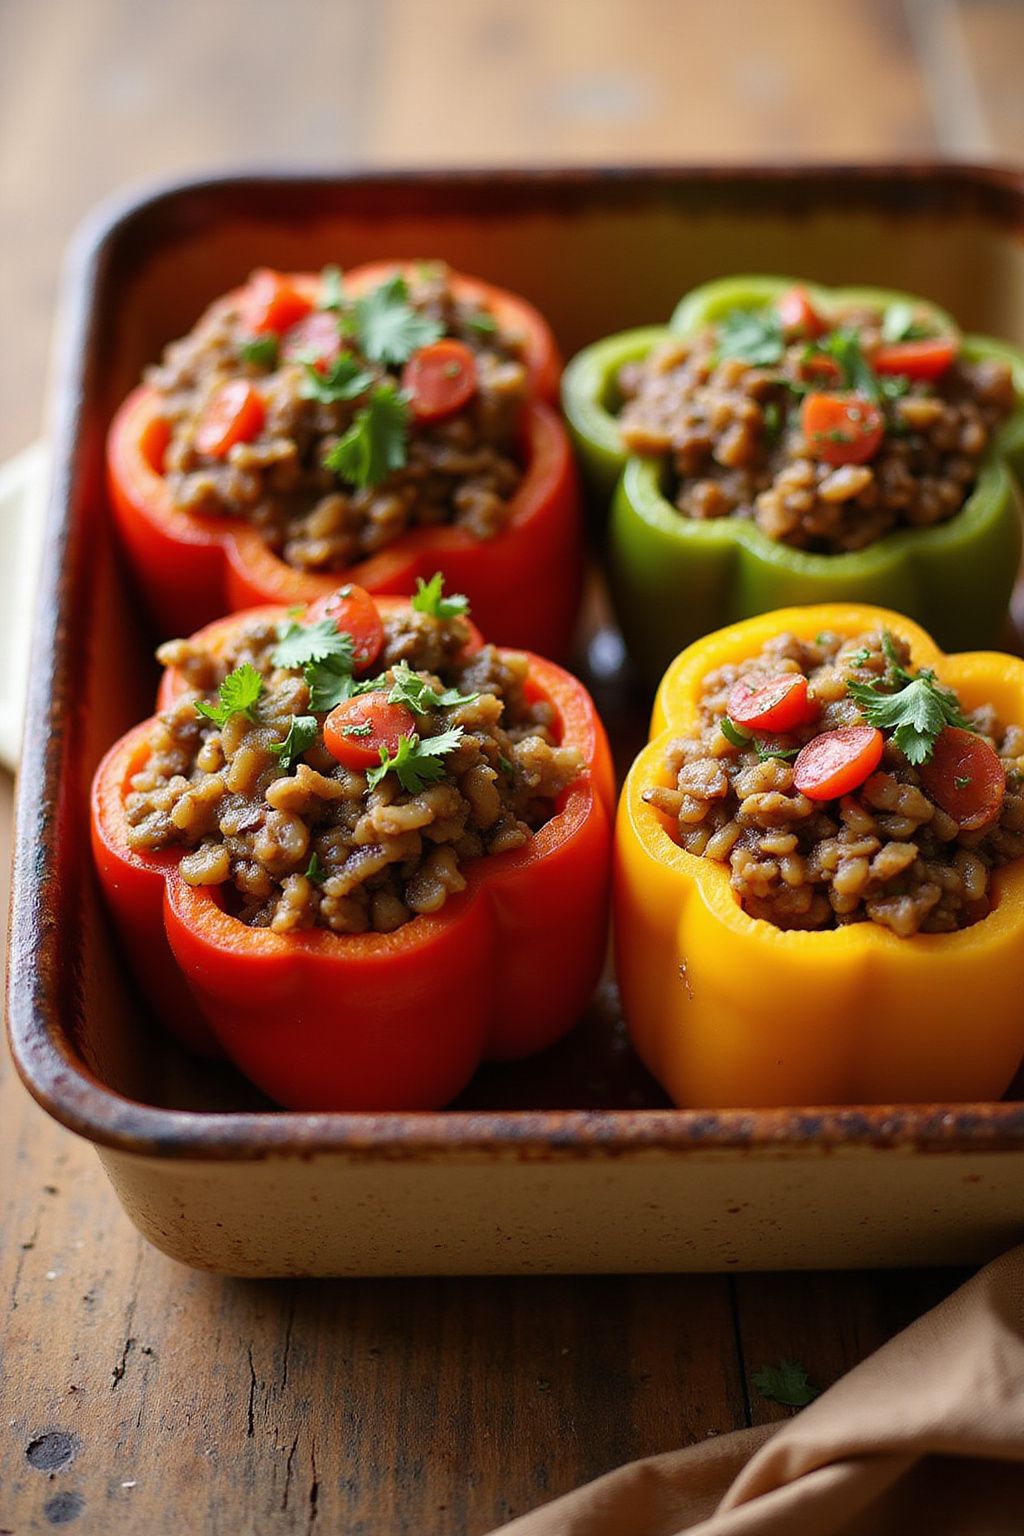
Stuffed Bell Peppers with Lentils are a delicious and healthy meal option. These colorful peppers are filled with a flavorful lentil mixture, making them a great choice for a hearty lunch or dinner. Packed with nutrients, they are not only vegan but also gluten-free!
Prep Time: 15 minutes
Cook Time: 30 minutes
Total Time: 45 minutes
Servings: 4
Ingredients:
- 4 large bell peppers (any color)
- 1 cup cooked lentils (green or brown)
- 1 cup cooked rice (or quinoa for a protein boost)
- 1 small onion, chopped
- 2 cloves garlic, minced
- 1 can diced tomatoes (14.5 oz)
- 1 teaspoon cumin
- 1 teaspoon paprika
- 1/2 teaspoon salt
- 1/4 teaspoon black pepper
- 2 tablespoons olive oil
- Fresh parsley, chopped (for garnish)
Instructions:
Start by preheating your oven to 375°F (190°C). While it’s heating, prepare the bell peppers. Cut the tops off the peppers and remove the seeds. Set them aside.
Next, heat olive oil in a pan over medium heat. Once hot, add the chopped onion and garlic. Sauté for about 5 minutes until the onion is soft and translucent. This will add a nice flavor to your filling.
After that, stir in the cooked lentils, cooked rice, diced tomatoes, cumin, paprika, salt, and black pepper. Mix everything well and let it cook for another 5 minutes. This will allow the flavors to meld together.
Now, it’s time to stuff the peppers! Take the cooked lentil mixture and fill each bell pepper generously. Place the stuffed peppers upright in a baking dish. If needed, you can add a splash of water to the bottom of the dish to keep them moist.
Cover the baking dish with foil and bake in your preheated oven for about 25 minutes. Then, remove the foil and bake an additional 5 minutes to allow the tops to brown slightly.
Once done, take them out of the oven and let them cool for a few minutes. Garnish with fresh parsley before serving.
Tips:
- For extra flavor, add some spices like chili powder or oregano to the lentil mixture.
- If you want a cheesy touch, sprinkle some vegan cheese on top of the peppers before the final 5 minutes of baking.
- These stuffed peppers can be made ahead and stored in the fridge for up to 3 days.
Nutrition Facts:
- Calories: 210 per serving
- Protein: 10g
- Fat: 7g
- Carbohydrates: 32g
- Fiber: 8g
- Sugar: 4g
18 Cinnamon Apple Crisp
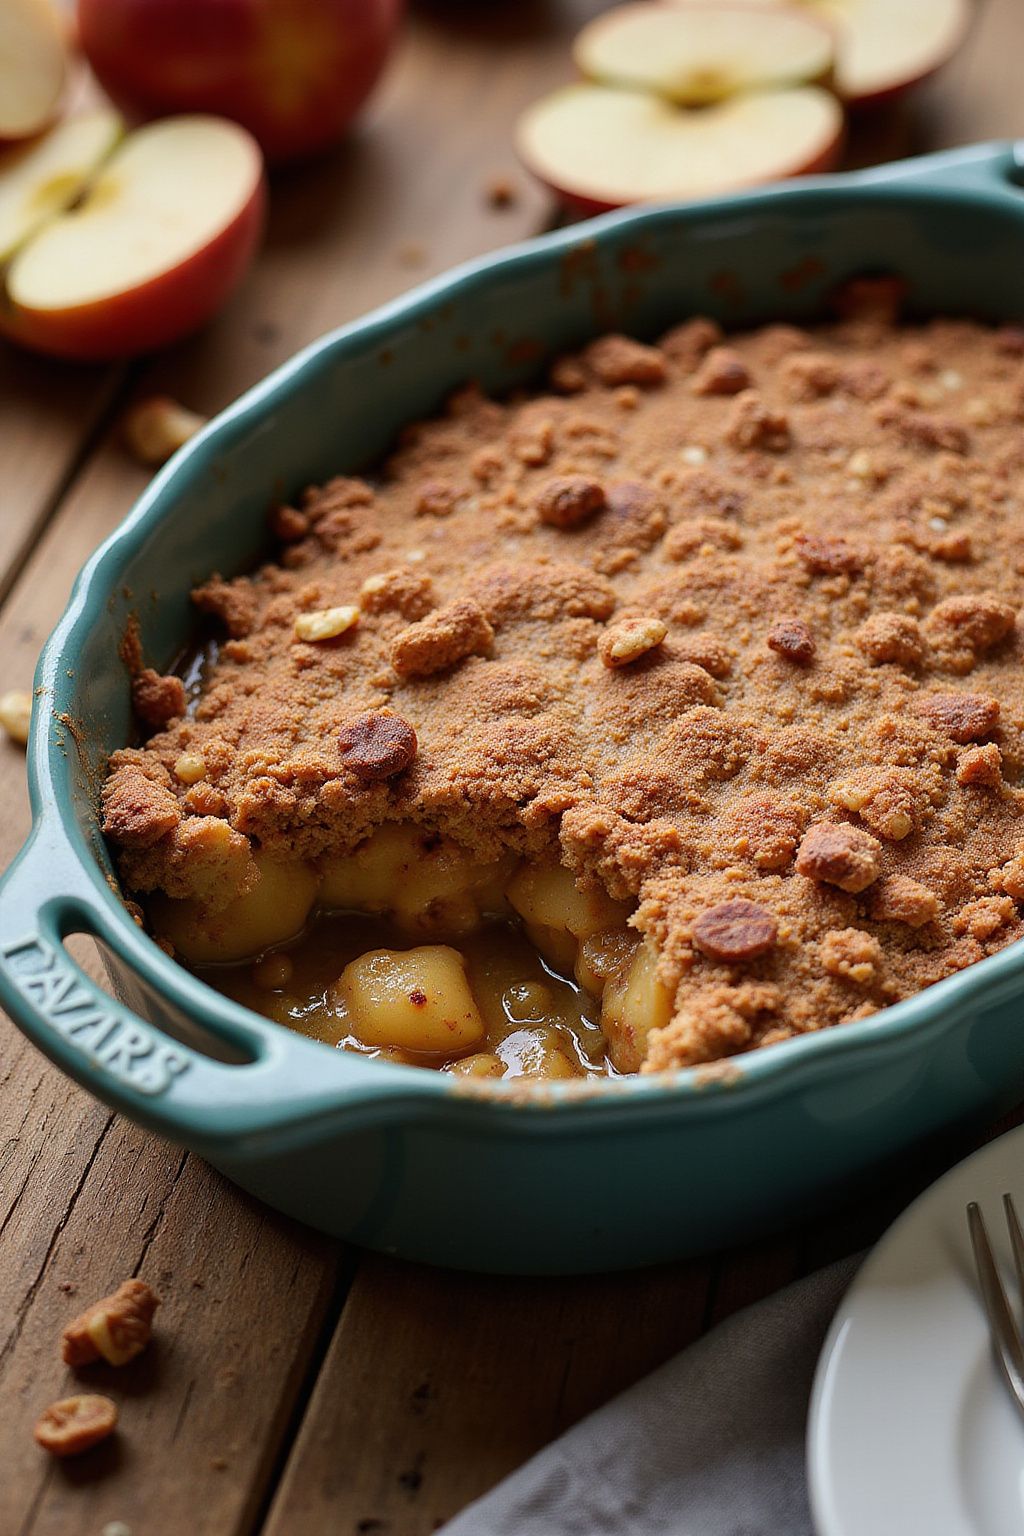
Cinnamon Apple Crisp is a delicious dessert that brings warmth and comfort to any table. With sweet apples and a crunchy topping, it’s perfect for cozy nights or gatherings with friends and family. Plus, it’s vegan and gluten-free, so everyone can enjoy it!
Prep Time: 15 minutes
Cook Time: 30 minutes
Total Time: 45 minutes
Servings: 6
Ingredients:
- 4 cups of sliced apples (any kind you like)
- 1 tablespoon of lemon juice
- 1 teaspoon of ground cinnamon
- 1/4 cup of coconut sugar (or brown sugar)
- 1 cup of rolled oats (gluten-free if needed)
- 1/2 cup of almond flour (or any nut flour)
- 1/3 cup of coconut oil (melted)
- 1/4 teaspoon of salt
- 1/4 cup of chopped nuts (like walnuts or pecans, optional)
Instructions:
Start by preheating your oven to 350°F (175°C). This is important to ensure the apple crisp cooks evenly.
In a large bowl, toss the sliced apples with lemon juice, ground cinnamon, and coconut sugar. Make sure the apples are well coated; this will give them a fantastic flavor.
Next, in another bowl, mix together the rolled oats, almond flour, melted coconut oil, salt, and chopped nuts if using. This will create the crispy topping. Stir until everything is combined well.
Now, take a baking dish and lightly grease it. Spread the apple mixture in the dish evenly, then sprinkle the oatmeal mixture on top. Make sure to cover the apples completely for a crunchy finish.
Place the dish in the preheated oven and bake for about 30 minutes. You’ll know it’s done when the apples are bubbling and the top is golden brown.
Let the Cinnamon Apple Crisp cool for a few minutes before serving. It’s delicious on its own but even better with a scoop of dairy-free ice cream or whipped coconut cream!
Tips:
- Feel free to add spices like nutmeg or ginger for extra flavor.
- You can substitute the coconut sugar with maple syrup or any sweetener of your choice.
- For a more tart flavor, mix in some cranberries or raspberries with the apples.
Nutrition Facts:
- Calories: 180 per serving
- Fat: 8g
- Carbohydrates: 28g
- Fiber: 4g
- Protein: 3g
- Sugar: 10g
19 Pesto Zoodle Bowl

A Pesto Zoodle Bowl is a fresh and healthy dish that combines zucchini noodles, or "zoodles," with a rich and flavorful pesto sauce. It’s perfect for a quick lunch or dinner and can be customized with your favorite toppings. Let’s dive into this vibrant, plant-based meal!
Prep Time: 10 minutes
Total Time: 10 minutes
Servings: 2
Ingredients:
- 2 medium zucchinis, spiralized into noodles
- 1 cup fresh basil leaves
- 1/4 cup pine nuts or walnuts
- 1/4 cup nutritional yeast (optional)
- 1 garlic clove
- 1/4 cup olive oil
- Salt and pepper, to taste
- Cherry tomatoes, halved (for garnish)
- Extra pine nuts or walnuts (for topping)
Instructions:
Start by spiralizing the zucchinis to create zoodles. You can use a spiralizer or a vegetable peeler for this step. Once done, set them aside in a large mixing bowl.
Next, make the pesto. In a food processor, add the basil leaves, pine nuts, nutritional yeast, and garlic. Pulse these ingredients until they are well combined. Slowly add the olive oil while the processor runs, until you achieve a smooth consistency.
Now, pour the pesto over the zoodles in the mixing bowl. Toss the zoodles gently until they are well coated with the pesto.
Finally, season with salt and pepper to taste. Divide the zoodle mixture between two bowls. Garnish with cherry tomatoes and extra pine nuts or walnuts on top for added crunch.
Tips:
- If you want to add some protein, consider tossing in some chickpeas or tofu.
- This dish is great as a cold salad too! Just refrigerate the zoodles and pesto ahead of time.
- You can experiment with different nuts in your pesto, such as almonds or cashews, for a unique flavor.
Nutrition Facts:
- Calories: 250
- Protein: 6g
- Carbohydrates: 15g
- Fat: 20g
- Fiber: 4g
- Sugars: 5g
20 Vegan Chocolate Chip Cookies

Vegan Chocolate Chip Cookies are a delicious treat that everyone can enjoy. They’re soft, chewy, and packed with chocolatey goodness. Plus, they’re super easy to make!
Prep Time: 10 minutes
Cook Time: 12 minutes
Total Time: 22 minutes
Servings: 12 cookies
Ingredients:
- 1 cup almond butter (or peanut butter)
- 1/2 cup brown sugar
- 1/4 cup maple syrup
- 1 teaspoon vanilla extract
- 1 cup gluten-free flour
- 1/2 teaspoon baking soda
- 1/4 teaspoon salt
- 1/2 cup vegan chocolate chips
Instructions:
First, preheat your oven to 350°F (175°C) and line a baking sheet with parchment paper. This will help prevent the cookies from sticking.
In a large mixing bowl, combine 1 cup of almond butter, 1/2 cup of brown sugar, 1/4 cup of maple syrup, and 1 teaspoon of vanilla extract. Mix these ingredients until they are smooth and creamy.
Next, add 1 cup of gluten-free flour, 1/2 teaspoon of baking soda, and 1/4 teaspoon of salt to the bowl. Stir everything together until it forms a thick cookie dough.
Now, gently fold in 1/2 cup of vegan chocolate chips. Make sure the chocolate chips are evenly distributed throughout the dough.
Using a spoon or your hands, scoop out small balls of dough and place them on the prepared baking sheet. Make sure to leave some space between each cookie, as they will spread a bit while baking.
Bake the cookies in the preheated oven for 10-12 minutes, or until the edges are lightly golden. Remove them from the oven and let them cool on the baking sheet for a few minutes before transferring them to a wire rack to cool completely.
Tips:
- For a nuttier flavor, try adding 1/4 cup of chopped nuts to the dough.
- If you prefer smaller cookies, you can make mini cookie dough balls and adjust the baking time to about 8-10 minutes.
- Store leftover cookies in an airtight container for up to 5 days.
Nutrition Facts:
- Calories: 120
- Total Fat: 7g
- Saturated Fat: 1g
- Cholesterol: 0mg
- Sodium: 50mg
- Total Carbohydrates: 14g
- Dietary Fiber: 1g
- Sugars: 5g
- Protein: 3g