My New Cookbook is Out! Check Out Now!
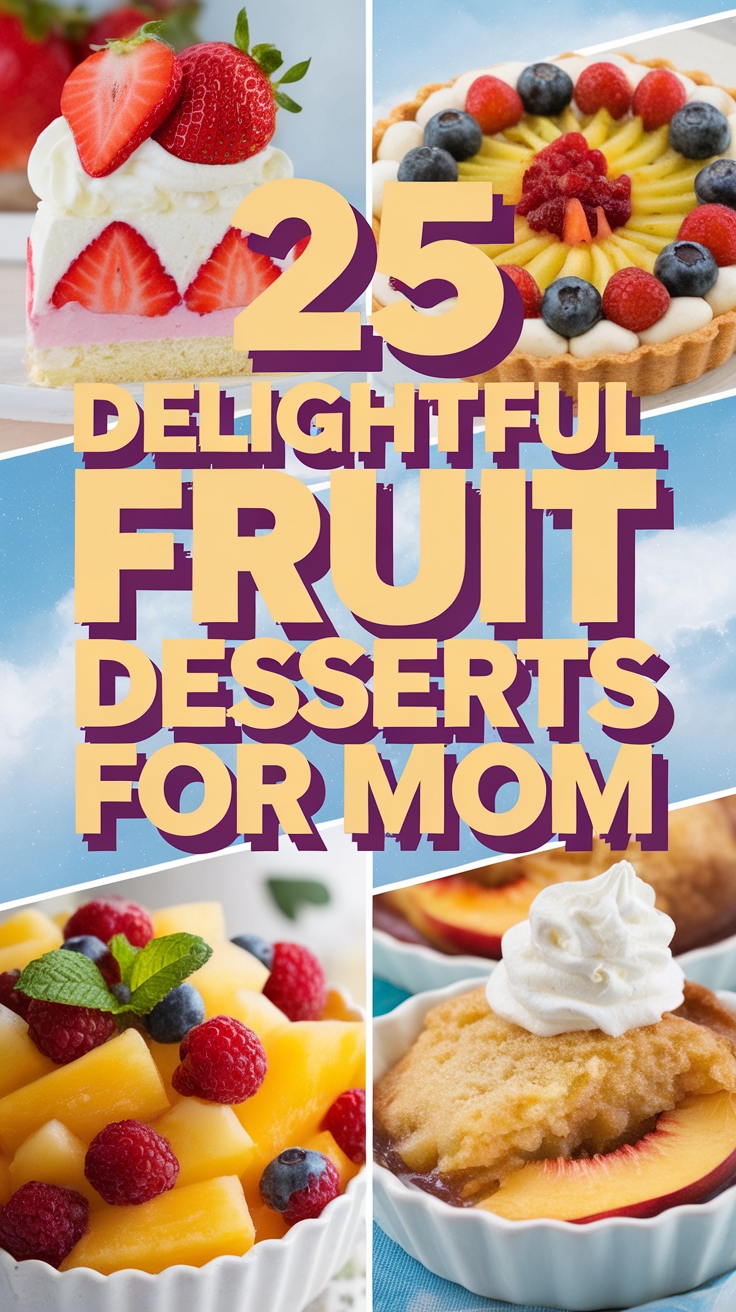
25 Tasty Fruit-Based Desserts for Mother’s Day
This page contains affiliate links and I earn a commission if you make a purchase through one of the links, at no cost to you.
Are you ready to surprise your mom this Mother’s Day with something delicious? Treating her to a homemade dessert made from her favorite fruits can show just how much you care! In this round-up, you’ll discover 25 fruit-based desserts that are not only easy to make but also bursting with flavor and love. Let’s dive in and make her day extra special!
Shop Our Must-Haves
![Rustic Fruit Desserts: Crumbles, Buckles, Cobblers, Pandowdies, and More [A Cookbook]](https://m.media-amazon.com/images/I/51EYjCttFhL._SL160_.jpg)


1 Strawberry Shortcake Delight
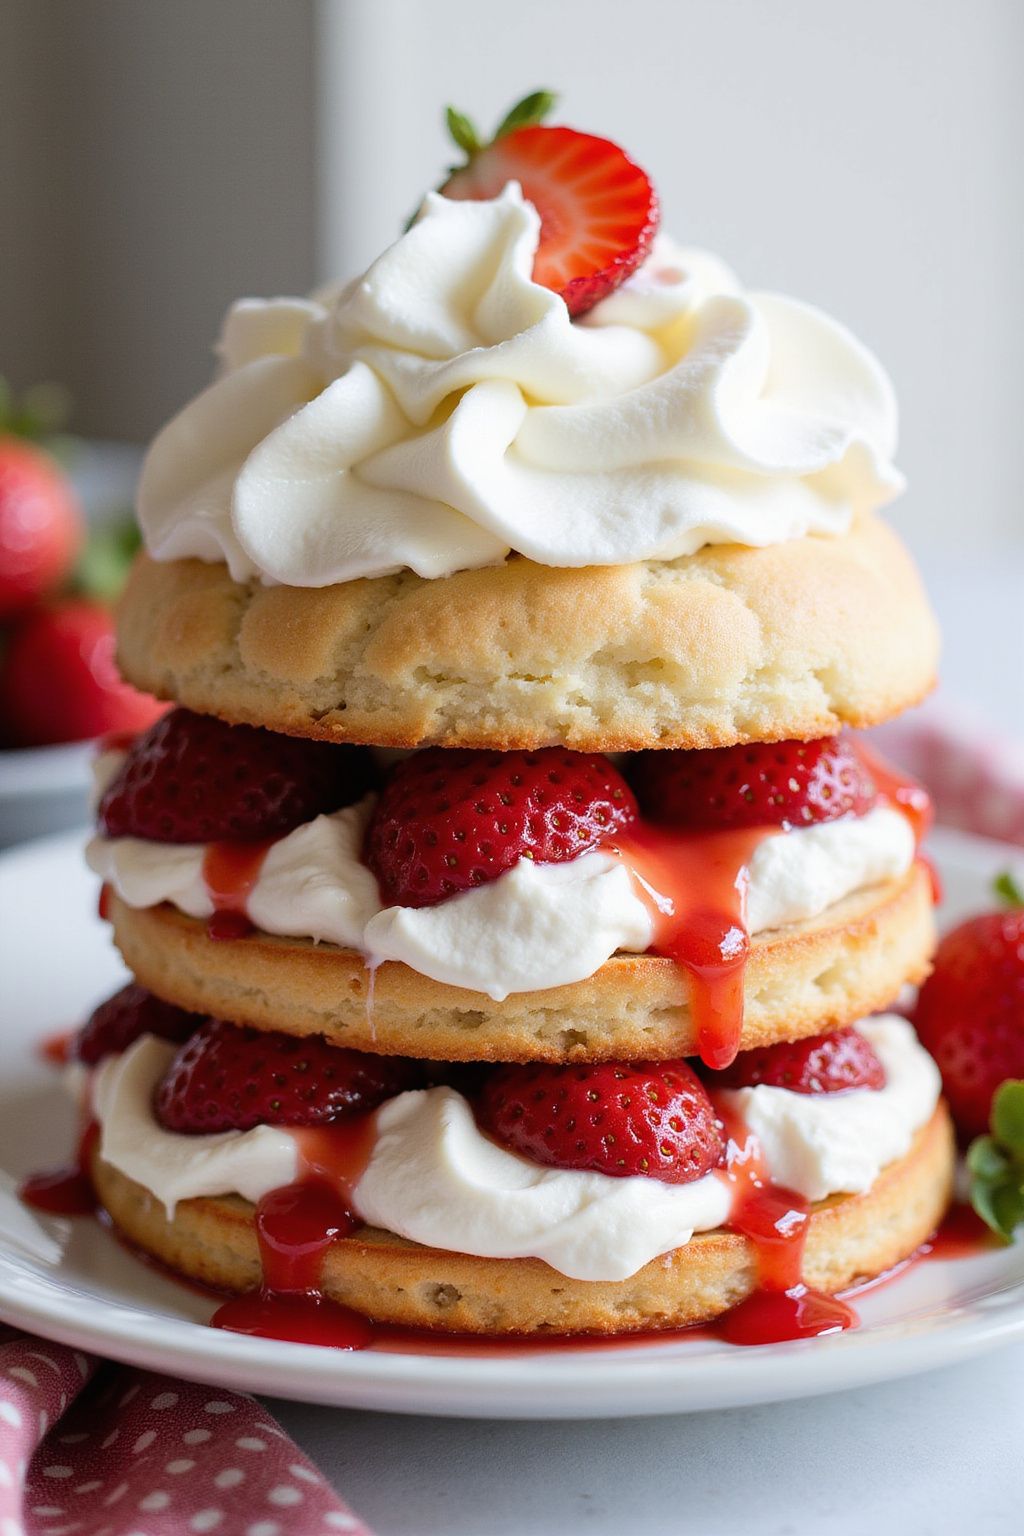
Get ready to indulge in a deliciously sweet Strawberry Shortcake Delight! This treat combines fluffy layers of cake, fresh strawberries, and luxurious whipped cream for a dessert that everyone will love. Perfect for any occasion, it’s easy to make and looks beautiful on the table.
Prep Time: 20 minutes
Total Time: 20 minutes
Servings: 8
Ingredients:
- 1 pound of fresh strawberries, hulled and sliced
- 1/4 cup of granulated sugar
- 1 box of angel food cake mix
- 1 cup of heavy whipping cream
- 1/4 cup of powdered sugar
- 1 teaspoon of vanilla extract
- Extra strawberries for garnish (optional)
Instructions:
First, start by preparing the strawberries. In a medium bowl, combine the sliced strawberries with the granulated sugar. Stir well to coat them and let them sit for about 10 minutes. This will draw out their natural juices, creating a delicious syrup.
Next, prepare the angel food cake according to the package instructions. Once baked, allow the cake to cool completely on a wire rack. While the cake cools, it’s time to whip some cream.
In a large mixing bowl, pour in the heavy whipping cream and add the powdered sugar and vanilla extract. Using a hand mixer, beat the cream until soft peaks form. Be careful not to over-whip, or it may turn into butter!
Now, it’s time to assemble your shortcake. Once the angel food cake has cooled, cut it into two or three layers. Place the bottom layer on a serving plate and spoon some of the syrupy strawberries and a generous amount of whipped cream over it.
Repeat the layers with the remaining cake, strawberries, and cream. Finish with a dollop of whipped cream and garnish with extra strawberries on top. Voilà! Your Strawberry Shortcake Delight is ready to serve.
Tips:
- For extra flavor, try adding a splash of lemon juice to the strawberries.
- If you like, you can use store-bought whipped cream to save time.
- This dessert is best served fresh but can be refrigerated for a short time if needed.
Nutrition Facts:
- Calories: 210 per serving
- Total Fat: 10g
- Sodium: 150mg
- Total Carbohydrates: 30g
- Dietary Fiber: 1g
- Sugars: 20g
- Protein: 3g
2 Tropical Mango Parfait
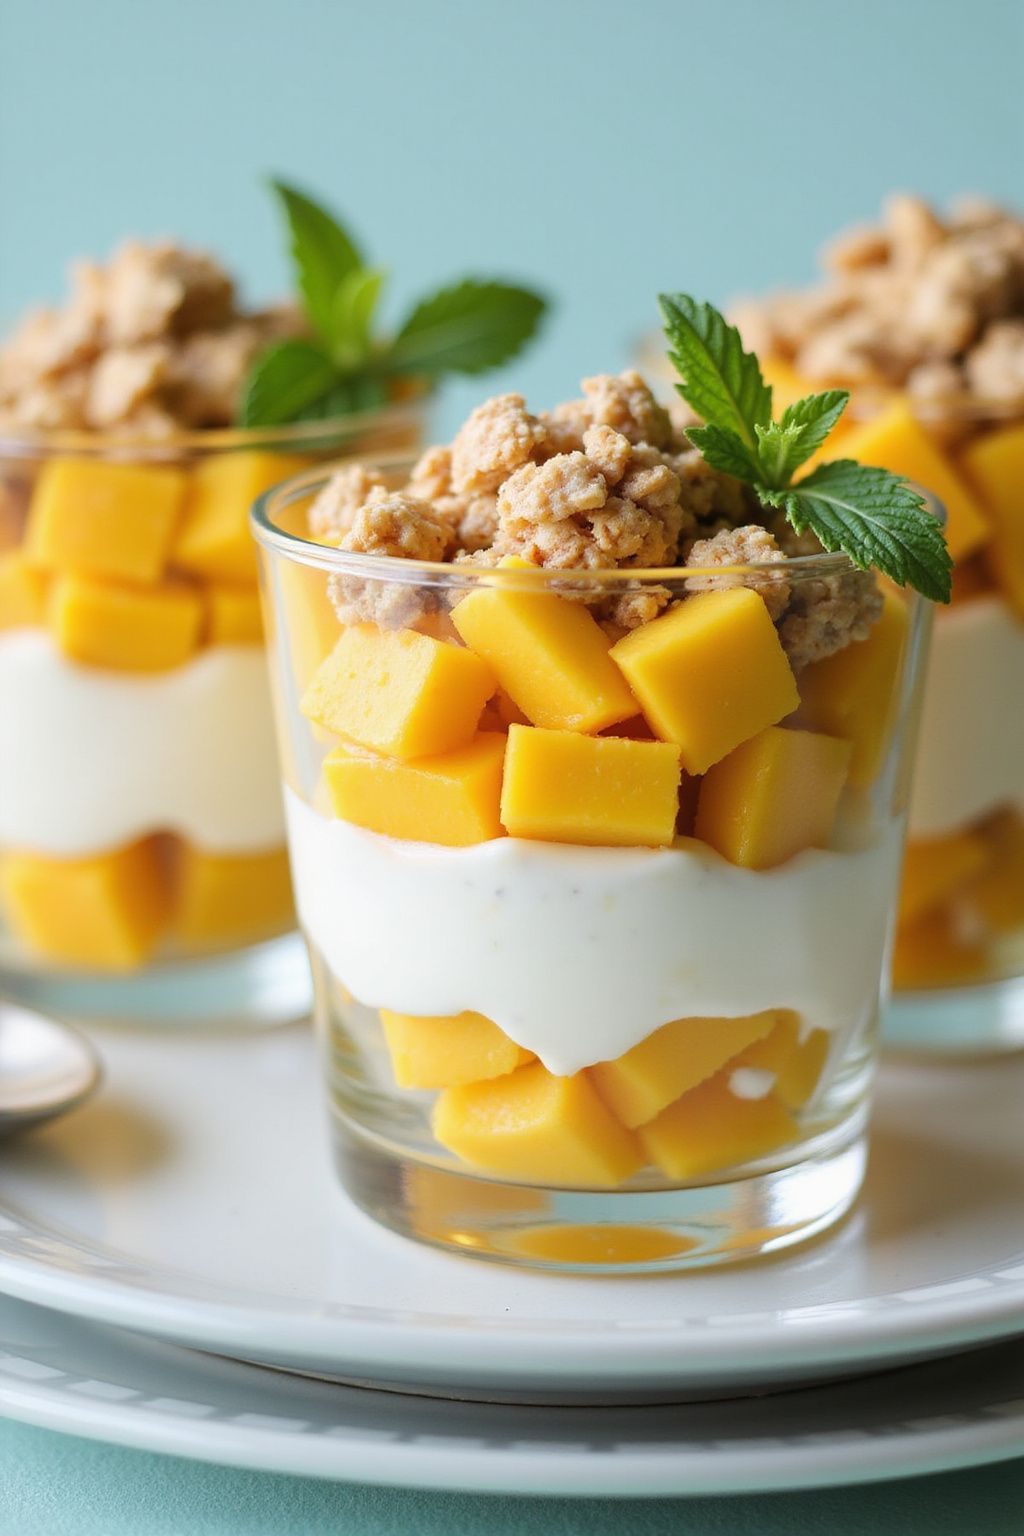
Dive into a burst of tropical flavors with this Tropical Mango Parfait! It’s a quick and easy dessert that’s layered with sweet mango, creamy yogurt, and crunchy granola. Perfect for any occasion, enjoy this refreshing treat that brightens up your day!
Prep Time: 15 minutes
Total Time: 15 minutes
Servings: 4
Ingredients:
- 2 ripe mangos, peeled and diced
- 2 cups Greek yogurt (plain or flavored)
- 1 cup granola
- 1 tablespoon honey (optional)
- Fresh mint leaves for garnish (optional)
Instructions:
Start by washing and peeling the mangos. Cut them into small, bite-sized pieces. Place the diced mangos in a bowl and set them aside for later.
Next, get your yogurt ready. If you want a touch of sweetness, mix in the honey with the yogurt until fully combined. You can use plain yogurt or a flavored one like vanilla for extra taste.
Now, it’s time to layer! Take four serving glasses or bowls. Start by adding a layer of the yogurt at the bottom. Follow it up with a layer of the diced mangos. After that, sprinkle a layer of granola on top. Repeat the layers until you fill the glasses, finishing off with the remaining mangos on top.
For a beautiful presentation, add a few fresh mint leaves as a garnish on top of your parfaits. Serve immediately or let them chill for a few minutes before serving.
Tips:
- Use ripe mangos: Choose mangos that are soft to the touch for the best flavor.
- Mix it up: You can add other fruits like pineapple or banana for variety.
- Make it ahead: Prepare the parfaits in the morning and refrigerate for a quick dessert later!
Nutrition Facts:
- Calories: 210 per serving
- Protein: 8g
- Carbohydrates: 36g
- Fat: 6g
- Sugar: 12g
- Fiber: 3g
3 Raspberry Lemonade Sorbet
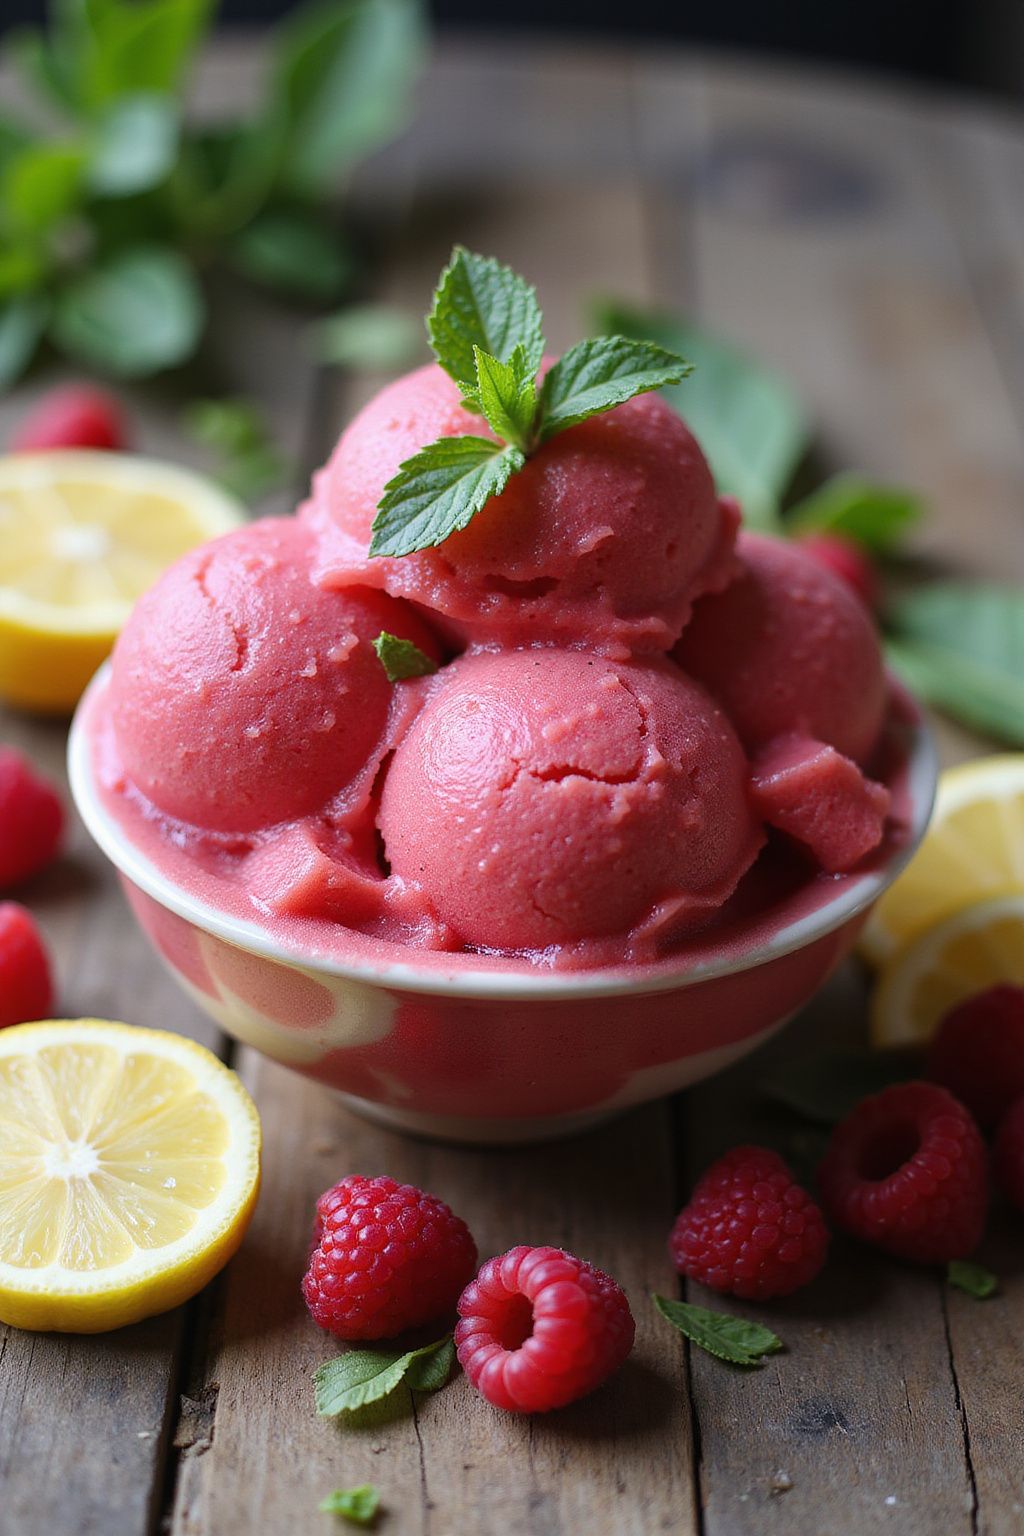
Raspberry Lemonade Sorbet is a delightful and refreshing treat perfect for hot days. The combination of sweet raspberries and zesty lemons creates a deliciously cool dessert that anyone will love. Plus, it’s super easy to make with just a few simple ingredients!
Prep Time: 15 minutes
Additional Time: 4 hours
Total Time: 4 hours 15 minutes
Servings: 4-6
Ingredients:
- 2 cups fresh raspberries
- 1 cup freshly squeezed lemon juice (about 4-6 lemons)
- 1 cup sugar
- 1 cup water
- 1 teaspoon lemon zest (optional, for extra flavor)
Instructions:
Start by rinsing 2 cups of fresh raspberries in cold water. Place them in a blender or food processor and puree until smooth. You can strain the puree through a fine-mesh sieve to remove the seeds if you prefer a smoother texture.
In a small saucepan, combine 1 cup of sugar and 1 cup of water. Heat the mixture over medium heat, stirring until the sugar completely dissolves. This creates a simple syrup. Once the syrup is ready, let it cool for a few minutes.
In a bowl, mix the cooled simple syrup, 1 cup of freshly squeezed lemon juice, the raspberry puree, and 1 teaspoon of lemon zest if you’re using it. Stir well to combine all the flavors.
Pour the mixture into a shallow dish or an ice cream maker. If using a shallow dish, place it in the freezer. After about every 30-40 minutes, use a fork to scrape and stir the mixture until it reaches a fluffy sorbet consistency. This will take around 4 hours.
If you’re using an ice cream maker, follow the manufacturer’s instructions. It usually takes about 20-30 minutes to churn into soft serve.
Once the sorbet reaches your desired texture, transfer it to a container and freeze it for at least another hour to firm up.
Tips:
- For a smoother sorbet, always strain the raspberry puree to get rid of seeds.
- If you want to make the sorbet sweeter or tangier, adjust the amount of sugar or lemon juice to your taste.
- Serve the sorbet in chilled bowls for an extra refreshing treat.
Nutrition Facts:
- Calories: 110 per serving
- Total Fat: 0g
- Sodium: 0mg
- Total Carbohydrates: 28g
- Dietary Fiber: 2g
- Sugars: 25g
- Protein: 1g
4 Pineapple Upside-Down Cake
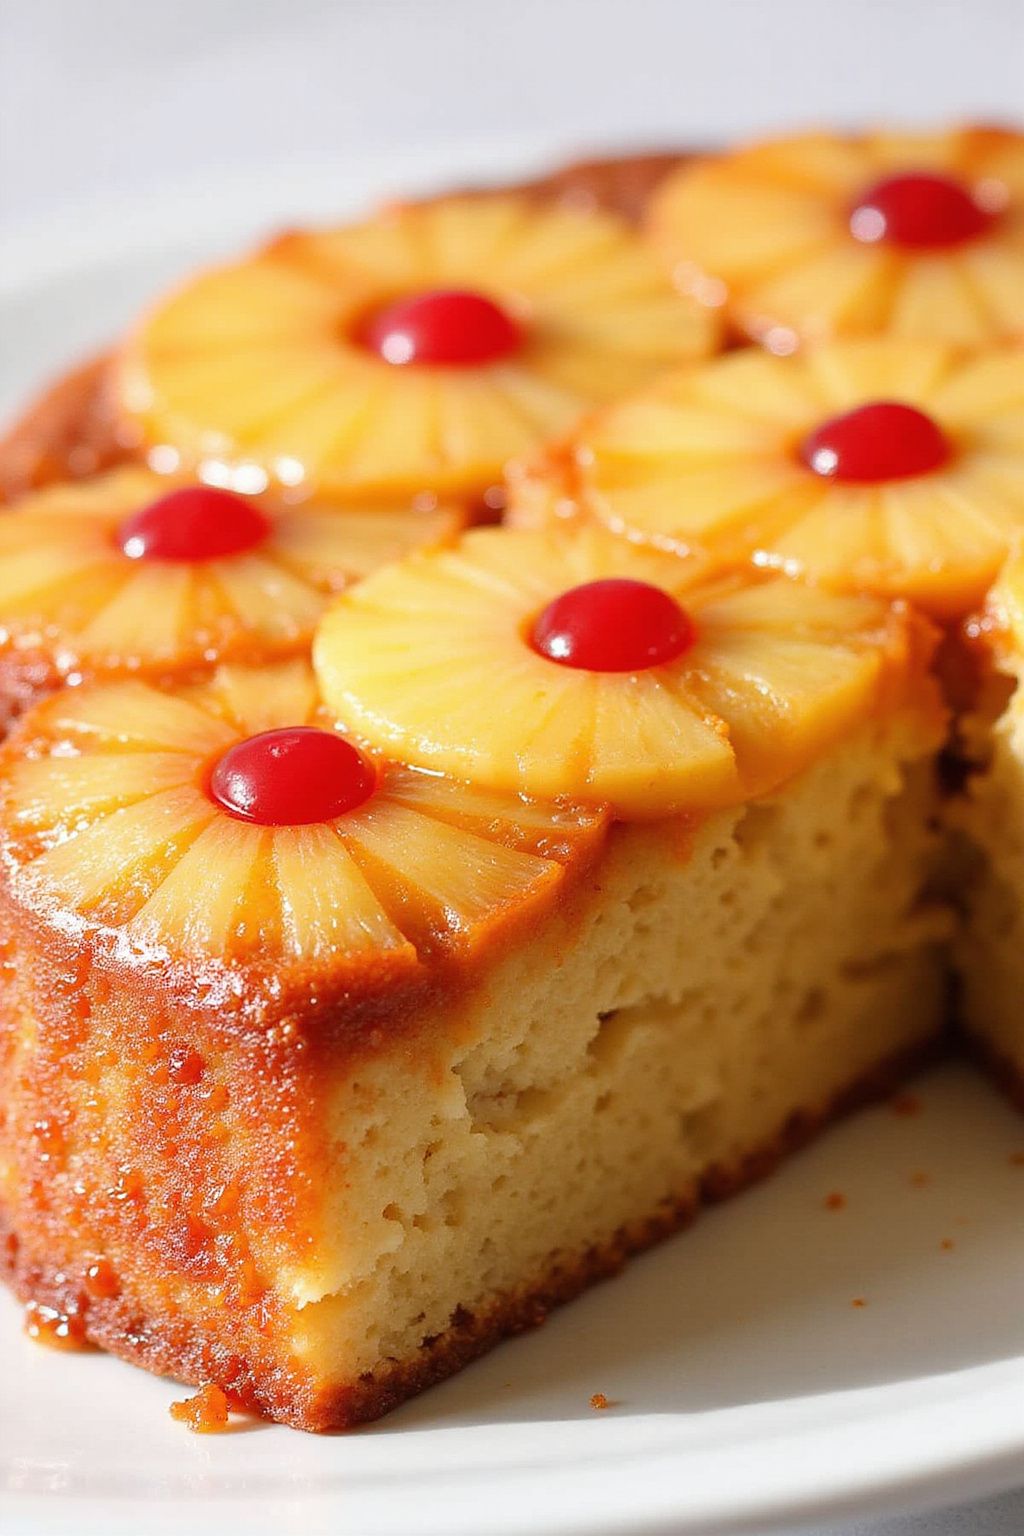
Pineapple Upside-Down Cake is a classic dessert that brings a tropical twist to your table. It features a caramelized topping of sweet pineapple slices and cherries, all sitting atop a moist cake. This cake is perfect for birthdays, potlucks, or just a sweet treat after dinner.
Prep Time: 20 minutes
Cook Time: 40 minutes
Additional Time: 10 minutes
Total Time: 1 hour 10 minutes
Servings: 8
Ingredients:
- 1/4 cup unsalted butter
- 1/2 cup packed brown sugar
- 1 can (20 oz) sliced pineapple, drained
- Maraschino cherries (about 8, for decoration)
- 1 cup all-purpose flour
- 1 cup granulated sugar
- 1/2 cup milk
- 2 large eggs
- 1/2 teaspoon vanilla extract
- 1 1/2 teaspoons baking powder
- 1/4 teaspoon salt
Instructions:
First, preheat your oven to 350°F (175°C). While it heats up, melt the butter in a round cake pan. Once melted, sprinkle the brown sugar evenly over the butter.
Next, arrange the pineapple slices over the sugar mixture. Place a maraschino cherry in the center of each pineapple slice, creating a beautiful pattern.
Now, in a mixing bowl, combine the flour, granulated sugar, baking powder, and salt. In a separate bowl, whisk together the milk, eggs, and vanilla extract. Gradually add the wet ingredients to the dry ingredients, mixing until just combined.
Pour the batter over the pineapple and cherries in the cake pan. Spread it evenly with a spatula. Bake the cake in the preheated oven for about 40 minutes, or until a toothpick inserted into the center comes out clean.
Once baked, remove the cake from the oven and let it cool in the pan for about 10 minutes. After cooling, use a plate to carefully flip the cake over. Gently lift the pan, and you’ll see the gorgeous pineapple topping.
Tips:
- To make the cake even more flavorful, you can add a dash of cinnamon to the batter.
- Make sure the cake is completely cool before flipping it to prevent sticking.
- Serve with a scoop of vanilla ice cream for a delicious treat!
Nutrition Facts:
- Calories: 260 per serving
- Total Fat: 8g
- Saturated Fat: 5g
- Cholesterol: 60mg
- Sodium: 180mg
- Total Carbohydrates: 42g
- Dietary Fiber: 1g
- Sugars: 24g
- Protein: 3g
5 Blueberry Cheesecake Bars
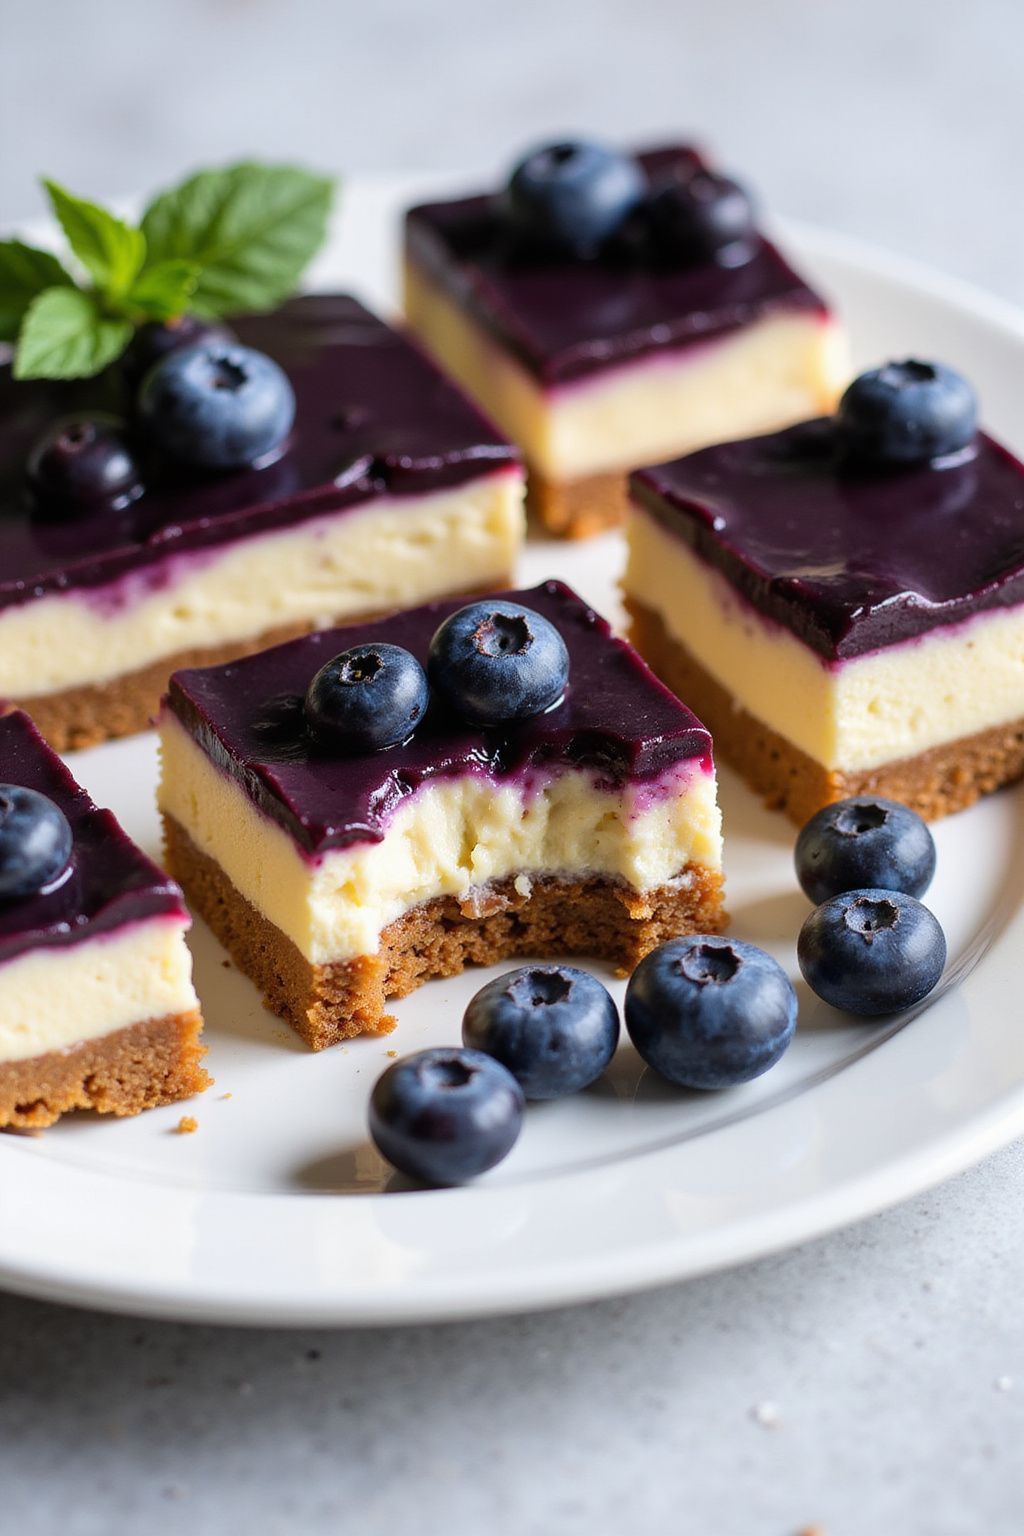
These Blueberry Cheesecake Bars are a delightful treat that combines the creamy goodness of cheesecake with the sweet burst of blueberries. They’re perfect for a family dessert or when you’re hosting friends. Easy to make, these bars will quickly become a favorite!
Prep Time: 15 minutes
Cook Time: 30 minutes
Additional Time: 4 hours (for chilling)
Total Time: 4 hours 45 minutes
Servings: 12
Ingredients:
- 1 ½ cups graham cracker crumbs
- ½ cup unsalted butter, melted
- ¼ cup granulated sugar
- 2 (8 oz) packages cream cheese, softened
- ¾ cup powdered sugar
- 1 teaspoon vanilla extract
- 2 large eggs
- 2 cups fresh or frozen blueberries
- 1 tablespoon cornstarch
Instructions:
Start by preheating your oven to 350°F (175°C). Line a 9×9 inch baking dish with parchment paper, leaving some overhang for easy removal later.
In a mixing bowl, combine graham cracker crumbs, melted butter, and granulated sugar. Stir until everything is well mixed. Press this mixture firmly into the bottom of the prepared baking dish. Bake for about 10 minutes or until golden brown, then remove and let it cool.
In another bowl, beat the softened cream cheese with an electric mixer until smooth. Gradually add the powdered sugar and vanilla extract, mixing well. Add the eggs, one at a time, beating until just combined. Do not overmix.
In a small bowl, toss the blueberries with cornstarch to coat them lightly. Gently fold the blueberries into the cheesecake mixture, making sure not to break them.
Pour the cheesecake mixture over the cooled graham cracker crust. Smooth it out evenly with a spatula. Bake for 20-25 minutes or until the center is set but slightly jiggly. Remove from the oven and let it cool to room temperature.
Once cooled, cover the dish with plastic wrap and place it in the refrigerator for at least 4 hours, or overnight if possible. When ready, lift the cheesecake out using the overhanging parchment paper and cut into bars.
Tips:
- For a sweeter bar, you can add a bit more sugar to the cheesecake mixture if you like.
- If using frozen blueberries, do not thaw them before mixing; this keeps them from bleeding into the cheesecake.
- Serve with a dollop of whipped cream on top for added deliciousness!
Nutrition Facts:
- Calories: 210 per serving
- Fat: 12g
- Carbohydrates: 24g
- Sugar: 10g
- Protein: 3g
6 Peach Crisp with Oat Topping
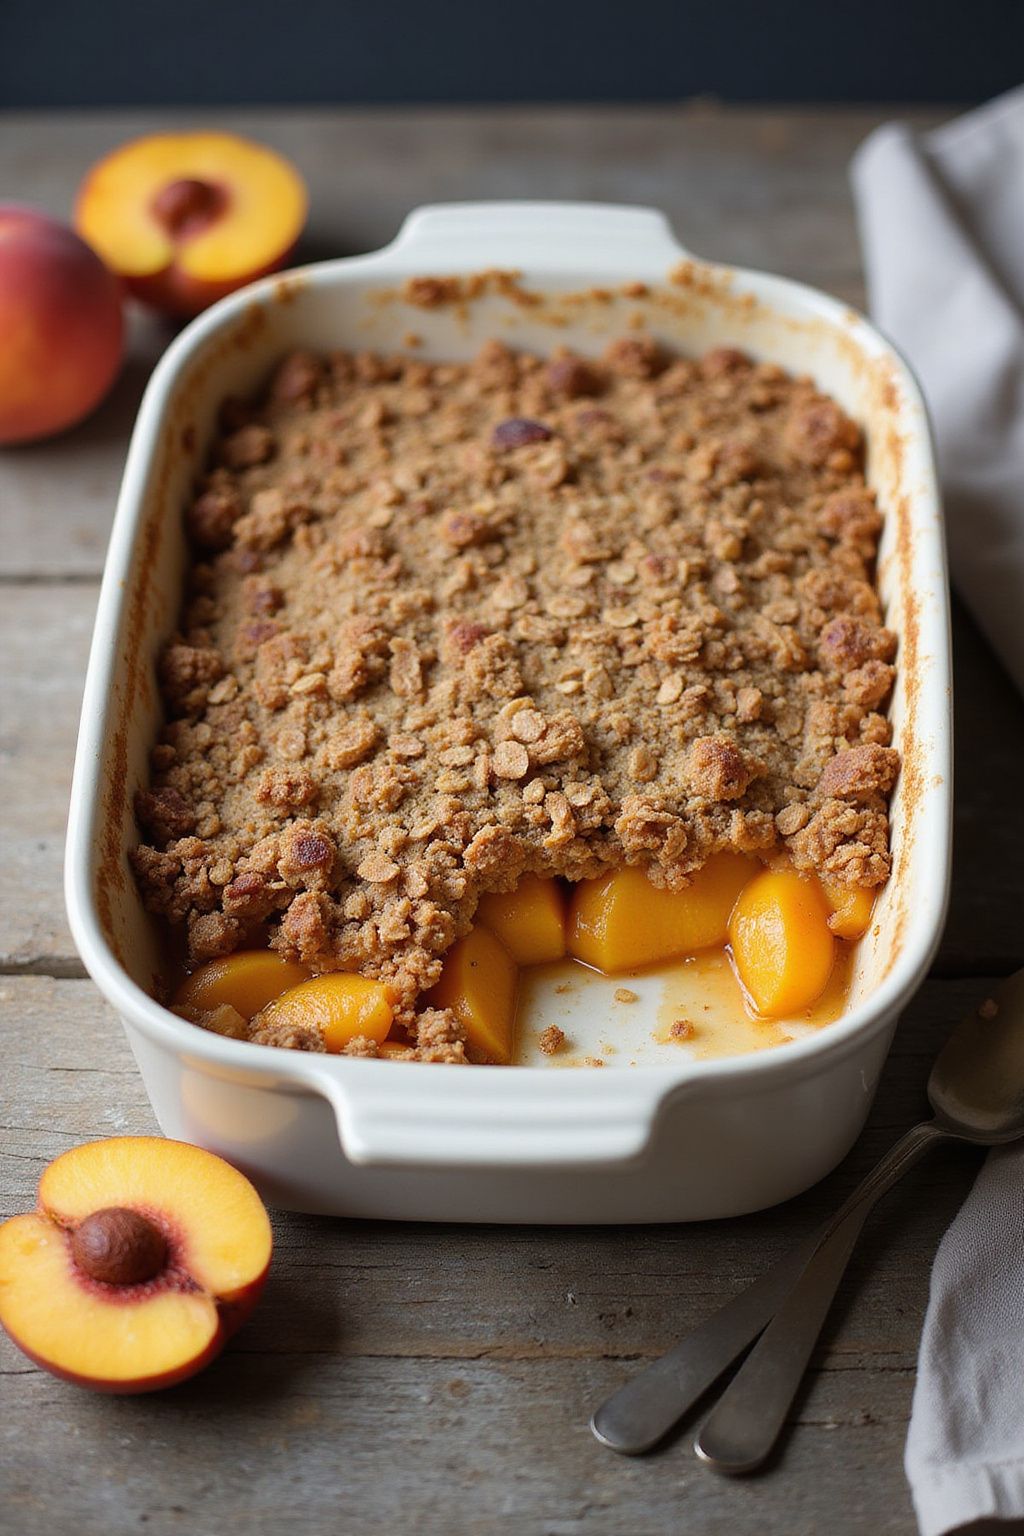
Peach Crisp with Oat Topping is a delicious dessert that brings together the sweet juiciness of peaches with a crunchy, golden topping. It’s easy to make and perfect for sharing with family and friends. This delightful treat will have everyone coming back for seconds!
Prep Time: 15 minutes
Cook Time: 30 minutes
Total Time: 45 minutes
Servings: 6
Ingredients:
- 4 cups fresh peaches, sliced (about 4-5 medium peaches)
- 1/4 cup granulated sugar
- 1 tablespoon lemon juice
- 1/2 cup all-purpose flour
- 1/2 cup rolled oats
- 1/2 cup brown sugar, packed
- 1 teaspoon ground cinnamon
- 1/4 teaspoon salt
- 1/4 cup unsalted butter, melted
Instructions:
Start by preheating your oven to 350°F (175°C). While the oven heats up, prepare your peaches. Slice the fresh peaches and place them in a large bowl. Add granulated sugar and lemon juice to the peaches. Mix everything together gently and set aside.
In another bowl, combine the flour, rolled oats, brown sugar, ground cinnamon, and salt. Stir these ingredients well to ensure they are evenly mixed. Then, pour in the melted butter and use a fork or your fingers to blend everything together until it forms a crumbly texture.
Next, take a baking dish and spread the peach mixture evenly at the bottom. Then, sprinkle the oat topping over the peaches, covering them completely. Place the dish in the preheated oven and bake for about 30 minutes. Keep an eye on it until the topping is golden brown and the peaches are bubbly.
Once it’s done, remove the peach crisp from the oven and let it cool for about 10 minutes. Serve warm either by itself or with a scoop of vanilla ice cream for extra delight!
Tips:
- Use ripe peaches for the best flavor. If they are too firm, let them sit at room temperature for a day or two to soften.
- For added crunch, you can mix in some chopped nuts like walnuts or almonds in the oat topping.
- Feel free to add other fruits like blueberries or raspberries for a mixed fruit crisp!
Nutrition Facts:
- Calories: 250 per serving
- Total Fat: 10g
- Saturated Fat: 5g
- Cholesterol: 20mg
- Sodium: 150mg
- Total Carbohydrates: 40g
- Dietary Fiber: 3g
- Sugars: 18g
- Protein: 3g
7 Chocolate-Covered Fruit Skewers
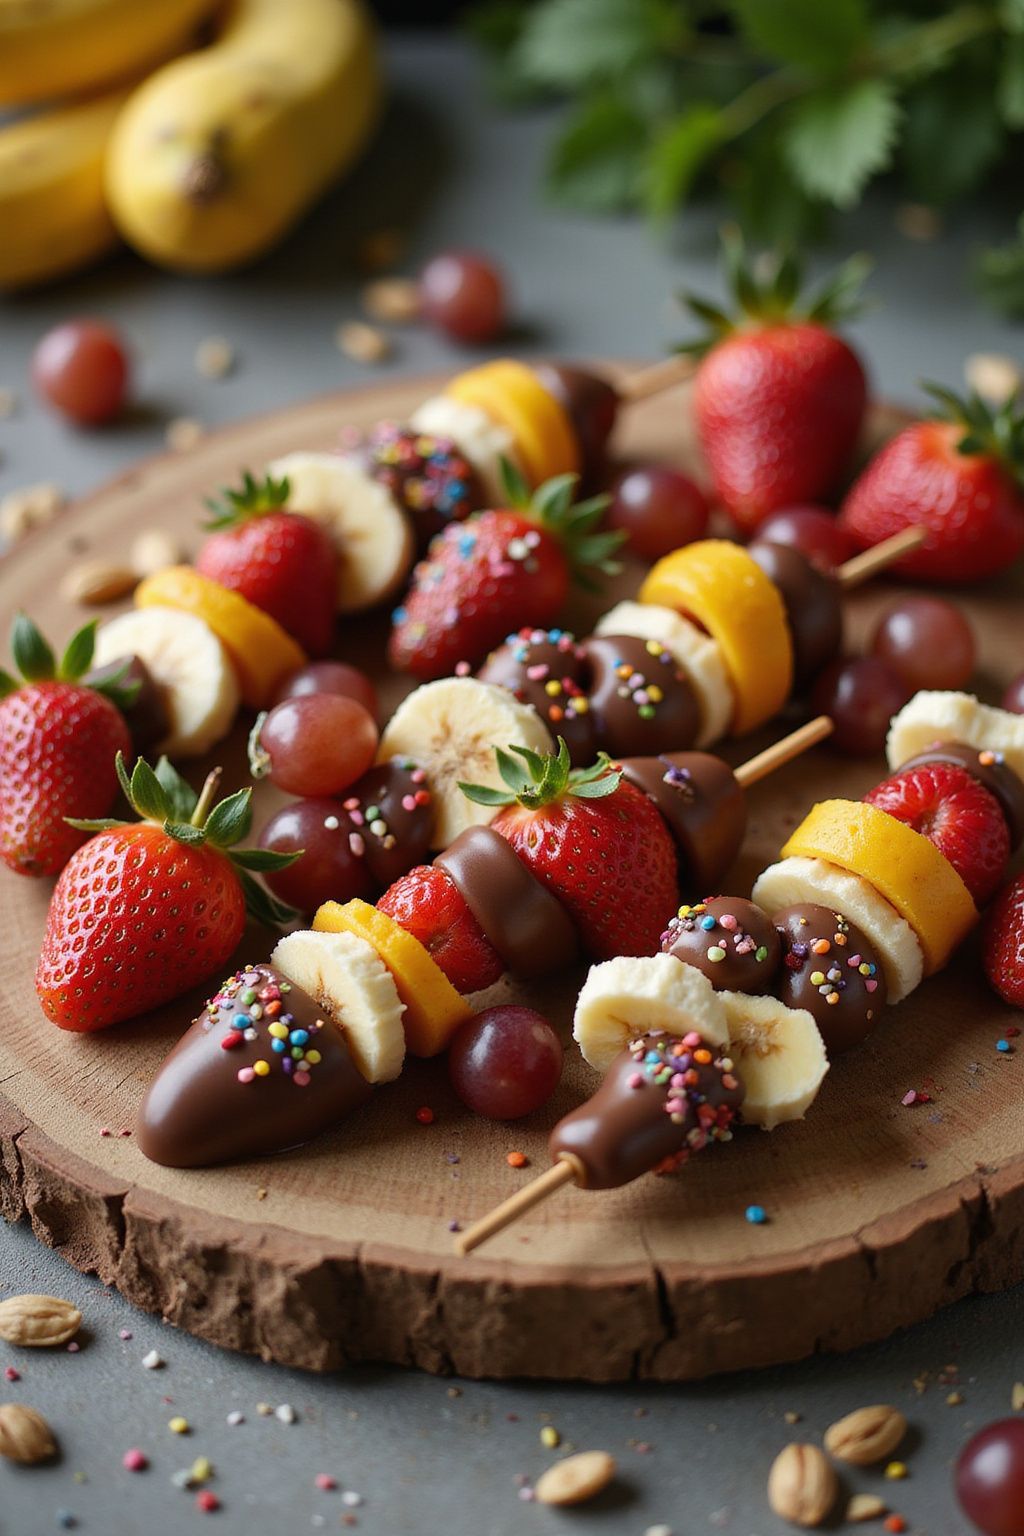
Chocolate-Covered Fruit Skewers are a fun and tasty treat that everyone will love! You can use your favorite fruits and dip them in rich chocolate for a delicious dessert or snack. Perfect for parties or just a sweet craving!
Prep Time: 15 minutes
Total Time: 15 minutes
Servings: 4
Ingredients:
- 8-10 strawberries, washed and stemmed
- 1-2 bananas, sliced
- 1 cup of grapes, washed
- 1 cup of chocolate chips (dark or milk chocolate)
- 1 tablespoon coconut oil (optional)
- Wooden skewers
Instructions:
Start by washing all the fruits well. Make sure they are dry before you begin. This helps the chocolate stick better.
Next, prepare your skewers by carefully threading your chosen fruits onto them. You can create fun patterns, alternating fruits to make your skewers colorful.
In a microwave-safe bowl, add the chocolate chips. If you want a smoother chocolate, you can add the coconut oil. Then, microwave the chocolate in short bursts of about 30 seconds, stirring in between until it’s completely melted and smooth.
Once the chocolate is ready, dip each fruit skewer into the melted chocolate. Make sure to coat the fruit well. Let the excess chocolate drip back into the bowl.
Place the dipped skewers on a parchment-lined baking tray. You can place them in the fridge for about 10 minutes to allow the chocolate to set.
When the chocolate is firm, your Chocolate-Covered Fruit Skewers are ready to enjoy. Serve them as a fun dessert or snack!
Tips:
- Use a variety of fruits such as pineapple or kiwi for different flavors and colors.
- For an extra crunch, sprinkle some crushed nuts or sprinkles on the chocolate before it hardens.
- Keep leftover skewers in the fridge for up to 2 days in an airtight container.
Nutrition Facts:
- Calories: 180
- Fat: 7g
- Carbohydrates: 30g
- Sugar: 20g
- Protein: 2g
8 Mixed Berry Pavlova
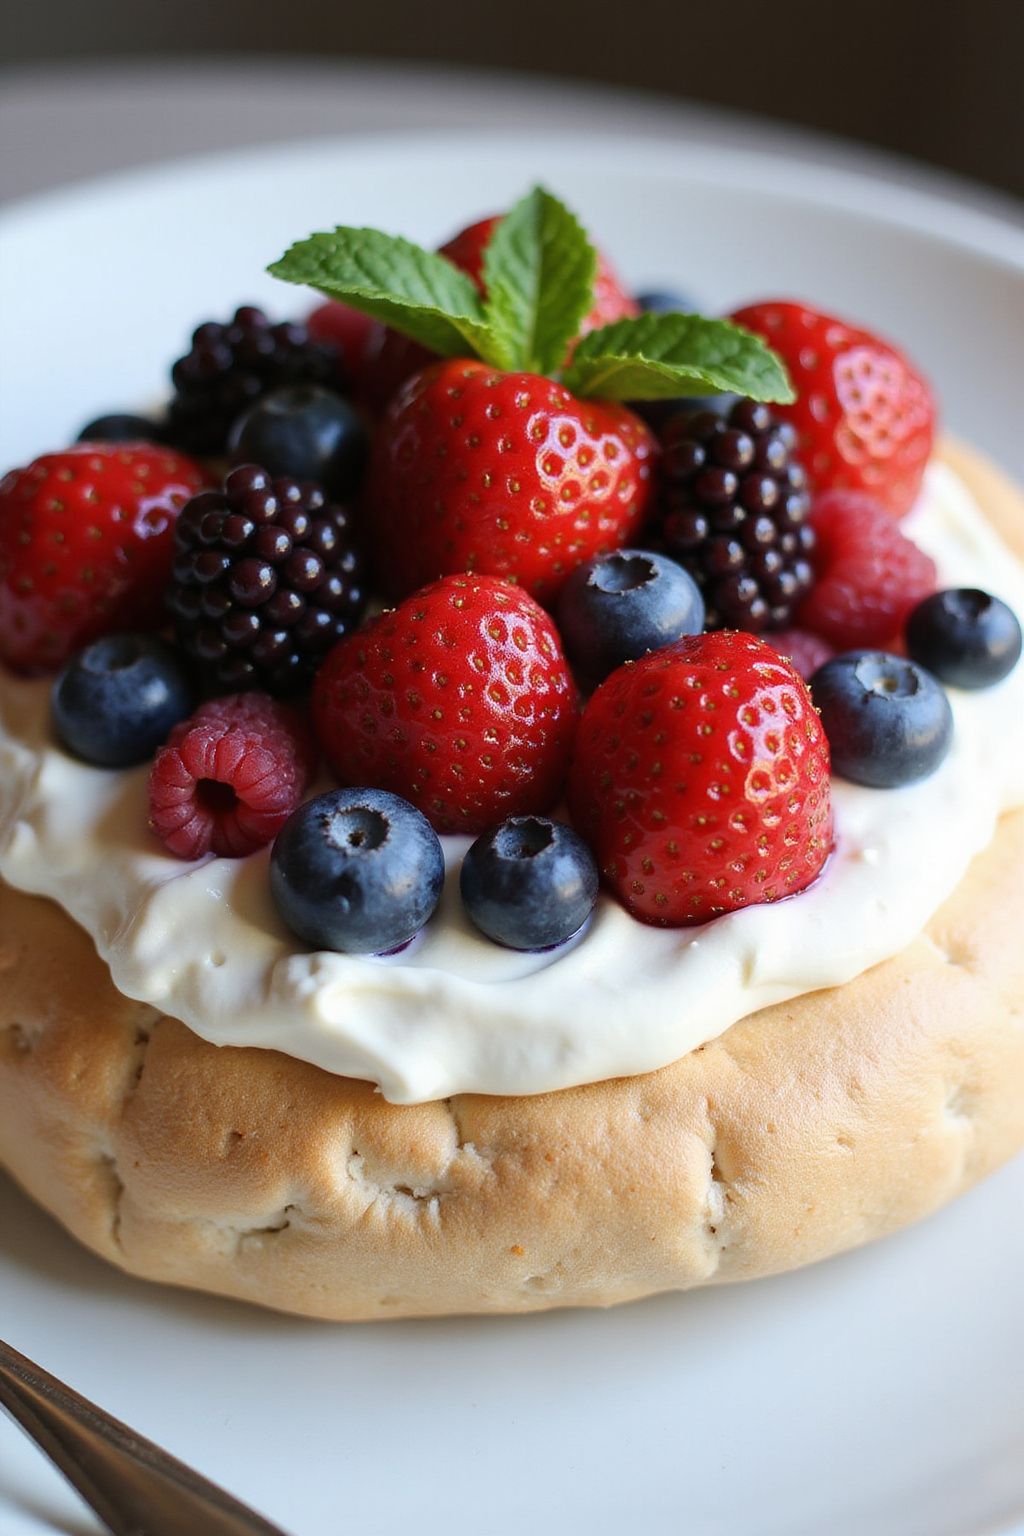
This Mixed Berry Pavlova is a delightful dessert that combines a crispy meringue shell with a soft, marshmallow-like center, topped with luscious mixed berries and whipped cream. It’s perfect for summer gatherings or special occasions!
Prep Time: 20 minutes
Additional Time: 1 hour (for cooling)
Total Time: 1 hour 20 minutes
Servings: 6
Ingredients:
- 4 large egg whites
- 1 cup granulated sugar
- 1 teaspoon white vinegar
- 1 teaspoon cornstarch
- 1 cup heavy cream
- 2 tablespoons powdered sugar
- 1 teaspoon vanilla extract
- 1 cup strawberries, sliced
- 1 cup blueberries
- 1 cup raspberries
- Mint leaves for garnish (optional)
Instructions:
Start by preheating your oven to 250°F (120°C). Line a baking sheet with parchment paper, making a circle about 8 inches in diameter on it for the pavlova.
In a large bowl, beat the egg whites with an electric mixer until soft peaks form. This will take about 2-3 minutes. Once you see soft peaks, gradually add in the granulated sugar, about one tablespoon at a time. Continue beating until the mixture is glossy and stiff peaks form, which usually takes 5-7 minutes.
Next, gently fold in the white vinegar and cornstarch. This will help create a perfect texture for the meringue. Now, spoon the meringue mixture onto the prepared circle, smoothing the edges and creating a slightly hollow center.
Place the meringue in the oven and bake for 1 hour. After baking, turn off the oven and let the pavlova cool completely inside with the door slightly ajar. This helps prevent cracks.
Once cooled, whip the heavy cream in a separate bowl with a mixer for about 3-4 minutes until it forms soft peaks. Add the powdered sugar and vanilla extract, and whip for another minute until combined.
Now it’s time to assemble! Spoon the whipped cream into the center of the pavlova. Gently arrange the mixed berries on top. You can use strawberries, blueberries, and raspberries for a colorful effect.
For an extra touch, sprinkle some mint leaves on top for garnish. Slice and serve your delicious Mixed Berry Pavlova!
Tips:
- Make sure your bowl and beaters are completely clean and dry to ensure the egg whites whip properly.
- You can use any mix of berries you like; try including blackberries or kiwis for more flavor.
- Serve the pavlova immediately after assembling to keep the meringue crunchy.
Nutrition Facts:
- Calories: 280 per serving
- Protein: 3g
- Total Fat: 18g
- Saturated Fat: 10g
- Carbohydrates: 30g
- Sugars: 24g
- Fiber: 2g
9 Classic Fruit Tart
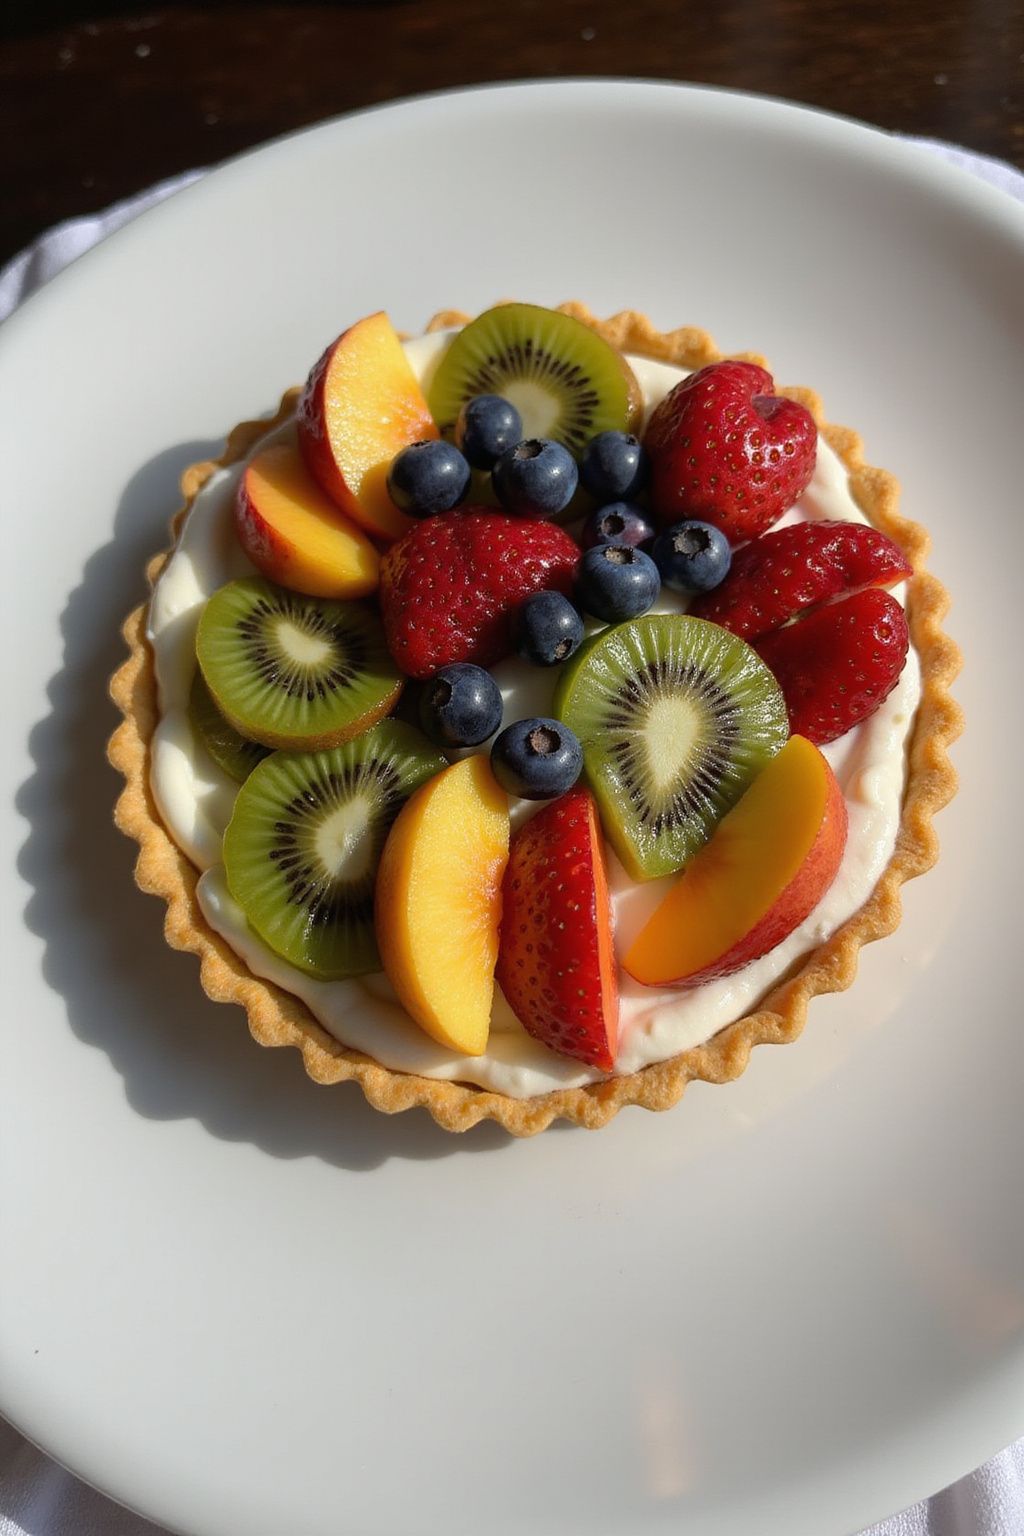
A Classic Fruit Tart is a delightful dessert that brings together a buttery crust, creamy filling, and colorful fruits. This tart is perfect for any occasion, whether it’s a birthday party or a family gathering. Let’s dive into how you can create this sweet masterpiece!
Prep Time: 30 minutes
Additional Time: 1 hour (for chilling)
Total Time: 1 hour 30 minutes
Servings: 8
Ingredients:
- 1 pre-made tart shell (9-inch)
- 1 cup heavy whipping cream
- 1/2 cup powdered sugar
- 1 teaspoon vanilla extract
- 1 cup pastry cream (store-bought or homemade)
- 2 cups mixed fresh fruit (e.g., strawberries, blueberries, kiwi, and peaches)
- 1/4 cup fruit glaze (optional)
Instructions:
Start by preparing your tart shell. If you are using a pre-made tart shell, make sure it’s completely cooled. This step ensures that your tart will hold its shape well once filled.
Next, whip the heavy cream in a mixing bowl until soft peaks form. Gradually add in the powdered sugar and vanilla extract, continuing to whip until the cream is stiff and holds peaks.
Once the cream is ready, gently fold the pastry cream into the whipped cream. This is called making chantilly cream and it will give your tart a light, fluffy texture. Be careful to not deflate the whipped cream too much while mixing.
Spread the creamy mixture evenly into the tart shell. Use a spatula to make the surface smooth and even.
Now it’s time to add the fruits. Wash and cut your selected fruits into bite-sized pieces. Arrange the fruits atop the cream mixture in whatever pattern you like, making it colorful and appealing.
If you’d like, you can brush some fruit glaze on top of your fruits to give them a nice shine and help preserve freshness.
Finally, place the tart in the refrigerator for at least 1 hour to chill before serving. This helps everything set nicely.
Tips:
- Use a variety of fruits to make your tart colorful and appealing.
- For extra flavor, you can add a hint of lemon zest to your cream mixture.
- Make the tart shell a day in advance to save time on the day you plan to serve it.
Nutrition Facts:
- Calories: 250 per serving
- Total Fat: 14g
- Saturated Fat: 8g
- Cholesterol: 50mg
- Sodium: 45mg
- Total Carbohydrates: 30g
- Dietary Fiber: 2g
- Sugars: 12g
- Protein: 3g
10 Watermelon Granita
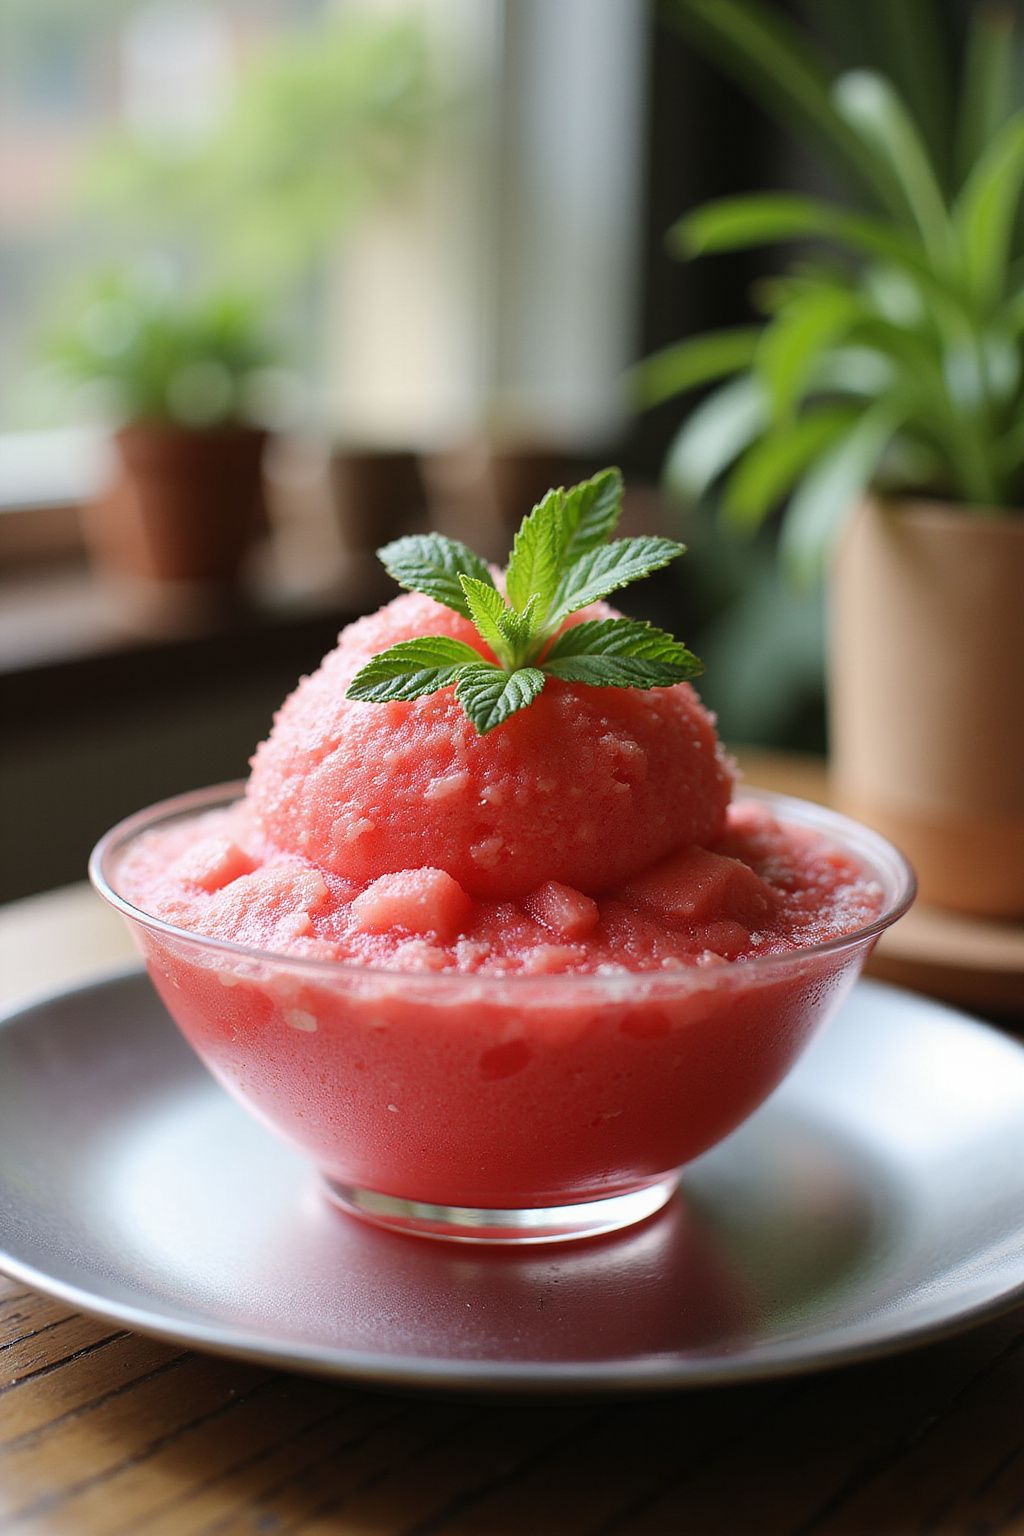
Watermelon Granita is a refreshing and simple dessert that is perfect for hot summer days. This icy treat is made from fresh watermelon, and it’s both sweet and fruity. It’s easy to prepare and can be enjoyed by everyone!
Prep Time: 10 minutes
Additional Time: 4 hours
Total Time: 4 hours 10 minutes
Servings: 4
Ingredients:
- 4 cups of seedless watermelon, chopped
- 2 tablespoons of sugar (adjust to taste)
- 1 tablespoon of fresh lime juice
- Optional: a pinch of salt
Instructions:
Start by chopping the watermelon into small pieces. You want to have about 4 cups of watermelon for this recipe. Make sure to remove any seeds if you’re using a variety that has them.
Next, place the chopped watermelon in a blender or food processor. Add the sugar and lime juice to the blender. Blend everything together until it’s nice and smooth.
Once blended, taste the mixture. If you want it sweeter, feel free to add a little more sugar. If you like a zing, you can also add a pinch of salt. Blend again if you add more ingredients.
Now, pour the mixture into a shallow dish, like a glass baking dish or a metal tray. Spread it evenly and place it in the freezer. After about 30 minutes, take it out and use a fork to scrape the ice from the surface. This will help make the granita fluffy.
Return the dish to the freezer and repeat the scraping every 30 minutes for about 4 hours. This creates those lovely icy flakes that make granita so enjoyable.
After the granita is frozen and fluffy, use a fork to scrape it one last time. Serve it in bowls or cups, and enjoy your delicious Watermelon Granita!
Tips:
- For an extra touch, garnish the granita with fresh mint leaves before serving.
- You can mix in other fruits, like lime or cucumber, for an interesting flavor twist.
- If you’re short on time, use seedless watermelon juice instead of blending.
Nutrition Facts:
- Calories: 50
- Carbohydrates: 13g
- Sugars: 11g
- Fat: 0g
- Protein: 1g
- Fiber: 0g
11 Cherry Almond Clafoutis
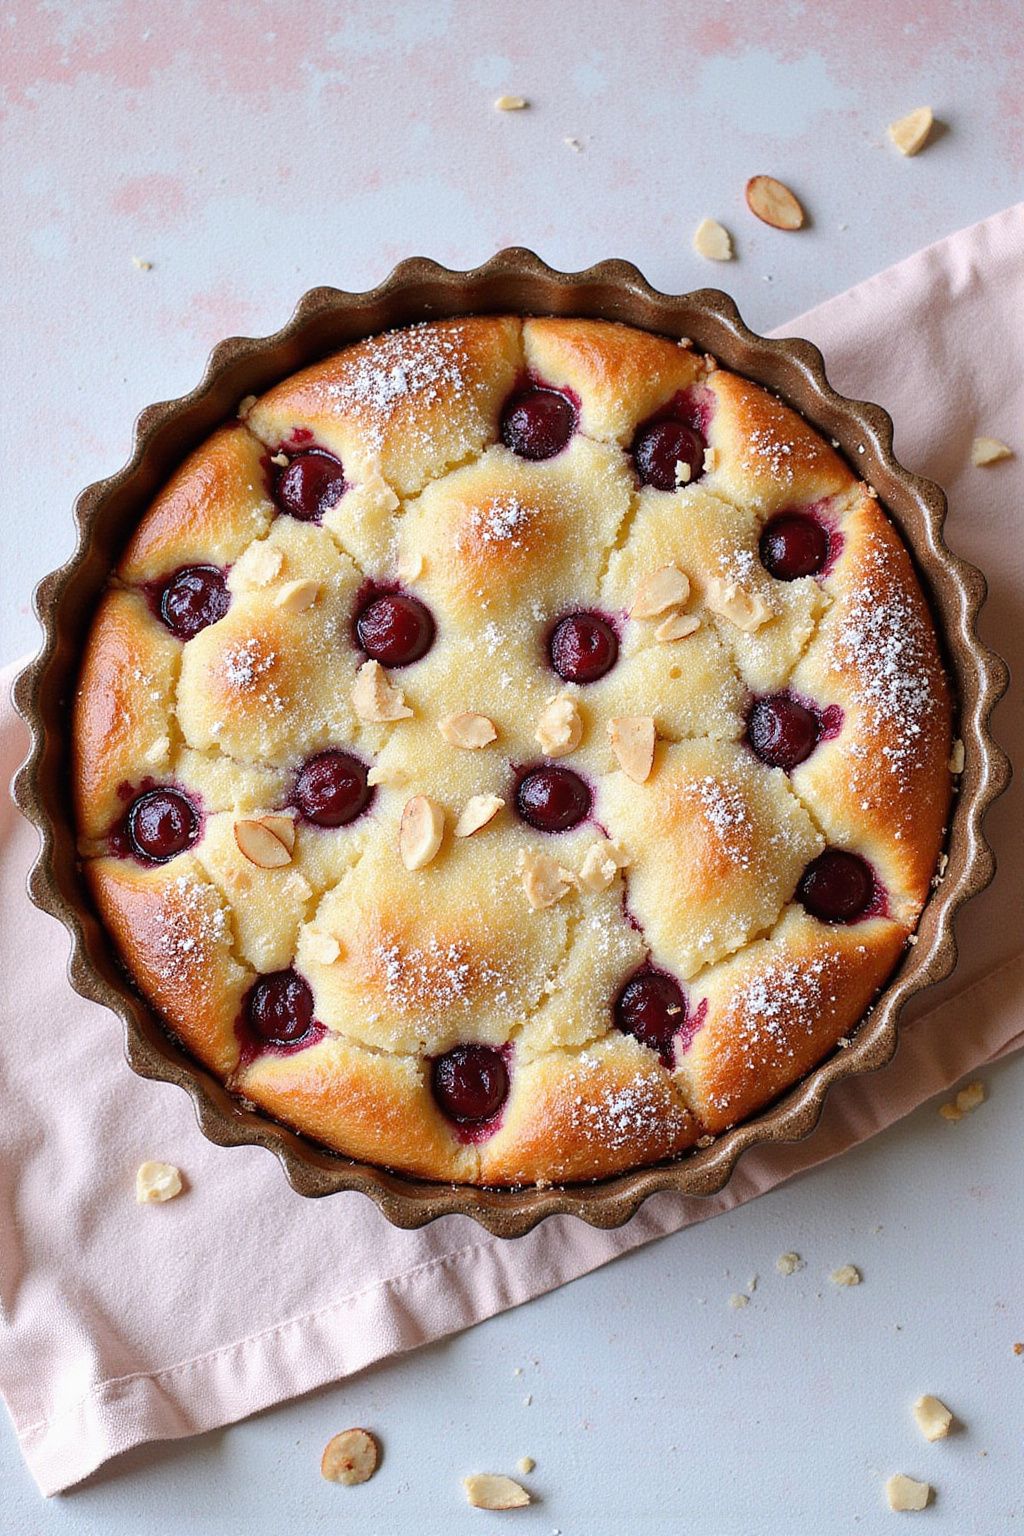
Cherry Almond Clafoutis is a delicious and rustic French dessert that’s perfect for any occasion. With its creamy texture and sweet cherries, this dish will impress your family and friends. Plus, it’s simple to make!
Prep Time: 15 minutes
Cook Time: 45 minutes
Additional Time: 10 minutes
Total Time: 1 hour 10 minutes
Servings: 6
Ingredients:
- 1 cup fresh cherries, pitted and halved
- 2 large eggs
- 1 cup milk
- 1/2 cup sugar
- 1 teaspoon vanilla extract
- 1/4 teaspoon almond extract
- 1/2 cup all-purpose flour
- 1/4 teaspoon salt
- 2 tablespoons unsalted butter, melted
- Powdered sugar, for dusting
Instructions:
First, preheat your oven to 350°F (175°C). Grab a 9-inch pie dish or an oven-safe dish and grease it lightly with butter. Then, spread the pitted cherries evenly across the bottom of the dish.
In a large bowl, whisk together the eggs, milk, sugar, vanilla extract, and almond extract until it’s all combined. Next, add in the flour and salt, and whisk until the mixture is just smooth. Finally, stir in the melted butter until everything is mixed well.
Pour the batter over the cherries in the dish. Make sure the cherries are evenly distributed in the batter. Place the dish in the preheated oven and bake for about 45 minutes, or until the clafoutis is puffed and golden brown on top.
Once it’s done, take the clafoutis out and let it cool for about 10 minutes. Before serving, dust it lightly with powdered sugar for a sweet touch. Cut it into slices and enjoy every bite!
Tips:
- You can use frozen cherries if fresh ones aren’t available. Just thaw and drain them before using.
- For an extra flavor boost, try adding sliced almonds on top before baking.
- Serve warm or at room temperature with a dollop of whipped cream on the side.
Nutrition Facts:
- Calories: 220 per serving
- Protein: 6g
- Fat: 9g
- Carbohydrates: 32g
- Sugar: 18g
- Fiber: 1g
12 Lemon Meringue Fruit Salad
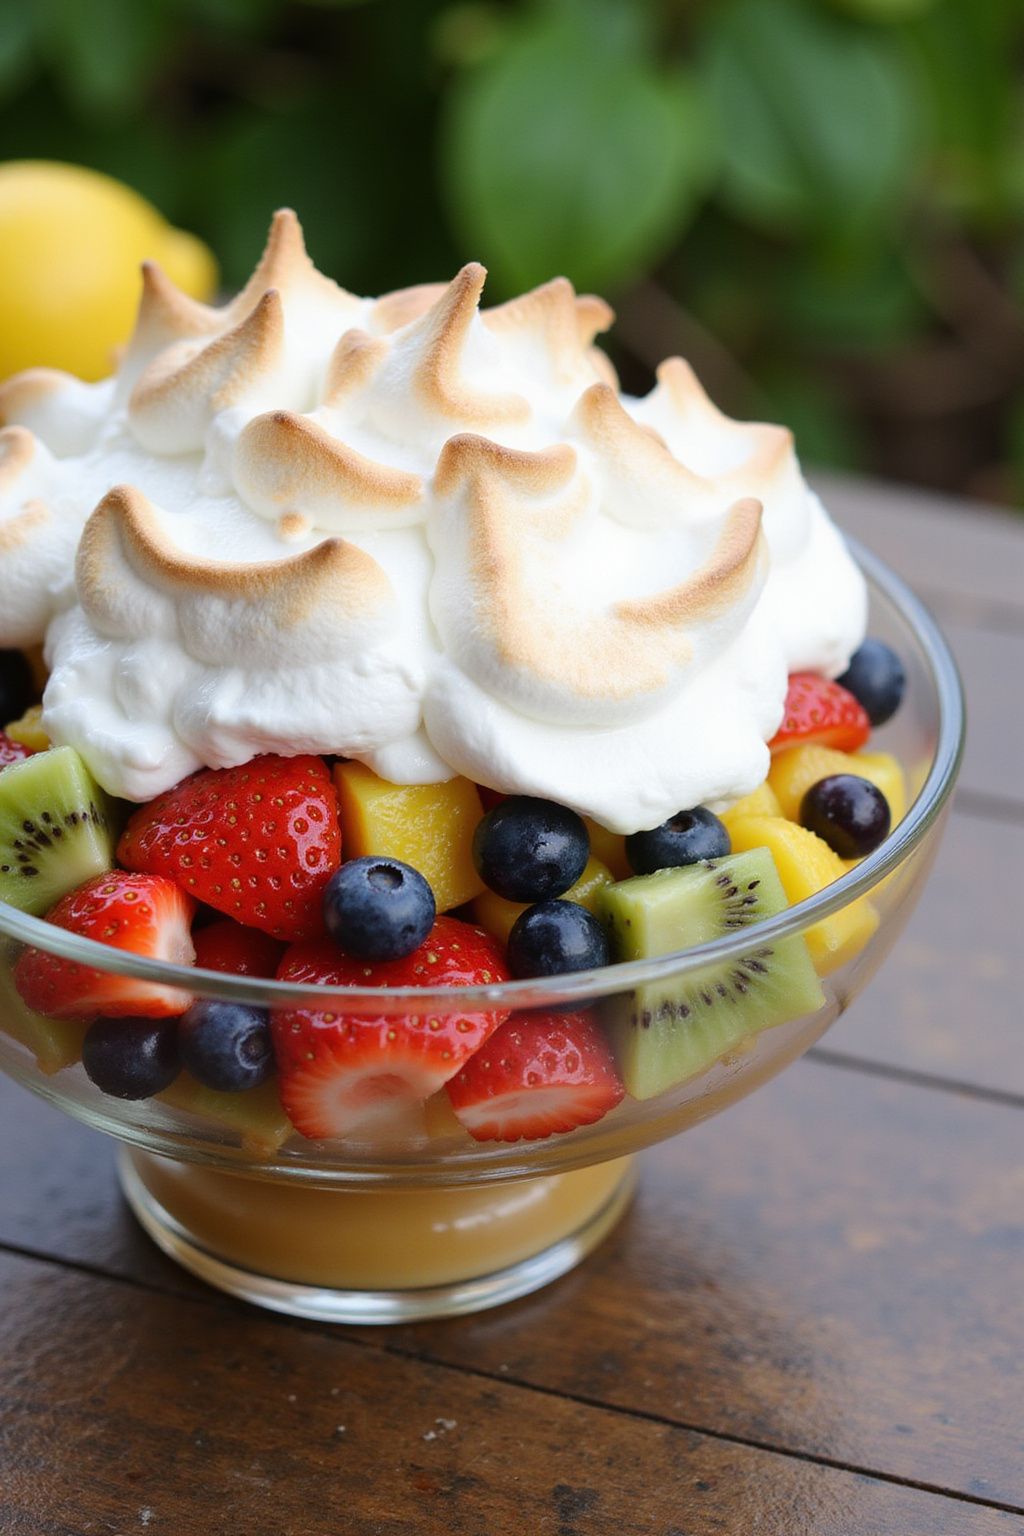
This Lemon Meringue Fruit Salad is a delightful twist on a classic dessert. It combines fresh, juicy fruits with a tangy lemon dressing and fluffy meringue topping. Perfect for summer gatherings or any time you want a sweet treat!
Prep Time: 20 minutes
Additional Time: 30 minutes (for meringue to set)
Total Time: 50 minutes
Servings: 6
Ingredients:
- 2 cups mixed fresh fruits (like strawberries, blueberries, and kiwi)
- 1 cup whipped cream
- 1/2 cup lemon juice
- 1/4 cup granulated sugar
- 4 large egg whites
- 1/4 teaspoon cream of tartar
- 1/2 teaspoon vanilla extract
Instructions:
Start by washing and preparing your fresh fruits. Cut the strawberries and kiwi into bite-sized pieces. In a large bowl, combine the mixed fruits and set them aside.
In another bowl, whisk together the lemon juice and granulated sugar until the sugar dissolves. Gently fold this mixture into the fresh fruit, making sure each piece is coated well.
Next, it’s time to make the meringue. In a clean mixing bowl, beat the egg whites and cream of tartar with an electric mixer on high speed until soft peaks form. This usually takes about 3-5 minutes.
Gradually add the remaining sugar while continuing to beat the egg whites. Keep whisking until stiff peaks form and the mixture looks glossy. Finally, mix in the vanilla extract.
Now, in individual serving bowls or a large dish, layer the fruit salad, and then top it with the fluffy meringue. Use a spatula to create pretty swirls on top.
Let the assembled salad sit for at least 30 minutes so the meringue can set. Serve it chilled for a refreshing dessert.
Tips:
- For the best flavor, use fresh, ripe fruits.
- Make sure your mixing bowl for the meringue is free of any grease or oil to achieve the best peaks.
- You can add a sprinkle of lemon zest for extra zing!
Nutrition Facts:
- Calories: 250
- Total Fat: 8g
- Sodium: 50mg
- Total Carbohydrates: 38g
- Sugars: 25g
- Protein: 4g
13 Apple Cinnamon Galette

A delicious Apple Cinnamon Galette is the perfect dessert for any occasion. It’s simple to make and tastes amazing with warm spices and fresh apples. This rustic dessert can impress everyone at your table!
Prep Time: 20 minutes
Cook Time: 35 minutes
Additional Time: 30 minutes
Total Time: 1 hour 25 minutes
Servings: 8
Ingredients:
- 1 cup all-purpose flour
- 1/4 teaspoon salt
- 1/4 cup unsalted butter, cold and cubed
- 3 tablespoons ice water
- 3 medium apples, peeled and sliced
- 1/4 cup brown sugar
- 1 teaspoon ground cinnamon
- 1 tablespoon lemon juice
- 1 egg, beaten (for egg wash)
- 1 tablespoon sugar (for sprinkling on top)
Instructions:
Start by making the galette dough. In a large bowl, mix 1 cup of flour with 1/4 teaspoon of salt. Add 1/4 cup of cold, cubed butter. Use a fork or your fingers to mix until the dough looks crumbly.
Next, slowly add 3 tablespoons of ice water to the mixture. Stir until the dough comes together. Form it into a ball, wrap it in plastic wrap, and let it chill in the fridge for 30 minutes.
While the dough is chilling, prepare the apple filling. In another bowl, combine the sliced apples with 1/4 cup of brown sugar, 1 teaspoon of ground cinnamon, and 1 tablespoon of lemon juice. Stir everything together until the apples are well-coated.
After the dough has chilled, preheat your oven to 400°F (200°C). Roll out the dough on a floured surface into a circle about 12 inches wide. Transfer it to a baking sheet lined with parchment paper.
Now, place the apple mixture in the center of the rolled-out dough but leave about 2 inches of space around the edges. Gently fold the edges of the dough over the apples, creating a rustic look.
Brush the folded edges with the beaten 1 egg and sprinkle 1 tablespoon of sugar on top for extra sweetness.
Bake the galette in the preheated oven for 35 minutes or until the apples are soft and the crust is golden brown.
Let it cool for a few minutes before slicing. Enjoy your delicious homemade Apple Cinnamon Galette!
Tips:
- Try using a mix of sweet and tart apples for a balanced flavor.
- Serve the galette warm with a scoop of vanilla ice cream for an extra treat.
- Store any leftovers in an airtight container at room temperature for up to 2 days.
Nutrition Facts:
- Calories: 220 per slice
- Total Fat: 10g
- Saturated Fat: 6g
- Cholesterol: 30mg
- Sodium: 50mg
- Total Carbohydrates: 34g
- Dietary Fiber: 2g
- Sugars: 10g
- Protein: 2g
14 Fig and Honey Pudding
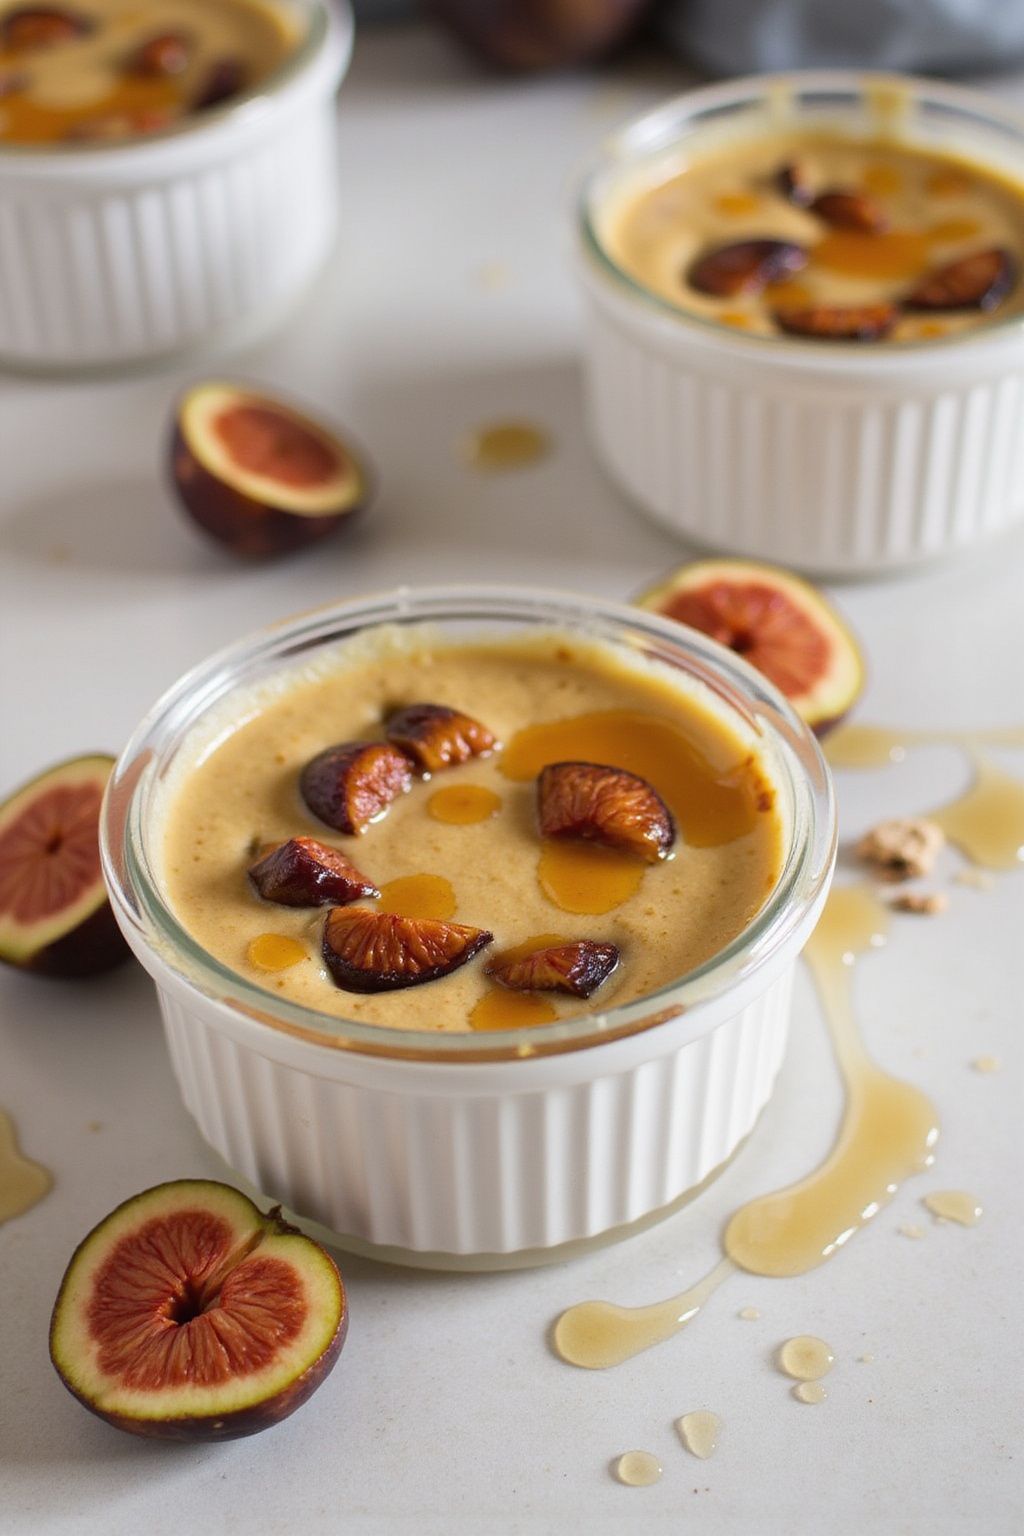
This Fig and Honey Pudding is a delightful and creamy dessert that celebrates the sweet flavor of figs. It’s easy to make and perfect for any occasion. You will love how the richness of honey pairs beautifully with the figs, creating a smooth and luscious pudding.
Prep Time: 15 minutes
Total Time: 2 hours
Servings: 4 servings
Ingredients:
- 2 cups fresh figs, chopped
- 1 cup milk
- 1/2 cup heavy cream
- 1/4 cup honey
- 2 large egg yolks
- 1 tablespoon cornstarch
- 1 teaspoon vanilla extract
- Pinch of salt
Instructions:
Start by washing the figs thoroughly and chopping them into small pieces. Set them aside for later use.
In a saucepan, combine the milk, heavy cream, and half of the honey. Heat the mixture over medium heat until it’s warm, but do not let it boil. Stir occasionally to ensure it doesn’t stick to the bottom.
In a separate bowl, whisk together the egg yolks, cornstarch, and salt until smooth. Slowly drizzle a bit of the warm milk mixture into the egg yolk mixture while whisking. This process is called tempering and will help prevent the eggs from cooking too quickly.
Once mixed, pour the egg yolk mixture back into the saucepan with the remaining warm milk. Stir well and continue to cook over low heat for about 5-7 minutes or until the mixture becomes thick. It should coat the back of a spoon.
Add the chopped figs, the rest of the honey, and vanilla extract to the pudding. Stir to combine and leave the mixture on the heat for another minute. This will allow the flavors to blend nicely.
Remove the saucepan from heat and pour the pudding into individual serving bowls. Let the pudding cool down at room temperature before transferring them to the fridge. Chill them for at least 1 hour to set.
Serve chilled and enjoy the sweet, creamy texture of your delicious Fig and Honey Pudding!
Tips:
- For extra flavor, consider adding a sprinkle of cinnamon or nutmeg to the pudding mixture.
- You can use dried figs if fresh ones are not available, just soak them in warm water for about 30 minutes before using.
- Top your pudding with whipped cream or additional chopped figs for an appealing presentation.
Nutrition Facts:
- Calories: 210 per serving
- Total Fat: 10g
- Saturated Fat: 6g
- Cholesterol: 70mg
- Sodium: 30mg
- Total Carbohydrates: 29g
- Dietary Fiber: 2g
- Sugars: 20g
- Protein: 4g
15 Avocado Chocolate Mousse
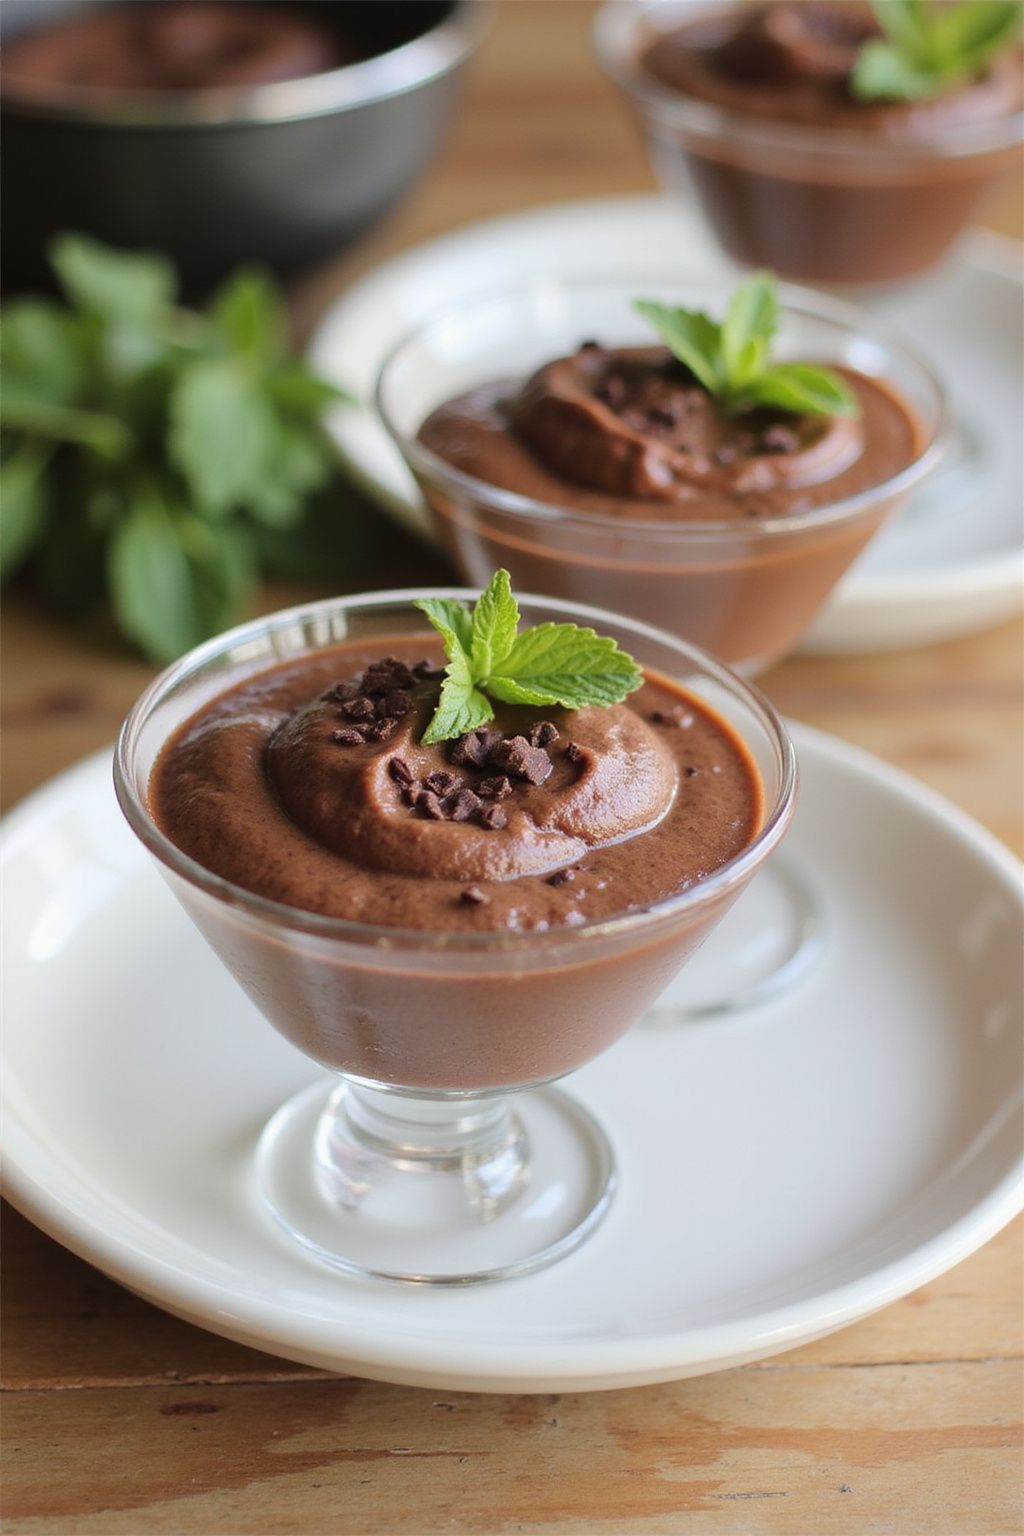
Indulge in a creamy, decadent treat that’s both healthy and delicious! This Avocado Chocolate Mousse is the perfect dessert for chocolate lovers who want to sneak some nutritious ingredients into their sweets. With just a few simple steps, you can whip up a delightful dessert that is sure to impress.
Prep Time: 10 minutes
Total Time: 10 minutes
Servings: 4
Ingredients:
- 2 ripe avocados
- 1/2 cup cocoa powder
- 1/4 cup maple syrup or honey
- 1/4 cup milk (dairy or non-dairy)
- 1 teaspoon vanilla extract
- A pinch of salt
Instructions:
Start by cutting the avocados in half and removing the pits. Scoop the green flesh into a blender or food processor.
Next, add in the cocoa powder, maple syrup (or honey), milk, vanilla extract, and a pinch of salt to the blender. Blend everything together until the mixture is completely smooth and creamy.
Taste the mousse, and if you’d like it sweeter, you can add a bit more maple syrup or honey. Blend again to combine.
Once your mousse is fluffy and smooth, use a spatula to scoop it out into small bowls or dessert cups. Then, you can chill it in the refrigerator for about 30 minutes to let it set, but it’s equally good served right away!
Tips:
- For a richer flavor, use dark cocoa powder.
- You can add toppings like whipped cream, chocolate shavings, or berries for extra flair.
- Store any leftovers in an airtight container in the refrigerator for up to 2 days.
Nutrition Facts:
- Calories: 180 per serving
- Fat: 12g
- Carbohydrates: 20g
- Fiber: 5g
- Protein: 3g
- Sugar: 6g
16 Coconut Lime Fruit Salad
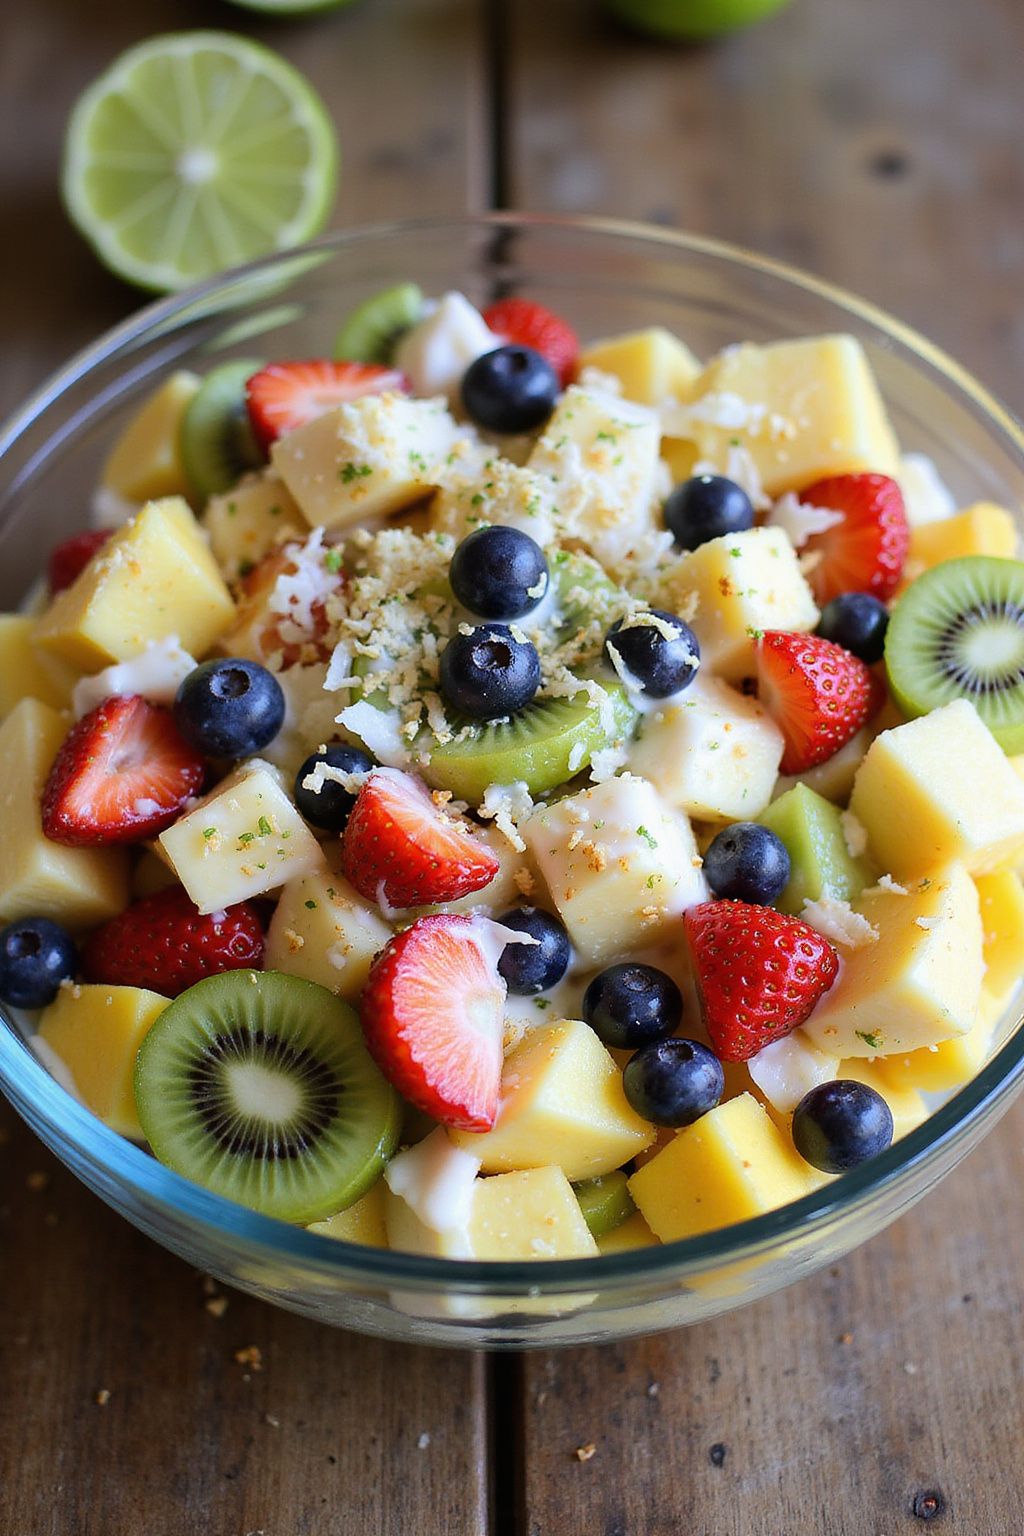
Bright and refreshing, this Coconut Lime Fruit Salad is the perfect treat for a hot day. The sweet and tangy flavors of lime blend beautifully with a mix of your favorite fruits, all topped with creamy coconut. It’s simple to make and a delight to eat!
Prep Time: 15 minutes
Total Time: 15 minutes
Servings: 6
Ingredients:
- 2 cups fresh pineapple, diced
- 1 cup strawberries, sliced
- 1 cup blueberries
- 1 cup kiwi, peeled and diced
- 1 cup mango, diced
- 1 can (14 oz) coconut milk
- 2 tablespoons fresh lime juice
- 1 tablespoon honey (optional)
- Zest of 1 lime
- ¼ cup shredded coconut, toasted
Instructions:
Start by preparing all the fresh fruits. Dice the pineapple, kiwi, and mango into bite-sized pieces. Slice the strawberries and measure out the blueberries.
In a large mixing bowl, combine all the prepared fruits. Gently stir them together so they mix well without getting squished.
Next, in a separate small bowl, whisk together the coconut milk, fresh lime juice, and honey if you prefer a sweeter taste.
Pour the coconut-lime mixture over the fruit and carefully toss to coat all the pieces.
Lastly, sprinkle the lime zest and toasted shredded coconut over the top. Give it one final gentle mix.
Serve the fruit salad immediately or refrigerate it for about 30 minutes to let the flavors meld together for a cooler treat.
Tips:
- For an extra tropical twist, try adding bananas or papaya to the mix.
- Make sure to toast the shredded coconut in a dry pan until golden brown for added flavor.
- If you want a bit of crunch, consider adding chopped nuts like almonds or cashews.
Nutrition Facts:
- Calories: 150
- Protein: 2g
- Fat: 5g
- Carbohydrates: 28g
- Fiber: 4g
- Sugar: 12g
17 Blackberry Vanilla Fool

Blackberry Vanilla Fool is a delightful dessert that’s creamy, fruity, and super easy to make. The combination of fresh blackberries and smooth vanilla cream creates a treat that everyone will love. It’s perfect for warm days or any special occasion!
Prep Time: 15 minutes
Additional Time: 1 hour
Total Time: 1 hour 15 minutes
Servings: 4
Ingredients:
- 2 cups fresh blackberries
- 2 tablespoons sugar
- 1 cup heavy whipping cream
- 1 teaspoon pure vanilla extract
- 1 tablespoon lemon juice
- Mint leaves for garnish (optional)
Instructions:
Start by washing the blackberries under cold water and gently patting them dry. In a mixing bowl, combine the blackberries with 2 tablespoons of sugar and the lemon juice. Toss them together and let them sit for about 10 minutes until they release some juice.
Next, take another bowl and add the heavy whipping cream and vanilla extract. Whip the cream with a mixer until it forms soft peaks. This means it should look fluffy and hold its shape but still be smooth.
Now, gently fold the sugared blackberries into the whipped cream. Be careful not to over-mix; you want to keep some of the beautiful color and texture of the blackberries.
Once mixed, scoop the dessert into serving glasses or bowls. Chill the Blackberry Vanilla Fool in the refrigerator for at least 1 hour before serving. This helps the flavors combine beautifully.
When you’re ready to serve, you can add a few fresh blackberries on top and decorate with mint leaves for a nice touch. Enjoy your delicious creation!
Tips:
- Use frozen blackberries if fresh ones are not available; just thaw them first.
- For extra flavor, try adding a splash of orange juice along with the lemon juice.
- You can substitute the heavy cream with Greek yogurt for a lighter version.
Nutrition Facts:
- Calories: 220 per serving
- Total Fat: 18g
- Saturated Fat: 10g
- Cholesterol: 65mg
- Sodium: 30mg
- Total Carbohydrates: 15g
- Dietary Fiber: 3g
- Sugars: 10g
- Protein: 2g
18 Passion Fruit Cheesecake
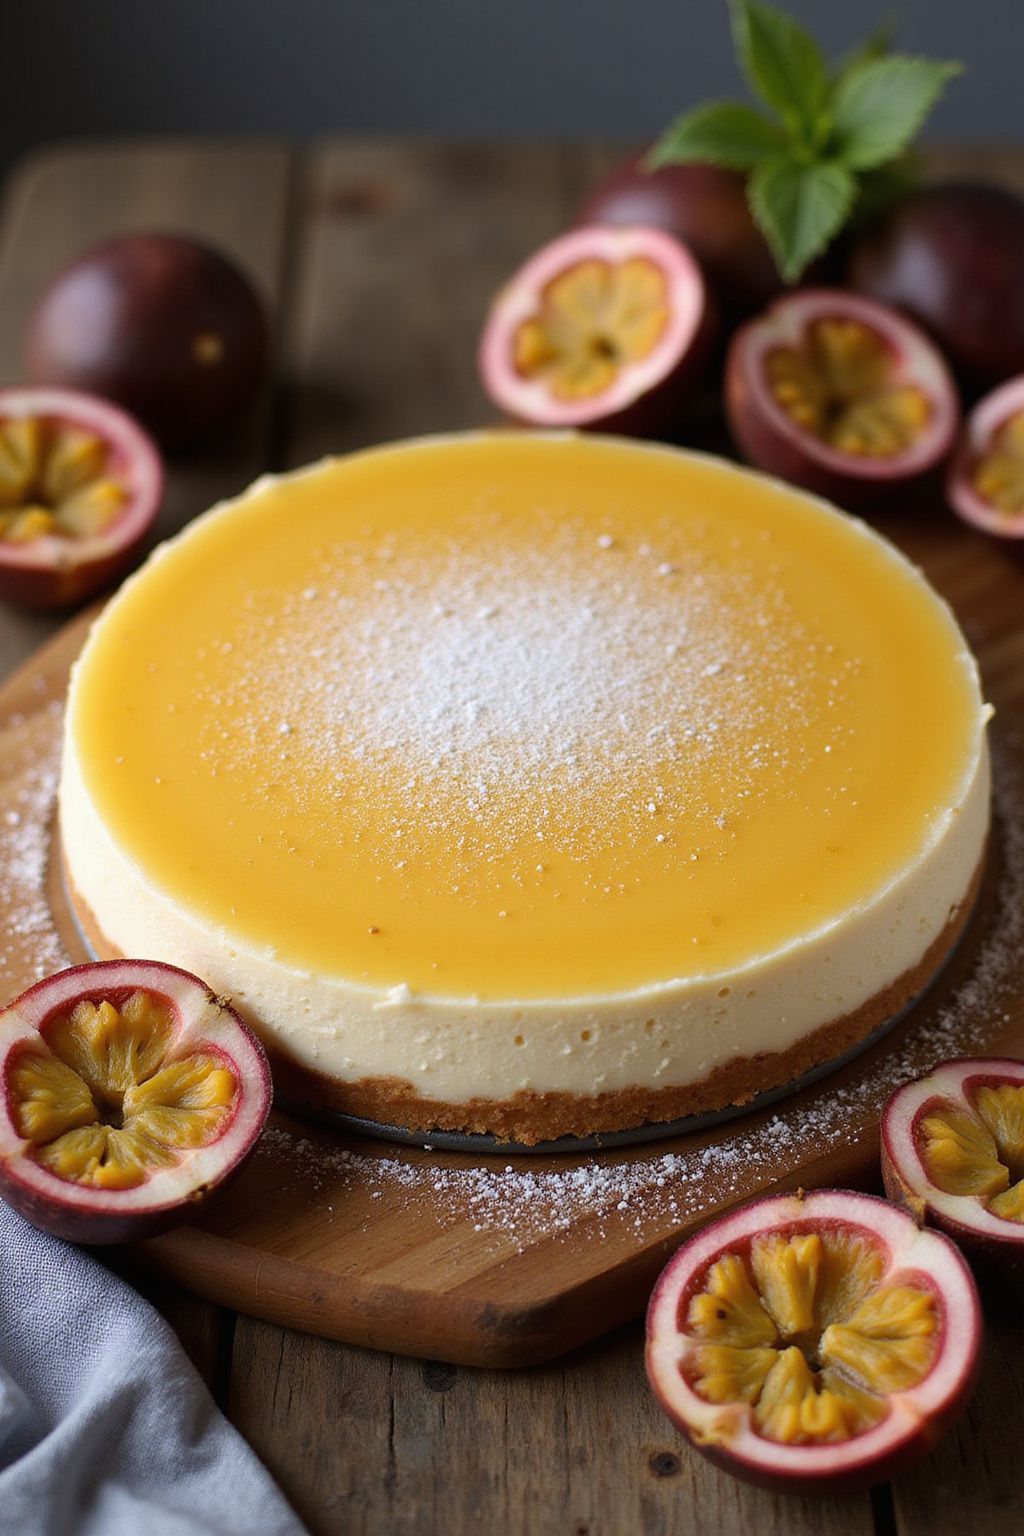
This Passion Fruit Cheesecake is a luscious and creamy dessert that combines the tangy flavor of passion fruit with a classic cheesecake base. It’s perfect for any occasion, bringing a refreshing tropical twist to the table. Let’s get started on making this delightful treat!
Prep Time: 15 minutes
Additional Time: 4 hours
Total Time: 4 hours 15 minutes
Servings: 12
Ingredients:
- 1 ½ cups graham cracker crumbs
- ½ cup unsalted butter, melted
- 3 (8-ounce) packages cream cheese, softened
- 1 cup granulated sugar
- 3 large eggs
- 1 cup sour cream
- 1 teaspoon vanilla extract
- ½ cup passion fruit pulp (fresh or canned)
- ¼ cup powdered sugar (for topping)
Instructions:
Start by preheating your oven to 325°F (160°C). In a medium bowl, mix the graham cracker crumbs with the melted butter. Stir it well until it looks like wet sand.
Next, press this mixture firmly into the bottom of a 9-inch springform pan to create the crust. Bake it in the preheated oven for about 10 minutes until it’s lightly golden. Remove it from the oven, and let it cool.
While the crust is cooling, prepare the cheesecake filling. In a large mixing bowl, beat the softened cream cheese and granulated sugar together until it’s smooth and fluffy. This should take about 3-4 minutes.
Add in the eggs, one at a time, mixing well after each addition. Then, mix in the sour cream, vanilla extract, and passion fruit pulp. Make sure everything is well combined and smooth.
Pour the cheesecake filling onto the cooled crust. Smooth the top with a spatula. Bake in the oven for about 50-60 minutes until the edges are set but the center still jiggles slightly.
Once baked, turn off the oven and let the cheesecake cool inside for about 1 hour. This helps prevent cracking. Then, refrigerate the cheesecake for at least 3 hours or until it’s fully chilled.
Before serving, dust the top with powdered sugar for a lovely finish. Slice, serve, and enjoy a slice of paradise with each bite!
Tips:
- Use fresh passion fruit for the best flavor, but canned pulp can work just as well.
- Let the cheesecake cool slowly in the oven to reduce the chance of cracks.
- For a decorative touch, top the cheesecake with whole passion fruits or fresh berries before serving.
Nutrition Facts:
- Calories: 350 per slice
- Total Fat: 24g
- Saturated Fat: 15g
- Cholesterol: 90mg
- Sodium: 250mg
- Total Carbohydrates: 29g
- Dietary Fiber: 1g
- Sugars: 18g
- Protein: 5g
19 Orange and Pomegranate Salad
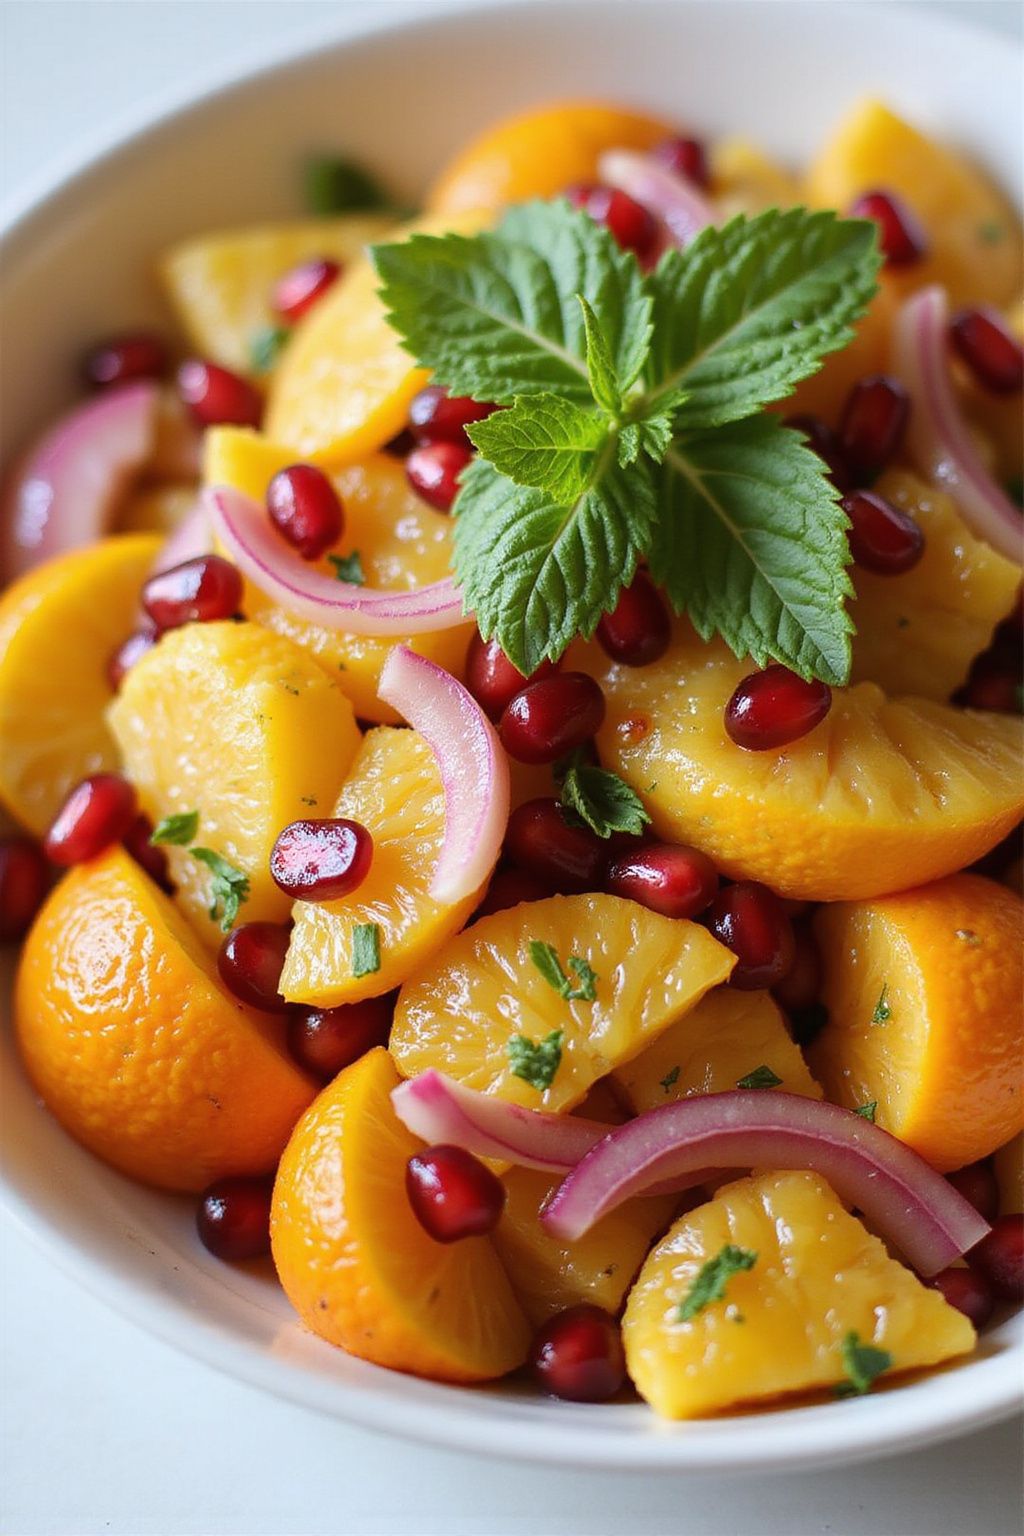
This refreshing Orange and Pomegranate Salad is the perfect mix of sweet and tangy flavors. It’s light, vibrant, and packed with vitamins, making it a great addition to any meal or a tasty snack on its own. Let’s dive into how you can make this colorful salad!
Prep Time: 15 minutes
Total Time: 15 minutes
Servings: 4
Ingredients:
- 4 medium oranges
- 1 cup pomegranate seeds
- 1/4 cup red onion, thinly sliced
- 1/4 cup fresh mint leaves, chopped
- 2 tablespoons honey
- 1 tablespoon lime juice
- Salt and pepper to taste
Instructions:
Start by peeling the oranges. Make sure to remove all the white pith to keep the salad from being bitter. Once peeled, cut the oranges into sections and place them in a large bowl.
Next, add the pomegranate seeds to the bowl with the orange sections. These little jewels add a delicious crunch and burst of flavor!
Then, thinly slice the red onion and add it to the mix. The onion gives a slight zesty kick that complements the sweetness of the fruit.
Chop the mint leaves and sprinkle them over the salad. The mint adds a fresh and aromatic touch that pairs beautifully with the citrus.
In a small bowl, whisk together the honey and lime juice to create a dressing. Pour this over the salad and gently toss everything together to combine.
Finally, season the salad with salt and pepper to taste. Serve immediately for the best flavor and freshness.
Tips:
- If you want to add some crunch, try adding toasted nuts like walnuts or almonds.
- For a more colorful salad, add in some diced cucumber or avocado.
- You can chill the salad for about 30 minutes in the fridge for a cooler and refreshing taste.
Nutrition Facts:
- Calories: 150
- Protein: 2g
- Carbohydrates: 35g
- Fiber: 5g
- Sugar: 25g
- Fat: 0.5g
20 Banana Foster’s Delight

Banana Foster’s Delight is a scrumptious dessert that combines the sweetness of bananas with the rich flavors of brown sugar and rum. This delightful dish is perfect for impressing guests or treating yourself on a special occasion. It’s easy to make and even easier to enjoy!
Prep Time: 10 minutes
Cook Time: 10 minutes
Total Time: 20 minutes
Servings: 4
Ingredients:
- 4 ripe bananas, sliced
- 1/2 cup of brown sugar
- 1/4 cup of butter
- 1/4 cup of dark rum
- 1 teaspoon of vanilla extract
- 1/4 teaspoon of cinnamon
- 1 cup of vanilla ice cream
- Chopped nuts (optional, for garnish)
Instructions:
Start by melting the butter in a large skillet over medium heat. Once melted, add the brown sugar and cinnamon, stirring until the mixture begins to bubble.
Now, add the sliced bananas to the skillet. Cook them gently for about 2-3 minutes, allowing them to soften and absorb the sweet sauce.
Next, carefully pour in the dark rum and continue to cook for another minute. If you want to flambe, give it a quick ignite with a long lighter to burn off the alcohol, but be cautious! If not, just let it simmer without the flame.
Finally, stir in the vanilla extract and mix everything well. Remove from heat and serve immediately over a scoop of vanilla ice cream. You can also sprinkle some chopped nuts on top for a crunch.
Tips:
- Use ripe bananas for the best flavor; they should be slightly brown.
- For a non-alcoholic version, replace the rum with apple juice or omit it entirely.
- Serve with extra ice cream on the side if you want to indulge even more!
Nutrition Facts:
- Calories: 300
- Total Fat: 14g
- Saturated Fat: 8g
- Cholesterol: 30mg
- Sodium: 50mg
- Total Carbohydrates: 41g
- Dietary Fiber: 2g
- Sugars: 30g
- Protein: 3g
21 Kiwi Coconut Popsicles
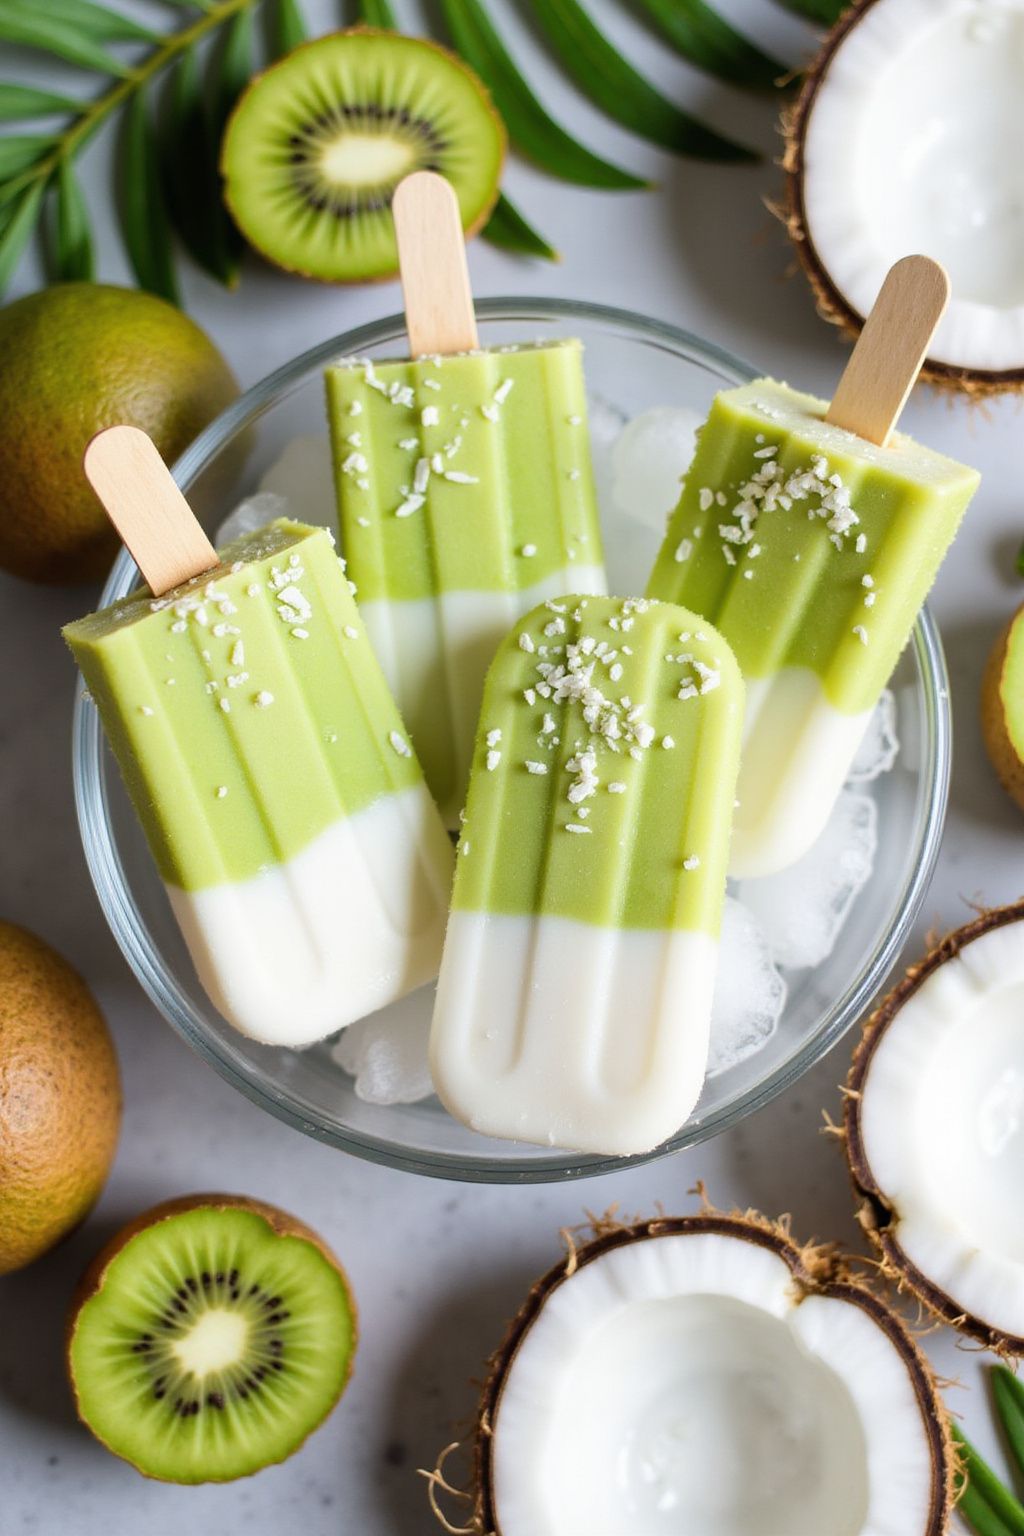
Make your summer cooler with these delicious Kiwi Coconut Popsicles! They are refreshing, fruity, and easy to make. The creamy coconut paired with the tangy kiwi creates a perfect treat for sunny days.
Prep Time: 15 minutes
Total Time: 4 hours 15 minutes
Servings: 6 popsicles
Ingredients:
- 4 ripe kiwis, peeled and sliced
- 1 cup coconut milk (canned or carton)
- 2 tablespoons honey or maple syrup (adjust for sweetness)
- 1/2 cup shredded coconut (sweetened or unsweetened)
Instructions:
Start by placing the sliced kiwis in a blender or food processor. Blend until you get a smooth puree. You can set this aside for later.
Next, in a separate bowl, mix together the coconut milk and honey or maple syrup. Stir well until the sweetener is fully combined with the coconut milk.
Now, take your popsicle molds and pour a splash of the coconut mixture into each mold, filling them about a quarter full. Add a layer of kiwi puree on top of the coconut milk mixture. You can create a swirl effect with a toothpick for a pretty design.
Continue to layer the coconut milk and kiwi puree until all the molds are filled. Leave a little space at the top for expansion. Finally, sprinkle some shredded coconut on top for added texture and flavor.
Insert the popsicle sticks into the filled molds. Place the molds into the freezer and let them freeze for at least 4 hours, or until solid. Once frozen, carefully remove the popsicles from the molds by running warm water over the outside for a few seconds.
Tips:
- Try adding other fruits such as mango or strawberries for more flavor combinations.
- For extra creaminess, you can mix a bit of yogurt into the coconut milk.
- If you like it sweeter, adjust the honey or maple syrup to your taste.
Nutrition Facts:
- Calories: 90 per popsicle
- Protein: 1g
- Fat: 4g
- Carbohydrates: 14g
- Fiber: 2g
- Sugar: 8g
22 Plum Crumble with Ice Cream
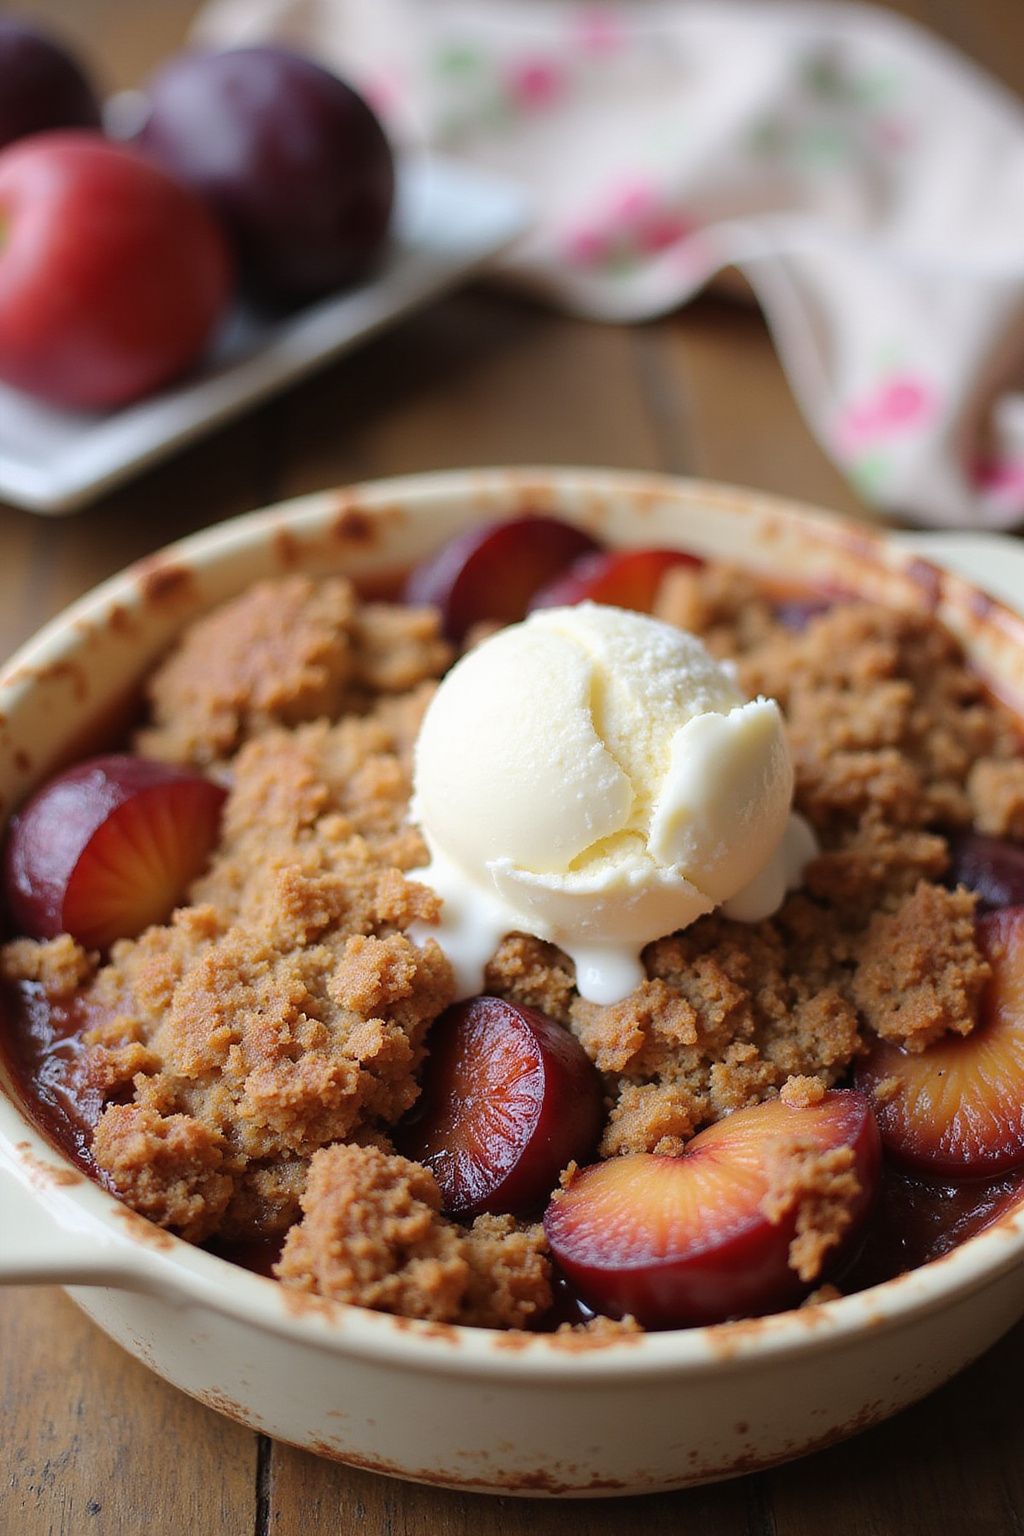
The Plum Crumble with Ice Cream is a delightful dessert that combines the sweet and tangy flavors of fresh plums with a crunchy crumble topping. It’s perfect for summer gatherings or cozy nights in. Best served warm with a scoop of creamy ice cream, this dish is sure to impress your family and friends.
Prep Time: 15 minutes
Cook Time: 30 minutes
Total Time: 45 minutes
Servings: 6
Ingredients:
- 6 cups fresh plums, pitted and sliced
- 1/2 cup granulated sugar
- 2 tablespoons lemon juice
- 1 teaspoon vanilla extract
- 1 cup all-purpose flour
- 1 cup rolled oats
- 1/2 cup brown sugar
- 1/2 teaspoon ground cinnamon
- 1/2 cup unsalted butter, softened
- Ice cream for serving
Instructions:
Start by preheating your oven to 350°F (175°C). Grab a large mixing bowl and combine the sliced plums, granulated sugar, lemon juice, and vanilla extract. Toss everything together until the plums are well-coated. Then, transfer the plum mixture into a baking dish.
In another bowl, mix the all-purpose flour, rolled oats, brown sugar, and ground cinnamon. Once combined, use your fingers to work in the softened butter. You want to create a crumbly texture. It should resemble wet sand.
Sprinkle the crumble mixture evenly over the plums in the baking dish. Make sure to cover as much surface area as possible. Now, place the dish in the oven and bake for about 30 minutes, or until the topping is golden brown and the plums are bubbling.
Once done, take it out of the oven and let it cool for about 10 minutes. Serve warm topped with a generous scoop of ice cream. Enjoy the contrast of the warm crumble and the cold ice cream!
Tips:
- For extra flavor, add a sprinkle of nutmeg to the crumble mixture.
- Try using different fruits like apples or berries with the plums for a mixed fruit crumble.
- Store any leftovers in an airtight container in the refrigerator for up to 3 days.
Nutrition Facts:
- Calories: 350 per serving
- Fat: 15g
- Carbohydrates: 55g
- Fiber: 3g
- Sugar: 25g
- Protein: 4g
23 Apricot and Rosemary Galette
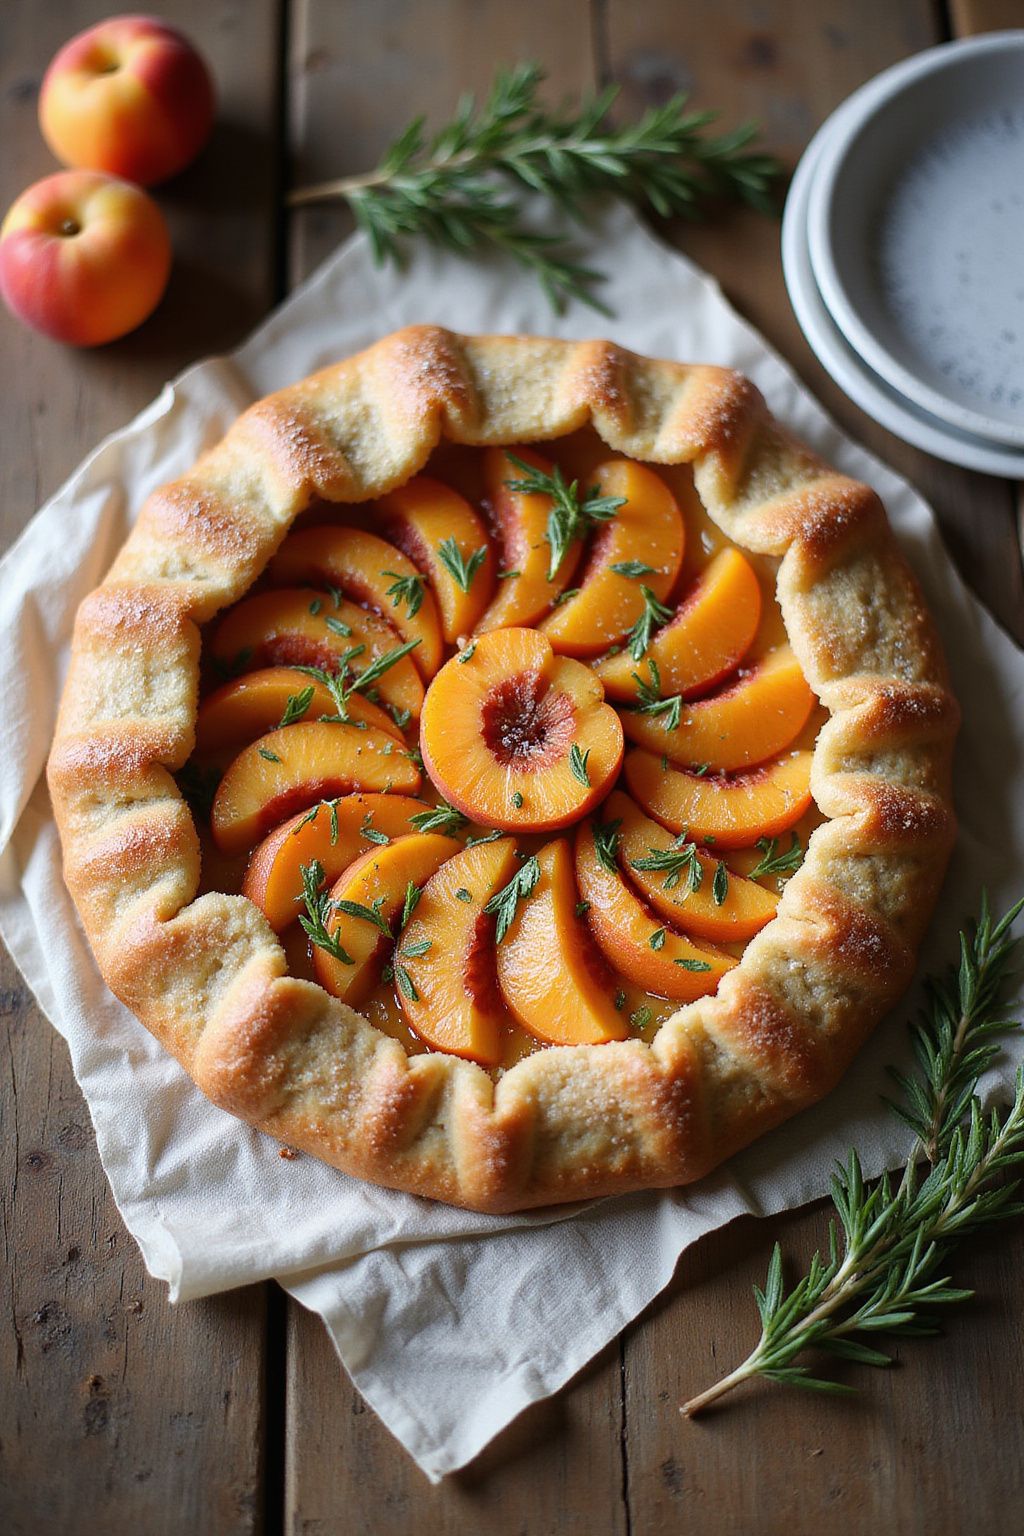
This Apricot and Rosemary Galette is a delightful blend of sweet and savory. The juicy apricots combined with the earthy flavor of rosemary create a unique dessert that’s fun to make! Perfect for a summer afternoon or a cozy gathering, this rustic tart is sure to impress.
Prep Time: 20 minutes
Additional Time: 30 minutes
Total Time: 50 minutes
Servings: 8
Ingredients:
- 1 cup all-purpose flour
- 1/4 teaspoon salt
- 1/4 cup cold unsalted butter, diced
- 2-3 tablespoons cold water
- 2 cups fresh apricots, pitted and sliced
- 1 tablespoon fresh rosemary, finely chopped
- 1/4 cup sugar
- 1 tablespoon cornstarch
- 1 tablespoon lemon juice
- 1 egg, beaten (for egg wash)
- Extra sugar for sprinkling on top
Instructions:
Start by making the pie crust. In a mixing bowl, combine 1 cup of flour and 1/4 teaspoon of salt. Add the diced cold butter and use a fork or pastry cutter to mix until it resembles coarse crumbs.
Next, add in 2-3 tablespoons of cold water, one tablespoon at a time, mixing gently until the dough comes together. Once formed, shape it into a disc, wrap it in plastic wrap, and refrigerate for 30 minutes.
While the dough is chilling, prepare the filling. In another bowl, combine the sliced apricots, 1 tablespoon of chopped rosemary, 1/4 cup of sugar, 1 tablespoon of cornstarch, and 1 tablespoon of lemon juice. Toss the mixture gently until the apricots are well coated.
After chilling, preheat your oven to 375°F (190°C). On a lightly floured surface, roll out the chilled dough into a circle about 12 inches in diameter. Transfer the crust to a baking sheet lined with parchment paper.
Spoon the apricot mixture onto the center of the crust, leaving about a 2-inch border. Fold the edges of the dough over the filling, pleating it as you go. Brush the edges with the beaten egg and sprinkle some extra sugar on top for a lovely finish.
Bake the galette in the preheated oven for about 30-35 minutes, or until the crust is golden brown and the apricots are bubbly. Allow it to cool for a few minutes before slicing to serve.
Tips:
- You can substitute fresh apricots with peaches or plums for different flavors.
- For an extra touch, serve the galette with a scoop of vanilla ice cream.
- Make sure to use cold ingredients for the dough to ensure a flaky crust.
Nutrition Facts:
- Calories: 210
- Total Fat: 9g
- Saturated Fat: 5g
- Cholesterol: 50mg
- Sodium: 120mg
- Total Carbohydrates: 32g
- Dietary Fiber: 2g
- Sugars: 12g
- Protein: 3g
24 Grape and Almond Trifle
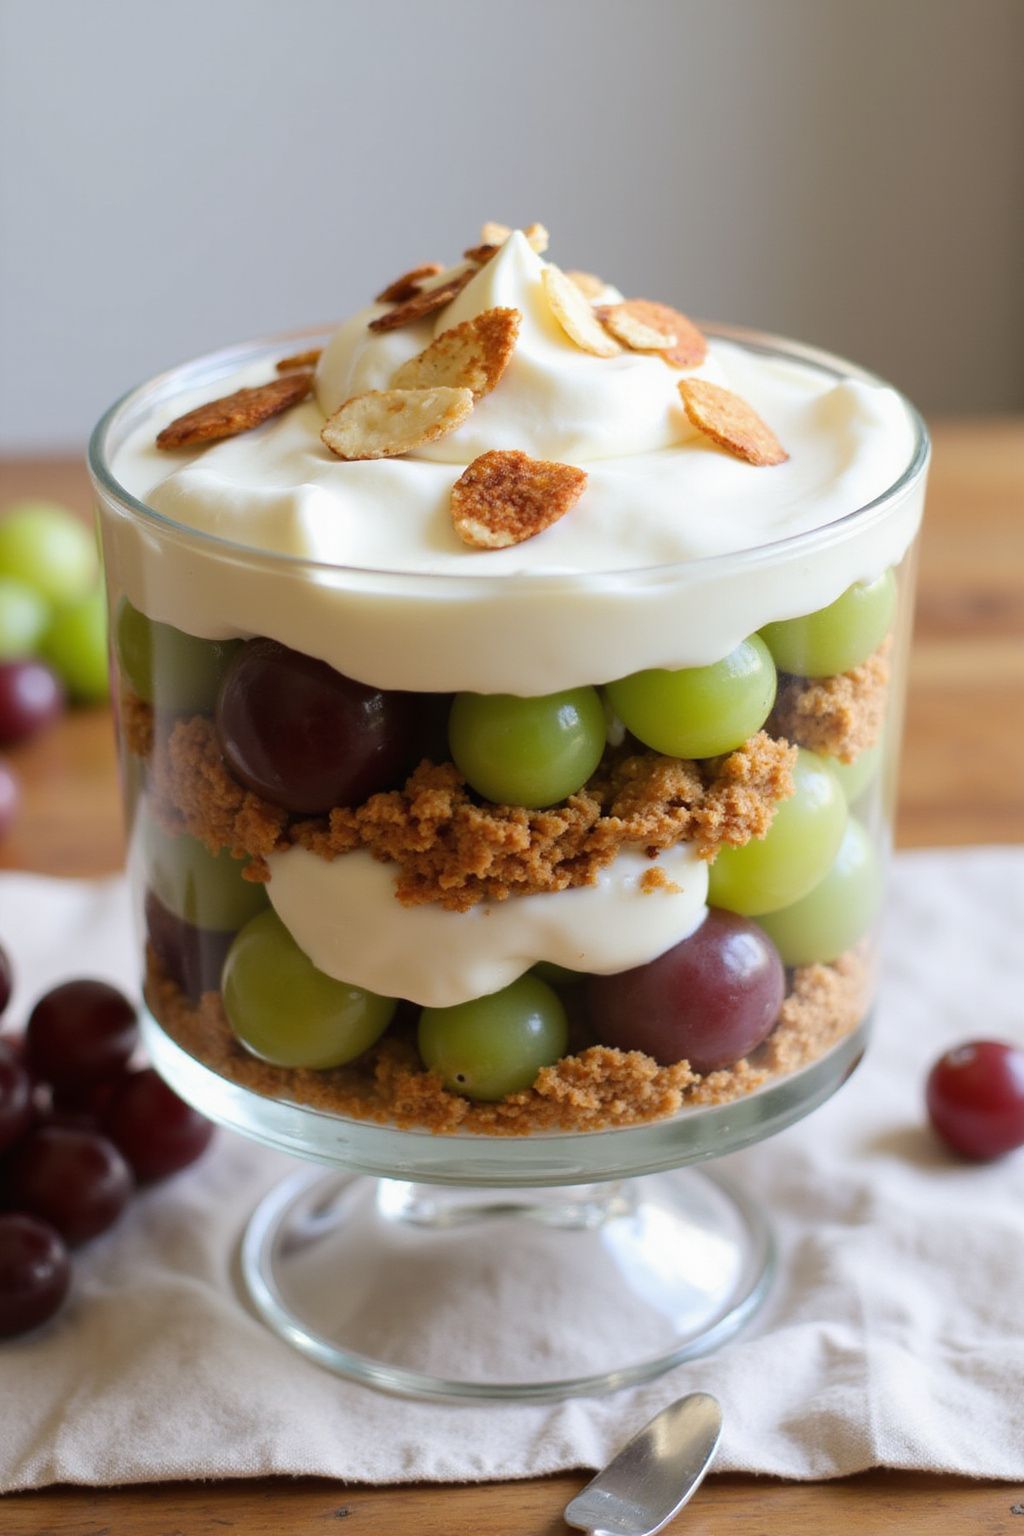
The Grape and Almond Trifle is a delightful dessert that combines fresh grapes, creamy almond custard, and crunchy almonds. It’s perfect for any occasion, from a family gathering to a special celebration. Let’s dive into this scrumptious recipe!
Prep Time: 20 minutes
Additional Time: 2 hours
Total Time: 2 hours 20 minutes
Servings: 6
Ingredients:
- 2 cups fresh grapes, halved
- 1 cup almond-flavored yogurt
- 1 cup whipped cream
- 1/2 cup almond milk
- 1/3 cup almond butter
- 1/4 cup sugar
- 1 teaspoon vanilla extract
- 1 cup crushed graham crackers
- 1/2 cup sliced almonds (toasted)
Instructions:
Start by mixing the almond-flavored yogurt and almond butter in a bowl. Stir well until they are fully combined. This mixture will be the creamy layer of your trifle.
In another bowl, take the whipped cream and gently fold it into the yogurt and almond butter mixture. Be careful not to deflate the whipped cream; you want it to stay light and fluffy.
Next, prepare your baking dish or individual glasses for serving. Begin by placing a layer of crushed graham crackers at the bottom of the dish. This will add a nice crunch to your trifle.
Now, spoon half of the almond cream mixture over the graham crackers, spreading it evenly. Then, add a layer of the halved grapes on top. Repeat this process with another layer of graham crackers, the almond cream mixture, and the grapes.
Finish off your trifle with a final layer of the whipped cream mixture. Sprinkle the toasted sliced almonds on top for a delicious crunch.
Cover the trifle with plastic wrap and refrigerate for at least 2 hours. This will allow the flavors to blend together beautifully.
Tips:
- For added sweetness, you can drizzle a little honey over the layers of grapes.
- You can use different types of fruit like strawberries or blueberries to change it up!
- Make sure to toast the almonds beforehand for extra flavor.
Nutrition Facts:
- Calories: 250 per serving
- Fat: 14g
- Carbohydrates: 28g
- Protein: 6g
- Sugar: 10g
25 Fruit and Nut Energy Bites
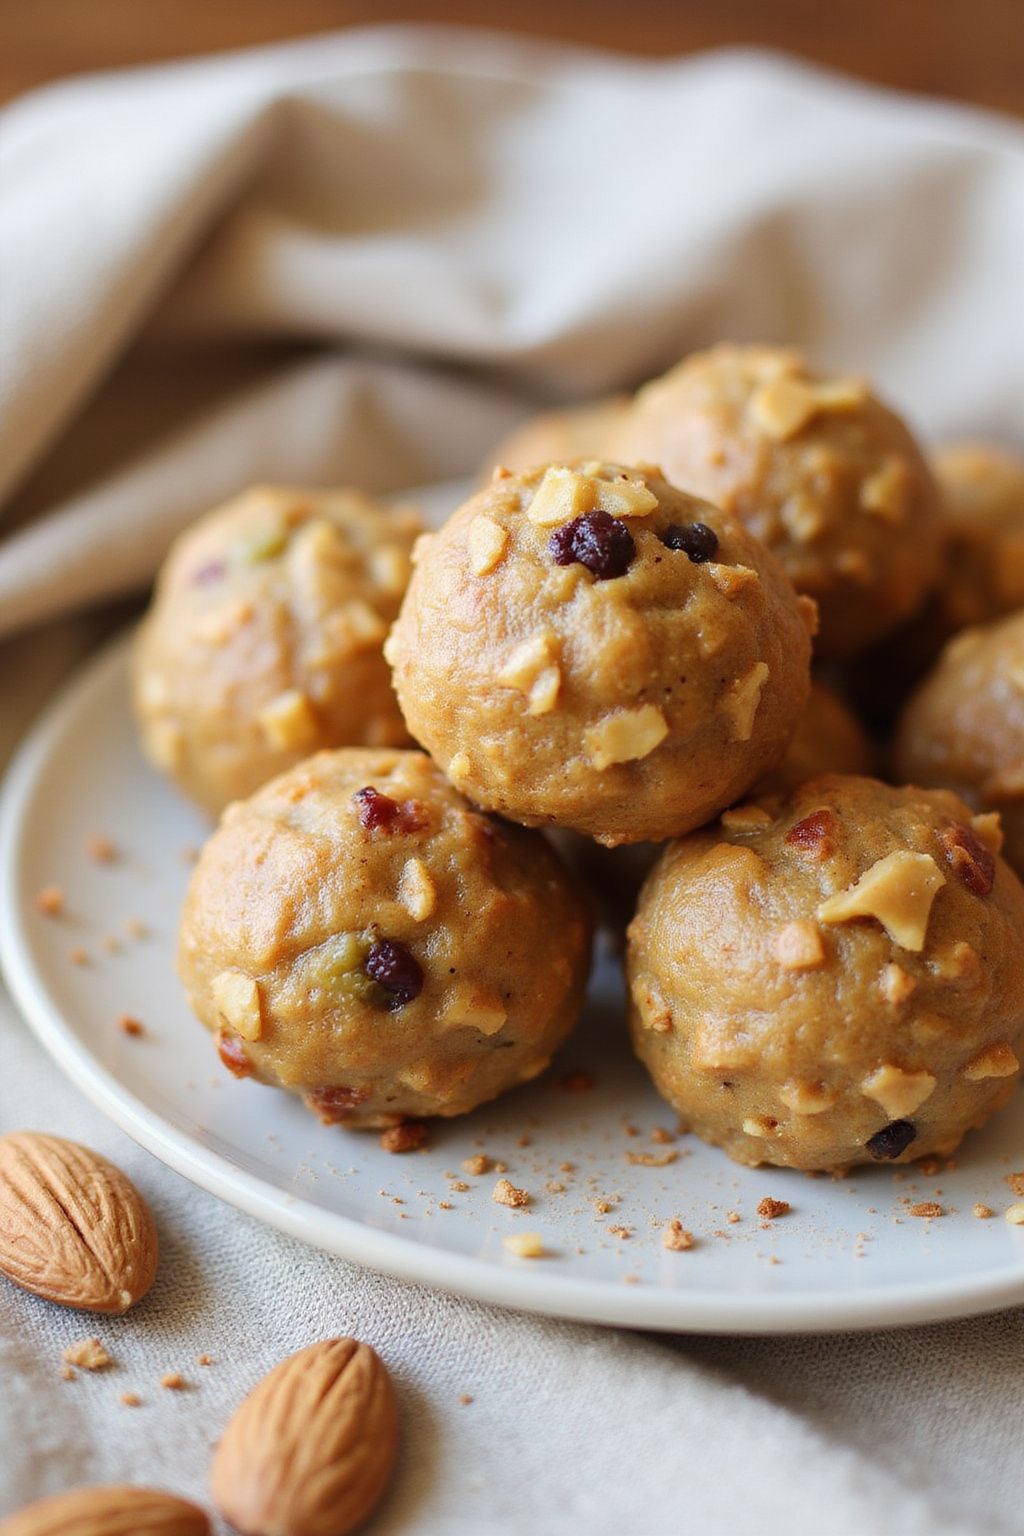
Fruit and Nut Energy Bites are a healthy and delicious snack that’s perfect for busy days! Packed with nutrients, they give you a quick energy boost without any added sugar. Plus, they’re super easy to make and can be customized with your favorite fruits and nuts.
Prep Time: 15 minutes
Total Time: 15 minutes
Servings: 12 energy bites
Ingredients:
- 1 cup rolled oats
- 1/2 cup almond butter (or any nut butter)
- 1/3 cup honey or maple syrup
- 1/2 cup chopped mixed nuts (like almonds, walnuts, or cashews)
- 1/2 cup dried fruit (such as raisins, cranberries, or apricots)
- 1/4 cup mini chocolate chips (optional)
- 1 teaspoon vanilla extract
- 1/2 teaspoon cinnamon
Instructions:
Start by gathering all your ingredients. In a large mixing bowl, combine rolled oats, almond butter, and honey. Mix well until everything is nicely blended.
Next, add in the chopped mixed nuts, dried fruit, mini chocolate chips (if using), vanilla extract, and cinnamon. Stir everything together until fully combined. The mixture should be sticky and easy to mold.
Now it’s time to form the energy bites! Use your hands to take small portions of the mixture and roll them into balls, about 1 inch in diameter. Place the balls on a plate or a baking sheet lined with parchment paper.
Once you’ve rolled all the bites, you can enjoy them right away or refrigerate them for about 30 minutes. Chilling helps them firm up and makes them even tastier!
Tips:
- Feel free to mix and match different nuts and dried fruits based on what you like or have at home.
- Store the energy bites in an airtight container in the fridge for up to one week.
- For a fun twist, roll the energy bites in shredded coconut or crushed nuts for added texture.
Nutrition Facts:
- Calories: 100 per bite
- Protein: 3g
- Fat: 4g
- Carbohydrates: 12g
- Fiber: 2g
- Sugar: 4g