My New Cookbook is Out! Check Out Now!
15 St. Patrick’s Day Treats That Are Fun and Festive
Did you know that over 13 million pints of Guinness are consumed worldwide on St. Patrick’s Day? It’s time to celebrate with something sweet! In this blog post, we’ll explore 15 fun and festive St. Patrick’s Day treats that will add a sprinkle of joy to your festivities. From emerald green cupcakes to delightful shamrock shake popsicles, get ready to discover easy and delicious recipes that will delight your family and friends!
Emerald Green Cupcakes

These Emerald Green Cupcakes are a delightful treat, combining the vibrant flavors of mint and lime with a visually stunning green hue that’s perfect for any occasion.
Ingredients:
- 1 ½ cups all-purpose flour
- 1 cup granulated sugar
- ½ cup unsalted butter, softened
- 2 large eggs
- ½ cup buttermilk
- 1 tablespoon lime juice
- 1 teaspoon pure vanilla extract
- 1 teaspoon baking powder
- ½ teaspoon baking soda
- ½ teaspoon salt
- 2 tablespoons green food coloring
- ½ cup mint extract frosting (store-bought or homemade)
Preparation Time: 15 minutes
Cooking Time: 20 minutes
Total Time: 35 minutes
Instructions:
1. Preheat your oven to 350°F (175°C) and line a muffin tin with cupcake liners.
2. In a mixing bowl, cream together the softened butter and granulated sugar until light and fluffy.
3. Add the eggs one at a time, mixing well after each addition.
4. Stir in the buttermilk, lime juice, and vanilla extract until combined.
5. In another bowl, whisk together the flour, baking powder, baking soda, and salt.
6. Gradually add the dry ingredients to the wet ingredients, mixing until just combined.
7. Fold in the green food coloring until the batter is evenly colored.
8. Divide the batter evenly among the cupcake liners and bake for about 20 minutes or until a toothpick inserted in the center comes out clean.
9. Allow the cupcakes to cool in the pan for 5 minutes before transferring to a wire rack to cool completely.
10. Once cooled, frost with the mint extract frosting and enjoy your vibrant cupcakes!
Tips:
- For an extra burst of flavor, add grated lime zest to the batter.
- Experiment with different frosting styles, such as a swirl or rosette, for a beautiful finish.
- Store leftovers in an airtight container to keep them fresh for up to 3 days.
Shamrock Shake Popsicles
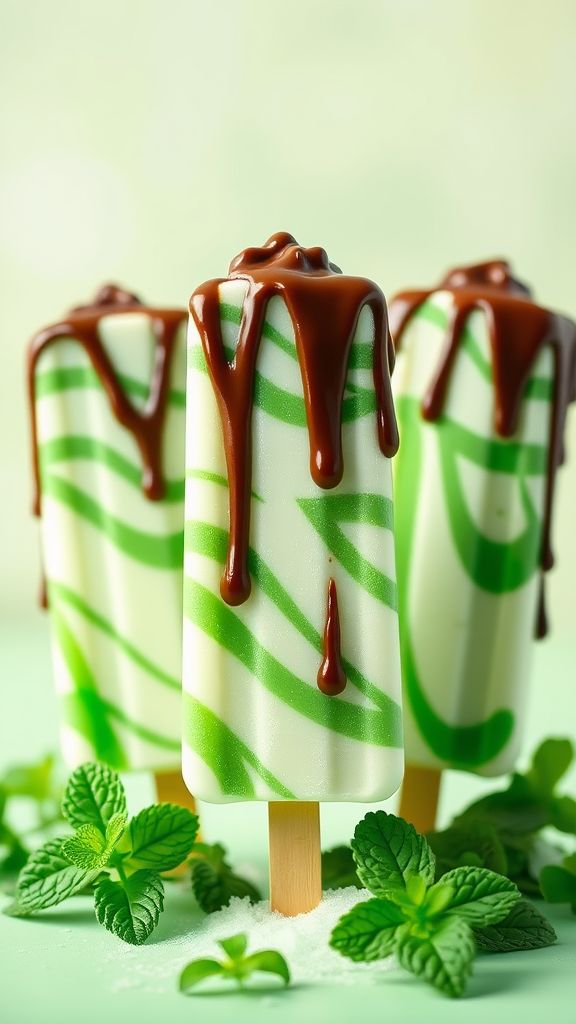
These Shamrock Shake Popsicles are a delightful blend of minty freshness and creamy vanilla, making them a perfect treat to celebrate St. Patrick’s Day or simply enjoy on a warm day.
Ingredients:
- 2 cups vanilla ice cream
- 1 cup milk
- 1/2 cup fresh mint leaves
- 1 teaspoon peppermint extract
- 2 tablespoons green food coloring
- 1/4 cup chocolate syrup
- 1 tablespoon sugar
Preparation Time: 10 minutes
Cooking Time: 0 minutes
Total Time: 4 hours (includes freezing time)
Instructions:
1. In a blender, combine the vanilla ice cream, milk, mint leaves, peppermint extract, sugar, and green food coloring until smooth.
2. Pour the mixture into popsicle molds, filling them about three-quarters full.
3. Drizzle chocolate syrup into each mold for a delicious surprise.
4. Insert the popsicle sticks and freeze for at least 4 hours or until fully set.
5. To remove the popsicles, run warm water over the outside of the mold for a few seconds.
Tips:
- For a stronger mint flavor, feel free to add more mint leaves.
- You can substitute almond milk or any other milk alternative for a dairy-free version.
- Serve these popsicles with extra chocolate syrup for dipping!
Lucky Leprechaun Cookie Bars

These Lucky Leprechaun Cookie Bars are a delightful blend of chocolatey goodness and rich mint flavors, perfect for celebrating St. Patrick’s Day or anytime you need a sweet treat.
Ingredients:
- 1 cup unsalted butter, softened
- 1 cup granulated sugar
- 1 cup brown sugar, packed
- 2 large eggs
- 2 teaspoons vanilla extract
- 3 cups all-purpose flour
- 1 teaspoon baking soda
- 1/2 teaspoon salt
- 1 cup chocolate chips
- 1 cup mint chocolate chips
- 1/2 cup green sprinkles
Preparation Time: 10 minutes
Cooking Time: 25 minutes
Total Time: 35 minutes
Instructions:
1. Preheat your oven to 350°F (175°C) and grease a 9×13 inch baking dish.
2. In a large bowl, cream together the softened butter, granulated sugar, and brown sugar until light and fluffy.
3. Beat in the eggs one at a time, then stir in the vanilla extract.
4. In a separate bowl, whisk together the flour, baking soda, and salt.
5. Gradually add the dry ingredients to the wet ingredients, mixing until just combined.
6. Fold in the chocolate chips, mint chocolate chips, and green sprinkles.
7. Spread the cookie dough evenly into the prepared baking dish.
8. Bake for 25 minutes, or until the edges are golden and a toothpick inserted into the center comes out clean.
9. Allow the bars to cool completely in the baking dish before cutting into squares.
Tips:
- For extra flavor, add a few drops of peppermint extract to the batter.
- Store leftover cookie bars in an airtight container for up to one week.
- Feel free to substitute the mint chocolate chips with white chocolate or regular chocolate chips for different flavor variations.
Rainbow Fruit Skewers
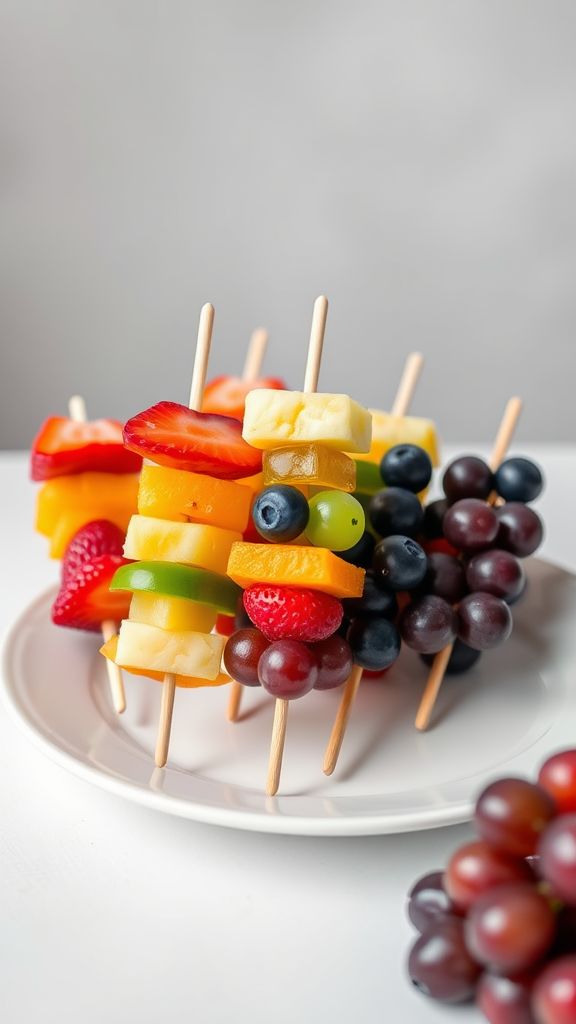
Rainbow Fruit Skewers are a vibrant and fun way to enjoy a variety of fresh fruits, bursting with sweet and tangy flavors that appeal to both kids and adults alike.
Ingredients:
- 1 cup strawberries, hulled and halved
- 1 cup orange segments
- 1 cup pineapple chunks
- 1 cup green grapes
- 1 cup blue blueberries
- 1 cup purple grapes
- 6 wooden skewers
Preparation Time: 15 minutes
Cooking Time: 0 minutes
Total Time: 15 minutes
Instructions:
1. Begin by preparing all the fruit: hull the strawberries, segment the oranges, cut the pineapple into chunks, and wash the grapes and blueberries.
2. Take a wooden skewer and start threading the fruits onto it in a colorful pattern, alternating between different fruits for the best visual appeal.
3. Continue adding fruits until the skewer is filled, leaving a little space at the bottom for easy handling.
4. Repeat this process with the remaining skewers and fruits until all are assembled.
5. Serve immediately or refrigerate for a short time until you’re ready to enjoy these tasty skewers.
Tips:
- Try using seasonal fruits for the freshest taste and vibrant colors.
- For a fun twist, drizzle a little honey or yogurt dip on the side.
- Keep leftover skewers wrapped in plastic wrap in the refrigerator for up to a day.
Mint Chocolate Truffle Balls

These Mint Chocolate Truffle Balls are a decadent blend of rich chocolate and refreshing mint, making them the perfect treat for any occasion.
Ingredients:
- 1 cup semi-sweet chocolate chips
- 1/2 cup heavy cream
- 1 teaspoon peppermint extract
- 1/4 cup cocoa powder
- 1/4 cup crushed candy canes
- 1 cup crushed graham crackers
- 1/2 cup powdered sugar
Preparation Time: 15 minutes
Cooking Time: 10 minutes
Total Time: 25 minutes
Instructions:
1. In a small saucepan, heat the heavy cream over medium heat until it begins to simmer. Remove from heat.
2. Add the semi-sweet chocolate chips to the saucepan and let sit for 2 minutes.
3. Stir the mixture until the chocolate is completely melted and smooth. Stir in the peppermint extract.
4. Allow the chocolate mixture to cool at room temperature for about 30 minutes, until it thickens slightly.
5. Use a spoon or cookie scoop to portion out the chocolate mixture and roll it into balls.
6. Roll each truffle in cocoa powder or crushed candy canes to coat.
7. Place the truffles on a parchment-lined baking sheet and refrigerate for at least 1 hour to set.
Tips:
- Use high-quality chocolate for the best flavor.
- For a stronger mint flavor, add a little more peppermint extract to the mixture.
- Store truffles in an airtight container in the refrigerator for up to two weeks.
- Consider dipping the truffles in melted chocolate for an extra indulgent treat.
St. Patrick’s Day Marshmallow Rice Treats
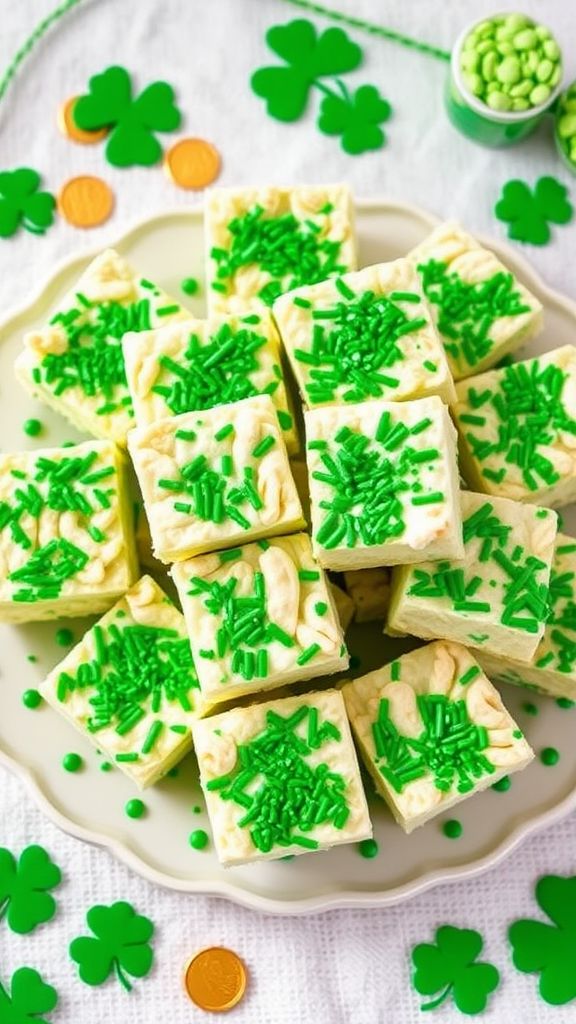
This St. Patrick’s Day, indulge in these delightful Marshmallow Rice Treats that combine the sweet flavors of marshmallows and the crunch of rice cereal, all in a festive, green twist!
Ingredients:
- 4 cups mini marshmallows
- 3 tablespoons unsalted butter
- 6 cups rice cereal
- 1/2 teaspoon green food coloring
- 1/2 cup green sprinkles
Preparation Time: 10 minutes
Cooking Time: 5 minutes
Total Time: 15 minutes
Instructions:
1. In a large saucepan, melt the butter over low heat.
2. Add the mini marshmallows and stir until completely melted and smooth.
3. Remove from heat and mix in the green food coloring until fully combined.
4. Stir in the rice cereal until well coated with the marshmallow mixture.
5. Press the mixture into a greased 9×13 inch pan, smoothing out the top.
6. While the mixture is still warm, sprinkle green sprinkles on top and press them gently into the bars.
7. Allow to cool completely before cutting into squares and serving.
Tips:
- Use a spatula or your hands (with butter) to press the mixture down firmly for a denser treat.
- For extra flavor, consider adding in some mint extract while melting the marshmallows.
- Store in an airtight container to keep them fresh for several days.
Green Velvet Cake Pops
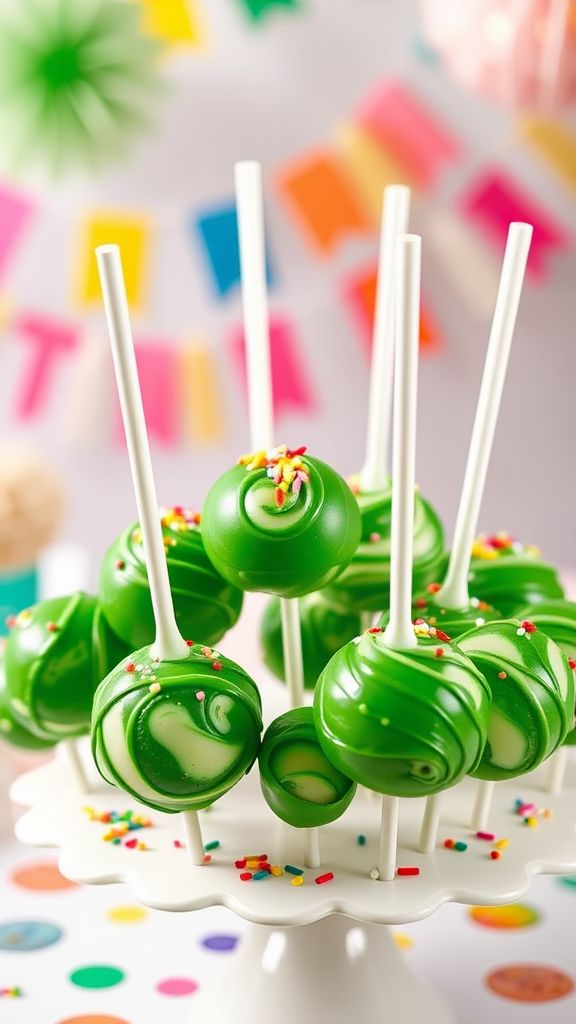
This Green Velvet Cake Pop recipe combines the rich flavors of cocoa and vanilla with a vibrant green hue, making it a visually stunning and delicious treat for any occasion.
Ingredients:
- 2 cups all-purpose flour
- 1 ½ cups granulated sugar
- 1 cup vegetable oil
- 1 cup buttermilk
- 3 large eggs
- 2 tablespoons cocoa powder
- 1 teaspoon baking soda
- 1 teaspoon vanilla extract
- 1 teaspoon white vinegar
- green food coloring (to desired intensity)
- 1 cup cream cheese frosting
- 1 pound candy coating or chocolate melts
- lollipop sticks (as needed)
Preparation Time: 20 minutes
Cooking Time: 30 minutes
Total Time: 50 minutes
Instructions:
1. Preheat your oven to 350°F (175°C) and grease two 9-inch round cake pans.
2. In a large mixing bowl, combine the flour, sugar, cocoa powder, baking soda, and salt until well mixed.
3. In another bowl, whisk together the vegetable oil, buttermilk, eggs, vanilla extract, and vinegar.
4. Slowly add the wet ingredients to the dry ingredients, mixing until just combined.
5. Add green food coloring until you achieve your desired color, and mix well.
6. Divide the batter evenly between the prepared cake pans, and smooth the tops.
7. Bake for 25-30 minutes or until a toothpick inserted in the center comes out clean.
8. Allow the cakes to cool completely before removing them from the pans.
9. Crumble the cooled cakes in a large bowl and mix in cream cheese frosting until well combined.
10. Roll the mixture into small balls, about 1 inch in size, and place them on a lined baking sheet.
11. Freeze the cake balls for at least 30 minutes to firm up.
12. Melt the candy coating or chocolate melts according to package instructions.
13. Dip the tip of each lollipop stick into the melted coating and insert it into a cake ball.
14. Completely dip each cake pop into the melted coating and allow the excess to drip off before placing it back on the baking sheet.
15. Allow the coating to set completely before serving or storing.
Tips:
- Ensure your cake is fully cooled before crumbling for best texture.
- Use different color candy coatings for festive occasions.
- Store in the refrigerator to keep them fresh longer.
Irish Cream Brownies
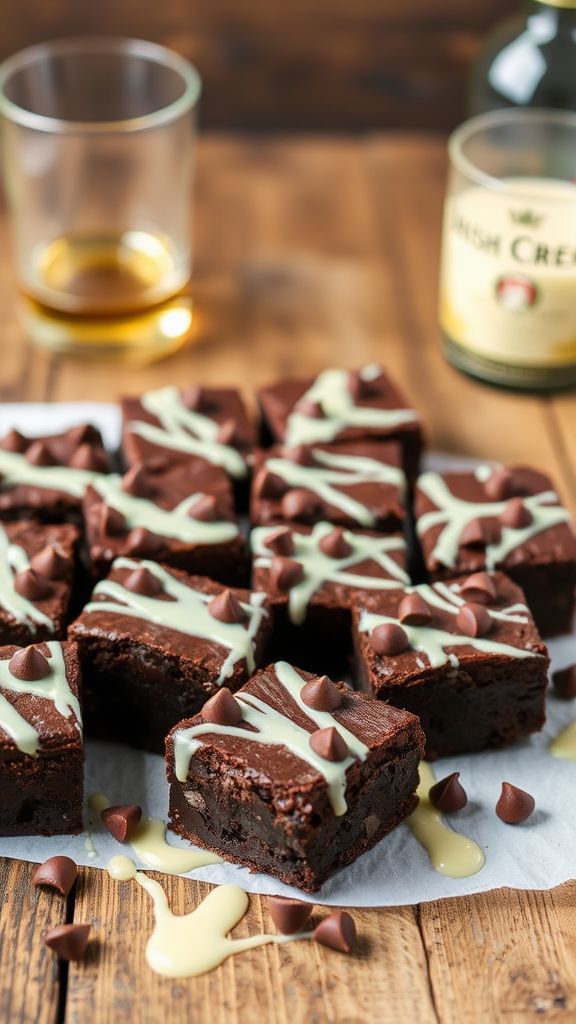
These Irish Cream Brownies are a delightful blend of rich chocolate and smooth Irish cream, creating an indulgent dessert that’s perfect for any occasion.
Ingredients:
- 1 cup unsalted butter
- 2 cups granulated sugar
- 4 large eggs
- 1 teaspoon vanilla extract
- 1 cup all-purpose flour
- 1 cup unsweetened cocoa powder
- 1/2 teaspoon salt
- 1 cup Irish cream liqueur
- 1 cup chocolate chips
Preparation Time: 15 minutes
Cooking Time: 30 minutes
Total Time: 45 minutes
Instructions:
1. Preheat your oven to 350°F (175°C) and grease a 9×13 inch baking pan.
2. In a large saucepan, melt the butter over low heat.
3. Remove from heat and stir in the sugar, eggs, and vanilla until well combined.
4. Sift together the flour, cocoa powder, and salt in a separate bowl.
5. Gradually mix the dry ingredients into the wet mixture until just combined.
6. Stir in the Irish cream liqueur and chocolate chips until evenly distributed.
7. Pour the batter into the prepared baking pan and spread evenly.
8. Bake in the preheated oven for 30-35 minutes, or until a toothpick inserted comes out with a few moist crumbs.
9. Allow the brownies to cool in the pan before cutting into squares and serving.
Tips:
- Make sure not to overmix the batter to keep the brownies fudgy.
- For an extra indulgent treat, top the brownies with whipped cream or additional chocolate drizzle.
- Store leftovers in an airtight container at room temperature for up to 3 days.
Pistachio Fudge Squares
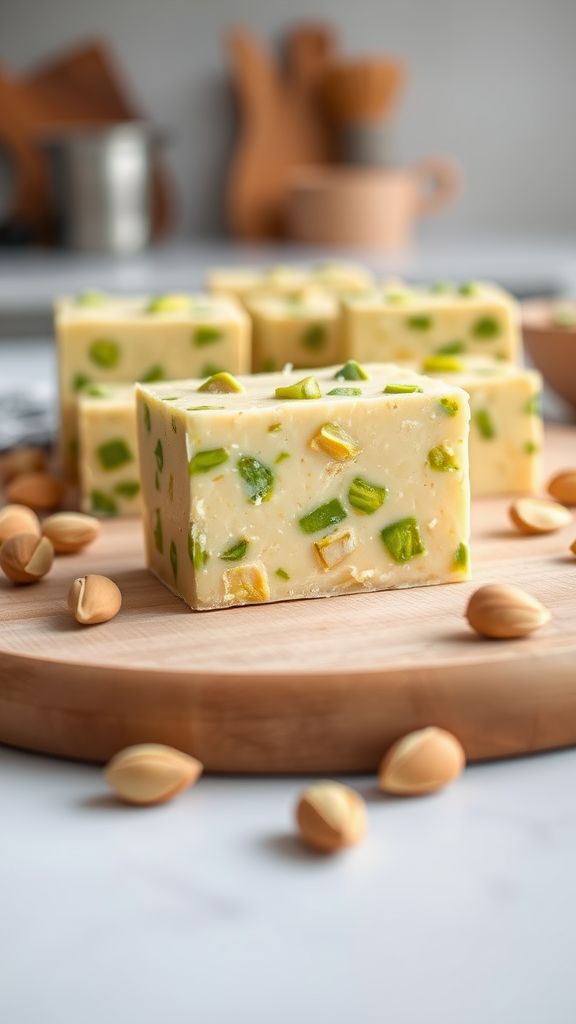
This Pistachio Fudge Squares recipe brings a harmonious blend of rich creaminess and nutty flavors that will tantalize your taste buds.
Ingredients:
- 2 cups sugar
- 1 cup heavy cream
- 1/2 cup unsalted butter
- 2 cups chopped pistachios
- 1 teaspoon vanilla extract
- 1/4 teaspoon salt
- 1 cup white chocolate chips
Preparation Time: 15 minutes
Cooking Time: 30 minutes
Total Time: 45 minutes
Instructions:
1. In a heavy-bottomed saucepan, combine sugar, heavy cream, and unsalted butter. Bring to a boil over medium heat while stirring constantly.
2. Continue boiling the mixture for about 5 minutes without stirring until it reaches the soft ball stage (234°F to 240°F).
3. Remove the saucepan from heat and stir in the chopped pistachios, vanilla extract, salt, and white chocolate chips until fully combined.
4. Pour the mixture into a greased 9×9-inch baking dish and spread it evenly.
5. Allow the fudge to cool at room temperature for about 2 hours until set.
6. Once set, cut into squares and enjoy!
Tips:
- To enhance the flavor, toast the pistachios before adding them to the fudge.
- For a twist, try adding a pinch of cardamom or almond extract for a different flavor profile.
- Store any leftovers in an airtight container at room temperature for up to a week.
Clover-Shaped Sugar Cookies
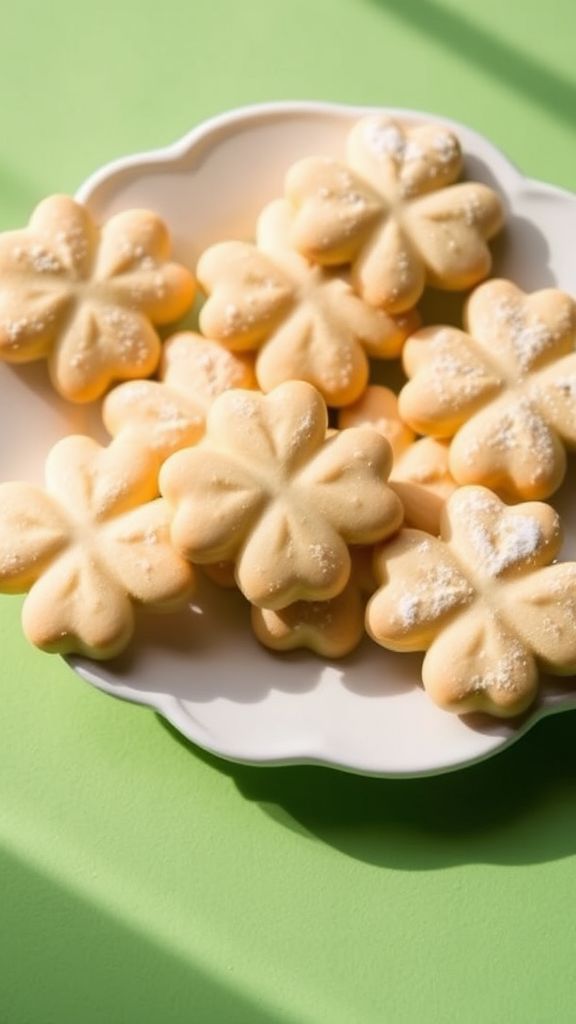
These delightful Clover-Shaped Sugar Cookies offer a charming design combined with a buttery sweetness that makes them perfect for any celebration or holiday.
Ingredients:
- 2 ½ cups all-purpose flour
- 1 teaspoon baking powder
- ½ teaspoon salt
- 1 cup unsalted butter, softened
- 1 ½ cups granulated sugar
- 1 teaspoon vanilla extract
- 1 large egg
- ½ cup powdered sugar, for decoration
Preparation Time: 15 minutes
Cooking Time: 10 minutes
Total Time: 25 minutes
Instructions:
1. In a bowl, whisk together the flour, baking powder, and salt. Set aside.
2. In another bowl, cream the softened butter and granulated sugar until light and fluffy.
3. Beat in the vanilla extract and egg until well combined.
4. Gradually add the dry ingredients to the wet mixture, mixing until a dough forms.
5. Chill the dough in the refrigerator for at least 30 minutes.
6. Preheat the oven to 350°F (175°C) and line baking sheets with parchment paper.
7. Roll out the chilled dough on a lightly floured surface to about ¼ inch thick.
8. Use a clover-shaped cookie cutter to cut out cookies and place them on the prepared baking sheets.
9. Bake for 8-10 minutes or until the edges are lightly golden.
10. Allow the cookies to cool on a wire rack before dusting with powdered sugar for decoration.
Tips:
- For more vibrant cookies, add a few drops of green food coloring to the dough.
- Make sure to chill the dough to prevent spreading while baking.
- Store cookies in an airtight container to maintain freshness.
Pot of Gold Chocolate Coins

This delightful recipe for Pot of Gold Chocolate Coins combines rich chocolate with a hint of mint for a festive treat that’s perfect for celebrations.
Ingredients:
- 2 cups semisweet chocolate chips
- 1 cup gold sanding sugar
- 1 teaspoon peppermint extract
- 1/4 teaspoon sea salt
- 1 tablespoon vegetable oil
- 1/2 cup mini marshmallows
Preparation Time: 15 minutes
Cooking Time: 5 minutes
Total Time: 20 minutes
Instructions:
1. In a microwave-safe bowl, combine the semisweet chocolate chips and vegetable oil. Microwave in 30-second intervals, stirring in between, until fully melted and smooth.
2. Stir in the peppermint extract and sea salt until well incorporated.
3. Pour the melted chocolate into a silicone mold, filling each cavity about halfway.
4. Add a few mini marshmallows on top of the melted chocolate, then fill the molds to the top with more melted chocolate.
5. Sprinkle gold sanding sugar over the top before the chocolate sets to create the look of coins.
6. Refrigerate for about 15 minutes, or until the chocolate is fully set.
7. Once set, gently pop the chocolate coins out of the mold and enjoy!
Tips:
- Make sure to use high-quality chocolate for the best flavor.
- For a fun twist, try adding different flavor extracts like vanilla or orange.
- Store the coins in an airtight container to keep them fresh.
Leprechaun Hat Cheesecakes

This delightful Leprechaun Hat Cheesecake recipe combines rich cream cheese with a hint of mint and chocolate, creating a whimsical dessert perfect for St. Patrick’s Day celebrations.
Ingredients:
- 1 cup chocolate graham cracker crumbs
- 1/4 cup granulated sugar
- 1/2 cup unsalted butter, melted
- 16 oz cream cheese, softened
- 1 cup powdered sugar
- 1 tsp vanilla extract
- 1/2 cup sour cream
- 2 large eggs
- 1/4 cup heavy cream
- 1/2 tsp mint extract
- Green chocolate melts for decoration
- Chocolate gold coins for topping
Preparation Time: 15 minutes
Cooking Time: 30 minutes
Total Time: 45 minutes
Instructions:
1. Preheat your oven to 325°F (160°C) and line a muffin tin with cupcake liners.
2. In a mixing bowl, combine the chocolate graham cracker crumbs, granulated sugar, and melted butter until well mixed.
3. Press the mixture firmly into the bottom of each cupcake liner to form the crust.
4. In another bowl, beat together the cream cheese and powdered sugar until smooth.
5. Add in the vanilla extract, sour cream, eggs, heavy cream, and mint extract, then mix until well blended.
6. Spoon the cheesecake mixture over the crusts in the muffin tin, filling each liner about three-quarters full.
7. Bake for 25-30 minutes, or until the edges are set and the centers are slightly jiggly.
8. Remove from the oven and allow to cool at room temperature before transferring to the refrigerator to chill for at least 2 hours.
9. Once chilled, melt the green chocolate melts and drizzle over the top of each cheesecake.
10. Top each cheesecake with a chocolate gold coin to resemble a leprechaun hat.
Tips:
- For a richer flavor, consider using dark chocolate graham crackers for the crust.
- Allow the cheesecakes to chill overnight for the best texture and flavor.
- Feel free to add festive sprinkles for an extra touch of celebration.
Pistachio Pudding Parfaits

This Pistachio Pudding Parfait is a delightful treat, featuring creamy pistachio layers and crunchy toppings that make it an irresistible dessert option.
Ingredients:
- 1 box (3.4 oz) instant pistachio pudding mix
- 2 cups cold milk
- 1 cup whipped topping
- 1/2 cup crushed pistachios
- 1/2 cup mini marshmallows
- 1/4 cup chocolate chips
- 1 teaspoon vanilla extract
Preparation Time: 10 minutes
Cooking Time: 0 minutes
Total Time: 10 minutes
Instructions:
1. In a mixing bowl, whisk together the pistachio pudding mix and cold milk until smooth and thickened, about 2 minutes.
2. Gently fold in the whipped topping and vanilla extract until well combined.
3. In serving glasses, layer the pistachio pudding mixture, crushed pistachios, mini marshmallows, and chocolate chips as desired.
4. Repeat the layers until the glasses are filled, finishing with a dollop of whipped topping and a sprinkle of crushed pistachios on top.
5. Chill the parfaits in the refrigerator for at least 1 hour before serving to allow flavors to meld.
Tips:
- For added flavor, consider mixing in some finely chopped pistaschio nuts directly into the pudding.
- Use clear glasses to showcase the beautiful layers of the parfait.
- You can substitute whipped topping with homemade whipped cream for a fresher taste.
Green Apple Sour Candy Worms
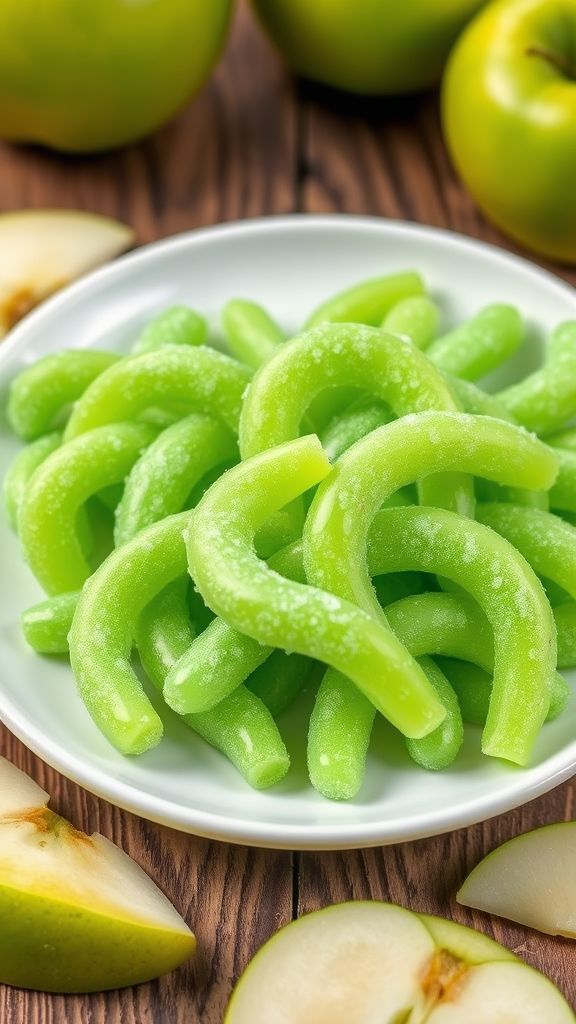
These Green Apple Sour Candy Worms bring a delightful blend of tangy green apple flavor and chewy sweetness that makes them irresistible for candy lovers of all ages.
Ingredients:
- 1 cup green apple juice
- 3 tablespoons gelatin powder
- 1/2 cup granulated sugar
- 1/4 cup citric acid
- 1 tablespoon green food coloring
- 1/2 cup corn syrup
- 1 teaspoon vanilla extract
- 1/2 cup extra granulated sugar for coating
Preparation Time: 10 minutes
Cooking Time: 15 minutes
Total Time: 25 minutes
Instructions:
1. In a saucepan, combine green apple juice, corn syrup, and vanilla extract; heat over medium until warm.
2. Slowly whisk in gelatin powder until fully dissolved, then add granulated sugar and stir until dissolved.
3. Remove from heat and stir in citric acid and green food coloring until evenly mixed.
4. Pour the mixture into worm-shaped candy molds and refrigerate for at least 2 hours, or until set.
5. Once set, carefully remove the candies from the molds and coat them in extra granulated sugar for a sour finish.
Tips:
- For a more intense sour flavor, increase the amount of citric acid in the recipe.
- Experiment with different food coloring to create a variety of candy colors.
- Store the candies in an airtight container to keep them fresh and chewy.
Festive Sprinkles Cake Bites

These Festive Sprinkles Cake Bites are a delightful treat that combines rich vanilla flavor with vibrant holiday colors, making them perfect for any celebration.
Ingredients:
- 1 ½ cups all-purpose flour
- ½ cup granulated sugar
- ½ cup unsalted butter, softened
- 2 large eggs
- 1 teaspoon vanilla extract
- ½ cup milk
- 1 teaspoon baking powder
- ¼ teaspoon salt
- 1 cup festive sprinkles
- 1 cup white chocolate, melted
Preparation Time: 15 minutes
Cooking Time: 20 minutes
Total Time: 35 minutes
Instructions:
1. Preheat your oven to 350°F (175°C) and grease a mini muffin tin.
2. In a bowl, cream together the softened butter and granulated sugar until light and fluffy.
3. Add the eggs one at a time, mixing well after each addition, then stir in the vanilla extract.
4. In another bowl, whisk together the flour, baking powder, and salt.
5. Gradually add the dry ingredients to the butter mixture, alternating with the milk, and mix until just combined.
6. Gently fold in the festive sprinkles.
7. Fill each mini muffin cup about two-thirds full with the batter.
8. Bake in the preheated oven for 18-20 minutes or until a toothpick inserted comes out clean.
9. Allow the cake bites to cool completely before dipping in melted white chocolate.
10. Once dipped, decorate with additional sprinkles as desired and let them set.
Tips:
- Let the cake bites cool fully to avoid melting the chocolate.
- For a fun twist, use different colored sprinkles based on the occasion.
- Store leftovers in an airtight container to keep them fresh.

