My New Cookbook is Out! Check Out Now!
18 No-Bake Desserts For a Stress-Free Winter
Did you know that the average person gains about 1-3 pounds during the winter holidays? Instead of stressing over baking, why not indulge in delicious treats that require zero oven time? In our blog, ’18 No-Bake Desserts for a Stress-Free Winter’, you’ll discover an array of delightful and easy-to-make dessert recipes that will keep your winter celebrations sweet and simple. From frosty coconut cream bars to holiday hot cocoa truffles, these no-bake desserts are sure to delight your taste buds and eliminate the seasonal baking hassle!
Frosty Coconut Cream Bars
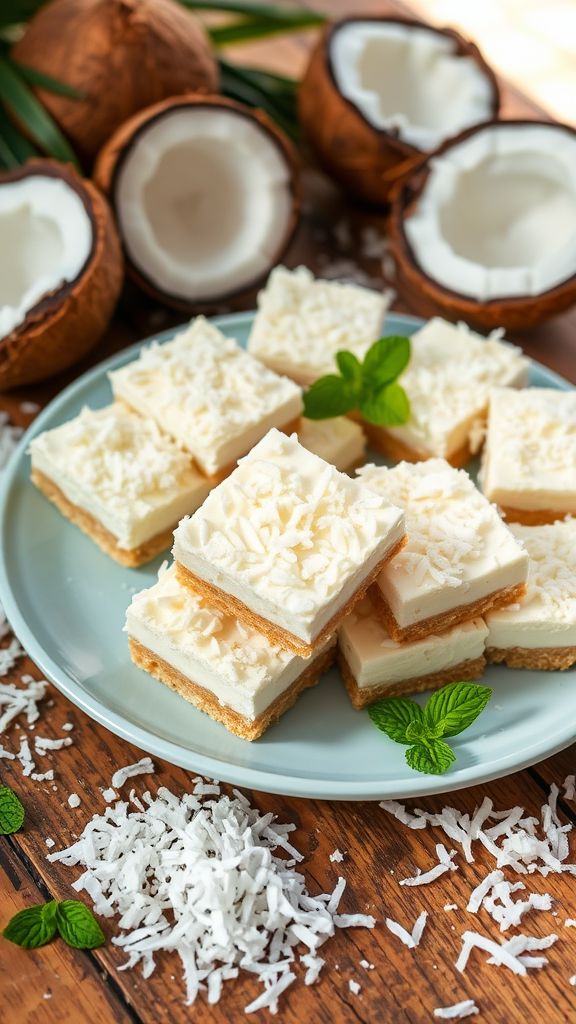
These Frosty Coconut Cream Bars are a delightful treat that perfectly combine the tropical flavors of coconut with a creamy, refreshing finish, making them an irresistible summer dessert.
Ingredients:
- 1 cup graham cracker crumbs
- 1/2 cup unsweetened shredded coconut
- 1/4 cup granulated sugar
- 1/3 cup unsalted butter, melted
- 2 cups cream cheese, softened
- 1 cup powdered sugar
- 2 cups heavy whipping cream
- 1 teaspoon vanilla extract
- 1/2 cup sweetened shredded coconut, for topping
Preparation Time: 20 minutes
Cooking Time: 0 minutes
Total Time: 2 hours (includes chilling time)
Instructions:
1. In a mixing bowl, combine the graham cracker crumbs, shredded coconut, granulated sugar, and melted butter until evenly mixed.
2. Press the mixture firmly into the bottom of a 9×9 inch baking pan to form the crust.
3. In another bowl, beat the softened cream cheese and powdered sugar together until smooth and creamy.
4. In a separate bowl, whip the heavy cream and vanilla extract until stiff peaks form.
5. Gently fold the whipped cream into the cream cheese mixture until well combined.
6. Spread the cream cheese mixture evenly over the crust in the baking pan.
7. Sprinkle the sweetened shredded coconut on top, press down lightly, and refrigerate for at least 2 hours or until set.
8. Cut into bars and serve chilled.
Tips:
- For added flavor, consider using toasted coconut as a topping.
- These bars can be made a day in advance for convenient serving.
- Keep them stored in the refrigerator for optimal freshness and texture.
Chocolate Hazelnut Bliss Bites
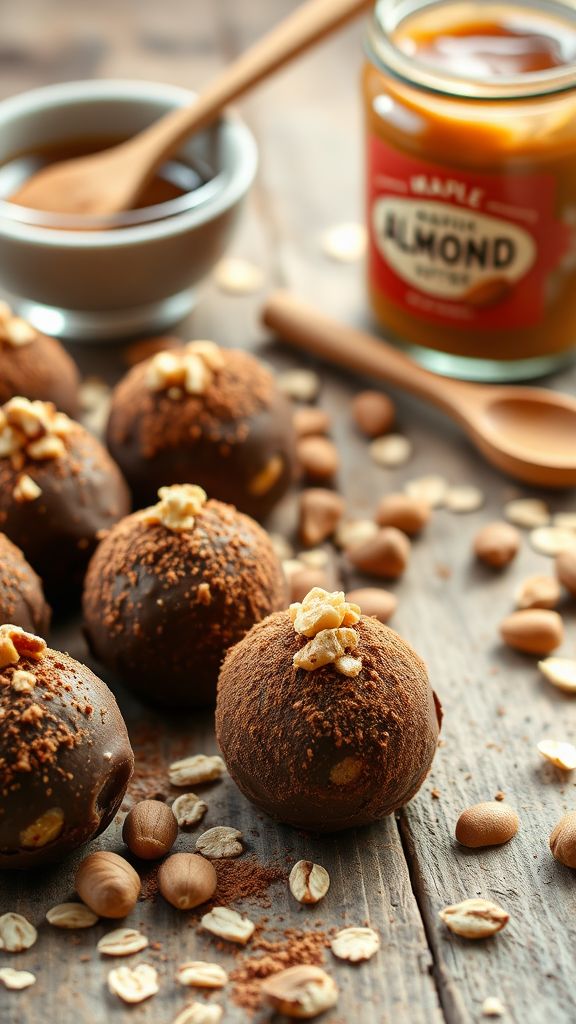
These Chocolate Hazelnut Bliss Bites combine rich chocolate, creamy hazelnut, and a hint of sweetness to create a delectable treat that will satisfy any sweet tooth.
Ingredients:
- 1 cup hazelnuts
- 1/2 cup rolled oats
- 1/2 cup cocoa powder
- 1/4 cup maple syrup
- 1/4 cup almond butter
- 1/2 teaspoon vanilla extract
- 1/4 teaspoon sea salt
Preparation Time: 10 minutes
Cooking Time: 0 minutes
Total Time: 10 minutes
Instructions:
1. Begin by toasting the hazelnuts in a dry skillet over medium heat for about 5 minutes, stirring frequently.
2. Allow the hazelnuts to cool, then blend them in a food processor until they reach a fine meal consistency.
3. Add the rolled oats, cocoa powder, maple syrup, almond butter, vanilla extract, and sea salt to the food processor.
4. Blend the mixture until it is well combined and forms a sticky dough.
5. Scoop tablespoon-sized portions of the mixture and roll them into bite-sized balls.
6. Place the bliss bites on a parchment-lined tray and refrigerate for at least 30 minutes to firm up.
Tips:
- For extra flavor, consider adding a pinch of cinnamon to the mixture.
- Store the bliss bites in an airtight container in the refrigerator for up to one week.
- You can also roll the bites in shredded coconut or crushed nuts for added texture.
Peppermint Patty No-Bake Cheesecake
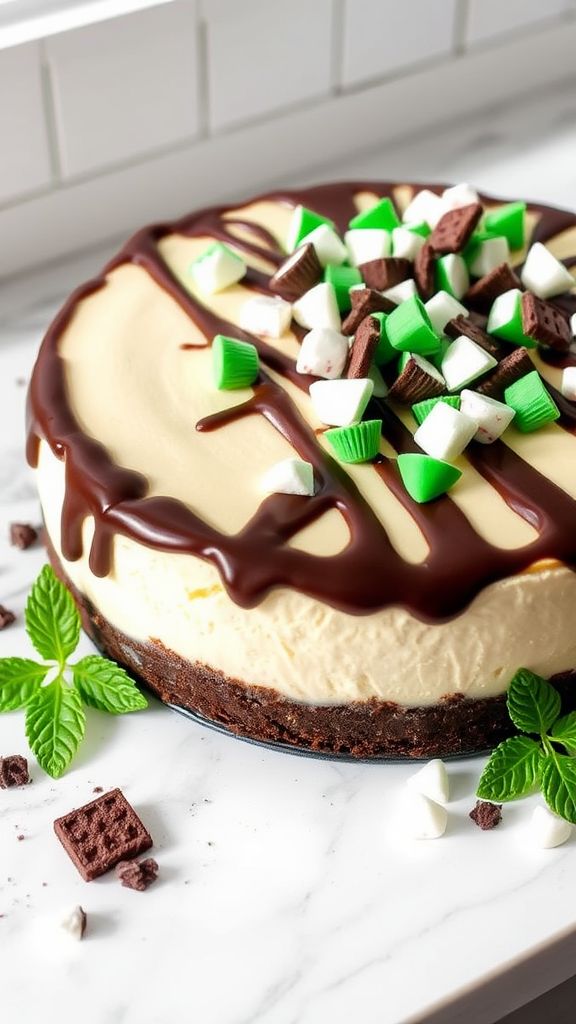
This Peppermint Patty No-Bake Cheesecake is a delightful blend of creamy chocolate and refreshing peppermint, perfect for holiday gatherings or any sweet tooth craving.
Ingredients:
- 1 ½ cups crushed chocolate cookies
- ½ cup unsalted butter, melted
- 2 cups cream cheese, softened
- 1 cup powdered sugar
- 1 teaspoon peppermint extract
- 1 cup whipped cream
- 1 cup semi-sweet chocolate chips
- 2 tablespoons vegetable oil
- 3-4 peppermint patties, chopped (for topping)
Preparation Time: 20 minutes
Cooking Time: 0 minutes
Total Time: 20 minutes
Instructions:
1. In a mixing bowl, combine the crushed chocolate cookies with the melted butter and mix until well combined.
2. Press the cookie mixture firmly into the bottom of a 9-inch springform pan to create the crust.
3. In another bowl, mix the softened cream cheese, powdered sugar, and peppermint extract until smooth and creamy.
4. Gently fold in the whipped cream to the cream cheese mixture until fully incorporated.
5. Pour the cream cheese mixture over the crust and smooth the top with a spatula.
6. Melt the chocolate chips with the vegetable oil in a microwave-safe bowl, stirring until smooth.
7. Drizzle the melted chocolate over the cheesecake layer and sprinkle the chopped peppermint patties on top.
8. Refrigerate for at least 4 hours or until set before serving.
Tips:
- For an extra chocolatey flavor, use double stuffed mint oreos for the crust.
- Ensure the cream cheese is at room temperature to avoid lumps.
- Feel free to add mini chocolate chips into the cheesecake mixture for added texture.
Winter Spice Layered Parfait
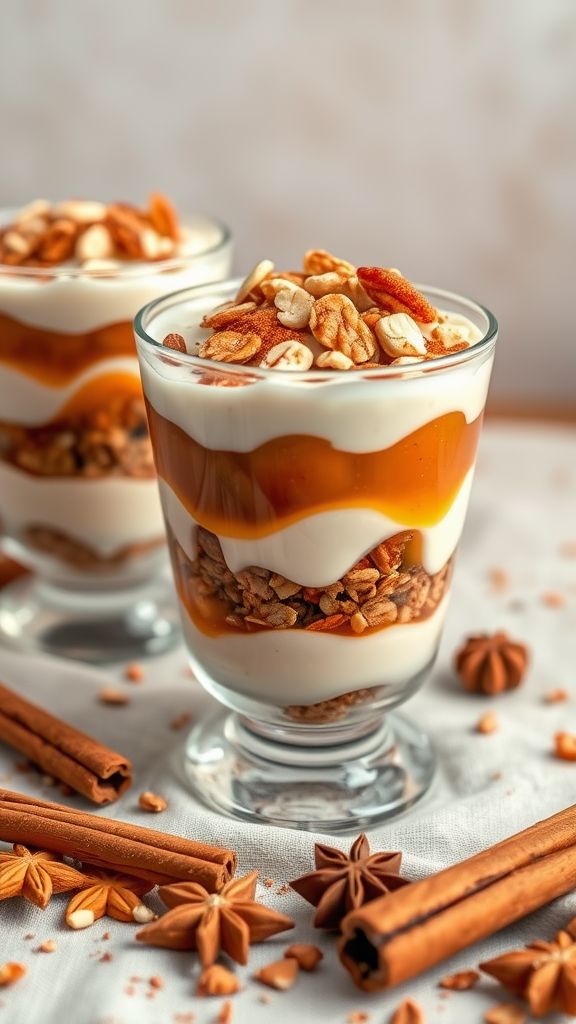
This Winter Spice Layered Parfait uniquely combines the warm flavors of cinnamon, nutmeg, and ginger, creating a delightful treat perfect for cozy gatherings.
Ingredients:
- 2 cups Greek yogurt
- 1 cup granola
- 1 cup apple sauce
- 1 teaspoon ground cinnamon
- 1/2 teaspoon ground nutmeg
- 1/4 teaspoon ground ginger
- 2 tablespoons honey
- 1/4 cup chopped nuts (optional)
Preparation Time: 15 minutes
Cooking Time: 0 minutes
Total Time: 15 minutes
Instructions:
1. In a bowl, mix the Greek yogurt with honey, ground cinnamon, ground nutmeg, and ground ginger until well blended.
2. In parfait glasses or bowls, start layering by adding a few tablespoons of the spiced yogurt mixture at the bottom.
3. Add a layer of apple sauce on top of the yogurt.
4. Next, sprinkle a layer of granola over the apple sauce.
5. Repeat the layers until the glasses are filled, finishing with yogurt and a sprinkle of chopped nuts if desired.
6. Serve immediately or refrigerate for up to 2 hours before serving for a chilled parfait.
Tips:
- Add seasonal fruits like pomegranate seeds for an extra pop of color and flavor.
- For a dairy-free version, use coconut yogurt instead of Greek yogurt.
- Feel free to customize with your favorite spices or toppings.
Creamy Pumpkin Chia Pudding
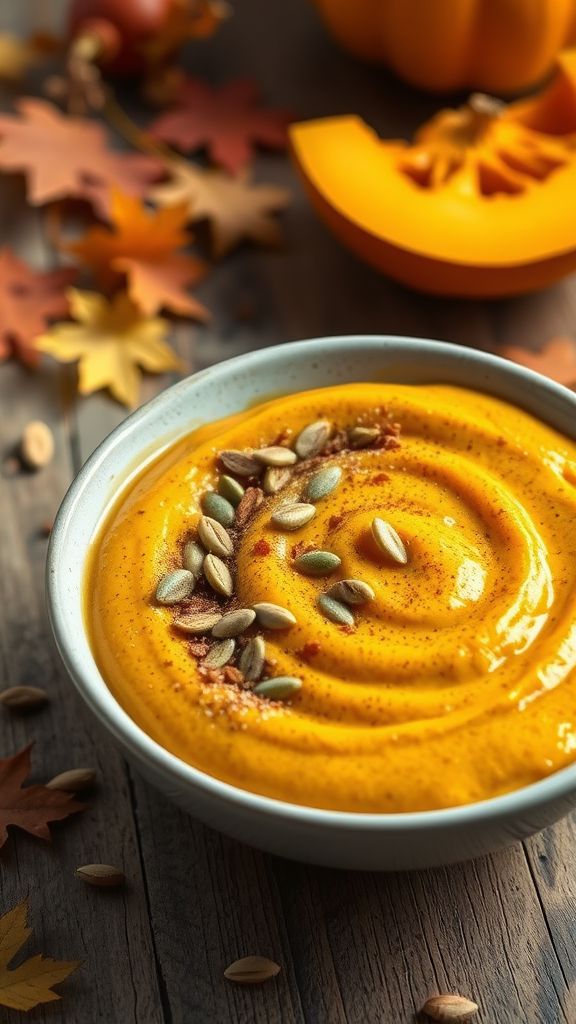
This Creamy Pumpkin Chia Pudding is a delightful blend of warm spices and smooth pumpkin flavor, making it a perfect healthy dessert or breakfast option.
Ingredients:
- 1 cup pumpkin puree
- 1 cup coconut milk
- 1/4 cup chia seeds
- 1/4 cup maple syrup
- 1 teaspoon vanilla extract
- 1/2 teaspoon ground cinnamon
- 1/4 teaspoon ground nutmeg
- 1/4 teaspoon salt
Preparation Time: 10 minutes
Cooking Time: 0 minutes
Total Time: 10 minutes + 4 hours chilling
Instructions:
1. In a bowl, whisk together the pumpkin puree, coconut milk, maple syrup, vanilla extract, ground cinnamon, ground nutmeg, and salt until smooth.
2. Stir in the chia seeds until they are evenly distributed throughout the mixture.
3. Cover the bowl and refrigerate for at least 4 hours or overnight to allow the chia seeds to absorb the liquid and thicken the pudding.
4. Once the pudding is set, give it a good stir before serving. Divide into bowls or jars and top with additional pumpkin seeds or a sprinkle of cinnamon if desired.
Tips:
- For a sweeter pudding, feel free to adjust the maple syrup to your taste.
- Experiment with different plant-based milks for varying flavors.
- This pudding can be stored in the fridge for up to 5 days, making it a great make-ahead breakfast.
Gingerbread Cookie Energy Balls

These Gingerbread Cookie Energy Balls are a delightful blend of warming spices and sweetness, perfect for a nutritious snack that captures the essence of the classic gingerbread cookie.
Ingredients:
- 1 cup rolled oats
- 1/2 cup almond butter
- 1/4 cup honey or maple syrup
- 1/2 teaspoon ground ginger
- 1/2 teaspoon ground cinnamon
- 1/4 teaspoon ground nutmeg
- 1/4 teaspoon ground cloves
- 1/4 cup molasses
- 1/4 cup chopped nuts or seeds (optional)
- 1/4 cup chocolate chips (optional)
Preparation Time: 10 minutes
Cooking Time: 0 minutes
Total Time: 10 minutes
Instructions:
1. In a large bowl, combine the rolled oats, almond butter, honey, ground ginger, ground cinnamon, ground nutmeg, ground cloves, and molasses.
2. Mix the ingredients together until well combined, forming a sticky mixture.
3. If desired, fold in the chopped nuts or seeds and chocolate chips.
4. Use your hands to roll the mixture into bite-sized balls, about 1 inch in diameter.
5. Place the energy balls on a parchment-lined tray and refrigerate for at least 30 minutes to firm up.
6. Once set, enjoy immediately or store in an airtight container in the fridge for up to a week.
Tips:
- For a vegan version, use maple syrup instead of honey.
- Feel free to adjust the spices according to your taste preference.
- These energy balls can also be rolled in shredded coconut or crushed nuts for an extra crunch.
- Store them in the freezer for longer freshness; just let them thaw for a few minutes before enjoying.
No-Bake Berry Delight Trifle
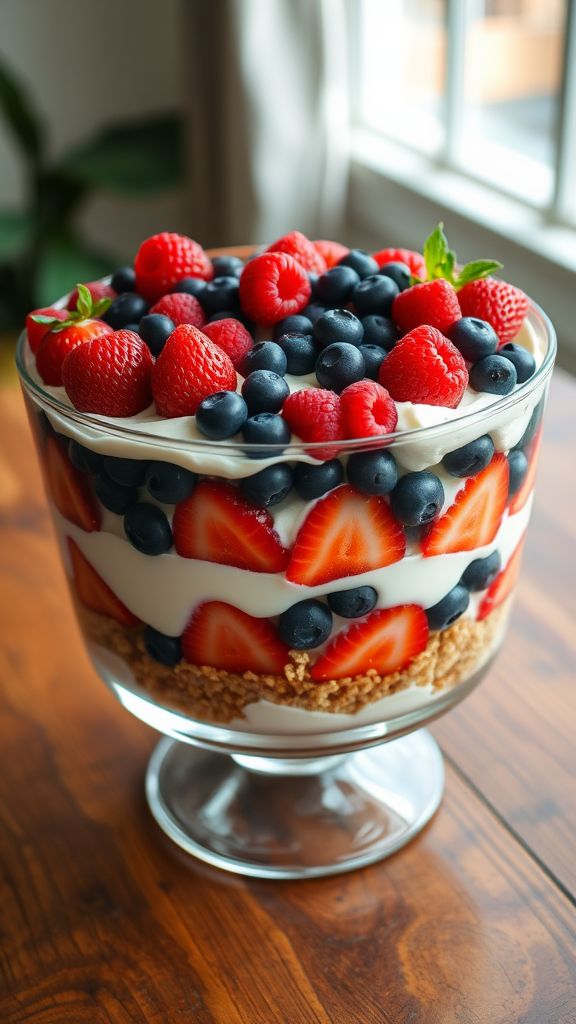
This No-Bake Berry Delight Trifle is a luscious dessert that combines creamy layers with fresh berries, making it a perfect treat for any occasion.
Ingredients:
- 2 cups mixed berries (strawberries, blueberries, raspberries)
- 1 cup heavy whipping cream
- 1 cup vanilla yogurt
- 1/2 cup powdered sugar
- 1 teaspoon vanilla extract
- 1 cup graham cracker crumbs
- 1/4 cup melted butter
Preparation Time: 20 minutes
Cooking Time: 0 minutes
Total Time: 20 minutes
Instructions:
1. In a medium bowl, combine the graham cracker crumbs and melted butter, mixing until well combined.
2. Layer half of the crumb mixture in the bottom of a trifle dish or glass bowl.
3. In another bowl, whip the heavy cream until soft peaks form, then add the powdered sugar and vanilla extract, continuing to whip until stiff peaks form.
4. Fold in the vanilla yogurt into the whipped cream mixture until combined.
5. Spread half of the cream mixture over the crumb layer, followed by half of the mixed berries.
6. Repeat the layers with the remaining ingredients: graham cracker crumbs, cream mixture, and berries.
7. Finish with a decorative layer of berries on top.
8. Refrigerate for at least 2 hours before serving to allow the flavors to meld.
Tips:
- For added sweetness, drizzle honey over the layers of berries before serving.
- Use a mix of berries for a colorful presentation and varied flavor.
- This dessert can be prepared a day in advance for convenience.
Decadent Dark Chocolate Mousse
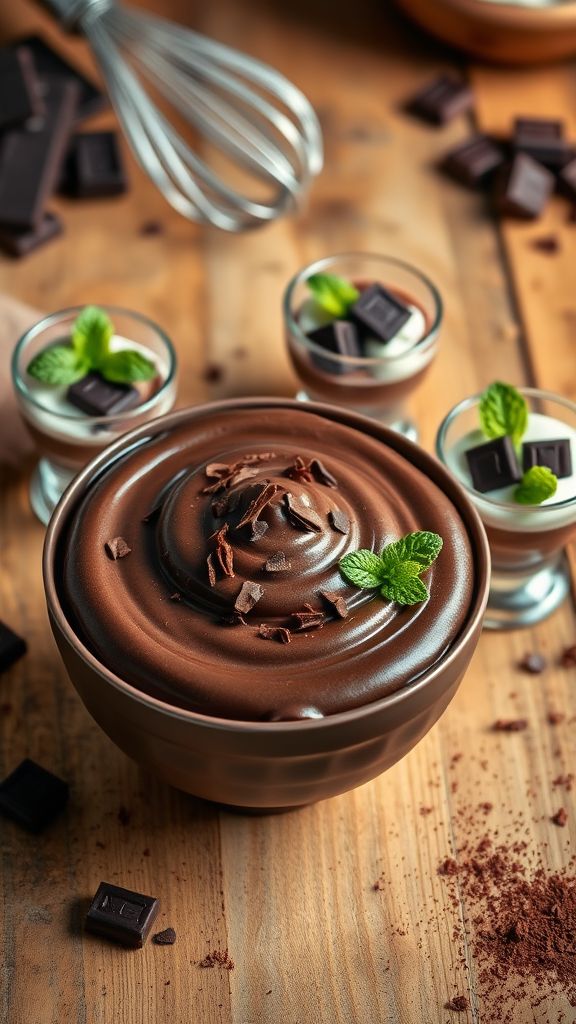
This Decadent Dark Chocolate Mousse is a rich and velvety dessert that tantalizes your taste buds with deep chocolate flavor and a light, airy texture.
Ingredients:
- 8 ounces dark chocolate (70% cacao or higher)
- 2 tablespoons unsalted butter
- 3 large eggs, separated
- 1/4 cup granulated sugar
- 1 cup heavy cream
- 1 teaspoon vanilla extract
- Pinch of salt
Preparation Time: 15 minutes
Cooking Time: 0 minutes
Total Time: 2 hours (including chilling)
Instructions:
1. Melt the dark chocolate and butter together in a heatproof bowl over simmering water, stirring until smooth. Remove from heat and let cool slightly.
2. In a separate bowl, whisk the egg yolks and granulated sugar until pale and thick.
3. Stir the melted chocolate mixture into the egg yolk mixture until well combined.
4. In another bowl, beat the heavy cream and vanilla extract until soft peaks form.
5. In a clean bowl, whisk the egg whites with a pinch of salt until stiff peaks form.
6. Fold the whipped cream into the chocolate mixture gently until no white streaks remain.
7. Next, fold in the egg whites in three additions, being careful not to deflate the mixture.
8. Spoon the mousse into serving dishes and refrigerate for at least 2 hours before serving.
Tips:
- For an extra touch, serve the mousse with whipped cream and chocolate shavings on top.
- Ensure the chocolate is completely cooled before mixing it with the egg yolks to avoid cooking them.
- Use high-quality chocolate for the best flavor.
Cinnamon Roll Oatmeal Cups

Cinnamon Roll Oatmeal Cups are a delightful combination of warm spices, sweet cinnamon, and hearty oats, making them the perfect breakfast treat.
Ingredients:
- 2 cups rolled oats
- 1 teaspoon baking powder
- 1 teaspoon ground cinnamon
- 1/2 teaspoon salt
- 2 cups almond milk (or any milk of choice)
- 1/4 cup maple syrup
- 1 teaspoon vanilla extract
- 1/4 cup brown sugar
- 1/4 cup chopped pecans (optional)
- 1/4 cup raisins (optional)
- 1/4 cup cream cheese frosting (for drizzling)
Preparation Time: 10 minutes
Cooking Time: 20 minutes
Total Time: 30 minutes
Instructions:
1. Preheat your oven to 350°F (175°C) and grease a muffin tin.
2. In a large mixing bowl, combine the rolled oats, baking powder, ground cinnamon, and salt.
3. In another bowl, mix the almond milk, maple syrup, vanilla extract, and brown sugar until well combined.
4. Pour the wet ingredients into the dry ingredients and stir until fully combined.
5. If using, fold in the chopped pecans and raisins.
6. Divide the oatmeal mixture evenly into the prepared muffin tin.
7. Bake in the preheated oven for about 20 minutes or until cups are set and lightly golden.
8. Allow to cool for a few minutes before drizzling with cream cheese frosting, if desired.
Tips:
- For extra sweetness, consider adding chocolate chips.
- These oatmeal cups can be stored in an airtight container in the fridge for up to 5 days.
- Feel free to substitute ingredients, such as using coconut milk for a tropical twist.
Maple Pecan Fudge Squares
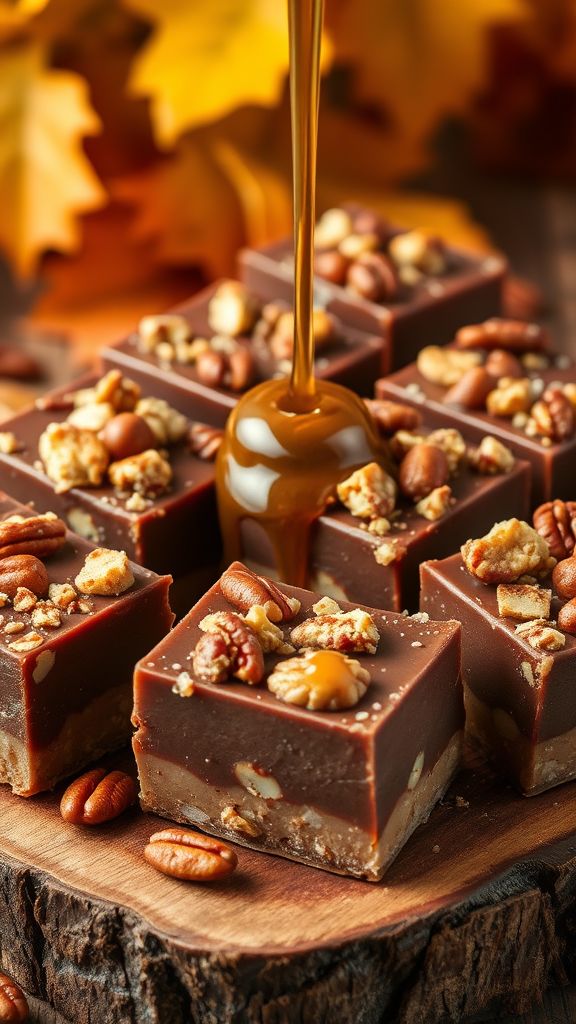
This Maple Pecan Fudge Squares recipe is a delightful treat that combines rich chocolate, sweet maple, and crunchy pecans to create a decadent dessert that is perfect for any occasion.
Ingredients:
- 1 cup unsalted butter
- 2 cups granulated sugar
- 1 cup packed brown sugar
- 1 can (14 oz) sweetened condensed milk
- 2 cups semisweet chocolate chips
- 1 cup chopped pecans
- 1/2 cup maple syrup
- 1 tsp vanilla extract
- 1/4 tsp salt
Preparation Time: 15 minutes
Cooking Time: 25 minutes
Total Time: 40 minutes
Instructions:
1. Preheat your oven to 350°F (175°C) and line a 9×9 inch baking pan with parchment paper.
2. In a medium saucepan, melt the butter over medium heat. Add the granulated sugar and brown sugar, stirring until smooth.
3. Stir in the sweetened condensed milk, and bring the mixture to a gentle boil, stirring constantly for about 5 minutes.
4. Remove from heat and mix in the chocolate chips until melted and smooth.
5. Stir in the maple syrup, vanilla extract, chopped pecans, and salt until well combined.
6. Pour the mixture into the prepared baking pan, spreading it evenly.
7. Bake in the preheated oven for about 25 minutes or until set.
8. Allow to cool completely before cutting into squares and serving.
Tips:
- For an extra crunch, toast the pecans in a dry skillet before adding them to the fudge.
- Store any leftovers in an airtight container at room temperature for up to one week.
- Feel free to substitute the pecans with walnuts or almonds for a different flavor profile.
Snowy White Chocolate Cranberry Clusters
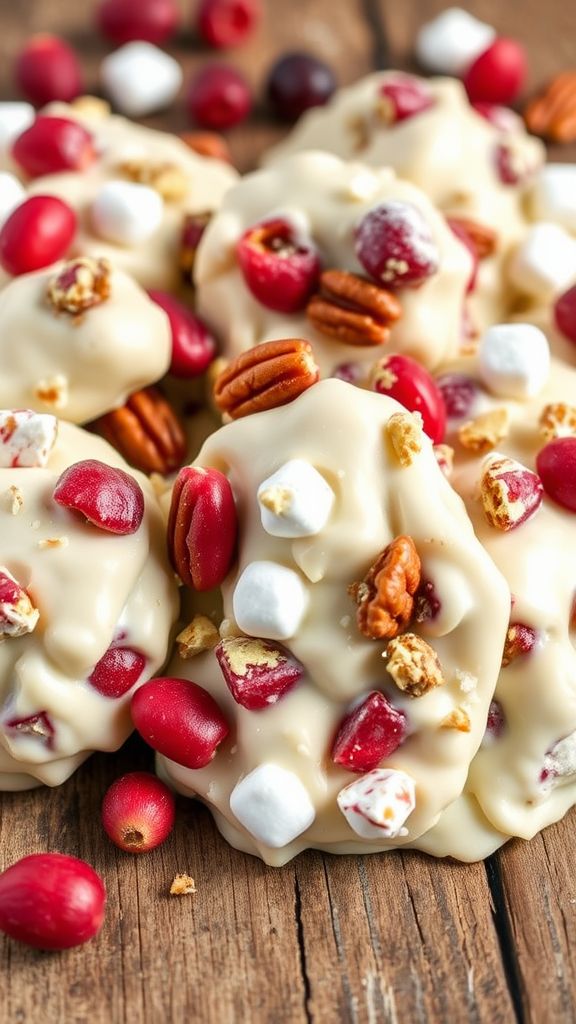
This Snowy White Chocolate Cranberry Clusters recipe is a delightful combination of creamy white chocolate and tart cranberries, making them an irresistible treat for any occasion.
Ingredients:
- 2 cups white chocolate chips
- 1 cup dried cranberries
- 1 cup mini marshmallows
- ½ cup chopped pecans
- 1 teaspoon vanilla extract
- ¼ teaspoon salt
Preparation Time: 10 minutes
Cooking Time: 5 minutes
Total Time: 15 minutes
Instructions:
1. In a microwave-safe bowl, melt the white chocolate chips in 30-second intervals, stirring in between, until smooth.
2. Once melted, stir in the vanilla extract and salt until well combined.
3. Gently fold in the dried cranberries, mini marshmallows, and chopped pecans until evenly coated with the chocolate.
4. Drop spoonfuls of the mixture onto a baking sheet lined with parchment paper.
5. Allow the clusters to cool at room temperature for about 10 minutes, or until the chocolate sets.
6. Once set, enjoy your Snowy White Chocolate Cranberry Clusters or store them in an airtight container.
Tips:
- For added texture, try incorporating other nuts or seeds.
- Make sure to use high-quality white chocolate for the best flavor.
- These clusters can be made ahead of time and stored for up to a week.
S’mores-Inspired Chocolate Cups

These S’mores-Inspired Chocolate Cups are a delightful blend of rich chocolate, creamy marshmallow, and crunchy graham cracker, capturing the essence of a classic campfire treat.
Ingredients:
- 1 cup chocolate chips
- 1/2 cup mini marshmallows
- 1/2 cup crushed graham crackers
- 1/4 cup creamy peanut butter
- 2 tablespoons powdered sugar
Preparation Time: 15 minutes
Cooking Time: 10 minutes
Total Time: 25 minutes
Instructions:
1. Begin by melting the chocolate chips in a microwave-safe bowl, heating in 30-second intervals until smooth.
2. Once melted, spoon a layer of chocolate into the bottom of cupcake liners in a muffin tin, spreading it evenly.
3. In a separate bowl, mix together the peanut butter, powdered sugar, and half of the crushed graham crackers until combined.
4. Place a dollop of the peanut butter mixture on top of the chocolate layer in each cup.
5. Add a few mini marshmallows on top of the peanut butter mixture, then cover with the remaining melted chocolate.
6. Sprinkle the remaining crushed graham crackers on top before placing the tray in the refrigerator to set for about 10 minutes.
7. Once set, carefully remove the chocolate cups from the liners and enjoy your delicious treats!
Tips:
- For an extra touch, drizzle some melted chocolate on top of the cups before refrigerating.
- Make sure to store any leftovers in an airtight container to keep them fresh.
- Feel free to experiment with different types of chocolate, like milk or dark chocolate, for varied flavors.
Easy No-Bake Apple Crisp
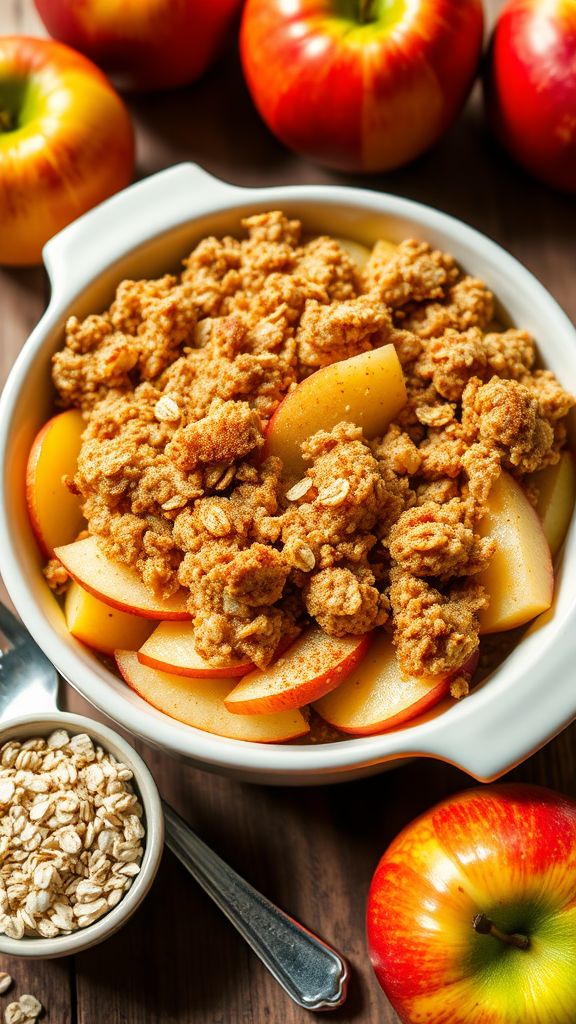
This Easy No-Bake Apple Crisp is a delightful dessert that combines the sweet and tart flavors of fresh apples with a buttery, crunchy topping, making it a quick and satisfying treat for any occasion.
Ingredients:
- 4 cups sliced apples
- 1 cup rolled oats
- 1 cup brown sugar
- 1/2 cup all-purpose flour
- 1/2 cup cold butter, cubed
- 1 teaspoon ground cinnamon
- 1/2 teaspoon vanilla extract
Preparation Time: 15 minutes
Cooking Time: 0 minutes
Total Time: 15 minutes
Instructions:
1. In a large mixing bowl, combine the sliced apples and vanilla extract. Set aside.
2. In another bowl, mix together the rolled oats, brown sugar, flour, and ground cinnamon.
3. Cut in the cold butter using a pastry cutter or your fingers until the mixture resembles coarse crumbs.
4. Layer the apple mixture in a serving dish and evenly spread the oat topping over the apples.
5. Refrigerate for at least 1 hour before serving to allow the flavors to meld.
Tips:
- For added flavor, consider adding a squeeze of lemon juice to the apples.
- Substitute half of the apples with pears for a different twist.
- Serve with a scoop of vanilla ice cream for an extra treat.
Nutty Date and Walnut Bites
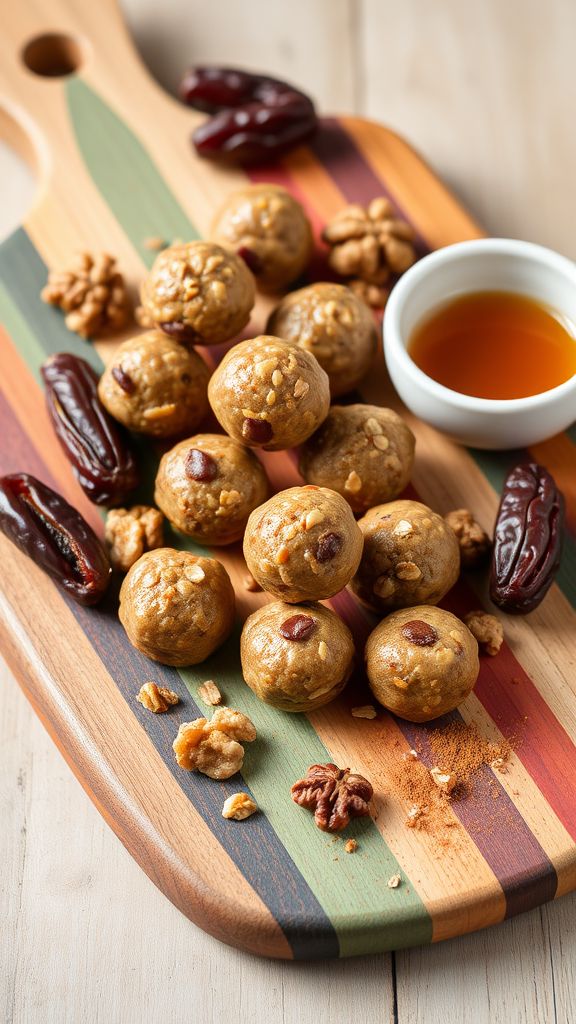
These Nutty Date and Walnut Bites are a delightful combination of sweet dates and crunchy walnuts, making them a perfect healthy snack or energy booster.
Ingredients:
- 1 cup pitted dates
- 1 cup walnuts
- 1/2 cup rolled oats
- 1/4 cup nut butter (like almond or peanut)
- 1/2 teaspoon vanilla extract
- 1/4 teaspoon salt
- 1 tablespoon honey or maple syrup (optional)
Preparation Time: 10 minutes
Cooking Time: 0 minutes
Total Time: 10 minutes
Instructions:
1. In a food processor, combine the pitted dates, walnuts, and rolled oats.
2. Add the nut butter, vanilla extract, salt, and honey or maple syrup if using.
3. Process the mixture until it forms a sticky dough, scraping down the sides as needed.
4. Once combined, take small portions of the mixture and roll them into bite-sized balls.
5. Place the balls on a plate or tray and refrigerate for at least 30 minutes to firm up.
6. Serve chilled, and enjoy your nutritious snacks!
Tips:
- For added flavor, consider mixing in some cocoa powder, shredded coconut, or cinnamon.
- Store in an airtight container in the refrigerator for up to one week.
- Feel free to substitute walnuts with your favorite nut or seed.
Choco-Mint Cookie Crumble

Combining the rich taste of chocolate with refreshing mint, this Choco-Mint Cookie Crumble is a delightful treat that will satisfy your sweet cravings.
Ingredients:
- 1 cup unsalted butter, softened
- 1 cup brown sugar, packed
- 1 cup granulated sugar
- 2 large eggs
- 2 teaspoons vanilla extract
- 2 ½ cups all-purpose flour
- 1 cup cocoa powder
- 1 teaspoon baking soda
- ½ teaspoon salt
- 1 cup mint chocolate chips
- ½ cup crushed peppermint candies
Preparation Time: 15 minutes
Cooking Time: 25 minutes
Total Time: 40 minutes
Instructions:
1. Preheat your oven to 350°F (175°C) and line a baking tray with parchment paper.
2. In a large bowl, cream together the softened butter, brown sugar, and granulated sugar until light and fluffy.
3. Beat in the eggs one at a time, then stir in the vanilla extract.
4. In a separate bowl, whisk together the all-purpose flour, cocoa powder, baking soda, and salt.
5. Gradually add the dry ingredients to the wet mixture and stir until just combined.
6. Fold in the mint chocolate chips and crushed peppermint candies.
7. Drop tablespoon-sized balls of dough onto the prepared baking tray, spacing them apart.
8. Bake for 10-12 minutes, then remove from the oven and let cool for a few minutes before transferring to a wire rack.
Tips:
- For extra mint flavor, try adding a few drops of peppermint extract.
- Store cookies in an airtight container to maintain freshness.
- These cookies can be served warm or chilled – both options are delicious!
Vanilla Bean Tiramisu Cups
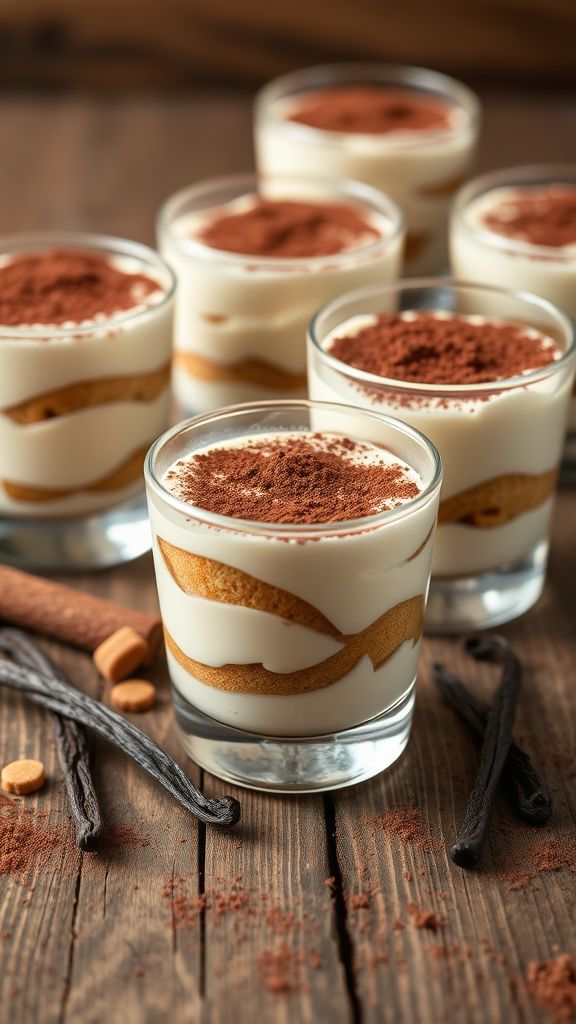
This Vanilla Bean Tiramisu Cups recipe offers a delightful twist on a classic dessert, featuring the rich flavors of vanilla bean and coffee layered into individual servings.
Ingredients:
- 1 cup heavy cream
- 8 ounces mascarpone cheese
- 1/2 cup granulated sugar
- 1 teaspoon vanilla bean paste
- 1 cup strong brewed coffee, cooled
- 2 tablespoons coffee liqueur (optional)
- 12 ladyfinger cookies
- 2 tablespoons cocoa powder, for dusting
Preparation Time: 20 minutes
Cooking Time: 0 minutes
Total Time: 20 minutes
Instructions:
1. In a large mixing bowl, whip the heavy cream until stiff peaks form.
2. In another bowl, combine the mascarpone cheese, granulated sugar, and vanilla bean paste, mixing until smooth.
3. Gently fold the whipped cream into the mascarpone mixture until well combined.
4. In a shallow dish, mix the cooled coffee with the coffee liqueur if using.
5. Quickly dip each ladyfinger into the coffee mixture, making sure not to soak them.
6. Layer half of the dipped ladyfingers in the bottom of serving cups.
7. Spoon half of the mascarpone mixture over the ladyfingers in each cup.
8. Repeat the layers with the remaining ladyfingers and mascarpone mixture.
9. Cover and refrigerate the tiramisu cups for at least 4 hours, or preferably overnight.
10. Just before serving, dust the tops with cocoa powder.
Tips:
- Use high-quality coffee for the best flavor.
- For a stronger vanilla flavor, add more vanilla bean paste.
- Chill the cups longer for a firmer consistency.
- Garnish with chocolate shavings for an extra treat.
Holiday Hot Cocoa Truffles

These Holiday Hot Cocoa Truffles are a delightful blend of rich chocolate, creamy marshmallows, and warm cocoa flavors, making them the perfect treat for cozy gatherings.
Ingredients:
- 1 cup heavy cream
- 8 ounces semi-sweet chocolate, chopped
- 1/2 cup unsweetened cocoa powder
- 1 teaspoon vanilla extract
- 1 cup mini marshmallows
- 1/2 teaspoon salt
- 1 cup crushed peppermint candies (optional)
Preparation Time: 15 minutes
Cooking Time: 10 minutes
Total Time: 25 minutes
Instructions:
1. In a small saucepan, heat the heavy cream over medium heat until it begins to simmer.
2. Remove from heat and add the chopped semi-sweet chocolate, stirring until melted and smooth.
3. Stir in the vanilla extract and salt, mixing well.
4. Fold in the mini marshmallows until they are evenly distributed.
5. Allow the mixture to cool to room temperature, then refrigerate for about 1 hour, or until firm.
6. Once firm, use a small cookie scoop to form truffles, rolling them into balls with your hands.
7. Roll the truffles in cocoa powder or crushed peppermint candies for decoration.
8. Place the truffles on a parchment-lined tray and refrigerate until ready to serve.
Tips:
- For extra flavor, try adding a splash of your favorite liqueur to the chocolate mixture.
- Try different types of chocolate to customize the truffles to your taste.
- Store truffles in an airtight container in the refrigerator for up to one week.
Coconut Almond Snowballs
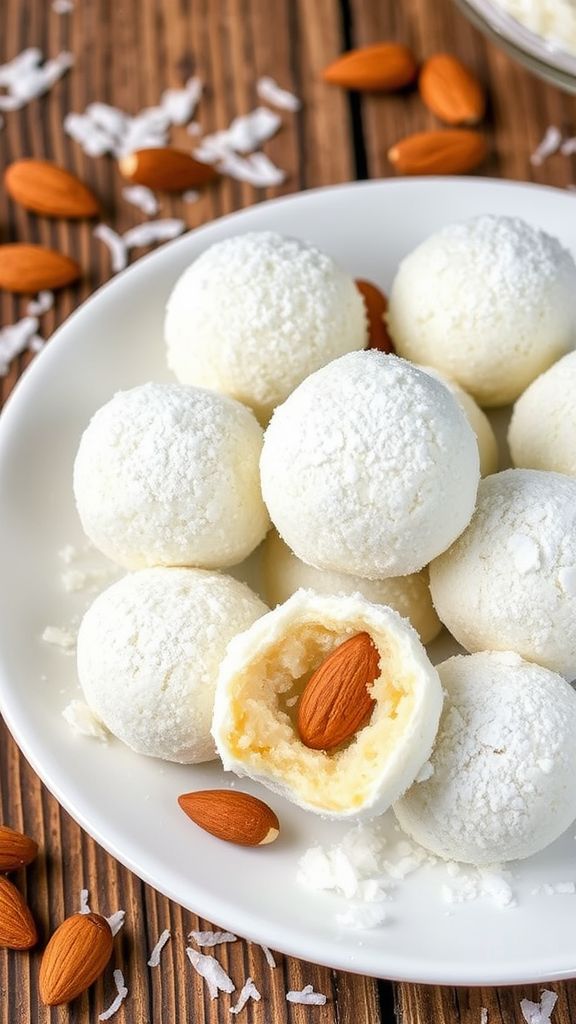
Coconut Almond Snowballs are a delightful treat that perfectly blend sweet coconut and rich almond flavors, creating a festive snack that melts in your mouth.
Ingredients:
- 1 cup unsweetened shredded coconut
- 1 cup almond flour
- 1/2 cup powdered sugar
- 1/4 cup coconut oil, melted
- 1 teaspoon vanilla extract
- 1/4 teaspoon salt
- 1/2 cup whole almonds
- 1/4 cup additional powdered sugar for dusting
Preparation Time: 15 minutes
Cooking Time: 10 minutes
Total Time: 25 minutes
Instructions:
1. Preheat your oven to 350°F (175°C) and line a baking sheet with parchment paper.
2. In a mixing bowl, combine the shredded coconut, almond flour, powdered sugar, melted coconut oil, vanilla extract, and salt. Mix until well combined.
3. Scoop about a tablespoon of the mixture and flatten it slightly in your hand. Place a whole almond in the center and roll it into a ball.
4. Place the formed snowballs on the prepared baking sheet, spacing them about 1 inch apart.
5. Bake in the preheated oven for about 10 minutes or until the edges begin to turn golden.
6. Remove from the oven and let them cool for a few minutes, then roll them in the additional powdered sugar while they are still slightly warm.
7. Once completely cooled, store them in an airtight container.
Tips:
- For a more intense almond flavor, use almond extract in place of vanilla.
- Chill the dough before rolling it into balls for easier handling.
- Try adding a pinch of cinnamon for an extra layer of flavor.
- These snowballs can be stored in the refrigerator for up to a week.


