My New Cookbook is Out! Check Out Now!
25 Mother’s Day Cookie Recipes to Bake with Love
This page contains affiliate links and I earn a commission if you make a purchase through one of the links, at no cost to you.
What’s sweeter than a hug from your mom? A batch of homemade cookies! If you’re looking to show your love this Mother’s Day, these 25 cookie recipes are the perfect way to do it. You’ll create delightful treats that will make her heart melt and fill your kitchen with warm, yummy smells. Let’s dive into these delicious ideas and celebrate the amazing moms in our lives!
Shop Our Must-Haves


1 Heartfelt Honey Vanilla Cookies
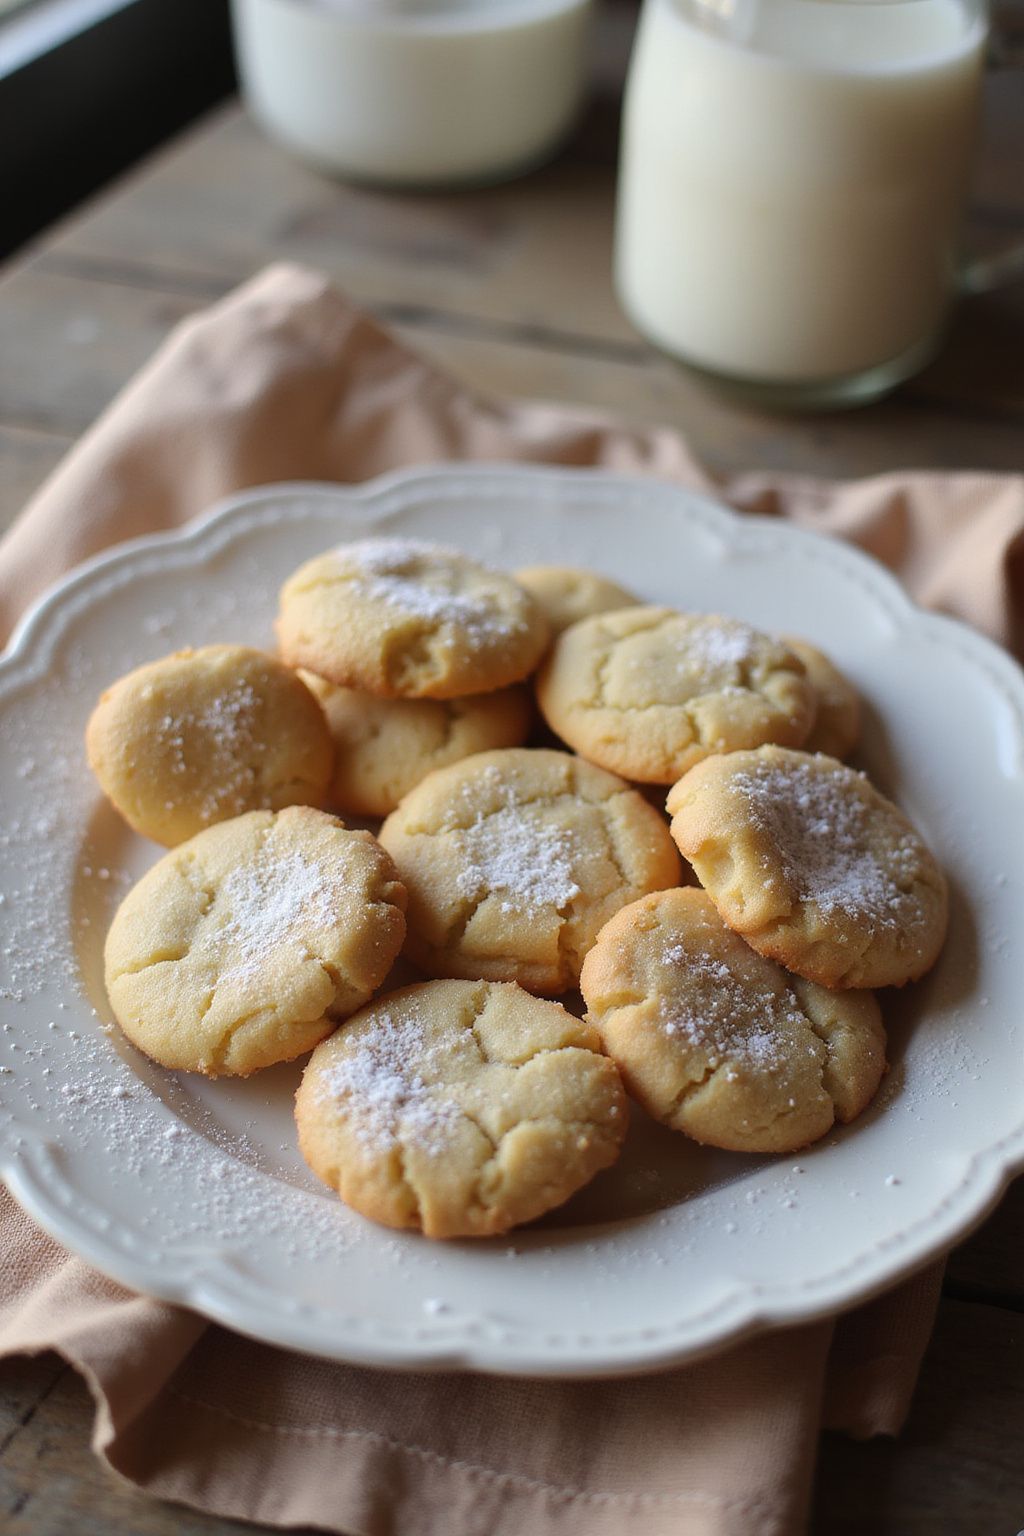
These Heartfelt Honey Vanilla Cookies are perfect for showing someone you care. With their sweet honey flavor and gentle hint of vanilla, these cookies are sure to bring a smile to anyone’s face. They’re easy to make and delightful to share!
Prep Time: 15 minutes
Cook Time: 10 minutes
Total Time: 25 minutes
Servings: 12 cookies
Ingredients:
- 1 cup all-purpose flour
- 1/2 cup rolled oats
- 1/2 teaspoon baking soda
- 1/4 teaspoon salt
- 1/4 cup unsalted butter, softened
- 1/4 cup honey
- 1/4 cup brown sugar
- 1 teaspoon vanilla extract
- 1/4 teaspoon cinnamon (optional)
Instructions:
Start by preheating your oven to 350°F (175°C). This will ensure your cookies bake evenly.
In a large bowl, combine the flour, rolled oats, baking soda, and salt. Mix these dry ingredients well to make sure everything is blended.
In another bowl, cream together the softened butter, honey, brown sugar, and vanilla extract. Mix until it’s smooth and creamy.
Gradually add the dry ingredients to the wet mixture. Stir until combined. If you like, sprinkle in cinnamon for extra flavor.
Scoop tablespoons of dough onto a baking sheet lined with parchment paper. Leave some space between each cookie because they’ll spread while baking.
Bake in your preheated oven for 10 minutes or until the edges are slightly golden.
Let the cookies cool on the baking sheet for a few minutes before transferring them to a wire rack to cool completely.
Tips:
- For a chewier cookie, add an extra tablespoon of honey to the dough.
- You can mix in chocolate chips or dried fruits for added flavor and texture.
- Store the cookies in an airtight container to keep them fresh longer.
Nutrition Facts:
- Calories: 120 per cookie
- Total Fat: 6g
- Saturated Fat: 4g
- Cholesterol: 15mg
- Sodium: 50mg
- Total Carbohydrates: 16g
- Dietary Fiber: 1g
- Sugars: 6g
- Protein: 1g
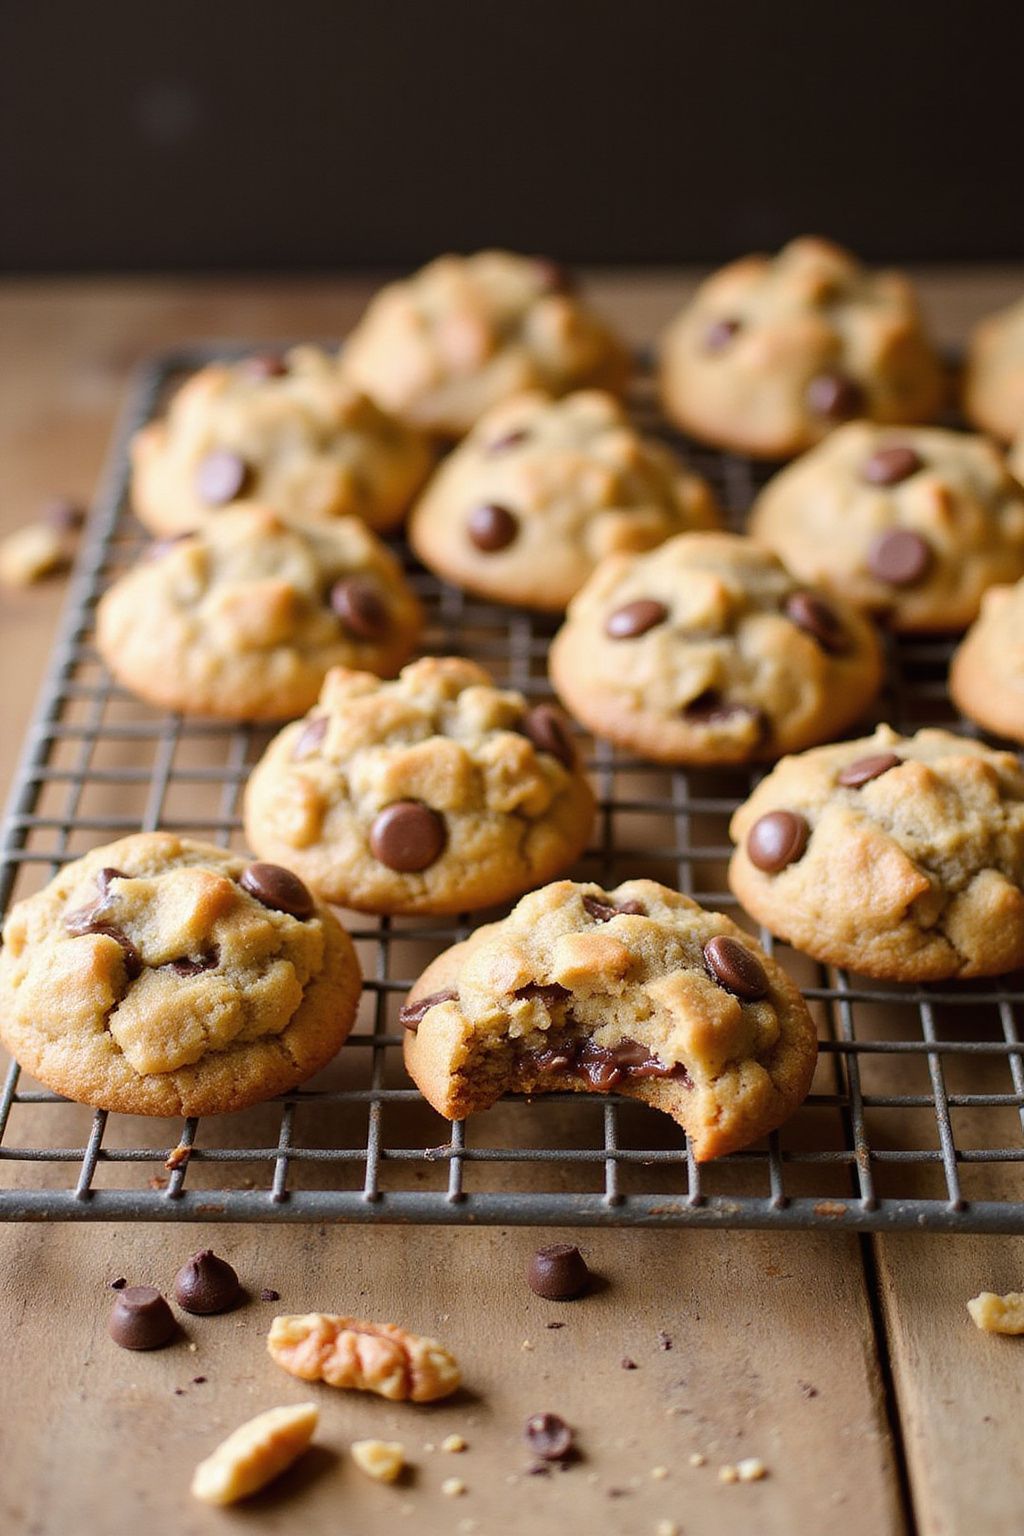
2 Chocolate Chip Love Bites

These Chocolate Chip Love Bites are the perfect way to show someone you care! These bite-sized treats are packed with chocolatey goodness and are sure to bring a smile to anyone’s face. They’re easy to make and great for sharing or enjoying all by yourself!
Prep Time: 10 minutes
Cook Time: 12 minutes
Total Time: 22 minutes
Servings: 24 bites
Ingredients:
- 1 cup unsalted butter, softened
- 1 cup brown sugar, packed
- 1/2 cup granulated sugar
- 2 large eggs
- 2 teaspoons vanilla extract
- 3 cups all-purpose flour
- 1 teaspoon baking soda
- 1/2 teaspoon salt
- 2 cups chocolate chips
- 1/2 cup chopped nuts (optional)
Instructions:
Start by preheating your oven to 350°F (175°C). This way, your oven will be hot and ready for those delicious cookies!
In a large bowl, mix together the softened butter, brown sugar, and granulated sugar. Use a hand mixer or a whisk to blend them until the mixture is fluffy. This usually takes about 2-3 minutes.
Next, add the eggs one at a time, mixing well after each addition. Then, stir in the vanilla extract. Make sure everything is well combined to create a smooth batter.
In a separate bowl, whisk together the flour, baking soda, and salt. Gradually add this dry mixture to the wet ingredients. Mix until everything is just combined.
Now, fold in the chocolate chips and, if you’re using them, the chopped nuts. This is where it gets fun! Make sure the chocolate chips are evenly distributed throughout the dough.
Scoop small portions of the dough onto a baking sheet lined with parchment paper. Leave some space between each scoop, as they will spread while baking.
Bake in the preheated oven for 10-12 minutes. Keep an eye on them, as you want them to be lightly golden around the edges.
Once baked, remove the bites from the oven and let them cool on the baking sheet for a few minutes before transferring them to a wire rack to cool completely.
Tips:
- For a fun twist, try adding peanut butter chips or white chocolate chips along with the chocolate chips.
- If you want to make these bites extra special, sprinkle a pinch of sea salt on top before baking.
- Store any leftovers in an airtight container to keep them fresh for days.
Nutrition Facts:
- Calories: 120 per bite
- Total Fat: 6g
- Saturated Fat: 4g
- Cholesterol: 25mg
- Sodium: 100mg
- Total Carbohydrate: 16g
- Dietary Fiber: 1g
- Sugars: 10g
- Protein: 2g
Enjoy these delightful Chocolate Chip Love Bites with family and friends, and let the love shine through in every bite!
3 Floral Sugar Cookie Blooms

These Floral Sugar Cookie Blooms are the perfect sweet treat for any celebration, especially for Mother’s Day! With their bright colors and beautiful designs, they sure to put a smile on everyone’s face. Plus, they’re fun and easy to make together with family.
Prep Time: 30 minutes
Cook Time: 10 minutes
Additional Time: 1 hour (for chilling)
Total Time: 1 hour 40 minutes
Servings: 24 cookies
Ingredients:
- 2 ¾ cups all-purpose flour
- 1 teaspoon baking powder
- ½ teaspoon salt
- 1 cup unsalted butter, softened
- 1 ½ cups granulated sugar
- 1 large egg
- 1 tablespoon vanilla extract
- Food coloring (variety of colors)
- Royal icing (for decorating)
- Edible flowers or sprinkles
Instructions:
First, start by preheating your oven to 350°F (175°C). This will ensure the cookies bake evenly and come out perfectly golden brown.
Next, in a bowl, whisk together the flour, baking powder, and salt. Set this mixture aside for later.
In a large mixing bowl, beat the softened butter and granulated sugar together until light and fluffy. This will take about 2-3 minutes.
Add the egg and vanilla extract to the butter mixture. Mix until everything is well combined.
Gradually add the dry ingredients to the wet mixture. Stir until the dough forms. It should be soft and a bit sticky.
Now, cover the dough with plastic wrap and chill it in the fridge for about 1 hour. Chilling helps the cookies hold their shape while baking.
Once the dough is chilled, roll it out on a floured surface to about ¼ inch thick. Use flower-shaped cookie cutters to cut out shapes and place them on a baking sheet lined with parchment paper.
Bake the cookies in the preheated oven for about 8-10 minutes or until the edges start to turn golden brown. Be sure not to overbake them!
Let the cookies cool on a wire rack completely. While they cool, prepare the royal icing and divide it into separate bowls for coloring.
Color the icing with food coloring and pipe it onto the cooled cookies. Use your creativity to design beautiful floral patterns! Finish off by adding edible flowers or sprinkles for extra flair.
Tips:
- If you want your cookies to be more colorful, try mixing multiple colors of icing together.
- Use a toothpick to create fine details in your icing designs.
- These cookies can be stored in an airtight container for up to one week.
Nutrition Facts:
- Calories: 150 per cookie
- Total Fat: 7g
- Saturated Fat: 4g
- Cholesterol: 20mg
- Sodium: 80mg
- Total Carbohydrates: 22g
- Dietary Fiber: 0g
- Sugars: 10g
- Protein: 1g
4 Raspberry Swirl Shortbread Delights

Raspberry Swirl Shortbread Delights are a sweet treat that will impress anyone, especially on special occasions like Mother’s Day. These delightful cookies combine buttery shortbread with a vibrant raspberry swirl that tastes as good as it looks. Let’s dive into making these delicious cookies!
Prep Time: 20 minutes
Additional Time: 1 hour
Total Time: 1 hour 20 minutes
Servings: 24 cookies
Ingredients:
- 1 cup unsalted butter, softened
- 1/2 cup powdered sugar
- 2 cups all-purpose flour
- 1/4 teaspoon salt
- 1 teaspoon vanilla extract
- 1/2 cup fresh raspberries (or raspberry jam)
- 2 tablespoons granulated sugar (for raspberries)
Instructions:
Start by preheating your oven to 325°F (160°C). Get a baking sheet ready by lining it with parchment paper. This will help prevent the cookies from sticking.
In a large bowl, cream together the softened butter and powdered sugar until the mixture is light and fluffy. This should take about 3-5 minutes. Next, add the vanilla extract and mix until combined.
Now, slowly mix in the flour and salt. Stir until the dough forms a ball and pulls away from the sides of the bowl. Don’t worry if the dough feels a bit crumbly; this is normal!
In a small saucepan, gently heat the fresh raspberries with the granulated sugar over low heat. Stir until the raspberries break down, forming a thick sauce. If you are using raspberry jam, just set it aside for later.
Roll out the shortbread dough on a floured surface to about 1/4 inch thick. Cut it into desired shapes using a cookie cutter. Spread a thin layer of the raspberry sauce or jam over half of the cookies, leaving a little border around the edges.
Take the remaining cookies and place them on top of the raspberry-topped cookies. Gently press down each cookie to seal them together. You can swirl a little more raspberry sauce on top for decoration.
Place the cookies on the prepared baking sheet and bake in the preheated oven for 15-18 minutes or until the edges are lightly golden. Once baked, allow them to cool on the baking sheet for a few minutes before transferring them to a wire rack to cool completely.
Tips:
- For a more intense raspberry flavor, feel free to add a bit more raspberry sauce before sealing the cookies.
- If you like crunchy cookies, let them bake for an extra couple of minutes.
- Store leftover cookies in an airtight container for up to 5 days.
Nutrition Facts:
- Calories: 150 per cookie
- Total Fat: 9g
- Saturated Fat: 5g
- Cholesterol: 35mg
- Sodium: 50mg
- Total Carbohydrates: 16g
- Dietary Fiber: 0g
- Sugars: 5g
- Protein: 1g
5 Lemon Zest Buttercream Sandwich Cookies
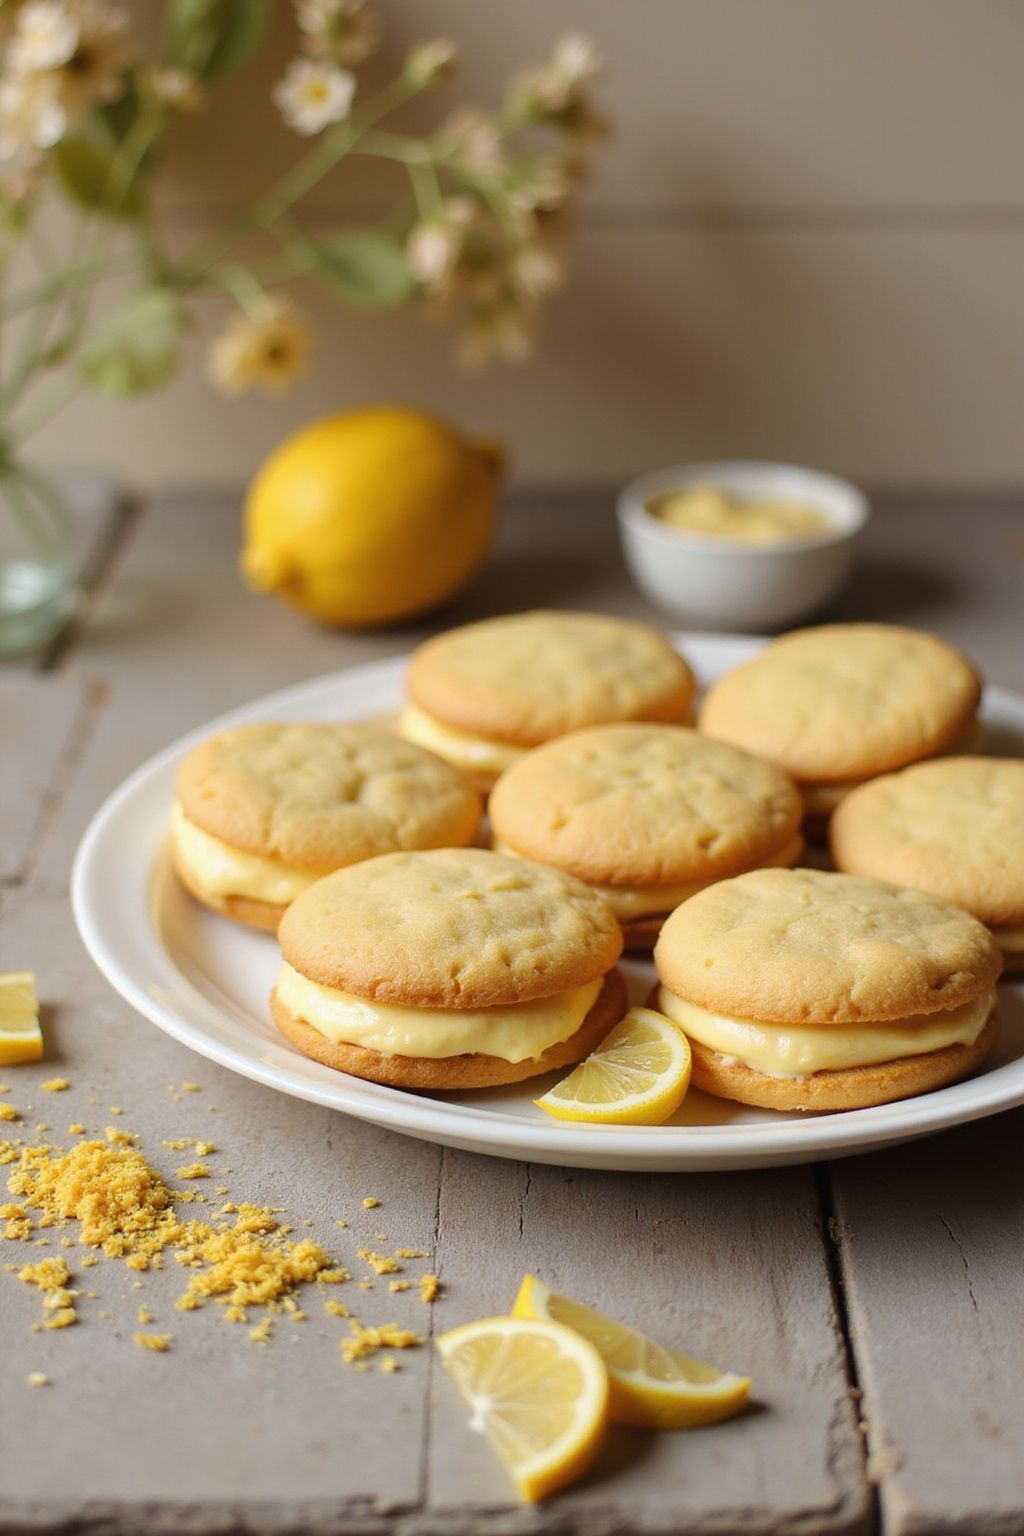
These Lemon Zest Buttercream Sandwich Cookies are perfect for any occasion, especially for making your mom smile on Mother’s Day! Bursting with fresh lemon flavor, these cookies are filled with creamy buttercream and are simply delightful with a cup of tea.
Prep Time: 20 minutes
Additional Time: 30 minutes
Total Time: 50 minutes
Servings: 12 cookies
Ingredients:
- 1 cup unsalted butter, softened
- 1 cup granulated sugar
- 2 large eggs
- 2 cups all-purpose flour
- 1/2 teaspoon baking powder
- 1/4 teaspoon salt
- 1 tablespoon lemon zest
- 1 tablespoon lemon juice
- 1 teaspoon vanilla extract
For the Buttercream:
- 1/2 cup unsalted butter, softened
- 2 cups powdered sugar
- 2 tablespoons heavy cream
- 1 teaspoon lemon zest
- 1 tablespoon lemon juice
Instructions:
Start by preheating your oven to 350°F (175°C). Line a baking sheet with parchment paper to prevent sticking. In a mixing bowl, cream together 1 cup of softened butter and 1 cup of sugar until it’s light and fluffy. This usually takes about 2-3 minutes.
Next, add the 2 eggs, 1 tablespoon of lemon zest, 1 tablespoon of lemon juice, and 1 teaspoon of vanilla extract. Mix well until everything is combined. In a separate bowl, whisk together the 2 cups of flour, 1/2 teaspoon of baking powder, and 1/4 teaspoon of salt.
Gradually add the dry ingredients to the wet mixture, stirring until there are no streaks of flour left. Scoop out tablespoon-sized balls of dough and place them on the prepared baking sheet at least 2 inches apart. Flatten slightly for even baking.
Bake in the preheated oven for 10-12 minutes or until the edges are lightly golden. Let the cookies cool on a wire rack for about 15 minutes while you make the buttercream.
For the buttercream, beat together 1/2 cup of softened butter and 2 cups of powdered sugar until smooth. Add 2 tablespoons of heavy cream, 1 tablespoon of lemon zest, and 1 tablespoon of lemon juice. Mix until it becomes a fluffy frosting.
Once the cookies are completely cool, spread a layer of the buttery lemon frosting on the bottom of one cookie and top it with another, forming a sandwich. Repeat until all cookies are filled. Enjoy your delicious lemony treats!
Tips:
- For more lemon flavor, add extra lemon zest to the buttercream.
- Store cookies in an airtight container to keep them fresh.
- You can decorate the cookies with lemon sprinkles for a fun touch!
Nutrition Facts:
- Calories: 200 per cookie
- Total Fat: 10g
- Saturated Fat: 6g
- Cholesterol: 30mg
- Sodium: 100mg
- Total Carbohydrates: 28g
- Dietary Fiber: 0g
- Sugars: 15g
- Protein: 1g
6 Whimsical Almond Lace Cookies
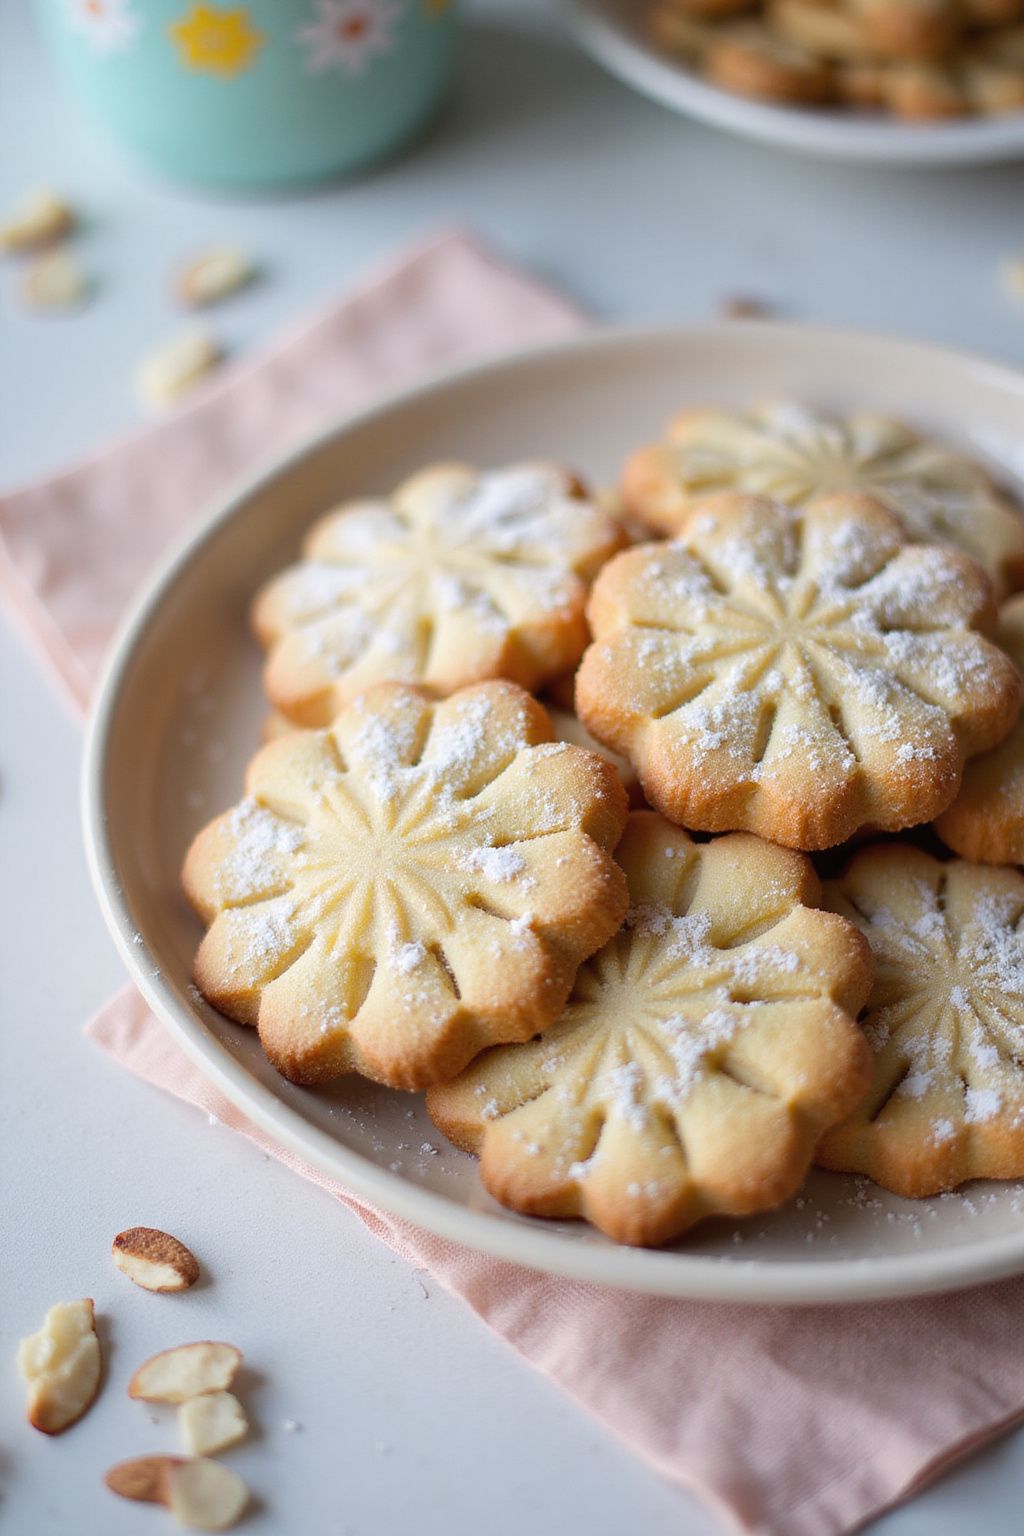
Whimsical Almond Lace Cookies are delicate treats that are both crispy and chewy. These lovely cookies will put a smile on anyone’s face, making them perfect for Mother’s Day or any special gathering. With their lace-like appearance and delightful almond flavor, they are sure to be a hit!
Prep Time: 15 minutes
Cook Time: 10 minutes
Total Time: 25 minutes
Servings: 24 cookies
Ingredients:
- 1 cup sliced almonds
- 1 cup granulated sugar
- 1/2 cup unsalted butter (melted)
- 1/2 cup all-purpose flour
- 1/2 teaspoon vanilla extract
- 1/2 teaspoon almond extract
- 1/4 teaspoon salt
- 1 large egg white
Instructions:
Start by preheating your oven to 350°F (175°C). Line a couple of baking sheets with parchment paper. This helps prevent the cookies from sticking.
Next, in a large mixing bowl, combine the melted butter, sugar, vanilla extract, almond extract, egg white, and salt. Whisk together until the mixture is smooth and well combined.
Now, gently fold in the sliced almonds and flour until they are evenly distributed. Be careful not to overmix; you want to maintain the lightness of the batter.
Spoon small mounds of the cookie batter onto the prepared baking sheets, leaving enough space between each mound as the cookies will spread. Aim for about 1 tablespoon of batter per cookie.
Finally, place the baking sheets in the preheated oven and bake for about 8-10 minutes until the edges are golden brown but the centers remain soft. Remove them from the oven and let the cookies cool on the baking sheets for a few minutes before transferring them to a wire rack to cool completely.
Tips:
- For extra flavor, you can toast the sliced almonds in a dry pan before adding them to the batter.
- Ensure your egg white is at room temperature for best results in achieving a nice rise.
- Be careful not to bake the cookies too long, as they can become hard instead of chewy.
Nutrition Facts:
- Calories: 90 kcal per cookie
- Total Fat: 4g
- Saturated Fat: 1g
- Cholesterol: 5mg
- Sodium: 20mg
- Total Carbohydrates: 12g
- Dietary Fiber: 1g
- Sugars: 7g
- Protein: 2g
7 Classic Oatmeal Raisin Hugs
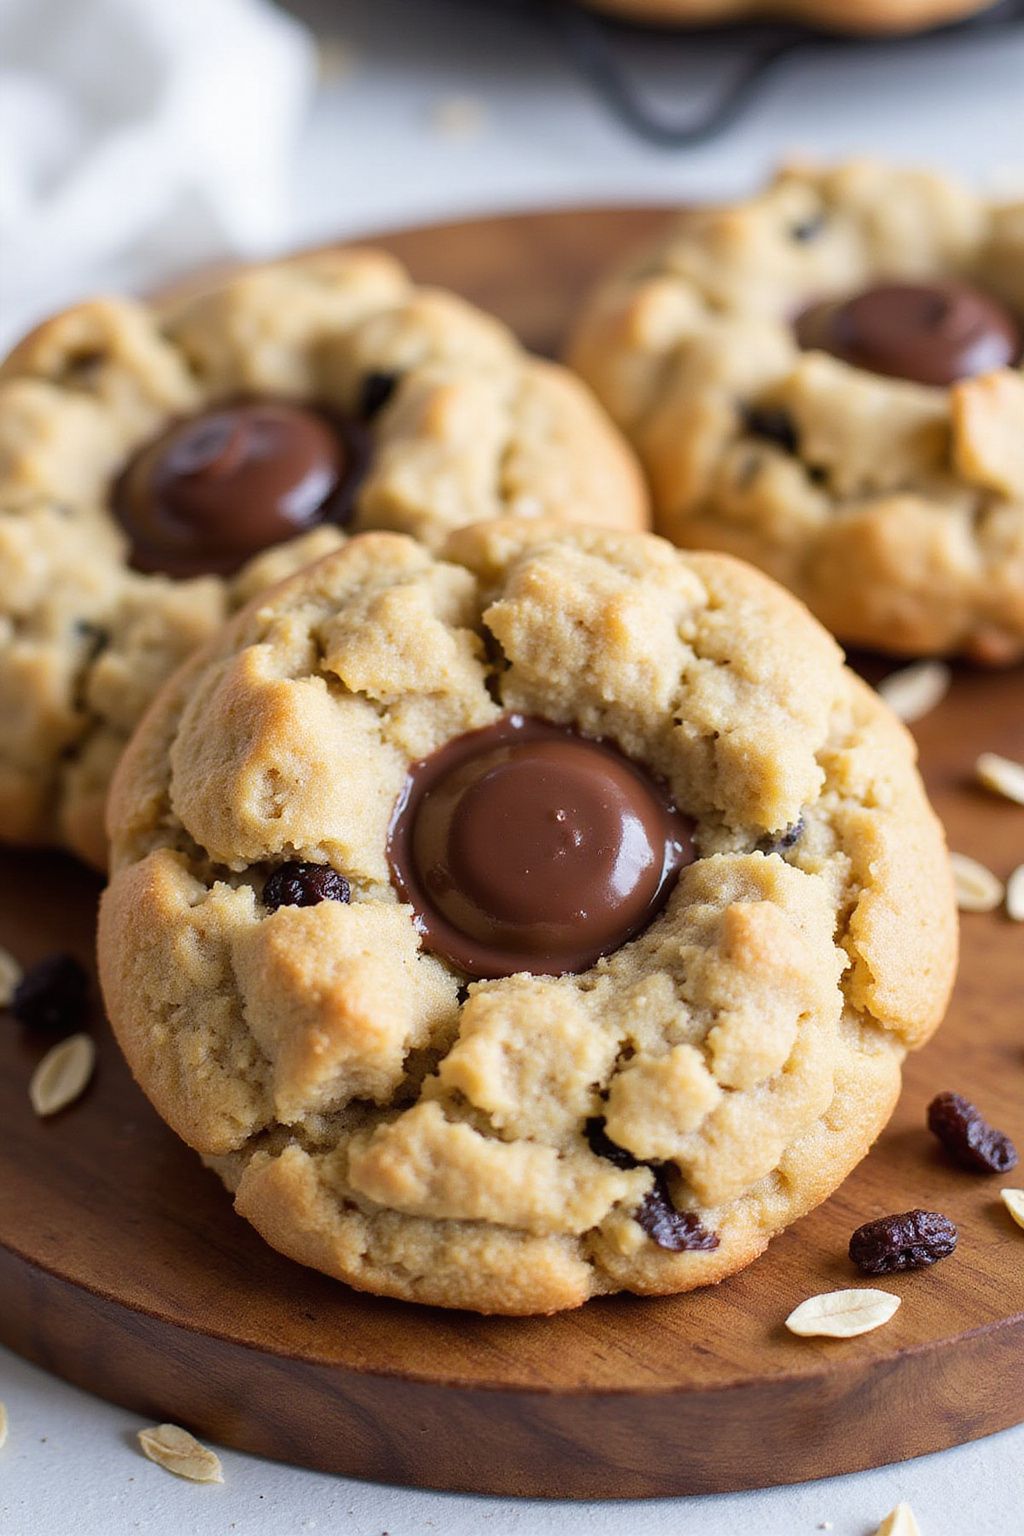
Classic Oatmeal Raisin Hugs are a delightful twist on a classic cookie favorite. These cookies combine chewy oats, sweet raisins, and creamy hugs chocolate for a delicious treat. Perfect for Mother’s Day, they’re sure to bring a smile to anyone’s face!
Prep Time: 15 minutes
Cook Time: 10-12 minutes
Additional Time: 5 minutes
Total Time: 30 minutes
Servings: 24 cookies
Ingredients:
- 1 cup unsalted butter, softened
- 1 cup brown sugar, packed
- 1/2 cup granulated sugar
- 2 large eggs
- 1 teaspoon vanilla extract
- 1 1/2 cups all-purpose flour
- 1 teaspoon baking soda
- 1 teaspoon ground cinnamon
- 1/2 teaspoon salt
- 3 cups rolled oats
- 1 cup raisins
- 1 cup Hershey’s Hugs, unwrapped
Instructions:
Start by preheating your oven to 350°F (175°C). Line two baking sheets with parchment paper for easy cleanup later.
In a large mixing bowl, cream together the softened butter, brown sugar, and granulated sugar until smooth and fluffy. This should take about 2-3 minutes.
Next, add in eggs one at a time along with the vanilla extract. Mix well after each addition. Set this bowl aside.
In another bowl, whisk together the all-purpose flour, baking soda, ground cinnamon, and salt. Gradually combine this dry mixture with the wet mixture, stirring until just combined.
Then, fold in the rolled oats and raisins until evenly distributed throughout the dough. Ensure the mixture is well mixed but don’t overwork it.
Scoop tablespoons of dough onto the prepared baking sheets, spacing them about 2 inches apart. Bake in the preheated oven for 10-12 minutes, or until the edges are golden.
As soon as the cookies are done, gently press a Hershey’s Hug into the center of each cookie while they are still warm. Let them cool on the baking sheets for about 5 minutes before transferring them to a wire rack to cool completely.
Tips:
- For a chewy cookie, avoid overbaking. Look for a slight golden color on the edges.
- You can substitute chocolate chips for Hershey’s Hugs if you prefer a different chocolate flavor.
- Store leftover cookies in an airtight container for up to one week.
Nutrition Facts:
- Calories: 120 per cookie
- Total Fat: 6g
- Saturated Fat: 3.5g
- Cholesterol: 20mg
- Sodium: 75mg
- Total Carbohydrates: 16g
- Dietary Fiber: 1g
- Sugars: 7g
- Protein: 1g
8 Strawberry Jam Thumbprint Cookies
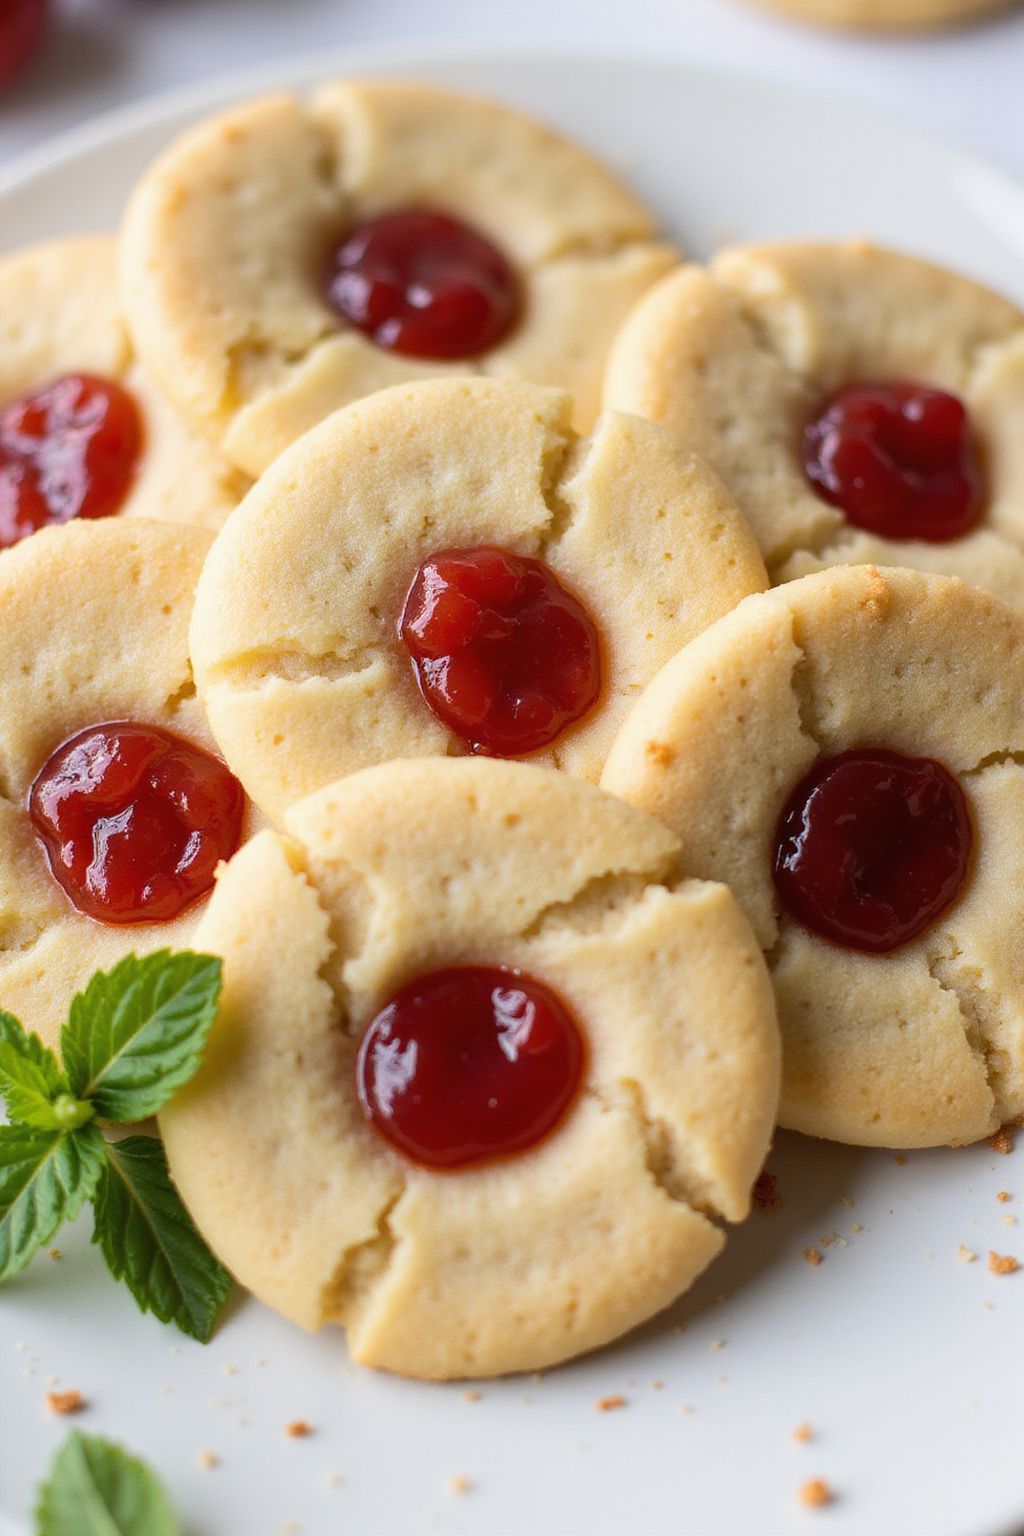
These Strawberry Jam Thumbprint Cookies are a delightful treat that will bring a smile to anyone’s face. Perfect for special occasions like Mother’s Day, these cookies are soft, buttery, and filled with delicious strawberry jam. They are a fun and easy way to show someone you care!
Prep Time: 20 minutes
Cook Time: 15 minutes
Additional Time: 30 minutes
Total Time: 1 hour 5 minutes
Servings: 24 cookies
Ingredients:
- 1 cup unsalted butter, softened
- 3/4 cup granulated sugar
- 1 tsp vanilla extract
- 2 cups all-purpose flour
- 1/4 tsp salt
- 3/4 cup strawberry jam
Instructions:
Start by preheating your oven to 350°F (175°C). Line two baking sheets with parchment paper to prevent the cookies from sticking.
In a large mixing bowl, cream together softened butter and granulated sugar until the mixture is light and fluffy. This should take about 2-3 minutes. Next, add in the vanilla extract and mix until well combined.
Gradually stir in the all-purpose flour and salt. Mix until everything is just combined and a dough begins to form. Be careful not to overmix; we want our cookies to stay tender.
Once the dough is ready, place it in the refrigerator for about 30 minutes. Chilling the dough will make it easier to handle and help the cookies keep their shape while baking.
After chilling, scoop out about 1 tablespoon of dough and roll it into a ball. Place the balls onto the prepared baking sheets, leaving some space between each one. Use your thumb or the back of a spoon to create a small indent in the center of each dough ball.
Now, fill each indent with strawberry jam. Don’t overfill, as it may overflow while baking.
Bake the cookies in the preheated oven for 12-15 minutes or until they are lightly golden on the edges. Keep an eye on them to ensure they don’t overbake.
Once done, remove the cookies from the oven and let them cool on the baking sheets for a few minutes before transferring them to a wire rack to cool completely.
Tips:
- To make the cookies extra special, try using different flavors of jam like raspberry or apricot.
- For added texture, sprinkle some chopped nuts on top of the jam before baking.
- Store leftover cookies in an airtight container at room temperature for up to a week.
Nutrition Facts:
- Calories: 120
- Total Fat: 7g
- Saturated Fat: 4g
- Cholesterol: 30mg
- Sodium: 40mg
- Total Carbohydrates: 12g
- Dietary Fiber: 0g
- Sugars: 5g
- Protein: 1g
9 Rosewater Pistachio Biscotti
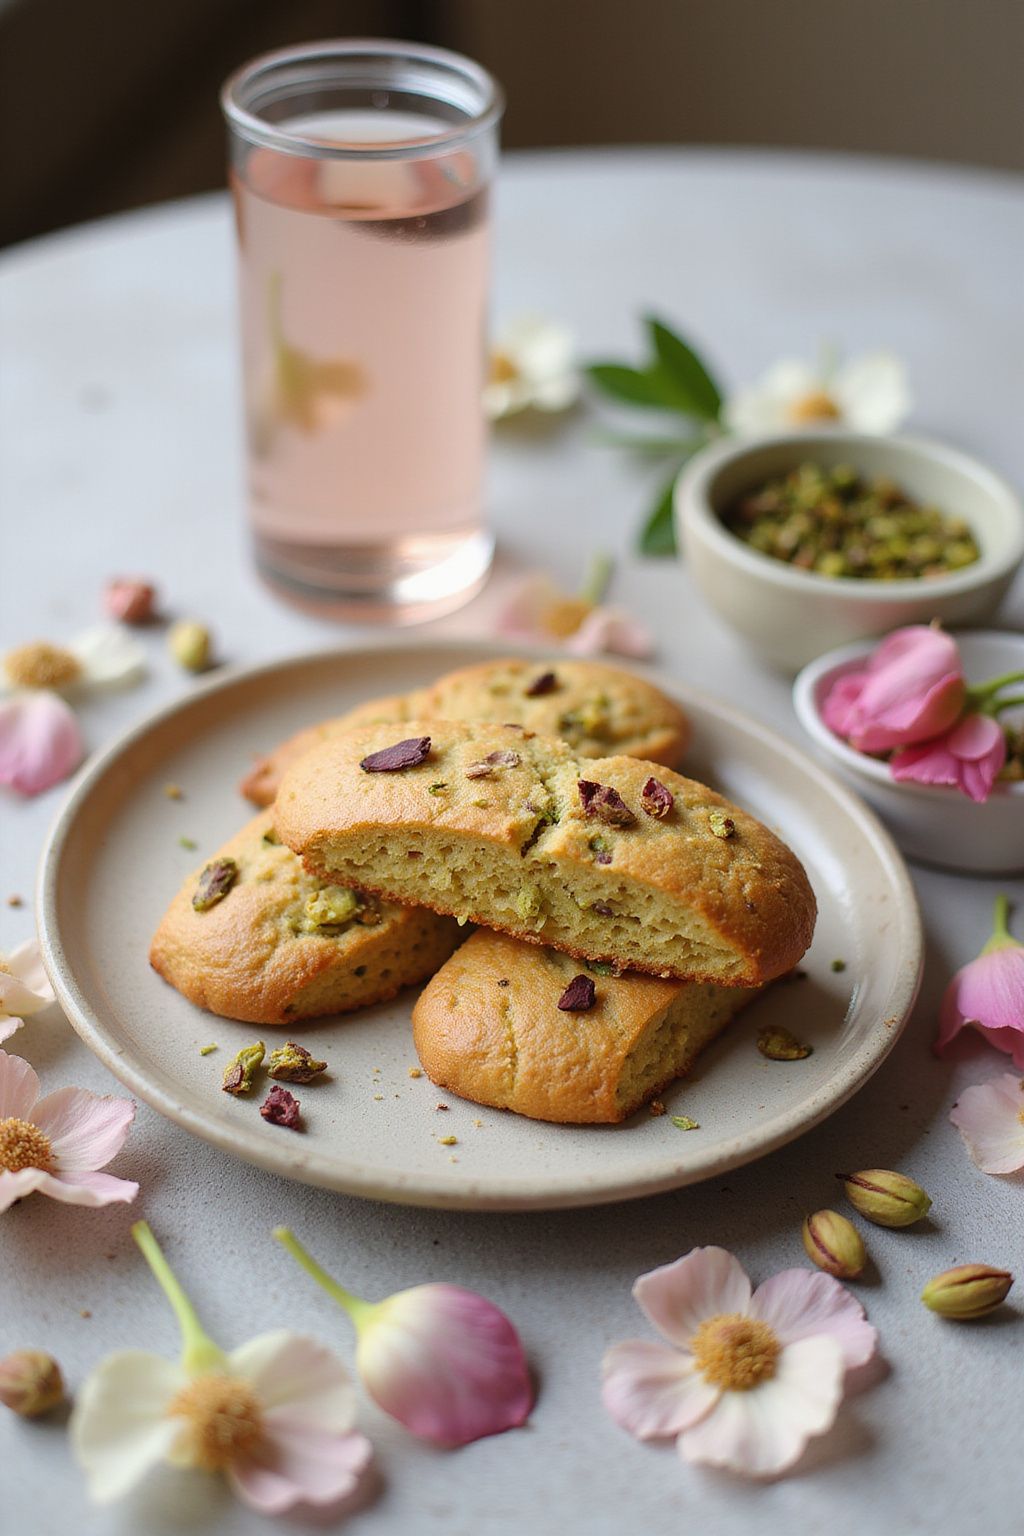
These Rosewater Pistachio Biscotti are a delightful treat perfect for any occasion, especially Mother’s Day! With a lovely floral aroma and crunchy texture, they make a great gift. Enjoy them with tea or coffee for a sweet moment with your loved ones.
Prep Time: 15 minutes
Cook Time: 30 minutes
Additional Time: 30 minutes (cooling)
Total Time: 1 hour 15 minutes
Servings: 24 biscotti
Ingredients:
- 2 cups all-purpose flour
- 1 cup granulated sugar
- 1 teaspoon baking powder
- 1/2 teaspoon salt
- 1/2 cup shelled pistachios, chopped
- 3 large eggs
- 2 tablespoons rosewater
- 1 teaspoon vanilla extract
- 1/2 teaspoon almond extract
- 1/2 cup white chocolate chips (optional)
Instructions:
Start by preheating your oven to 350°F (175°C). Line a baking sheet with parchment paper to prevent sticking.
In a large bowl, mix together the flour, sugar, baking powder, and salt. Stir until well combined. Add the chopped pistachios into the dry mixture, making sure they are evenly distributed.
In another bowl, whisk the eggs, rosewater, vanilla extract, and almond extract. Make sure the mixture is smooth. Slowly add it to the dry ingredients, stirring gently until a soft dough forms. If you are using white chocolate chips, fold them in now for extra sweetness.
Next, divide the dough in half. Shape each portion into a log, about 12 inches long and 2 inches wide. Place the logs on the prepared baking sheet, spacing them about 3 inches apart.
Bake the logs in the preheated oven for 25-30 minutes, or until they are golden brown. Let them cool on the baking sheet for about 10 minutes. After cooling, slice the logs into 1-inch pieces for the biscotti.
Finally, place the sliced biscotti back onto the baking sheet, cut side up. Bake again for an extra 10-15 minutes to make them crispy. Allow them to cool completely on a wire rack before serving.
Tips:
- To enhance the flavor, you can toast the pistachios lightly before adding them to the dough.
- Store the biscotti in an airtight container for up to two weeks to keep them fresh.
- Feel free to substitute almond flour for a gluten-free version.
Nutrition Facts:
- Calories: 130 per biscotti
- Total Fat: 6g
- Saturated Fat: 2g
- Cholesterol: 25mg
- Sodium: 50mg
- Total Carbohydrates: 18g
- Dietary Fiber: 1g
- Sugars: 6g
- Protein: 3g
10 Cream Cheese Frosted Carrot Cookies
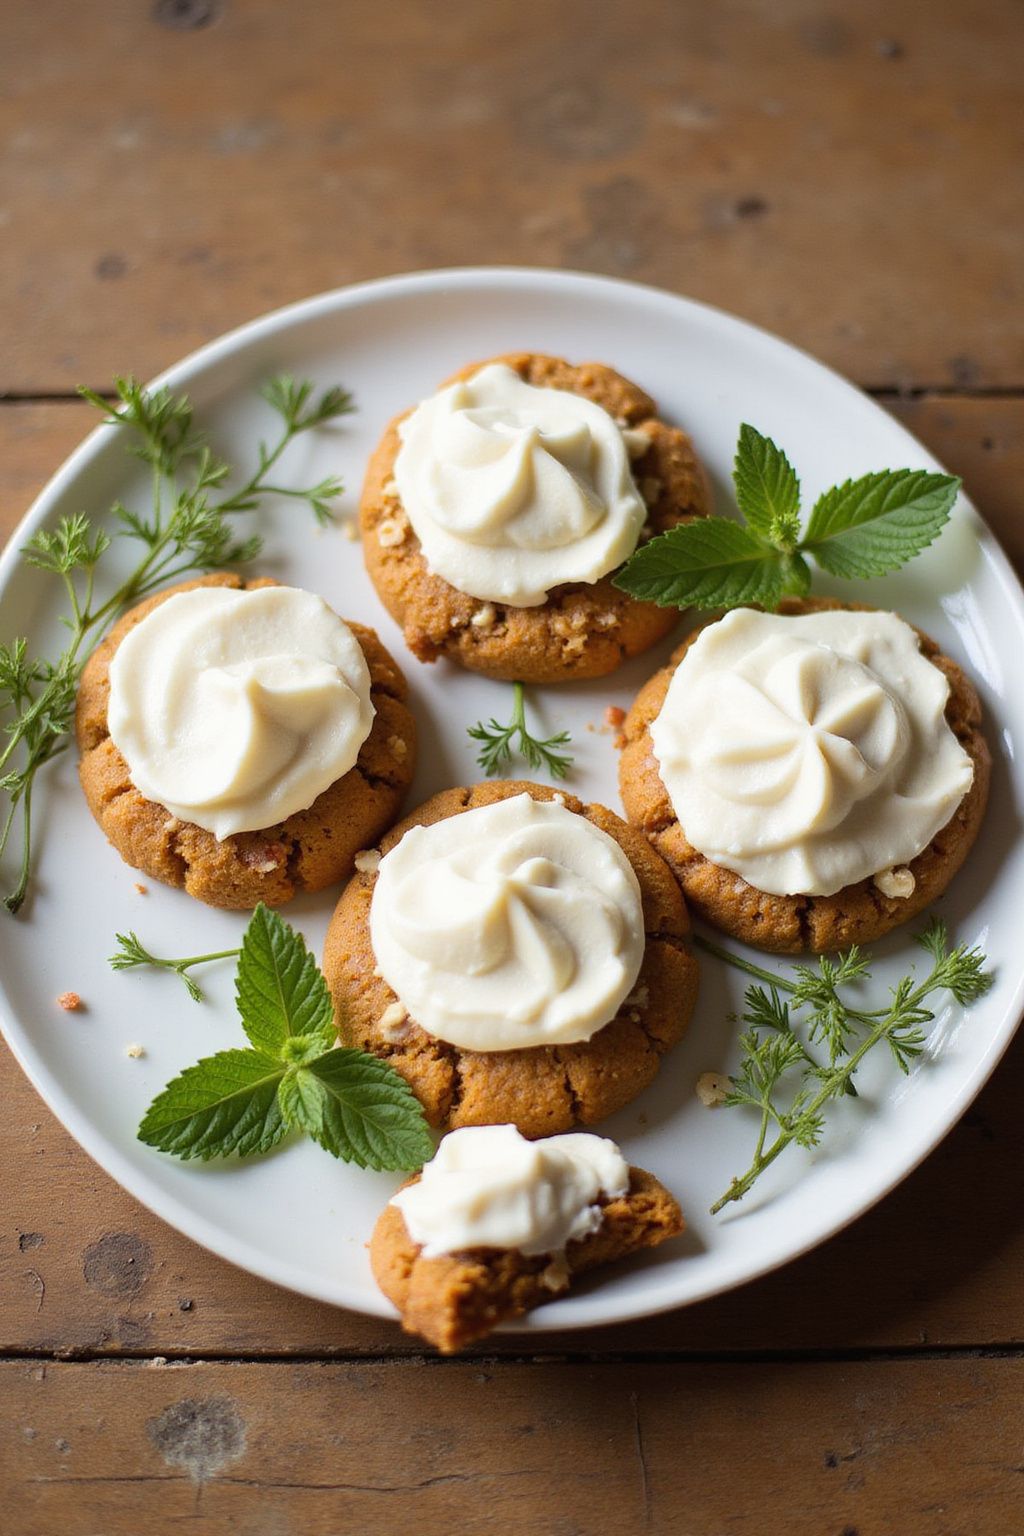
These Cream Cheese Frosted Carrot Cookies are soft, chewy, and packed with flavor. They make a perfect treat for any occasion, especially for Mother’s Day! The cream cheese frosting adds a delightful sweetness that perfectly complements the carrots and spices in the cookies.
Prep Time: 20 minutes
Cook Time: 12 minutes
Additional Time: 30 minutes to cool
Total Time: 1 hour
Servings: 24 cookies
Ingredients:
- 1 cup unsalted butter, softened
- 1 cup brown sugar, packed
- 1/2 cup granulated sugar
- 2 large eggs
- 2 teaspoons vanilla extract
- 2 cups all-purpose flour
- 1 teaspoon baking soda
- 1 teaspoon baking powder
- 1 teaspoon ground cinnamon
- 1/2 teaspoon ground nutmeg
- 1/2 teaspoon salt
- 2 cups shredded carrots
- 1/2 cup chopped nuts (optional)
Instructions:
Start by preheating your oven to 350°F (175°C). Prepare a baking sheet by lining it with parchment paper. This will help prevent the cookies from sticking.
In a large bowl, cream together the butter, brown sugar, and granulated sugar until it’s light and fluffy. This usually takes about 3 to 5 minutes with a hand mixer.
Add the eggs one at a time, mixing well after each addition. Then, stir in the vanilla extract.
In another bowl, whisk together the flour, baking soda, baking powder, cinnamon, nutmeg, and salt. Gradually mix the dry ingredients into the wet mixture until combined.
Fold in the shredded carrots and optional chopped nuts until everything is well mixed.
Using a tablespoon or cookie scoop, drop the dough onto the prepared baking sheet, leaving some space between each cookie.
Bake in the preheated oven for about 10-12 minutes, or until the edges are golden. Let them cool on the baking sheet for a few minutes before transferring to a wire rack.
Once the cookies are completely cool, make the frosting. In a bowl, beat together 8 oz of softened cream cheese and 1/2 cup of softened butter until smooth. Gradually add 4 cups of powdered sugar and 1 teaspoon of vanilla extract, mixing until creamy.
Frost each cooled cookie with the cream cheese frosting and let it set for about 30 minutes before serving.
Enjoy your delicious Cream Cheese Frosted Carrot Cookies with family and friends!
Tips:
- For extra flavor, add 1/2 cup of raisins to the cookie batter.
- You can also use coconut in place of nuts for a different taste.
- Store leftover cookies in an airtight container to keep them fresh.
Nutrition Facts:
- Serving size: 1 cookie
- Calories: 180
- Total Fat: 8g
- Saturated Fat: 4g
- Cholesterol: 30mg
- Sodium: 100mg
- Total Carbohydrates: 25g
- Dietary Fiber: 1g
- Sugars: 12g
- Protein: 2g
11 Chocolate Dipped Coconut Macaroons

These Chocolate Dipped Coconut Macaroons are sweet, chewy treats that are perfect for sharing with family and friends. They are easy to make and are sure to impress anyone with their delightful combination of coconut and chocolate. Enjoy them for any occasion or just as a tasty snack!
Prep Time: 15 minutes
Additional Time: 30 minutes
Total Time: 45 minutes
Servings: 12
Ingredients:
- 2 ⅓ cups sweetened shredded coconut
- 1 cup sweetened condensed milk
- 1 teaspoon vanilla extract
- ½ teaspoon almond extract
- 2 large egg whites
- ½ cup semisweet chocolate chips
- 1 teaspoon coconut oil (optional)
Instructions:
Start by preheating your oven to 325°F (163°C). Line a baking sheet with parchment paper to prevent sticking.
In a large mixing bowl, combine the sweetened shredded coconut, sweetened condensed milk, vanilla extract, and almond extract. Stir everything well until the mixture is evenly combined.
In another bowl, whip the egg whites until they form stiff peaks. This means they should hold their shape but still be shiny. Gently fold the whipped egg whites into the coconut mixture. Be careful not to deflate the egg whites too much.
Using a spoon or your hands, scoop out small amounts of the mixture and shape them into mounds on the prepared baking sheet. Leave some space between each mound.
Bake in the preheated oven for about 20-25 minutes, or until the macaroons are lightly golden on top. Once baked, let them cool on the baking sheet for a few minutes before transferring them to a wire rack to cool completely.
While the macaroons cool, melt the semisweet chocolate chips in a microwave-safe bowl. You can add coconut oil to make the chocolate smoother. Heat in the microwave in short bursts, stirring until fully melted.
Dip the cooled macaroons into the melted chocolate, letting the excess chocolate drip off. Place them back on the parchment paper and allow the chocolate to set. For quicker setting, you can place them in the fridge for 30 minutes.
Tips:
- You can use dark chocolate if you prefer a richer flavor.
- Add some chopped nuts or dried fruit to the coconut mixture for extra texture.
- Store any leftover macaroons in an airtight container at room temperature.
Nutrition Facts:
- Calories: 250 per macaroon
- Total Fat: 10g
- Saturated Fat: 7g
- Cholesterol: 20mg
- Sodium: 40mg
- Total Carbohydrates: 38g
- Dietary Fiber: 2g
- Sugars: 26g
- Protein: 3g
12 Matcha Green Tea Cookies
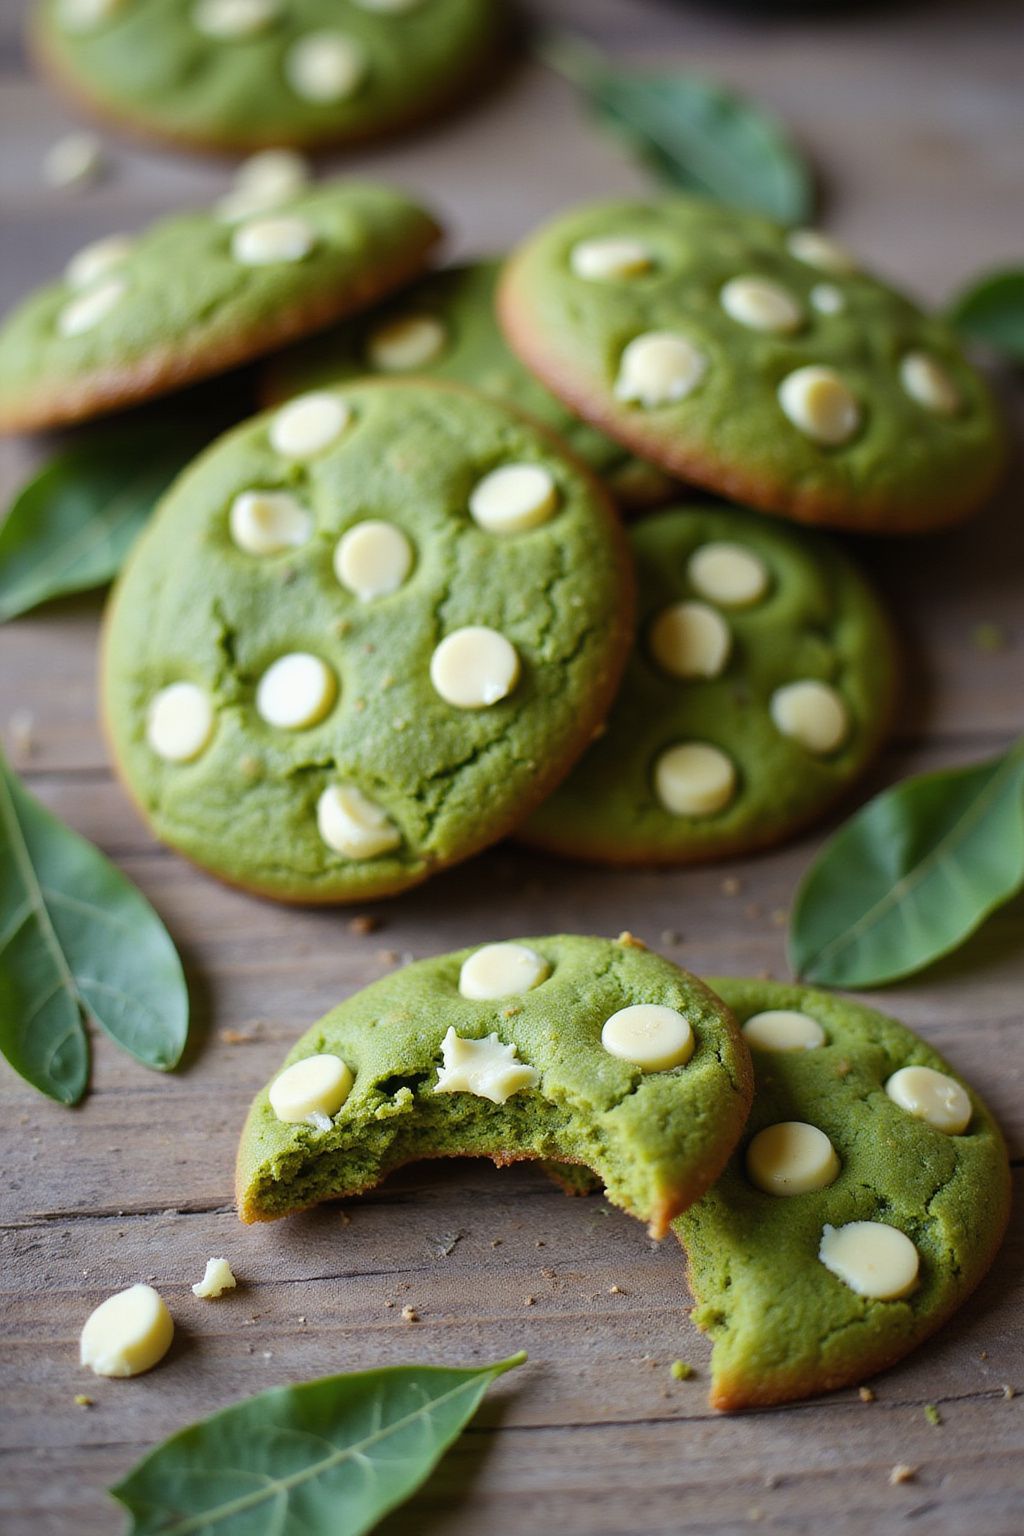
Matcha Green Tea Cookies are a delightful twist on traditional cookies, combining the earthy flavor of matcha with a sweet treat. These cookies are not only fun to make but also add a vibrant green color to your dessert table. Perfect for impressing friends and family during special occasions!
Prep Time: 15 minutes
Cook Time: 10 minutes
Additional Time: 30 minutes (chill time)
Total Time: 55 minutes
Servings: 12 cookies
Ingredients:
- 1 cup all-purpose flour
- 2 tablespoons matcha green tea powder
- 1/2 teaspoon baking soda
- 1/4 teaspoon salt
- 1/2 cup unsalted butter, softened
- 1/2 cup granulated sugar
- 1/4 cup brown sugar, packed
- 1 large egg
- 1 teaspoon vanilla extract
- 1/2 cup white chocolate chips (optional)
Instructions:
Start by combining the all-purpose flour, matcha powder, baking soda, and salt in a bowl. Whisk these dry ingredients together until they are well mixed. This helps distribute the matcha evenly through the cookies.
In another bowl, beat the softened butter, granulated sugar, and brown sugar using a hand mixer or whisk until the mixture is light and fluffy. This usually takes about 3 to 5 minutes.
Add the egg and vanilla extract to the butter-sugar mixture and beat it in until well combined. Make sure everything is mixed nicely.
Next, gradually add the dry ingredients to the wet ingredients. Mix until the dough comes together and no flour streaks are visible. If you’re using white chocolate chips, fold them in at this point.
Cover the dough with plastic wrap and chill it in the refrigerator for about 30 minutes. Chilling helps the cookies maintain their shape when baking.
Preheat your oven to 350°F (175°C). Line a baking sheet with parchment paper to prevent the cookies from sticking.
Once chilled, scoop tablespoons of dough onto the prepared baking sheet, leaving some space between them. Flatten the dough slightly with your fingers for even baking.
Bake the cookies in the preheated oven for 10 minutes. They should look set but slightly soft in the center. Let them cool on the baking sheet for a couple of minutes before transferring to a wire rack to cool completely.
Tips:
- For a stronger matcha flavor, add an extra teaspoon of matcha powder.
- Store leftover cookies in an airtight container to keep them fresh longer.
- Add chopped nuts like almonds or walnuts for extra crunch!
Nutrition Facts:
- Calories: 120 per cookie
- Total Fat: 6g
- Saturated Fat: 4g
- Cholesterol: 15mg
- Sodium: 50mg
- Total Carbohydrates: 16g
- Dietary Fiber: 0.5g
- Sugars: 8g
- Protein: 1g
13 Peanut Butter Blossom Treats
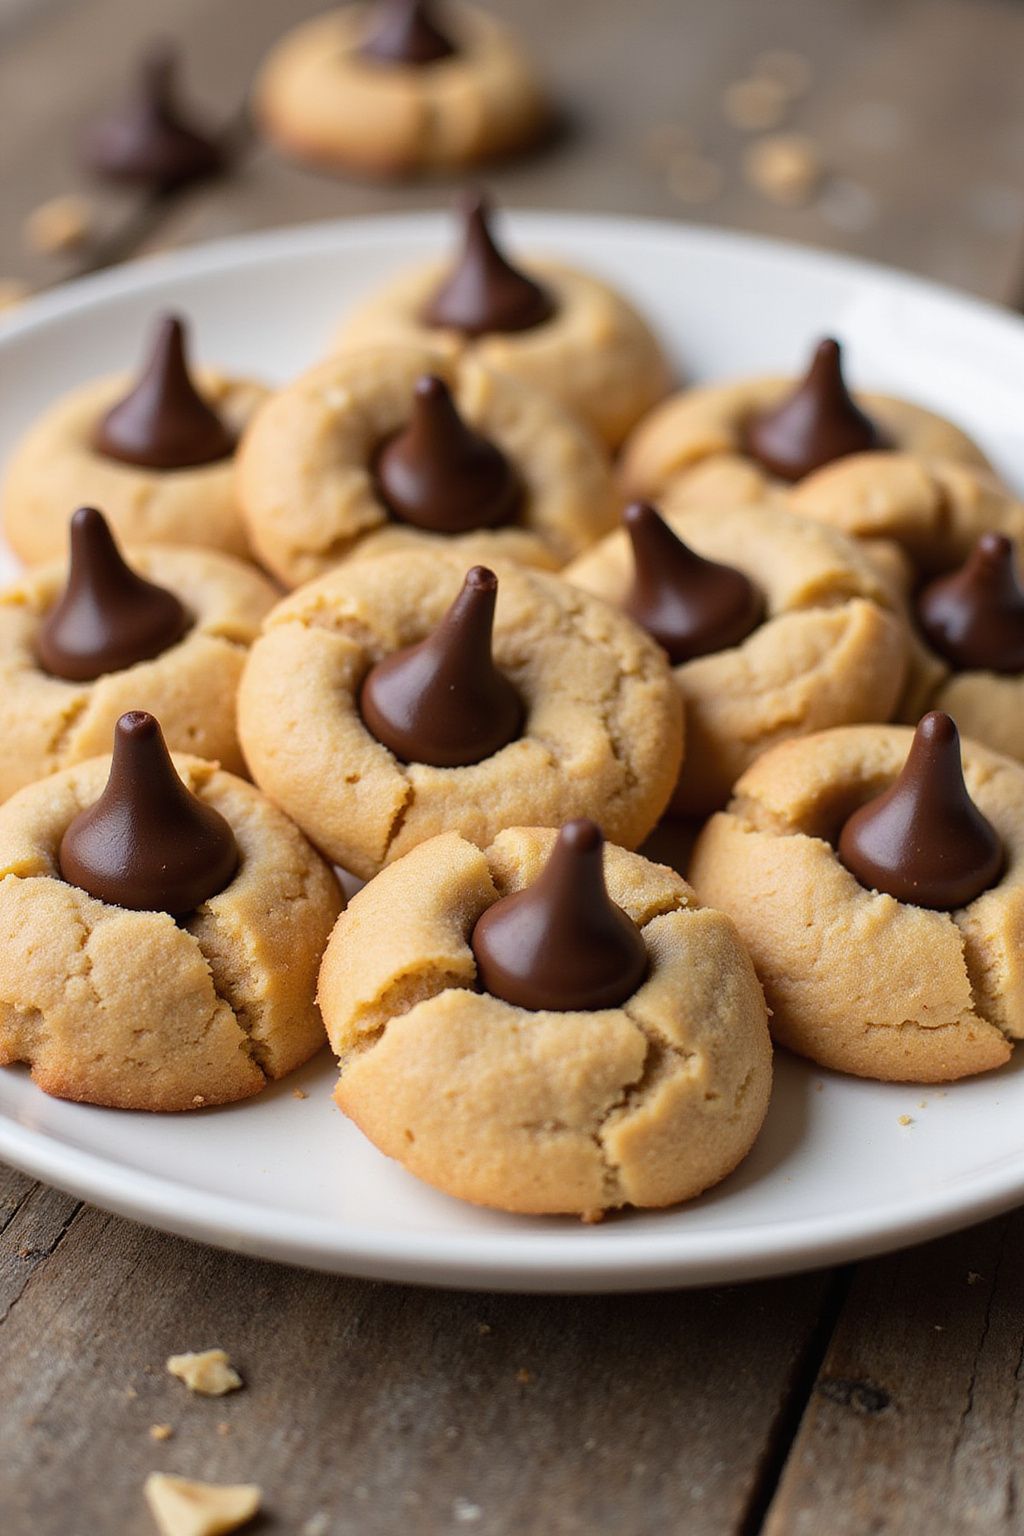
Peanut Butter Blossom Treats are a delightful combination of sweet and salty flavors that will make your taste buds dance. These cookies are perfect for sharing, especially during special occasions like Mother’s Day. With a chocolate kiss tucked in the center, they’re sure to be a favorite!
Prep Time: 15 minutes
Cook Time: 10 minutes
Total Time: 25 minutes
Servings: 24 cookies
Ingredients:
- 1 cup peanut butter
- 1 cup sugar
- 1 egg
- 1 teaspoon vanilla extract
- 1 teaspoon baking soda
- 24 chocolate kisses (unwrapped)
Instructions:
Start by preheating your oven to 350°F (175°C). This helps the cookies bake evenly and become deliciously fluffy.
In a large mixing bowl, combine the peanut butter, sugar, egg, and vanilla extract. Mix well until everything is fully blended together. The dough should be smooth and creamy.
Next, add in the baking soda and stir until it’s well incorporated. The baking soda will help the cookies rise a bit while baking.
Using a spoon or your hands, scoop out small portions of dough and roll them into balls about the size of a golf ball. Place the dough balls on a baking sheet lined with parchment paper, leaving about 2 inches of space between each ball.
Bake the cookies in the preheated oven for 8 to 10 minutes. You’ll know they are done when the edges are lightly golden, but they should still be soft in the center.
As soon as you take the cookies out of the oven, gently press one chocolate kiss into the center of each cookie. Let the cookies cool for a few minutes on the baking sheet, and then transfer them to a wire rack to cool completely.
Tips:
- For a fun variation, try using different flavored kisses, like caramel or peanut butter.
- Make sure to let the cookies cool a bit before pressing the kisses in so they don’t melt too much.
- Store leftover cookies in an airtight container to keep them fresh for longer.
Nutrition Facts:
- Calories: 90 per cookie
- Total fat: 5g
- Saturated fat: 1g
- Cholesterol: 5mg
- Sodium: 50mg
- Total carbohydrates: 10g
- Dietary fiber: 1g
- Sugars: 8g
- Protein: 2g
14 Funfetti Celebration Cookies
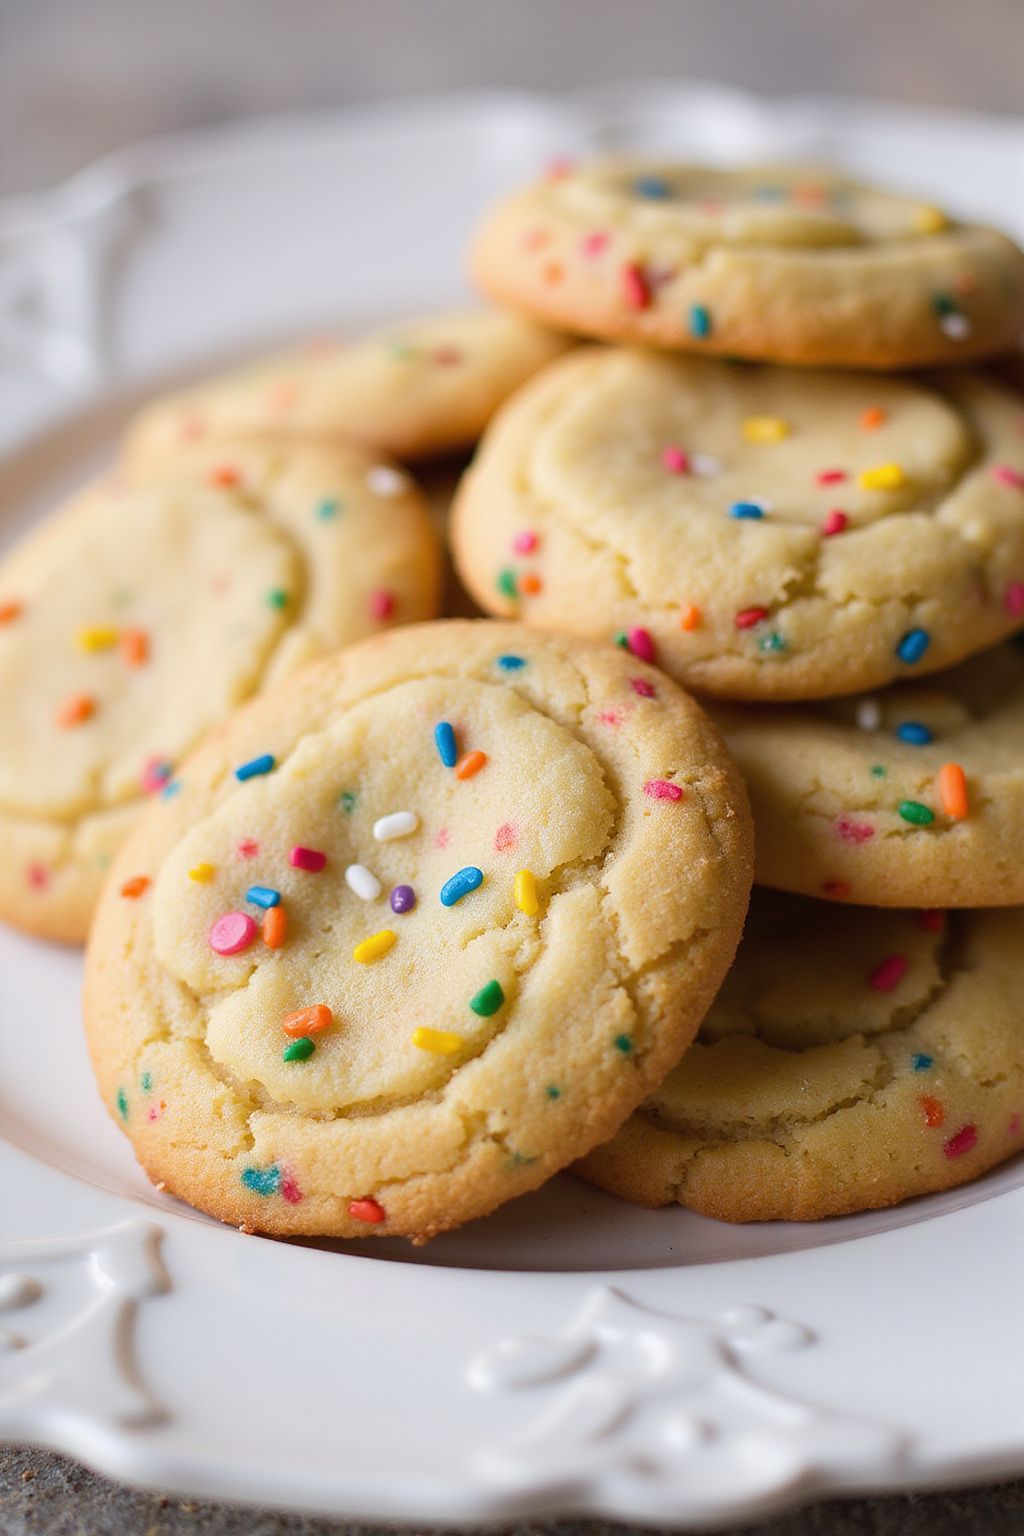
These Funfetti Celebration Cookies are perfect for any festive occasion! Bursting with colorful sprinkles, these cookies are sure to bring joy to everyone who tastes them. Let’s get started!
Prep Time: 15 minutes
Cook Time: 10 minutes
Additional Time: 10 minutes (for cooling)
Total Time: 35 minutes
Servings: 24 cookies
Ingredients:
- 2 ¾ cups all-purpose flour
- 1 teaspoon baking powder
- ½ teaspoon baking soda
- ½ teaspoon salt
- 1 cup unsalted butter, softened
- 1 cup granulated sugar
- ½ cup brown sugar, packed
- 2 large eggs
- 2 teaspoons vanilla extract
- ¾ cup colorful sprinkles
- ½ cup white chocolate chips (optional)
Instructions:
First, preheat your oven to 350°F (175°C) and line two baking sheets with parchment paper. This helps the cookies not stick while baking.
In a mixing bowl, whisk together flour, baking powder, baking soda, and salt. Set this mixture aside for later.
In a large bowl, cream the butter, granulated sugar, and brown sugar together until it becomes light and fluffy. This usually takes about 2-3 minutes.
Next, add the eggs and vanilla extract to the butter mixture. Beat them together until everything is well combined.
Gradually mix the dry ingredients into the wet ingredients. Stir until just combined—be careful not to overmix!
Now, gently fold in the colorful sprinkles and white chocolate chips, if using. This is the fun part where all the colors come together.
Using a cookie scoop or tablespoon, drop rounded balls of dough onto the prepared baking sheets, spacing them about 2 inches apart.
Bake the cookies in the preheated oven for 10 minutes or until the edges are lightly golden but the centers look soft. They will continue to cook as they cool.
Once baked, let the cookies cool on the baking sheet for about 10 minutes before transferring them to a wire rack to cool completely.
Tips:
- For softer cookies, avoid overbaking. Remove them from the oven when they still look a bit underdone.
- Store any leftover cookies in an airtight container to keep them fresh longer.
- Feel free to mix in other add-ins like nuts or chocolate chunks for extra flavor!
Nutrition Facts:
- Calories: 150
- Total Fat: 7g
- Saturated Fat: 4g
- Cholesterol: 30mg
- Sodium: 55mg
- Total Carbohydrates: 20g
- Dietary Fiber: 0g
- Sugars: 10g
- Protein: 1g
15 Maple Pecan Crunch Cookies
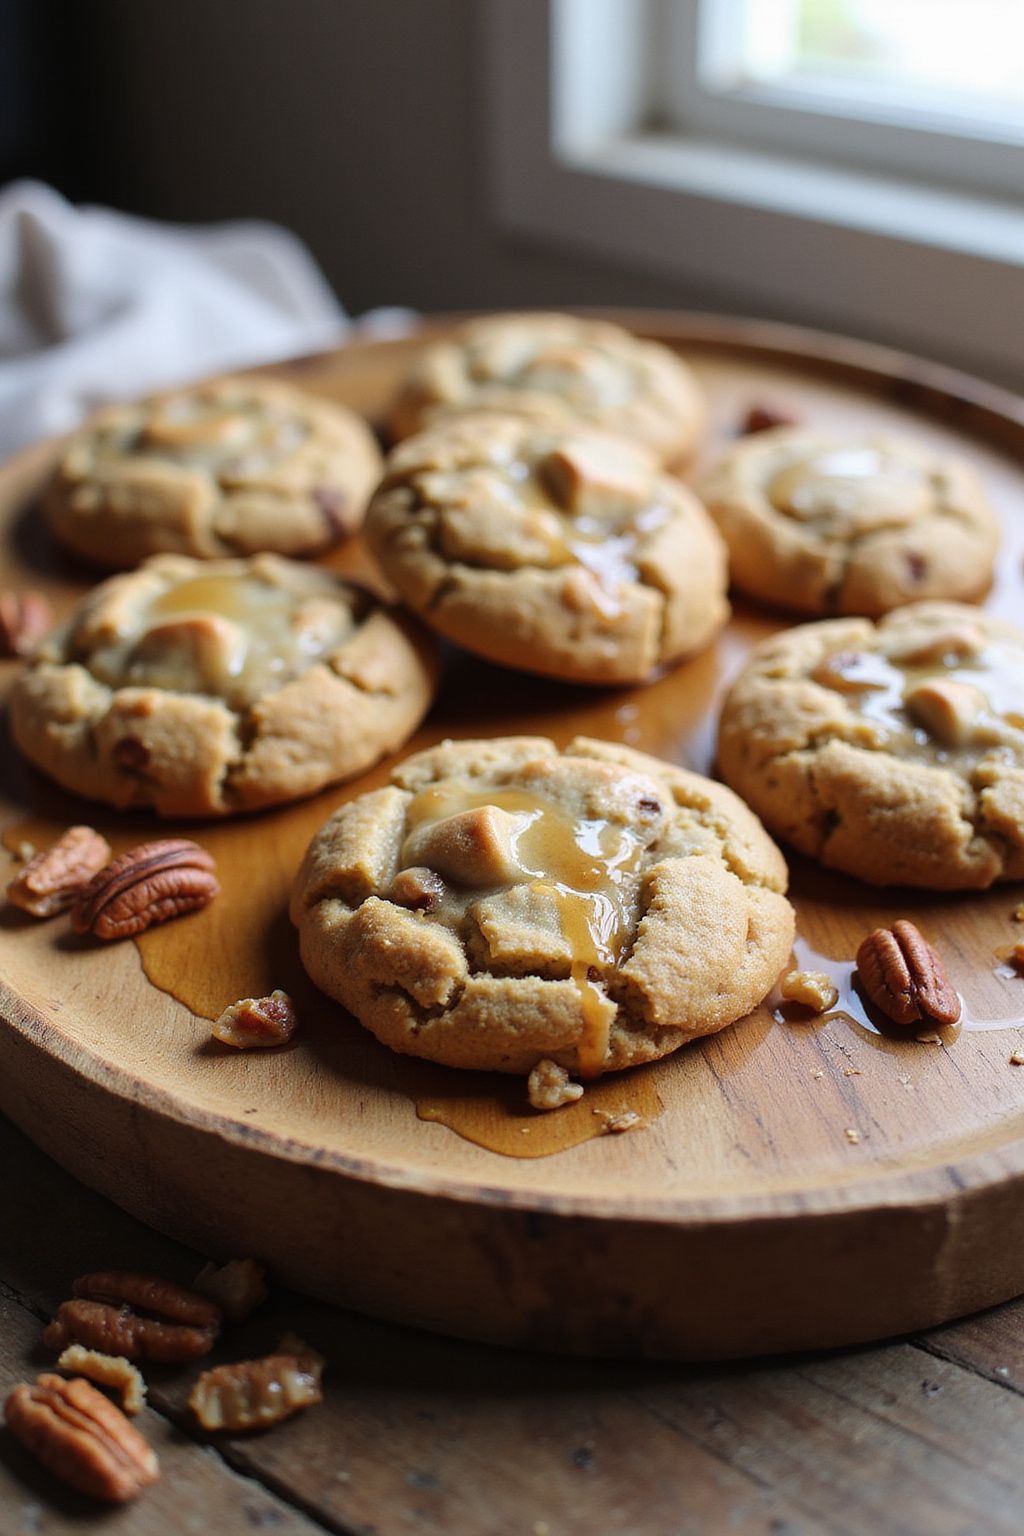
These Maple Pecan Crunch Cookies are the perfect treat to surprise your mom this Mother’s Day. With a delightful blend of maple syrup and crunchy pecans, these cookies are sure to steal the spotlight. Get ready to bake something special!
Prep Time: 15 minutes
Cook Time: 12-15 minutes
Additional Time: 10 minutes
Total Time: 37-40 minutes
Servings: 24 cookies
Ingredients:
- 1 cup unsalted butter, softened
- 1 cup brown sugar, packed
- 1/2 cup granulated sugar
- 1/2 cup maple syrup
- 2 large eggs
- 2 teaspoons vanilla extract
- 3 cups all-purpose flour
- 1 teaspoon baking soda
- 1/2 teaspoon salt
- 1 cup chopped pecans
- 1 cup rolled oats
Instructions:
Start by preheating your oven to 350°F (175°C). Line two baking sheets with parchment paper to prepare for the cookies.
In a large mixing bowl, cream together the butter, brown sugar, and granulated sugar until the mixture is light and fluffy. This usually takes about 3-5 minutes of mixing.
Next, add the maple syrup, eggs, and vanilla extract into the creamed mixture. Mix thoroughly until all ingredients are well combined.
In another bowl, whisk together the flour, baking soda, and salt. Gradually add the dry mixture to the wet mixture, stirring until you see no dry flour.
Now fold in the chopped pecans and rolled oats. Make sure they are evenly distributed throughout the cookie dough.
Scoop tablespoon-sized amounts of dough and place them on the prepared baking sheets, leaving some space between each scoop for spreading while baking.
Bake in the preheated oven for about 12-15 minutes, or until the edges are lightly golden but the centers are still soft. Once done, remove the cookies from the oven and let them cool on the baking sheets for 10 minutes before transferring them to a wire rack to cool completely.
Tips:
- For added crunch, toast the pecans in a dry skillet for 5-7 minutes before adding them to the dough.
- Try drizzling a little extra maple syrup on top of the cookies once they cool for a sweeter finish.
- Store the cookies in an airtight container to keep them fresh for up to one week.
Nutrition Facts:
- Calories: 150 per cookie
- Total Fat: 7g
- Saturated Fat: 4g
- Cholesterol: 30mg
- Sodium: 80mg
- Total Carbohydrates: 20g
- Dietary Fiber: 1g
- Sugars: 10g
- Protein: 2g
16 Coconut Lime Dream Cookies

These Coconut Lime Dream Cookies are a delicious treat that will brighten up any day! Full of tropical flavors, these cookies are soft, chewy, and packed with zest. Perfect for sharing or enjoying by yourself, they bring a taste of the islands right to your kitchen.
Prep Time: 15 minutes
Total Time: 30 minutes
Servings: 24 cookies
Ingredients:
- 1 cup unsalted butter, softened
- 1 cup granulated sugar
- 1 cup brown sugar, packed
- 2 large eggs
- 2 teaspoons vanilla extract
- Zest of 3 limes
- 2 tablespoons lime juice
- 3 cups all-purpose flour
- 1 teaspoon baking soda
- 1/2 teaspoon salt
- 1 cup shredded coconut, sweetened
- Extra lime zest and coconut for topping (optional)
Instructions:
Start by preheating your oven to 350°F (175°C). Line two baking sheets with parchment paper for easy cleanup later.
In a large mixing bowl, beat the softened butter, granulated sugar, and brown sugar together until it’s light and fluffy. This should take about 2-3 minutes with a hand mixer or stand mixer.
Next, add in the eggs, vanilla extract, and the lime zest and juice. Mix until everything is combined well. The tropical aroma will start to fill your kitchen!
In another bowl, whisk together the all-purpose flour, baking soda, and salt. Gradually add this dry mixture to your wet ingredients, mixing until just combined. Be careful not to overmix!
Now, gently fold in the shredded coconut. This will give the cookies that wonderful chewiness and coconut flavor.
Using a cookie scoop or tablespoon, drop balls of dough onto your prepared baking sheets, making sure to leave some space between each cookie. If you like, sprinkle a little extra lime zest and coconut on top of each ball before baking.
Bake the cookies in your preheated oven for 10-12 minutes, or until they are golden brown around the edges. Remove them and let them cool for a few minutes on the baking sheet before transferring them to a wire rack to cool completely.
Tips:
- If you want extra lime flavor, add a bit more lime juice or zest to the dough.
- Make sure your butter is softened for easy blending and to get the right texture.
- Store any leftover cookies in an airtight container to keep them fresh.
Nutrition Facts:
- Calories: 140 per cookie
- Fat: 7g
- Carbohydrates: 18g
- Sugar: 10g
- Protein: 1g
- Fiber: 0.5g
17 Cinnamon Roll Snickerdoodles
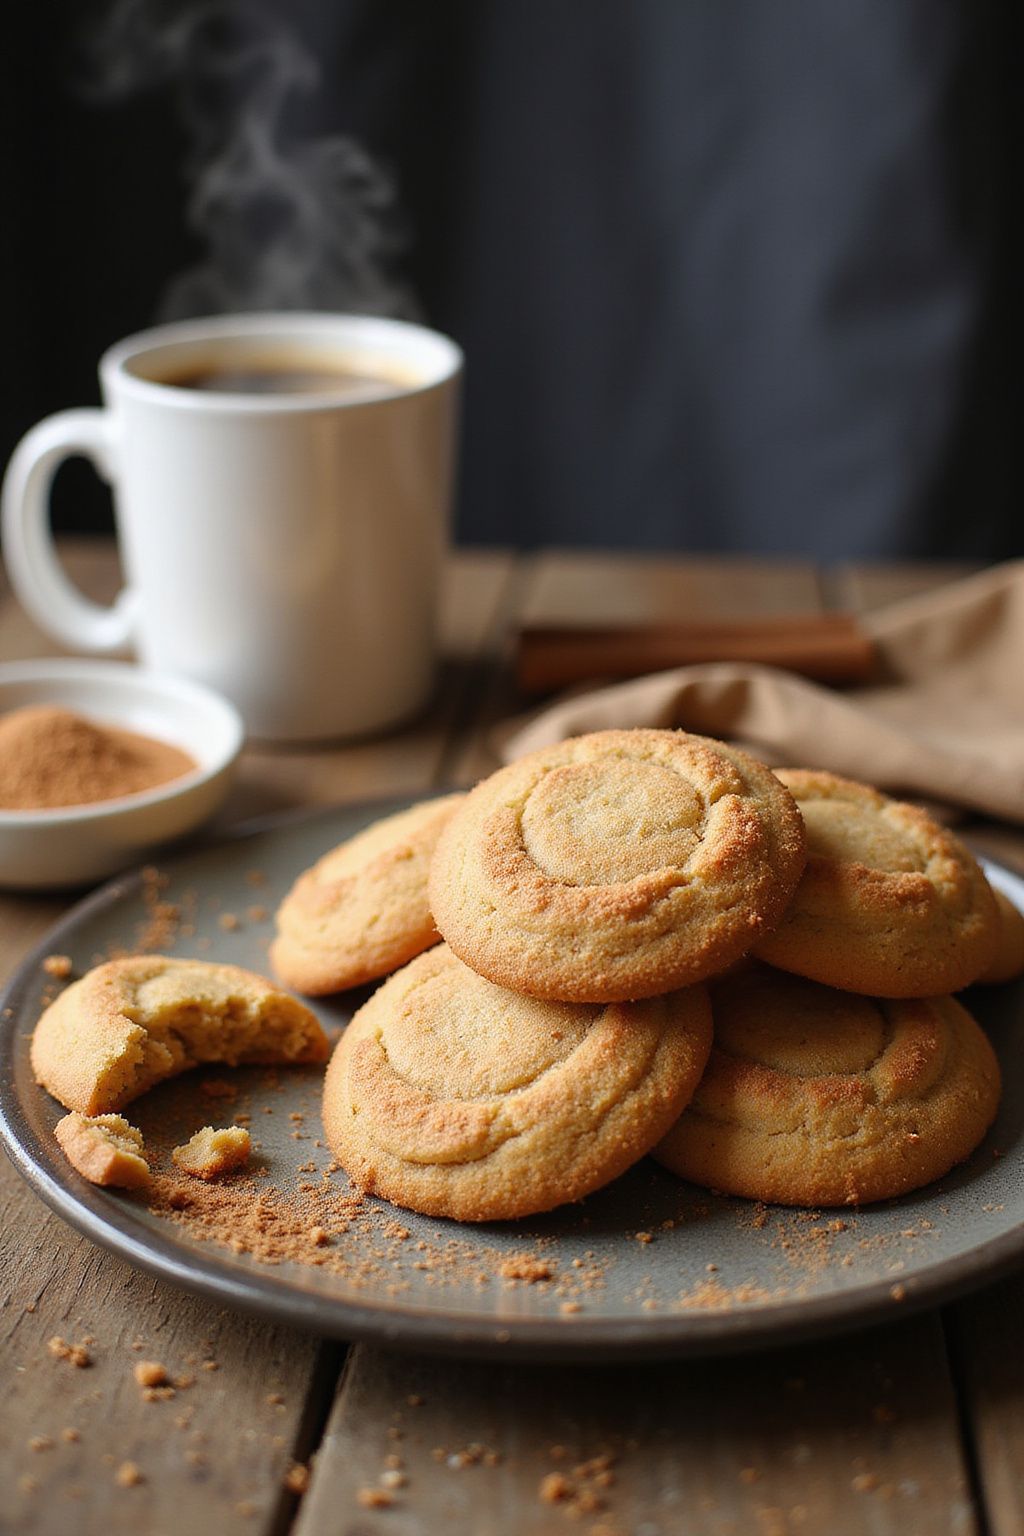
Cinnamon Roll Snickerdoodles are a delightful treat that combines the best of two worlds: the soft, chewy texture of snickerdoodles and the warm, comforting flavors of cinnamon rolls. Perfect for sharing on special occasions or enjoying at home, these cookies are sure to win hearts!
Prep Time: 15 minutes
Cook Time: 10-12 minutes
Additional Time: 30 minutes (for chilling)
Total Time: 55 minutes
Servings: 24 cookies
Ingredients:
- 2 ¾ cups all-purpose flour
- 1 teaspoon baking powder
- 1 teaspoon baking soda
- ½ teaspoon salt
- 1 tablespoon ground cinnamon
- 1 cup unsalted butter, softened
- 1 cup granulated sugar
- ¾ cup brown sugar, packed
- 2 large eggs
- 2 teaspoons vanilla extract
- ½ cup granulated sugar (for rolling)
- 2 tablespoons ground cinnamon (for rolling)
Instructions:
Start by mixing the flour, baking powder, baking soda, salt, and 1 tablespoon of cinnamon in a large bowl. Whisk it all together until combined.
In another bowl, cream the butter, granulated sugar, and brown sugar together using a hand mixer or stand mixer until the mixture is light and fluffy. This usually takes about 2-3 minutes.
Next, add the eggs and vanilla extract to the butter mixture. Beat everything together until smooth, making sure the eggs are well combined.
Now, gradually add the dry ingredients into the wet mixture. Mix until just combined; be careful not to overmix the dough.
Cover the bowl with plastic wrap and place it in the refrigerator for about 30 minutes. This chilling time helps the cookies set nicely while baking.
Preheat your oven to 350°F (175°C). While it’s heating up, mix ½ cup of granulated sugar and 2 tablespoons of cinnamon in a small bowl for rolling the cookies.
Once chilled, scoop out about 1 tablespoon of dough and roll it into a ball. Roll it in the cinnamon-sugar mixture until fully coated. Place the dough balls on a baking sheet lined with parchment paper, leaving some space between them.
Bake in the preheated oven for 10-12 minutes or until the edges are set but the centers remain soft. Allow the cookies to cool on the baking sheet for a few minutes before transferring them to a wire rack to cool completely.
Tips:
- For extra flavor, add some chopped pecans or walnuts to the dough.
- Store leftover cookies in an airtight container to keep them fresh.
- You can also drizzle these cookies with cream cheese frosting for an even sweeter treat!
Nutrition Facts:
- Calories: 120 per cookie
- Fat: 6g
- Carbohydrates: 16g
- Protein: 1g
- Sugar: 9g
18 Nutty Chocolate Chip Morsels
Indulge in the delightful combination of nuts and chocolate with these Nutty Chocolate Chip Morsels. They’re perfect for satisfying your sweet tooth or surprising your loved ones on special occasions. You’ll have a delicious batch ready in no time!
Prep Time: 15 minutes
Total Time: 35 minutes
Servings: 24 cookies
Ingredients:
- 1 cup all-purpose flour
- 1/2 teaspoon baking soda
- 1/4 teaspoon salt
- 1/2 cup unsalted butter, softened
- 1/2 cup brown sugar, packed
- 1/4 cup granulated sugar
- 1 teaspoon vanilla extract
- 1 large egg
- 1 cup semi-sweet chocolate chips
- 1/2 cup chopped nuts (walnuts or pecans work well)
Instructions:
Start by preheating your oven to 350°F (175°C). This ensures that your cookies bake evenly.
In a mixing bowl, combine flour, baking soda, and salt. Whisk them together until they are well blended. This step helps to distribute the baking soda and salt evenly in the flour.
In a separate bowl, cream together the butter, brown sugar, and granulated sugar until the mixture is light and fluffy. This should take about 2-3 minutes.
Next, add the vanilla extract and egg to the butter mixture. Mix until everything is combined. This helps to bind the ingredients and add flavor.
Gradually add the flour mixture to the wet ingredients. Stir until just combined, being careful not to overmix. Overmixing can lead to tough cookies!
Now it’s time to fold in the chocolate chips and chopped nuts. This is the best part, as it adds that nutty crunch to your sweet morsels.
Scoop spoonfuls of dough onto a baking sheet lined with parchment paper, making sure they are spaced about 2 inches apart. This gives them room to spread while baking.
Bake in the preheated oven for 12-15 minutes, or until the edges are lightly golden. Let them cool on the baking sheet for a few minutes before transferring them to a wire rack.
Tips:
- For a more intense flavor, toast your nuts lightly before adding them to the dough.
- If you prefer chewier cookies, chill the dough in the refrigerator for about 30 minutes before baking.
- Try using different types of chocolate chips, like dark or white chocolate, for variety.
Nutrition Facts:
- Calories: 150 per cookie
- Total Fat: 7g
- Saturated Fat: 4g
- Cholesterol: 20mg
- Sodium: 50mg
- Carbohydrates: 20g
- Dietary Fiber: 1g
- Sugars: 10g
- Protein: 2g
19 Lavender Earl Grey Cookies

These Lavender Earl Grey Cookies are perfect for a special occasion like Mother’s Day. With a delightful combination of floral lavender and the rich taste of Earl Grey tea, these cookies will surely impress everyone. They are easy to make and bring a touch of elegance to your dessert table.
Prep Time: 15 minutes
Cook Time: 12-15 minutes
Additional Time: 30 minutes (chill the dough)
Total Time: 1 hour
Servings: 24 cookies
Ingredients:
- 1 cup unsalted butter, softened
- 1 cup granulated sugar
- 1 large egg
- 1 teaspoon vanilla extract
- 2 cups all-purpose flour
- 2 tablespoons Dried culinary lavender
- 2 tablespoons Earl Grey tea leaves
- 1 teaspoon baking soda
- 1/2 teaspoon salt
- 1/2 cup powdered sugar (for dusting)
Instructions:
Start by preheating your oven to 350°F (175°C). While the oven is warming up, take a large mixing bowl and cream together the softened butter and granulated sugar. Mix them until the mixture is light and fluffy.
Next, add the egg and vanilla extract to the bowl and mix well until everything is combined. In a separate bowl, whisk together the flour, Dried culinary lavender, Earl Grey tea leaves, baking soda, and salt. Gradually add this dry mixture to the wet ingredients, stirring until a soft dough forms.
Once your dough is ready, cover it with plastic wrap and refrigerate for 30 minutes. Chilling the dough helps the cookies to hold their shape. After chilling, scoop tablespoon-sized portions of the dough and roll them into balls. Place the balls on a baking sheet lined with parchment paper, leaving some space in between.
Bake the cookies in the preheated oven for 12-15 minutes or until the edges are lightly golden. Once baked, take them out and let them cool on the baking sheet for a few minutes before transferring them to a wire rack. Finally, dust the cooled cookies with powdered sugar for that perfect finishing touch.
Tips:
- Use high-quality Dried culinary lavender for the best flavor.
- To make the cookies extra special, add a glaze made from powdered sugar and lemon juice.
- Store the cookies in an airtight container to keep them fresh for a longer time.
Nutrition Facts:
- Calories: 120 per cookie
- Total Fat: 7g
- Saturated Fat: 4g
- Cholesterol: 20mg
- Sodium: 50mg
- Total Carbohydrates: 14g
- Dietary Fiber: 0g
- Sugars: 6g
- Protein: 1g
20 White Chocolate Raspberry Cookies
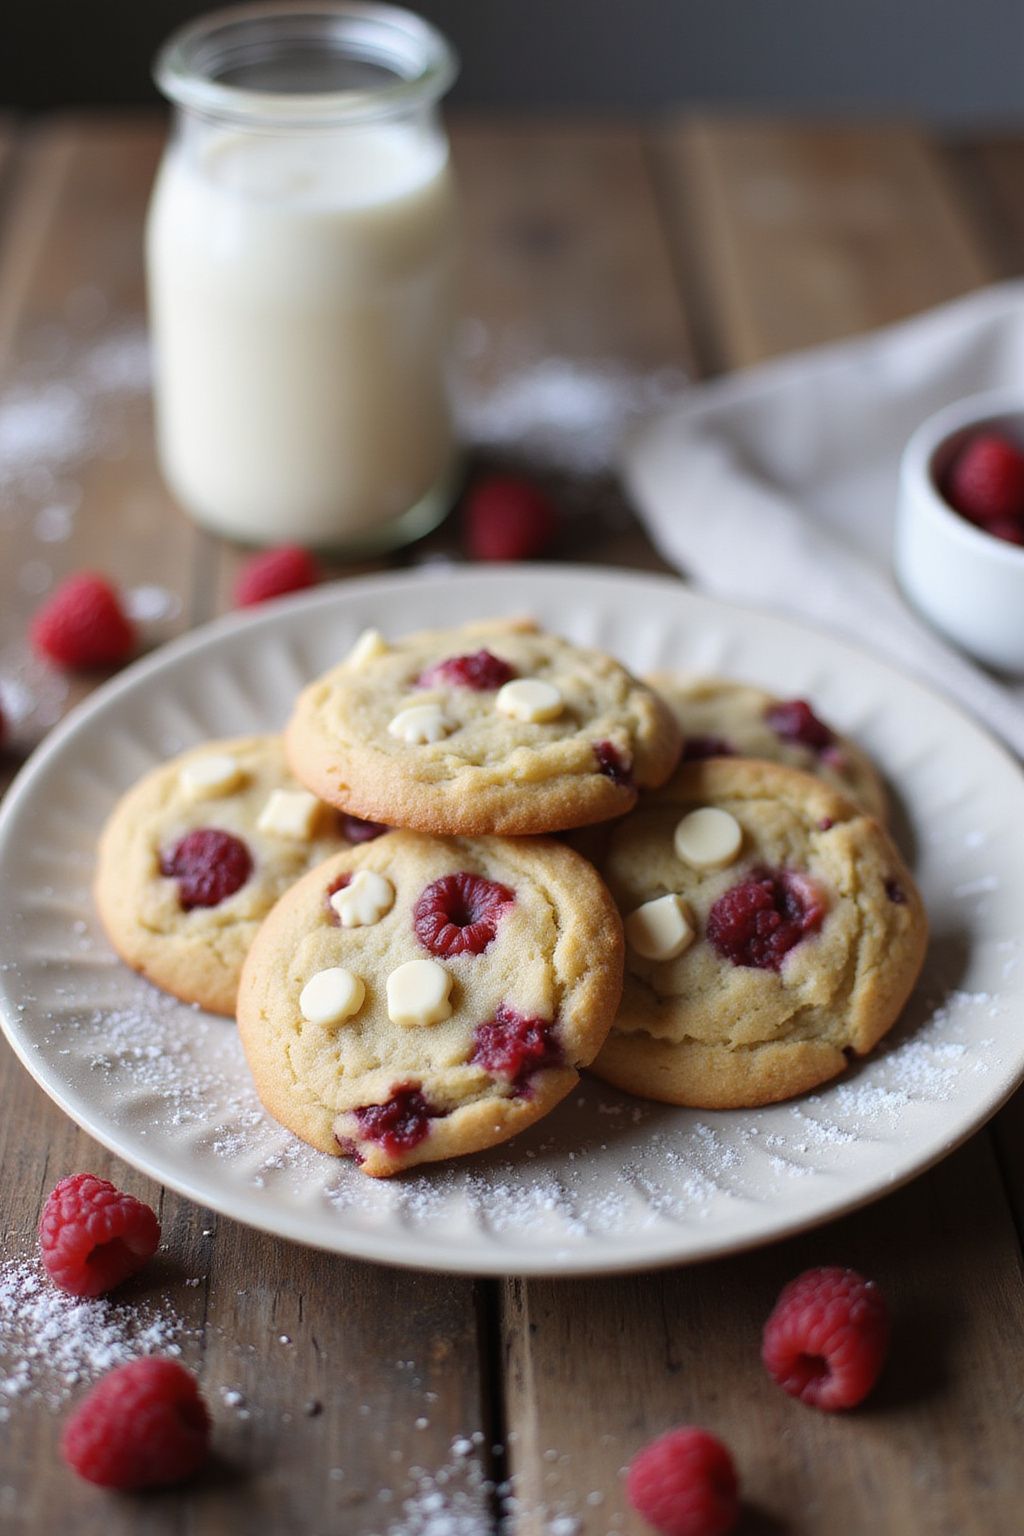
These White Chocolate Raspberry Cookies are a perfect treat for any occasion, including Mother’s Day! They are sweet, chewy, and full of juicy raspberries and creamy white chocolate. Your family and friends will love these delicious cookies!
Prep Time: 15 minutes
Cook Time: 12 minutes
Additional Time: 10 minutes (for cooling)
Total Time: 37 minutes
Servings: 24 cookies
Ingredients:
- 1 cup unsalted butter, softened
- 1 cup granulated sugar
- 1 cup brown sugar, packed
- 2 large eggs
- 2 teaspoons vanilla extract
- 3 cups all-purpose flour
- 1 teaspoon baking soda
- 1/2 teaspoon salt
- 1 cup white chocolate chips
- 1 cup fresh raspberries, gently rinsed and dried
Instructions:
First, preheat your oven to 350°F (175°C). This ensures that your cookies bake evenly. Get two baking sheets ready by lining them with parchment paper.
In a large mixing bowl, cream together the softened butter, granulated sugar, and brown sugar until it’s light and fluffy. This step adds air to the dough, making your cookies nice and soft.
Next, add the eggs one at a time, mixing well after each addition. Stir in the vanilla extract for that wonderful flavor.
In another bowl, whisk together the flour, baking soda, and salt. Gradually add this dry mixture to the butter mixture, stirring until it’s fully combined. Be careful not to over-mix; we want the cookies to stay soft.
Fold in the white chocolate chips and fresh raspberries gently. Try not to crush the raspberries too much, so you can have lovely pieces in every bite.
Using a cookie scoop or a tablespoon, drop the dough onto the prepared baking sheets. Leave some space between the cookies, as they will spread while baking.
Bake in the preheated oven for about 10-12 minutes, or until the edges are lightly golden. The centers might look a bit soft, but they will firm up as they cool.
Let the cookies cool on the baking sheets for about 10 minutes before transferring them to a wire rack to cool completely. This helps them set perfectly.
Tips:
- If you can’t find fresh raspberries, you can use frozen raspberries instead. Just make sure they’re thawed and drained.
- For extra flavor, consider adding a sprinkle of lemon zest to the dough.
- Store the cookies in an airtight container to keep them fresh and chewy for several days.
Nutrition Facts:
- Calories: 180 per cookie
- Total fat: 8g
- Saturated fat: 5g
- Cholesterol: 30mg
- Sodium: 100mg
- Total carbohydrates: 26g
- Dietary fiber: 1g
- Sugars: 12g
- Protein: 2g
21 Salted Caramel Crinkle Cookies
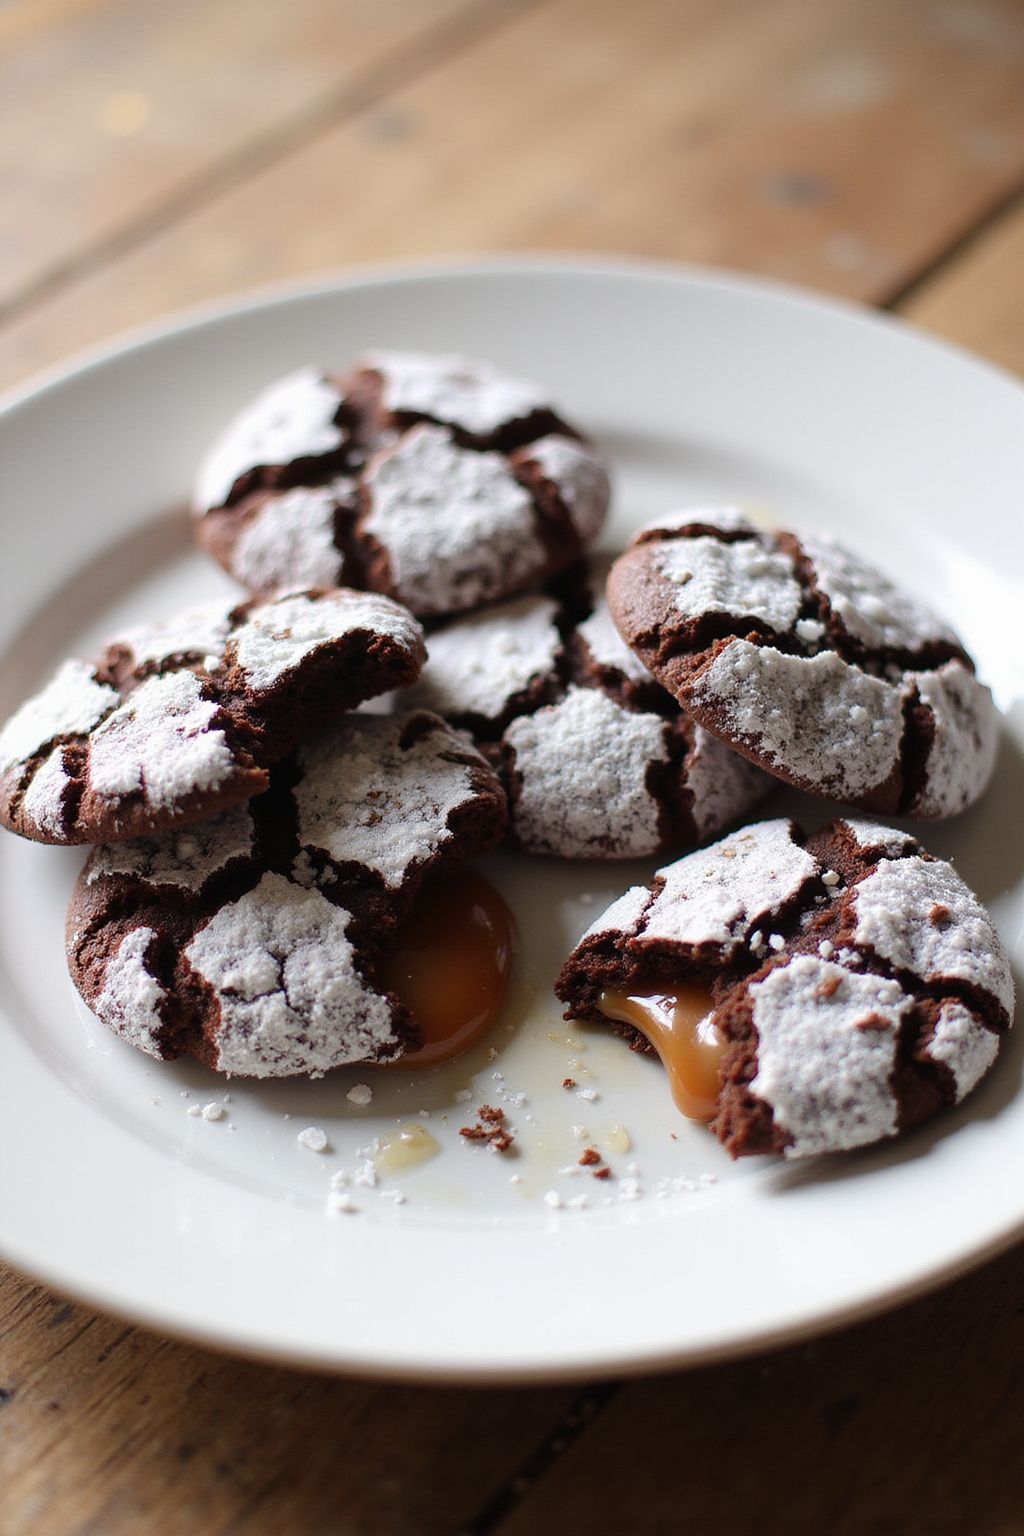
These Salted Caramel Crinkle Cookies are a delightful treat perfect for any occasion, especially for Mother’s Day! With a rich chocolate flavor and gooey salted caramel filling, they’re sure to impress. Plus, their crinkly tops make them as fun to look at as they are to eat!
Prep Time: 15 minutes
Cook Time: 10 minutes
Additional Time: 30 minutes (chilling)
Total Time: 55 minutes
Servings: 24 cookies
Ingredients:
- 1 cup all-purpose flour
- ½ cup unsweetened cocoa powder
- ½ teaspoon baking powder
- ½ teaspoon baking soda
- ¼ teaspoon salt
- ¾ cup granulated sugar
- ¼ cup brown sugar, packed
- 1 large egg
- ⅓ cup vegetable oil
- 1 teaspoon vanilla extract
- ½ cup salted caramel sauce (store-bought or homemade)
- ½ cup powdered sugar (for rolling)
- Flaky sea salt (for topping)
Instructions:
Start by mixing the flour, cocoa powder, baking powder, baking soda, and salt in a bowl. Whisk these dry ingredients together until they are well combined.
In another large bowl, combine granulated sugar, brown sugar, and the egg. Whisk until the mixture is smooth and creamy. Next, stir in the vegetable oil and vanilla extract until well combined.
Gradually add the dry mixture to the wet ingredients, stirring just until incorporated. The dough will be thick. Fold in about half of the salted caramel sauce, but don’t overmix. Cover the bowl with plastic wrap and refrigerate for about 30 minutes.
Preheat your oven to 350°F (175°C) and line two baking sheets with parchment paper. Once the dough has chilled, scoop out tablespoon-sized portions and roll them into balls.
Roll each ball in powdered sugar until well coated. Place the balls on the prepared baking sheets about two inches apart. Use your thumb to make a small indentation in the center of each cookie.
Transfer these cookies to the oven and bake for about 10 minutes. Remove them from the oven and allow them to cool for a few minutes before carefully filling each indentation with the remaining salted caramel sauce. Finish with a sprinkle of flaky sea salt on top.
Tips:
- If you want extra gooey cookies, add a bit more salted caramel to each cookie before serving.
- Store any leftovers in an airtight container to keep the cookies fresh.
- You can make your own salted caramel sauce if you prefer a homemade touch!
Nutrition Facts:
- Calories: 120
- Total Fat: 5g
- Saturated Fat: 1g
- Cholesterol: 10mg
- Sodium: 50mg
- Total Carbohydrates: 18g
- Dietary Fiber: 1g
- Sugars: 10g
- Protein: 1g
22 S’mores Inspired Cookie Bars
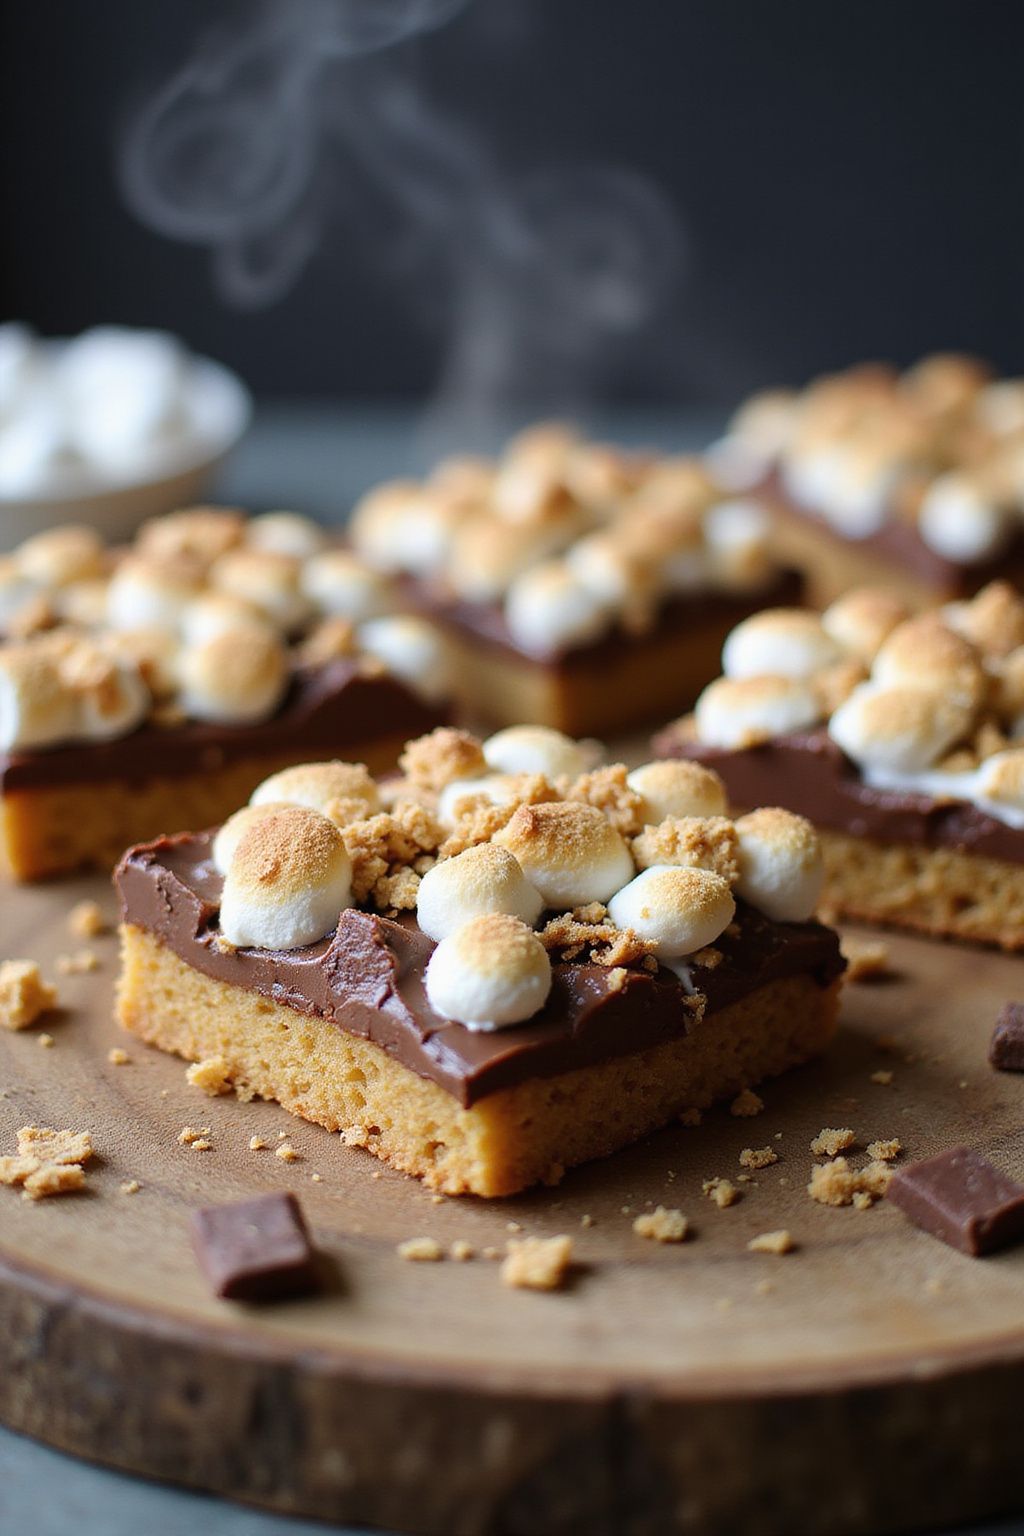
S’mores Inspired Cookie Bars are a delicious twist on the classic campfire treat. These bars are chewy, sweet, and feature all the favorite S’mores flavors: chocolate, marshmallow, and graham crackers. Perfect for sharing, these cookie bars make an excellent dessert for any occasion!
Prep Time: 15 minutes
Cook Time: 25 minutes
Additional Time: 10 minutes
Total Time: 50 minutes
Servings: 12 bars
Ingredients:
- 1 cup unsalted butter, softened
- 1 cup brown sugar, packed
- 1/2 cup granulated sugar
- 2 cups all-purpose flour
- 1 teaspoon baking soda
- 1/2 teaspoon salt
- 2 teaspoons vanilla extract
- 1 cup chocolate chips (semi-sweet or milk chocolate)
- 1 cup mini marshmallows
- 1 cup crushed graham crackers (about 6 full sheets)
Instructions:
Start by preheating your oven to 350°F (175°C). Grease a 9×13 inch baking dish or line it with parchment paper for easy removal.
In a large mixing bowl, beat the softened butter, brown sugar, and granulated sugar together until the mixture is light and fluffy. This should take about 2-3 minutes of mixing.
Add in the vanilla extract, followed by the eggs (if you want to use them), and mix until everything is well combined.
In another bowl, whisk together the flour, baking soda, and salt. Gradually add this dry mixture to the wet ingredients. Mix until just combined—do not overmix.
Now fold in the chocolate chips, mini marshmallows, and crushed graham crackers. The mixture should be thick and sticky.
Spread the cookie dough evenly in the prepared baking dish. Use a spatula to make sure it’s flat on the top.
Bake in the preheated oven for about 25 minutes or until the edges are golden brown, and the center looks set.
After baking, let the cookie bars cool in the pan for about 10 minutes before transferring them to a wire rack to cool completely. Cut into squares and enjoy your tasty S’mores Inspired Cookie Bars!
Tips:
- For an extra gooey texture, add some more marshmallows on top in the last few minutes of baking.
- Store any leftovers in an airtight container, and they should last for up to 5 days.
- For a fun twist, try using different types of chocolate, like dark or white chocolate chips.
Nutrition Facts:
- Calories: 210 per bar
- Total Fat: 10g
- Saturated Fat: 6g
- Cholesterol: 30mg
- Sodium: 120mg
- Total Carbohydrates: 29g
- Dietary Fiber: 1g
- Sugars: 15g
- Protein: 2g
23 Heavenly Hazelnut Espresso Cookies
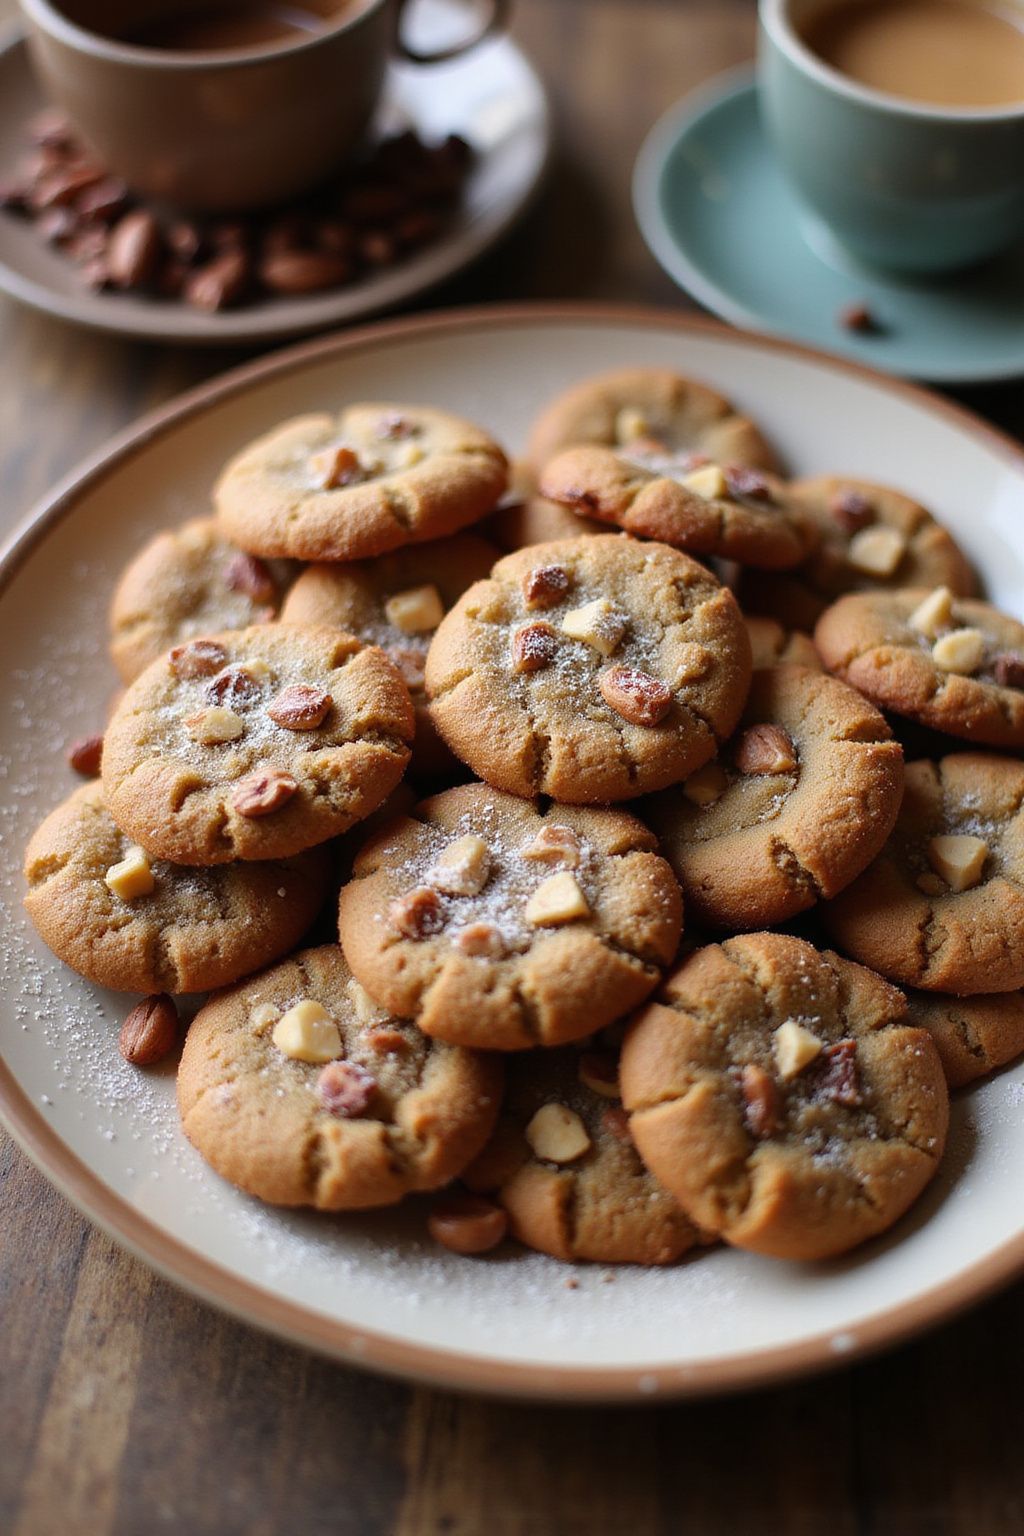
These Heavenly Hazelnut Espresso Cookies are a delightful treat for coffee lovers! With a perfect blend of nutty hazelnuts and rich espresso, each bite will remind you of a cozy café. Get ready to impress your friends and family with these delicious cookies!
Prep Time: 15 minutes
Cook Time: 10 minutes
Additional Time: 10 minutes (for cooling)
Total Time: 35 minutes
Servings: 24 cookies
Ingredients:
- 1 cup unsalted butter, softened
- 1 cup brown sugar, packed
- 1/2 cup granulated sugar
- 2 large eggs
- 2 teaspoons vanilla extract
- 2 cups all-purpose flour
- 1/2 teaspoon baking soda
- 1/2 teaspoon salt
- 1 tablespoon instant espresso powder
- 1 cup toasted hazelnuts, chopped
- 1/2 cup chocolate chips (optional)
Instructions:
Start by preheating your oven to 350°F (175°C). Line two baking sheets with parchment paper. This will help the cookies bake evenly and not stick.
In a large bowl, cream together the softened butter, brown sugar, and granulated sugar. Use an electric mixer on medium speed for about 2-3 minutes until the mixture is light and fluffy.
Add in the eggs and vanilla extract to the butter and sugar mixture. Beat the ingredients together until well combined. Make sure everything is mixed together smoothly.
In another bowl, whisk together the all-purpose flour, baking soda, salt, and instant espresso powder. Slowly add this dry mixture to the wet ingredients. Stir gently with a spatula just until everything is combined.
Next, fold in the toasted hazelnuts and chocolate chips if you’re using them. Gently mix until the nuts and chocolate are evenly distributed in the cookie dough.
Scoop tablespoon-sized balls of dough onto the prepared baking sheets, leaving some space in between each cookie. Bake in the preheated oven for about 10 minutes or until the edges are golden brown.
Once they are done baking, remove the cookies from the oven and let them cool on the baking sheets for 10 minutes. Then, transfer them to a wire rack to cool completely.
Tips:
- For extra flavor, toast the hazelnuts in the oven for a few minutes before chopping them.
- If you prefer a softer cookie, take them out of the oven slightly earlier.
- Experiment with different types of chocolate chips, like dark or white chocolate, for a unique twist!
Nutrition Facts:
- Calories: 150 per cookie
- Total Fat: 8g
- Sodium: 50mg
- Carbohydrates: 19g
- Dietary Fiber: 1g
- Sugars: 8g
- Protein: 2g
24 Classic Butter Cookies with Sprinkles

Classic Butter Cookies with Sprinkles are a delightful treat that everyone loves! With their buttery flavor and colorful sprinkles, these cookies brighten up any occasion. They’re perfect for pleasing a crowd or simply enjoying at home.
Prep Time: 15 minutes
Cook Time: 10-12 minutes
Additional Time: 30 minutes
Total Time: 55 minutes
Servings: 24 cookies
Ingredients:
- 1 cup unsalted butter, softened
- 3/4 cup granulated sugar
- 1/4 cup packed brown sugar
- 1 large egg
- 1 teaspoon vanilla extract
- 2 cups all-purpose flour
- 1/4 teaspoon salt
- 1/2 teaspoon baking powder
- 1/2 cup colorful sprinkles
Instructions:
Start by preheating your oven to 350°F (175°C). Line a baking sheet with parchment paper to prevent the cookies from sticking.
In a large bowl, beat together the softened butter, granulated sugar, and brown sugar until it’s creamy. It should take about 2-3 minutes.
Next, add in the egg and vanilla extract. Continue mixing until well combined and smooth.
In another bowl, whisk together the flour, salt, and baking powder. Gradually add this dry mixture into the wet mixture, mixing until just combined. Be careful not to overmix.
Fold in the colorful sprinkles, making sure they are evenly distributed throughout the dough. After that, cover the bowl with plastic wrap and refrigerate the dough for 30 minutes. Chilling helps the cookies keep their shape while baking.
Once the dough is chilled, use a spoon or cookie scoop to form small balls of dough and place them on the prepared baking sheet, leaving space between each cookie.
Bake the cookies in the preheated oven for 10-12 minutes or until the edges are golden. Keep an eye on them, as baking time may vary.
After baking, let the cookies cool on the baking sheet for a few minutes before transferring them to a wire rack to cool completely.
Tips:
- For an extra buttery flavor, use high-quality unsalted butter.
- Mix up the sprinkles to match different holidays or personal preferences.
- Store cookies in an airtight container at room temperature for up to one week.
Nutrition Facts:
- Calories: 150 per cookie
- Total Fat: 7g
- Saturated Fat: 4g
- Cholesterol: 20mg
- Sodium: 40mg
- Total Carbohydrate: 20g
- Dietary Fiber: 0g
- Sugars: 8g
- Protein: 1g
25 Mint Chocolate Chip Surprise Cookies
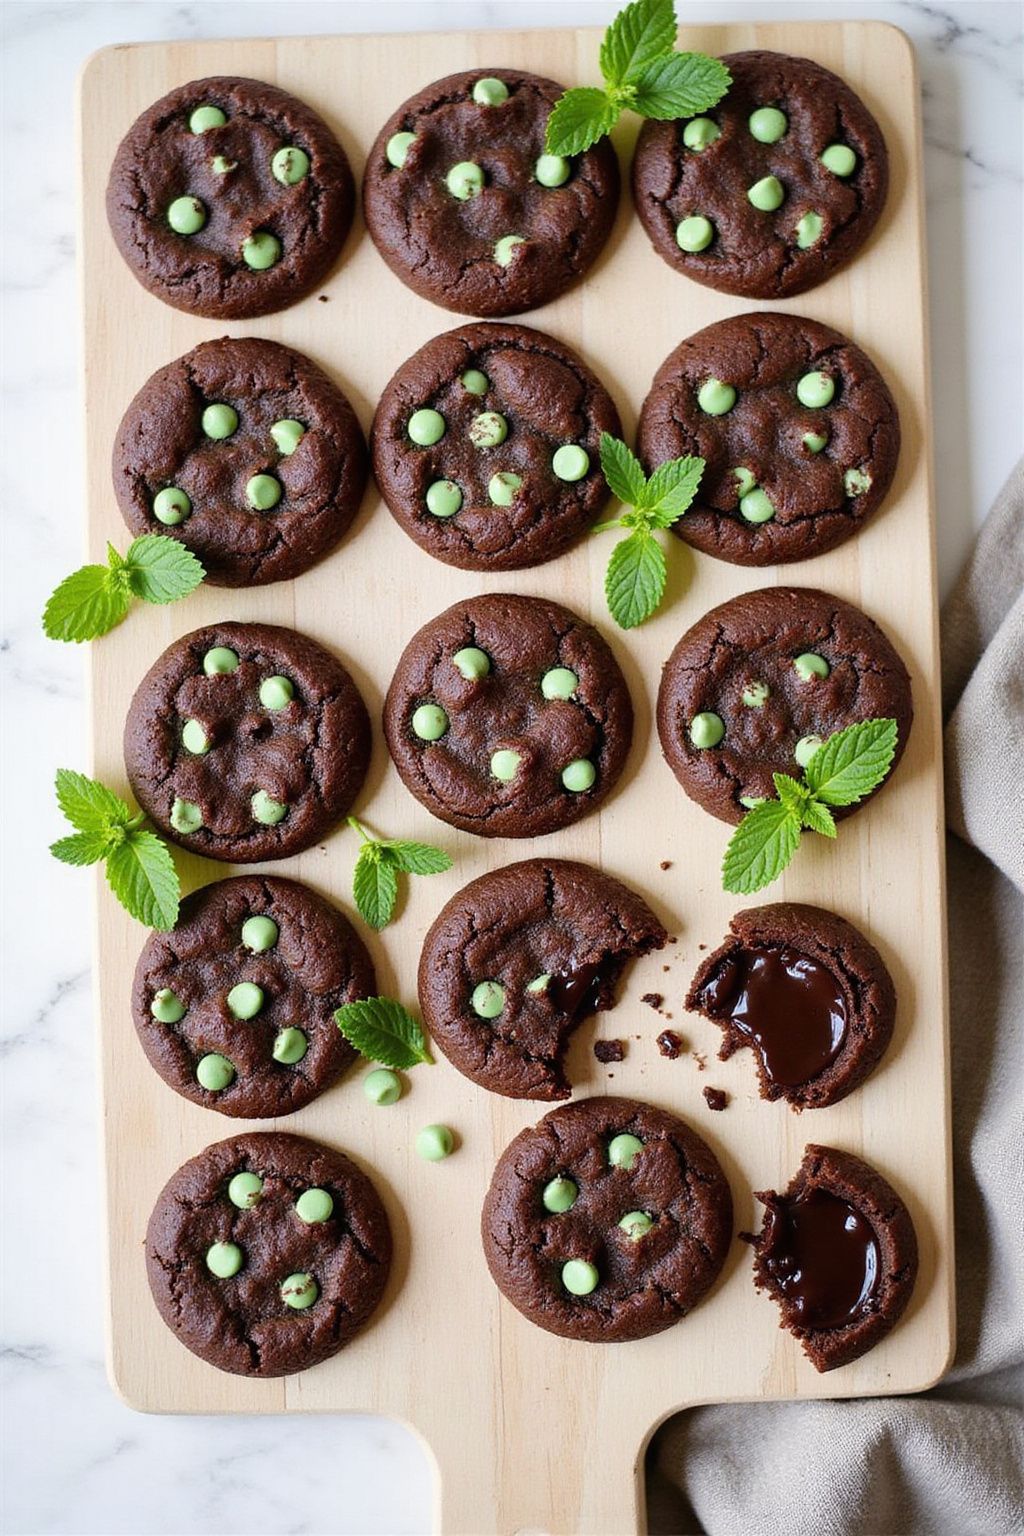
These Mint Chocolate Chip Surprise Cookies are sure to bring a smile to anyone’s face! With a delicious minty flavor and hidden chocolate chips, they are perfect for a special occasion or just a sweet treat. Let’s dive into this easy recipe that combines mint and chocolate for a delightful surprise!
Prep Time: 15 minutes
Cook Time: 10-12 minutes
Additional Time: 5 minutes (cooling)
Total Time: 30 minutes
Servings: 12 cookies
Ingredients:
- 1 cup all-purpose flour
- 1/2 cup unsweetened cocoa powder
- 1/4 teaspoon baking soda
- 1/4 teaspoon salt
- 1/2 cup unsalted butter, softened
- 3/4 cup granulated sugar
- 1/4 cup brown sugar, packed
- 1 teaspoon pure vanilla extract
- 1 large egg
- 1 teaspoon peppermint extract
- 3/4 cup mint chocolate chips
Instructions:
Start by preheating your oven to 350°F (175°C). This will ensure your cookies bake evenly.
In a medium bowl, mix the flour, cocoa powder, baking soda, and salt together. Set this mixture aside for now.
In a large mixing bowl, beat together the butter, granulated sugar, and brown sugar until it’s light and fluffy. This will take about 2 to 3 minutes.
Next, add the egg, vanilla extract, and peppermint extract to the mix. Stir until everything is well combined.
Slowly add the dry ingredient mixture to the wet ingredients. Mix until just combined, being careful not to over-mix.
Now it’s time to fold in the mint chocolate chips. Make sure they are evenly distributed throughout the cookie dough.
Using a tablespoon, scoop out the dough and place them on a baking sheet lined with parchment paper. Leave some space between each scoop as they will spread while baking.
Bake in the preheated oven for 10-12 minutes, or until the edges are set. The centers may look slightly soft; that’s okay!
Once baked, remove the cookies from the oven and let them cool on the baking sheet for 5 minutes. Then, transfer them to a wire rack to cool completely.
Tips:
- For an extra minty flavor, add a bit of green food coloring to your cookie dough.
- Store any leftovers in an airtight container to keep them fresh for up to a week.
- You can substitute the mint chocolate chips with regular chocolate chips if you prefer less minty cookies.
Nutrition Facts:
- Calories: 150 per cookie
- Total Fat: 8g
- Saturated Fat: 5g
- Cholesterol: 25mg
- Sodium: 50mg
- Total Carbohydrates: 19g
- Dietary Fiber: 1g
- Sugars: 10g
- Protein: 2g