My New Cookbook is Out! Check Out Now!
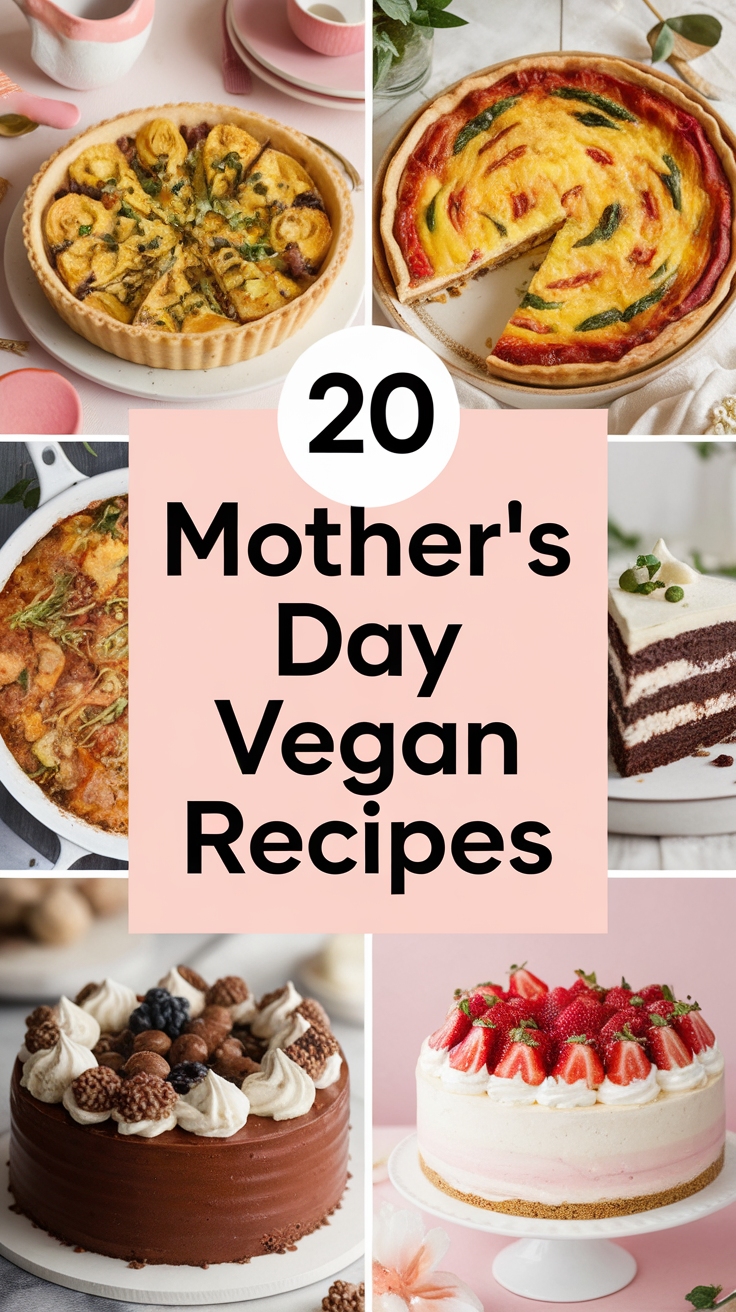
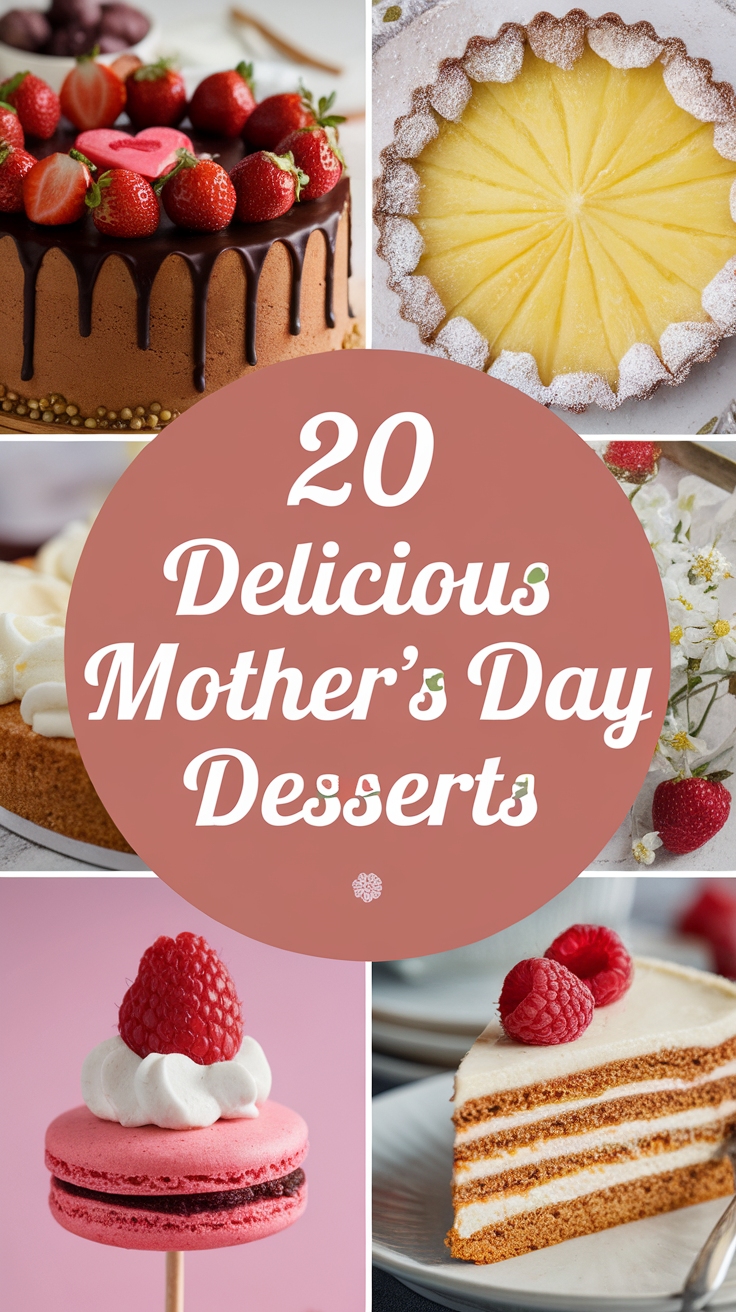
20 Homemade Desserts for Mother’s Day
This page contains affiliate links and I earn a commission if you make a purchase through one of the links, at no cost to you.
What’s sweeter than a homemade dessert made with love? Mother’s Day is the perfect time to show your appreciation with a special treat. Whether you’re a baking pro or just getting started, these 20 delicious recipes will help you create something amazing. Bring joy, celebrate her day, and make memories that will last forever!
Shop Our Must-Haves


1 Chocolate-Covered Strawberry Tart
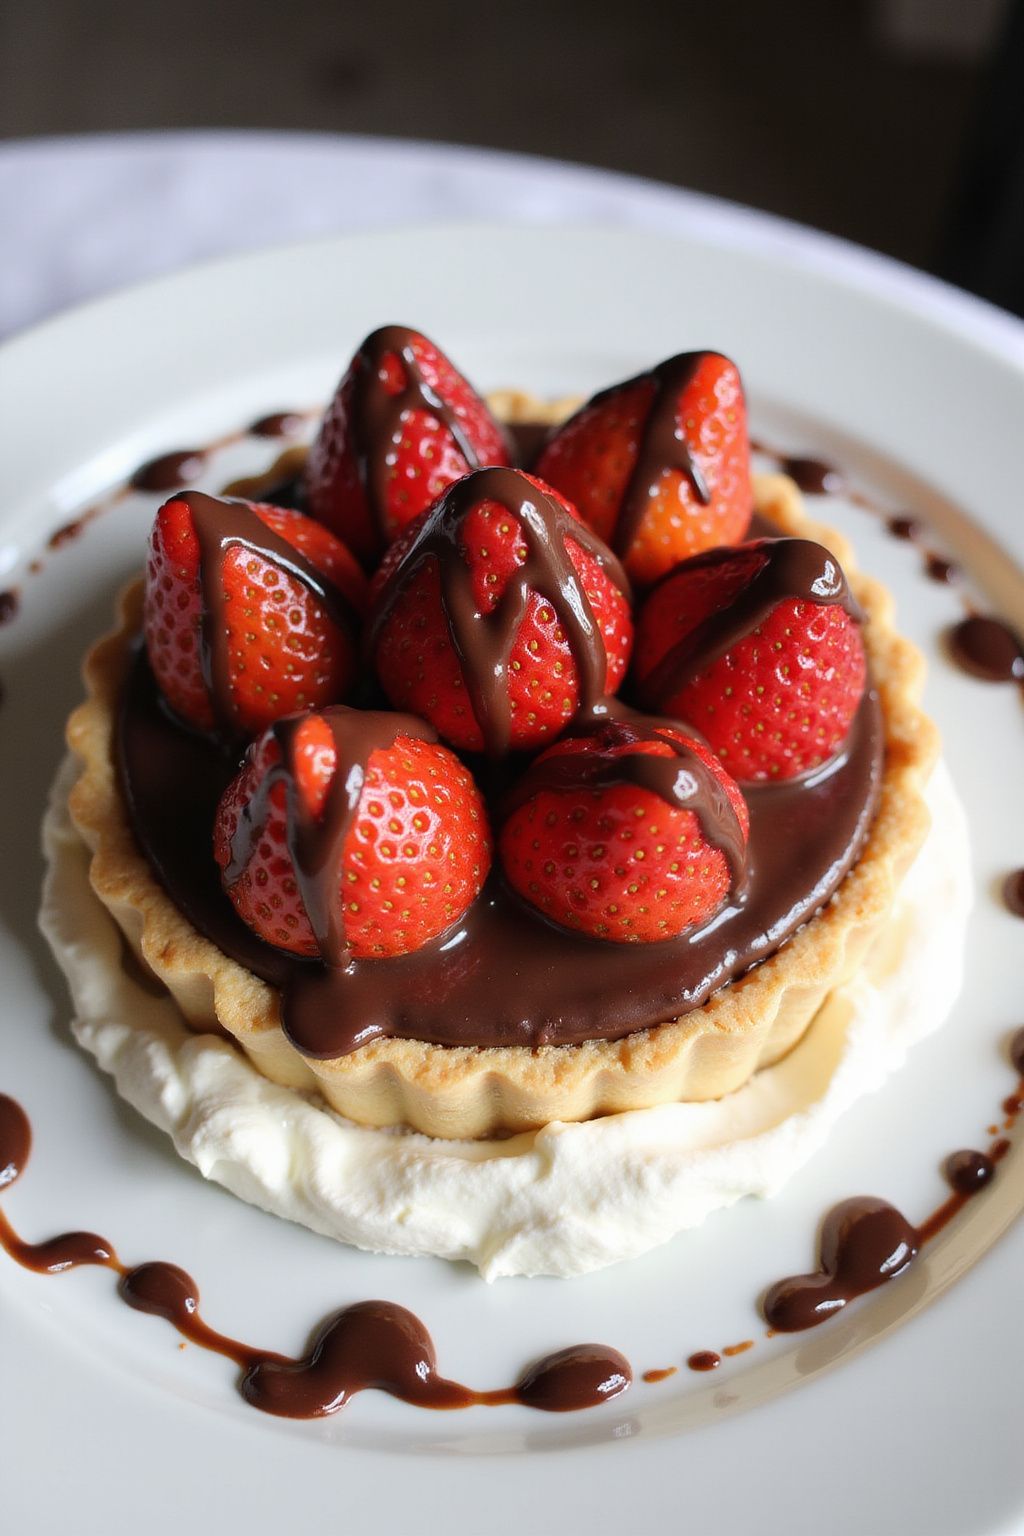
Indulge in the deliciousness of a Chocolate-Covered Strawberry Tart! This dessert combines a rich chocolate filling with fresh strawberries, all sitting on a flaky tart crust. It’s perfect for any occasion, and it looks just as amazing as it tastes!
Prep Time: 30 minutes
Additional Time: 2 hours
Total Time: 2 hours 30 minutes
Servings: 8
Ingredients:
- 1 pre-made tart shell
- 1 cup heavy cream
- 8 oz semi-sweet chocolate, chopped
- 2 tablespoons sugar
- 1 teaspoon vanilla extract
- 1 pint fresh strawberries, cleaned and hulled
- 1 cup milk chocolate, melted (for topping)
- Optional: Whipped cream for serving
Instructions:
Start by preparing your tart shell. Place it in a tart pan and make sure it’s evenly spread out. Pre-bake it according to the package instructions until lightly golden. Allow it to cool completely.
Next, heat the heavy cream in a saucepan over medium heat until it begins to simmer. Once it simmers, remove it from the heat and add the chopped semi-sweet chocolate. Stir until the chocolate is fully melted and the mixture is smooth.
Now, add the sugar and vanilla extract to the chocolate mixture. Stir well to combine all the ingredients. Allow the chocolate mixture to cool slightly before pouring it into the cooled tart shell.
While the chocolate sets, you can prepare the strawberries. Slice them in half and arrange them nicely on top of the chocolate filling in the tart. Place the tart in the refrigerator for about 2 hours to let it firm up nicely.
Once ready to serve, drizzle the melted milk chocolate over the strawberries for an extra touch of sweetness. You can also optionally add some whipped cream on the side for an extra treat!
Tips:
- Make sure to use fresh, ripe strawberries for the best flavor.
- If you want a richer taste, try using dark chocolate instead of semi-sweet.
- You can prepare the tart a day in advance and just add the strawberries before serving.
Nutrition Facts:
- Calories per serving: 350
- Total Fat: 22g
- Saturated Fat: 12g
- Cholesterol: 50mg
- Sodium: 50mg
- Total Carbohydrates: 39g
- Dietary Fiber: 3g
- Sugars: 20g
- Protein: 4g
2 Vanilla Bean Panna Cotta
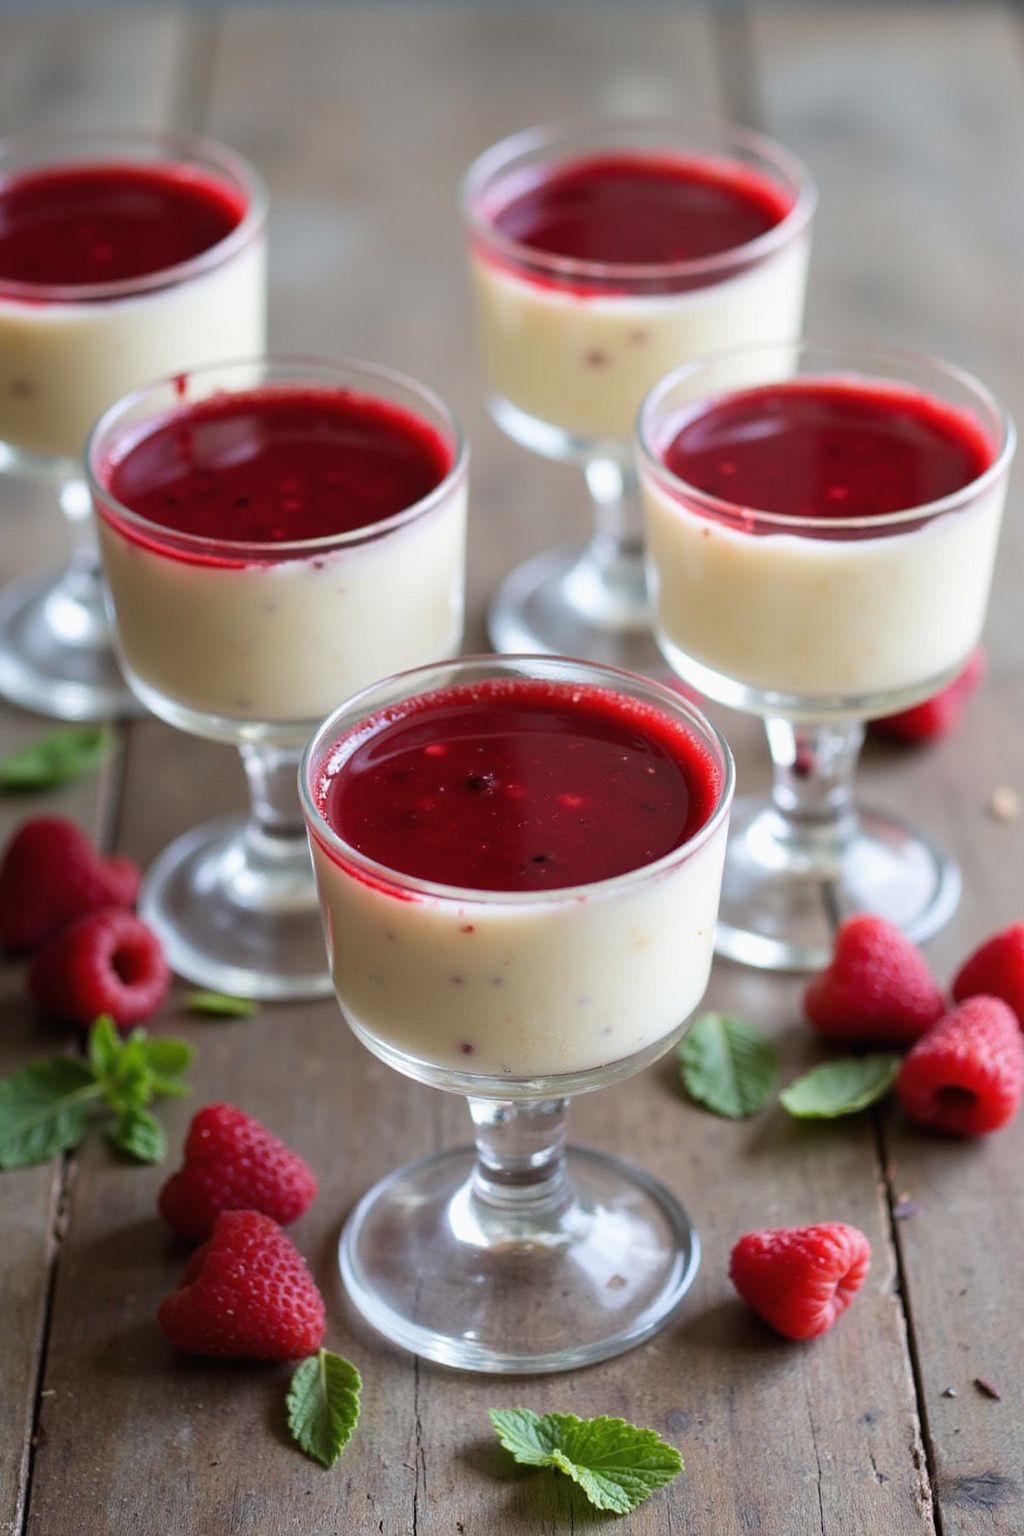
Vanilla Bean Panna Cotta is a deliciously creamy dessert that’s perfect for any occasion. With its rich vanilla flavor and smooth texture, it’s sure to impress your friends and family. Plus, it’s surprisingly easy to make!
Prep Time: 15 minutes
Additional Time: 4 hours
Total Time: 4 hours 15 minutes
Servings: 6
Ingredients:
- 2 cups heavy cream
- 1 cup whole milk
- 1/2 cup granulated sugar
- 1 1/2 teaspoons vanilla bean paste or seeds from 1 vanilla bean
- 2 1/4 teaspoons unflavored gelatin (about 1 packet)
- 3 tablespoons cold water
Instructions:
Start by pouring the cold water into a small bowl and sprinkling the gelatin over it. Let it sit for about 5 minutes until it blooms and becomes soft.
In a medium saucepan, combine the heavy cream, whole milk, and sugar. Heat the mixture over medium heat, stirring regularly, until it is hot but not boiling. This should take about 5 minutes.
Now, add the vanilla bean paste or vanilla seeds to the cream mixture. Stir well to combine all the flavors.
Next, remove the saucepan from the heat. Add the softened gelatin to the warm cream mixture, stirring constantly until the gelatin is completely dissolved. This usually takes a minute or two.
Once everything is well mixed, pour the mixture into 6 small dessert cups or ramekins. Allow them to cool at room temperature for about 30 minutes. After that, cover each cup with plastic wrap and place them in the refrigerator.
Let the panna cotta chill for at least 4 hours, or until set. When ready to serve, run a small knife around the edge of each cup, if you want to unmold them, or simply enjoy them right in the cups.
Tips:
- You can add fresh berries or a fruit sauce on top for a refreshing twist.
- For a richer flavor, try using homemade vanilla extract instead of vanilla bean paste.
- If you can’t find vanilla bean paste, just use the seeds from an additional vanilla bean or a good quality vanilla extract.
Nutrition Facts:
- Calories: 320 per serving
- Total Fat: 25g
- Saturated Fat: 15g
- Cholesterol: 90mg
- Sodium: 70mg
- Carbohydrates: 24g
- Sugar: 22g
- Protein: 3g
3 Raspberry Lemonade Cake
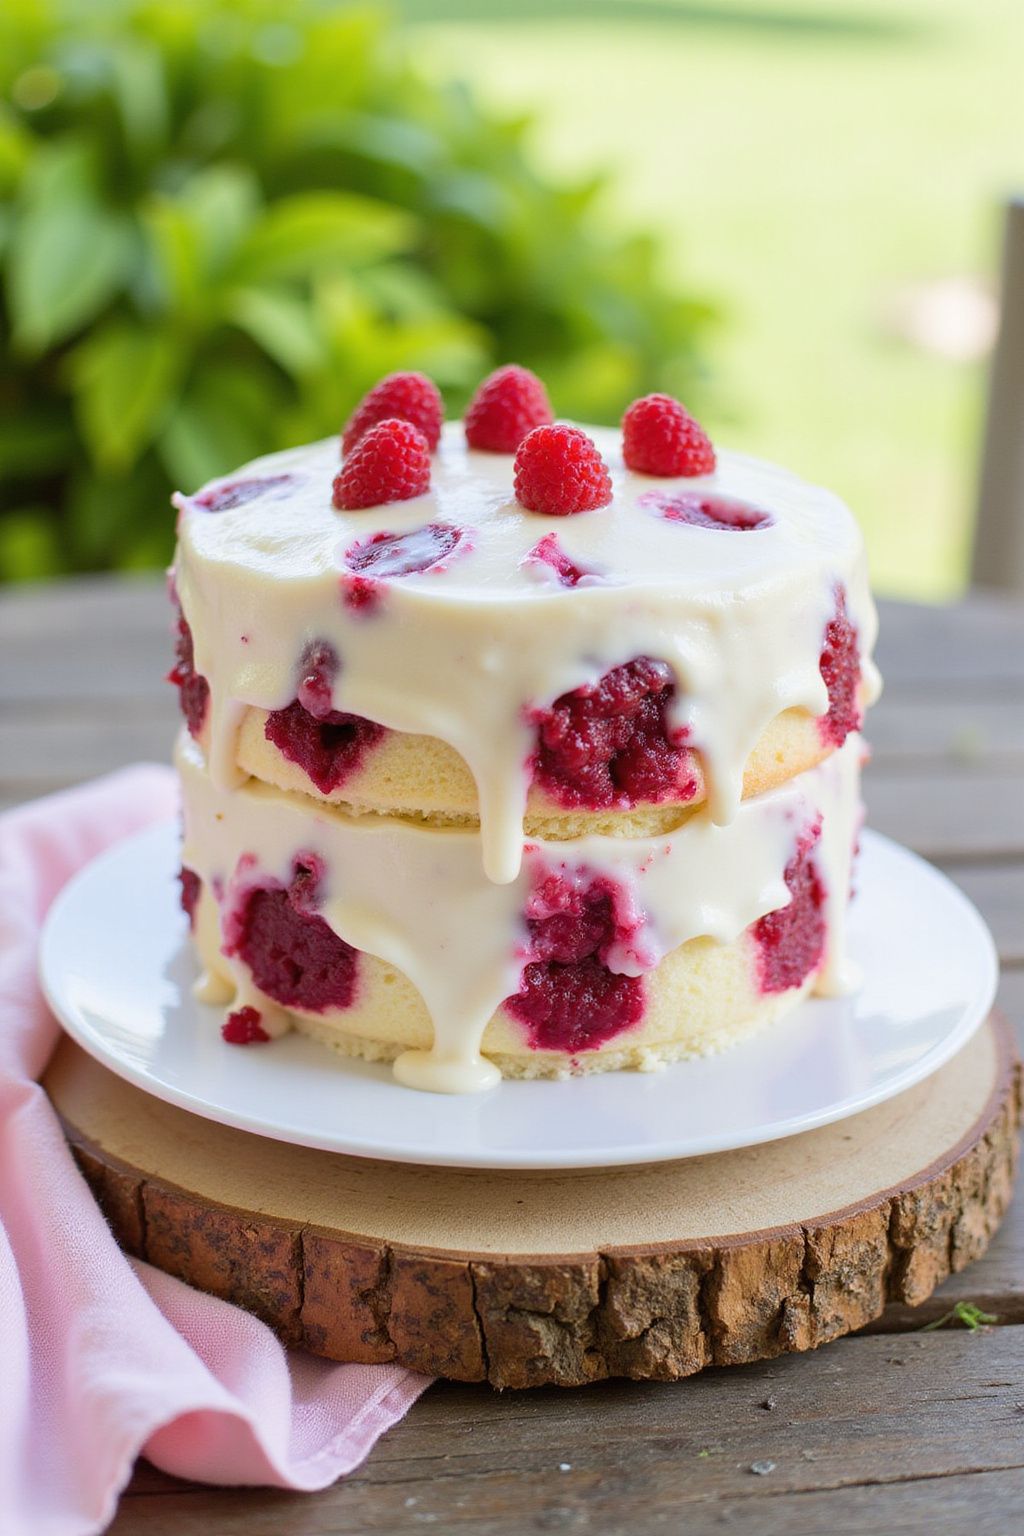
Dive into this delicious Raspberry Lemonade Cake that balances sweet and tart flavors perfectly! This moist cake is perfect for any summer gathering or just a sweet treat for yourself.
Prep Time: 20 minutes
Cook Time: 30 minutes
Additional Time: 1 hour (for cooling)
Total Time: 1 hour 50 minutes
Servings: 8
Ingredients:
- 2 cups all-purpose flour
- 1 ½ cups granulated sugar
- ½ cup unsalted butter, softened
- 1 cup milk
- 3 large eggs
- 1 tablespoon lemon zest
- ½ cup fresh lemon juice
- 1 teaspoon baking powder
- 1 teaspoon baking soda
- 1 teaspoon salt
- 1 cup fresh raspberries
- 1 cup powdered sugar (for frosting)
- 2-3 tablespoons lemon juice (for frosting)
Instructions:
Start by preheating your oven to 350°F (175°C). Grease and flour two 9-inch round cake pans. This will help the cakes come out easily after baking.
In a large mixing bowl, cream together the softened butter and granulated sugar until light and fluffy. This process usually takes about 3-5 minutes. Add the eggs one at a time, mixing well after each addition.
Now, mix in the milk, lemon zest, and lemon juice. Stir until everything is well combined. In another bowl, whisk together the flour, baking powder, baking soda, and salt. Gradually add this dry mixture to the wet ingredients, mixing until just combined.
Gently fold in the fresh raspberries to avoid breaking them. Pour the batter evenly into the prepared cake pans. Bake in the preheated oven for 25-30 minutes, or until a toothpick inserted in the center comes out clean.
Once baked, let the cakes cool in the pans for about 10 minutes. Then, remove them from the pans and let them cool completely on a wire rack for about 1 hour.
For the frosting, combine the powdered sugar and lemon juice in a bowl. Stir until it reaches a smooth consistency. Once the cakes have cooled, place one layer on a serving plate and spread some frosting on top. Add the second cake layer and frost the top and sides of the cake.
Tips:
- Make sure to use fresh raspberries for the best flavor.
- You can add extra lemon zest in the frosting for a stronger lemon flavor.
- If you want a colorful touch, garnish the top with additional raspberries before serving.
Nutrition Facts:
- Calories: 350 per serving
- Total Fat: 15g
- Saturated Fat: 9g
- Cholesterol: 70mg
- Sodium: 300mg
- Total Carbohydrates: 54g
- Dietary Fiber: 1g
- Sugars: 30g
- Protein: 4g
4 Classic Tiramisu
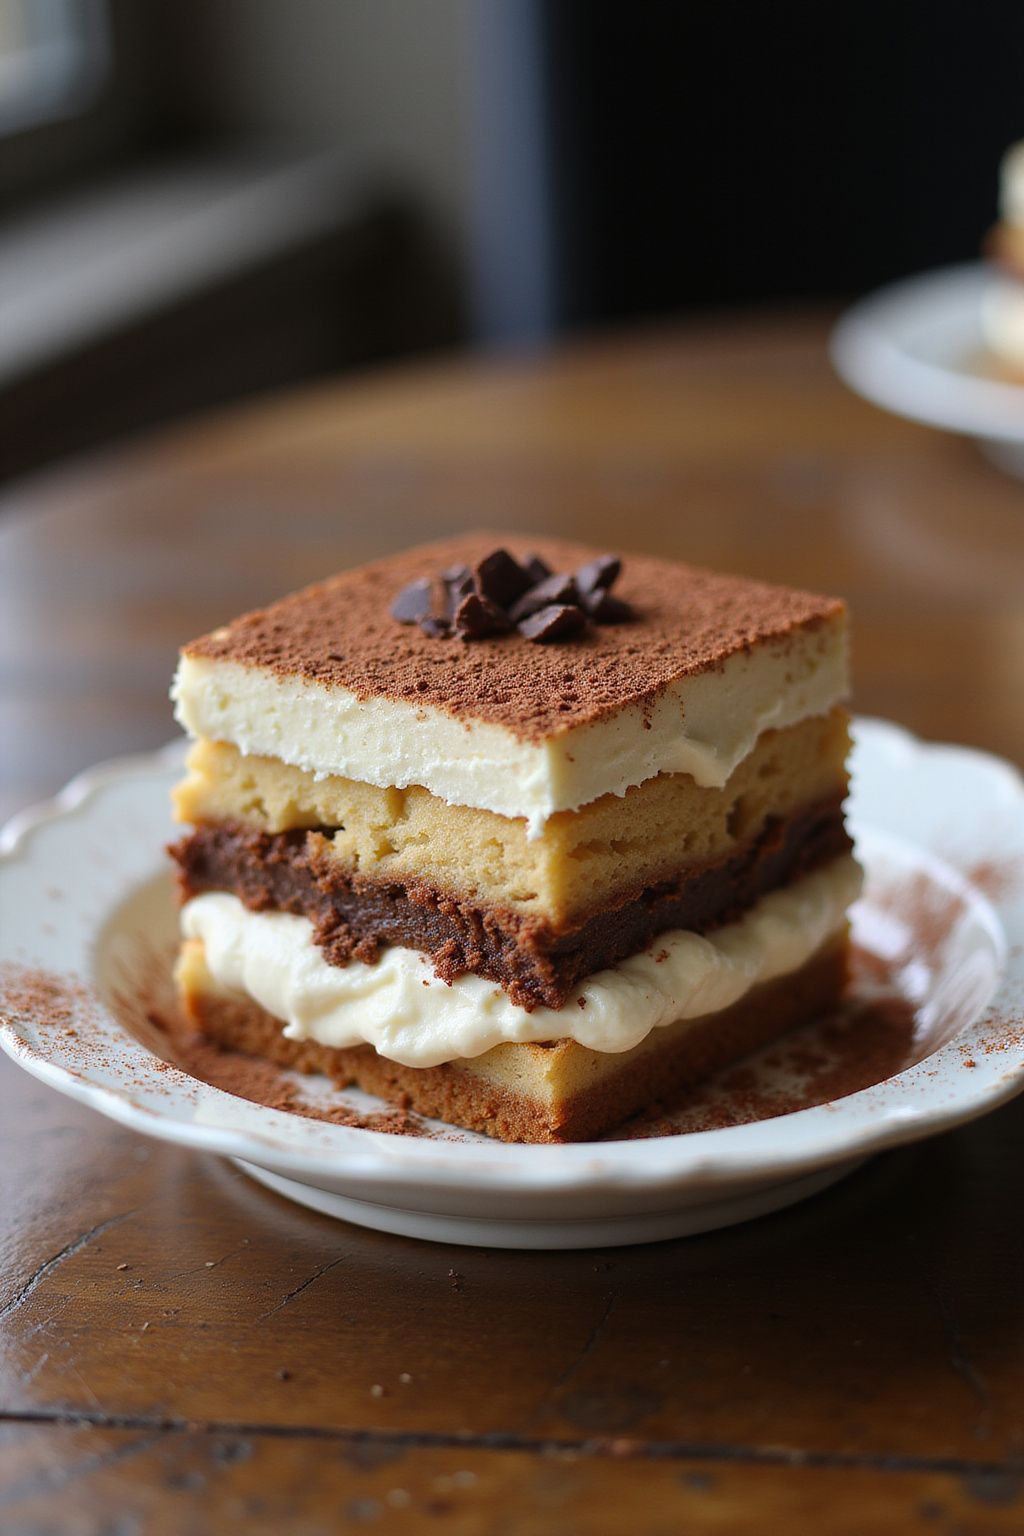
Classic Tiramisu is a delicious and creamy dessert that layers coffee-soaked ladyfingers with a rich mascarpone mixture. It’s the perfect treat for a special occasion or when you simply want to impress your guests! This no-bake dessert is easy to make and will leave everyone asking for seconds.
Prep Time: 30 minutes
Additional Time: 4 hours (chill time)
Total Time: 4 hours 30 minutes
Servings: 8
Ingredients:
- 6 egg yolks
- 3/4 cup granulated sugar
- 2/3 cup milk
- 1 1/4 cups heavy cream
- 8 oz mascarpone cheese
- 1 cup strong brewed coffee (cooled)
- 1/2 cup coffee liqueur (optional)
- 24 ladyfinger cookies
- Cocoa powder (for dusting)
- Dark chocolate shavings (optional for garnish)
Instructions:
Start by whisking the egg yolks and sugar in a bowl until it turns pale and creamy. This should take about 3 to 5 minutes. Then, heat the milk in a saucepan until it’s warm, but not boiling. Gradually add the warm milk to the yolk mixture while whisking continuously to avoid cooking the eggs.
Next, return the mixture to the saucepan and cook over low heat. Stir constantly until it thickens enough to coat the back of a spoon. Once thickened, remove it from the heat and let it cool completely.
In another bowl, whip the heavy cream until stiff peaks form. Gently fold in the cooled egg mixture and mascarpone cheese until well combined. Be careful not to deflate the whipped cream.
Now, in a shallow dish, combine the cooled coffee and coffee liqueur if you’re using it. Quickly dip each ladyfinger in the coffee mixture, making sure not to soak them too long. Layer half of the soaked ladyfingers in the bottom of a serving dish.
Spread half of the mascarpone mixture over the ladyfingers. Repeat the layers with the remaining ladyfingers and mascarpone mixture. Smooth the top with a spatula, then cover the dish with plastic wrap. Refrigerate for at least 4 hours to allow the flavors to meld.
Before serving, dust the top with cocoa powder and add dark chocolate shavings for an extra touch! Serve chilled and enjoy!
Tips:
- Use fresh mascarpone cheese for a creamier texture.
- For a stronger coffee flavor, use dark roast coffee and make it slightly stronger than usual.
- Allowing the tiramisu to sit overnight enhances the flavors even more!
Nutrition Facts:
- Calories: 450 per serving
- Total Fat: 32g
- Saturated Fat: 18g
- Cholesterol: 155mg
- Sodium: 95mg
- Total Carbohydrates: 36g
- Dietary Fiber: 1g
- Sugars: 20g
- Protein: 6g
5 Caramel Apple Crisp

Caramel Apple Crisp is the perfect dessert to enjoy when the weather gets cooler. This delightful treat features sweet apples topped with a crunchy oatmeal and brown sugar mixture, all drizzled with rich caramel sauce. It’s like a warm hug in a bowl and is sure to impress your family and friends!
Prep Time: 15 minutes
Cook Time: 35 minutes
Total Time: 50 minutes
Servings: 8
Ingredients:
- 6 medium apples, peeled and sliced
- 1/2 cup granulated sugar
- 1 tablespoon lemon juice
- 1 teaspoon cinnamon
- 1 cup rolled oats
- 1/2 cup all-purpose flour
- 1/2 cup brown sugar
- 1/4 teaspoon salt
- 1/2 cup unsalted butter, softened
- 1 cup caramel sauce (store-bought or homemade)
Instructions:
Start by preheating your oven to 350°F (175°C). In a large bowl, combine the sliced apples, granulated sugar, lemon juice, and cinnamon. Toss everything together until the apples are well coated.
Next, transfer the apple mixture into a greased 9×13 inch baking dish. In another bowl, mix the rolled oats, flour, brown sugar, and salt. Add the softened butter to this mixture and use your fingers or a fork to combine until it resembles coarse crumbs.
Spread the oat topping evenly over the apples in the baking dish. Bake the crisp in the preheated oven for 30-35 minutes, or until the topping is golden brown and the apples are bubbling.
Once it’s done baking, remove it from the oven and let it cool for about 5-10 minutes. Drizzle the caramel sauce over the warm apple crisp just before serving. Enjoy with a scoop of vanilla ice cream for an extra treat!
Tips:
- Use a mix of tart and sweet apples for a more complex flavor.
- For added crunch, you can include chopped nuts like pecans or walnuts in the topping.
- If you prefer a gooier texture, you can increase the amount of caramel sauce used.
Nutrition Facts:
- Calories: 320 per serving
- Total Fat: 16g
- Saturated Fat: 10g
- Cholesterol: 40mg
- Sodium: 150mg
- Total Carbohydrates: 46g
- Dietary Fiber: 3g
- Sugars: 22g
- Protein: 3g
6 Coconut Cream Pie
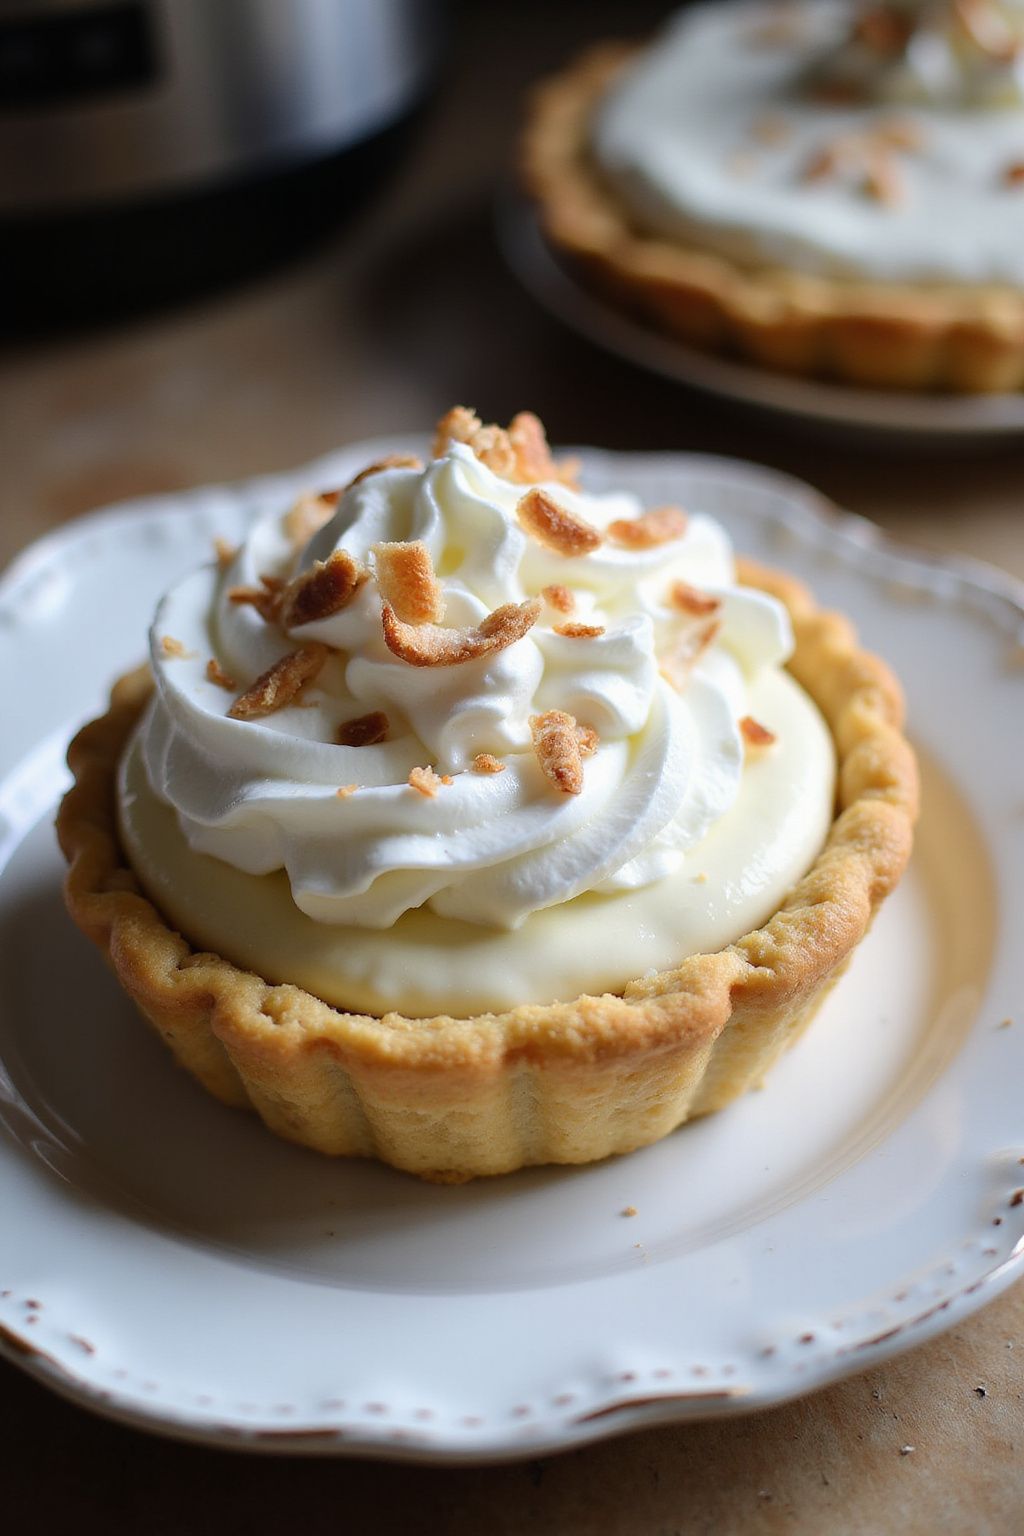
Coconut Cream Pie is a delicious dessert that’s perfect for any occasion. Its creamy texture and sweet coconut flavor will make your taste buds dance with joy. Plus, it’s simple to make, and your family will love it!
Prep Time: 20 minutes
Additional Time: 3 hours
Total Time: 3 hours 20 minutes
Servings: 8
Ingredients:
- 1 pre-made pie crust (9-inch)
- 1 cup shredded coconut (sweetened or unsweetened)
- 1 cup milk
- 1 cup heavy cream
- 3/4 cup sugar
- 1/4 cup cornstarch
- 1/4 teaspoon salt
- 4 large egg yolks
- 1 teaspoon vanilla extract
- 1 tablespoon butter
- Whipped cream (for topping)
- Additional toasted coconut (for garnish)
Instructions:
Start by preparing the pie crust according to package instructions. Bake it until golden brown and let it cool completely.
In a medium saucepan, combine 1 cup of milk, 1 cup of heavy cream, 3/4 cup of sugar, 1/4 cup of cornstarch, and 1/4 teaspoon of salt. Whisk these ingredients together over medium heat.
Next, cook the mixture while stirring constantly until it thickens and starts to bubble. This should take about 5-7 minutes. Once thickened, remove the saucepan from heat.
In another bowl, whisk the 4 egg yolks. Gradually pour in a small amount of the hot mixture to temper the yolks. This helps prevent them from cooking too quickly. Stir this back into the saucepan.
Return the saucepan to low heat and cook for a couple more minutes. Then, stir in the 1 teaspoon of vanilla extract and 1 tablespoon of butter. Mix until smooth.
Now, add the shredded coconut into the filling and give it a good stir. Pour this creamy coconut filling into the cooled pie crust. Cover the pie with plastic wrap and refrigerate for at least 3 hours to allow it to set.
Once it’s set, top the pie with whipped cream and sprinkle the additional toasted coconut on top. Slice and serve your Coconut Cream Pie to family and friends!
Tips:
- For extra flavor, you can toast the shredded coconut in the oven until golden brown before adding it to the filling.
- Feel free to use coconut milk instead of regular milk for a richer coconut flavor.
- Make sure the pie is fully chilled before serving for the best texture.
Nutrition Facts:
- Calories: 350 per slice
- Total Fat: 25g
- Saturated Fat: 15g
- Cholesterol: 120mg
- Sodium: 150mg
- Total Carbohydrates: 32g
- Dietary Fiber: 2g
- Sugars: 20g
- Protein: 4g
7 Lemon Blueberry Cheesecake
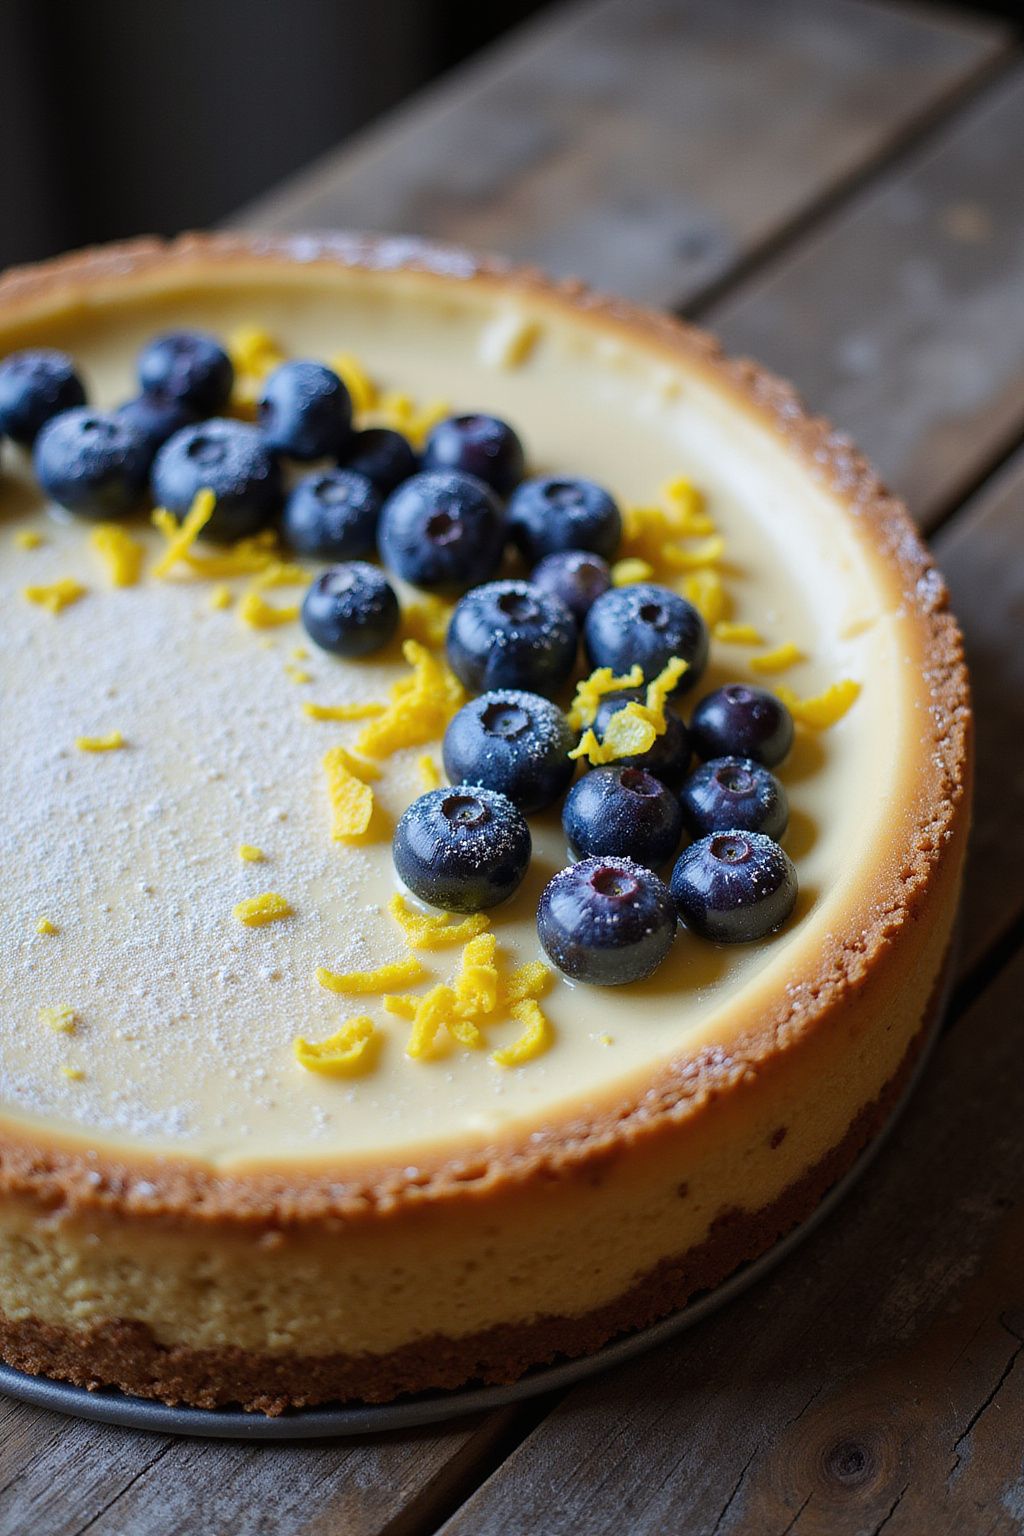
Lemon Blueberry Cheesecake is a delightful dessert that combines the creamy goodness of cheesecake with the zesty taste of lemon and sweet, juicy blueberries. Perfect for any occasion, this dessert will impress your family and friends!
Prep Time: 30 minutes
Additional Time: 4 hours
Total Time: 4 hours 30 minutes
Servings: 8
Ingredients:
- 1 ½ cups of graham cracker crumbs
- ⅓ cup of granulated sugar
- ½ cup of unsalted butter, melted
- 16 oz of cream cheese, softened
- ½ cup of granulated sugar
- 2 large eggs
- 1 tablespoon of lemon zest
- ¼ cup of fresh lemon juice
- 1 teaspoon of vanilla extract
- 1 cup of fresh blueberries
- ¼ cup of powdered sugar (for topping)
- Additional blueberries for garnish (optional)
Instructions:
Begin by preheating your oven to 325°F (163°C). In a mixing bowl, combine the graham cracker crumbs, granulated sugar, and melted butter. Mix until the crumbs are well coated. Press this mixture firmly into the bottom of a 9-inch springform pan to form the crust.
Next, in another bowl, beat the cream cheese until smooth. Add in granulated sugar, and mix until well blended. Then, add the eggs, one at a time, and continue mixing. Stir in the lemon zest, lemon juice, and vanilla extract until everything is fully combined.
Gently fold in the fresh blueberries into the cream cheese mixture. Pour this mixture over the prepared crust in your springform pan. Bake in the preheated oven for about 45-50 minutes, or until the edges are set but the center is still slightly jiggly.
Once baked, turn off the oven and leave the cheesecake inside with the door ajar for about 1 hour to cool slowly. After that, remove the cheesecake from the oven and let it cool at room temperature for an additional 30 minutes. Cover it and chill in the refrigerator for at least 4 hours, preferably overnight, to set.
Before serving, dust the top with powdered sugar and add some additional blueberries for garnish if desired. Slice, serve, and enjoy your delicious Lemon Blueberry Cheesecake!
Tips:
- For a stronger lemon flavor, add more lemon zest to the filling.
- Be careful not to overmix the batter once you add the eggs; this keeps the cheesecake smooth.
- Serve with a dollop of whipped cream for extra creaminess!
Nutrition Facts:
- Calories: 350 per serving
- Total Fat: 22g
- Saturated Fat: 12g
- Cholesterol: 80mg
- Sodium: 250mg
- Total Carbohydrates: 35g
- Dietary Fiber: 1g
- Sugars: 20g
- Protein: 5g
8 Mocha Mousse Cups
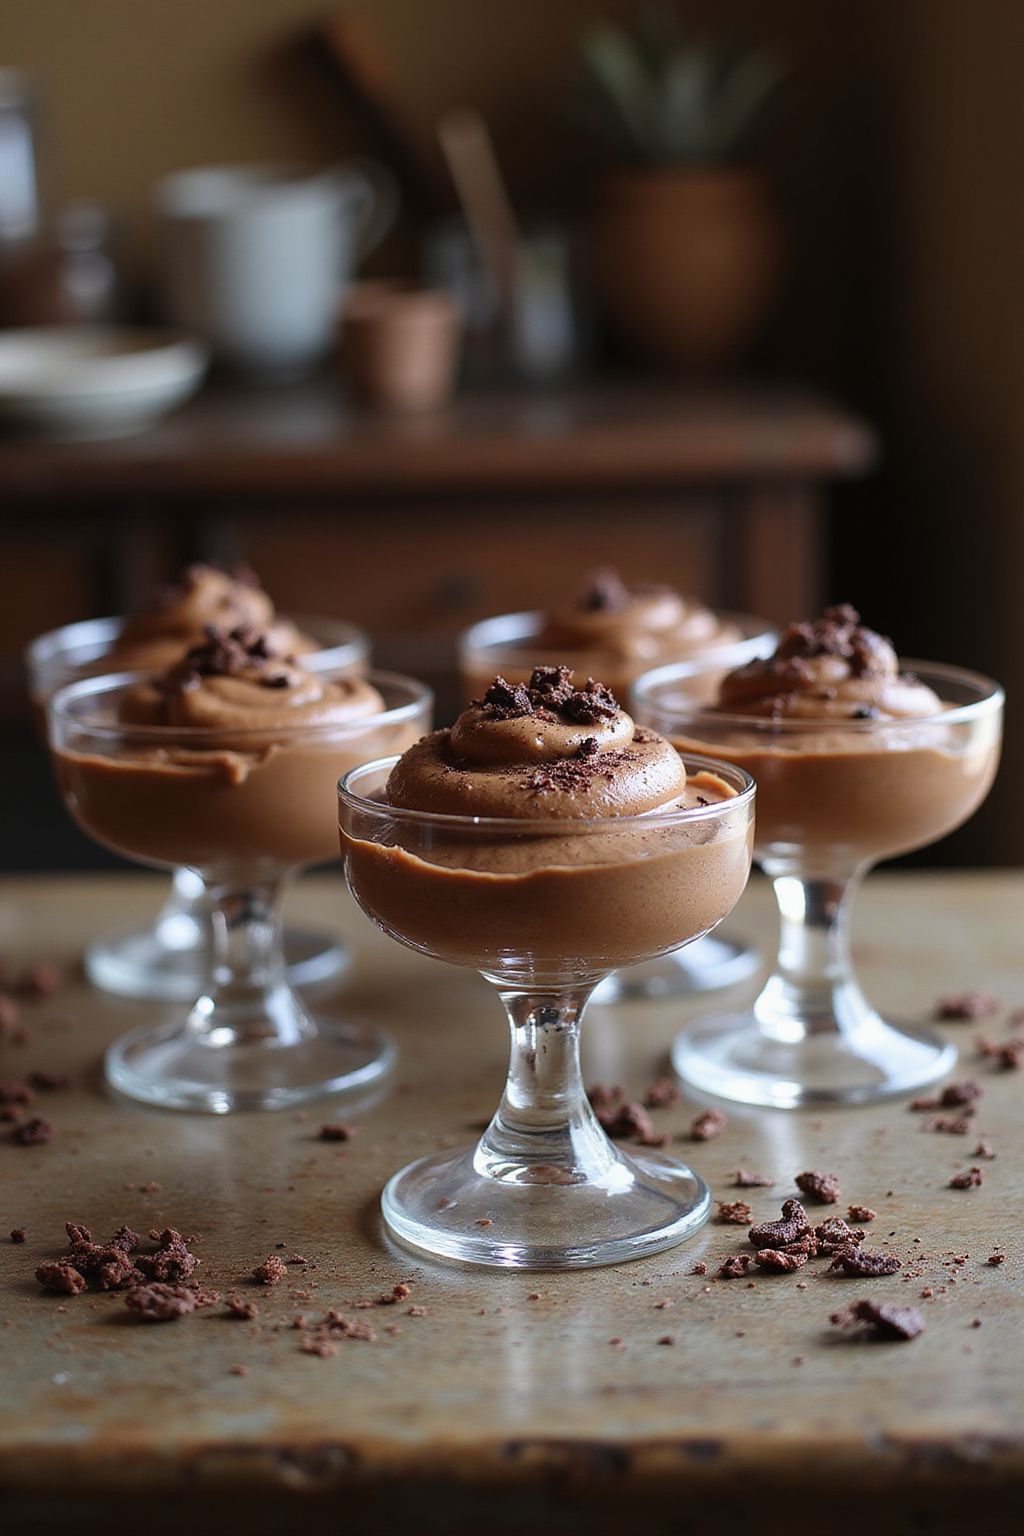
Indulge in the rich and creamy delight of Mocha Mousse Cups. These easy-to-make treats combine the bold flavor of coffee with sweet chocolate, resulting in a dessert that’s sure to impress. Perfect for serving at a dinner party or enjoying on a cozy evening at home, these mousse cups are a real treat!
Prep Time: 20 minutes
Additional Time: 2 hours (Chill Time)
Total Time: 2 hours 20 minutes
Servings: 6
Ingredients:
- 1 cup heavy whipping cream
- 1/2 cup semi-sweet chocolate chips
- 1/4 cup strong brewed coffee (cooled)
- 2 tablespoons sugar
- 1 teaspoon vanilla extract
- 1/4 teaspoon salt
- Chocolate shavings for garnish (optional)
Instructions:
Start by melting the semi-sweet chocolate chips. Place them in a microwave-safe bowl and heat in the microwave for 30 seconds. Stir and keep heating in 15-second intervals until smooth. Set the melted chocolate aside to cool slightly.
In a separate bowl, pour in the heavy whipping cream. Use a hand mixer or stand mixer to beat the cream on medium speed until it starts to thicken. Add the sugar, vanilla extract, and salt. Continue mixing until soft peaks form.
Once the chocolate has cooled, stir in the strong brewed coffee into the chocolate. Carefully fold the chocolate mixture into the whipped cream using a spatula. Be gentle to keep the mousse light and airy.
After combining everything well, distribute the mousse into individual cups or ramekins. Cover them with plastic wrap and chill in the refrigerator for at least 2 hours to firm up.
When ready to serve, remove from the fridge and garnish with chocolate shavings if desired. Enjoy your delicious Mocha Mousse Cups!
Tips:
- For added coffee flavor, you can use espresso instead of brewed coffee.
- Make sure the chocolate isn’t too hot before mixing it with the whipped cream to prevent melting it down.
- You can top the mousse with whipped cream for an extra touch of sweetness.
Nutrition Facts:
- Calories: 250
- Total Fat: 18g
- Saturated Fat: 11g
- Cholesterol: 60mg
- Sodium: 50mg
- Total Carbohydrates: 20g
- Sugars: 12g
- Protein: 2g
9 Red Velvet Cupcakes with Cream Cheese Frosting
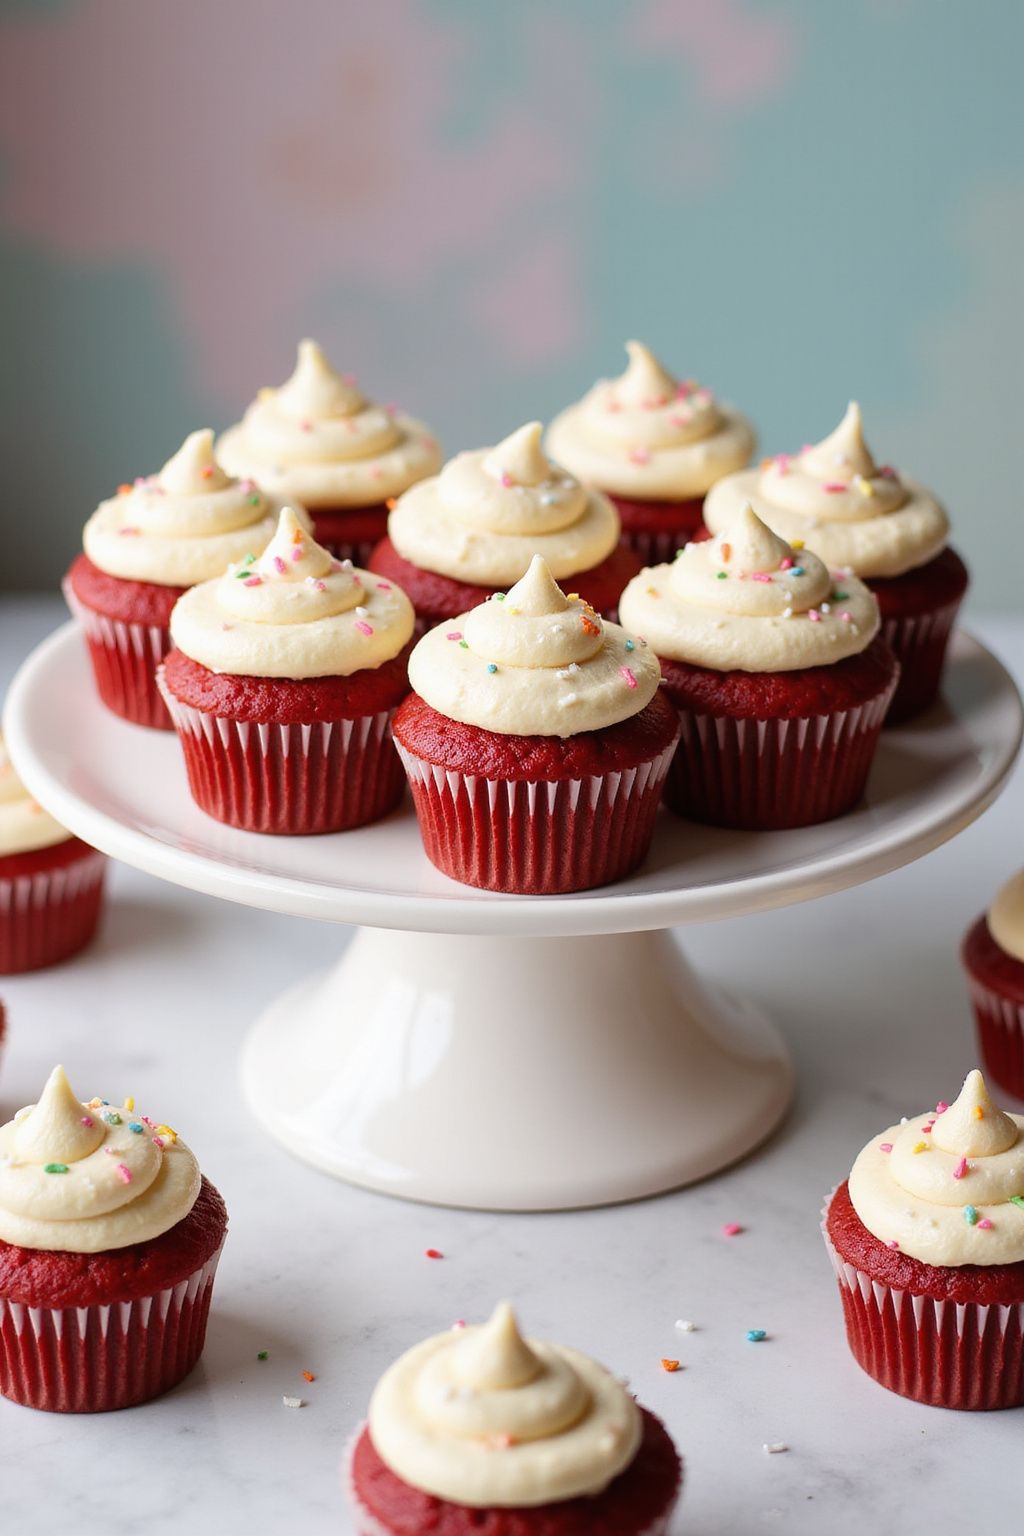
These delicious Red Velvet Cupcakes are perfect for any occasion! With their rich flavor and beautiful red color, they’re sure to impress. Topped with creamy cream cheese frosting, these cupcakes are a sweet treat that everyone loves.
Prep Time: 20 minutes
Cook Time: 20 minutes
Additional Time: 30 minutes (for frosting)
Total Time: 1 hour 10 minutes
Servings: 12 cupcakes
Ingredients:
- 1 ½ cups all-purpose flour
- 1 cup granulated sugar
- 1 teaspoon baking soda
- 1 teaspoon cocoa powder
- ½ teaspoon salt
- 1 cup vegetable oil
- 1 cup buttermilk, room temperature
- 2 large eggs, room temperature
- 2 tablespoons red food coloring
- 1 teaspoon vanilla extract
- 1 teaspoon white vinegar
For the Cream Cheese Frosting:
- 8 oz cream cheese, softened
- ½ cup unsalted butter, softened
- 4 cups powdered sugar
- 1 teaspoon vanilla extract
- 2-3 tablespoons milk (if needed for consistency)
Instructions:
Start by preheating your oven to 350°F (175°C). Line a muffin tin with paper cupcake liners. This will make it easy to remove the cupcakes later.
In a large bowl, mix together the flour, sugar, baking soda, cocoa powder, and salt. Stir until everything is combined and set aside.
In another bowl, combine the oil, buttermilk, eggs, red food coloring, vanilla extract, and vinegar. Whisk these wet ingredients until they are smooth and well blended.
Now, pour the wet mixture into the dry ingredients. Stir gently until just combined. Don’t overmix; a few lumps are okay!
Scoop the batter into the prepared muffin tin, filling each liner about two-thirds full. Bake for 20 minutes, or until a toothpick inserted comes out clean.
Once done, remove the cupcakes from the oven and let them cool in the tin for 5 minutes. Then, transfer them to a wire rack to cool completely.
While the cupcakes are cooling, make the cream cheese frosting. In a mixing bowl, beat the cream cheese and butter together until creamy. Gradually add in the powdered sugar and vanilla extract, mixing until smooth. If the frosting is too thick, add milk a tablespoon at a time until you reach your desired consistency.
Once the cupcakes are cool, frost them generously with cream cheese frosting. You can use a knife or a piping bag for a fun design!
Tips:
- For extra chocolate flavor, add in 1 tablespoon of cocoa powder to the cream cheese frosting.
- Store leftover cupcakes in an airtight container in the refrigerator for up to 5 days.
- Add fun sprinkles on top for decoration if you want to make them extra festive!
Nutrition Facts:
- Calories: 220 per cupcake
- Total Fat: 10g
- Saturated Fat: 4g
- Trans Fat: 0g
- Cholesterol: 30mg
- Sodium: 200mg
- Total Carbohydrates: 32g
- Dietary Fiber: 0g
- Sugars: 20g
- Protein: 2g
10 Silky Chocolate Pots de Crème
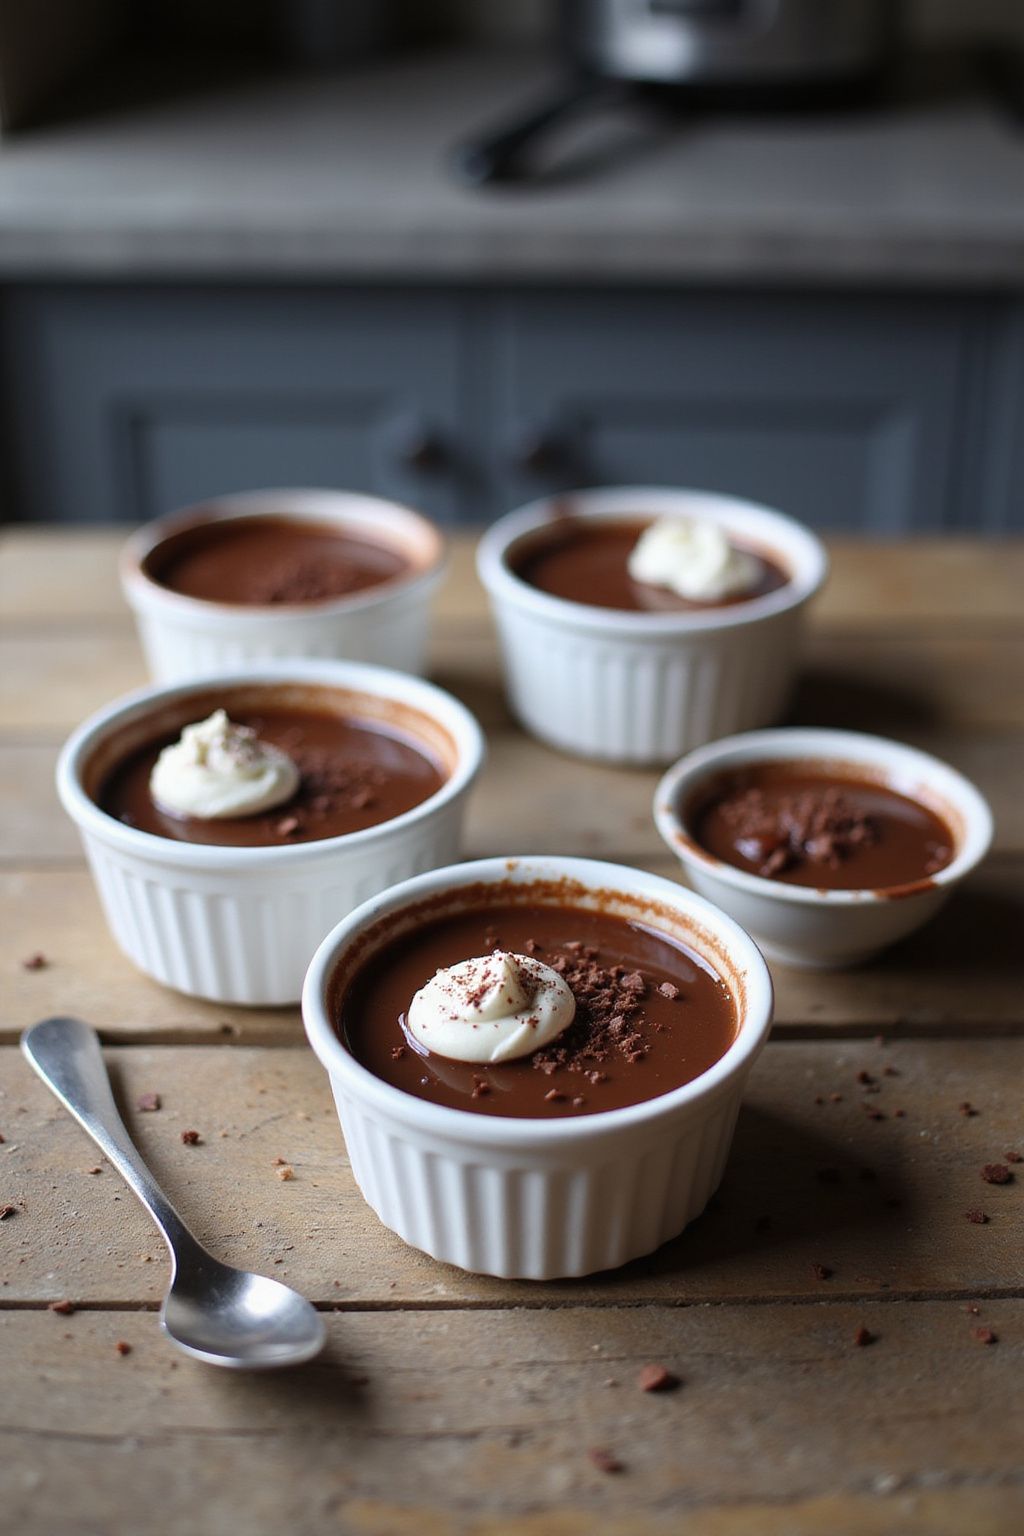
Silky Chocolate Pots de Crème are rich, creamy desserts that will melt in your mouth. They are perfect for impressing guests or treating yourself. With just a few simple ingredients, you can create a sweet chocolate delight!
Prep Time: 15 minutes
Additional Time: 4 hours (chilling)
Total Time: 4 hours 15 minutes
Servings: 4
Ingredients:
- 1 cup heavy cream
- 1 cup whole milk
- 6 oz semisweet chocolate, chopped
- 1/2 cup granulated sugar
- 4 large egg yolks
- 1 teaspoon vanilla extract
- Pinch of salt
Instructions:
Begin by preheating your oven to 325°F (160°C). This will prepare it for baking the pots de crème gently.
In a medium saucepan, combine 1 cup of heavy cream and 1 cup of whole milk. Heat the mixture over medium heat until it starts to steam, but do not let it boil. Stir occasionally to prevent scorching.
Once heated, add the 6 oz of chopped semisweet chocolate to the cream mixture. Keep stirring until the chocolate is completely melted and the mixture is smooth. This should only take a few minutes.
In a separate bowl, whisk together the 4 large egg yolks, 1/2 cup of granulated sugar, 1 teaspoon of vanilla extract, and a pinch of salt. Make sure to whisk until it is well combined and slightly frothy.
Slowly pour the warm chocolate mixture into the egg yolk mixture while whisking constantly. This will help temper the eggs and prevent them from scrambling.
Once fully combined, strain the mixture through a fine-mesh sieve into a large measuring cup or bowl. This removes any lumps and ensures a silky texture.
Divide the mixture evenly into four small ramekins or pots. Place them in a baking dish and carefully add hot water to the dish until it reaches halfway up the sides of the ramekins. This water bath helps the chocolate cook evenly.
Bake in the preheated oven for about 30 to 35 minutes. The pots de crème are done when they are just set but still slightly jiggly in the center.
After baking, remove them from the water bath and let them cool to room temperature. Once cooled, cover each pot with plastic wrap and refrigerate for at least 4 hours to chill completely.
Tips:
- For an extra touch, top with whipped cream or shaved chocolate before serving.
- Use high-quality chocolate for the richest flavor.
- If you want to mix things up, try adding a splash of espresso for a mocha flavor!
Nutrition Facts:
- Calories: 320
- Total Fat: 22g
- Saturated Fat: 13g
- Cholesterol: 155mg
- Carbohydrates: 30g
- Sugars: 25g
- Protein: 4g
11 Peach Cobbler with Vanilla Ice Cream
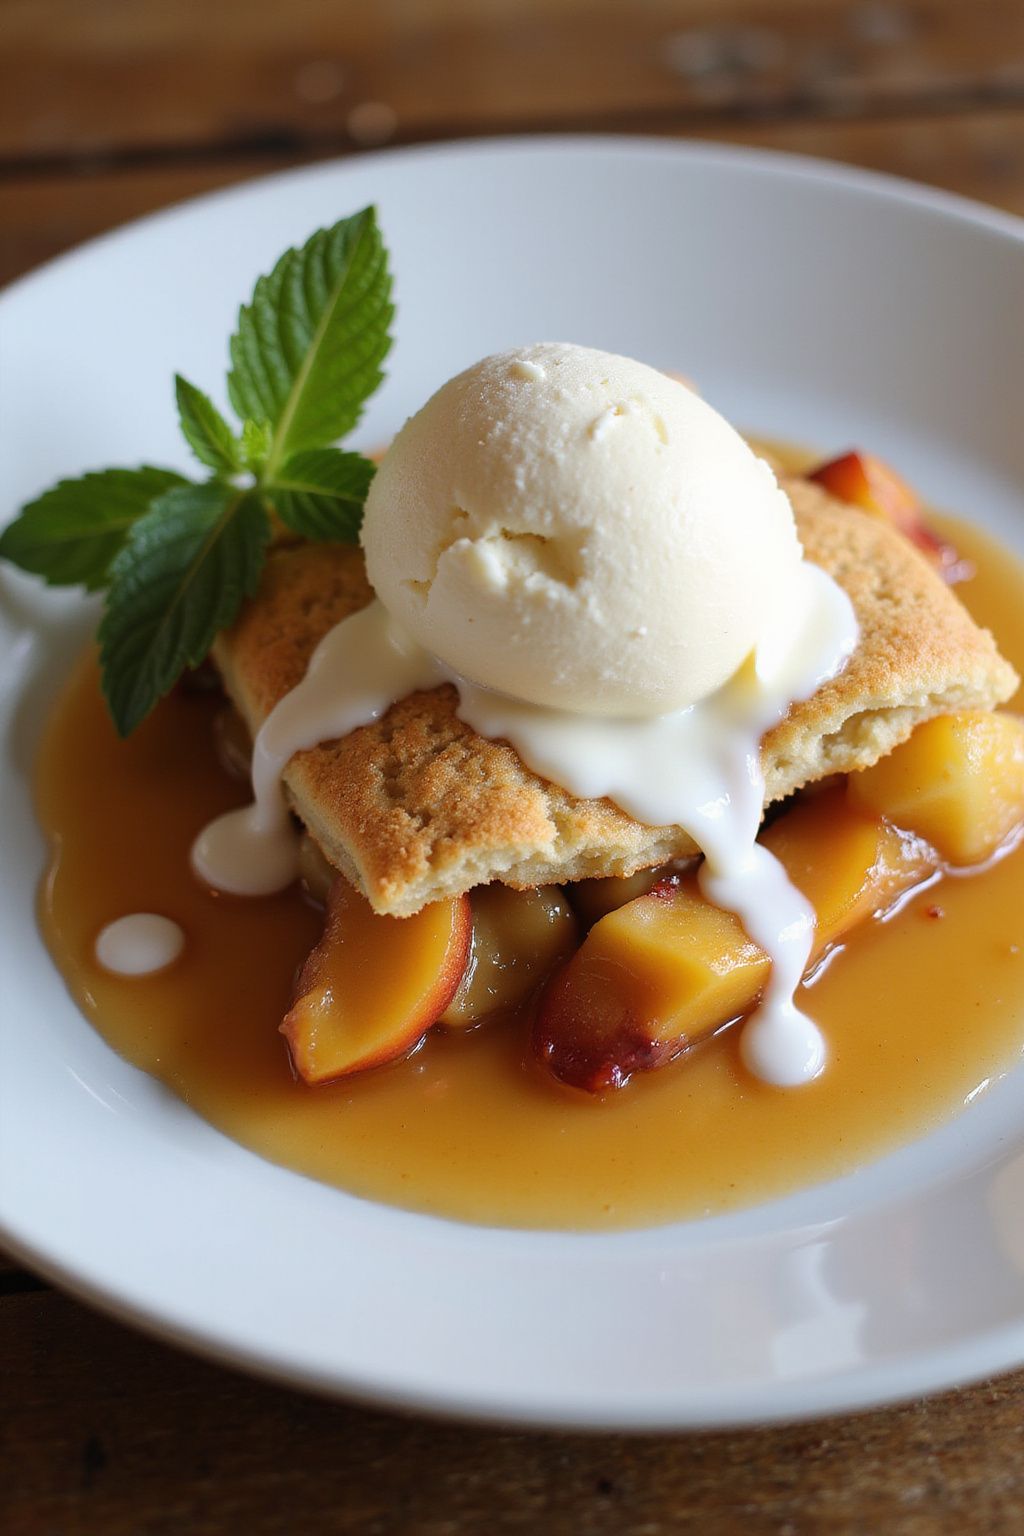
Peach cobbler is a delicious dessert that combines sweet, juicy peaches with a buttery crust. Topped with cold vanilla ice cream, it makes for the perfect summer treat. Let’s dive into making this delightful dish!
Prep Time: 15 minutes
Cook Time: 45 minutes
Total Time: 1 hour
Servings: 8
Ingredients:
- 6 cups fresh peaches, peeled and sliced
- 1 cup granulated sugar
- 1 teaspoon vanilla extract
- 1 tablespoon lemon juice
- 1 cup all-purpose flour
- 1 tablespoon baking powder
- 1/2 teaspoon salt
- 1 cup milk
- 1/2 cup unsalted butter, melted
- 1 teaspoon ground cinnamon (optional)
- Vanilla ice cream for serving
Instructions:
Start by preheating your oven to 375°F (190°C). Prepare a baking dish by greasing it lightly with butter or cooking spray.
In a large bowl, combine the peaches, 1/2 cup sugar, vanilla extract, and lemon juice. Toss everything together to coat the peaches well. Let this mixture sit while you prepare the batter.
In another bowl, mix the flour, baking powder, salt, and the remaining 1/2 cup sugar. Stir in the milk and the melted butter until just combined. Don’t overmix; it’s okay if there are a few lumps.
Pour the batter into the prepared baking dish. Next, carefully spoon the peach mixture over the top of the batter. Do not stir it in; the peaches will settle as it bakes, creating a delicious cobbler effect.
Sprinkle a dash of ground cinnamon over the top if you want extra flavor. Place the baking dish in the preheated oven and bake for about 45 minutes, or until the top is golden brown and the peaches are bubbly.
When done, take the cobbler out of the oven and let it cool for a few minutes. Serve it warm with a scoop of vanilla ice cream on each serving.
Tips:
- For an extra twist, add a few berries with the peaches for mixed fruit flavor.
- You can use frozen peaches if fresh ones are not available. Just make sure they are fully thawed and drained before using.
- To make it even easier, use store-bought pie crust instead of making the batter from scratch.
Nutrition Facts:
- Calories: 250 per serving
- Total Fat: 10g
- Saturated Fat: 5g
- Cholesterol: 35mg
- Sodium: 150mg
- Total Carbohydrates: 38g
- Dietary Fiber: 2g
- Sugars: 20g
- Protein: 3g
Enjoy your homemade peach cobbler with a scoop of vanilla ice cream!
12 Almond Joy Bars

Indulge in a delicious treat with these homemade Almond Joy Bars! They combine the rich flavors of chocolate, coconut, and crunchy almonds, making them a perfect snack or dessert. These bars are super easy to make and are sure to satisfy your sweet tooth.
Prep Time: 20 minutes
Additional Time: 2 hours
Total Time: 2 hours 20 minutes
Servings: 12 bars
Ingredients:
- 1 cup shredded coconut, sweetened
- 1/2 cup creamy almond butter
- 1/4 cup honey or maple syrup
- 1 teaspoon vanilla extract
- 1 cup dark chocolate chips
- 1/2 cup almonds, whole or slivered
Instructions:
Start by preparing a square baking dish, about 8×8 inches, by lining it with parchment paper. This will make removing the bars easier once they are set.
In a mixing bowl, combine the shredded coconut, almond butter, honey, and vanilla extract. Stir everything together until well mixed. The mixture should be sticky and clump together easily.
Press the coconut mixture firmly into the bottom of the prepared baking dish. Make sure it’s packed tightly so the bars hold their shape when cut.
Next, melt the dark chocolate chips in a microwave-safe bowl. Heat in the microwave in 30-second intervals, stirring in between, until it’s smooth and melted.
Pour the melted chocolate over the pressed coconut base in the baking dish. Use a spatula to spread the chocolate evenly over the top.
Sprinkle the almonds over the melted chocolate. Press them down lightly so they stick. Then, refrigerate the bars for about 2 hours until the chocolate is firm and set.
Once the bars are set, remove them from the baking dish using the parchment paper. Cut them into 12 equal squares or rectangles, and enjoy!
Tips:
- For extra flavor, try adding a pinch of salt to the coconut mixture before pressing it into the pan.
- You can substitute peanut butter for almond butter if you prefer a different taste.
- Keep the bars stored in an airtight container in the refrigerator for up to a week.
Nutrition Facts:
- Calories: 200 per bar
- Protein: 3g
- Carbohydrates: 22g
- Fat: 12g
- Sugar: 10g
13 Strawberry Shortcake Trifle
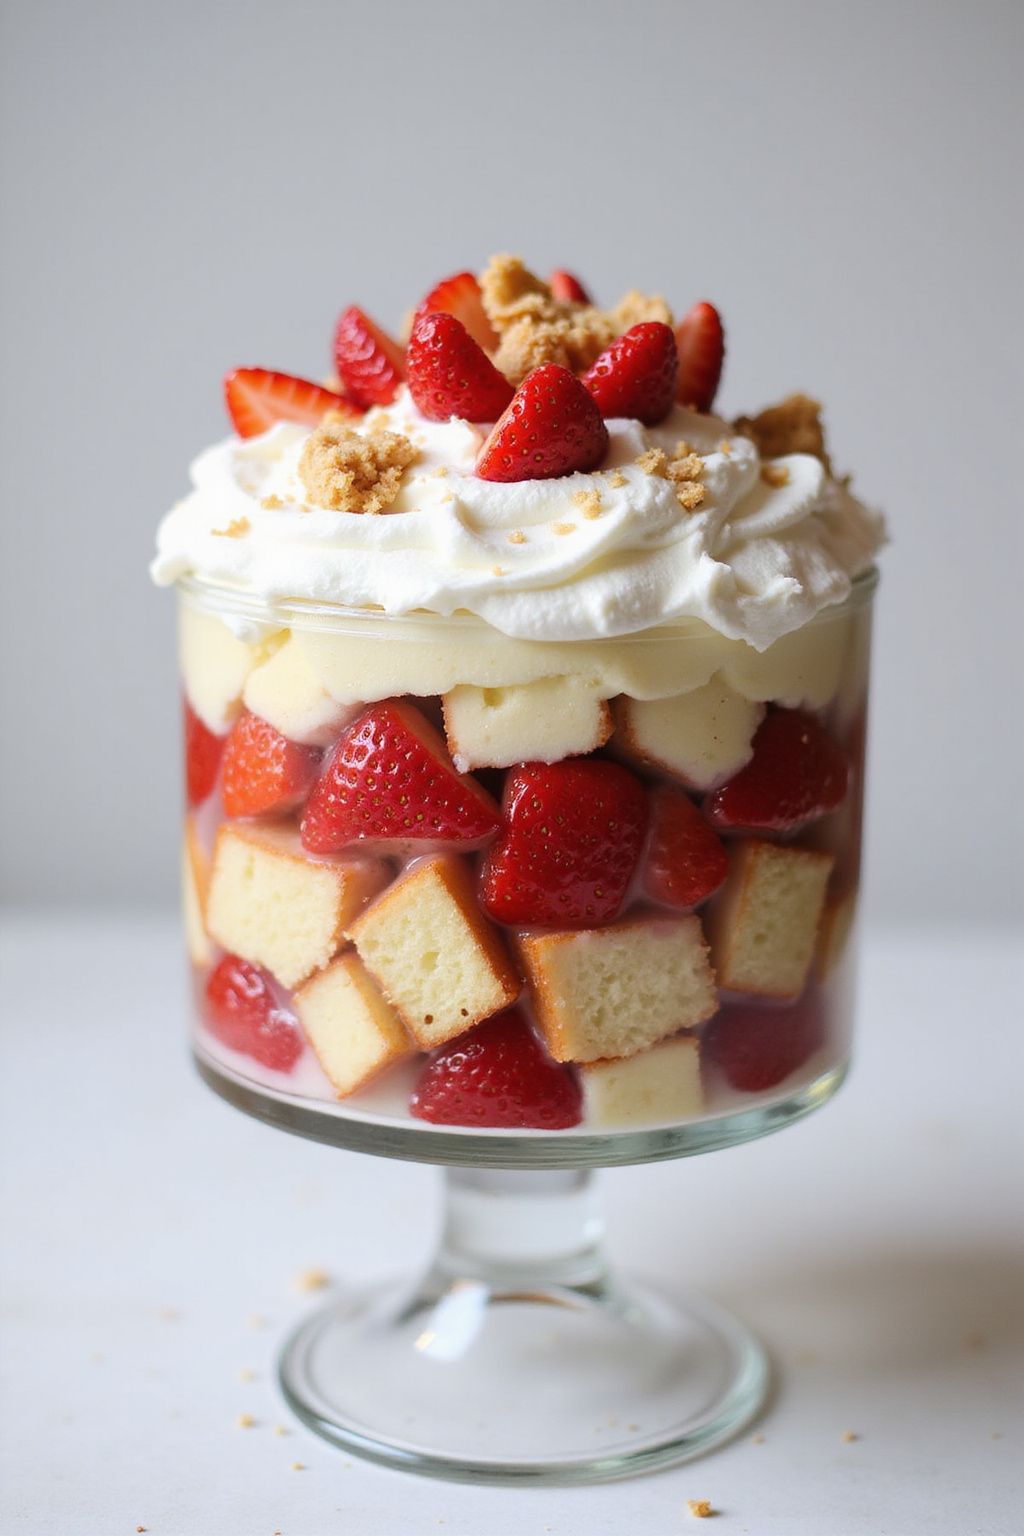
Layers of fluffy cake, sweet strawberries, and creamy whipped topping make this Strawberry Shortcake Trifle a delightful dessert. It’s perfect for parties or family gatherings, and it comes together easily, making it a great choice for any occasion.
Prep Time: 20 minutes
Additional Time: 2 hours
Total Time: 2 hours 20 minutes
Servings: 6-8
Ingredients:
- 2 cups fresh strawberries, sliced
- 1/4 cup granulated sugar
- 1 cup heavy cream
- 1/2 cup powdered sugar
- 1 teaspoon vanilla extract
- 1 store-bought pound cake, cut into cubes
- 1 cup vanilla pudding (homemade or store-bought)
Instructions:
Start by preparing your strawberries. In a mixing bowl, combine the sliced strawberries with granulated sugar. Toss them gently and let them sit for about 15 minutes. This will help release their natural juices.
Next, whip the heavy cream using a mixer until it starts to thicken. Gradually add the powdered sugar and vanilla extract. Continue whipping until soft peaks form. Make sure not to overwhip; you want it light and fluffy.
Now, it’s time to assemble your trifle. Take a large glass bowl or individual serving glasses. Start with a layer of pound cake cubes at the bottom. Next, add a layer of the vanilla pudding, followed by a layer of the sweetened strawberries with their juices.
Repeat this layering process until you reach the top of your dish, ending with a generous layer of whipped cream. You can swirl it around for a pretty finish.
Once it’s assembled, cover the trifle with plastic wrap and place it in the refrigerator for about two hours. This lets the flavors blend together beautifully.
Before serving, you can garnish the top with a few extra sliced strawberries or a sprinkle of crumbled pound cake for a nice touch. Enjoy your creamy and fruity creation!
Tips:
- For more flavor, you can add a splash of lemon juice to the strawberries.
- If you like a bit of crunch, consider layering in some toasted slivered almonds.
- This recipe can be made a day ahead; just keep it covered in the fridge until you’re ready to serve.
Nutrition Facts:
- Calories: 320 per serving
- Total Fat: 18g
- Saturated Fat: 10g
- Cholesterol: 65mg
- Sodium: 120mg
- Carbohydrates: 36g
- Dietary Fiber: 1g
- Sugars: 20g
- Protein: 4g
14 Funfetti Birthday Cake
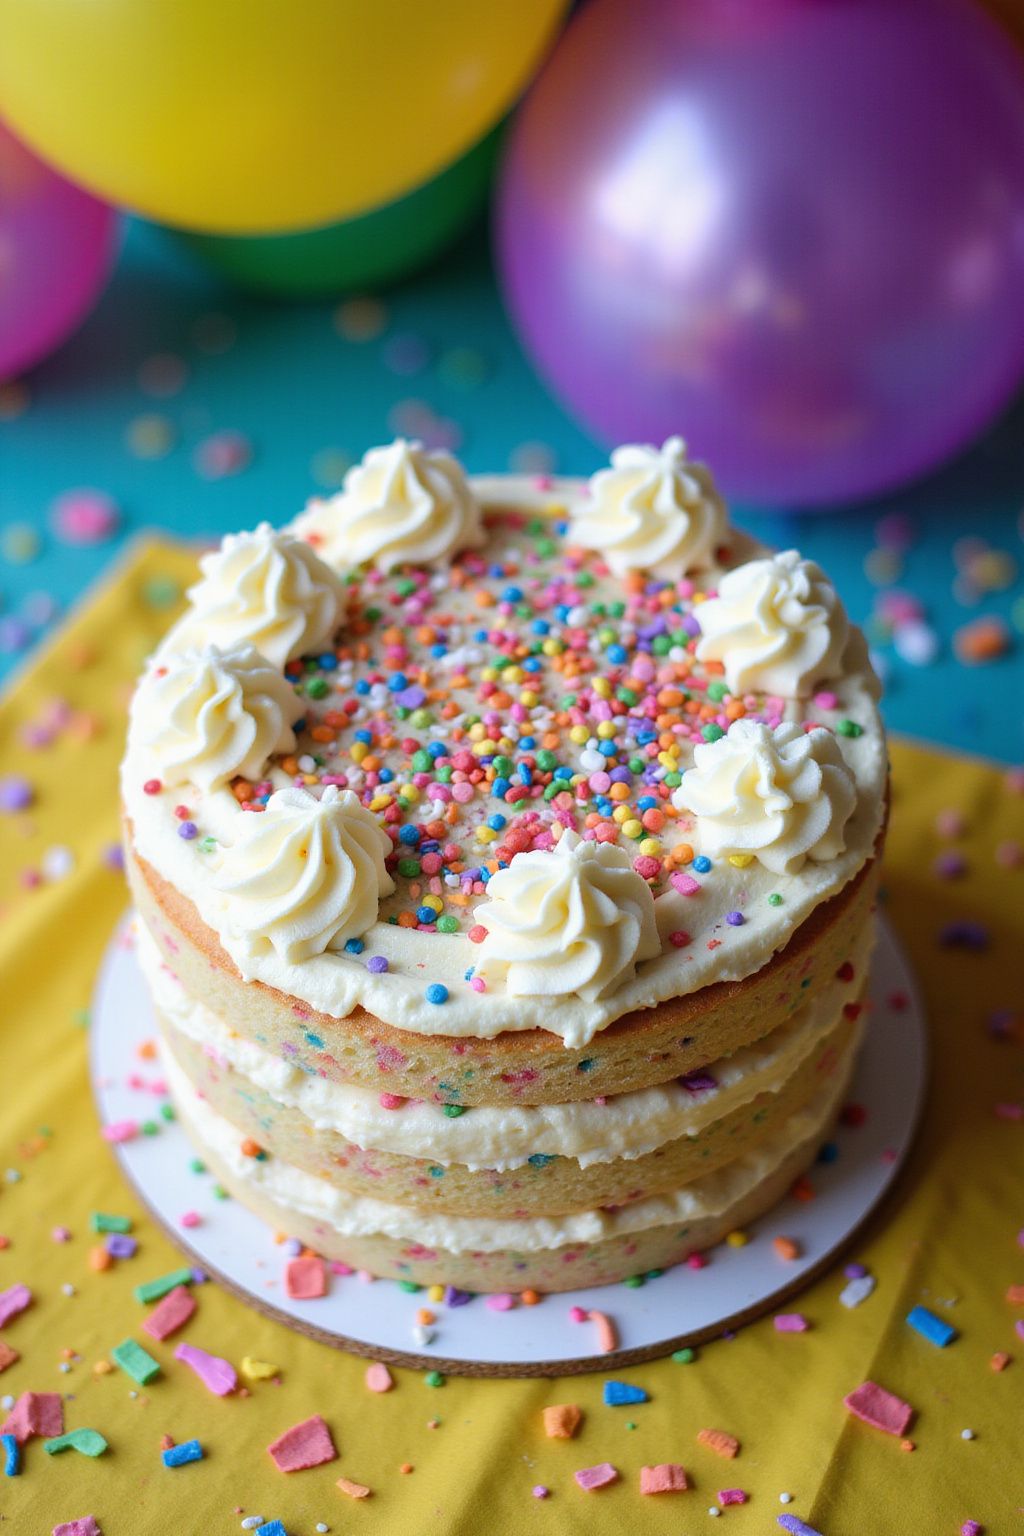
Get ready to celebrate with a colorful and delicious Funfetti Birthday Cake! This cake is perfect for any birthday party and brings joy with every slice. Loaded with sprinkles and topped with creamy frosting, it will make your special day even brighter!
Prep Time: 20 minutes
Cook Time: 30 minutes
Additional Time: 1 hour (for cooling)
Total Time: 1 hour 50 minutes
Servings: 12
Ingredients:
- 2 cups all-purpose flour
- 1 ½ cups granulated sugar
- ½ cup unsalted butter, softened
- 1 cup whole milk
- 3 large eggs
- 2 ½ tsp baking powder
- 1 tsp vanilla extract
- ½ tsp salt
- ¾ cup rainbow sprinkles
- 2 cups frosting (store-bought or homemade)
- Extra sprinkles for decoration
Instructions:
Preheat your oven to 350°F (175°C). Grease and flour two 9-inch round cake pans. This will help the cakes come out easily.
In a large bowl, cream together the softened butter and sugar. Beat them until the mixture is light and fluffy. This usually takes about 3-5 minutes with an electric mixer.
Add the eggs one at a time, mixing well after each addition. Then stir in the vanilla extract.
In another bowl, whisk together the flour, baking powder, and salt. Gradually add this dry mixture to the butter mixture. Alternate adding the milk and mixing until everything is combined. Don’t forget to scrape the sides of the bowl!
Gently fold in the rainbow sprinkles. Be careful not to over-mix, or the sprinkles might lose some color.
Divide the batter evenly between the prepared cake pans. Bake in the preheated oven for about 30 minutes, or until a toothpick inserted into the center comes out clean.
Once baked, let the cakes cool in the pans for about 10 minutes. Then, transfer them to wire racks to cool completely for at least 1 hour.
After the cakes have cooled, spread a layer of frosting on top of one cake. Place the other cake on top and frost the top and sides. Finally, sprinkle some extra sprinkles on top for a festive look!
Tips:
- For even more flavor, try adding almond extract along with the vanilla extract.
- To keep your cake layers flat, you can trim the tops with a knife once they are completely cool.
- Store any leftovers in an airtight container at room temperature for up to 3 days.
Nutrition Facts:
- Calories: 350
- Total Fat: 15g
- Saturated Fat: 9g
- Cholesterol: 60mg
- Sodium: 200mg
- Carbohydrates: 51g
- Fiber: 0g
- Sugar: 30g
- Protein: 4g
15 Maple Pecan Brownies
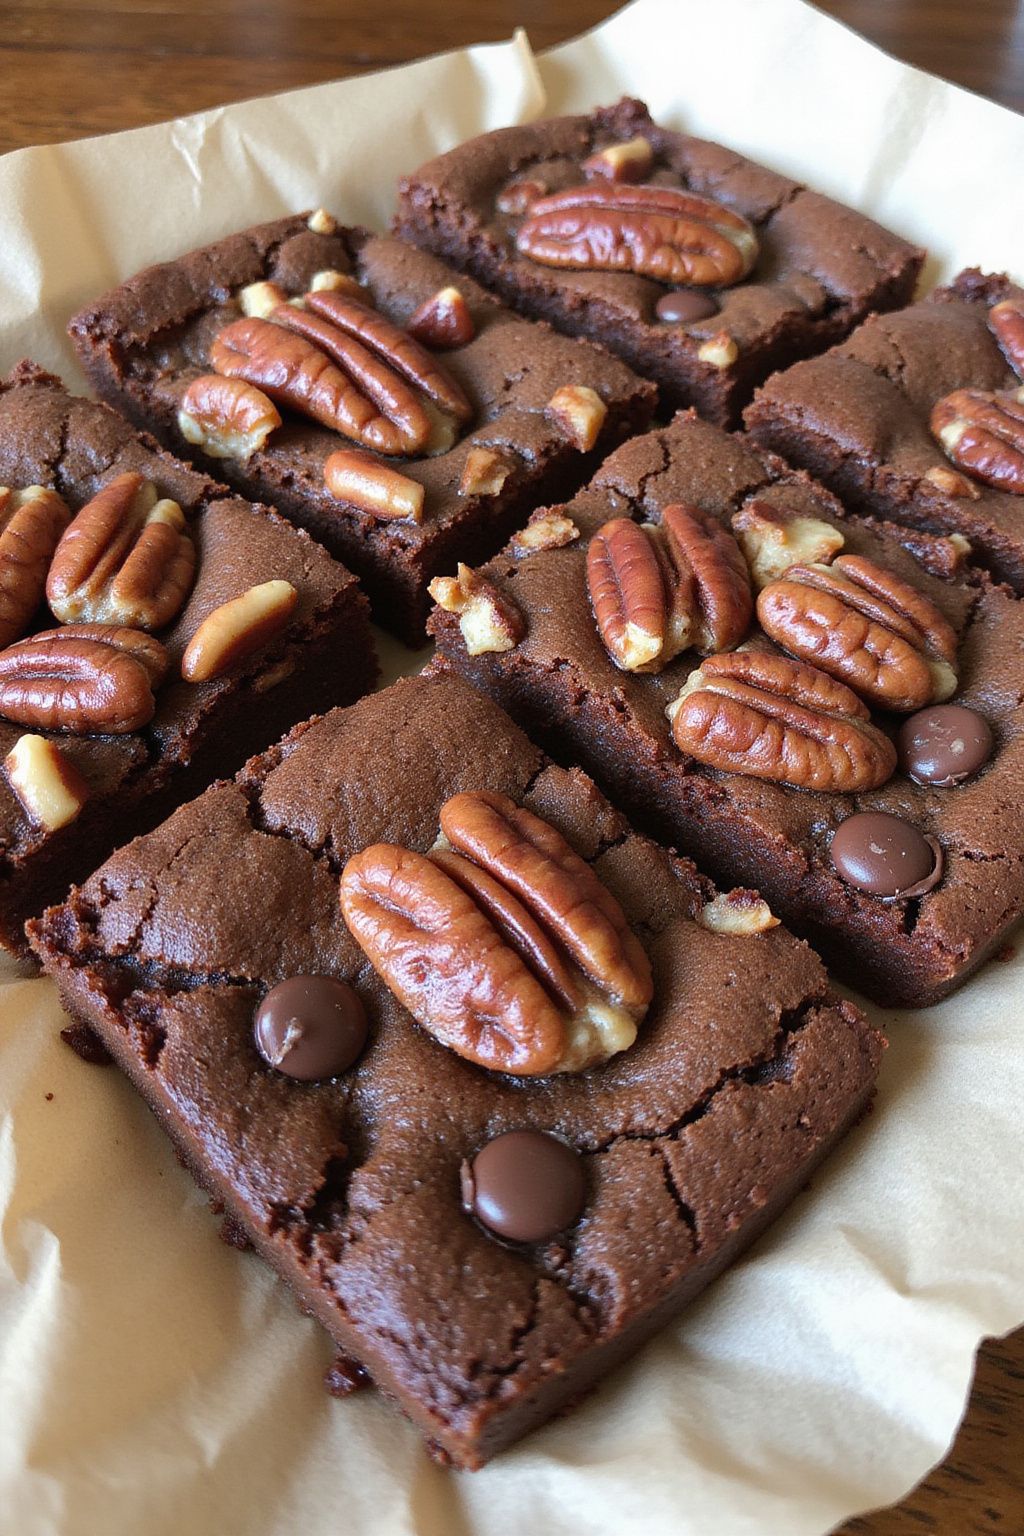
These Maple Pecan Brownies are a delightful twist on classic brownies. With a rich, fudgy base and the sweet flavor of maple syrup, they are sure to satisfy your sweet tooth. Each bite is packed with crunchy pecans, making them a perfect dessert for any occasion.
Prep Time: 15 minutes
Cook Time: 25 minutes
Additional Time: 10 minutes
Total Time: 50 minutes
Servings: 12
Ingredients:
- 1 cup unsalted butter
- 2 cups granulated sugar
- 1 cup brown sugar, packed
- 4 large eggs
- 1 tablespoon pure maple syrup
- 1 teaspoon vanilla extract
- 1 cup all-purpose flour
- 1 cup cocoa powder
- 1/2 teaspoon salt
- 1 cup chopped pecans
- 1/2 cup chocolate chips (optional)
Instructions:
Start by preheating your oven to 350°F (175°C). Grease a 9×13 inch baking pan or line it with parchment paper for easy removal.
In a large mixing bowl, melt the unsalted butter in the microwave or on the stove. Once melted, mix in the granulated sugar and brown sugar until well combined.
Next, add the eggs, maple syrup, and vanilla extract to the butter and sugar mixture. Beat everything together until it is smooth and creamy.
In another bowl, whisk together the all-purpose flour, cocoa powder, and salt. Gradually add the dry ingredients to the wet ingredients, stirring until just combined. Be careful not to overmix!
Fold in the chopped pecans and chocolate chips if you are using them. Pour the brownie batter into the prepared baking pan and spread it evenly.
Bake in the preheated oven for about 25 minutes. To check if they’re done, insert a toothpick; it should come out with a few moist crumbs, but not wet batter.
Once baked, remove the brownies from the oven and let them cool in the pan for about 10 minutes. After cooling, lift them out using the parchment paper, cut into squares, and enjoy!
Tips:
- For an extra maple flavor, you can drizzle more maple syrup on top before serving.
- To enhance the crunchiness, lightly toast the pecans in a dry skillet before adding them to the batter.
- Serve these brownies warm with a scoop of vanilla ice cream for a delicious dessert!
Nutrition Facts:
- Calories: 350 per serving
- Total Fat: 20g
- Saturated Fat: 10g
- Cholesterol: 70mg
- Sodium: 150mg
- Total Carbohydrate: 40g
- Dietary Fiber: 2g
- Sugars: 28g
- Protein: 4g
16 Key Lime Pie with Graham Cracker Crust
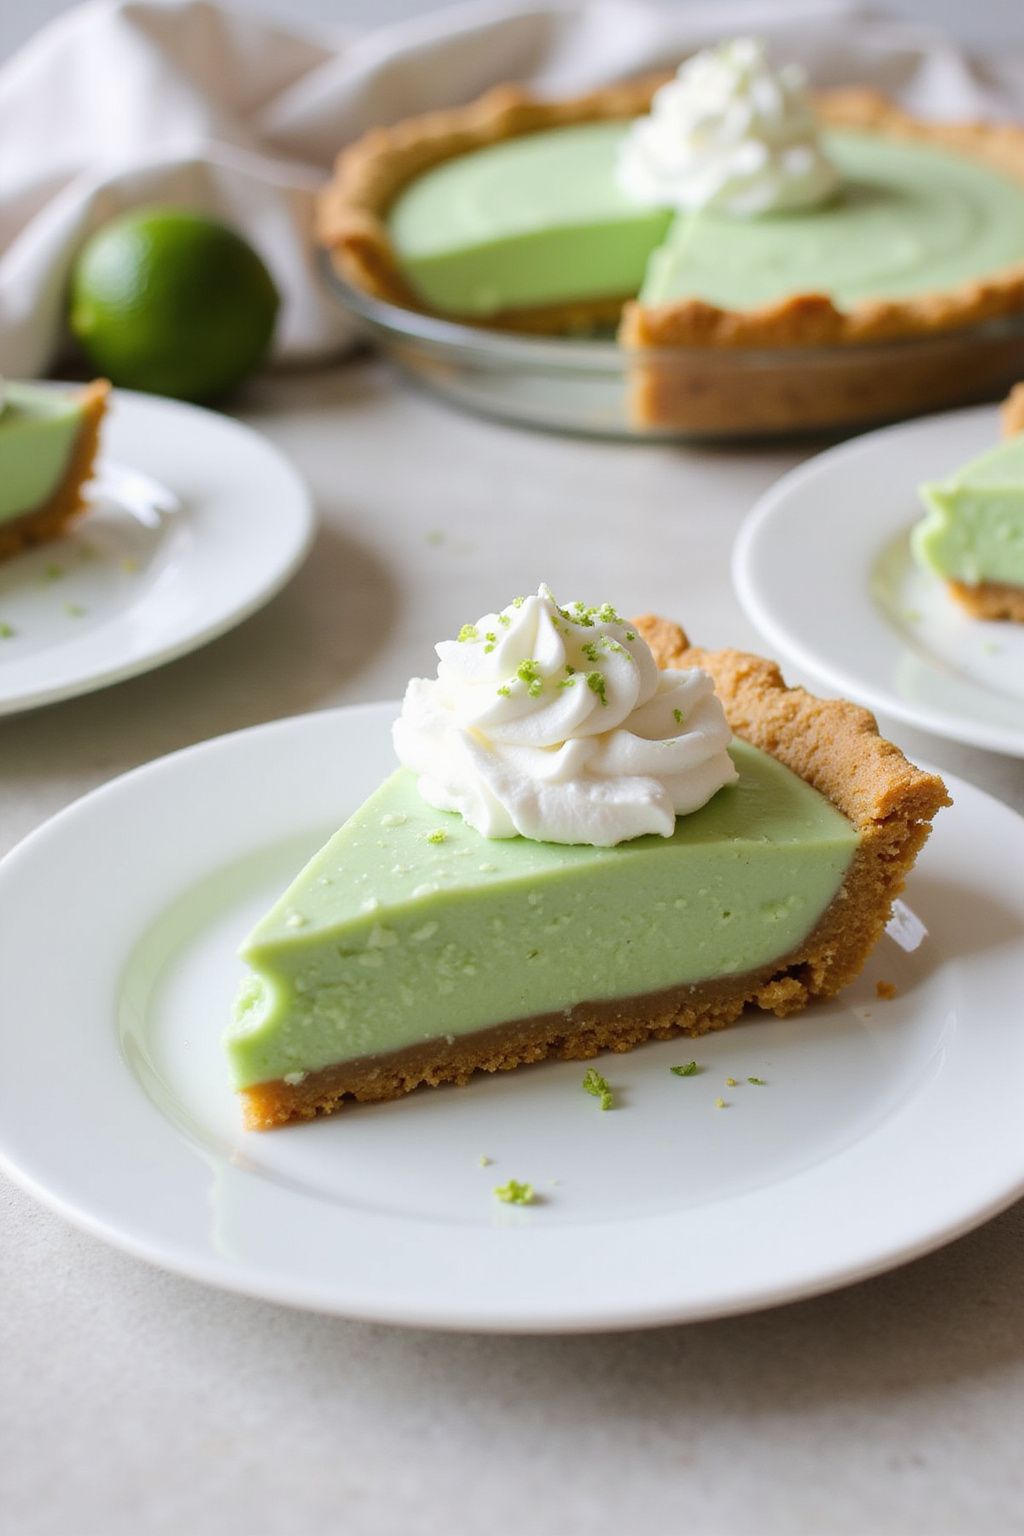
Enjoy the sweet and tangy flavor of Key Lime Pie with a delightful Graham Cracker Crust. This easy-to-make dessert is perfect for any occasion, bringing a taste of the tropics right to your home. With a smooth filling and crunchy base, it will surely impress your family and friends.
Prep Time: 15 minutes
Additional Time: 2 hours
Total Time: 2 hours 15 minutes
Servings: 8
Ingredients:
- 1 ½ cups of Graham cracker crumbs
- ½ cup of granulated sugar
- ⅓ cup of unsalted butter, melted
- 4 large egg yolks
- 1 can (14 ounces) of sweetened condensed milk
- ½ cup of fresh key lime juice (or regular lime juice)
- 1 tablespoon of lime zest
- A pinch of salt
- Whipped cream for serving (optional)
Instructions:
Start by preheating your oven to 350°F (175°C). In a bowl, combine the Graham cracker crumbs, granulated sugar, and melted butter. Mix until everything is well combined and looks like wet sand.
Next, press this mixture firmly into the bottom and up the sides of a pie pan to form your crust. Bake the crust in the preheated oven for 8-10 minutes until it’s lightly golden. Once done, take it out of the oven and let it cool while you prepare the filling.
In a separate bowl, whisk together the egg yolks and sweetened condensed milk until smooth. Then, add the fresh key lime juice, lime zest, and a pinch of salt. Mix everything well to combine all the flavors together.
Pour the mixture into your cooled Graham cracker crust. Bake the pie in the oven for an additional 10-15 minutes, or until the filling is set but still has a slight jiggle in the center. Remove it from the oven and let it cool at room temperature.
After the pie cools, place it in the refrigerator for at least 2 hours to chill and firm up before serving. When ready to serve, add a dollop of whipped cream on top if desired.
Tips:
- For an extra tangy flavor, try adding a bit more lime zest to the filling.
- Always use fresh lime juice for the best flavor, but bottled juice can work in a pinch.
- If you want a sweeter pie, add a little more sugar to the filling.
Nutrition Facts:
- Calories: 320 per serving
- Total Fat: 18g
- Saturated Fat: 10g
- Cholesterol: 130mg
- Sodium: 150mg
- Total Carbohydrates: 42g
- Dietary Fiber: 0g
- Sugars: 22g
- Protein: 5g
17 Chocolate Molten Lava Cake
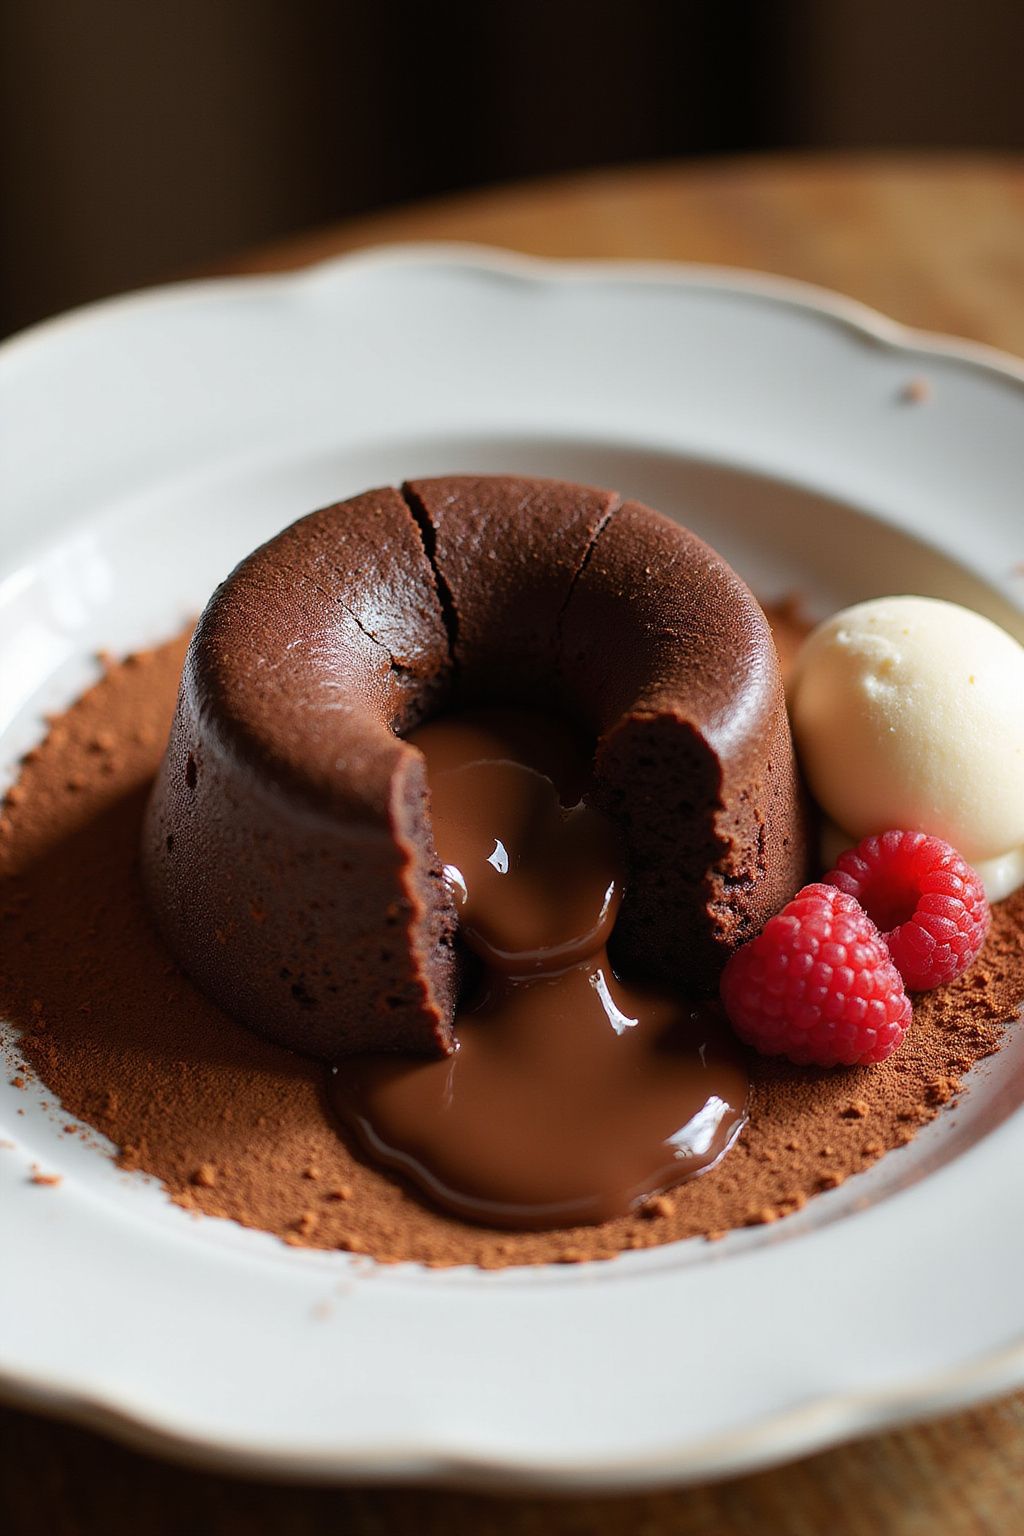
Chocolate Molten Lava Cake is the ultimate dessert that will impress everyone. It’s rich, gooey, and filled with melted chocolate that flows out when you cut into it. Perfect for special occasions or a cozy night in!
Prep Time: 15 minutes
Cook Time: 12 minutes
Additional Time: 10 minutes
Total Time: 37 minutes
Servings: 4
Ingredients:
- ½ cup unsalted butter
- 1 cup semi-sweet chocolate chips
- 2 large eggs
- 2 egg yolks
- ½ cup granulated sugar
- ¼ cup all-purpose flour
- ½ teaspoon vanilla extract
- Pinch of salt
- Butter and cocoa powder for greasing ramekins
Instructions:
Begin by preheating your oven to 425°F (220°C). This high temperature is essential for achieving that perfect molten center.
Next, take four ramekins and grease them with butter. Dust each one with cocoa powder to prevent sticking. Set them aside.
In a medium saucepan, melt ½ cup of butter and 1 cup of chocolate chips over low heat. Stir constantly until smooth. Remove from heat, and let it cool for a few minutes.
In another mixing bowl, whisk together 2 eggs, 2 egg yolks, and ½ cup of sugar. Beat this mixture until it’s thick and light in color, which will take about 2 minutes.
Add in the cooled chocolate mixture, ¼ cup of all-purpose flour, ½ teaspoon of vanilla extract, and a pinch of salt. Gently fold everything together until just combined, being careful not to overmix.
Evenly spoon the batter into the prepared ramekins. Place them on a baking sheet for easier handling, and bake in the preheated oven for about 12 minutes. The edges should look set, but the center will still be soft.
After baking, let them sit for about 10 minutes. This step helps to ensure they hold their shape. To serve, run a knife around the edge, then carefully invert them onto plates.
Enjoy warm, maybe with a scoop of vanilla ice cream on the side!
Tips:
- For an extra chocolatey treat, add a chocolate square in the center of each cake before baking.
- Serve immediately after cooling for the best molten effect.
- If you have leftovers, reheat them in the microwave for 10-15 seconds to revive their gooey center.
Nutrition Facts:
- Calories: 350
- Protein: 6g
- Fat: 22g
- Carbohydrates: 35g
- Sugar: 24g
- Fiber: 1g
18 Peanut Butter Pie
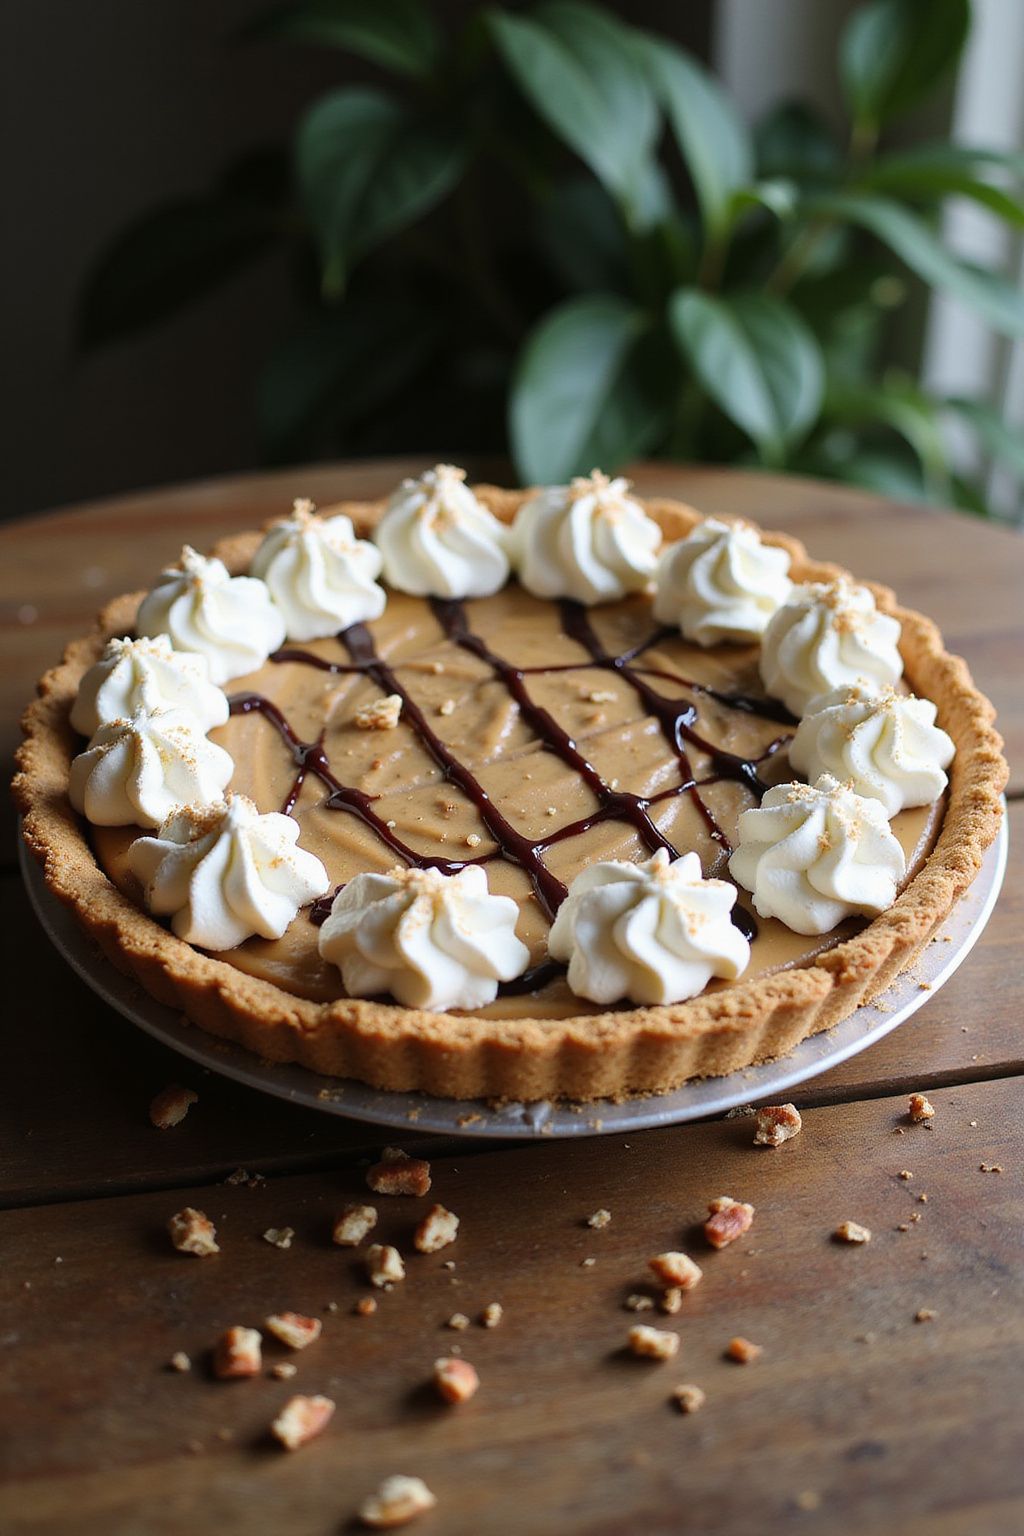
Enjoy the rich and creamy taste of this delightful Peanut Butter Pie! It’s a fantastic dessert that’s easy to make and sure to impress your family and friends. With a delicious peanut butter filling and a crunchy crust, every bite is pure bliss!
Prep Time: 15 minutes
Additional Time: 4 hours
Total Time: 4 hours 15 minutes
Servings: 8
Ingredients:
- 1 pre-made graham cracker crust
- 1 cup creamy peanut butter
- 1 cup cream cheese, softened
- 1 cup powdered sugar
- 1 teaspoon vanilla extract
- 1 cup whipped cream (plus extra for topping)
- 2 tablespoons chocolate syrup (for drizzling, optional)
Instructions:
Start by combining creamy peanut butter and softened cream cheese in a mixing bowl. Use a hand mixer to blend them together until smooth. This will give your filling a creamy and silky texture.
Next, gradually add in the powdered sugar and vanilla extract while continuing to mix. Make sure everything is well combined and creamy. Once mixed, carefully fold in your whipped cream. This will make the filling light and fluffy.
After that, pour the peanut butter mixture into the graham cracker crust. Use a spatula to spread it evenly, smoothing the top.
Cover the pie with plastic wrap and place it in the refrigerator. Let it chill for at least 4 hours to set properly and develop the flavors.
Once it’s set, take it out and add some extra whipped cream on top. Drizzle with chocolate syrup if you like some extra sweetness.
Tips:
- For a crunchy texture, sprinkle some chopped peanuts or chocolate chips on top before serving.
- Make sure your cream cheese is at room temperature. This makes it easier to mix and creates a smoother filling.
- You can also use a homemade pie crust if you prefer.
Nutrition Facts:
- Calories: 350 per serving
- Total Fat: 24g
- Saturated Fat: 10g
- Cholesterol: 40mg
- Sodium: 230mg
- Total Carbohydrates: 30g
- Dietary Fiber: 1g
- Sugars: 15g
- Protein: 6g
19 Berry Galette with Whipped Cream
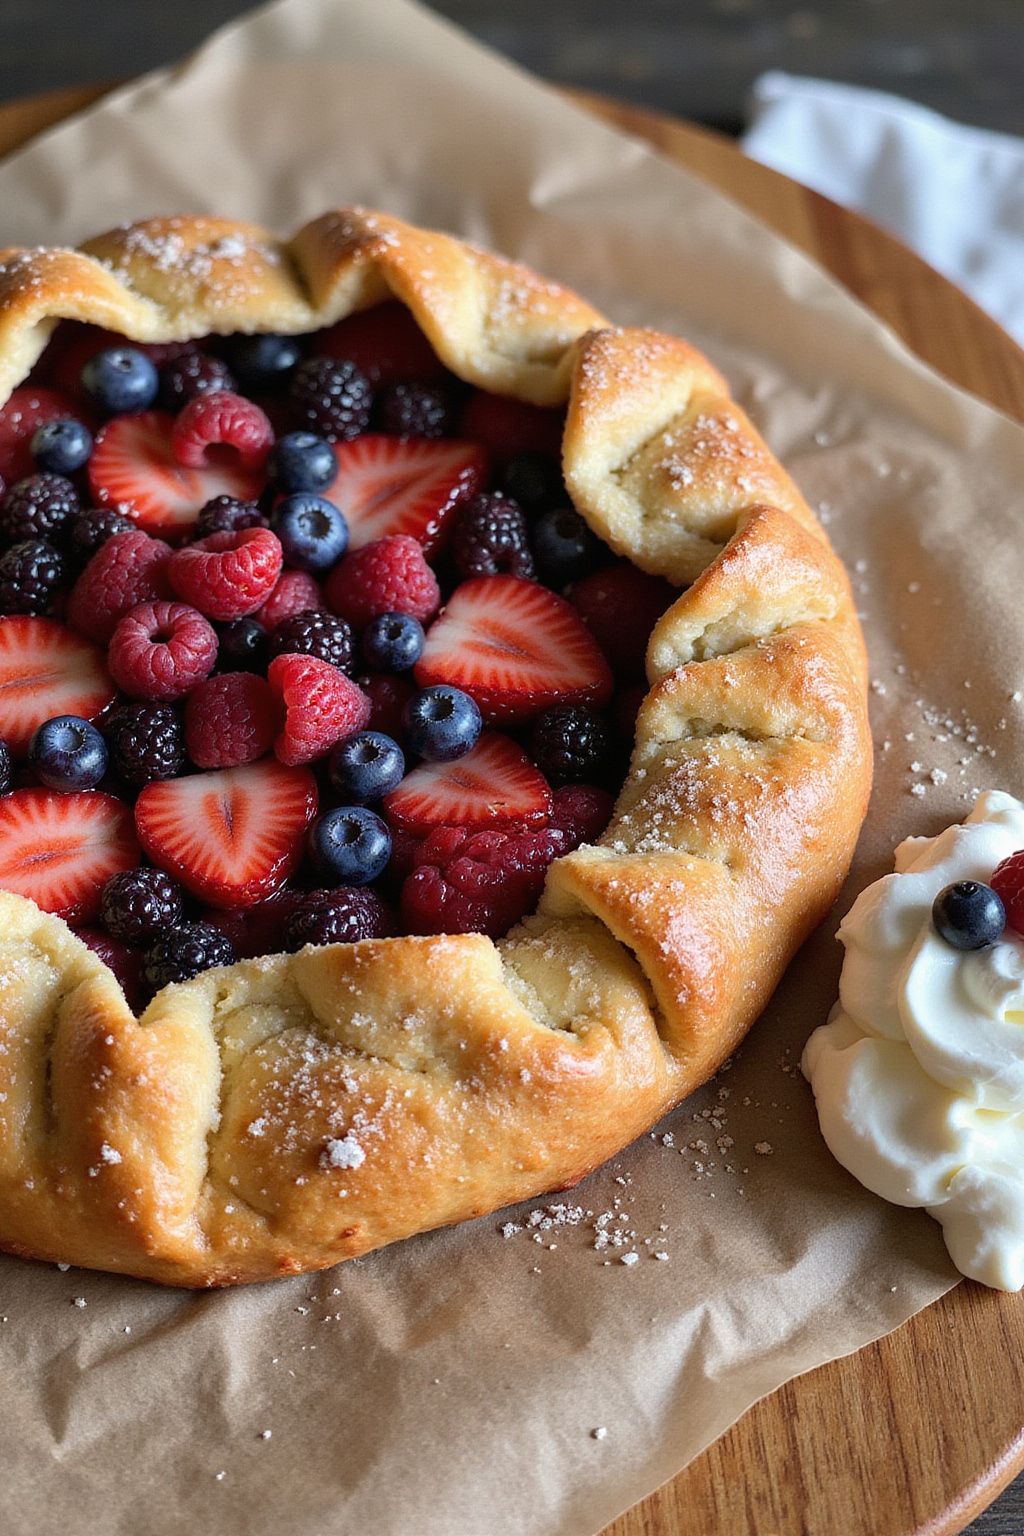
Enjoy the delightful taste of a Berry Galette with Whipped Cream! This rustic dessert is easy to make and perfect for showcasing fresh berries. Serve it warm or at room temperature for a sweet treat that everyone will love.
Prep Time: 30 minutes
Additional Time: 45 minutes
Total Time: 1 hour 15 minutes
Servings: 8
Ingredients:
- 1 cup of fresh mixed berries (like strawberries, blueberries, and raspberries)
- 1 tablespoon of sugar (plus extra for sprinkling)
- 1 teaspoon of cornstarch
- 1 tablespoon of lemon juice
- 1 sheet of pie crust (store-bought or homemade)
- 1 egg (beaten, for egg wash)
- 1 cup of heavy whipping cream
- 2 tablespoons of powdered sugar
- 1 teaspoon of vanilla extract
Instructions:
Start by preheating your oven to 400°F (200°C). This will ensure your galette bakes evenly and gets that perfect golden crust.
In a bowl, mix the berries with 1 tablespoon of sugar, cornstarch, and lemon juice. Toss them gently to combine and let them sit while you prepare the crust.
On a clean surface, roll out your pie crust into a rough circle, about 12 inches in diameter. It doesn’t have to be perfect—rustic is the goal!
Transfer the rolled-out crust to a baking sheet lined with parchment paper. Spoon the berry mixture onto the center of the crust, leaving about 2 inches around the edges.
Fold the edges of the crust over the berries, creating a border but leaving the center open. Brush the edges with the beaten egg and sprinkle a little extra sugar on top for sweetness.
Bake the galette in the oven for 25-30 minutes, or until the crust is golden brown and the berries are bubbly. Once it’s done, take it out and let it cool for about 15 minutes.
While it cools, beat the heavy cream with a mixer until it starts to thicken. Add the powdered sugar and vanilla extract. Continue to beat until soft peaks form.
Slice the cooled galette and serve it warm with a generous dollop of whipped cream on top. Enjoy this delicious dessert!
Tips:
- Substitute the berries with your favorite fruit, like peaches or apples, if you prefer.
- For an extra crunch, sprinkle some chopped nuts over the berries before folding the crust.
- Serve the galette with a scoop of vanilla ice cream for a delightful twist.
Nutrition Facts:
- Calories: 250 per serving
- Total Fat: 15g
- Saturated Fat: 8g
- Cholesterol: 45mg
- Sodium: 105mg
- Total Carbohydrates: 28g
- Dietary Fiber: 3g
- Sugars: 10g
- Protein: 3g
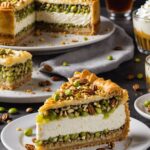
20 Honey Almond Baklava
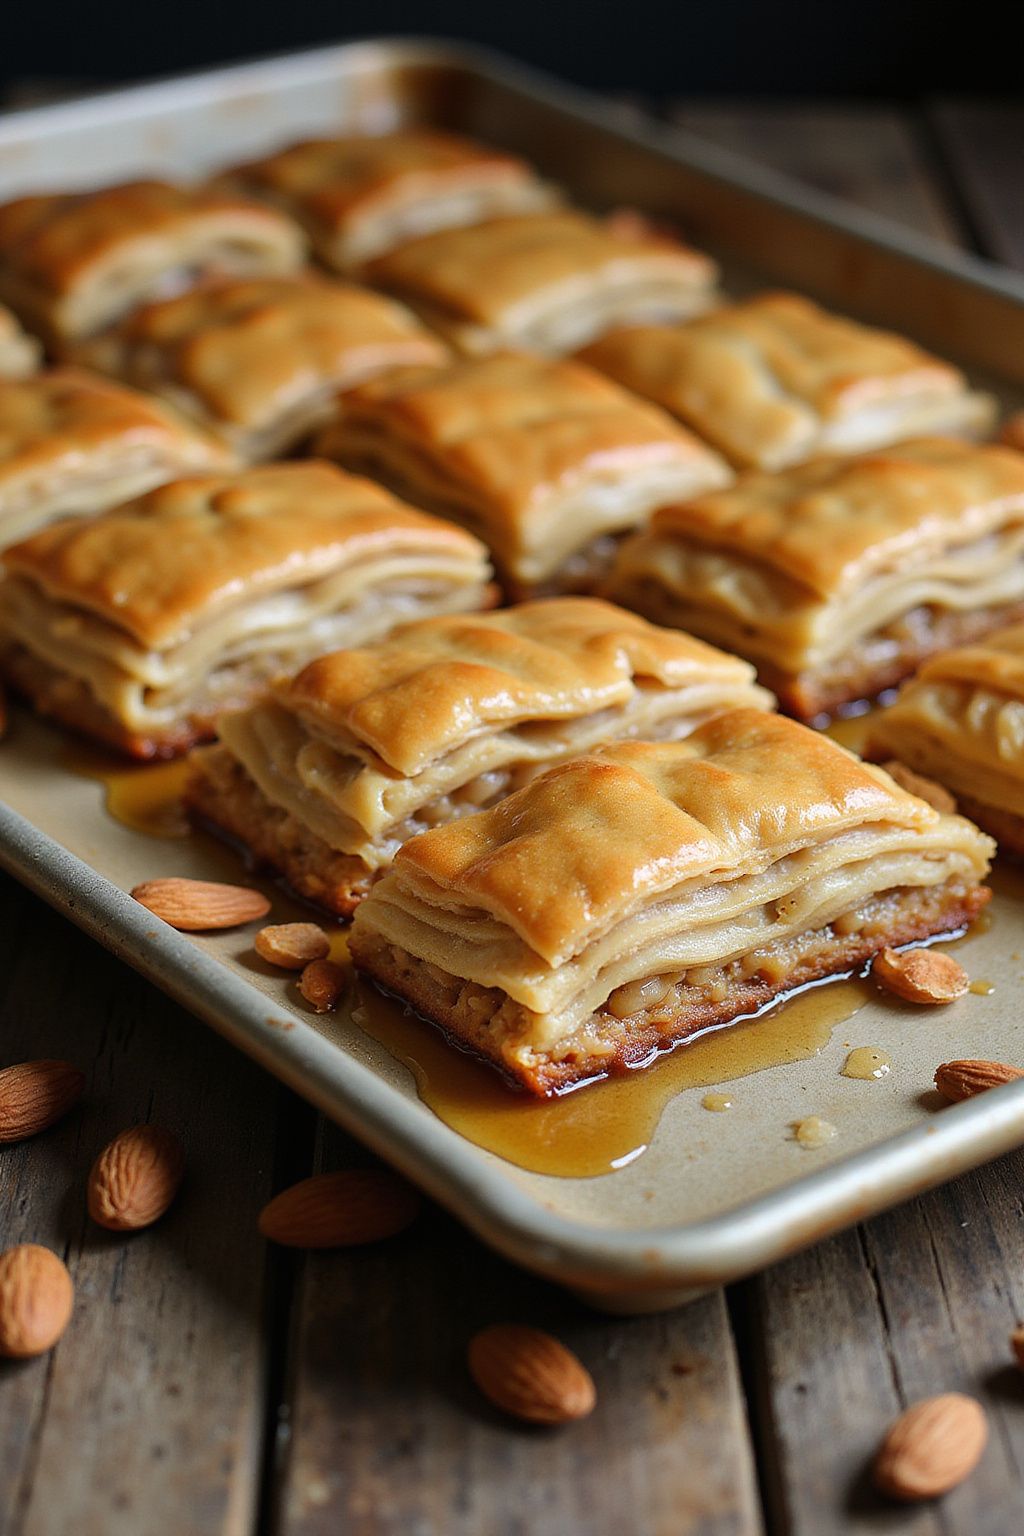
Baklava is a sweet, flaky dessert that is layered with nuts and soaked in syrup. This Honey Almond Baklava is especially easy to make and is perfect for sharing with family and friends. Its delightful combination of honey and almonds will impress anyone with a sweet tooth!
Prep Time: 30 minutes
Cook Time: 45 minutes
Additional Time: 1 hour
Total Time: 2 hours 15 minutes
Servings: 20 pieces
Ingredients:
- 1 package of phyllo dough (16 oz), thawed
- 1 cup unsalted butter, melted
- 2 cups almonds, finely chopped
- 1 cup sugar
- 1 teaspoon ground cinnamon
- 1 cup honey
- 3/4 cup water
- 1 teaspoon vanilla extract
- 1 tablespoon lemon juice
Instructions:
Preheat your oven to 350°F (175°C). Get a baking dish that is 9×13 inches ready and brush it lightly with some of the melted butter.
In a bowl, mix the finely chopped almonds, sugar, and ground cinnamon together. This filling will add a sweet crunch to every bite.
Now, take the phyllo dough and carefully unroll it. Keep the dough covered with a damp cloth so that it doesn’t dry out. Place one sheet of phyllo in the baking dish and brush it with melted butter. Repeat this with about 8 sheets, making sure to brush each layer with butter.
Next, spread a layer of your almond mixture evenly over the phyllo layers. Then, continue layering by adding two more sheets of phyllo, brushing them with butter each time. Repeat this process, adding almond mixture and phyllo layers until all the ingredients are used, ending with about 8 sheets of phyllo on top.
Using a sharp knife, cut the baklava into diamond or square shapes. This will make it easier to serve later. Now, place the baking dish in the preheated oven and bake for 45 minutes or until it is golden brown.
While the baklava is baking, prepare the syrup. In a saucepan, combine honey, water, vanilla extract, and lemon juice. Bring this mixture to a boil, then reduce the heat and let it simmer for about 10 minutes.
Once the baklava is done baking, take it out of the oven and immediately pour the warm syrup over the hot baklava. Allow it to cool completely, letting it soak up all the delicious syrup for about 1 hour.
Tips:
- Make sure to keep the phyllo dough covered while you work to prevent it from drying out.
- You can substitute almonds with other nuts like walnuts or pistachios for different flavors.
- For extra sweetness, drizzle more honey over the baklava before serving.
Nutrition Facts:
- Calories: 200 per piece
- Total Fat: 12g
- Saturated Fat: 4g
- Cholesterol: 30mg
- Sodium: 50mg
- Total Carbohydrates: 22g
- Dietary Fiber: 1g
- Sugars: 10g
- Protein: 3g