My New Cookbook is Out! Check Out Now!
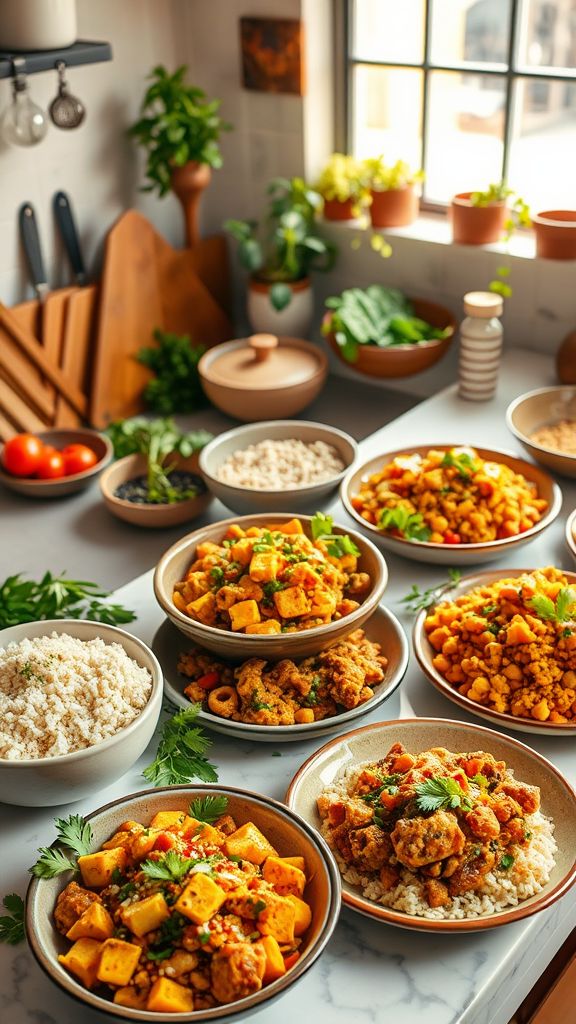
30 High-Protein Family Meals on a Budget
This page contains affiliate links and I earn a commission if you make a purchase through one of the links, at no cost to you.
Did you know that a high-protein diet can help boost metabolism and keep you feeling full longer, all while saving money? In our blog post, ’30 High-Protein Family Meals on a Budget’, we’re excited to share delicious and affordable recipes that will satisfy your family’s cravings without breaking the bank. From hearty chicken casseroles to protein-packed lentil chili, you’ll discover a variety of tasty dishes that make mealtime a breeze while ensuring your loved ones get the nutrients they need!
Shop Our Must-Haves
No products found.
Budget-Friendly Chicken and Quinoa Casserole
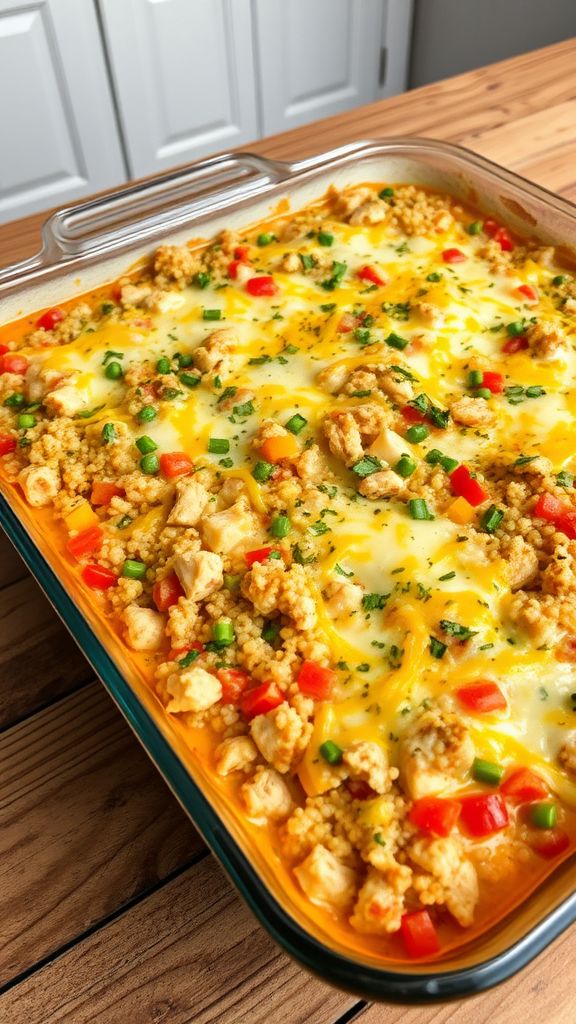
This Budget-Friendly Chicken and Quinoa Casserole combines savory chicken, wholesome quinoa, and a medley of vegetables, creating a hearty meal that’s both nutritious and economical. With a delightful blend of spices and creamy texture, it’s perfect for family dinners or meal prep!
Ingredients:
- 1 lb boneless, skinless chicken breasts, diced
- 1 cup quinoa, rinsed
- 2 cups chicken broth
- 1 cup frozen mixed vegetables
- 1 can (10.5 oz) cream of chicken soup
- 1 tsp garlic powder
- 1 tsp onion powder
- 1 tsp paprika
- 1/2 tsp salt
- 1/2 tsp black pepper
- 1 cup shredded cheese (cheddar or your choice)
Preparation Time: 15 minutes
Cooking Time: 30 minutes
Total Time: 45 minutes
Instructions:
1. Preheat your oven to 350°F (175°C).
2. In a large mixing bowl, combine the diced chicken, rinsed quinoa, frozen mixed vegetables, cream of chicken soup, chicken broth, garlic powder, onion powder, paprika, salt, and black pepper.
3. Stir until everything is well combined, then transfer the mixture into a greased 9×13 inch baking dish.
4. Cover the dish with aluminum foil and bake for 25 minutes.
5. After 25 minutes, remove the foil and sprinkle the shredded cheese over the top.
6. Return the casserole to the oven and bake for an additional 5 minutes, or until the cheese is melted and bubbly.
Tips:
- Feel free to swap out the vegetables for your favorites or whatever you have on hand.
- This casserole is great for meal prep and can be stored in the fridge for up to 4 days.
- Add some fresh herbs like parsley or thyme for extra flavor before serving.
Protein-Packed Lentil Chili
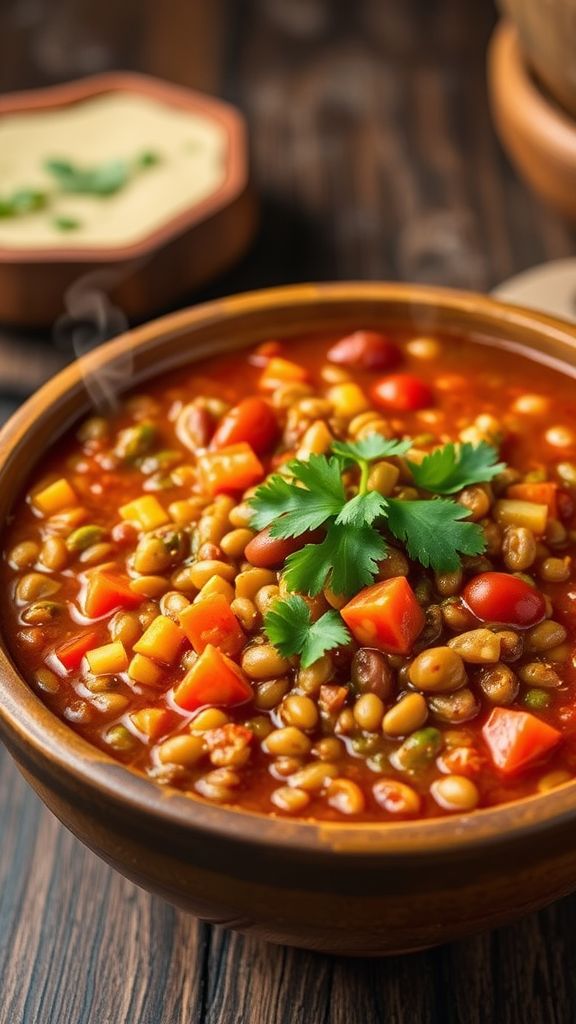
This Protein-Packed Lentil Chili is a hearty and satisfying dish, full of rich flavors from spices and fresh vegetables. With its protein-rich lentils and a touch of smokiness, it’s both nutritious and comforting.
Ingredients:
- 1 cup dried green or brown lentils
- 1 tablespoon olive oil
- 1 onion, chopped
- 2 cloves garlic, minced
- 1 bell pepper, chopped
- 2 carrots, diced
- 2 celery stalks, diced
- 1 (14.5 ounces) can diced tomatoes
- 4 cups vegetable broth
- 2 tablespoons chili powder
- 1 teaspoon cumin
- 1 teaspoon smoked paprika
- 1/2 teaspoon salt
- 1/4 teaspoon black pepper
- 1 can kidney beans, rinsed and drained
- 1 tablespoon lime juice
- Fresh cilantro for garnish (optional)
Preparation Time: 10 minutes
Cooking Time: 30 minutes
Total Time: 40 minutes
Instructions:
1. Rinse the lentils under cold water and set aside.
2. In a large pot, heat the olive oil over medium heat and add the onion, garlic, bell pepper, carrots, and celery. Sauté until the vegetables are tender, about 5-7 minutes.
3. Stir in the chili powder, cumin, smoked paprika, salt, and black pepper. Cook for another minute until the spices are fragrant.
4. Add the lentils, diced tomatoes, and vegetable broth to the pot. Bring to a boil, then reduce the heat to low and cover. Simmer for about 25 minutes or until the lentils are tender.
5. Stir in the kidney beans and lime juice, cooking for an additional 5 minutes to heat through.
6. Serve hot, garnished with fresh cilantro if desired.
Tips:
- For extra flavor, add a chipotle pepper in adobo sauce for a smoky kick.
- Keep leftovers in the fridge for up to 5 days or freeze for up to 3 months.
- Adjust spice levels by adding more or less chili powder based on your preference.
Affordable Turkey and Bean Tacos
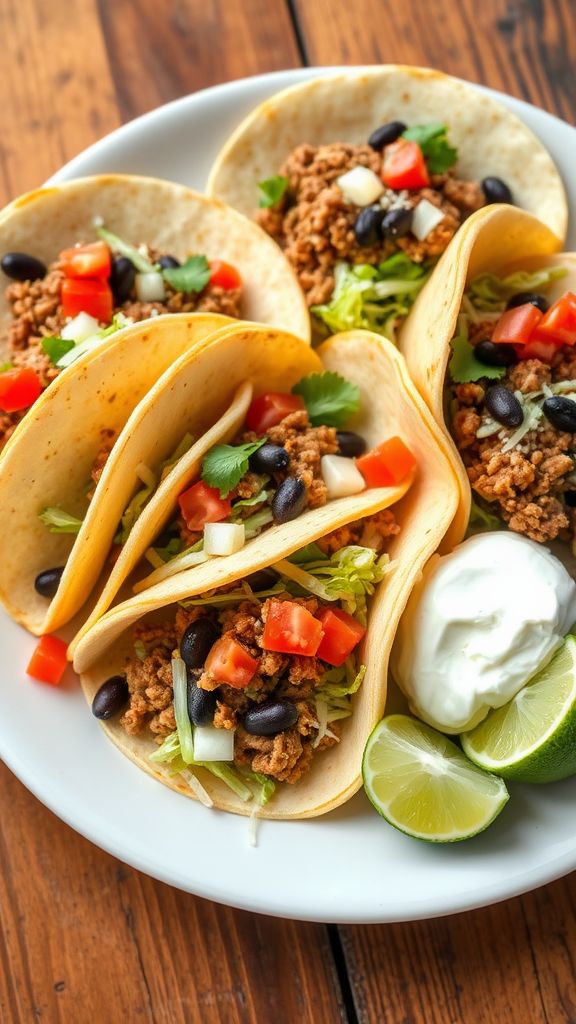
These Affordable Turkey and Bean Tacos are a delightful combination of savory turkey, hearty beans, and vibrant spices, making them perfect for an easy weeknight dinner. With their flavorful and satisfying components, these tacos offer a deliciously budget-friendly meal that everyone will love.
Ingredients:
- 1 pound ground turkey
- 1 can (15 ounces) black beans, drained and rinsed
- 1 tablespoon olive oil
- 1 medium onion, chopped
- 2 cloves garlic, minced
- 1 tablespoon chili powder
- 1 teaspoon cumin
- 8 small corn tortillas
- 1 cup shredded lettuce
- 1 cup diced tomatoes
- 1/2 cup shredded cheese
- 1/4 cup sour cream (optional)
Preparation Time: 10 minutes
Cooking Time: 20 minutes
Total Time: 30 minutes
Instructions:
1. Heat the olive oil in a large skillet over medium heat. Add the onion and garlic, sautéing until the onion is translucent.
2. Add the ground turkey to the skillet, cooking until browned and no longer pink, about 5-7 minutes.
3. Stir in the black beans, chili powder, cumin, and salt to the turkey mixture. Cook for an additional 5 minutes to combine the flavors.
4. While the mixture is cooking, warm the corn tortillas in a separate pan or microwave until pliable.
5. Assemble the tacos by placing a generous scoop of the turkey and bean mixture onto each tortilla, and top with lettuce, tomatoes, cheese, and sour cream if desired.
Tips:
- For extra flavor, squeeze fresh lime juice over the tacos before serving.
- You can substitute ground beef or chicken for turkey if preferred.
- Feel free to add your favorite toppings like avocado or jalapeños for added spice.
Low-Cost Beef and Broccoli Stir-Fry
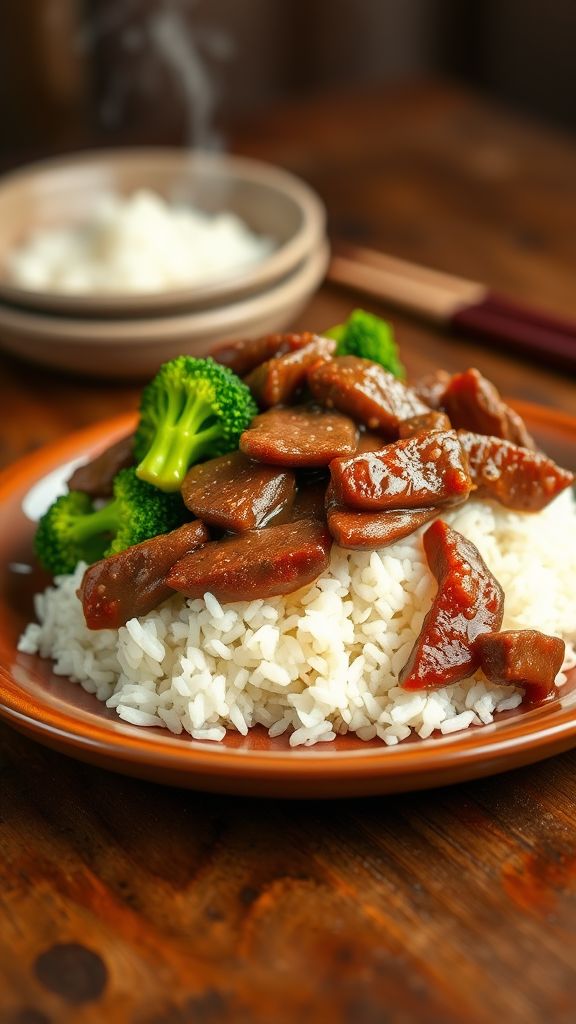
This Low-Cost Beef and Broccoli Stir-Fry is a quick and delicious meal that brings together tender beef, crisp broccoli, and savory flavors to create an irresistible dish. It’s perfect for busy weeknights and budget-friendly, making it a staple in any household.
Ingredients:
- 1 pound beef (flank, sirloin, or other cuts)
- 2 cups broccoli florets
- 3 tablespoons soy sauce
- 2 tablespoons oyster sauce
- 2 tablespoons vegetable oil
- 3 cloves garlic, minced
- 1 tablespoon cornstarch
- 1 cup beef broth or water
- 1 teaspoon ginger, minced (optional)
- 2 cups cooked rice (for serving)
Preparation Time: 10 minutes
Cooking Time: 15 minutes
Total Time: 25 minutes
Instructions:
1. Slice the beef thinly against the grain and toss it with cornstarch.
2. Heat 1 tablespoon of vegetable oil in a large pan or wok over medium-high heat.
3. Add the beef to the pan and cook until browned, about 3-4 minutes. Remove and set aside.
4. In the same pan, add the remaining tablespoon of oil, then add minced garlic and ginger, and sauté for 30 seconds.
5. Add broccoli florets and stir-fry for about 3-4 minutes until bright green and tender-crisp.
6. Return the cooked beef to the pan, then add soy sauce, oyster sauce, and beef broth or water. Stir well to combine.
7. Simmer for an additional 2-3 minutes until the sauce thickens slightly.
8. Serve hot over cooked rice.
Tips:
- For more flavor, let the beef marinate in soy sauce for 15-30 minutes before cooking.
- You can add other vegetables like bell peppers or carrots to make it even more colorful.
- Adjust the amount of soy sauce based on your taste preference for saltiness.
- Stir-frying quickly at high heat keeps the beef tender and the broccoli crispy.
Savory Egg and Spinach Frittata

This Savory Egg and Spinach Frittata is a delightful dish that combines the rich flavors of eggs with fresh, nutritious spinach. It’s perfect for breakfast, brunch, or even a light dinner!
Ingredients:
- 6 large eggs
- 1 cup fresh spinach, chopped
- 1/2 cup cherry tomatoes, halved
- 1/4 cup onion, diced
- 1/2 cup shredded cheese (cheddar or feta)
- 2 tablespoons olive oil
- Salt and pepper to taste
Preparation Time: 10 minutes
Cooking Time: 20 minutes
Total Time: 30 minutes
Instructions:
1. Preheat your oven to 375°F (190°C).
2. In a large mixing bowl, whisk together the eggs, salt, and pepper.
3. In an oven-safe skillet, heat the olive oil over medium heat. Add the diced onion and sauté until translucent.
4. Stir in the chopped spinach and cook until wilted.
5. Add the halved cherry tomatoes and mix well.
6. Pour the egg mixture over the spinach and tomato mixture. Cook without stirring for about 3-4 minutes until the edges start to set.
7. Sprinkle the shredded cheese on top and transfer the skillet to the preheated oven.
8. Bake for 15 minutes, or until the frittata is puffed and set in the center.
9. Remove from the oven and allow to cool slightly before slicing and serving.
Tips:
- Feel free to add other vegetables like bell peppers or mushrooms for extra flavor.
- Frittata can be stored in the refrigerator for up to 3 days and is great reheated.
- For a spicier version, consider adding red pepper flakes to the egg mixture.
Thrifty Salmon and Sweet Potato Bowls
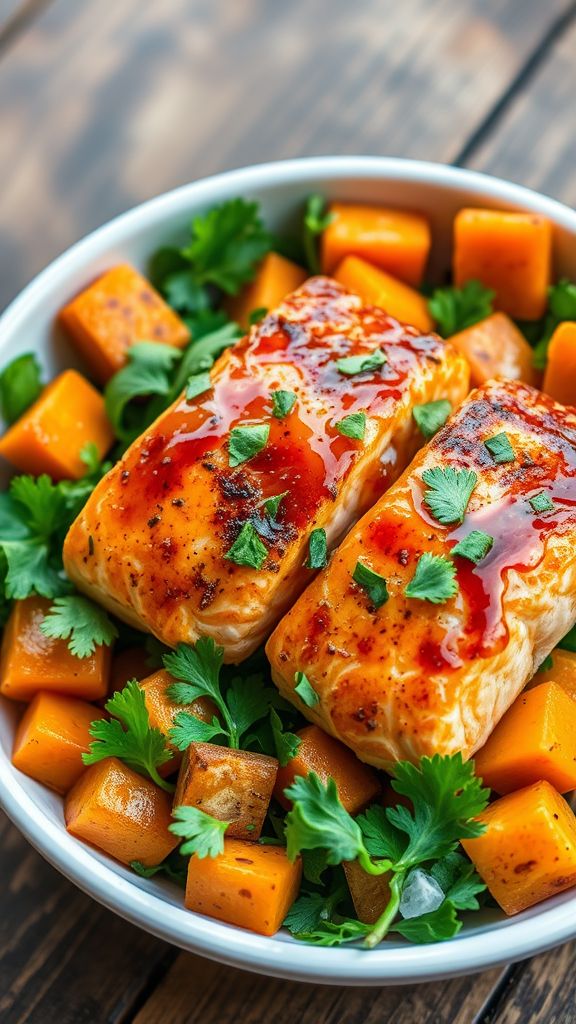
This Thrifty Salmon and Sweet Potato Bowl brings together the delightful flavors of roasted sweet potatoes and perfectly seasoned salmon for a budget-friendly yet satisfying meal. With a balance of sweetness and savory spices, this dish is sure to please your palate while keeping your wallet happy.
Ingredients:
- 2 medium sweet potatoes, peeled and cubed
- 2 tablespoons olive oil
- 1 teaspoon paprika
- 1 teaspoon garlic powder
- 1 teaspoon onion powder
- 1/2 teaspoon salt
- 1/2 teaspoon black pepper
- 4 salmon fillets (about 6 oz each)
- 1 tablespoon soy sauce
- 1 tablespoon honey
- 1 tablespoon lemon juice
- 2 cups mixed greens
- 1/4 cup chopped fresh parsley
Preparation Time: 10 minutes
Cooking Time: 25 minutes
Total Time: 35 minutes
Instructions:
1. Preheat your oven to 400°F (200°C).
2. In a large bowl, toss the cubed sweet potatoes with 1 tablespoon olive oil, paprika, garlic powder, onion powder, salt, and black pepper.
3. Spread the sweet potatoes on a baking sheet and roast for about 20 minutes, or until tender and slightly caramelized.
4. While the sweet potatoes are roasting, prepare the salmon by mixing soy sauce, honey, and lemon juice in a small bowl.
5. Heat the remaining 1 tablespoon of olive oil in a skillet over medium heat and add the salmon fillets. Cook for about 4-5 minutes on each side until the salmon is cooked through and flakes easily with a fork.
6. Drizzle the honey-soy mixture over the salmon during the last minute of cooking.
7. To assemble the bowls, place a bed of mixed greens at the bottom, top with roasted sweet potatoes and a salmon fillet, and garnish with chopped parsley.
Tips:
- Swap the salmon for canned salmon for an even more budget-friendly option.
- Feel free to add other vegetables, like broccoli or bell peppers, to the roasting pan for added nutrition.
- Store any leftovers in an airtight container in the refrigerator for up to 3 days.
Family-Style Chickpea Curry

This Family-Style Chickpea Curry is a delightful dish that brings together the warmth of spices and the creaminess of coconut milk, creating a comforting meal for everyone at the table. With its rich flavors and wholesome ingredients, it’s sure to become a family favorite.
Ingredients:
- 2 cans chickpeas, drained and rinsed
- 1 tablespoon olive oil
- 1 onion, diced
- 3 cloves garlic, minced
- 1 tablespoon ginger, minced
- 2 teaspoons curry powder
- 1 teaspoon cumin
- 1 can coconut milk
- 1 cup vegetable broth
- 1 cup diced tomatoes
- 2 cups spinach, chopped
- Salt and pepper to taste
- Fresh cilantro for garnish
Preparation Time: 10 minutes
Cooking Time: 30 minutes
Total Time: 40 minutes
Instructions:
1. Heat the olive oil in a large pot over medium heat.
2. Add the diced onion and sauté until it becomes translucent, about 5 minutes.
3. Stir in the minced garlic and ginger, cooking for an additional minute until fragrant.
4. Add the curry powder and cumin, stirring well to coat the onions.
5. Pour in the coconut milk, vegetable broth, and diced tomatoes, then bring to a simmer.
6. Add the chickpeas and spinach, stirring until the spinach wilts and everything is well combined.
7. Season with salt and pepper to taste, and let it simmer for about 15 minutes.
8. Serve hot, garnished with fresh cilantro.
Tips:
- For extra heat, add a pinch of cayenne pepper or chopped chili.
- This dish pairs well with rice or naan for a complete meal.
- Feel free to add other vegetables such as bell peppers or carrots for added nutrition.
Economical Shrimp Fried Rice
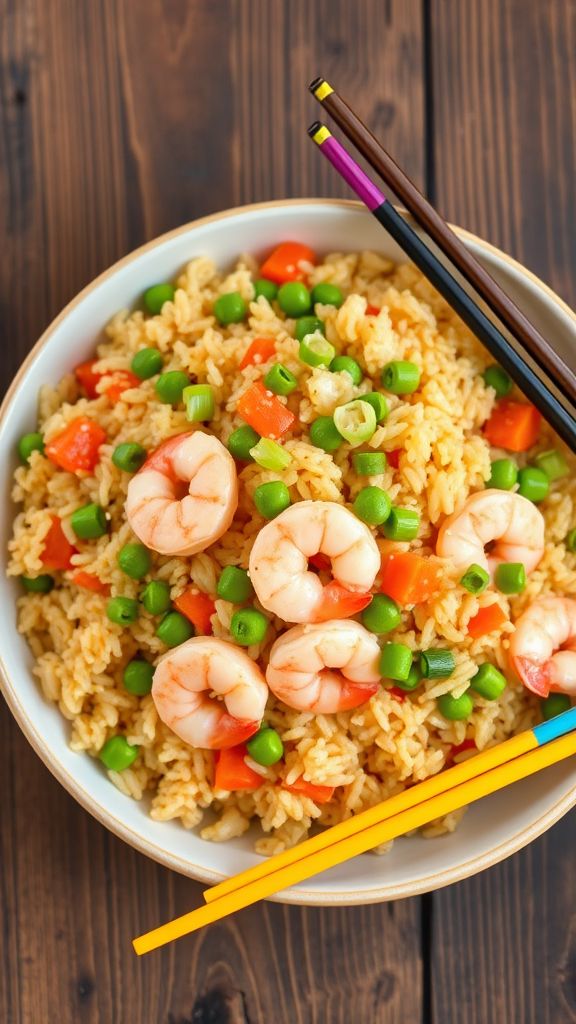
This Economical Shrimp Fried Rice is a quick and satisfying dish that blends the savory flavors of shrimp with fresh vegetables and fragrant rice. It’s budget-friendly and perfect for using up leftover rice!
Ingredients:
- 2 cups cooked rice
- 1 cup shrimp, peeled and deveined
- 1/2 cup peas and carrots
- 2 tablespoons soy sauce
- 1 tablespoon sesame oil
- 2 teaspoons garlic, minced
- 2 green onions, chopped
- 2 eggs, beaten
- Salt and pepper to taste
Preparation Time: 10 minutes
Cooking Time: 15 minutes
Total Time: 25 minutes
Instructions:
1. Heat sesame oil in a large pan over medium heat.
2. Add garlic and stir-fry for about 30 seconds until fragrant.
3. Add the shrimp and cook until pink, about 3-4 minutes.
4. Push the shrimp to one side and pour the beaten eggs into the pan, scrambling them until fully cooked.
5. Add the peas and carrots, stirring to combine.
6. Stir in the cooked rice and soy sauce, mixing everything well.
7. Season with salt and pepper, and fold in the green onions just before serving.
Tips:
- Use leftover rice for the best texture and flavor.
- Feel free to substitute shrimp with chicken or tofu for a different protein.
- Add any other vegetables you have on hand to enhance the dish.
Hearty Black Bean and Rice Burritos

These Hearty Black Bean and Rice Burritos are packed with flavor from earthy spices and bright cilantro, making them not only delicious but also a filling option for any meal. The combination of tender black beans, hearty rice, and fresh toppings will have everyone coming back for seconds!
Ingredients:
- 1 cup brown rice
- 2 cups vegetable broth
- 1 can (15 oz) black beans, drained and rinsed
- 1 tablespoon olive oil
- 1 medium onion, diced
- 2 cloves garlic, minced
- 1 teaspoon ground cumin
- 1 teaspoon chili powder
- ½ teaspoon paprika
- 1 cup corn (fresh, frozen, or canned)
- ½ cup chopped fresh cilantro
- 4 large flour tortillas
- 1 cup shredded cheese (cheddar or your choice)
- 1 cup salsa (for serving)
- 1 avocado, sliced (for serving)
Preparation Time: 10 minutes
Cooking Time: 30 minutes
Total Time: 40 minutes
Instructions:
1. Rinse the brown rice under cold water and combine it with vegetable broth in a pot. Bring to a boil, then reduce heat, cover, and simmer for about 30 minutes or until the rice is tender and the liquid is absorbed.
2. In a skillet over medium heat, heat olive oil. Add the diced onion and sauté for about 5 minutes until softened.
3. Add minced garlic, cumin, chili powder, and paprika to the skillet. Cook for another minute until the spices are fragrant.
4. Stir in the black beans and corn, cooking until heated through for about 5 minutes.
5. Once the rice is cooked, add it to the bean mixture along with chopped cilantro. Mix well until everything is combined, and remove from heat.
6. To assemble the burritos, place a generous amount of the black bean and rice mixture onto each tortilla, sprinkle with cheese, and fold the sides over before rolling it up tightly.
7. Serve the burritos warm with salsa and avocado slices on the side.
Tips:
- For added flavor, you can add sliced jalapeños or hot sauce to the filling.
- Feel free to customize your burritos by adding bell peppers, diced tomatoes, or your favorite toppings.
- These burritos freeze well; wrap them in foil and store them in a freezer-safe bag for up to 3 months.
Cost-Effective Baked Ziti with Ground Turkey
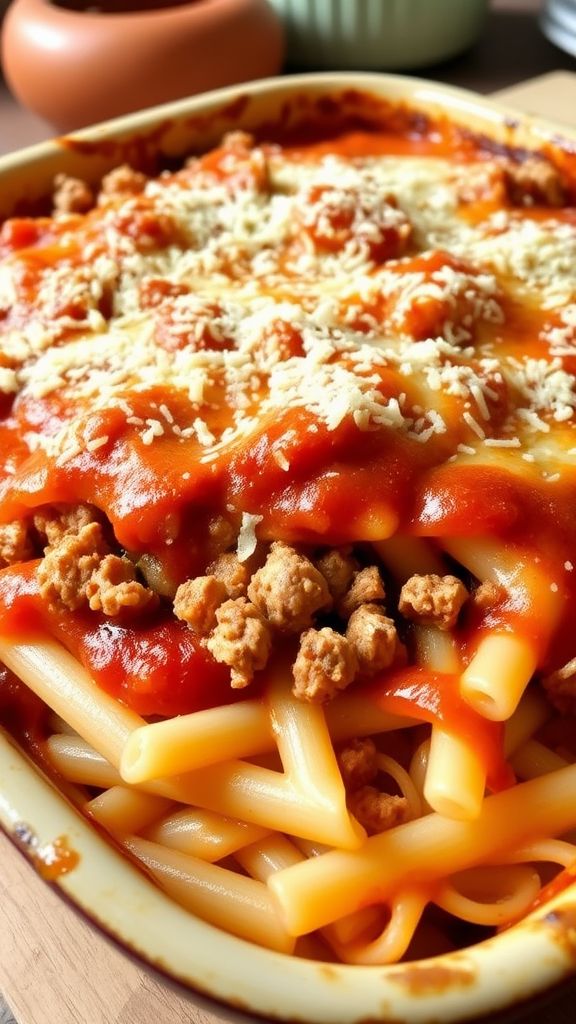
This Cost-Effective Baked Ziti with Ground Turkey is a delicious and budget-friendly dish that combines hearty flavors and comforting textures. The savory ground turkey paired with rich marinara sauce and melted cheese will surely satisfy your family’s cravings.
Ingredients:
- 12 ounces ziti pasta
- 1 pound ground turkey
- 2 cups marinara sauce
- 1 teaspoon Italian seasoning
- 1/2 teaspoon garlic powder
- 2 cups shredded mozzarella cheese
- 1/2 cup grated Parmesan cheese
- 1 tablespoon olive oil
- Salt and pepper to taste
Preparation Time: 10 minutes
Cooking Time: 30 minutes
Total Time: 40 minutes
Instructions:
1. Preheat your oven to 375°F (190°C) and grease a 9×13 inch baking dish.
2. Cook the ziti pasta according to package instructions until al dente, then drain and set aside.
3. In a large skillet, heat the olive oil over medium heat and add the ground turkey. Cook until browned, breaking it apart with a spatula.
4. Stir in the marinara sauce, Italian seasoning, garlic powder, salt, and pepper. Let it simmer for about 5 minutes.
5. In a large bowl, combine the cooked ziti pasta with the turkey sauce mixture and half of the mozzarella cheese. Mix well to combine.
6. Transfer the mixture to the greased baking dish and top with the remaining mozzarella and Parmesan cheese.
7. Bake in the preheated oven for 20-25 minutes, or until the cheese is melted and bubbly.
8. Let it cool for a few minutes before serving.
Tips:
- For extra flavor, add chopped vegetables like bell peppers or spinach to the turkey mixture.
- Feel free to substitute ziti with any pasta shape you have on hand.
- This dish can be made ahead of time and stored in the refrigerator before baking.
- Leftovers can be frozen for up to 3 months; just reheat before serving.
Protein-Rich Pesto Pasta with Chickpeas
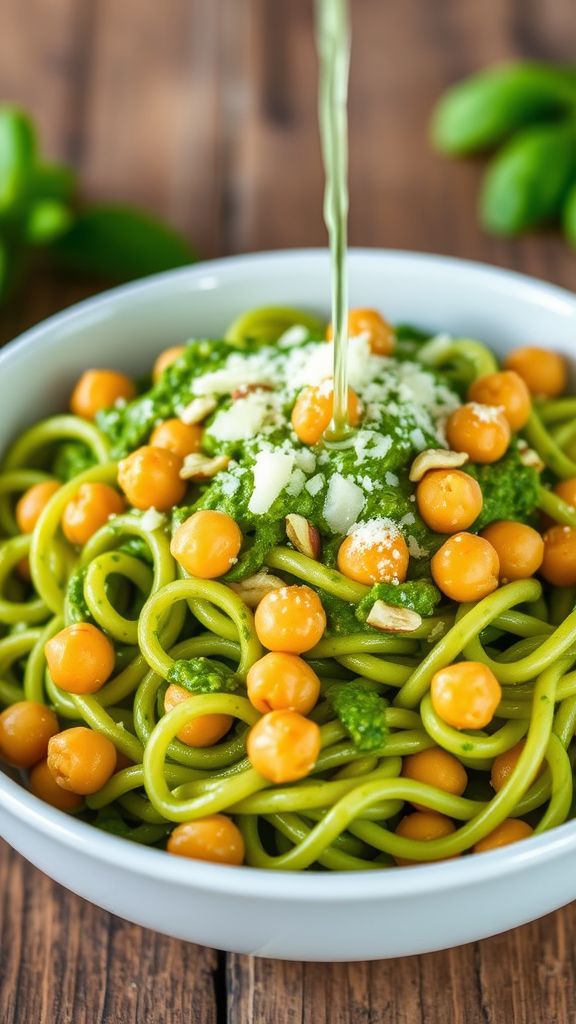
This Protein-Rich Pesto Pasta with Chickpeas is a delightful and nutritious dish, combining the fresh tastes of basil and garlic with hearty chickpeas for a satisfying meal. The vibrant green pesto adds a burst of flavor while packing a protein punch!
Ingredients:
- 8 ounces whole wheat pasta
- 1 can (15 ounces) chickpeas, drained and rinsed
- 2 cups fresh basil leaves
- 1/2 cup grated Parmesan cheese
- 1/3 cup pine nuts
- 3 cloves garlic, minced
- 1/2 cup olive oil
- Salt and pepper to taste
- Juice of 1 lemon
Preparation Time: 10 minutes
Cooking Time: 15 minutes
Total Time: 25 minutes
Instructions:
1. Cook the whole wheat pasta according to package instructions until al dente, then drain and set aside.
2. In a food processor, combine basil leaves, Parmesan cheese, pine nuts, garlic, lemon juice, salt, and pepper. Blend until well combined.
3. With the food processor running, slowly pour in olive oil until the pesto reaches your desired consistency.
4. In a large mixing bowl, combine the cooked pasta, chickpeas, and pesto. Toss until everything is well coated.
5. Serve immediately, garnished with extra Parmesan if desired.
Tips:
- For a vegan option, substitute Parmesan with nutritional yeast.
- Add cherry tomatoes or spinach for extra color and nutrients.
- Store leftover pesto in the refrigerator for up to a week in an airtight container.
Budget Chicken Stir-Fry with Veggies
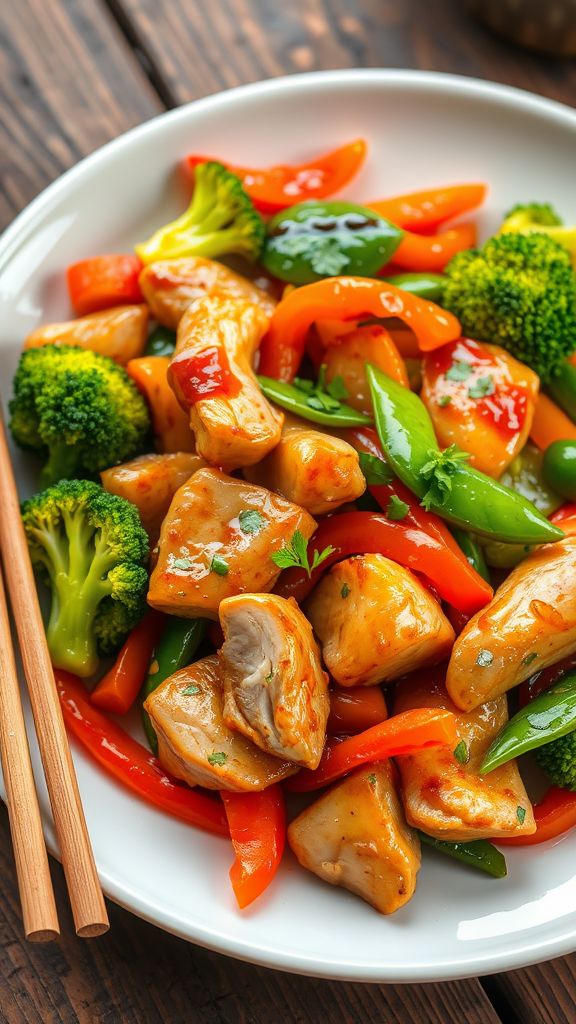
This Budget Chicken Stir-Fry with Veggies is a quick and wholesome meal that brings together vibrant vegetables and tender chicken in a savory sauce. Perfect for busy weekdays, it balances flavor and nutrition without breaking the bank.
Ingredients:
- 1 lb boneless, skinless chicken breast, sliced
- 2 tablespoons soy sauce
- 1 tablespoon vegetable oil
- 2 cups mixed vegetables (frozen or fresh)
- 2 cloves garlic, minced
- 1 teaspoon ginger, grated
- 2 tablespoons cornstarch (optional for thickening)
- 1 tablespoon sesame oil (optional for extra flavor)
- Salt and pepper to taste
Preparation Time: 10 minutes
Cooking Time: 15 minutes
Total Time: 25 minutes
Instructions:
1. In a bowl, marinate the chicken slices with soy sauce, garlic, ginger, salt, and pepper for about 10 minutes.
2. Heat vegetable oil in a large pan or wok over medium-high heat.
3. Add the marinated chicken to the pan and cook until golden brown and cooked through, about 5-7 minutes.
4. Stir in the mixed vegetables and cook until they are tender, around 3-4 minutes.
5. If using, mix in cornstarch dissolved in a bit of water and toss everything to combine until the sauce thickens.
6. Drizzle with sesame oil and stir well before serving.
Tips:
- Feel free to customize with your favorite vegetables or what you have on hand.
- Serve over rice or noodles for a complete meal.
- For meal prep, store in airtight containers and reheat for quick lunches.
Nutritious Tuna Salad Stuffed Bell Peppers
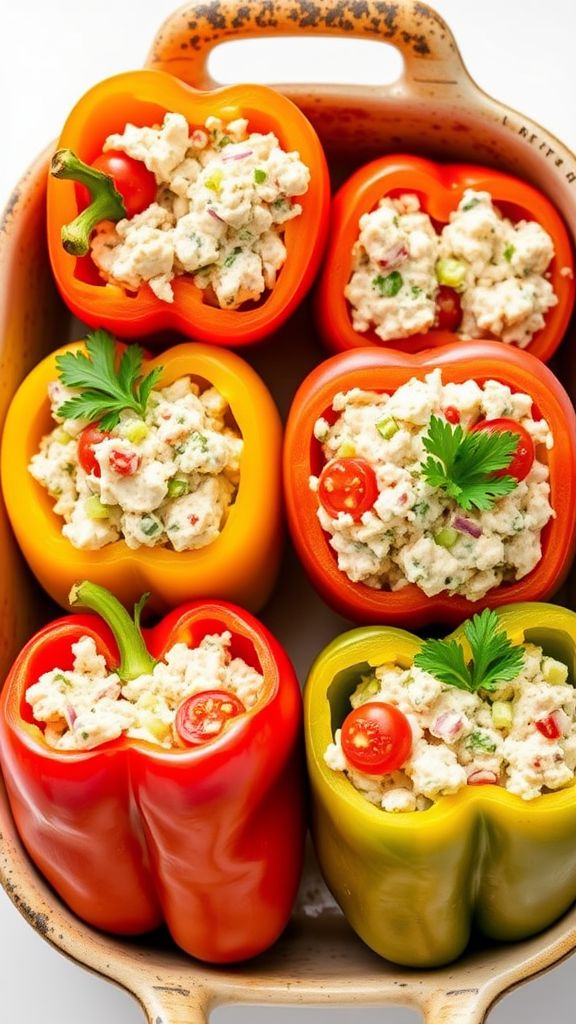
This Nutritious Tuna Salad Stuffed Bell Peppers recipe is a delightful blend of fresh flavors and wholesome ingredients. The combination of savory tuna, crisp bell peppers, and zesty dressing makes it a satisfying meal that’s as nutritious as it is delicious.
Ingredients:
- 4 bell peppers (any color)
- 2 cans tuna in water, drained
- 1/2 cup Greek yogurt
- 1/4 cup diced celery
- 1/4 cup diced red onion
- 1 tablespoon Dijon mustard
- 1 tablespoon lemon juice
- 1 teaspoon garlic powder
- 1/2 teaspoon salt
- 1/4 teaspoon black pepper
- 1/4 cup chopped fresh parsley
- 1/2 cup cherry tomatoes, halved
Preparation Time: 15 minutes
Cooking Time: 0 minutes
Total Time: 15 minutes
Instructions:
1. Preheat your oven to 375°F (190°C) if you prefer to roast the bell peppers.
2. Cut the tops off the bell peppers and remove the seeds and membranes. Set aside.
3. In a mixing bowl, combine the drained tuna, Greek yogurt, diced celery, diced red onion, Dijon mustard, lemon juice, garlic powder, salt, black pepper, chopped parsley, and cherry tomatoes. Mix until well combined.
4. Stuff each bell pepper with the tuna salad mixture, pressing gently to pack it in.
5. Place the stuffed peppers upright in a baking dish. If roasting, cover with foil and bake for about 15-20 minutes until the peppers are tender.
6. Remove from the oven, let cool slightly, and serve immediately or refrigerate for later.
Tips:
- For added flavor, try mixing in some diced avocado or other vegetables you love.
- These stuffed peppers can be made in advance and stored in the fridge for up to 2 days.
- Feel free to use canned salmon or chicken as an alternative to tuna.
Simple Vegetarian Bean and Cheese Enchiladas

These Simple Vegetarian Bean and Cheese Enchiladas are a delightful combination of creamy beans and melty cheese, all wrapped up in soft tortillas and drenched in savory enchilada sauce. With their bold flavors and comforting appeal, they’re perfect for any weeknight dinner.
Ingredients:
- 2 cups cooked black beans
- 1 cup shredded cheddar cheese
- 1 cup enchilada sauce
- 8 corn tortillas
- 1 teaspoon ground cumin
- 1 teaspoon chili powder
- 1/2 cup diced onion
- 1 tablespoon olive oil
- 1/4 cup chopped fresh cilantro (optional)
- 1/2 cup sour cream (optional, for serving)
Preparation Time: 15 minutes
Cooking Time: 25 minutes
Total Time: 40 minutes
Instructions:
1. Preheat your oven to 375°F (190°C).
2. In a skillet, heat the olive oil over medium heat and sauté the diced onion until translucent, about 5 minutes.
3. In a mixing bowl, combine the cooked black beans, sautéed onions, ground cumin, chili powder, and half of the cheddar cheese.
4. Warm the tortillas in a microwave or on a skillet to make them pliable.
5. Place a generous amount of the bean mixture down the center of each tortilla, roll it up, and place seam-side down in a baking dish.
6. Pour the enchilada sauce over the top of the rolled tortillas and sprinkle with the remaining cheddar cheese.
7. Bake in the preheated oven for 20 minutes, or until the cheese is melted and bubbly.
8. Remove from oven and let cool for a few minutes before serving. Garnish with chopped cilantro and serve with sour cream if desired.
Tips:
- Feel free to customize the filling with your favorite vegetables like bell peppers or spinach.
- For added heat, add diced jalapeños to the bean mixture.
- To save time, use store-bought enchilada sauce.
- These enchiladas can be made ahead of time and stored in the refrigerator before baking.
Wholesome Greek Yogurt Chicken Salad
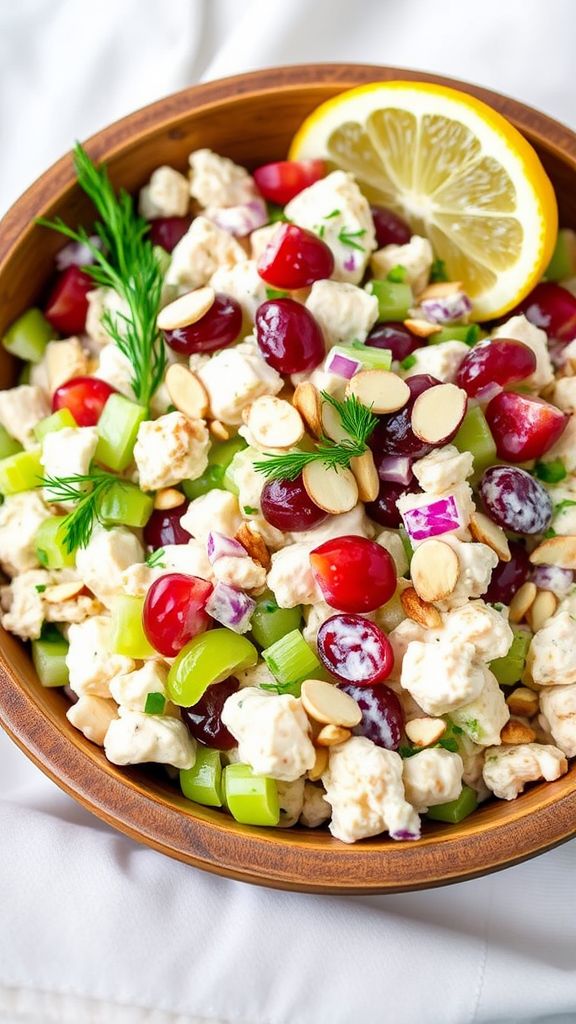
This Wholesome Greek Yogurt Chicken Salad is a deliciously healthy twist on a classic favorite, bringing together savory chicken, tangy Greek yogurt, and vibrant vegetables for a refreshing meal. The combination of creamy textures and zesty flavors makes it perfect for a light lunch or a satisfying dinner.
Ingredients:
- 2 cups cooked chicken, diced
- 1 cup plain Greek yogurt
- 1/2 cup celery, finely chopped
- 1/2 cup red grapes, halved
- 1/4 cup red onion, finely chopped
- 1/4 cup almonds, sliced
- 2 tablespoons fresh dill, chopped
- 1 tablespoon lemon juice
- 1 teaspoon garlic powder
- Salt and pepper to taste
Preparation Time: 15 minutes
Cooking Time: 0 minutes
Total Time: 15 minutes
Instructions:
1. In a large mixing bowl, combine the diced chicken, Greek yogurt, celery, grapes, red onion, and almonds.
2. Add the chopped dill, lemon juice, garlic powder, salt, and pepper to the mixture.
3. Gently fold all ingredients together until well combined.
4. Taste and adjust seasoning as needed, adding more salt, pepper, or lemon juice to your preference.
5. Serve immediately or chill in the refrigerator for at least 30 minutes to enhance the flavors.
Tips:
- For extra crunch, add diced bell peppers or cucumbers to the salad.
- You can substitute chicken with canned tuna or chickpeas for a different protein option.
- This salad can be stored in the refrigerator for up to 3 days, making it great for meal prep.
Frugal Quinoa and Black Bean Salad
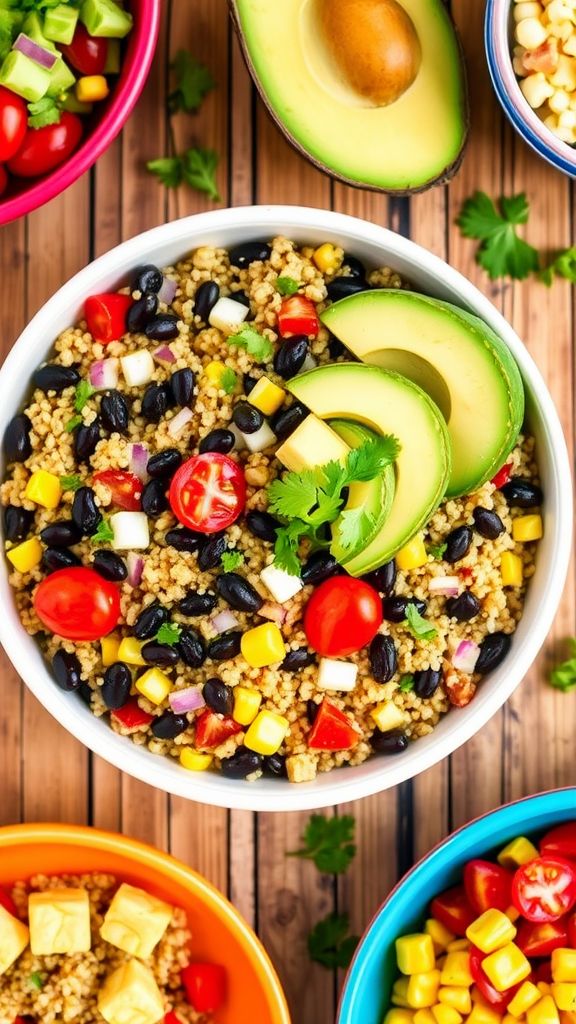
This Frugal Quinoa and Black Bean Salad is not only budget-friendly but bursting with vibrant flavors from fresh vegetables and zesty lime. It’s a nutritious, satisfying meal that can be enjoyed on its own or as a side dish!
Ingredients:
- 1 cup quinoa
- 2 cups vegetable broth
- 1 can (15 oz) black beans, rinsed and drained
- 1 cup cherry tomatoes, halved
- 1 cup corn (frozen or canned)
- 1/2 red onion, finely chopped
- 1 avocado, diced
- 1/4 cup fresh cilantro, chopped
- 2 limes, juiced
- 2 tablespoons olive oil
- 1 teaspoon cumin
- Salt and pepper to taste
Preparation Time: 15 minutes
Cooking Time: 20 minutes
Total Time: 35 minutes
Instructions:
1. Rinse the quinoa under cold water and drain.
2. In a medium saucepan, combine quinoa and vegetable broth. Bring to a boil, then reduce heat, cover, and simmer for about 15 minutes or until the quinoa is fluffy and the liquid is absorbed.
3. In a large bowl, combine the black beans, cherry tomatoes, corn, red onion, avocado, and cilantro.
4. Once the quinoa is cooked, let it cool slightly before adding it to the vegetable mixture.
5. In a small bowl, whisk together the lime juice, olive oil, cumin, salt, and pepper. Pour over the salad and toss gently to combine.
6. Serve immediately or refrigerate for 30 minutes to enhance flavors.
Tips:
- Feel free to add other vegetables like bell peppers or cucumber for extra crunch.
- This salad can be stored in the fridge for up to 3 days, making it perfect for meal prep.
- For added protein, consider topping with grilled chicken or feta cheese.
Low-Budget Stuffed Cabbage Rolls

These Low-Budget Stuffed Cabbage Rolls pack a flavorful punch while being easy on your wallet, making them a perfect meal for families. With savory ground meat, rice, and aromatic spices, each roll is a satisfying delight!
Ingredients:
- 1 head of cabbage
- 1 pound ground beef or turkey
- 1 cup cooked rice
- 1 small onion, finely chopped
- 2 cloves garlic, minced
- 1 can (15 oz) tomato sauce
- 1 teaspoon salt
- 1/2 teaspoon black pepper
- 1 teaspoon paprika
- 1 tablespoon olive oil
- 1/4 cup fresh parsley, chopped (optional)
Preparation Time: 20 minutes
Cooking Time: 45 minutes
Total Time: 65 minutes
Instructions:
1. Preheat your oven to 350°F (175°C).
2. Bring a large pot of salted water to a boil and carefully remove the leaves from the cabbage head while boiling for about 2-3 minutes, just until softened. Drain and set aside.
3. In a skillet, heat the olive oil over medium heat, then add the onion and garlic, sautéing until translucent.
4. In a large bowl, combine the ground meat, cooked rice, sautéed onion and garlic, salt, pepper, paprika, and parsley.
5. Take one cabbage leaf, fill it with a generous amount of the meat mixture, and roll it tightly, tucking in the sides. Repeat for all leaves and filling.
6. Place the cabbage rolls seam-side down in a baking dish and pour the tomato sauce over the top, covering entirely.
7. Cover the baking dish with foil and bake for 30-35 minutes. Remove foil and bake for an additional 10 minutes until heated through.
Tips:
- Feel free to use leftover rice or a combination of different meats for a unique flavor.
- Adding cheese to the filling can elevate the taste even further.
- These rolls can be frozen before or after cooking for a quick meal later.
Thrifty Sweet Potato and Black Bean Tacos

These Thrifty Sweet Potato and Black Bean Tacos bring together the earthy sweetness of roasted sweet potatoes and the hearty taste of black beans, making for a budget-friendly, flavor-packed meal. Perfect for a quick dinner or a casual gathering, they are sure to please both vegetarians and meat-lovers alike!
Ingredients:
- 2 cups diced sweet potatoes
- 1 can (15 oz) black beans, rinsed and drained
- 1 tablespoon olive oil
- 1 teaspoon ground cumin
- 1 teaspoon smoked paprika
- 1/2 teaspoon salt
- 8 corn tortillas
- 1/2 cup crumbled feta cheese (optional)
- 1 avocado, sliced
- 1 lime, cut into wedges
- 1/4 cup fresh cilantro, chopped
Preparation Time: 10 minutes
Cooking Time: 25 minutes
Total Time: 35 minutes
Instructions:
1. Preheat the oven to 400°F (200°C).
2. Toss the diced sweet potatoes with olive oil, cumin, paprika, and salt in a large bowl until evenly coated.
3. Spread the sweet potatoes on a baking sheet in a single layer and roast for about 20 minutes, or until tender and slightly caramelized.
4. While the sweet potatoes are roasting, warm the black beans in a small saucepan over medium heat until heated through.
5. In a dry skillet, quickly warm the corn tortillas for about 30 seconds on each side.
6. Assemble the tacos by placing a scoop of roasted sweet potatoes and black beans onto each tortilla.
7. Top with slices of avocado, crumbled feta (if using), cilantro, and a squeeze of lime.
8. Serve immediately, garnished with extra lime wedges on the side.
Tips:
- For added flavor, try mixing in some diced red onion or jalapeño while roasting the sweet potatoes.
- You can prepare the sweet potatoes and beans ahead of time for a quicker meal when needed.
- These tacos pair well with salsa or hot sauce for those who enjoy a bit of heat.
Protein-Loaded Spinach and Feta Stuffed Chicken
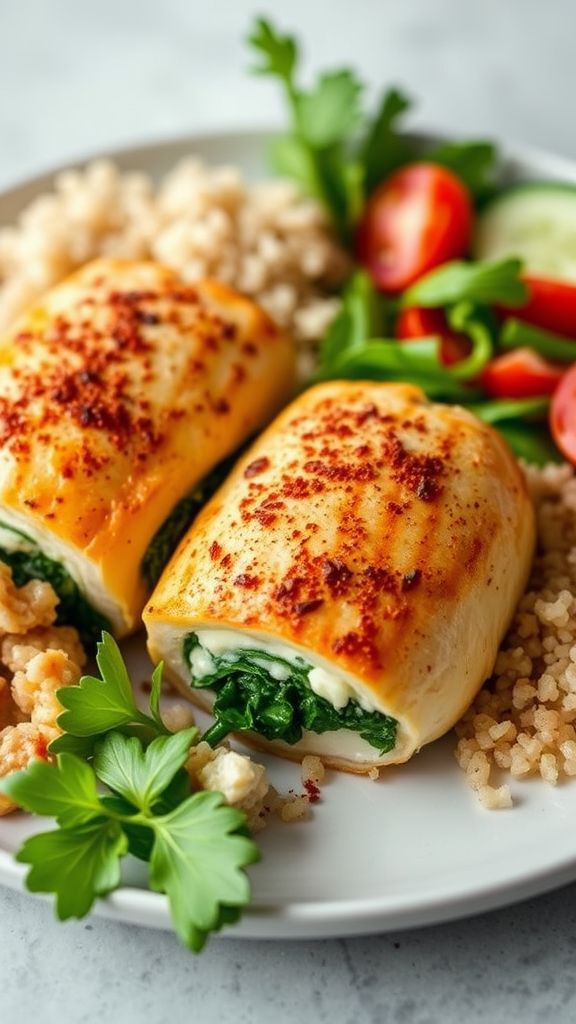
This Protein-Loaded Spinach and Feta Stuffed Chicken offers a delightful blend of savory flavors and wholesome nutrition. The combination of spinach and feta cheese enveloped in tender chicken breasts makes this dish both appealing and satisfying.
Ingredients:
- 4 boneless, skinless chicken breasts
- 2 cups fresh spinach, chopped
- 1 cup feta cheese, crumbled
- 1/4 cup cream cheese, softened
- 2 cloves garlic, minced
- 1 teaspoon onion powder
- 1 teaspoon dried oregano
- 1 tablespoon olive oil
- Salt and pepper to taste
- 1/2 teaspoon paprika (optional, for garnish)
Preparation Time: 15 minutes
Cooking Time: 25 minutes
Total Time: 40 minutes
Instructions:
1. Preheat your oven to 375°F (190°C).
2. In a mixing bowl, combine the chopped spinach, feta cheese, cream cheese, minced garlic, onion powder, oregano, salt, and pepper. Mix well to create the filling.
3. Carefully slice a pocket into each chicken breast, ensuring not to cut all the way through.
4. Stuff each chicken breast with the spinach and feta mixture.
5. Heat olive oil in a skillet over medium heat. Sear the stuffed chicken breasts for about 2-3 minutes on each side until golden brown.
6. Transfer the seared chicken to a baking dish and bake in the preheated oven for 20 minutes, or until the chicken is cooked through.
7. Remove from the oven and let rest for a few minutes before serving. Garnish with paprika if desired.
Tips:
- For added flavor, marinate the chicken breasts in lemon juice and garlic before stuffing.
- Feel free to experiment with different cheeses such as mozzarella or ricotta.
- Serve with a side of quinoa or a fresh salad for a complete meal.
Affordable Family Meatball Subs

These Affordable Family Meatball Subs are a delicious combination of savory meatballs smothered in rich marinara sauce, topped with gooey cheese, making them a crowd-pleaser for the whole family without breaking the bank.
Ingredients:
- 1 pound ground beef
- 1/2 cup breadcrumbs
- 1/4 cup grated Parmesan cheese
- 1 egg
- 2 cloves garlic, minced
- 1 teaspoon Italian seasoning
- 1 teaspoon salt
- 1/2 teaspoon black pepper
- 2 cups marinara sauce
- 4 sub rolls
- 1 cup shredded mozzarella cheese
Preparation Time: 10 minutes
Cooking Time: 25 minutes
Total Time: 35 minutes
Instructions:
1. Preheat your oven to 375°F (190°C).
2. In a large bowl, combine the ground beef, breadcrumbs, Parmesan cheese, egg, garlic, Italian seasoning, salt, and black pepper. Mix until well combined.
3. Form the mixture into meatballs, about 1 inch in diameter.
4. Heat marinara sauce in a large skillet over medium heat. Once hot, add the meatballs and cook for about 10-15 minutes until they are cooked through, stirring occasionally.
5. Place sub rolls on a baking sheet. Spoon meatballs along with sauce into each roll, then top with shredded mozzarella cheese.
6. Bake in the preheated oven for 10 minutes, or until the cheese is melted and bubbly.
7. Remove from the oven and let cool slightly before serving.
Tips:
- Feel free to use ground turkey or chicken as a leaner alternative.
- For extra flavor, add chopped parsley or basil to the meatball mixture.
- These meatball subs can be prepared ahead of time and reheated for a quick meal.
- Serve with a side salad or chips for a complete dinner.
Budget-Friendly Beef and Vegetable Stew
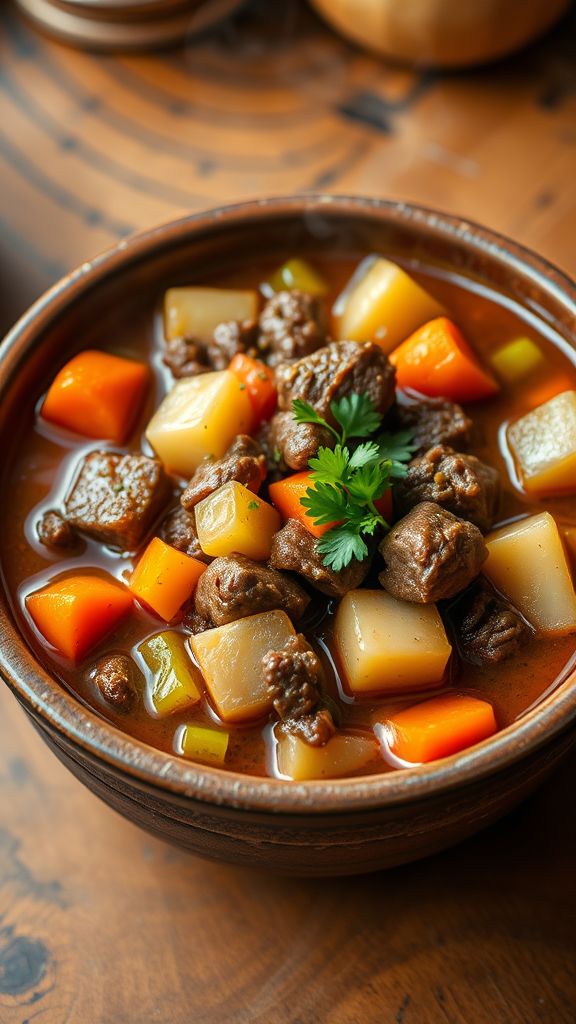
This Budget-Friendly Beef and Vegetable Stew is a wholesome meal packed with savory flavors and hearty ingredients. Enjoy the delicious blend of tender beef, fresh vegetables, and aromatic herbs that create a comforting dish perfect for any budget.
Ingredients:
- 1 pound beef stew meat
- 4 cups beef broth
- 2 carrots diced
- 2 potatoes cubed
- 1 onion chopped
- 2 stalks celery diced
- 2 cloves garlic minced
- 1 teaspoon dried thyme
- 1 teaspoon dried rosemary
- 2 tablespoons vegetable oil
- Salt to taste
- Pepper to taste
Preparation Time: 15 minutes
Cooking Time: 2 hours
Total Time: 2 hours 15 minutes
Instructions:
1. In a large pot, heat the vegetable oil over medium-high heat. Add the beef stew meat and brown on all sides.
2. Once browned, add the chopped onion and minced garlic to the pot, sauté until the onion is translucent.
3. Pour in the beef broth and stir in the carrots, potatoes, celery, thyme, and rosemary.
4. Season with salt and pepper as desired, bring the stew to a boil.
5. Reduce heat to low, cover, and let simmer for about 2 hours or until the beef is tender.
Tips:
- Feel free to add any other vegetables you have on hand, like peas or bell peppers.
- For added flavor, let the stew simmer longer on low heat.
- This stew freezes well, so make a double batch for easy meals later.
Economical Shrimp and Grits Bake

This Economical Shrimp and Grits Bake combines the creamy texture of grits with the robust flavors of seasoned shrimp, making it a comforting yet budget-friendly dish. The blend of cheddar cheese and spices elevates this classic Southern meal, appealing to both the palate and the wallet.
Ingredients:
- 1 cup grits
- 4 cups water
- 1 cup shredded cheddar cheese
- 1 pound shrimp, peeled and deveined
- 4 tablespoons butter
- 2 cloves garlic, minced
- 1 teaspoon smoked paprika
- 1 teaspoon salt
- 1/2 teaspoon black pepper
- 1/2 teaspoon cayenne pepper
- 2 green onions, sliced
- 1 cup milk
- 1/2 cup heavy cream
Preparation Time: 10 minutes
Cooking Time: 30 minutes
Total Time: 40 minutes
Instructions:
1. In a large saucepan, bring the water to a boil. Gradually stir in the grits, reduce the heat, and cook until thickened, about 5-7 minutes.
2. Remove the grits from the heat and stir in the shredded cheddar cheese, milk, and heavy cream until smooth and creamy.
3. In a skillet, melt the butter over medium heat. Add the minced garlic and sauté for about 1 minute until fragrant.
4. Add the shrimp to the skillet, along with the smoked paprika, salt, black pepper, and cayenne pepper. Cook until the shrimp are pink and opaque, about 5-6 minutes.
5. Preheat your oven to 350°F (175°C).
6. In a greased baking dish, spread the creamy grits mixture evenly. Top with the cooked shrimp and any remaining sauce from the skillet.
7. Bake in the preheated oven for 15-20 minutes until heated through and slightly bubbly.
8. Garnish with sliced green onions before serving.
Tips:
- For extra flavor, add a splash of hot sauce to the shrimp mixture.
- You can substitute frozen shrimp for fresh to save more money.
- Feel free to use leftover grits or make them a day in advance for quicker preparation.
Easy One-Pot Chickpea and Spinach Pasta
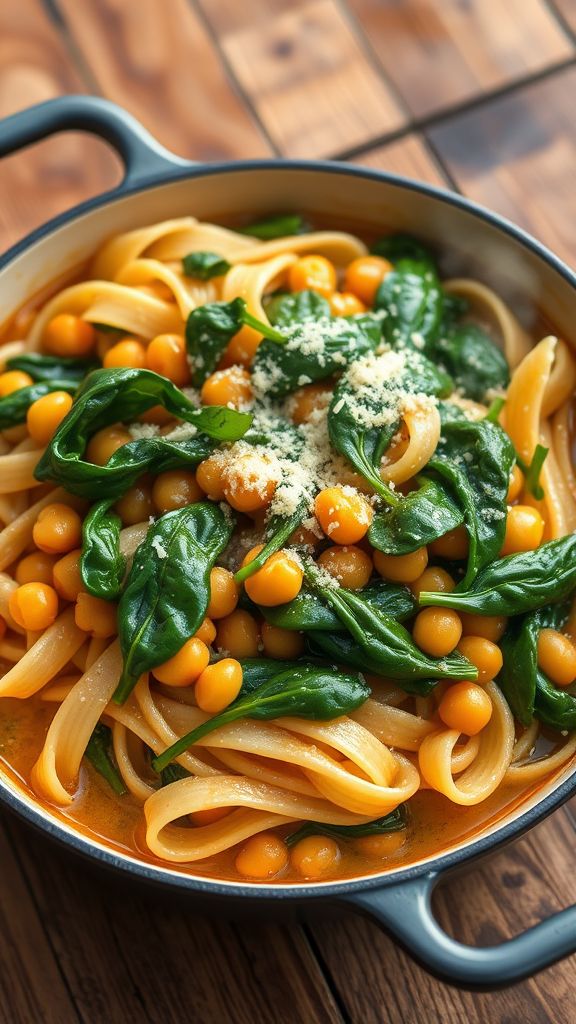
This Easy One-Pot Chickpea and Spinach Pasta is a deliciously simple weeknight meal that marries the nuttiness of chickpeas with the vibrant freshness of spinach. The comforting flavors come together in one pot for a hassle-free, nutritious dinner.
Ingredients:
- 8 ounces pasta of choice
- 1 can (15 ounces) chickpeas, drained and rinsed
- 2 cups fresh spinach
- 3 cups vegetable broth
- 1 tablespoon olive oil
- 2 cloves garlic, minced
- 1 teaspoon Italian seasoning
- Salt and pepper to taste
- 1/4 cup grated Parmesan cheese (optional)
Preparation Time: 10 minutes
Cooking Time: 15 minutes
Total Time: 25 minutes
Instructions:
1. In a large pot, heat the olive oil over medium heat and sauté the minced garlic until fragrant, about 1 minute.
2. Add the chickpeas, vegetable broth, and pasta to the pot; bring to a boil.
3. Once boiling, reduce heat to a simmer and cook according to pasta package instructions, stirring occasionally, until the pasta is al dente.
4. Stir in the fresh spinach and Italian seasoning; cook for an additional 2-3 minutes until the spinach is wilted.
5. Season with salt and pepper to taste, and serve with grated Parmesan cheese if desired.
Tips:
- Feel free to swap out spinach for kale or any other leafy green you prefer.
- Add a squeeze of lemon juice for a bright finish.
- This dish stores well, making it great for leftovers.
Thrifty Barbecue Chicken and Rice Casserole
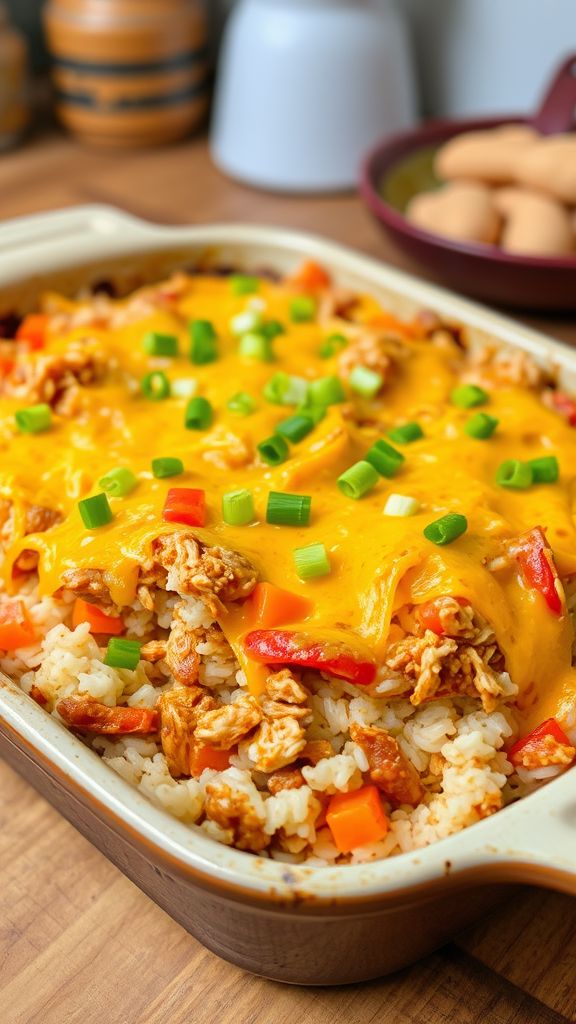
This Thrifty Barbecue Chicken and Rice Casserole is a budget-friendly dish that packs a punch of smoky flavors and hearty goodness. It’s the perfect one-pan meal that combines tender chicken, rice, and zesty barbecue sauce for a satisfying family dinner.
Ingredients:
- 2 cups cooked rice
- 2 cups shredded cooked chicken
- 1 cup barbecue sauce
- 1 cup shredded cheese (cheddar or mozzarella)
- 1/2 cup chopped bell pepper
- 1/2 cup chopped onion
- 1 teaspoon garlic powder
- 1 teaspoon smoked paprika
- 1/2 teaspoon salt
- 1/4 teaspoon black pepper
- 1 tablespoon olive oil
- 1/4 cup chopped green onions (for garnish)
Preparation Time: 15 minutes
Cooking Time: 30 minutes
Total Time: 45 minutes
Instructions:
1. Preheat your oven to 350°F (175°C).
2. In a large skillet, heat the olive oil over medium heat and sauté the chopped onion and bell pepper until they are softened, about 5 minutes.
3. In a large mixing bowl, combine the cooked rice, shredded chicken, barbecue sauce, sautéed vegetables, garlic powder, smoked paprika, salt, and black pepper. Stir until well combined.
4. Pour the mixture into a greased 9×13 inch casserole dish and spread it evenly.
5. Sprinkle the shredded cheese on top of the casserole.
6. Bake in the preheated oven for about 25 minutes, or until the cheese is melted and bubbly.
7. Remove from the oven and let it cool for a few minutes before serving. Garnish with chopped green onions.
Tips:
- For an extra kick, add some diced jalapeños to the mixture.
- This casserole can be made ahead of time and stored in the fridge for up to 2 days before baking.
- Feel free to substitute the barbecue sauce with your favorite flavor for a personalized touch.
Budget Tuna and Bean Pasta Salad
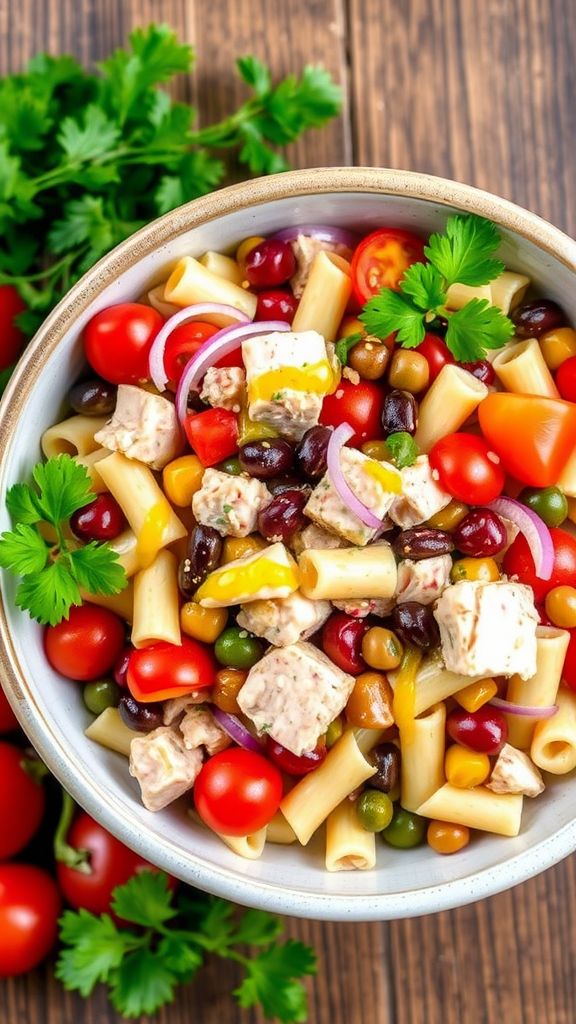
This Budget Tuna and Bean Pasta Salad is a perfect blend of protein-packed tuna, hearty beans, and al dente pasta, all tossed in a zesty dressing. It’s not only budget-friendly but also a quick and satisfying meal that makes for great leftovers!
Ingredients:
- 2 cups cooked pasta (any shape)
- 1 can tuna in water, drained
- 1 can mixed beans, drained and rinsed
- 1/2 cup cherry tomatoes, halved
- 1/4 cup red onion, finely chopped
- 1/4 cup bell pepper, diced
- 1/4 cup olive oil
- 2 tablespoons lemon juice
- 1 teaspoon garlic powder
- Salt and pepper to taste
- 1/4 cup parsley, chopped (optional)
Preparation Time: 10 minutes
Cooking Time: 15 minutes
Total Time: 25 minutes
Instructions:
1. Cook the pasta according to the package instructions. Drain and rinse under cold water to cool.
2. In a large bowl, combine cooked pasta, drained tuna, mixed beans, cherry tomatoes, red onion, and bell pepper.
3. In a small bowl, whisk together olive oil, lemon juice, garlic powder, salt, and pepper.
4. Pour the dressing over the pasta mixture and toss until everything is well coated.
5. If using, sprinkle chopped parsley on top before serving. Chill in the fridge for at least 30 minutes for best flavor.
Tips:
- Customize with your favorite vegetables like cucumbers or carrots for extra crunch.
- This salad keeps well in the fridge for up to three days, making it great for meal prep.
- For added flavor, consider mixing in some spices or capers.
Protein-Rich Turkey and Cabbage Skillet

This Protein-Rich Turkey and Cabbage Skillet is a wholesome, one-pan meal packed with flavor and nutrition. With its savory turkey and crisp cabbage, this dish is not only satisfying but also easy to prepare, making it perfect for a quick weeknight dinner.
Ingredients:
- 1 lb ground turkey
- 4 cups shredded cabbage
- 1 onion, diced
- 2 cloves garlic, minced
- 1 tsp ground cumin
- 1 tsp paprika
- 1/2 tsp salt
- 1/2 tsp black pepper
- 2 tbsp olive oil
- 1/4 cup chicken broth
- 2 tbsp soy sauce
- 1/4 cup green onions, chopped
Preparation Time: 10 minutes
Cooking Time: 20 minutes
Total Time: 30 minutes
Instructions:
1. In a large skillet, heat 2 tbsp of olive oil over medium heat.
2. Add the diced onion and minced garlic, sautéing until the onion is translucent, about 3-4 minutes.
3. Add the ground turkey to the skillet and cook, breaking it up with a spoon, until no longer pink, about 5-7 minutes.
4. Stir in the shredded cabbage, ground cumin, paprika, salt, and black pepper; cook for another 5 minutes until the cabbage is tender.
5. Pour in the chicken broth and soy sauce, mixing well; let it simmer for an additional 5 minutes.
6. Remove from heat and garnish with chopped green onions before serving.
Tips:
- For an extra kick, add some crushed red pepper flakes to the skillet.
- Use leftover turkey for a quicker meal preparation.
- This dish pairs well with brown rice or quinoa for additional fiber.
Cost-Conscious Beef and Lentil Tacos

This recipe for Cost-Conscious Beef and Lentil Tacos is a flavorful and budget-friendly meal that’s perfect for families. Packed with the spices of cumin and chili, these tacos offer a satisfying blend of beef and lentils that will please even the pickiest eaters.
Ingredients:
- 1 pound ground beef
- 1 cup cooked lentils
- 1 cup diced onion
- 2 cloves garlic, minced
- 1 tablespoon chili powder
- 1 teaspoon ground cumin
- 1/2 teaspoon salt
- 1/4 teaspoon black pepper
- 1 cup diced tomatoes
- 8 taco shells
- 1 cup shredded lettuce
- 1 cup shredded cheese
- 1/2 cup salsa
Preparation Time: 10 minutes
Cooking Time: 20 minutes
Total Time: 30 minutes
Instructions:
1. In a large skillet, cook the ground beef over medium heat until browned, about 5-7 minutes.
2. Add the diced onion and garlic to the skillet and sauté until the onion is translucent, about 3-4 minutes.
3. Stir in the cooked lentils, chili powder, cumin, salt, and black pepper. Cook for an additional 5 minutes, stirring occasionally.
4. Add the diced tomatoes and cook for another 2-3 minutes, until heated through.
5. While the beef and lentil mixture cooks, warm the taco shells according to package instructions.
6. Assemble the tacos by filling each shell with the beef and lentil mixture, then top with lettuce, cheese, and salsa as desired.
Tips:
- For extra flavor, add fresh cilantro or avocado as toppings.
- Feel free to swap ground beef for turkey or a vegetarian protein for a healthier option.
- Make a double batch and freeze leftovers for an easy meal later.
Simple Chicken and Vegetable Stir-Fry
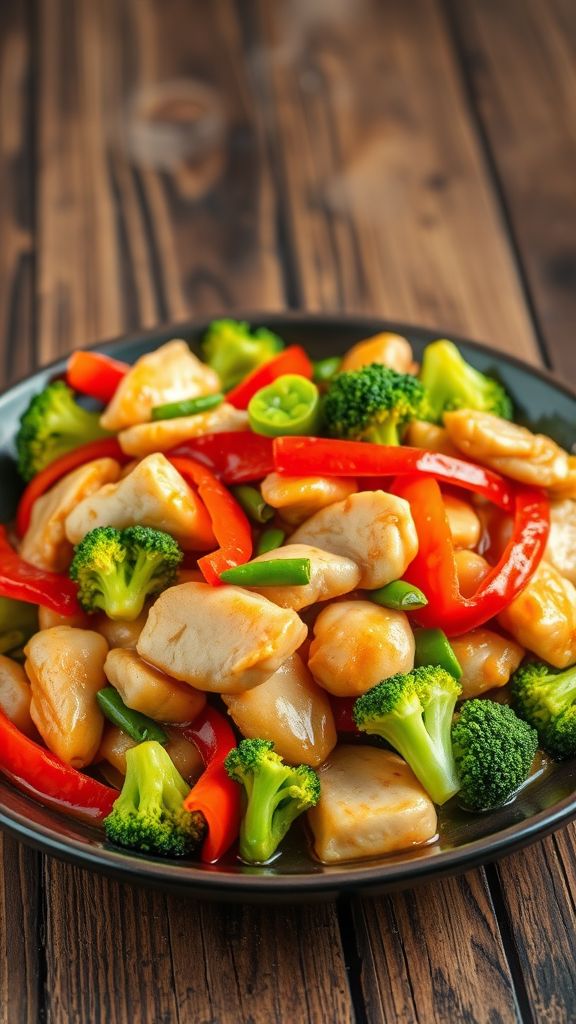
This Simple Chicken and Vegetable Stir-Fry is a quick and delicious way to enjoy a colorful medley of fresh vegetables paired with tender chicken. The combination of soy sauce and ginger brings a delightful depth of flavor that appeals to everyone.
Ingredients:
- 1 pound boneless, skinless chicken breast, sliced
- 2 cups mixed bell peppers, sliced
- 1 cup broccoli florets
- 1 cup snow peas
- 3 tablespoons soy sauce
- 1 tablespoon sesame oil
- 2 cloves garlic, minced
- 1 teaspoon ginger, minced
- 1 tablespoon vegetable oil
- 1 teaspoon cornstarch (optional, for thickening)
Preparation Time: 10 minutes
Cooking Time: 15 minutes
Total Time: 25 minutes
Instructions:
1. In a large bowl, combine the sliced chicken with soy sauce, garlic, and ginger. Let it marinate for about 10 minutes.
2. Heat vegetable oil in a large skillet or wok over medium-high heat.
3. Add the marinated chicken to the skillet and cook until browned and cooked through, about 5-7 minutes. Remove the chicken and set aside.
4. In the same skillet, add the bell peppers, broccoli, and snow peas. Stir-fry for 3-4 minutes until the vegetables are tender-crisp.
5. Return the chicken to the skillet, add the sesame oil, and toss everything together to combine. If using, mix cornstarch with a little water and add to thicken the sauce.
6. Cook for another 1-2 minutes, ensuring the chicken and vegetables are well coated in the sauce.
7. Serve hot over rice or noodles, if desired.
Tips:
- You can substitute any vegetables you have on hand for a personalized twist.
- For extra flavor, sprinkle sesame seeds on top before serving.
- Leftovers can be stored in an airtight container in the refrigerator for up to 3 days.
Budget-Friendly Quinoa and Vegetable Stuffed Peppers
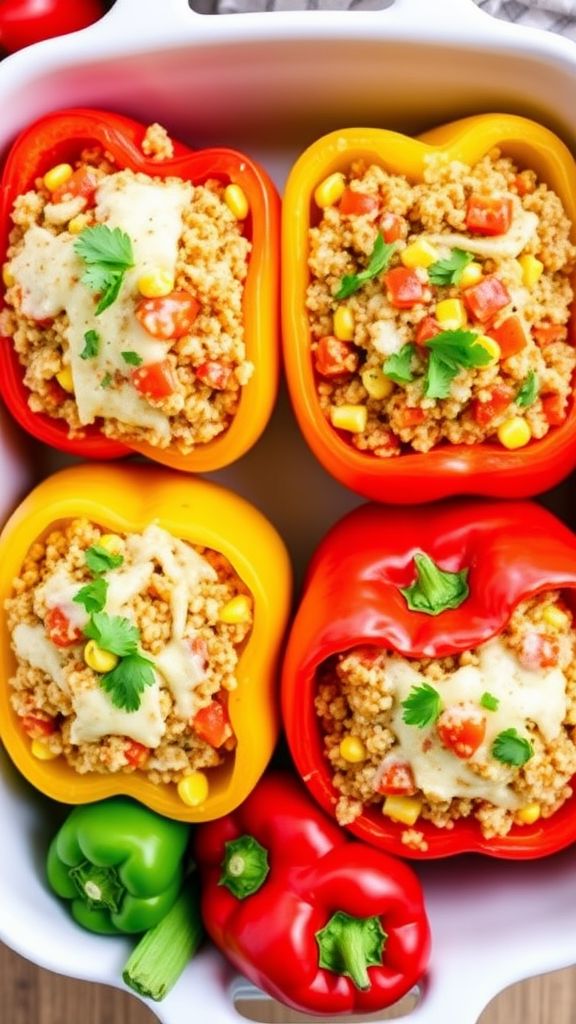
This Budget-Friendly Quinoa and Vegetable Stuffed Peppers recipe combines nutritious quinoa with vibrant vegetables for a delicious and satisfying dish that’s easy on the wallet. The flavors of garlic, cumin, and fresh herbs make it a savory delight for any meal.
Ingredients:
- 4 large bell peppers
- 1 cup quinoa
- 2 cups vegetable broth
- 1 small onion, diced
- 2 cloves garlic, minced
- 1 cup diced tomatoes (canned or fresh)
- 1 cup corn (frozen or canned)
- 1 teaspoon cumin
- 1 teaspoon paprika
- 1/2 teaspoon salt
- 1/2 teaspoon black pepper
- 1/4 cup fresh parsley, chopped
- 1 cup shredded cheese (optional)
Preparation Time: 15 minutes
Cooking Time: 30 minutes
Total Time: 45 minutes
Instructions:
1. Preheat your oven to 375°F (190°C) and prepare a baking dish by lightly greasing it.
2. Rinse the quinoa under cold water, then combine it with the vegetable broth in a saucepan and bring to a boil. Reduce heat to low, cover, and simmer for about 15 minutes or until all the liquid is absorbed.
3. While quinoa cooks, cut the tops off the bell peppers and remove the seeds and membranes.
4. In a skillet, sauté the onion and garlic over medium heat until softened, about 5 minutes.
5. Add the diced tomatoes, corn, cumin, paprika, salt, and black pepper to the skillet and stir well. Cook for an additional 5 minutes.
6. Once the quinoa is cooked, add it to the skillet mixture along with the chopped parsley and mix thoroughly.
7. Stuff each bell pepper with the quinoa and vegetable mixture, packing it tightly. Place the stuffed peppers upright in the baking dish.
8. If desired, sprinkle shredded cheese on top of each pepper.
9. Cover the dish with foil and bake for 25 minutes. Remove the foil and bake for an additional 5 minutes until the peppers are tender.
Tips:
- Feel free to customize the vegetables based on what you have on hand.
- Add beans or lentils for extra protein and fiber.
- These stuffed peppers store well in the fridge for up to 4 days.
Nutritious Ham and Bean Soup
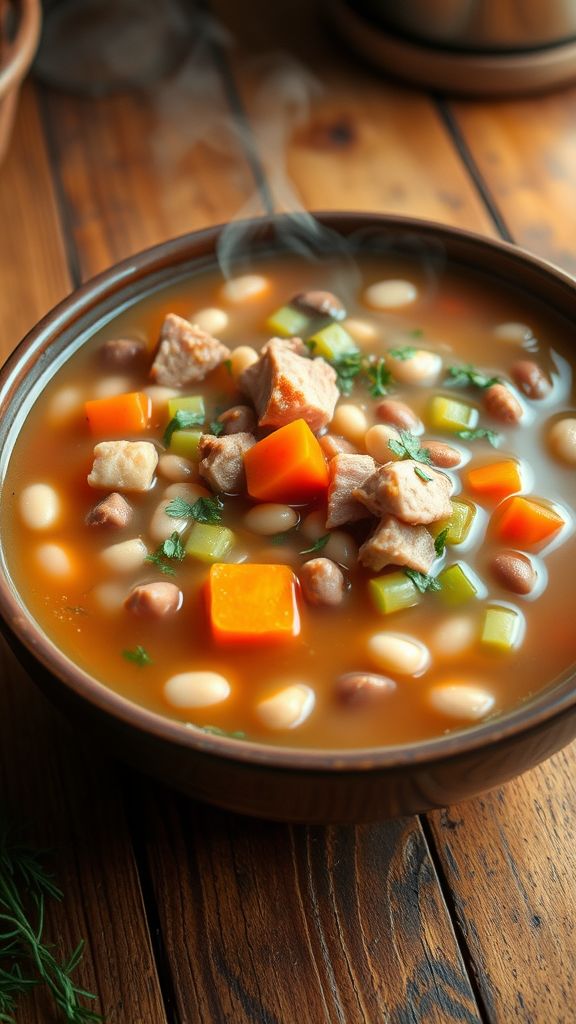
This Nutritious Ham and Bean Soup is a hearty, flavorful dish that combines the rich taste of smoked ham with the earthy goodness of beans. Perfect for warming you up on a cold day, each spoonful is packed with protein and comforting flavors.
Ingredients:
- 1 cup diced smoked ham
- 1 cup dried navy beans
- 1 medium onion, chopped
- 2 cloves garlic, minced
- 2 carrots, sliced
- 2 celery stalks, sliced
- 4 cups chicken broth
- 1 teaspoon dried thyme
- 1 teaspoon paprika
- Salt and pepper to taste
- 2 tablespoons olive oil
- 1 bay leaf
Preparation Time: 15 minutes
Cooking Time: 1 hour 30 minutes
Total Time: 1 hour 45 minutes
Instructions:
1. Rinse and soak the dried navy beans in water for at least 4 hours or overnight.
2. Heat olive oil in a large pot over medium heat. Add diced ham, onion, garlic, carrots, and celery. Sauté for about 5 minutes until vegetables are softened.
3. Drain the soaked beans and add them to the pot along with the chicken broth, thyme, paprika, bay leaf, and season with salt and pepper.
4. Bring the mixture to a boil, then reduce heat to low and let it simmer for about 1 hour until the beans are tender.
5. Remove the bay leaf and adjust seasoning if necessary. Serve hot and enjoy!
Tips:
- For added depth of flavor, you can use bone-in ham or a ham hock in the soup.
- Feel free to add other vegetables like kale or spinach for extra nutrition.
- This soup stores well in the fridge for up to 3 days; just reheat before serving.