My New Cookbook is Out! Check Out Now!
20 Easy Camping Desserts to Sweeten Your Outdoor Adventure
Did you know that over 70% of campers consider dessert the most exciting part of their camping trip? If you’re looking to sweeten your outdoor adventure, you’ve come to the right place! In this blog, we will explore 20 easy camping desserts that are perfect for satisfying your sweet tooth while enjoying nature. Get ready to impress your friends and family with delightful treats like S’mores Delight Bars and Campfire Banana Boats that are sure to make your camping experience unforgettable!
S’mores Delight Bars
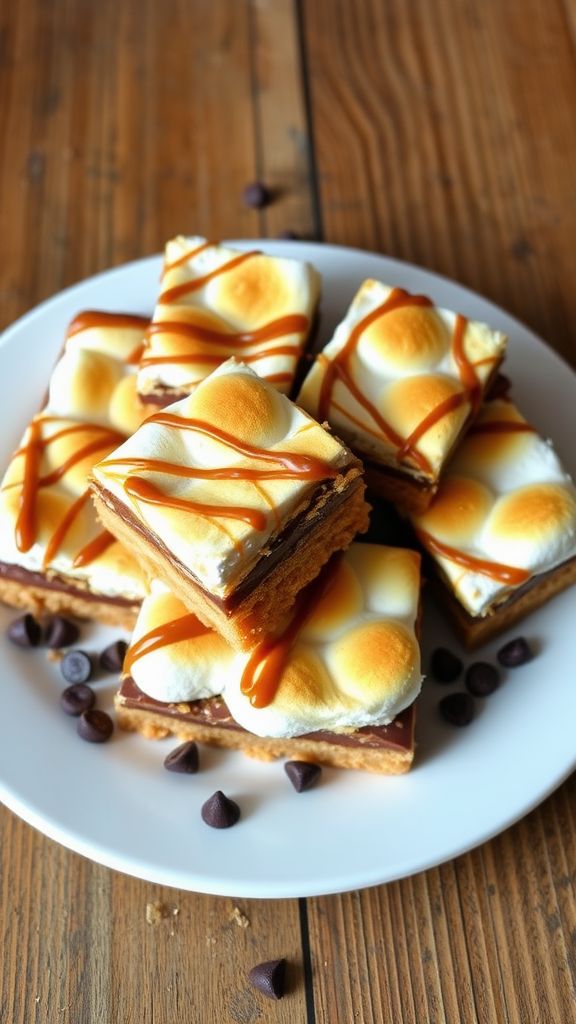
These S’mores Delight Bars perfectly combine the rich flavors of chocolate, gooey marshmallows, and graham cracker crust, making them an irresistible treat for any occasion.
Ingredients:
- 1 ½ cups graham cracker crumbs
- ½ cup unsalted butter, melted
- 1 cup chocolate chips
- 1 cup mini marshmallows
- ½ cup sweetened condensed milk
- ¼ cup chopped nuts (optional)
Preparation Time: 15 minutes
Cooking Time: 25 minutes
Total Time: 40 minutes
Instructions:
1. Preheat your oven to 350°F (175°C) and grease a 9×9-inch baking pan.
2. In a mixing bowl, combine the graham cracker crumbs and melted butter until well mixed.
3. Press the graham cracker mixture evenly into the bottom of the prepared baking pan.
4. Sprinkle the chocolate chips and mini marshmallows evenly over the crust.
5. Drizzle the sweetened condensed milk over the top of the chocolate chips and marshmallows.
6. If using, sprinkle the chopped nuts over the mixture.
7. Bake in the preheated oven for 25 minutes or until the marshmallows are golden and the mixture is bubbly.
8. Allow to cool completely before cutting into bars and serving.
Tips:
- Use a non-stick spray for easier removal from the pan.
- For an extra touch, you can toast the marshmallows on top slightly under the broiler for 1-2 minutes.
- These bars can be stored in an airtight container for up to one week.
Campfire Banana Boats
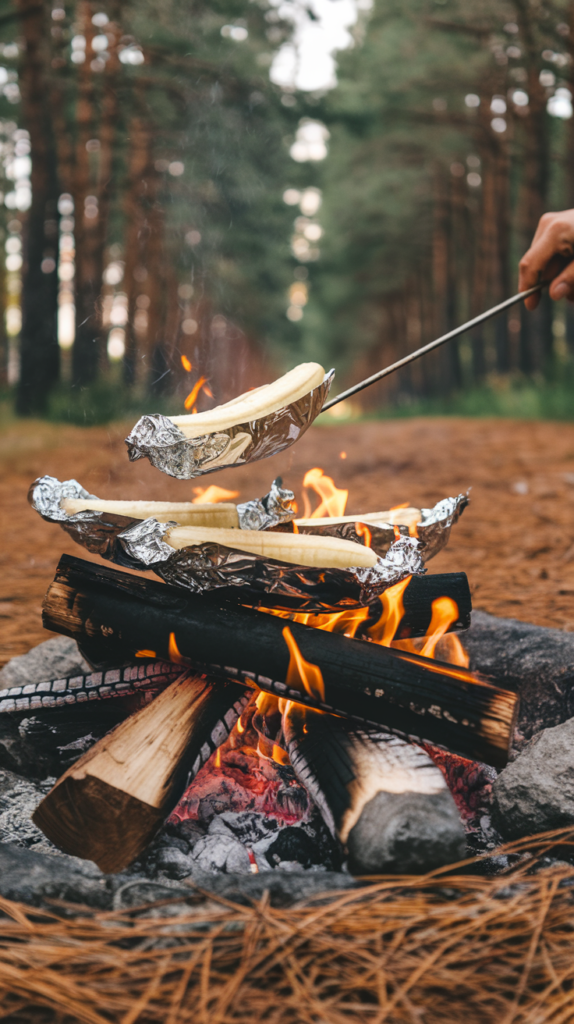
Campfire Banana Boats are a delightful way to enjoy rich chocolate, gooey marshmallows, and sweet bananas all wrapped up in a fun and simple dessert, perfect for any outdoor gathering.
Ingredients:
- 4 ripe bananas
- 1 cup chocolate chips
- 1 cup miniature marshmallows
- 1 teaspoon aluminum foil
- Optional: ¼ cup chopped nuts for crunch
- Optional: ¼ teaspoon cinnamon for extra flavor
Preparation Time: 5 minutes
Cooking Time: 10 minutes
Total Time: 15 minutes
Instructions:
1. Carefully slice each banana lengthwise, keeping the skin on, to create a pocket for the fillings.
2. Fill the banana pocket with chocolate chips and marshmallows, and add nuts or cinnamon if desired.
3. Wrap each banana in aluminum foil, making sure it is sealed tightly.
4. Place the foil-wrapped bananas over the campfire coals for about 10 minutes, turning occasionally.
5. Once the bananas are soft and the fillings are melted, carefully unwrap and enjoy straight from the foil!
Tips:
- For an extra layer of flavor, drizzle some caramel or peanut butter over the fillings.
- Always use caution when handling hot foil from the fire.
- Experiment with different types of chocolate or add fruit like strawberries for a unique twist.
Chocolate Chip Cookie Dough Cones

This recipe for Chocolate Chip Cookie Dough Cones combines the irresistible flavors of buttery cookie dough and rich chocolate chips, all served in a fun and crunchy cone for an unforgettable treat!
Ingredients:
- 1 cup unsalted butter, softened
- 1 cup brown sugar, packed
- ½ cup granulated sugar
- 2 cups all-purpose flour
- 1 teaspoon vanilla extract
- ¼ teaspoon salt
- 1 cup mini chocolate chips
- 12 ice cream cones
- 1 cup melting chocolate (for dipping)
- Sprinkles (optional, for decoration)
Preparation Time: 15 minutes
Cooking Time: 0 minutes
Total Time: 15 minutes
Instructions:
1. In a large mixing bowl, cream together the softened butter, brown sugar, and granulated sugar until light and fluffy.
2. Add the vanilla extract and salt, mixing until well combined.
3. Gradually mix in the all-purpose flour until just incorporated.
4. Fold in the mini chocolate chips evenly throughout the dough.
5. Scoop the cookie dough into the ice cream cones, pressing down gently to fill them completely.
6. In a microwave-safe bowl, melt the melting chocolate according to the package instructions until smooth.
7. Dip the tops of the filled cones into the melted chocolate, allowing any excess to drip off.
8. If desired, sprinkle the tops with additional sprinkles before the chocolate sets.
9. Place the cones upright in a cup or stand to allow the chocolate to harden, then enjoy your delicious creations!
Tips:
- For a fun twist, try adding different types of chocolate chips or mix-ins like nuts or dried fruit.
- Store any leftover cookie dough in an airtight container in the refrigerator for up to one week.
- For a more decadent treat, drizzle extra melted chocolate over the finished cones.
No-Bake Berry Cheesecakes
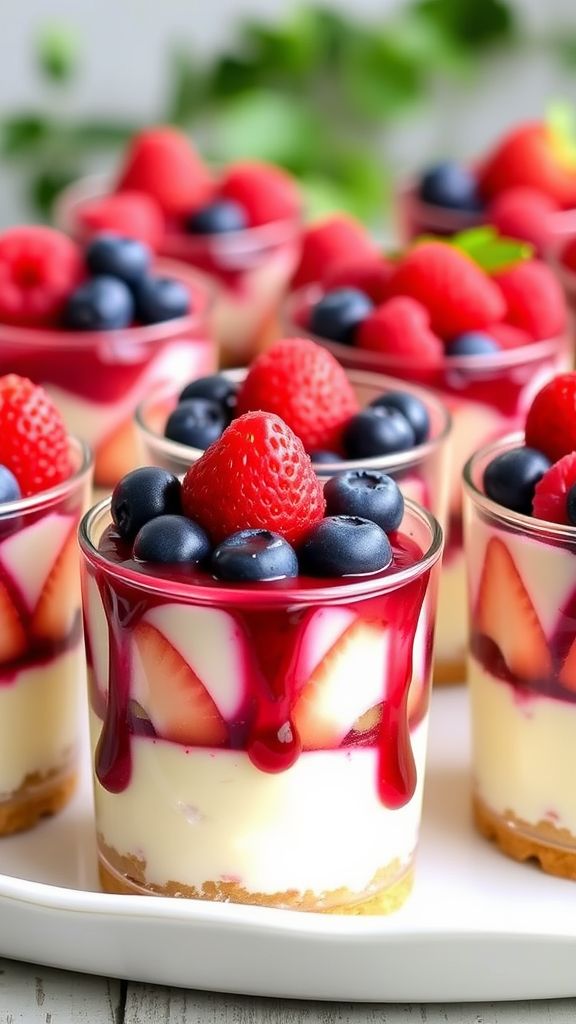
This No-Bake Berry Cheesecake recipe is special for its creamy texture and fresh fruit flavors that make it an irresistible dessert.
Ingredients:
- 1 ½ cups crushed graham crackers
- 6 tablespoons unsalted butter, melted
- 1 cup cream cheese, softened
- ½ cup powdered sugar
- 1 teaspoon vanilla extract
- 1 cup heavy whipping cream
- 2 cups mixed berries (strawberries, blueberries, raspberries)
- ¼ cup berry jam or preserve
Preparation Time: 15 minutes
Cooking Time: 0 minutes
Total Time: 15 minutes
Instructions:
1. In a bowl, combine crushed graham crackers and melted butter until well mixed.
2. Press the mixture into the bottom of individual serving cups or a springform pan to form the crust.
3. In another bowl, beat the softened cream cheese, powdered sugar, and vanilla extract until smooth.
4. In a separate bowl, whip the heavy cream until stiff peaks form, then gently fold it into the cream cheese mixture.
5. Spoon the cream cheese mixture over the crust in each cup or pan.
6. In a small saucepan, warm the berry jam over low heat until it’s smooth, then drizzle it over the cheesecake layer.
7. Top with mixed berries for garnish and refrigerate for at least 4 hours or until set.
Tips:
- For best results, use fresh berries that are at their peak ripeness.
- If you prefer a sweeter cheesecake, adjust the amount of powdered sugar to taste.
- These cheesecakes can be made a day in advance for an even firmer texture.
Campfire Apple Crisp
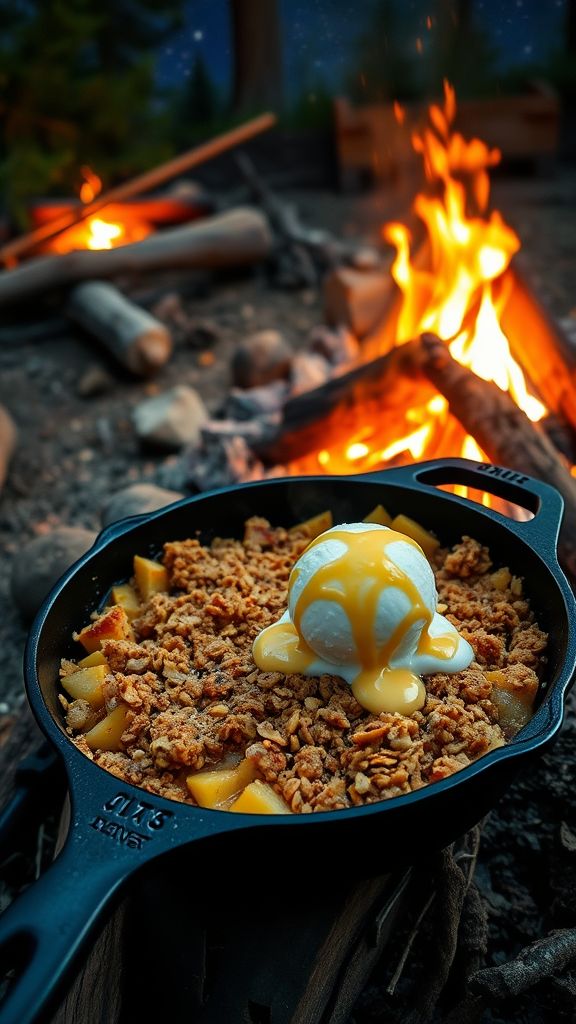
This Campfire Apple Crisp recipe brings together the warm, comforting flavors of cinnamon, brown sugar, and sweet apples, making it the perfect dessert for your outdoor adventures.
Ingredients:
- 6 cups sliced apples
- 1 cup brown sugar
- 1 teaspoon ground cinnamon
- 1 cup rolled oats
- 1 cup all-purpose flour
- 1/2 cup cold butter, cubed
- 1/4 teaspoon salt
- 1/2 cup chopped nuts (optional)
Preparation Time: 15 minutes
Cooking Time: 30 minutes
Total Time: 45 minutes
Instructions:
1. In a large bowl, combine the sliced apples, brown sugar, and ground cinnamon.
2. Mix well and set aside to allow the flavors to meld.
3. In another bowl, mix the rolled oats, all-purpose flour, salt, and chopped nuts (if using).
4. Cut in the cold butter until the mixture resembles coarse crumbs.
5. Place the apple mixture into a cast iron skillet or heavy-duty foil pan.
6. Sprinkle the oat mixture evenly over the apples.
7. Cover with aluminum foil and place over the campfire or on hot coals.
8. Cook for about 30 minutes, or until the apples are tender and the topping is golden.
Tips:
- Use a mix of sweet and tart apples for depth of flavor.
- Feel free to add raisins or cranberries for extra texture.
- Serve with vanilla ice cream or whipped cream for a delightful treat.
Pineapple Upside-Down Cakes in Foil

This Pineapple Upside-Down Cake in foil offers a delightful combination of caramelized pineapple and buttery cake that transforms a classic dessert into a portable treat.
Ingredients:
- 1/2 cup unsalted butter
- 1 cup packed brown sugar
- 1 can (20 ounces) sliced pineapple, drained
- Maraschino cherries for garnish
- 1 1/2 cups all-purpose flour
- 1 cup granulated sugar
- 2 teaspoons baking powder
- 1/2 teaspoon salt
- 1/2 cup whole milk
- 1/2 teaspoon vanilla extract
- 2 large eggs
Preparation Time: 15 minutes
Cooking Time: 30 minutes
Total Time: 45 minutes
Instructions:
1. Preheat your oven to 350°F (175°C).
2. In a saucepan, melt 1/2 cup of butter over medium heat, then stir in 1 cup of brown sugar until dissolved.
3. Pour the butter-brown sugar mixture evenly into the bottom of individual foil cupcake liners.
4. Arrange pineapple slices on top of the mixture, placing a cherry in the center of each pineapple slice.
5. In a mixing bowl, combine 1 1/2 cups flour, 1 cup sugar, 2 teaspoons baking powder, and 1/2 teaspoon salt.
6. In another bowl, whisk together 1/2 cup milk, 1/2 teaspoon vanilla extract, and 2 eggs.
7. Gradually mix the wet ingredients into the dry ingredients until just combined.
8. Spoon the batter over the pineapple and cherries in each foil liner.
9. Bake in the preheated oven for 25-30 minutes, or until a toothpick inserted into the center comes out clean.
10. Allow to cool slightly before inverting the cakes onto a serving plate or individual dishes.
Tips:
- Use heavy-duty foil to prevent any leaking during baking.
- Feel free to add nuts for a crunchy texture.
- These cakes can be made ahead of time and reheated for a warm dessert.
Easy Chocolate Fondue
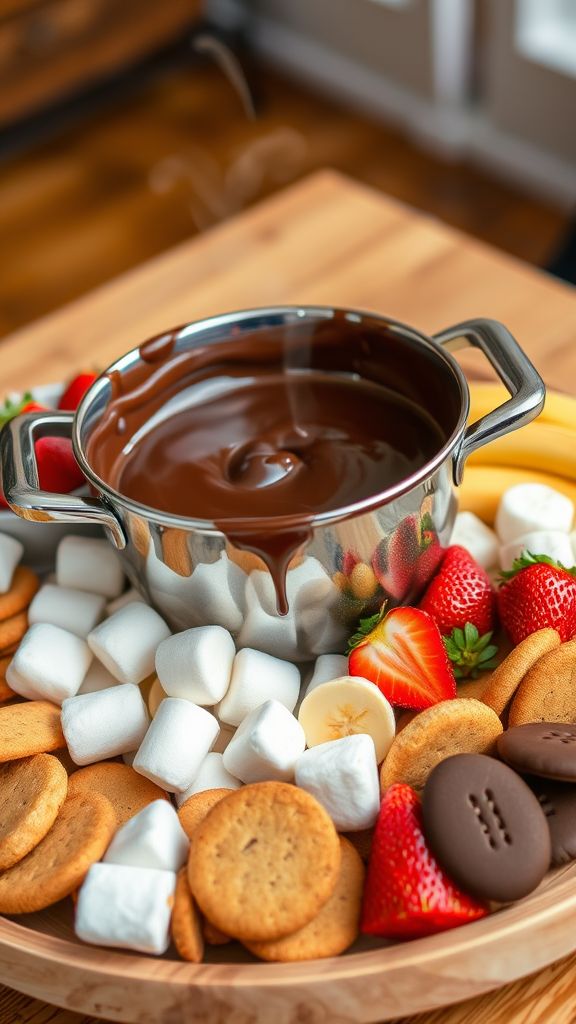
This Easy Chocolate Fondue recipe brings together the rich, creamy flavors of chocolate and a variety of dippable treats, making it a perfect dessert for gatherings.
Ingredients:
- 2 cups semi-sweet chocolate chips
- 1 cup heavy cream
- 1 teaspoon vanilla extract
- 1 pinch salt
- Fresh fruits, such as strawberries and bananas for dipping
- Marshmallows for dipping
- Cookies, like graham crackers or biscotti, for dipping
Preparation Time: 10 minutes
Cooking Time: 5 minutes
Total Time: 15 minutes
Instructions:
1. In a medium saucepan, heat the heavy cream over medium heat until it begins to simmer.
2. Remove the saucepan from heat and add the semi-sweet chocolate chips, stirring until melted and smooth.
3. Stir in the vanilla extract and a pinch of salt to enhance the chocolate flavor.
4. Transfer the chocolate mixture to a fondue pot or a heat-safe bowl to keep it warm.
5. Arrange fresh fruits, marshmallows, and cookies on a platter for dipping.
Tips:
- For a flavored fondue, try adding a splash of liqueur or flavored extracts.
- If the chocolate becomes too thick, add a little more cream to reach your desired consistency.
- Keep the fondue warm on low heat to prevent it from hardening.
Quick Trail Mix Energy Bites

This Quick Trail Mix Energy Bites recipe is special for its delightful blend of nutty, sweet, and chewy flavors that provide a perfect on-the-go snack.
Ingredients:
- 1 cup rolled oats
- 1/2 cup almond butter
- 1/4 cup honey
- 1/4 cup mini chocolate chips
- 1/4 cup mixed nuts (chopped)
- 1/4 cup dried fruit (raisins or cranberries)
- 1 teaspoon vanilla extract
- 1/2 teaspoon cinnamon
Preparation Time: 10 minutes
Cooking Time: 0 minutes
Total Time: 10 minutes
Instructions:
1. In a large bowl, mix together rolled oats, almond butter, honey, and vanilla extract until well combined.
2. Stir in mini chocolate chips, chopped nuts, dried fruit, and cinnamon until evenly incorporated.
3. Once the mixture is well combined, use your hands to form small bites, about 1 inch in diameter.
4. Place the formed bites on a baking sheet lined with parchment paper and chill in the refrigerator for at least 30 minutes to firm up.
5. After chilling, transfer the energy bites to an airtight container for storage.
Tips:
- You can customize your energy bites by adding different nuts, seeds, or nut butter according to your taste.
- If the mixture is too sticky, add a little more oats to help with forming the bites.
- These bites can be stored in the refrigerator for up to one week, or frozen for longer storage.
Grilled Peaches with Honey
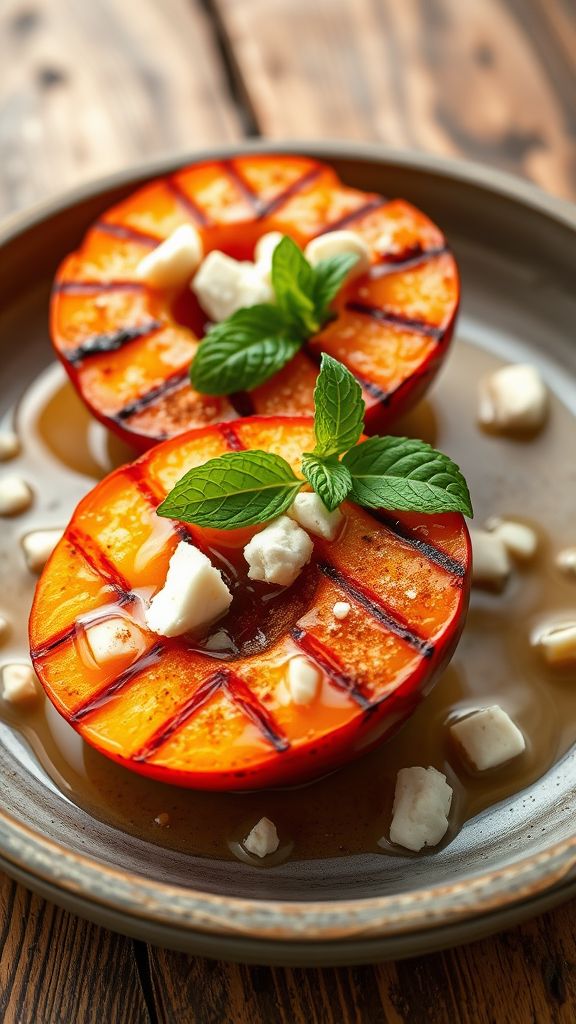
Grilled Peaches with Honey is a delightful dessert that highlights the natural sweetness of peaches, enhanced by the rich flavors of honey and a hint of cinnamon.
Ingredients:
- 4 ripe peaches, halved and pitted
- 2 tablespoons olive oil
- 2 tablespoons honey
- 1 teaspoon ground cinnamon
- 1 tablespoon fresh lemon juice
- 1/4 cup crumbled feta cheese (optional)
- Fresh mint leaves for garnish (optional)
Preparation Time: 10 minutes
Cooking Time: 10 minutes
Total Time: 20 minutes
Instructions:
1. Preheat the grill to medium heat.
2. In a small bowl, mix the olive oil, honey, ground cinnamon, and lemon juice until well combined.
3. Brush the cut sides of the peach halves with the honey mixture.
4. Place the peaches cut-side down on the grill and cook for about 4-5 minutes until grill marks appear.
5. Carefully flip the peaches over and grill for an additional 4-5 minutes.
6. Remove the peaches from the grill and drizzle with any remaining honey mixture.
7. Serve warm, optionally topped with crumbled feta cheese and fresh mint leaves.
Tips:
- Choose peaches that are slightly firm for grilling; they should not be overly ripe.
- For extra flavor, consider adding a sprinkle of sea salt before serving.
- These grilled peaches are delicious served with vanilla ice cream.
Marshmallow Chocolate Popcorn

This Marshmallow Chocolate Popcorn combines the irresistible crunch of popcorn with the creamy sweetness of marshmallows and rich chocolate, making it a perfect treat for any occasion.
Ingredients:
- 10 cups popped popcorn
- 1 cup mini marshmallows
- 1 cup semi-sweet chocolate chips
- 2 tablespoons unsalted butter
- 1/2 cup white chocolate chips
- 1/4 teaspoon salt
- 1/2 teaspoon vanilla extract
Preparation Time: 10 minutes
Cooking Time: 5 minutes
Total Time: 15 minutes
Instructions:
1. In a large mixing bowl, add the popped popcorn and set aside.
2. In a saucepan over low heat, melt the butter and stir in the semi-sweet chocolate chips until smooth.
3. Remove from heat and add the mini marshmallows, salt, and vanilla extract, mixing until the marshmallows are melted and well combined.
4. Pour the chocolate-marshmallow mixture over the popcorn and stir until evenly coated.
5. Spread the coated popcorn onto a baking sheet lined with parchment paper and allow it to cool for about 10 minutes.
6. Melt the white chocolate chips in a microwave-safe bowl, stirring every 30 seconds until smooth.
7. Drizzle the melted white chocolate over the cooled popcorn and let it harden before serving.
Tips:
- Use fresh popcorn for the best texture and flavor.
- Add nuts or sprinkles for extra crunch and color.
- Store in an airtight container to keep it fresh longer.
Duct Tape Cinnamon Roll Casserole
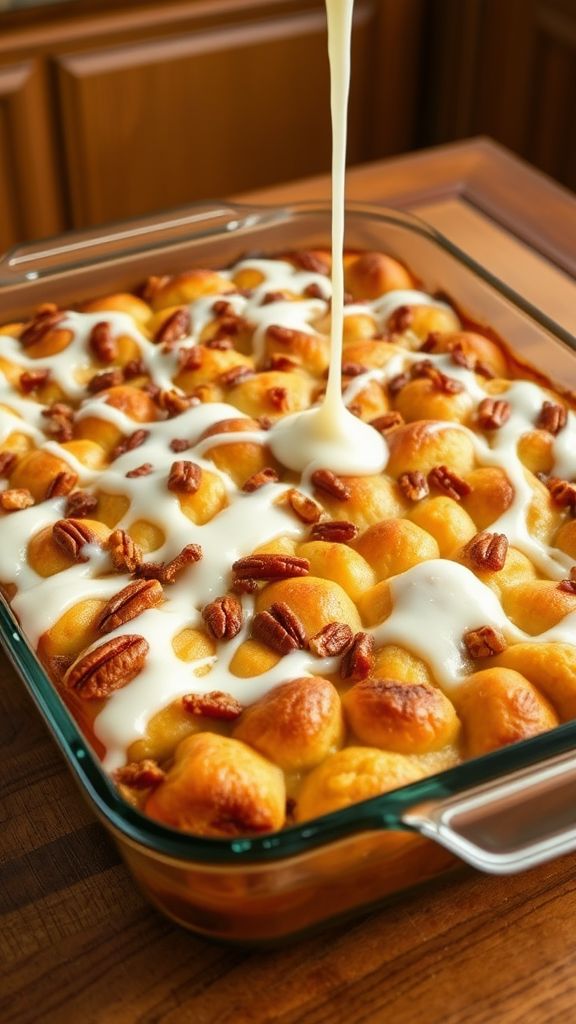
This Duct Tape Cinnamon Roll Casserole is a delightful fusion of gooey cinnamon rolls and the convenience of a casserole, making it the perfect breakfast treat for gatherings.
Ingredients:
- 2 cans refrigerated cinnamon roll dough
- 1 cup maple syrup
- 4 large eggs
- 1 cup milk
- 1 tablespoon vanilla extract
- 1 teaspoon ground cinnamon
- 1/2 cup chopped pecans (optional)
- 1 cup powdered sugar (for icing)
- 2 tablespoons milk (for icing)
Preparation Time: 10 minutes
Cooking Time: 30 minutes
Total Time: 40 minutes
Instructions:
1. Preheat your oven to 375°F (190°C) and grease a 9×13 inch baking dish.
2. Open the cinnamon roll dough and cut each roll into quarters.
3. In a large bowl, whisk together the eggs, milk, vanilla extract, maple syrup, and ground cinnamon.
4. Add the quartered cinnamon rolls to the egg mixture and gently stir to coat.
5. Pour the mixture into the greased baking dish and sprinkle with chopped pecans if using.
6. Bake in the preheated oven for 25-30 minutes, or until the casserole is puffed and golden brown.
7. While the casserole is baking, prepare the icing by mixing the powdered sugar and 2 tablespoons of milk in a small bowl until smooth.
8. Once the casserole is done, drizzle the icing over the top while it’s still warm.
Tips:
- For extra flavor, add a pinch of nutmeg to the egg mixture.
- Serve warm for the best taste and texture.
- You can prepare the mixture the night before and bake in the morning.
Campfire Berry Skewers
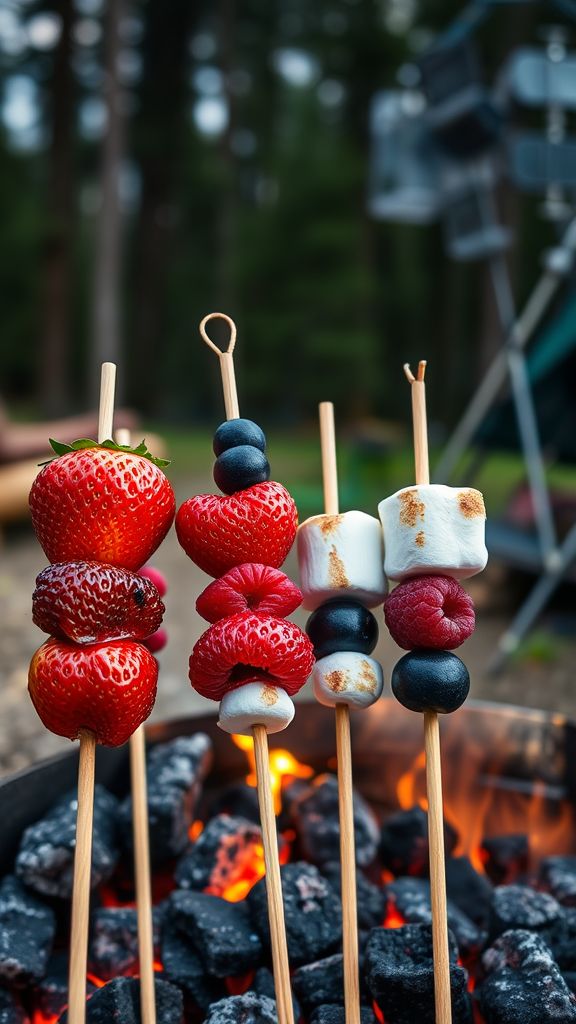
These Campfire Berry Skewers are a delightful treat that combines the sweetness of fresh berries with the smoky flavor of the campfire, making them the perfect dessert for outdoor adventures.
Ingredients:
- 1 cup strawberries, hulled and halved
- 1 cup blueberries
- 1 cup raspberries
- 1 cup mini marshmallows
- 4 wooden skewers
- 1 tablespoon honey (optional)
- 1 tablespoon chocolate chips (optional)
Preparation Time: 10 minutes
Cooking Time: 5 minutes
Total Time: 15 minutes
Instructions:
1. Carefully thread the strawberries, blueberries, raspberries, and marshmallows onto the wooden skewers, alternating between the different fruits and marshmallows.
2. Once all ingredients are skewered, prepare your campfire until you have a nice bed of hot coals.
3. Place the skewers over the hot coals and roast for about 1-2 minutes, turning frequently to avoid burning.
4. Remove the skewers from the fire once the marshmallows are golden brown and slightly melted, and the berries are warm.
5. Drizzle with honey or sprinkle with chocolate chips for added sweetness, if desired.
Tips:
- For a fun twist, try adding slices of banana or pineapple to the skewers.
- Serve immediately while warm for the best flavor and texture.
- Make sure to soak wooden skewers in water for 30 minutes before using to prevent burning.
- Adjust the amount of fruit based on personal preference or availability.
Portable Rice Crispy Treats
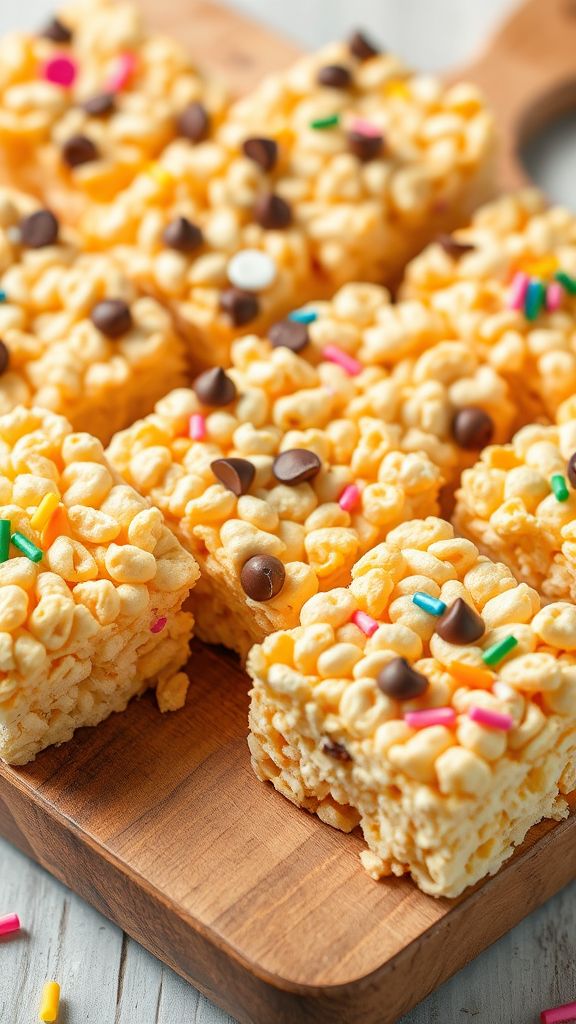
These Portable Rice Crispy Treats are a delightful blend of classic marshmallow sweetness and a hint of vanilla, perfect for on-the-go snacking.
Ingredients:
- 6 cups rice cereal
- 4 tablespoons unsalted butter
- 10 ounces marshmallows
- 1 teaspoon vanilla extract
- 1/4 teaspoon salt
- 1/2 cup mini chocolate chips (optional)
Preparation Time: 10 minutes
Cooking Time: 5 minutes
Total Time: 15 minutes
Instructions:
1. In a large saucepan, melt the butter over low heat.
2. Add the marshmallows to the melted butter and stir until completely melted and smooth.
3. Remove the saucepan from heat and stir in the vanilla extract and salt.
4. In a large bowl, combine the rice cereal and the melted marshmallow mixture, stirring until evenly coated.
5. If desired, fold in the mini chocolate chips.
6. Press the mixture firmly into a greased 9×13 inch pan and let it cool completely before slicing into squares.
Tips:
- For easier cutting, use a lightly greased knife.
- Wrap individual bars in plastic wrap for easy transport.
- Add colorful sprinkles to the top before it fully sets for a festive touch.
Campfire Chocolate Lava Cakes
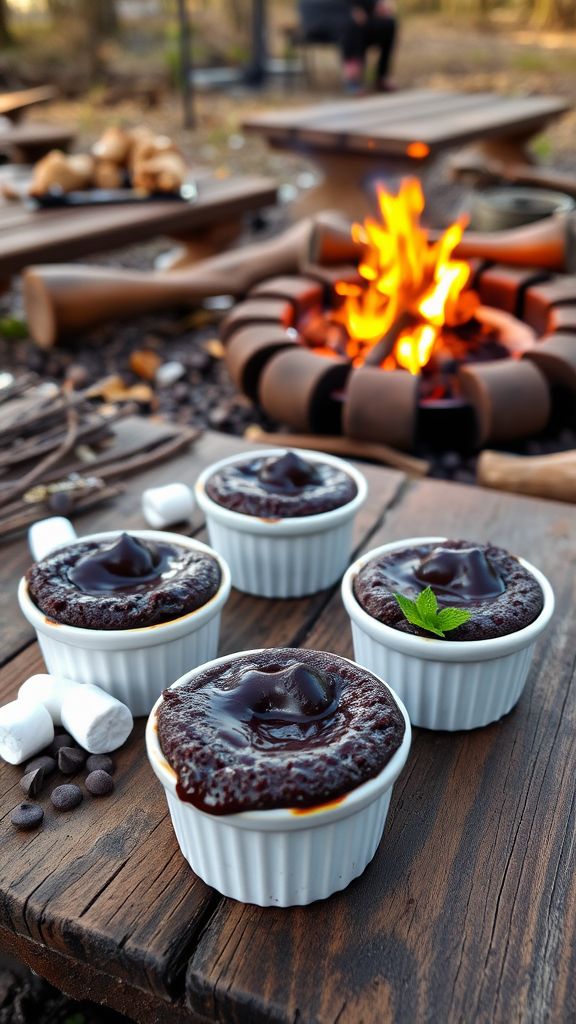
These Campfire Chocolate Lava Cakes are a delightful treat, offering a perfect blend of rich chocolate and gooey molten centers that make them an unforgettable dessert for your outdoor adventures.
Ingredients:
- 1 cup dark chocolate chips
- 1/2 cup unsalted butter
- 1 cup powdered sugar
- 2 large eggs
- 2 large egg yolks
- 1 teaspoon vanilla extract
- 1/2 cup all-purpose flour
- 1/4 teaspoon salt
- Cooking spray (for greasing the baking cups)
- Use aluminum foil to cover the cups if cooking over direct flames to prevent burning.
- Experiment with different chocolates for varied flavors.
- Serve with ice cream or whipped cream for an extra decadent treat.
- 36 Oreo cookies
- 8 oz cream cheese, softened
- 1 cup semi-sweet chocolate chips
- 1 tablespoon vegetable oil
- Additional crushed Oreos for topping
- For a fun twist, try using white chocolate instead of semi-sweet chocolate for coating.
- Keep the truffles stored in the refrigerator for up to a week for the best freshness.
- Experiment with flavor by adding a splash of vanilla extract to the cream cheese mixture.
- 1 cup all-purpose flour
- 1/2 cup unsalted butter, chilled and cubed
- 1/4 cup powdered sugar
- 1/4 cup ice water
- 1/2 cup granulated sugar
- 3 large egg yolks
- 1/4 cup fresh lemon juice
- 1 tablespoon lemon zest
- 1/4 cup cornstarch
- 2 cups water
- 3 large egg whites
- 1/4 teaspoon cream of tartar
- 1/2 cup granulated sugar (for meringue)
- Make sure the meringue is spread all the way to the edges to seal in the lemon filling.
- Use fresh lemon juice for the best flavor.
- Store any leftovers in an airtight container in the refrigerator for up to 2 days.
- 1 cup all-purpose flour
- 1 teaspoon baking powder
- 1/2 teaspoon salt
- 1 tablespoon sugar
- 1 cup milk
- 1 large egg
- 2 tablespoons vegetable oil
- 1/2 cup Nutella
- Cooking spray for greasing the waffle iron
- For a fun twist, add sliced strawberries or bananas inside the waffles with the Nutella.
- Wrap leftover waffles in foil to keep them warm while you cook the rest.
- Experiment with different spreads, like peanut butter or cookie butter, instead of Nutella.
- 1 cup rolled oats
- 1/2 cup peanut butter
- 1/4 cup honey or maple syrup
- 1/4 cup chocolate chips
- 1/4 cup ground flaxseed
- 1 teaspoon vanilla extract
- 1/4 teaspoon salt
- Feel free to customize the recipe by adding nuts, seeds, or dried fruit for extra flavor and texture.
- If the mixture seems too dry, add a splash more peanut butter or honey to achieve the desired consistency.
- For a fun twist, roll the energy balls in unsweetened cocoa powder or shredded coconut before refrigerating.
- 1 small watermelon, cut into thick slices
- 1 cup feta cheese, crumbled
- 2 tablespoons olive oil
- 1 tablespoon balsamic glaze
- 1/2 teaspoon salt
- 1/4 teaspoon black pepper
- Fresh mint leaves, for garnish
- Choose a seedless watermelon for easier grilling and serving.
- For added flavor, try sprinkling some chili flakes on top before serving.
- This dish is best served fresh, but leftovers can be stored in an airtight container in the fridge for a day.
- 1 cup pitted and chopped dates
- 1 cup boiling water
- 1 teaspoon baking soda
- 1/2 cup unsalted butter, softened
- 1 cup brown sugar, packed
- 2 large eggs
- 1 teaspoon vanilla extract
- 1 cup all-purpose flour
- 1 teaspoon baking powder
- 1/4 teaspoon salt
- 1/2 cup toffee bits
- 1 package prepared pastry dough
- 1/4 cup heavy cream (for serving)
- For extra flavor, add a sprinkle of cinnamon to the date mixture.
- Serve warm with a scoop of vanilla ice cream for a delightful dessert.
- Store leftovers in an airtight container to maintain freshness.
Preparation Time: 15 minutes
Cooking Time: 12 minutes
Total Time: 27 minutes
Instructions:
1. Start by preparing your campfire or heat source to medium heat.
2. In a medium heatproof bowl, combine the dark chocolate chips and unsalted butter. Melt over the campfire using a pot or directly over the embers until smooth, stirring occasionally.
3. Remove the bowl from heat and whisk in the powdered sugar until fully combined.
4. Add the eggs and egg yolks, whisking until the mixture is smooth and glossy. Then, stir in the vanilla extract.
5. Gently fold in the all-purpose flour and salt until just combined; do not overmix.
6. Grease individual heatproof cups or ramekins with cooking spray and pour the batter evenly into each, filling them about 2/3 of the way full.
7. Place the cups carefully on a grill grate over the campfire or in a Dutch oven, and cook for about 12 minutes, or until the edges are firm but the center is still soft.
8. Remove from the fire, let cool slightly, then carefully invert to serve and enjoy the molten center!
Tips:
No-Bake Oreo Truffles
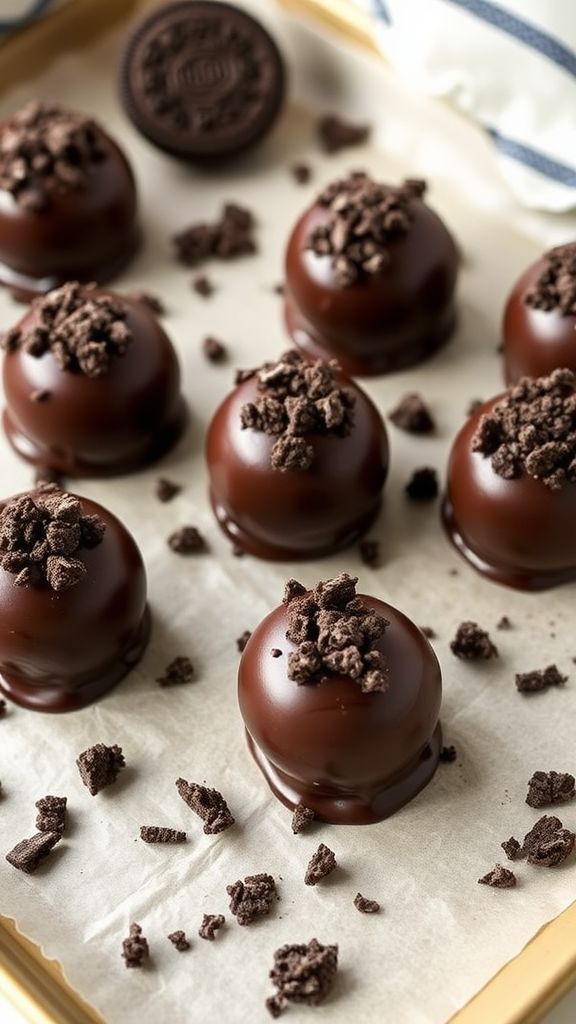
No-Bake Oreo Truffles are a delightful treat that combine the rich flavor of chocolate with the creamy decadence of cream cheese, making them an irresistible dessert.
Ingredients:
Preparation Time: 15 minutes
Cooking Time: 0 minutes
Total Time: 15 minutes
Instructions:
1. Crush the Oreo cookies into fine crumbs using a food processor or by placing them in a plastic bag and crushing them with a rolling pin.
2. In a mixing bowl, combine the crushed Oreo cookies and softened cream cheese until thoroughly mixed.
3. Roll the mixture into small balls, about 1 inch in diameter, and place them on a baking sheet lined with parchment paper.
4. Freeze the truffles for about 30 minutes, or until firm.
5. While the truffles are freezing, melt the semi-sweet chocolate chips and vegetable oil together in a microwave-safe bowl in 30-second intervals, stirring in between, until completely smooth.
6. Dip each frozen truffle into the melted chocolate, allowing any excess chocolate to drip off, and then return them to the baking sheet.
7. Before the chocolate sets, sprinkle some crushed Oreo crumbs on top for decoration.
8. Refrigerate the truffles for at least 30 minutes to let the chocolate harden before serving.
Tips:
Mini Lemon Meringue Pies

This Mini Lemon Meringue Pie recipe brings together the perfect balance of tangy lemon, creamy filling, and fluffy meringue for a delightful dessert experience.
Ingredients:
Preparation Time: 30 minutes
Cooking Time: 25 minutes
Total Time: 55 minutes
Instructions:
1. Preheat your oven to 350°F (175°C).
2. In a bowl, mix 1 cup flour and 1/4 cup powdered sugar, then add 1/2 cup cubed butter. Use a pastry cutter to combine until the mixture resembles coarse crumbs.
3. Stir in 1/4 cup ice water until the dough comes together, then shape it into a disc, wrap it in plastic, and refrigerate for at least 15 minutes.
4. Roll out the chilled dough on a floured surface and cut into circles to fit into a mini muffin pan. Press the dough into the pan and prick the bottom with a fork.
5. Bake the pie crusts for about 10 minutes or until lightly golden, then let them cool.
6. In a saucepan, combine 2 cups water and 1/4 cup cornstarch, then bring to a boil. Add 1/2 cup sugar, 3 egg yolks, 1/4 cup lemon juice, and 1 tablespoon lemon zest. Stir constantly until thickened, then remove from heat.
7. Pour the lemon filling into the cooled crusts.
8. In a clean bowl, beat 3 egg whites and 1/4 teaspoon cream of tartar until soft peaks form, then gradually add 1/2 cup sugar until stiff peaks form.
9. Spread the meringue over the lemon filling, ensuring it touches the edges of the crusts to prevent shrinkage.
10. Bake for an additional 10-15 minutes, until the meringue is golden brown. Let cool before serving.
Tips:
Campfire Nutella Stuffed Waffles
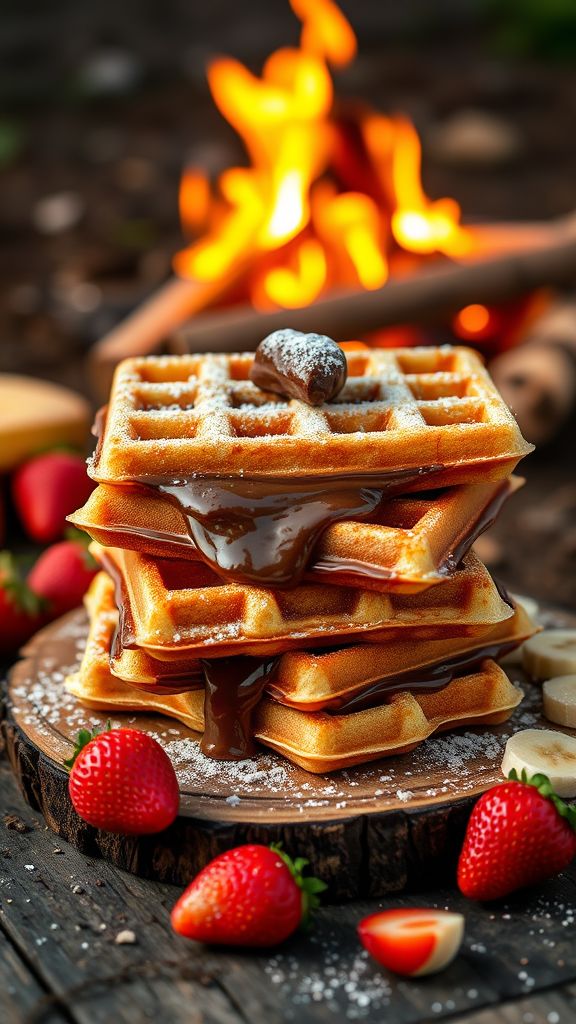
These Campfire Nutella Stuffed Waffles are a delicious treat that combines the rich flavors of Nutella with crispy, golden waffles for an unforgettable outdoor dessert.
Ingredients:
Preparation Time: 10 minutes
Cooking Time: 5 minutes
Total Time: 15 minutes
Instructions:
1. In a bowl, whisk together the flour, baking powder, salt, and sugar.
2. In another bowl, mix the milk, egg, and vegetable oil until well combined.
3. Pour the wet ingredients into the dry ingredients and stir until just combined; do not overmix.
4. Preheat your waffle iron and coat it with cooking spray.
5. Pour a ladleful of batter into the center of the waffle iron and gently spread it out.
6. Add a spoonful of Nutella in the center, then cover it with more batter.
7. Close the waffle iron and cook until the waffles are golden brown and crispy, about 3-5 minutes.
8. Carefully remove the waffle and repeat with the remaining batter and Nutella.
Tips:
Chocolate Peanut Butter Energy Balls

These Chocolate Peanut Butter Energy Balls are packed with the rich flavors of chocolate and creamy peanut butter, making them a delicious and nutritious snack.
Ingredients:
Preparation Time: 10 minutes
Cooking Time: 0 minutes
Total Time: 10 minutes
Instructions:
1. In a large mixing bowl, combine rolled oats, ground flaxseed, and salt.
2. Add peanut butter, honey (or maple syrup), chocolate chips, and vanilla extract to the dry ingredients.
3. Mix all ingredients together until well combined, using your hands if necessary.
4. Once the mixture is well combined, form small balls, about 1 inch in diameter.
5. Place the energy balls on a baking sheet lined with parchment paper and refrigerate for at least 30 minutes to firm up.
6. Store leftovers in an airtight container in the refrigerator for up to a week.
Tips:
Grilled Watermelon with Feta
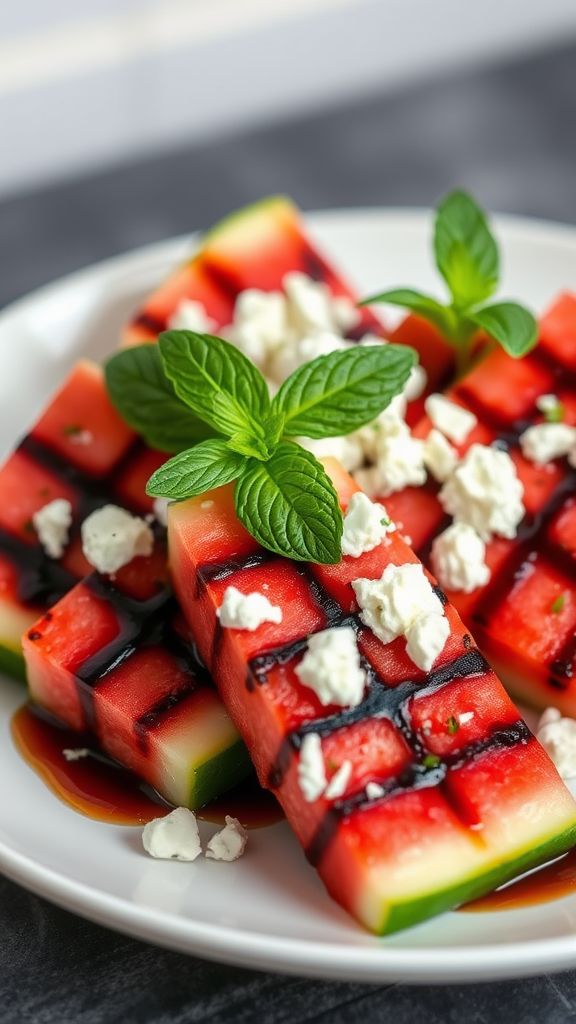
This Grilled Watermelon with Feta recipe is a unique blend of sweet and savory flavors, offering a refreshing dish that’s perfect for summer gatherings.
Ingredients:
Preparation Time: 10 minutes
Cooking Time: 5 minutes
Total Time: 15 minutes
Instructions:
1. Preheat the grill to medium-high heat.
2. Brush the watermelon slices with olive oil on both sides.
3. Season the watermelon with salt and pepper.
4. Place the watermelon slices on the grill and cook for about 3 minutes on each side until grill marks appear.
5. Remove the watermelon from the grill and drizzle with balsamic glaze.
6. Top with crumbled feta cheese and garnish with fresh mint leaves before serving.
Tips:
Sticky Toffee Pudding Pockets

These Sticky Toffee Pudding Pockets are a delightful combination of rich dates, sweet toffee, and a flaky pastry that make for an irresistible dessert treat.
Ingredients:
Preparation Time: 20 minutes
Cooking Time: 25 minutes
Total Time: 45 minutes
Instructions:
1. Preheat your oven to 350°F (175°C) and line a baking sheet with parchment paper.
2. In a bowl, combine the chopped dates and boiling water, then stir in the baking soda and let it sit for 10 minutes to soften.
3. In a separate bowl, cream together the butter and brown sugar until light and fluffy.
4. Beat in the eggs one at a time, followed by the vanilla extract.
5. In another bowl, whisk together the flour, baking powder, and salt, then gradually add this to the wet mixture.
6. Fold in the softened date mixture and toffee bits until well combined.
7. Roll out the pastry dough on a floured surface and cut into squares.
8. Place a spoonful of the pudding mixture in the center of each pastry square, then fold over and seal the edges with a fork.
9. Transfer the pockets to the prepared baking sheet and bake for 20-25 minutes until golden brown.
10. Drizzle with heavy cream before serving for an extra touch of indulgence.
Tips:

