My New Cookbook is Out! Check Out Now!
12 DIY Edible Valentine’s Day Gift Ideas
Did you know that Valentine’s Day is one of the most popular days for gifting sweets, with over 48 million roses given each year? If you’re looking to impress your loved ones this year, why not go beyond the traditional flowers and try your hand at something truly special? In this blog post, we’ll share 12 DIY Edible Valentine’s Day Gift Ideas that are sure to delight your sweetheart while showcasing your creativity. From indulgent chocolate-covered strawberry bouquets to charming homemade raspberry jam, you’ll discover a variety of unique treats that add a personal touch to your celebrations!
Chocolate-Covered Strawberry Bouquet

This Chocolate-Covered Strawberry Bouquet combines the luscious flavors of ripe strawberries with rich, creamy chocolate, creating an irresistible and visually stunning treat.
Ingredients:
- 1 pound fresh strawberries
- 8 ounces semi-sweet chocolate
- 2 tablespoons coconut oil
- 1/2 cup white chocolate (optional, for drizzling)
- 1 tablespoon edible sprinkles (optional)
- 1 bouquet vase or container for arrangement
Preparation Time: 15 minutes
Cooking Time: 10 minutes
Total Time: 25 minutes
Instructions:
1. Rinse and dry the strawberries thoroughly, making sure they are free from moisture.
2. In a microwave-safe bowl, combine the semi-sweet chocolate and coconut oil.
3. Microwave the chocolate mixture in 30-second intervals, stirring in between, until completely melted and smooth.
4. Dip each strawberry into the melted chocolate, allowing the excess chocolate to drip off.
5. Place the chocolate-covered strawberries on a parchment-lined baking sheet to set.
6. If desired, melt the white chocolate in a separate bowl and use it to drizzle over the set chocolate-covered strawberries.
7. Add sprinkles on top of the drizzled chocolate before it sets for a festive touch.
8. Once everything is set, arrange the strawberries in a vase or container to create an attractive bouquet.
Tips:
- Use room temperature strawberries for better chocolate adherence.
- Experiment with different types of chocolate for varied flavors.
- Store in the refrigerator if not consumed immediately to maintain freshness.
- Consider adding other fruits or treats to the bouquet for a colorful mix.
Heart-Shaped Sugar Cookies with Royal Icing

These Heart-Shaped Sugar Cookies with Royal Icing are a delightful treat with a sweet, buttery flavor and charming decoration that make them perfect for any occasion.
Ingredients:
- 2 ¾ cups all-purpose flour
- 1 teaspoon baking powder
- ½ teaspoon salt
- 1 cup unsalted butter, softened
- 1 ½ cups granulated sugar
- 1 large egg
- 2 teaspoons vanilla extract
- 2 cups powdered sugar (for icing)
- 2 tablespoons meringue powder
- 6 tablespoons water (for icing)
- Food coloring (optional)
Preparation Time: 30 minutes
Cooking Time: 10-12 minutes
Total Time: 40-42 minutes
Instructions:
1. In a bowl, whisk together the flour, baking powder, and salt; set aside.
2. In another bowl, cream together the softened butter and granulated sugar until light and fluffy.
3. Beat in the egg and vanilla until well combined.
4. Gradually add the flour mixture to the butter mixture, mixing until just combined.
5. Divide the dough in half, wrap in plastic wrap, and chill in the refrigerator for at least 1 hour.
6. Preheat your oven to 350°F (175°C) and line baking sheets with parchment paper.
7. Roll out one half of the dough on a lightly floured surface to about ¼ inch thick.
8. Use a heart-shaped cookie cutter to cut out shapes and place them on prepared baking sheets.
9. Bake for 10-12 minutes, or until the edges are lightly golden.
10. Allow cookies to cool completely on a wire rack before icing.
11. To make royal icing, beat together the powdered sugar, meringue powder, and water until smooth and glossy; add food coloring if desired.
12. Decorate cooled cookies with royal icing and let them dry completely.
Tips:
- Chill the dough after mixing to make it easier to roll out.
- Use different food coloring to create a variety of decorated cookies.
- To achieve a smooth icing finish, ensure that the cookies are completely cool before decorating.
- Store decorated cookies in an airtight container to maintain freshness.
Homemade Raspberry Jam in a Decorative Jar
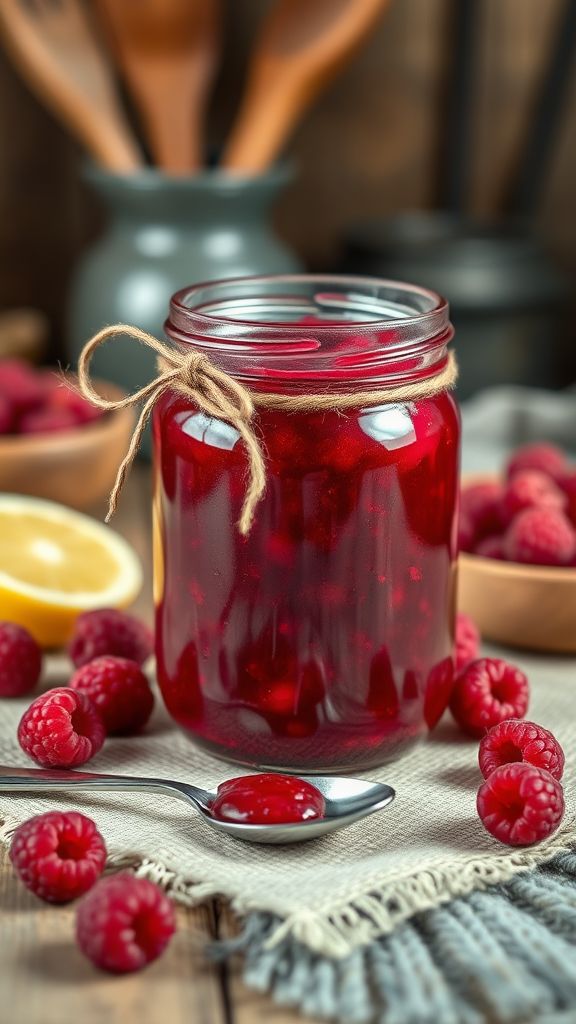
This Homemade Raspberry Jam is special for its vibrant flavor and beautiful color, making it a delightful treat for any occasion.
Ingredients:
- 4 cups fresh raspberries
- 2 cups granulated sugar
- 1/4 cup lemon juice
- 1 teaspoon vanilla extract
- 1 packet pectin
- 1/2 teaspoon butter (optional, to reduce foaming)
Preparation Time: 10 minutes
Cooking Time: 30 minutes
Total Time: 40 minutes
Instructions:
1. In a large pot, combine the raspberries and lemon juice. Mash the raspberries gently with a potato masher.
2. Stir in the granulated sugar and let the mixture sit for about 10 minutes, allowing the sugar to dissolve.
3. Add the pectin and stir to combine. If using, add the butter to reduce foaming.
4. Bring the mixture to a boil over medium-high heat, stirring constantly. Once it reaches a full boil, let it cook for 10 minutes.
5. Remove the pot from heat and stir in the vanilla extract. Skim off any foam that may have formed on the surface.
6. Pour the hot jam into sterilized decorative jars, seal them, and let them cool completely at room temperature.
Tips:
- Always use fresh raspberries for the best flavor.
- Make sure jars are sterilized to prolong shelf life.
- You can adjust the sugar amount based on your sweetness preference.
- Store the jam in the refrigerator for up to 3 weeks or process it for longer storage.
Spiced Hot Cocoa Mix with Heart Marshmallows
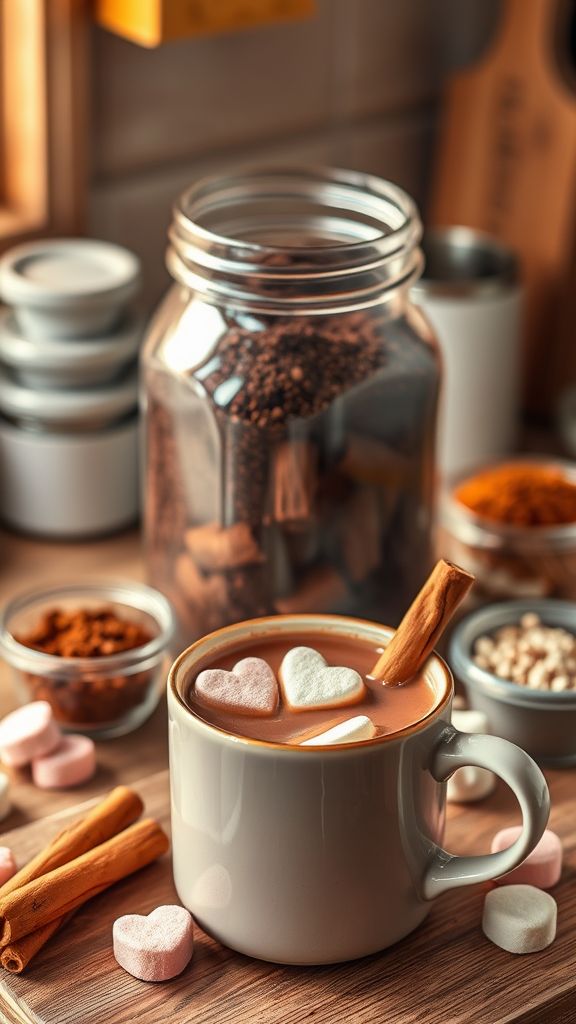
This Spiced Hot Cocoa Mix with Heart Marshmallows is a delightful blend of rich cocoa and warming spices, perfect for cozy evenings.
Ingredients:
- 1 cup unsweetened cocoa powder
- 2 cups powdered sugar
- 1 cup powdered milk
- 1 teaspoon ground cinnamon
- 1/2 teaspoon ground nutmeg
- 1/4 teaspoon cayenne pepper
- 1 teaspoon vanilla extract
- 1 cup heart-shaped marshmallows
Preparation Time: 10 minutes
Cooking Time: 0 minutes
Total Time: 10 minutes
Instructions:
1. In a large mixing bowl, combine the cocoa powder, powdered sugar, powdered milk, ground cinnamon, ground nutmeg, and cayenne pepper.
2. Whisk the dry ingredients together until fully combined and no lumps remain.
3. Add the vanilla extract and mix well to incorporate into the dry mixture.
4. Store the hot cocoa mix in an airtight container.
5. When ready to enjoy, combine 1/4 cup of the mix with 1 cup of hot water or milk.
6. Stir until well blended and top with heart-shaped marshmallows before serving.
Tips:
- For a richer flavor, use whole milk instead of water.
- Adjust the amount of cayenne pepper to your preferred spice level.
- Gift the dry mix in a jar with a decorative ribbon and a tag with instructions for a lovely present.
Red Velvet Truffle Pops

These Red Velvet Truffle Pops are a decadent treat that combines the rich flavor of red velvet cake with creamy chocolate, perfect for any celebration.
Ingredients:
- 1 box red velvet cake mix
- 3 large eggs
- 1 cup water
- 1/2 cup vegetable oil
- 8 oz cream cheese, softened
- 1/2 cup powdered sugar
- 12 oz white chocolate, melted
- Sprinkles, for decoration
- 10-12 lollipop sticks
Preparation Time: 20 minutes
Cooking Time: 30 minutes
Total Time: 50 minutes
Instructions:
1. Preheat your oven to 350°F (175°C) and prepare a cake pan according to the package instructions for the red velvet cake mix.
2. In a large bowl, mix together the cake mix, eggs, water, and vegetable oil until well combined.
3. Pour the batter into the prepared cake pan and bake according to the package instructions, usually around 25-30 minutes.
4. Once baked, let the cake cool completely before crumbling it into a large bowl.
5. In a separate bowl, mix the softened cream cheese and powdered sugar until smooth.
6. Add the cream cheese mixture to the crumbled cake and blend until fully combined.
7. Form the mixture into small balls and place them on a baking sheet lined with parchment paper.
8. Once all the balls are formed, insert a lollipop stick into each ball and freeze for about 30 minutes.
9. Dip each frozen truffle pop into the melted white chocolate, ensuring they are fully coated.
10. Immediately sprinkle with decorations of your choice before the chocolate sets.
11. Return the truffle pops to the freezer for another 10 minutes to set the chocolate.
Tips:
- Make sure the cake is completely cool before crumbling to avoid a mushy texture.
- Experiment with different types of chocolate coatings, such as dark or milk chocolate.
- Store the truffle pops in the refrigerator if not consumed right away to maintain freshness.
Love Potion Fruit Infused Water
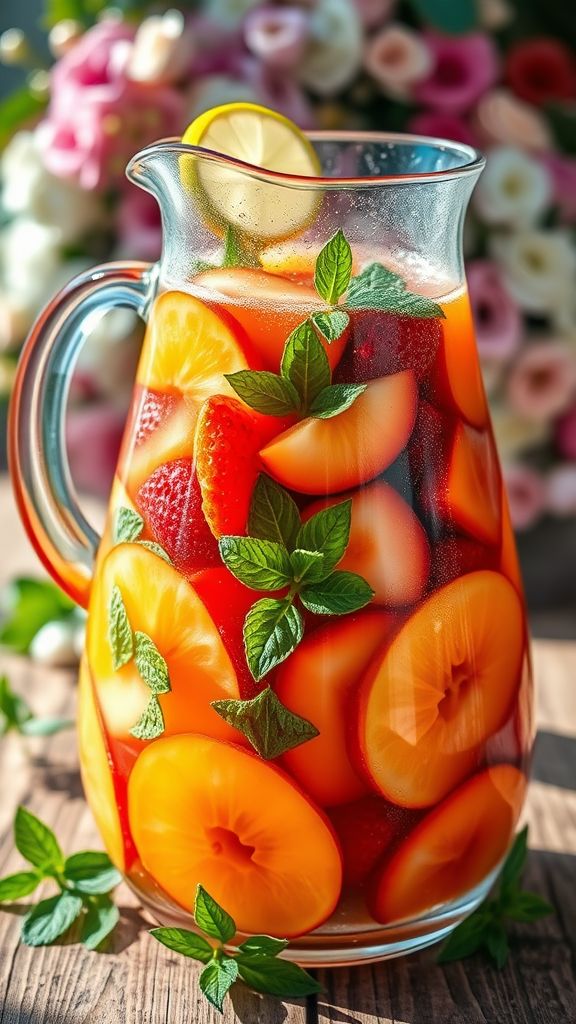
This Love Potion Fruit Infused Water is a delightful blend of refreshing fruits and herbs that not only tastes amazing but also adds a romantic touch to any occasion.
Ingredients:
- 4 cups filtered water
- 1 cup sliced strawberries
- 1 ripe peach, diced
- 1 orange, sliced
- 1/2 cup fresh mint leaves
- 1 lime, sliced
Preparation Time: 10 minutes
Cooking Time: 0 minutes
Total Time: 10 minutes
Instructions:
1. Combine all the sliced fruits and mint leaves in a large pitcher.
2. Pour the filtered water over the fruit and mint mixture.
3. Stir gently to mix everything together.
4. Refrigerate for at least 2 hours to allow the flavors to infuse.
5. Serve chilled, garnished with additional mint leaves if desired.
Tips:
- For a sweeter flavor, add a splash of honey or agave syrup.
- Use sparkling water for a fizzy twist.
- Feel free to experiment with other fruits like blueberries or pineapple.
Sweetheart Candy Bark
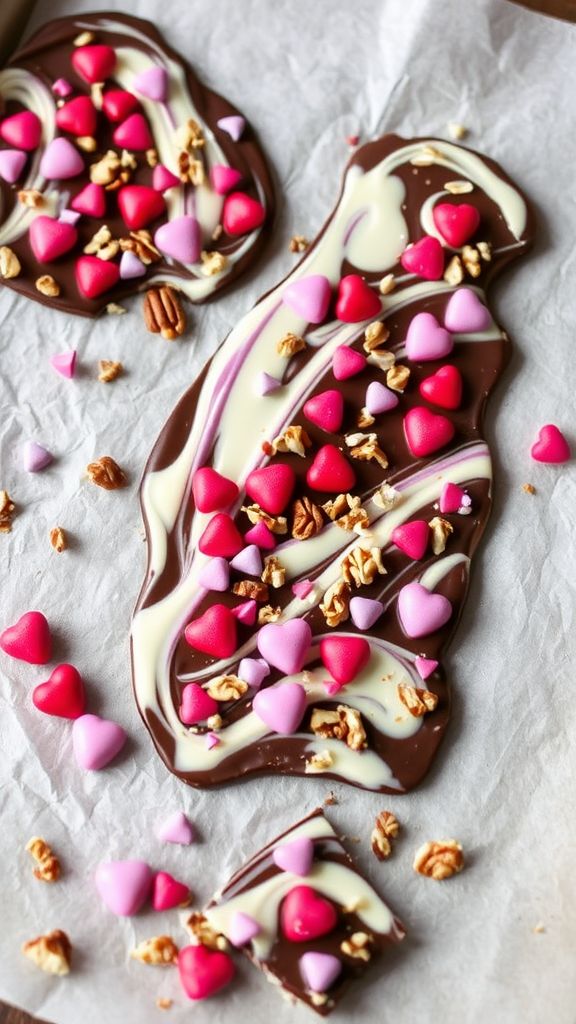
This Sweetheart Candy Bark combines rich chocolate with delightful candy pieces, creating a sweet treat perfect for sharing on special occasions.
Ingredients:
- 2 cups semi-sweet chocolate chips
- 1 cup white chocolate chips
- 1/2 cup heart-shaped candies
- 1/2 cup crushed nuts (optional)
- 1 teaspoon vanilla extract
Preparation Time: 15 minutes
Cooking Time: 5 minutes
Total Time: 20 minutes
Instructions:
1. Begin by lining a baking sheet with parchment paper and set aside.
2. Melt the semi-sweet chocolate chips in a microwave-safe bowl in 30-second intervals, stirring until smooth.
3. Pour the melted semi-sweet chocolate onto the prepared baking sheet and spread evenly with a spatula.
4. In another bowl, melt the white chocolate chips in the same manner until smooth, then stir in the vanilla extract.
5. Pour the melted white chocolate over the semi-sweet chocolate layer, swirling with a toothpick for a marbled effect.
6. Sprinkle the heart-shaped candies and crushed nuts over the top before the chocolate sets.
7. Refrigerate the baking sheet for about 1 hour or until the chocolate bark is completely hardened.
8. Once set, break the bark into pieces and serve or package as a delightful gift.
Tips:
- Feel free to customize with your favorite candies or toppings for a unique twist.
- Store the bark in an airtight container at room temperature for up to one week.
- For a glossy finish, ensure you temper the chocolate before melting.
Miniature Cheesecakes with Berry Topping
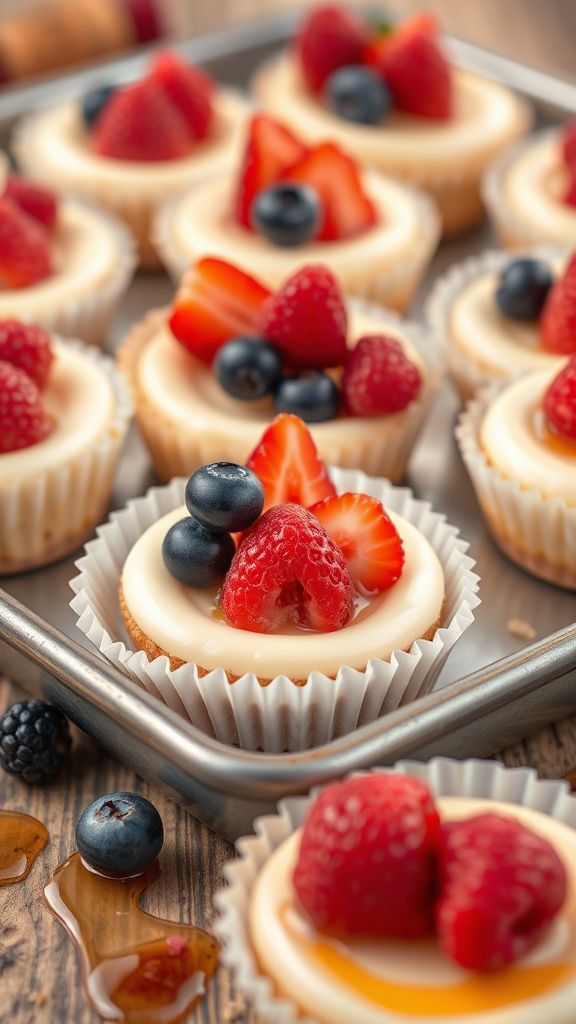
These Miniature Cheesecakes with Berry Topping combine the creamy richness of cheesecake with the bright, fresh flavors of berries, making them the perfect bite-sized treat for any occasion.
Ingredients:
- 1 cup graham cracker crumbs
- 1/4 cup unsalted butter, melted
- 2 tablespoons granulated sugar
- 16 ounces cream cheese, softened
- 1/2 cup powdered sugar
- 1 teaspoon vanilla extract
- 2 large eggs
- 1 cup mixed berries (strawberries, blueberries, raspberries)
- 2 tablespoons honey or maple syrup
Preparation Time: 15 minutes
Cooking Time: 25 minutes
Total Time: 40 minutes
Instructions:
1. Preheat your oven to 325°F (160°C) and line a muffin tin with paper liners.
2. In a mixing bowl, combine the graham cracker crumbs, melted butter, and granulated sugar until well mixed. Press the mixture into the bottom of each muffin liner to form a crust.
3. In a separate bowl, beat the softened cream cheese until smooth. Gradually add the powdered sugar and vanilla extract, mixing until fully combined.
4. Add the eggs one at a time, mixing on low speed until just combined. Be careful not to overmix.
5. Pour the cheesecake batter over the crust in each muffin liner, filling them about three-quarters full.
6. Bake in preheated oven for about 20-25 minutes, until the edges are set but the centers still jiggle slightly. Allow to cool at room temperature before transferring to the refrigerator to chill for at least 2 hours.
7. Before serving, toss the mixed berries with honey or maple syrup and spoon over the chilled cheesecakes.
Tips:
- For a more defined flavor, try using specific types of berries like only raspberries or strawberries.
- These mini cheesecakes can be made a day ahead for convenience; just add the berry topping right before serving.
- Feel free to experiment with different crusts, such as using chocolate cookies for a richer flavor.
Heartfelt Granola Jars with Personal Messages
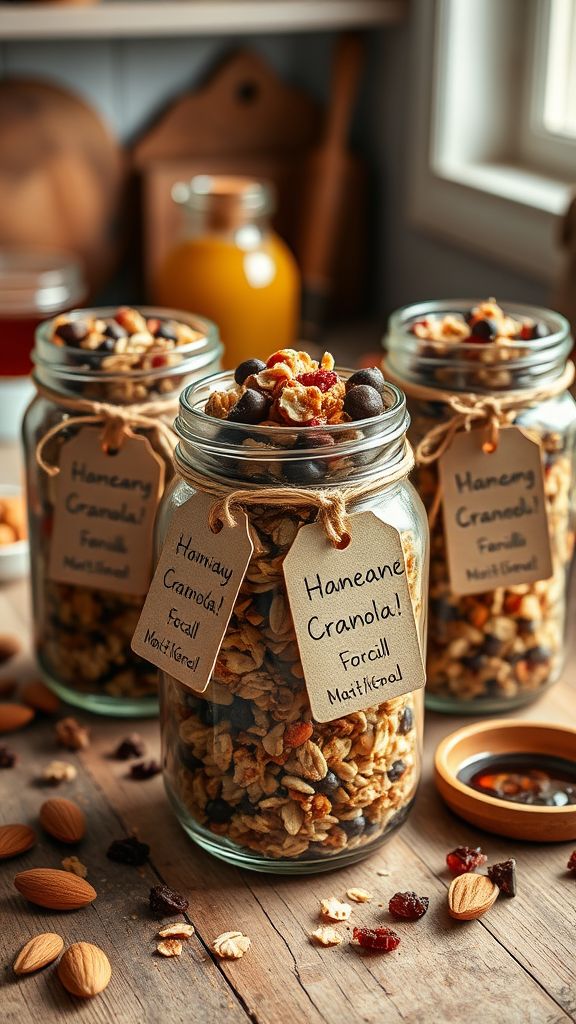
This recipe for Heartfelt Granola Jars combines the warmth of homemade granola with personal touches that make it a perfect gift, packed with flavors like honey, vanilla, nuts, and dried fruit.
Ingredients:
- 3 cups rolled oats
- 1 cup nuts (e.g., almonds, walnuts, or pecans)
- 1 cup honey or maple syrup
- 1/2 cup vegetable oil or coconut oil
- 1 teaspoon vanilla extract
- 1 teaspoon ground cinnamon
- 1/2 teaspoon salt
- 1 cup dried fruits (e.g., cranberries, raisins, or apricots)
- 1/2 cup chocolate chips (optional)
Preparation Time: 15 minutes
Cooking Time: 25 minutes
Total Time: 40 minutes
Instructions:
1. Preheat your oven to 350°F (175°C) and prepare a baking sheet lined with parchment paper.
2. In a large bowl, combine rolled oats, chopped nuts, salt, and cinnamon.
3. In a separate bowl, whisk together honey (or maple syrup), vegetable oil, and vanilla extract until well mixed.
4. Pour the wet ingredients over the dry ingredients and mix until everything is evenly coated.
5. Spread the mixture evenly on the prepared baking sheet and bake for about 20-25 minutes, stirring halfway through to ensure even toasting.
6. Remove from the oven and let it cool completely on the baking sheet.
7. Once cooled, stir in the dried fruits and chocolate chips, if using.
8. Transfer the granola into jars and personalize each jar with a handwritten note or message.
Tips:
- Feel free to experiment with different nuts, seeds, or spices to create your favorite flavor combination.
- For a crunchier texture, bake the granola a bit longer, but watch closely to prevent burning.
- Store the granola in an airtight container to keep it fresh for several weeks.
- Label the jars with the contents and a personal message to make your gift extra special.
Rose Petal Infused Honey
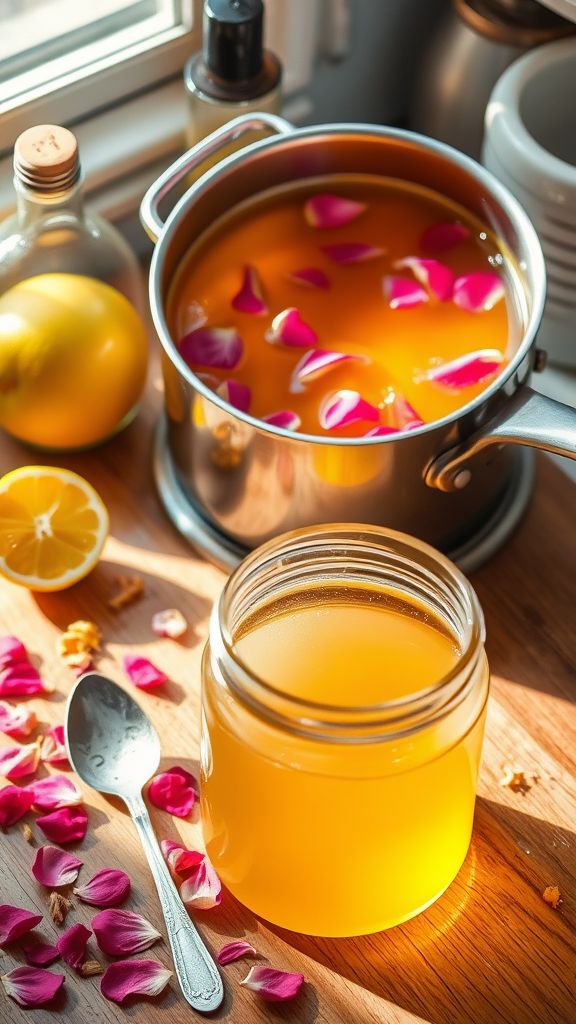
Indulge in the delicate floral notes of this Rose Petal Infused Honey, where sweet and floral meet for a delightful culinary experience.
Ingredients:
- 1 cup dried rose petals
- 2 cups honey
- 1 tablespoon lemon zest
- 1 teaspoon vanilla extract
Preparation Time: 5 minutes
Cooking Time: 10 minutes
Total Time: 15 minutes
Instructions:
1. In a small saucepan, combine the honey and dried rose petals over low heat.
2. Stir gently and allow the honey to warm up for about 10 minutes, ensuring it does not boil.
3. Remove from heat and add the lemon zest and vanilla extract, stirring well to combine.
4. Let the mixture cool to room temperature, then strain out the rose petals using a fine mesh sieve.
5. Pour the infused honey into a clean jar and seal tightly. Store in a cool, dark place.
Tips:
- Ensure that the rose petals are pesticide-free if you are harvesting them yourself.
- For a stronger flavor, allow the honey to infuse for a longer period before straining.
- This honey makes a wonderful addition to teas, desserts, and as a sweetener for yogurt.
Build-Your-Own Cupcake Kit
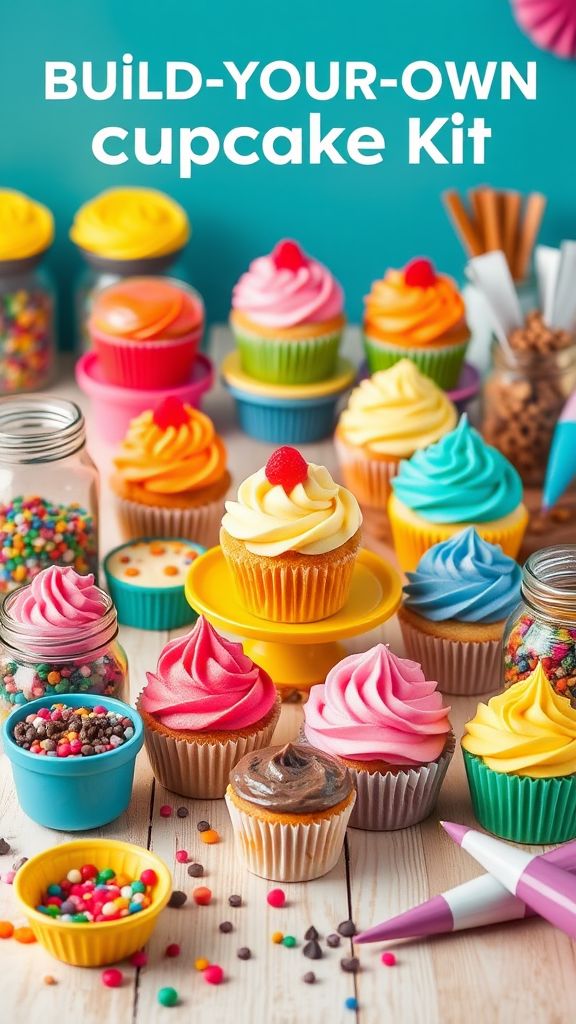
This Build-Your-Own Cupcake Kit allows you to unleash your creativity with a variety of flavors, toppings, and fillings, making it a fun and delicious experience for everyone!
Ingredients:
- 2 cups all-purpose flour
- 1 ½ cups granulated sugar
- 1 cup unsalted butter, softened
- 4 large eggs
- 1 cup milk
- 2 ½ tsp baking powder
- 1 tsp vanilla extract
- ½ tsp salt
- 2 cups assorted sprinkles
- 1 cup chocolate chips
- 2 cups assorted frosting (vanilla, chocolate, cream cheese, etc.)
- 1 cup fruit fillings (strawberry, raspberry, lemon curd, etc.)
Preparation Time: 15 minutes
Cooking Time: 20 minutes
Total Time: 35 minutes
Instructions:
1. Preheat your oven to 350°F (175°C) and line a cupcake pan with cupcake liners.
2. In a large mixing bowl, cream together the butter and sugar until light and fluffy.
3. Add in the eggs, one at a time, mixing well after each addition.
4. Stir in the milk and vanilla extract until just combined.
5. In a separate bowl, whisk together the flour, baking powder, and salt.
6. Gradually add the dry ingredients to the wet mixture, mixing until just combined.
7. Scoop batter into the prepared cupcake liners, filling each about two-thirds full.
8. Bake for 18-20 minutes, or until a toothpick inserted into the center comes out clean.
9. Allow cupcakes to cool completely before decorating with your choice of frosting, sprinkles, or fruit fillings.
Tips:
- Experiment with different flavor combinations for the cupcakes and frostings.
- Allow cupcakes to cool completely to prevent melting the frosting.
- Prepare a cupcake decoration station for a fun, interactive activity.
DIY Chocolate Fudge with Sea Salt Sprinkles
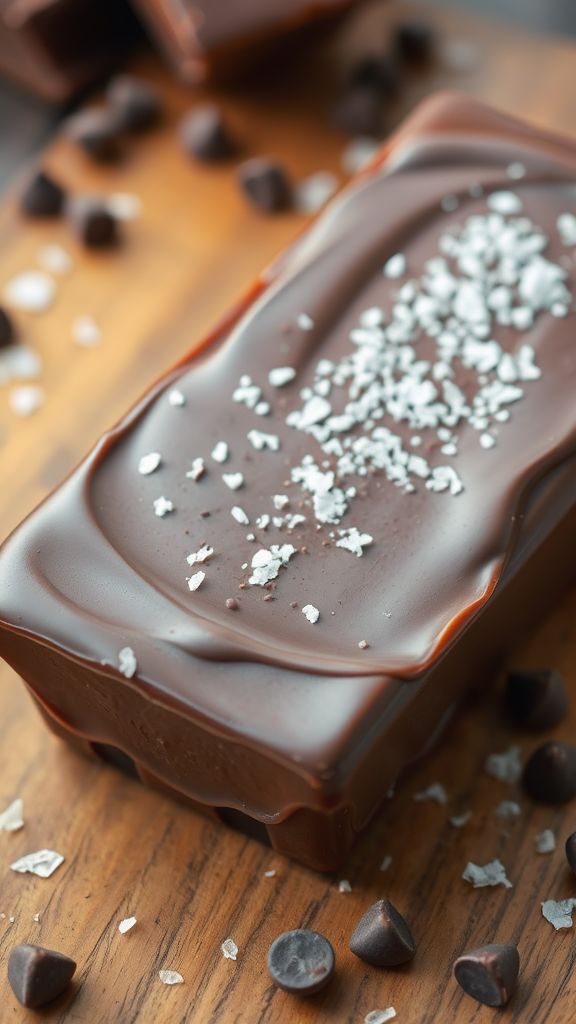
This DIY Chocolate Fudge with Sea Salt Sprinkles brings a delightful blend of rich chocolate and a hint of sea salt, making it an irresistible treat for any chocolate lover.
Ingredients:
- 2 cups semi-sweet chocolate chips
- 1 can (14 oz) sweetened condensed milk
- 1/4 cup unsalted butter
- 1 teaspoon vanilla extract
- 1/4 teaspoon sea salt
- 2 tablespoons sea salt sprinkles
Preparation Time: 10 minutes
Cooking Time: 5 minutes
Total Time: 15 minutes
Instructions:
1. In a medium saucepan, combine the semi-sweet chocolate chips, sweetened condensed milk, and unsalted butter over low heat.
2. Stir the mixture continuously until the chocolate chips are fully melted and the mixture is smooth.
3. Remove from heat and stir in the vanilla extract and sea salt until well combined.
4. Pour the melted fudge into a greased or parchment-lined 8-inch square dish, spreading it evenly.
5. Sprinkle the sea salt sprinkles on top of the fudge while it is still warm.
6. Allow the fudge to cool at room temperature for about 2 hours, or until firm.
7. Once set, cut into squares and enjoy!
Tips:
- For a richer flavor, use dark chocolate chips instead of semi-sweet.
- Make sure to let the fudge cool completely for a better texture.
- Add chopped nuts or dried fruit for a unique twist on the classic fudge.
