My New Cookbook is Out! Check Out Now!
15 Delicious St. Patrick’s Day Desserts to Sweeten the Celebration
Did you know that over 13 million pints of Guinness are consumed on St. Patrick’s Day every year? It’s not just about the drinks; this vibrant holiday also calls for some scrumptious dishes to celebrate!
In this blog, we’ll explore 15 delicious St. Patrick’s Day desserts that will not only satisfy your sweet tooth but also add a delightful twist to your festivities. From decadent Irish Cream Cheesecake Bars to colorful Leprechaun Layered Rainbow Cakes, get ready to discover an array of treats that will sweeten your celebration!
Shamrock Mint Chocolate Brownies
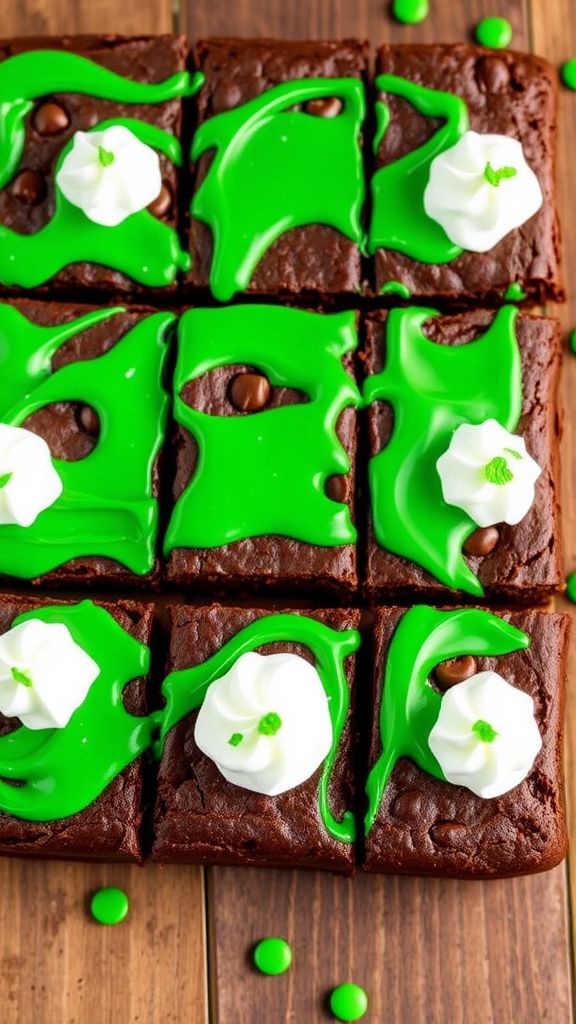
These Shamrock Mint Chocolate Brownies are a delightful combination of rich chocolate and refreshing mint, making them a perfect treat for St. Patrick’s Day or anytime you crave a sweet indulgence.
Ingredients:
- 1 cup unsalted butter
- 2 cups granulated sugar
- 4 large eggs
- 1 teaspoon vanilla extract
- 1 cup all-purpose flour
- 1 cup unsweetened cocoa powder
- 1/2 teaspoon salt
- 1 teaspoon baking powder
- 1/4 teaspoon peppermint extract
- 1/2 cup chocolate chips
- 1/2 cup green candy melts (for topping)
- 1/4 cup whipped cream (for garnish)
Preparation Time: 15 minutes
Cooking Time: 25 minutes
Total Time: 40 minutes
Instructions:
1. Preheat your oven to 350°F (175°C) and grease a 9×13 inch baking pan.
2. In a large bowl, melt the butter and stir in the sugar until well combined.
3. Beat in the eggs one at a time, then mix in the vanilla and peppermint extract.
4. Sift together the flour, cocoa powder, salt, and baking powder, then gradually add to the wet mixture until just combined.
5. Fold in the chocolate chips and pour the batter into the prepared baking pan, spreading evenly.
6. Bake in the preheated oven for 25 minutes, or until a toothpick inserted comes out with a few moist crumbs.
7. While the brownies cool, melt the green candy melts in a microwave-safe bowl in 30-second intervals, stirring in between.
8. Once melted, pour the green candy over the cooled brownies and spread evenly.
9. Let the candy coating set before cutting into squares.
10. Serve topped with a dollop of whipped cream, if desired.
Tips:
- For extra mint flavor, add a few drops of food coloring and more peppermint extract to the batter.
- Store brownies in an airtight container to keep them fresh for up to one week.
- Pair with a scoop of mint chocolate chip ice cream for an indulgent dessert.
Irish Cream Cheesecake Bars
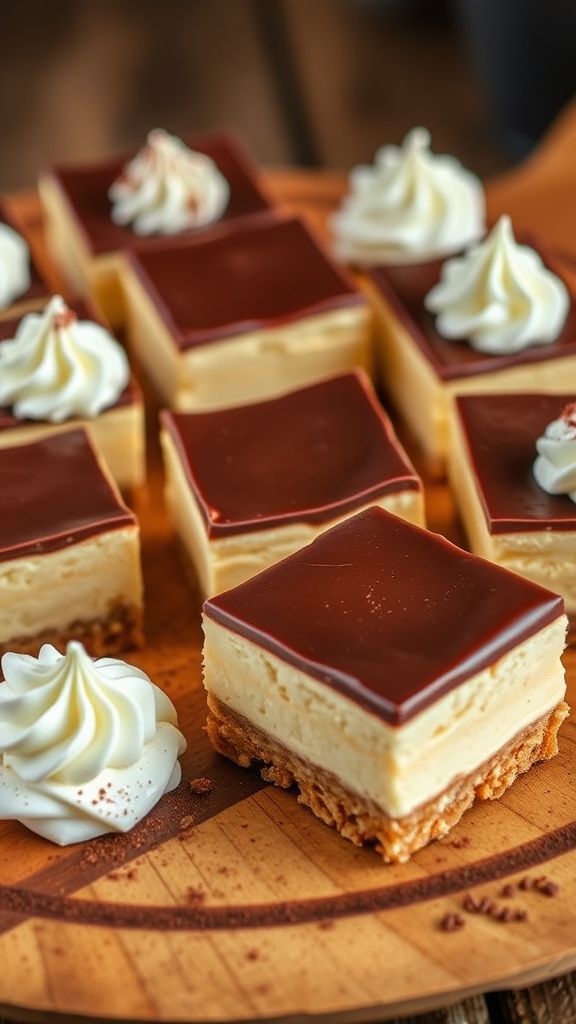
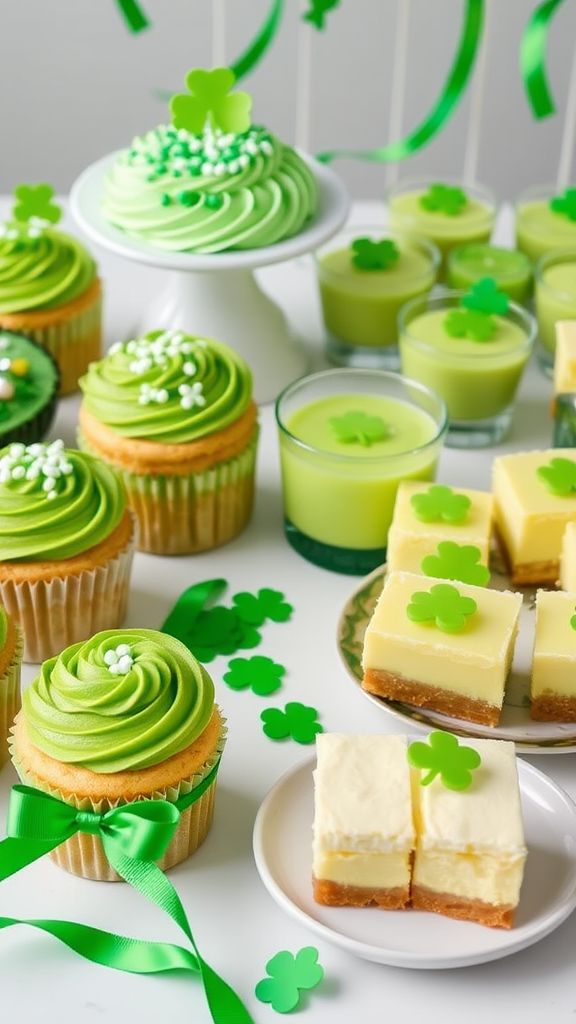
Irish Cream Cheesecake Bars are a decadent treat that beautifully blends the rich flavors of creamy cheesecake with the delightful essence of Irish cream, making them perfect for any gathering.
Ingredients:
- 1 1/2 cups graham cracker crumbs
- 1/2 cup unsalted butter, melted
- 2 cups cream cheese, softened
- 3/4 cup granulated sugar
- 2 large eggs
- 1 cup Irish cream liqueur
- 1 teaspoon vanilla extract
- 1/4 cup all-purpose flour
- 1/4 teaspoon salt
- 1/2 cup chocolate chips (optional)
Preparation Time: 15 minutes
Cooking Time: 45 minutes
Total Time: 1 hour
Instructions:
1. Preheat your oven to 325°F (160°C) and line a 9×9 inch baking pan with parchment paper.
2. In a medium bowl, combine the graham cracker crumbs and melted butter, then mix until well combined.
3. Press the mixture firmly into the bottom of the prepared pan to form the crust.
4. In a large mixing bowl, beat together the cream cheese and sugar until smooth and creamy.
5. Add the eggs one at a time, mixing well after each addition.
6. Stir in the Irish cream liqueur, vanilla extract, flour, and salt until fully incorporated.
7. If using, fold in the chocolate chips gently.
8. Pour the cheesecake mixture over the crust and smooth the top with a spatula.
9. Bake in the preheated oven for about 45 minutes, or until the edges are set and the center is slightly jiggly.
10. Turn off the oven and leave the door ajar, allowing the cheesecake to cool gradually for about an hour.
11. Once cooled, refrigerate for at least 4 hours or overnight before cutting into bars.
Tips:
- For a firmer texture, increase the baking time by 5-10 minutes.
- Enjoy topped with whipped cream or a drizzle of chocolate sauce for an extra indulgent treat.
- Make sure all ingredients are at room temperature for a smoother batter.
- These bars can be stored in the fridge for up to a week in an airtight container.
Leprechaun Layered Rainbow Cake
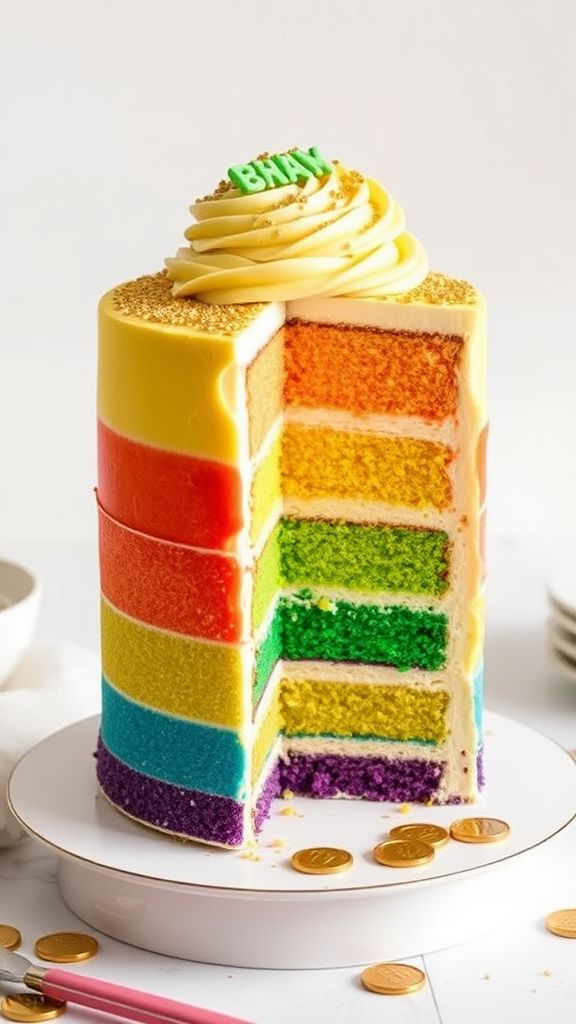
This Leprechaun Layered Rainbow Cake is special for its vibrant colors and delightful blend of vanilla and almond flavors, making it a festive treat for any celebration.
Ingredients:
- 2 ½ cups all-purpose flour
- 2 ½ tsp baking powder
- ½ tsp salt
- 1 cup unsalted butter, softened
- 2 cups granulated sugar
- 4 large eggs
- 1 tsp vanilla extract
- 1 tsp almond extract
- 1 cup whole milk
- food coloring (red, orange, yellow, green, blue, purple)
- 4 cups buttercream frosting
- gold sprinkles for decoration
Preparation Time: 30 minutes
Cooking Time: 25 minutes
Total Time: 55 minutes
Instructions:
1. Preheat your oven to 350°F (175°C) and grease six 8-inch round cake pans.
2. In a medium bowl, whisk together the flour, baking powder, and salt; set aside.
3. In a large bowl, cream the softened butter and sugar until light and fluffy.
4. Add the eggs one at a time, mixing well after each addition, then stir in the vanilla and almond extracts.
5. Gradually add the dry ingredients to the wet ingredients, alternating with the milk, starting and ending with the flour mixture.
6. Divide the batter evenly into six bowls; add a different food coloring to each bowl and mix until well combined.
7. Pour each color of batter into the prepared cake pans and smooth the tops.
8. Bake for 20-25 minutes, or until a toothpick inserted in the center comes out clean.
9. Allow the cakes to cool in the pans for 10 minutes, then transfer to wire racks to cool completely.
10. Once cooled, layer the cakes with buttercream frosting in between each layer and cover the entire cake with frosting.
11. Finish by sprinkling with gold sprinkles on top for a festive touch.
Tips:
- For brighter colors, use gel food coloring instead of liquid.
- Ensure all ingredients are at room temperature for best results.
- Freeze the cake layers for easier assembly and frosting.
- Store the cake in an airtight container at room temperature for up to 3 days.
Guinness Stout Chocolate Cupcakes
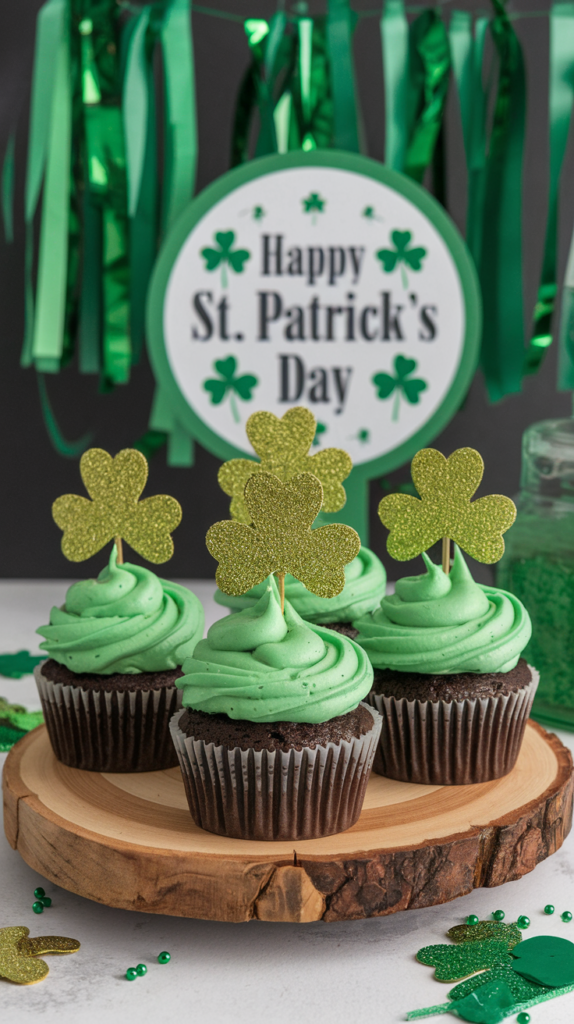
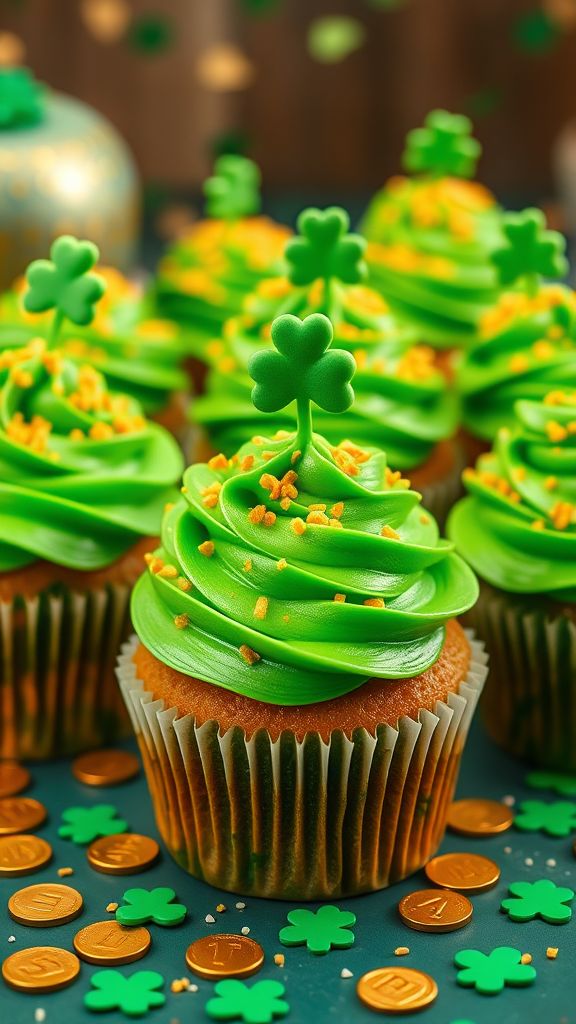
These Guinness Stout Chocolate Cupcakes are a delightful treat that perfectly blend rich chocolate flavor with the distinctive, robust taste of stout beer.
Ingredients:
- 1 cup stout beer (such as Guinness)
- 1 cup unsalted butter
- 1 ¼ cups cocoa powder
- 2 cups all-purpose flour
- 2 cups granulated sugar
- 1 ½ teaspoons baking soda
- 1 teaspoon salt
- 2 large eggs
- 1 cup sour cream
- 1 tablespoon vanilla extract
- 1 cup chocolate chips (optional)
Preparation Time: 15 minutes
Cooking Time: 20 minutes
Total Time: 35 minutes
Instructions:
1. Preheat your oven to 350°F (175°C) and line a muffin tin with cupcake liners.
2. In a saucepan, combine the stout beer and butter over medium heat until the butter is melted. Remove from heat and whisk in the cocoa powder until smooth.
3. In a large bowl, mix the flour, sugar, baking soda, and salt together.
4. In another bowl, whisk together the eggs, sour cream, and vanilla extract until well combined.
5. Pour the stout mixture into the dry ingredients, followed by the egg mixture, and stir until just combined. If using, fold in the chocolate chips.
6. Fill the cupcake liners about 2/3 full and bake in the preheated oven for 18-20 minutes, or until a toothpick comes out clean.
7. Allow the cupcakes to cool in the pan for a few minutes before transferring them to a wire rack to cool completely.
Tips:
- For an extra chocolatey flavor, top the cupcakes with a rich chocolate ganache.
- Store any leftovers in an airtight container to keep them fresh.
- Try pairing these cupcakes with vanilla ice cream for a delicious dessert!
Pistachio Pistachio Pudding Parfaits
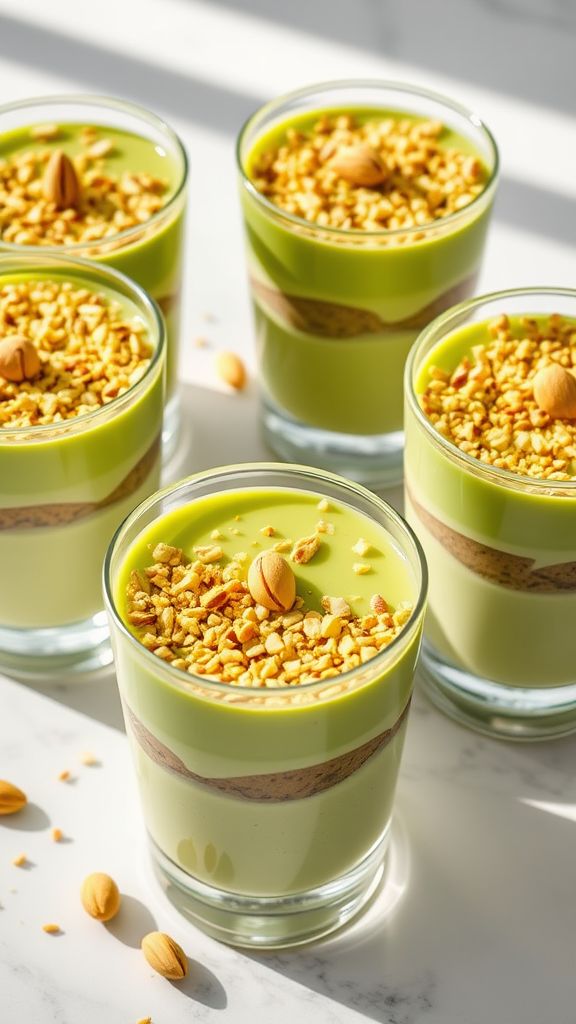
This Pistachio Pistachio Pudding Parfait is a delightful blend of creamy pudding and crunchy pistachios, making it a deliciously unique dessert perfect for any occasion.
Ingredients:
- 1 cup pistachio pudding mix
- 2 cups milk
- 1 cup whipped cream
- 1 cup crushed pistachios
- 1 teaspoon vanilla extract
- 6 short glasses or dessert cups
Preparation Time: 10 minutes
Cooking Time: 0 minutes
Total Time: 10 minutes
Instructions:
1. In a mixing bowl, combine the pistachio pudding mix and milk. Whisk until the mixture is smooth and starts to thicken.
2. Gently fold the whipped cream into the pudding mixture until well combined.
3. Layer the pudding mixture and crushed pistachios in the dessert cups, starting with pudding, then a layer of pistachios, and repeating until cups are filled.
4. Drizzle a bit of vanilla extract on top of each parfait for added flavor.
5. Refrigerate for at least 30 minutes before serving to allow the flavors to meld.
Tips:
- For added flair, garnish with whole pistachios and a dollop of whipped cream on top before serving.
- Try using flavored whipped cream for an extra layer of taste.
- Store any leftovers in the refrigerator for up to 2 days, but the pistachios may lose their crunch.
Minty Grasshopper Pie
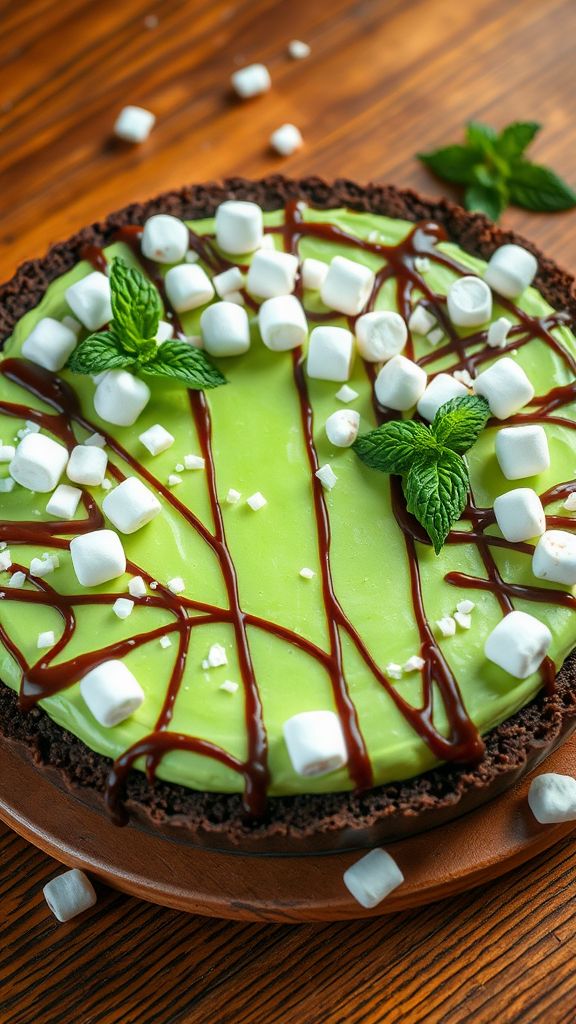
This Minty Grasshopper Pie recipe combines refreshing mint and creamy chocolate flavors, making it a delightful dessert perfect for any occasion.
Ingredients:
- 1 ½ cups chocolate wafer crumbs
- ½ cup unsalted butter, melted
- 1 cup powdered sugar
- 1 cup heavy whipping cream
- 1 teaspoon peppermint extract
- 1 cup green mint chocolate chips
- 1 cup mini marshmallows
- ¼ cup chocolate syrup
Preparation Time: 15 minutes
Cooking Time: 0 minutes
Total Time: 15 minutes
Instructions:
1. In a mixing bowl, combine the chocolate wafer crumbs and melted butter, mixing until well combined.
2. Press the mixture into the bottom of a 9-inch pie pan to form the crust.
3. In another bowl, whip the heavy cream until soft peaks form.
4. Gently fold in the powdered sugar, peppermint extract, mint chocolate chips, and mini marshmallows until evenly combined.
5. Spoon the mint filling into the prepared crust and spread evenly.
6. Drizzle chocolate syrup over the top of the pie.
7. Refrigerate the pie for at least 2 hours or until set.
Tips:
- For a stronger mint flavor, add a few drops of food-grade peppermint oil.
- You can substitute the chocolate wafer crumbs with graham cracker crumbs for a different flavor.
- Top with extra whipped cream and chocolate shavings for a decorative touch before serving.
Lucky Charm Rice Krispie Treats
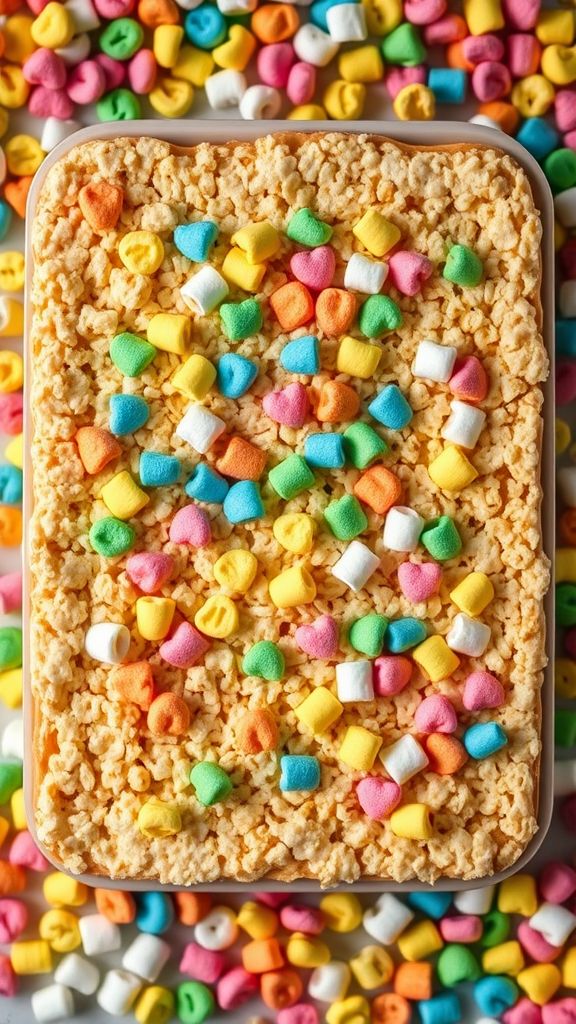
This Lucky Charm Rice Krispie Treats recipe is a whimsical twist on the classic treat, combining the delightful flavors of marshmallows and cereal with the fun, colorful charms of breakfast favorites.
Ingredients:
- 3 tablespoons unsalted butter
- 1 (10 oz) bag mini marshmallows
- 6 cups Rice Krispies cereal
- 2 cups Lucky Charms cereal
- 1 cup additional mini marshmallows (for topping)
Preparation Time: 10 minutes
Cooking Time: 5 minutes
Total Time: 15 minutes
Instructions:
1. In a large saucepan, melt the butter over low heat.
2. Add the mini marshmallows and stir until completely melted and smooth.
3. Remove from heat and quickly add the Rice Krispies cereal and Lucky Charms cereal, stirring until well combined.
4. Fold in the additional mini marshmallows for an extra gooey texture.
5. Press the mixture into a greased 9×13 inch baking dish, spreading evenly.
6. Allow to cool for about 30 minutes before cutting into squares.
Tips:
- For a festive touch, add extra Lucky Charms on top before cooling.
- Use a spatula coated with cooking spray to help press the mixture into the pan.
- Store in an airtight container to keep them fresh and chewy.
Bailey’s Irish Cream Truffles
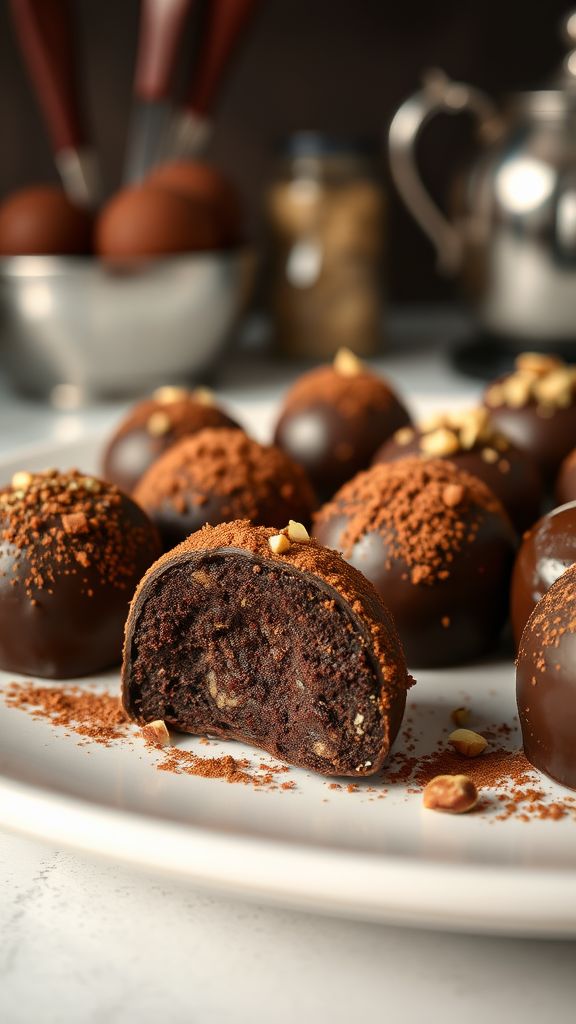
These Bailey’s Irish Cream Truffles are a delightful blend of chocolate and rich cream flavors, perfect for special occasions or as an indulgent treat.
Ingredients:
- 1 cup semi-sweet chocolate chips
- 1/2 cup heavy cream
- 1/4 cup Bailey’s Irish Cream
- 1 teaspoon vanilla extract
- 1/4 cup unsweetened cocoa powder
- 1/4 cup finely chopped nuts (optional)
Preparation Time: 15 minutes
Cooking Time: 5 minutes
Total Time: 20 minutes
Instructions:
1. In a saucepan, heat the heavy cream over medium heat until it begins to simmer.
2. Remove from heat and add the semi-sweet chocolate chips, stirring until smooth and melted.
3. Stir in Bailey’s Irish Cream and vanilla extract until well combined.
4. Allow the mixture to cool, then refrigerate for about 1 hour or until firm.
5. Once firm, use a teaspoon to scoop out portions and roll them into balls using your hands.
6. Roll the truffles in cocoa powder or finely chopped nuts to coat, then place them on a baking sheet.
7. Refrigerate for another 30 minutes to set before serving.
Tips:
- Make sure the cream doesn’t boil to prevent burning the chocolate.
- For a stronger flavor, add more Bailey’s Irish Cream, but adjust the chocolate amount accordingly.
- Store truffles in an airtight container in the refrigerator for up to a week.
Green Velvet Cake with Cream Cheese Frosting
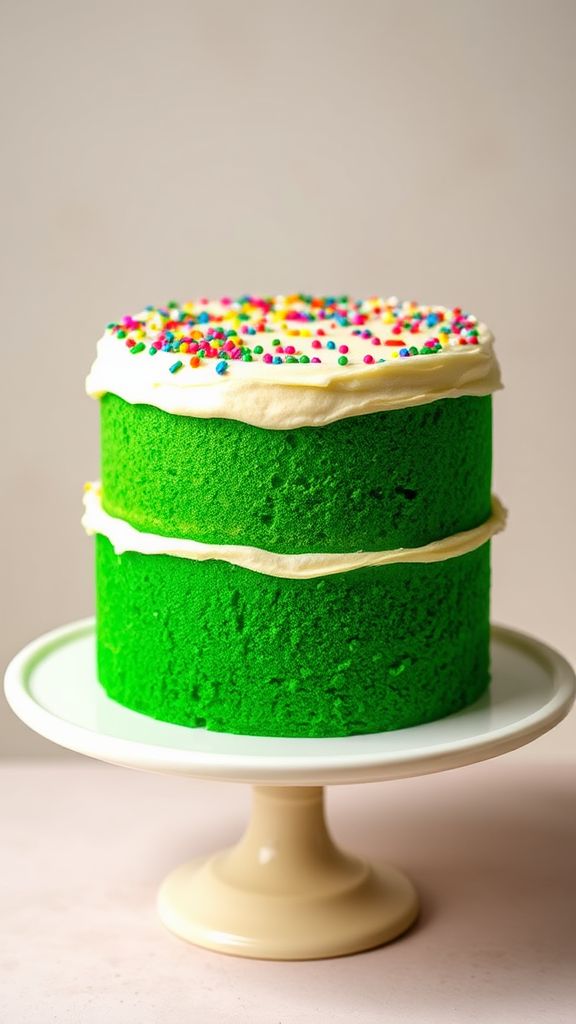
This Green Velvet Cake with Cream Cheese Frosting is a stunning twist on the classic dessert, combining rich cocoa flavor with a vibrant green hue that’s perfect for celebrations.
Ingredients:
- 2 ½ cups all-purpose flour
- 1 ½ cups granulated sugar
- 1 teaspoon baking powder
- 1 teaspoon baking soda
- ½ teaspoon salt
- 1 cup vegetable oil
- 1 cup buttermilk, room temperature
- 2 large eggs, room temperature
- 2 tablespoons green food coloring
- 1 teaspoon vanilla extract
- 1 tablespoon cocoa powder
- 8 oz. cream cheese, softened
- 4 cups powdered sugar
- ½ cup unsalted butter, softened
- 1 teaspoon vanilla extract (for frosting)
Preparation Time: 20 minutes
Cooking Time: 30 minutes
Total Time: 50 minutes
Instructions:
1. Preheat your oven to 350°F (175°C) and grease two 9-inch round cake pans.
2. In a large mixing bowl, whisk together the flour, sugar, baking powder, baking soda, salt, and cocoa powder.
3. In another bowl, mix the vegetable oil, buttermilk, eggs, green food coloring, and vanilla extract until well combined.
4. Gradually add the wet ingredients to the dry ingredients, mixing until just combined.
5. Divide the batter evenly between the prepared cake pans and smooth the tops.
6. Bake in the preheated oven for 25-30 minutes, or until a toothpick inserted in the center comes out clean.
7. Allow the cakes to cool in the pans for 10 minutes, then transfer to wire racks to cool completely.
8. While the cakes are cooling, prepare the cream cheese frosting by beating the softened cream cheese and butter together until smooth.
9. Gradually add the powdered sugar, mixing until fluffy, then add the vanilla extract and beat until combined.
10. Once the cakes are completely cool, frost the top of one layer, place the second layer on top, and frost the top and sides of the cake.
11. Decorate with sprinkles or cake decorations if desired, and serve.
Tips:
- Ensure your ingredients are at room temperature for better mixing.
- Store any leftovers in an airtight container in the refrigerator.
- Feel free to adjust the amount of food coloring for a deeper or lighter green hue.
Shortbread Cookies with Shamrock Icing

These delightful Shortbread Cookies with Shamrock Icing combine buttery flavors with the festive charm of St. Patrick’s Day, making them a perfect treat for celebrations.
Ingredients:
- 2 cups all-purpose flour
- 1/2 cup cornstarch
- 1/2 cup powdered sugar
- 1 cup unsalted butter, softened
- 1 teaspoon vanilla extract
- 1/4 teaspoon salt
- 2 cups powdered sugar (for icing)
- 2-3 tablespoons milk (for icing)
- Green food coloring (for icing)
Preparation Time: 15 minutes
Cooking Time: 20 minutes
Total Time: 35 minutes
Instructions:
1. Preheat your oven to 350°F (175°C) and line a baking sheet with parchment paper.
2. In a bowl, mix together the flour, cornstarch, powdered sugar, and salt until well combined.
3. In a separate bowl, cream the softened butter and vanilla extract until light and fluffy.
4. Gradually add the dry ingredients to the butter mixture, mixing until a dough forms.
5. Roll out the dough on a lightly floured surface to about 1/4 inch thickness.
6. Cut out shapes using a shamrock cookie cutter and place them onto the prepared baking sheet.
7. Bake for 15-20 minutes or until the edges are lightly golden. Let cool completely on a wire rack.
8. To prepare the icing, mix the powdered sugar with milk and add green food coloring until desired color is achieved.
9. Frost the cooled cookies with the shamrock icing and let set before serving.
Tips:
- For added flavor, consider incorporating almond extract into the butter mixture.
- Make sure the cookies are completely cool before icing to prevent the icing from melting.
- Use a toothpick to add details or designs to the icing for a fun touch.
Chocolate Mint Whoopie Pies
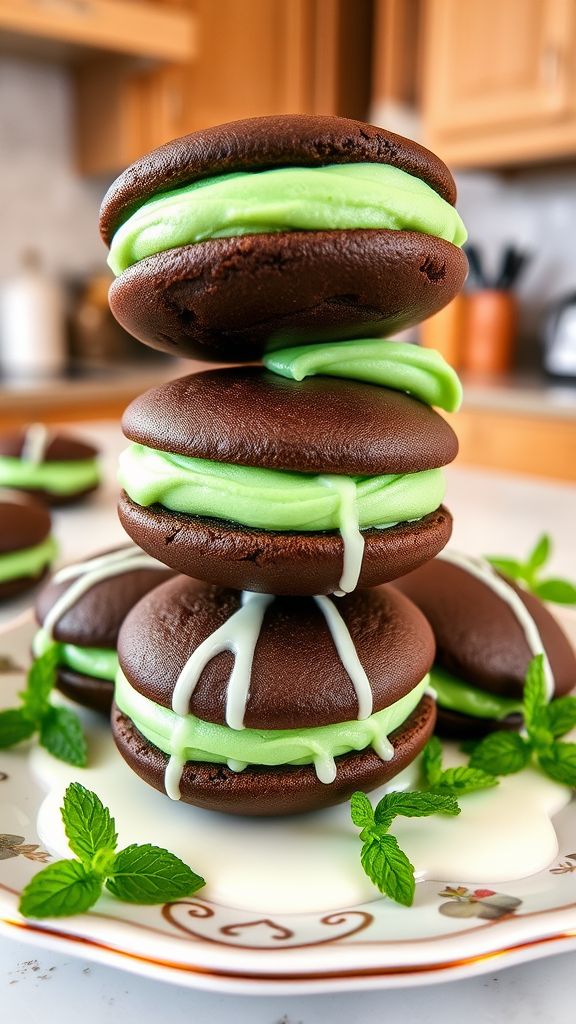
These Chocolate Mint Whoopie Pies are a delightful treat that perfectly combines rich chocolate and refreshing mint flavors, making them irresistible!
Ingredients:
- 1 cup unsweetened cocoa powder
- 2 cups all-purpose flour
- 1 tsp baking soda
- 1/2 tsp salt
- 1 cup unsalted butter, softened
- 2 cups granulated sugar
- 2 large eggs
- 2 tsp vanilla extract
- 1 cup buttermilk
- 1/2 cup mint frosting
- 1 cup powdered sugar
- 2 tbsp milk
Preparation Time: 15 minutes
Cooking Time: 10 minutes
Total Time: 25 minutes
Instructions:
1. Preheat your oven to 350°F (175°C) and line baking sheets with parchment paper.
2. In a bowl, whisk together cocoa powder, flour, baking soda, and salt.
3. In a large bowl, beat the butter and sugar until light and fluffy.
4. Add the eggs one at a time, mixing well after each addition, then stir in vanilla extract.
5. Gradually add the dry ingredients to the butter mixture, alternately with buttermilk, starting and ending with the dry ingredients.
6. Drop tablespoons of batter onto the prepared baking sheets, leaving space between each.
7. Bake for 8-10 minutes, or until the tops are set. Let cool completely.
8. Once cool, pipe or spread mint frosting onto the flat side of half the cookies, then sandwich with the other halves.
9. In a small bowl, mix powdered sugar and milk until smooth; drizzle over the whoopie pies for a decorative finish.
Tips:
- Use room temperature ingredients for better blending.
- For extra mint flavor, add a few drops of peppermint extract to the frosting.
- Store whoopie pies in an airtight container to maintain freshness.
Clovers and Gold Chocolate Bark
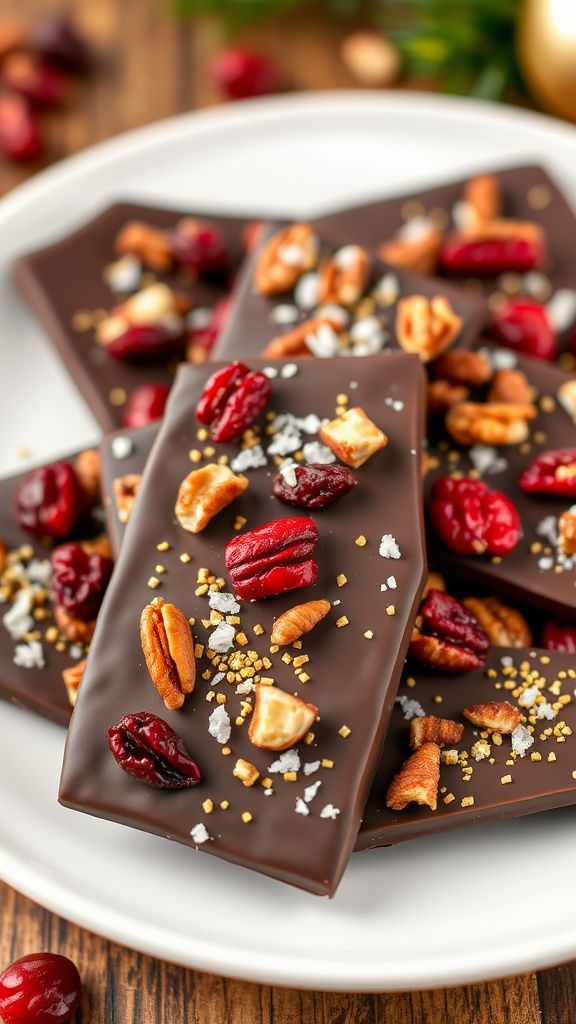
This Clovers and Gold Chocolate Bark combines the rich taste of chocolate with the refreshing crunch of nuts, making it an irresistible treat that’s perfect for any occasion.
Ingredients:
- 2 cups dark chocolate chips
- 1 cup toasted pecans, chopped
- 1/2 cup dried cranberries
- 1/4 cup sea salt flakes
- 1/2 cup gold sprinkles
Preparation Time: 10 minutes
Cooking Time: 10 minutes
Total Time: 20 minutes
Instructions:
1. Line a baking sheet with parchment paper and set aside.
2. In a microwave-safe bowl, melt the dark chocolate chips in 30-second intervals, stirring in between until smooth.
3. Pour the melted chocolate onto the prepared baking sheet and spread it evenly with a spatula.
4. Sprinkle the chopped pecans, dried cranberries, and sea salt flakes evenly over the melted chocolate.
5. Add the gold sprinkles on top for a festive touch.
6. Refrigerate for about 1 hour or until the chocolate is completely set.
7. Once set, break the chocolate bark into pieces and serve or store in an airtight container.
Tips:
- Make sure to chop the pecans into small pieces for better distribution over the chocolate.
- Feel free to substitute dried cranberries with any other dried fruit of your choice.
- Store the chocolate bark in a cool, dry place to keep it fresh for longer.
Irish Soda Bread Pudding with Whiskey Sauce
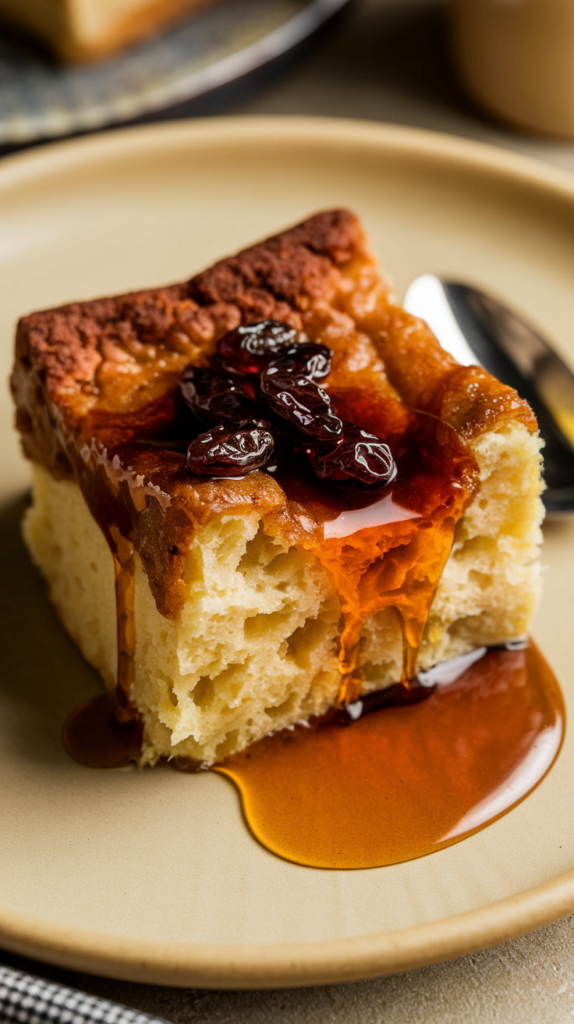
This Irish Soda Bread Pudding with Whiskey Sauce combines the comforting flavors of traditional soda bread with a rich, velvety whiskey-infused sauce, making it a delightful dessert for any occasion.
Ingredients:
- 4 cups cubed Irish soda bread
- 4 large eggs
- 2 cups whole milk
- 1 cup heavy cream
- 1 cup granulated sugar
- 1 teaspoon vanilla extract
- 1 teaspoon ground cinnamon
- 1/2 teaspoon salt
- 1/2 cup raisins or currants
- 1/2 cup Irish whiskey
- 1/4 cup brown sugar
- 1/4 cup unsalted butter
Preparation Time: 15 minutes
Cooking Time: 45 minutes
Total Time: 1 hour
Instructions:
1. Preheat the oven to 350°F (175°C) and lightly grease a baking dish.
2. In a large bowl, whisk together the eggs, whole milk, heavy cream, granulated sugar, vanilla extract, ground cinnamon, and salt until well combined.
3. Gently fold in the cubed soda bread and raisins or currants, ensuring the bread is thoroughly soaked in the egg mixture.
4. Pour the mixture into the greased baking dish and bake for 45 minutes, or until the top is golden and a toothpick inserted in the center comes out clean.
5. While the pudding is baking, prepare the whiskey sauce by melting the butter in a saucepan over medium heat.
6. Stir in the brown sugar and cook until dissolved, then add the Irish whiskey and simmer for a few minutes until slightly thickened.
7. Once the pudding is done baking, let it cool for a few minutes before serving drizzled with the warm whiskey sauce.
Tips:
- For added texture, consider incorporating chopped nuts into the pudding mix.
- Let the whiskey sauce cool slightly for a thicker consistency.
- This pudding can be made a day ahead and reheated gently before serving.
Matcha Green Tea Macarons
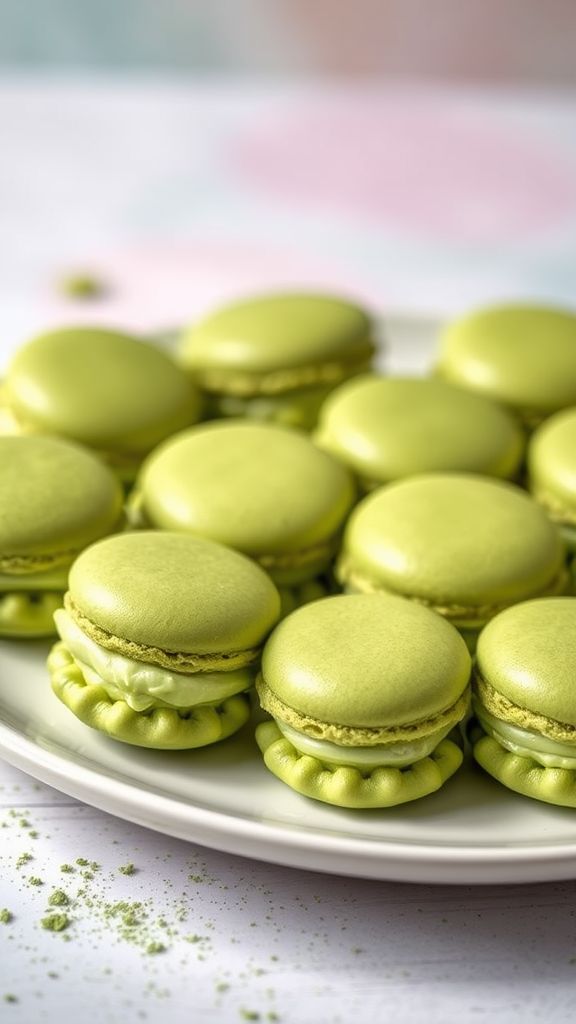
This Matcha Green Tea Macaron recipe blends the earthy richness of matcha with the delicate sweetness of meringue for an elegant and delicious treat.
Ingredients:
- 1 cup almond flour
- 1 cup powdered sugar
- 1 tablespoon matcha green tea powder
- 3 large egg whites
- 1/4 cup granulated sugar
- 1/4 teaspoon cream of tartar
- 1/2 cup unsalted butter, softened
- 2 cups confectioners’ sugar (for filling)
- 1 teaspoon vanilla extract
- 2 tablespoons milk
Preparation Time: 30 minutes
Cooking Time: 15 minutes
Total Time: 45 minutes
Instructions:
1. Preheat your oven to 300°F (150°C) and line baking sheets with parchment paper.
2. In a bowl, sift together the almond flour, powdered sugar, and matcha green tea powder until no lumps remain.
3. In a separate bowl, beat the egg whites until they become frothy, then add cream of tartar.
4. Gradually add granulated sugar to the frothy egg whites while continuing to beat until stiff peaks form.
5. Gently fold the dry ingredients into the meringue in three additions until fully incorporated and smooth.
6. Transfer the macaron batter to a piping bag and pipe small rounds onto the prepared baking sheets, leaving space in between.
7. Tap the baking sheets against the counter to release any air bubbles and let the macarons sit for 30 minutes to form a skin.
8. Bake for 15 minutes, then allow to cool completely on the baking sheets.
9. For the filling, beat the softened butter until creamy, then gradually add confectioners’ sugar, vanilla extract, and milk until smooth.
10. Match the macarons in pairs, filling one half with the buttercream and sandwiching with the other half.
Tips:
- Ensure all ingredients are at room temperature for best results.
- Use a kitchen scale for accurate measurements.
- Experiment with different flavors by adding essence or colored fillings.
Rainbow Fruit Tart with Lucky Clover Glaze
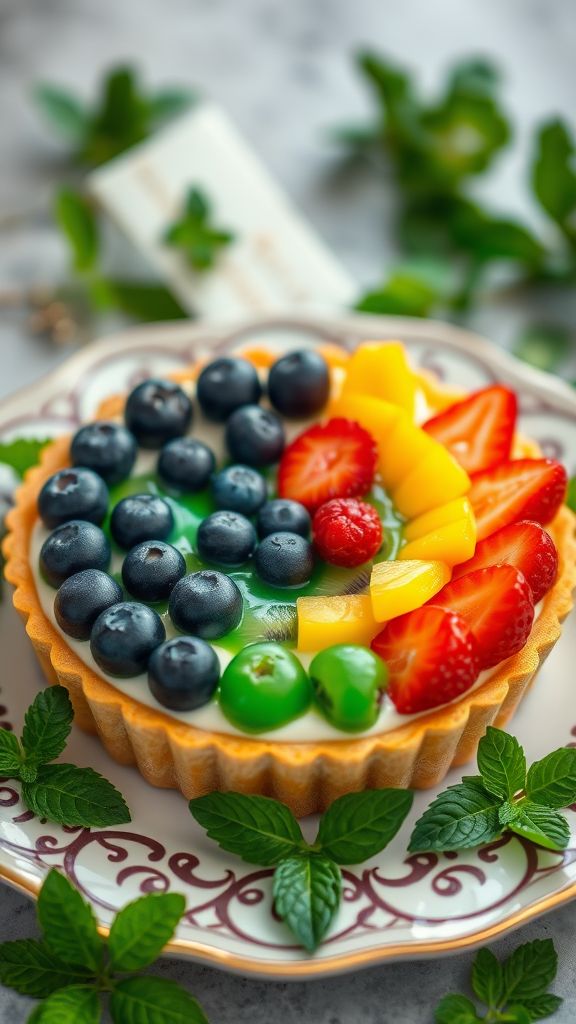
This Rainbow Fruit Tart with Lucky Clover Glaze is a vibrant blend of fresh fruits and a sweet, zesty glaze that’s perfect for any celebration.
Ingredients:
- 1 pre-made tart shell
- 2 cups mixed fresh fruits (strawberries, blueberries, kiwi, and mango)
- 1 cup cream cheese, softened
- ½ cup powdered sugar
- 1 teaspoon vanilla extract
- ½ cup corn syrup
- 2 tablespoons lemon juice
- 2 teaspoons green food coloring
- 1 tablespoon gelatin powder
- 3 tablespoons cold water
Preparation Time: 20 minutes
Cooking Time: 10 minutes
Total Time: 30 minutes
Instructions:
1. Preheat the oven to 350°F (175°C) and blind bake the tart shell for 10 minutes until lightly golden.
2. In a mixing bowl, combine the cream cheese, powdered sugar, and vanilla extract, and beat until smooth.
3. Spread the cream cheese mixture evenly over the cooled tart shell.
4. Arrange the mixed fresh fruits on top of the cream cheese layer in a rainbow design.
5. In a small saucepan, combine the corn syrup, lemon juice, and green food coloring over low heat.
6. In a separate small bowl, sprinkle the gelatin over cold water and let it sit for 5 minutes to bloom.
7. Stir the bloomed gelatin into the warm corn syrup mixture until fully dissolved.
8. Pour the Lucky Clover glaze over the arranged fruit and refrigerate for at least 1 hour to set.
9. Once set, slice the tart and enjoy your vibrant dessert!
Tips:
- Use a variety of fruits for color and flavor diversity.
- If you prefer a sweeter tart, adjust the powdered sugar to your taste.
- Make sure to refrigerate the tart long enough for the glaze to set properly.

