My New Cookbook is Out! Check Out Now!
20 Satisfying Winter Camping Snacks You’ll Love on the Trail
Did you know that over 70% of campers enjoy snacking while they explore the great outdoors? If you’re gearing up for an unforgettable winter camping adventure, you’ll want to keep your energy levels high with some delicious treats!
In this blog, we’ll share 20 satisfying winter camping snacks that are not only easy to pack but also bursting with flavor. Get ready to discover snacks like chocolate-dipped peanut butter energy bites and spicy sriracha roasted chickpeas that will make your taste buds dance around the campfire!
Trail-Worthy Cheddar Puffed Popcorn

This Trail-Worthy Cheddar Puffed Popcorn combines the irresistible crunch of popcorn with the rich, savory flavor of cheddar, making it a perfect snack for any adventure.
Ingredients:
- 1/2 cup popcorn kernels
- 1/4 cup unsalted butter
- 1 cup grated cheddar cheese
- 1 teaspoon garlic powder
- 1 teaspoon onion powder
- 1/2 teaspoon smoked paprika
- 1/2 teaspoon salt
- 1/4 teaspoon black pepper
Preparation Time: 10 minutes
Cooking Time: 5 minutes
Total Time: 15 minutes
Instructions:
1. Pop the popcorn kernels using an air popper or on the stove according to package instructions.
2. In a small saucepan, melt the unsalted butter over low heat.
3. Once melted, remove from heat and stir in the garlic powder, onion powder, smoked paprika, salt, and black pepper.
4. Pour the butter mixture over the popped popcorn and toss gently to coat evenly.
5. Sprinkle the grated cheddar cheese over the popcorn and toss again until evenly distributed.
6. Serve immediately or store in an airtight container for your next adventure!
Tips:
- For an extra kick, add a pinch of cayenne pepper to the seasoning mix.
- Experiment with different cheeses, such as parmesan or a spicy cheddar, for varied flavors.
- This popcorn is best enjoyed fresh, but you can reheat it slightly in the oven to revive its crunch.
Warm Cinnamon Apple Trail Mix
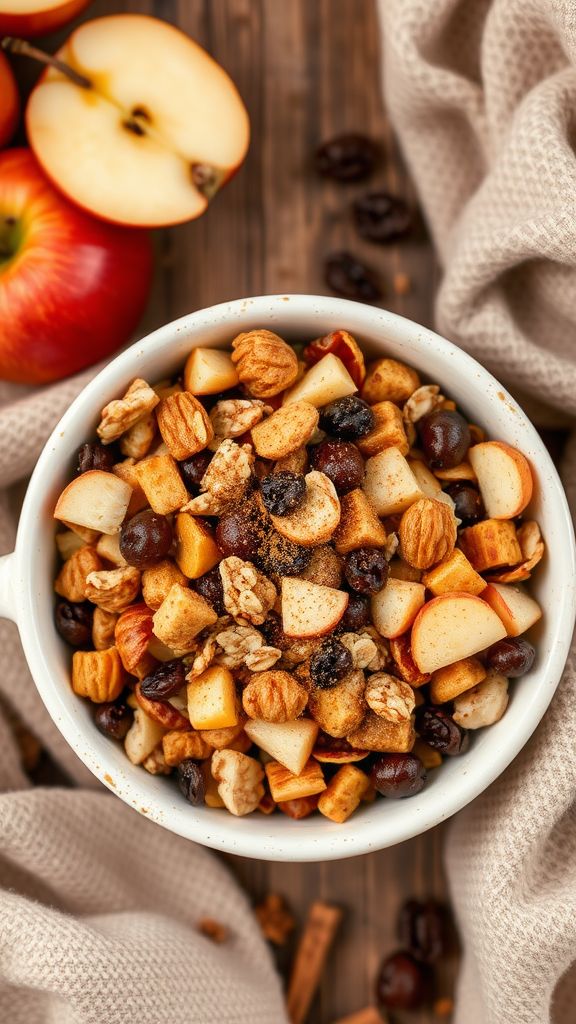
This Warm Cinnamon Apple Trail Mix brings together the comforting flavors of cinnamon and apples, creating a delightful snack that’s both healthy and satisfying.
Ingredients:
- 1 cup dried apples, chopped
- 1 cup nuts (such as almonds or walnuts)
- 1 cup rolled oats
- 1/2 cup raisins
- 2 teaspoons ground cinnamon
- 1/4 cup honey
- 1/4 teaspoon salt
Preparation Time: 10 minutes
Cooking Time: 15 minutes
Total Time: 25 minutes
Instructions:
1. Preheat your oven to 350°F (175°C).
2. In a large mixing bowl, combine the chopped dried apples, nuts, rolled oats, raisins, ground cinnamon, and salt.
3. Drizzle the honey over the mixture and stir well until all ingredients are evenly coated.
4. Spread the mixture in a single layer on a baking sheet lined with parchment paper.
5. Bake for 15 minutes, stirring halfway through to ensure even toasting.
6. Remove from the oven and let it cool before storing in an airtight container.
Tips:
- For added sweetness, consider mixing in some chocolate chips after the trail mix cools.
- Feel free to substitute the nuts with your personal favorites or any nut allergies.
- Store the trail mix in an airtight container to maintain freshness for up to two weeks.
Chocolate-Dipped Peanut Butter Energy Bites

These Chocolate-Dipped Peanut Butter Energy Bites are special for their creamy peanut butter flavor paired with rich chocolate, making them a delightful and nutritious snack.
Ingredients:
- 1 cup rolled oats
- 1/2 cup natural peanut butter
- 1/4 cup honey or maple syrup
- 1/4 cup chia seeds
- 1/2 cup chocolate chips
- 1/4 cup shredded coconut (optional)
- 1/2 tsp vanilla extract
- 1/8 tsp salt
Preparation Time: 15 minutes
Cooking Time: 0 minutes
Total Time: 15 minutes
Instructions:
1. In a large bowl, combine the rolled oats, peanut butter, honey, chia seeds, shredded coconut (if using), vanilla extract, and salt. Mix until well combined.
2. Once the mixture is combined, use your hands to form small balls, about 1 inch in diameter.
3. Place the energy bites on a baking sheet lined with parchment paper and refrigerate for about 30 minutes to firm up.
4. While the bites are chilling, melt the chocolate chips in a microwave-safe bowl in 30-second intervals, stirring in between, until smooth.
5. Remove the energy bites from the fridge and dip each one halfway into the melted chocolate, allowing the excess to drip off.
6. Return the chocolate-dipped bites to the parchment paper and refrigerate again until the chocolate has hardened, about 15 minutes.
Tips:
- Feel free to customize with add-ins like nuts, seeds, or dried fruits.
- Store the energy bites in an airtight container in the refrigerator for up to a week.
- For an extra touch, sprinkle sea salt on top of the chocolate before it sets.
Savory Herb and Cheese Crackers

These Savory Herb and Cheese Crackers are a delightful combination of bold flavors and crispy texture, perfect for snacking or entertaining.
Ingredients:
- 1 ½ cups all-purpose flour
- ½ teaspoon salt
- ½ teaspoon baking powder
- ½ cup unsalted butter, softened
- 1 cup shredded sharp cheddar cheese
- 2 tablespoons fresh rosemary, chopped
- 2 tablespoons fresh thyme, chopped
- 2 tablespoons milk
Preparation Time: 15 minutes
Cooking Time: 20 minutes
Total Time: 35 minutes
Instructions:
1. Preheat your oven to 350°F (175°C) and line a baking sheet with parchment paper.
2. In a mixing bowl, combine the all-purpose flour, salt, and baking powder.
3. Add the softened butter and mix until crumbly.
4. Stir in the shredded cheddar cheese, chopped rosemary, and thyme until well combined.
5. Gradually add milk, mixing until the dough comes together.
6. Roll out the dough to about ¼ inch thickness on a floured surface and cut into desired shapes.
7. Place the crackers on the prepared baking sheet and bake for 15-20 minutes or until golden brown.
8. Allow the crackers to cool before serving.
Tips:
- Experiment with different herbs like basil or dill for varied flavors.
- Store in an airtight container to keep them crisp.
- Serve with dips or cheese spreads for an enhanced snack experience.
Spicy Sriracha Roasted Chickpeas

This Spicy Sriracha Roasted Chickpeas recipe combines the crunch of roasted chickpeas with the bold heat of Sriracha for a snack that is both flavorful and addictive.
Ingredients:
- 1 can (15 oz) chickpeas, drained and rinsed
- 2 tablespoons olive oil
- 2 tablespoons Sriracha sauce
- 1 teaspoon garlic powder
- 1 teaspoon cumin
- 1/2 teaspoon salt
- 1/4 teaspoon black pepper
Preparation Time: 10 minutes
Cooking Time: 25 minutes
Total Time: 35 minutes
Instructions:
1. Preheat your oven to 400°F (200°C).
2. In a mixing bowl, combine the chickpeas, olive oil, Sriracha, garlic powder, cumin, salt, and black pepper; stir until evenly coated.
3. Spread the chickpeas in a single layer on a baking sheet.
4. Roast the chickpeas in the preheated oven for 25-30 minutes, stirring halfway through, until golden and crispy.
5. Remove from the oven and let cool slightly before serving.
Tips:
- For extra crunch, make sure to thoroughly dry the chickpeas before roasting.
- Adjust the Sriracha amount to your preferred level of spiciness.
- Store leftover roasted chickpeas in an airtight container for up to 3 days.
Maple Glazed Almond Clusters
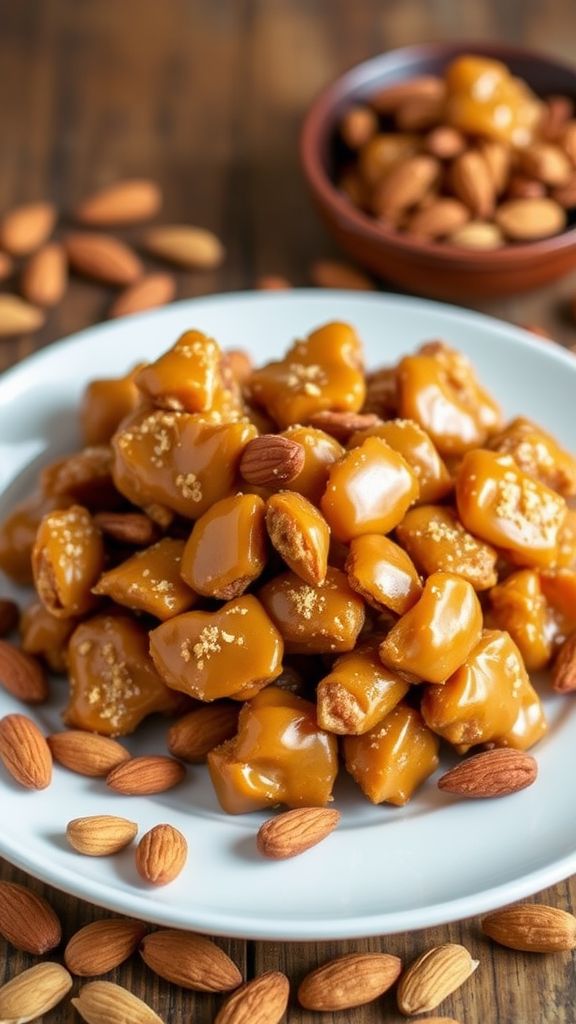
Indulge in the perfect balance of sweet maple and crunchy almonds with these delightful Maple Glazed Almond Clusters that make for an irresistible treat.
Ingredients:
- 2 cups whole almonds
- 1/2 cup pure maple syrup
- 1/4 cup brown sugar
- 1/2 teaspoon vanilla extract
- 1/4 teaspoon salt
- 1/4 teaspoon ground cinnamon
- 1 tablespoon unsalted butter
Preparation Time: 10 minutes
Cooking Time: 15 minutes
Total Time: 25 minutes
Instructions:
1. Preheat the oven to 350°F (175°C) and line a baking sheet with parchment paper.
2. In a medium saucepan over medium heat, combine the maple syrup, brown sugar, vanilla extract, salt, and ground cinnamon. Stir until the mixture comes to a light boil.
3. Add the almonds and stir to coat them evenly in the syrup mixture.
4. Remove from heat and stir in the unsalted butter until melted and combined.
5. Pour the almond mixture onto the prepared baking sheet, spreading it out into a single layer.
6. Bake in the preheated oven for about 15 minutes, stirring halfway through to ensure even coating and baking.
7. Once golden and fragrant, remove from the oven and let cool completely on the baking sheet. The clusters will harden as they cool.
Tips:
- For added flavor, consider adding a pinch of nutmeg or using roasted almonds.
- Store the clusters in an airtight container to maintain freshness.
- These clusters make for a great topping on yogurt or salads for a crunchy twist.
Miniature Meat and Cheese Charcuterie Packs

This miniature meat and cheese charcuterie pack brings together rich flavors and delightful textures for a charming, shareable snack perfect for any occasion.
Ingredients:
- 4 oz assorted deli meats (salami, prosciutto, and turkey)
- 4 oz assorted cheeses (cheddar, brie, and gouda)
- 1 cup mixed nuts (almonds, walnuts, and cashews)
- 1 cup fresh fruit (grapes and sliced apples)
- 4 small crackers or breadsticks
- 2 tbsp honey or fig jam
- 1 tbsp fresh herbs (rosemary or thyme) for garnish
Preparation Time: 10 minutes
Cooking Time: 0 minutes
Total Time: 10 minutes
Instructions:
1. Start by slicing the assorted deli meats and cheeses into smaller, bite-sized pieces.
2. In a small container or on a platter, arrange the meats and cheeses artfully.
3. Add the mixed nuts around the meats and cheeses to create a balanced look.
4. Place the fresh fruits in the remaining spaces for a pop of color and natural sweetness.
5. Include the small crackers or breadsticks for crunch and serve with honey or fig jam on the side.
6. Finally, garnish with fresh herbs for an aromatic finish.
Tips:
- Feel free to customize the meats and cheeses based on your personal preferences.
- Use seasonal fruits for a fresh twist throughout the year.
- Prepare the packs in advance for an easy serving option at gatherings.
- Consider adding small labels if serving to guests to identify different flavors.
Hot Cocoa Cereal Bars
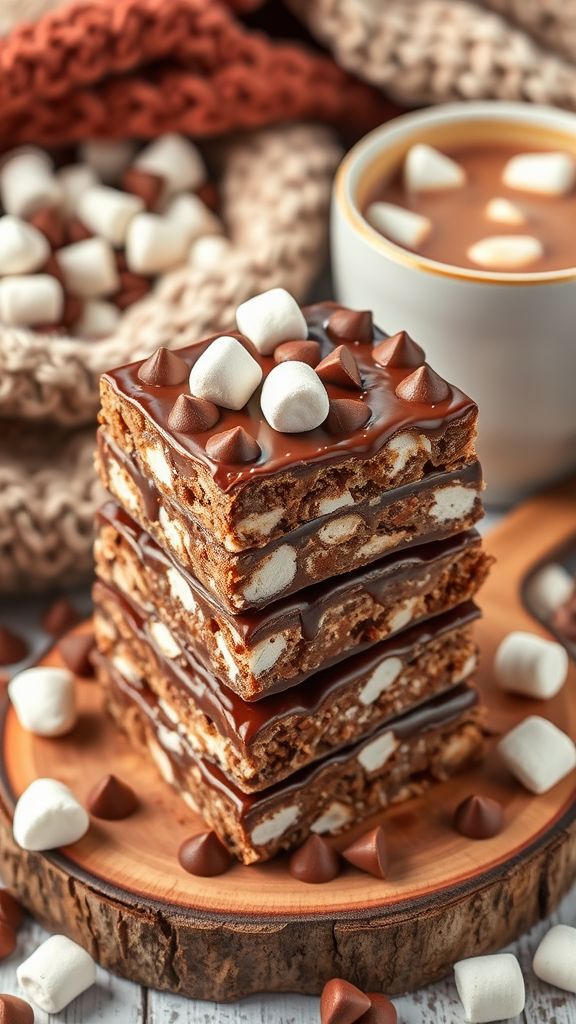
These Hot Cocoa Cereal Bars are a delightful treat combining rich chocolate flavors with the comforting taste of marshmallows, making them perfect for a cozy snack.
Ingredients:
- 3 cups crispy rice cereal
- 1 cup mini marshmallows
- 1/2 cup unsweetened cocoa powder
- 1/2 cup honey
- 1/2 cup smooth nut butter (e.g., almond or peanut)
- 1 tsp vanilla extract
- 1/4 cup chocolate chips
Preparation Time: 10 minutes
Cooking Time: 5 minutes
Total Time: 15 minutes
Instructions:
1. In a large saucepan, combine the honey and nut butter over medium heat; stir until melted and smooth.
2. Remove from heat and stir in cocoa powder and vanilla extract until well combined.
3. Add the crispy rice cereal and mini marshmallows; mix until evenly coated with the chocolate mixture.
4. Press the mixture into a greased 9×9 inch baking dish, ensuring it’s packed tightly.
5. Sprinkle chocolate chips on top and gently press them into the bars.
6. Allow the bars to cool at room temperature for about 30 minutes before cutting into squares.
Tips:
- For added texture, consider mixing in chopped nuts or crushed graham crackers.
- Store in an airtight container for up to a week to maintain freshness.
- Feel free to use dark chocolate chips for a richer flavor.
Smoky BBQ Beef Jerky
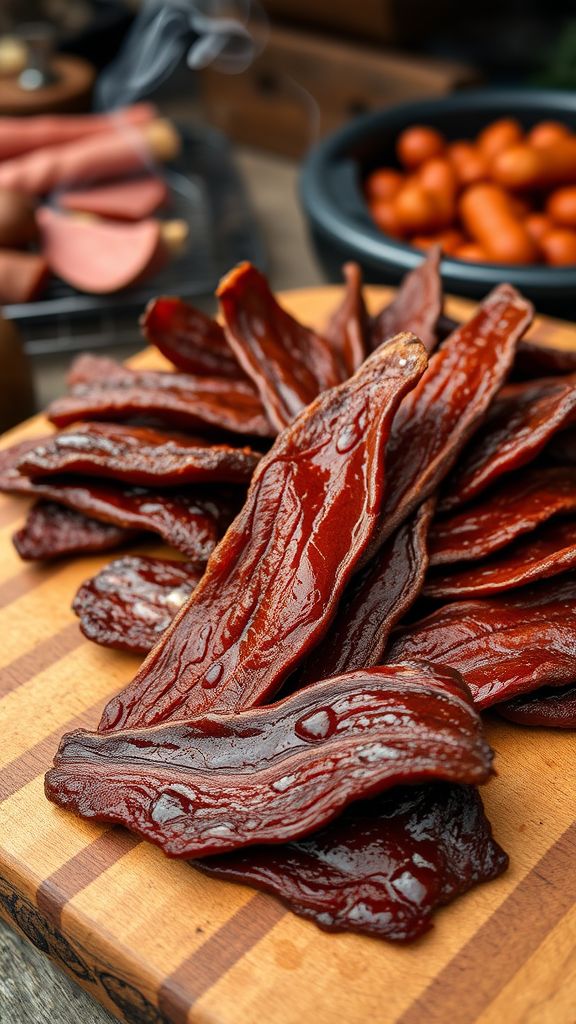
This Smoky BBQ Beef Jerky is special because it combines rich, smoky flavors with a perfect balance of sweetness and spice that will tantalize your taste buds.
Ingredients:
- 2 pounds beef flank steak
- ¼ cup soy sauce
- ¼ cup Worcestershire sauce
- 2 tablespoons brown sugar
- 1 tablespoon smoked paprika
- 1 tablespoon garlic powder
- 1 tablespoon onion powder
- 1 teaspoon black pepper
- 1 teaspoon cayenne pepper
- 2 teaspoons liquid smoke
Preparation Time: 15 minutes
Cooking Time: 6 hours
Total Time: 6 hours 15 minutes
Instructions:
1. Slice the beef flank steak into thin strips against the grain for optimal tenderness.
2. In a bowl, combine soy sauce, Worcestershire sauce, brown sugar, smoked paprika, garlic powder, onion powder, black pepper, cayenne pepper, and liquid smoke to create the marinade.
3. Place the beef strips in a resealable plastic bag and pour the marinade over the meat, ensuring all strips are well-coated.
4. Seal the bag, removing any excess air, and refrigerate for at least 4 hours, or overnight for the best flavor.
5. Preheat your dehydrator or oven to 160°F (70°C).
6. Remove the beef from the marinade and place the strips in a single layer on dehydrator trays or a baking sheet lined with parchment paper if using an oven.
7. Dehydrate the beef jerky for about 6 hours, checking for doneness; it should be dry but still chewy.
8. Once done, allow the jerky to cool, then store it in an airtight container for up to a month.
Tips:
- For an extra kick, add more cayenne pepper to the marinade.
- Select lean cuts of meat to ensure the jerky has a long shelf life.
- Experiment with different types of wood chips in the smoker for varied smoky flavors.
Nutty Banana Oatmeal Cookies

These Nutty Banana Oatmeal Cookies are a delightful blend of sweet bananas and crunchy nuts, making them a wholesome and tasty treat.
Ingredients:
- 1 cup mashed ripe bananas
- 1 cup rolled oats
- 1/2 cup chopped mixed nuts (walnuts, pecans, or almonds)
- 1/4 cup honey or maple syrup
- 1/2 cup all-purpose flour
- 1/2 teaspoon baking powder
- 1/2 teaspoon vanilla extract
- 1/4 teaspoon salt
Preparation Time: 10 minutes
Cooking Time: 15 minutes
Total Time: 25 minutes
Instructions:
1. Preheat your oven to 350°F (175°C) and line a baking sheet with parchment paper.
2. In a large mixing bowl, combine the mashed bananas, honey or maple syrup, and vanilla extract.
3. In another bowl, mix together the rolled oats, all-purpose flour, baking powder, and salt.
4. Gradually add the dry ingredients to the banana mixture, stirring until well combined.
5. Fold in the chopped mixed nuts until evenly distributed throughout the dough.
6. Scoop tablespoons of the dough onto the prepared baking sheet, leaving space between each cookie.
7. Bake in the preheated oven for about 12-15 minutes, or until the cookies are lightly golden.
8. Allow the cookies to cool on the baking sheet for a few minutes before transferring them to a wire rack to cool completely.
Tips:
- For added flavor, mix in chocolate chips or dried fruits.
- Store cookies in an airtight container for up to a week.
- You can substitute the mixed nuts with your favorite nuts or seeds.
Toasted Coconut Cashew Granola
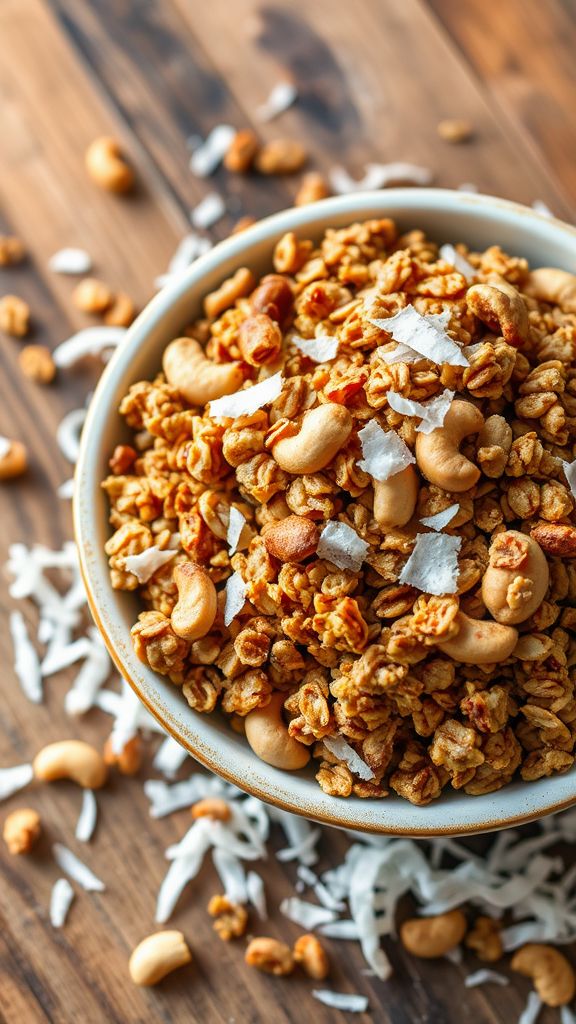
This Toasted Coconut Cashew Granola combines the rich flavors of toasted coconut and crunchy cashews, making it a deliciously satisfying breakfast or snack.
Ingredients:
- 3 cups rolled oats
- 1 cup unsweetened shredded coconut
- 1 cup cashews, chopped
- 1/2 cup honey or maple syrup
- 1/4 cup coconut oil, melted
- 1 teaspoon vanilla extract
- 1/2 teaspoon salt
- 1 teaspoon cinnamon
Preparation Time: 10 minutes
Cooking Time: 25 minutes
Total Time: 35 minutes
Instructions:
1. Preheat your oven to 300°F (150°C) and line a baking sheet with parchment paper.
2. In a large mixing bowl, combine rolled oats, shredded coconut, chopped cashews, salt, and cinnamon.
3. In a separate bowl, whisk together honey (or maple syrup), melted coconut oil, and vanilla extract until well combined.
4. Pour the wet ingredients over the dry ingredients and mix until everything is evenly coated.
5. Spread the mixture evenly onto the prepared baking sheet.
6. Bake for 15 minutes, then stir the granola and bake for an additional 10 minutes, or until golden brown and fragrant.
7. Remove from the oven and let it cool completely before storing it in an airtight container.
Tips:
- Feel free to add other nuts or dried fruits for extra flavor and texture.
- Store your granola in an airtight container to keep it fresh for longer.
- You can adjust the sweetness by adding more or less honey or maple syrup according to your taste.
Sweet Potato and Lentil Patties

This Sweet Potato and Lentil Patties recipe is special for its delightful blend of earthy lentils and sweet potatoes, making a nutritious and flavorful dish that appeals to everyone.
Ingredients:
- 2 cups mashed sweet potatoes
- 1 cup cooked lentils
- 1/2 cup breadcrumbs
- 1/4 cup finely chopped onion
- 2 cloves minced garlic
- 1 teaspoon ground cumin
- 1/2 teaspoon smoked paprika
- 1/4 teaspoon salt
- 1/4 teaspoon black pepper
- 2 tablespoons olive oil for frying
- 1 tablespoon fresh parsley (optional, for garnish)
Preparation Time: 15 minutes
Cooking Time: 20 minutes
Total Time: 35 minutes
Instructions:
1. In a large mixing bowl, combine the mashed sweet potatoes and cooked lentils.
2. Add breadcrumbs, chopped onion, minced garlic, ground cumin, smoked paprika, salt, and black pepper to the mixture.
3. Mix well until all ingredients are thoroughly combined.
4. Form the mixture into small patties, about the size of your palm.
5. Heat olive oil in a frying pan over medium heat.
6. Cook the patties for about 5-7 minutes on each side or until golden brown and crispy.
7. Remove from the pan and place on a paper towel to absorb excess oil.
8. Garnish with fresh parsley before serving, if desired.
Tips:
- For a spicier kick, consider adding a pinch of cayenne pepper.
- These patties can be frozen for up to a month; just make sure to separate them with parchment paper to prevent sticking.
- Serve with a yogurt or tahini sauce for added flavor.
Crunchy Veggie Chips with Hummus Dip
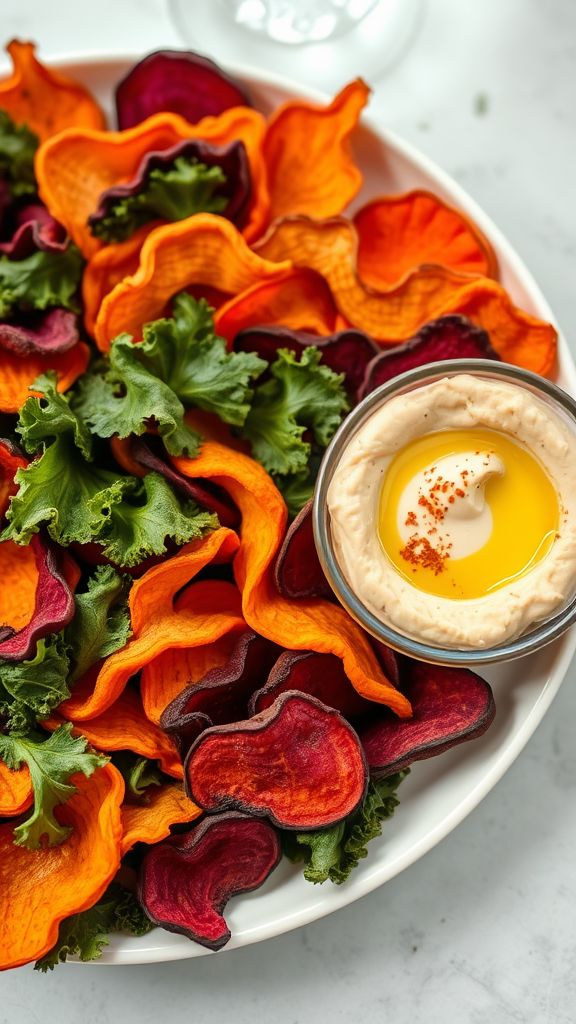
This Crunchy Veggie Chips with Hummus Dip recipe combines the vibrant flavors of fresh vegetables with a creamy, savory dip, making it a healthy and delicious snack for any occasion.
Ingredients:
- 2 cups kale, chopped
- 1 cup carrots, thinly sliced
- 1 cup sweet potatoes, thinly sliced
- 1 cup beets, thinly sliced
- 2 tablespoons olive oil
- 1 teaspoon sea salt
- 1 teaspoon paprika
- 1 cup canned chickpeas, drained and rinsed
- 2 tablespoons tahini
- 1 tablespoon lemon juice
- 1 clove garlic, minced
- 2-3 tablespoons water
Preparation Time: 15 minutes
Cooking Time: 25 minutes
Total Time: 40 minutes
Instructions:
1. Preheat the oven to 350°F (175°C).
2. In a large bowl, combine the kale, carrots, sweet potatoes, and beets with olive oil, sea salt, and paprika; toss to coat evenly.
3. Spread the vegetable mixture on a baking sheet in a single layer.
4. Bake for about 25 minutes, or until the veggies are crispy, tossing halfway through.
5. While the chips are baking, prepare the hummus by blending chickpeas, tahini, lemon juice, garlic, and water in a food processor until smooth.
6. Adjust the consistency with more water if needed, and season to taste.
7. Once the chips are done, allow them to cool slightly and serve with the hummus dip.
Tips:
- For extra crunch, ensure the veggie slices are uniform in thickness.
- Experiment with different spices like chili powder or garlic powder for varied flavors.
- If you prefer a smoother hummus, blend longer and add more water until desired consistency is achieved.
Creamy Avocado and Black Bean Pita Pockets
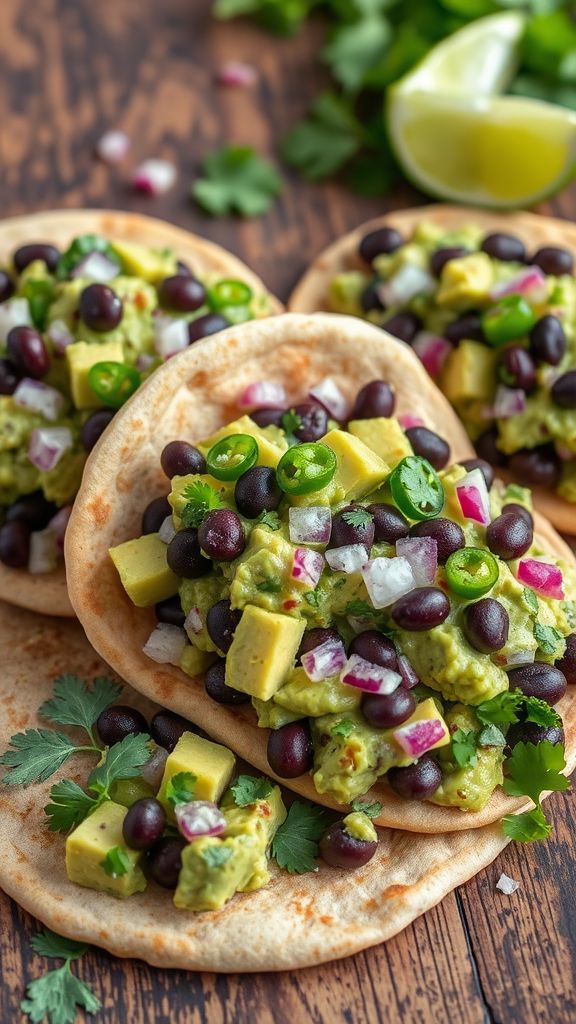
This Creamy Avocado and Black Bean Pita Pocket recipe brings together rich avocado creaminess and hearty black beans, creating a deliciously satisfying meal with fresh flavors.
Ingredients:
- 2 ripe avocados
- 1 can (15 oz) black beans, rinsed and drained
- 1 small red onion, finely chopped
- 1 jalapeño, seeded and diced
- 1 lime, juiced
- 1/4 cup fresh cilantro, chopped
- 4 whole wheat pita pockets
- 1/2 teaspoon garlic powder
- 1/2 teaspoon cumin
- Salt and pepper to taste
Preparation Time: 10 minutes
Cooking Time: 0 minutes
Total Time: 10 minutes
Instructions:
1. In a medium bowl, mash the avocados until creamy.
2. Stir in the black beans, red onion, jalapeño, lime juice, cilantro, garlic powder, cumin, salt, and pepper until well combined.
3. Gently fold the mixture until the black beans are incorporated into the avocado mixture.
4. Carefully cut the pita pockets in half and stuff them with the creamy avocado and black bean mixture.
5. Serve immediately and enjoy your delicious pita pockets!
Tips:
- For added crunch, consider adding diced bell peppers or shredded lettuce.
- To prevent browning, store any leftover avocado mixture in an airtight container with plastic wrap pressed against the surface.
- These pita pockets can be made ahead of time for a quick and easy lunch option.
Berry and Yogurt Parfait Jars
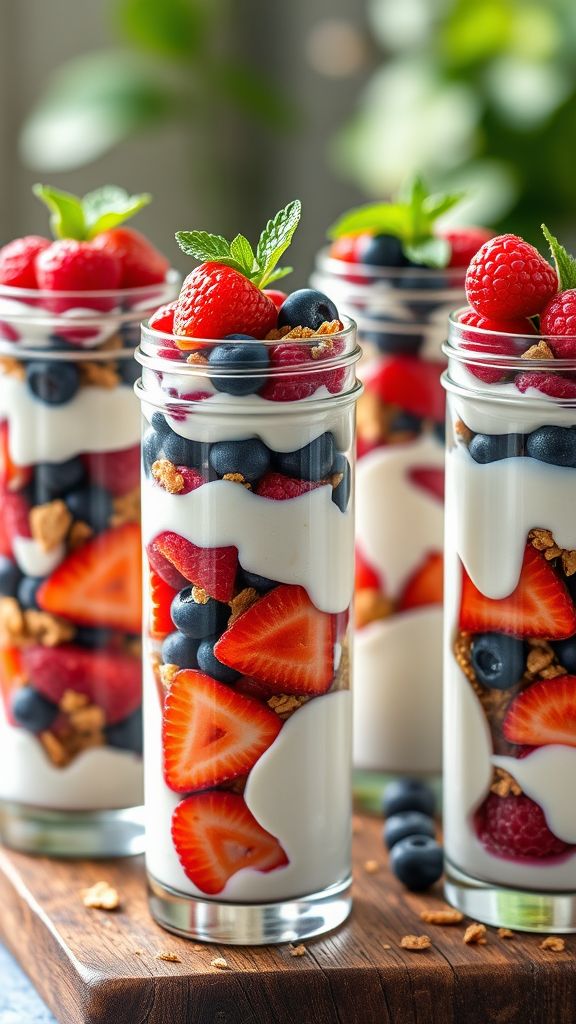
This Berry and Yogurt Parfait Jars recipe combines the refreshing flavors of mixed berries with creamy yogurt, making it a delightful healthy treat.
Ingredients:
- 2 cups Greek yogurt
- 1 cup mixed berries (strawberries, blueberries, raspberries)
- 1/2 cup granola
- 2 tablespoons honey or maple syrup
- 1 teaspoon vanilla extract
Preparation Time: 10 minutes
Cooking Time: 0 minutes
Total Time: 10 minutes
Instructions:
1. In a medium bowl, mix the Greek yogurt with honey and vanilla extract until well combined.
2. In serving jars, layer the yogurt mixture, followed by a layer of mixed berries, and then a layer of granola.
3. Repeat the layers until the jars are filled, finishing with a layer of berries on top.
4. Serve immediately, or cover and refrigerate for up to 2 hours for a chilled treat.
Tips:
- Use seasonal berries for the best flavor and freshness.
- Feel free to substitute granola with crushed nuts for added texture.
- Adjust the sweetness by varying the amount of honey or maple syrup according to your taste.
Cheesy Rice and Quinoa Balls

Cheesy Rice and Quinoa Balls are a delightful blend of creamy cheese, nutty quinoa, and fluffy rice, making them a perfect savory snack or appetizer.
Ingredients:
- 1 cup cooked rice
- 1 cup cooked quinoa
- 1 cup shredded cheese (mozzarella or cheddar)
- 1/2 cup breadcrumbs
- 1/4 cup chopped fresh parsley
- 1 large egg
- 2 cloves garlic, minced
- 1 teaspoon onion powder
- 1 teaspoon salt
- 1/2 teaspoon black pepper
- 1/4 cup olive oil (for frying)
Preparation Time: 15 minutes
Cooking Time: 20 minutes
Total Time: 35 minutes
Instructions:
1. In a large bowl, combine the cooked rice and quinoa, shredded cheese, breadcrumbs, chopped parsley, egg, minced garlic, onion powder, salt, and black pepper. Mix well until all ingredients are fully incorporated.
2. Using your hands, form the mixture into small balls, about the size of a golf ball, and place them on a baking sheet lined with parchment paper.
3. Heat olive oil in a large skillet over medium heat. Once hot, add the rice and quinoa balls in batches, ensuring not to overcrowd the pan.
4. Fry the balls for about 3-4 minutes on each side, or until they are golden brown and crispy.
5. Once cooked, transfer the balls to a plate lined with paper towels to absorb excess oil.
6. Serve warm with your favorite dipping sauce.
Tips:
- For an extra cheesy version, you can add more shredded cheese into the mixture.
- These balls can be baked in the oven at 400°F for 20-25 minutes for a healthier option.
- Leftover balls can be stored in the fridge for up to 3 days and reheated in the oven or microwave when needed.
Stuffed Mini Peppers with Cream Cheese

These Stuffed Mini Peppers with Cream Cheese are a delightful combination of creamy, tangy flavors and vibrant, sweet peppers that make for perfect appetizers or snacks.
Ingredients:
- 12 mini sweet peppers
- 8 ounces cream cheese, softened
- 1/2 cup shredded cheddar cheese
- 1/4 cup green onions, chopped
- 1 tablespoon garlic powder
- 1 teaspoon black pepper
- 1 teaspoon salt
- 1 tablespoon olive oil
Preparation Time: 15 minutes
Cooking Time: 20 minutes
Total Time: 35 minutes
Instructions:
1. Preheat your oven to 375°F (190°C).
2. Cut the mini peppers in half lengthwise and remove the seeds.
3. In a mixing bowl, combine the softened cream cheese, shredded cheddar cheese, chopped green onions, garlic powder, black pepper, and salt. Mix until well combined.
4. Stuff each pepper half with the cheese mixture, pressing it in to ensure it’s filled adequately.
5. Place the stuffed peppers on a baking sheet and drizzle with olive oil.
6. Bake in the preheated oven for 15-20 minutes or until the peppers are tender and the cheese is bubbly.
7. Remove from the oven and let cool slightly before serving.
Tips:
- Feel free to add diced jalapeños for a spicy kick.
- You can substitute the cheddar cheese with any cheese of your choice.
- These stuffed peppers can be prepared ahead of time and baked just before serving.
Grilled Corn and Zucchini Salad Cups
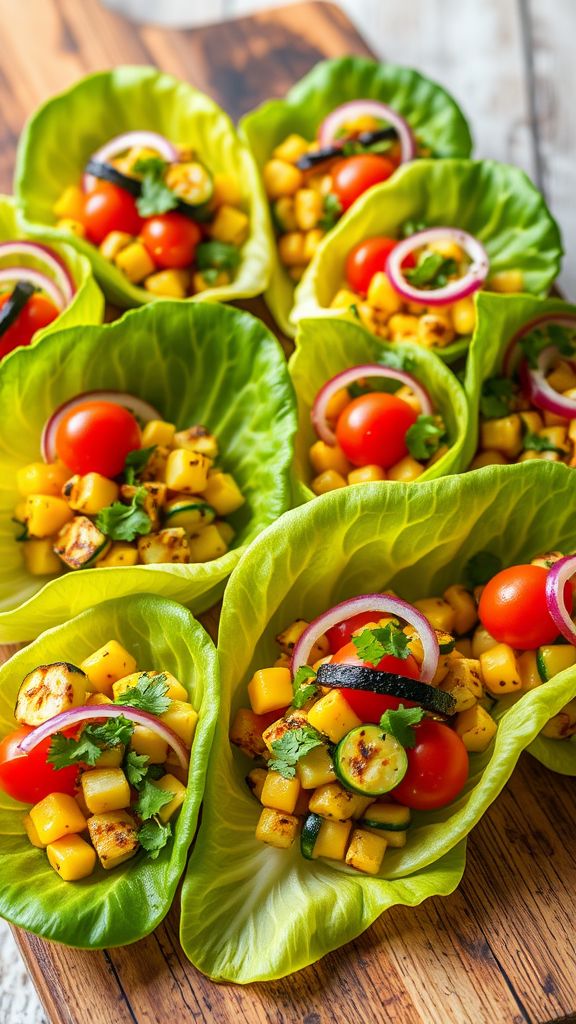
This Grilled Corn and Zucchini Salad Cups recipe offers a delicious blend of smoky, sweet, and fresh flavors that make for a perfect summer appetizer.
Ingredients:
- 2 cups corn kernels (fresh or frozen)
- 2 medium zucchinis, diced
- 1 tablespoon olive oil
- 1 teaspoon salt
- 1/2 teaspoon black pepper
- 1/4 cup red onion, finely chopped
- 1/4 cup cilantro, chopped
- 2 tablespoons lime juice
- 1 cup cherry tomatoes, halved
- 12 small lettuce leaves (romaine or butter)
Preparation Time: 15 minutes
Cooking Time: 10 minutes
Total Time: 25 minutes
Instructions:
1. Preheat your grill to medium-high heat.
2. In a bowl, combine the corn kernels, diced zucchinis, olive oil, salt, and black pepper; mix well.
3. Place the corn and zucchini mixture on the grill and cook for about 10 minutes, stirring occasionally, until they are tender and slightly charred.
4. Remove the grilled vegetables from the grill and let them cool slightly.
5. In a large bowl, combine the grilled corn and zucchini with red onion, cilantro, cherry tomatoes, and lime juice; toss gently.
6. Spoon the salad mixture into the lettuce leaves to create the salad cups.
7. Serve immediately and enjoy.
Tips:
- For extra flavor, add feta cheese or avocado to the salad.
- Serve these cups chilled for a refreshing summer appetizer.
- Feel free to grill the veggies the day before and store them in the fridge to save time.
Miso Glazed Edamame Pods
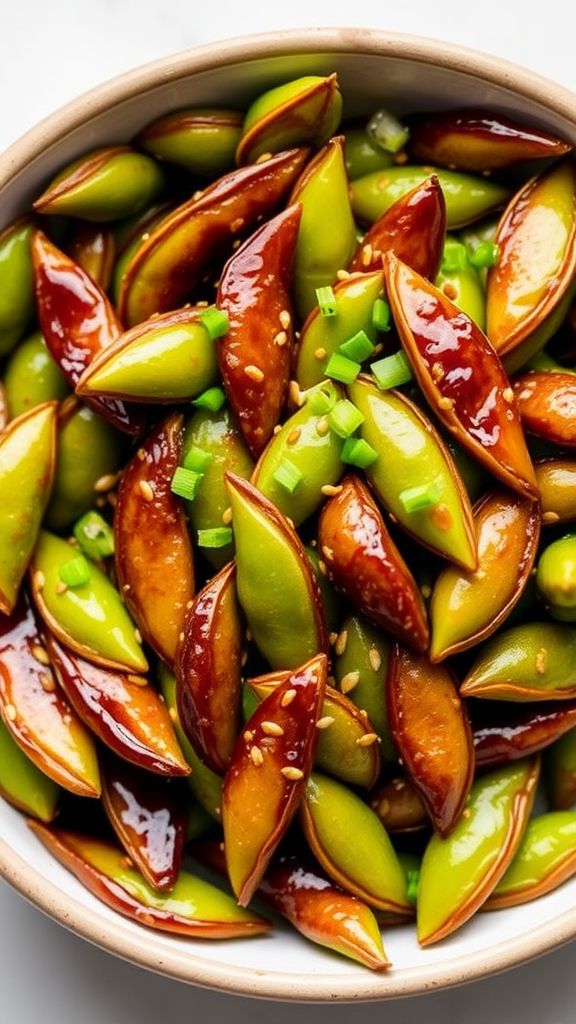
This Miso Glazed Edamame Pods recipe is a delightful combination of savory umami flavors and a touch of sweetness that makes for an irresistible snack or appetizer.
Ingredients:
- 1 pound edamame pods
- 2 tablespoons miso paste
- 1 tablespoon soy sauce
- 1 tablespoon honey or maple syrup
- 1 teaspoon sesame oil
- 1 teaspoon rice vinegar
- 1 teaspoon toasted sesame seeds
- 1 green onion, finely chopped
Preparation Time: 5 minutes
Cooking Time: 10 minutes
Total Time: 15 minutes
Instructions:
1. Begin by boiling water in a large pot and adding the edamame pods. Cook for about 5 minutes until they are tender.
2. While the edamame is cooking, in a small bowl, whisk together the miso paste, soy sauce, honey or maple syrup, sesame oil, and rice vinegar until smooth.
3. Drain the cooked edamame and return them to the pot or a mixing bowl.
4. Pour the miso mixture over the edamame and toss to coat evenly.
5. Sprinkle with toasted sesame seeds and chopped green onion before serving.
Tips:
- For extra flavor, try adding a pinch of red pepper flakes to the miso mixture for a spicy kick.
- Serve immediately for the best texture, but you can also chill them in the refrigerator for a refreshing cold snack.
- Experiment with different types of miso paste; white miso is sweeter, while red miso has a stronger flavor.
Dark Chocolate Trail Bar Delights
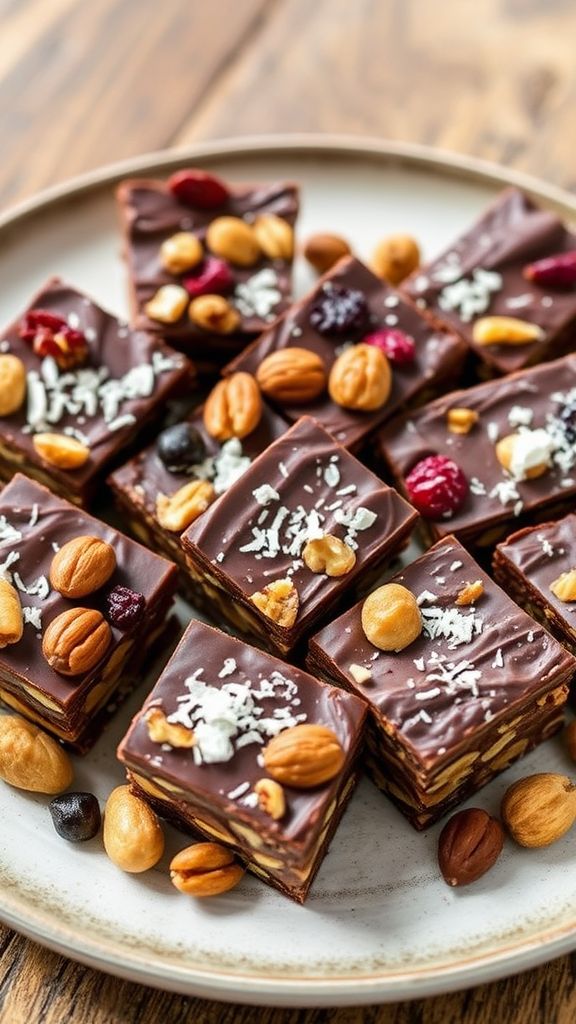
These Dark Chocolate Trail Bar Delights are special for their perfect blend of rich dark chocolate, crunchy nuts, and chewy dried fruits that create an irresistible snack.
Ingredients:
- 1 cup rolled oats
- 1/2 cup chopped nuts (such as almonds or walnuts)
- 1/2 cup dried fruits (such as cranberries or apricots)
- 1/2 cup dark chocolate chips
- 1/4 cup honey or maple syrup
- 1/4 cup nut butter (such as almond or peanut butter)
- 1/2 teaspoon vanilla extract
- 1/4 teaspoon salt
Preparation Time: 10 minutes
Cooking Time: 15 minutes
Total Time: 25 minutes
Instructions:
1. Preheat your oven to 350°F (175°C) and line a baking dish with parchment paper.
2. In a large bowl, combine rolled oats, chopped nuts, dried fruits, dark chocolate chips, and salt.
3. In a separate bowl, mix together honey (or maple syrup), nut butter, and vanilla extract until smooth.
4. Pour the wet mixture over the dry ingredients and stir until everything is well combined.
5. Transfer the mixture to the prepared baking dish and press it down firmly into an even layer.
6. Bake in the preheated oven for about 15 minutes, or until the edges are golden brown.
7. Allow to cool completely in the baking dish before cutting into bars.
Tips:
- Try adding different nuts or seeds for varied flavors and textures.
- Store bars in an airtight container to keep them fresh for longer.
- For extra sweetness, you can sprinkle some coconut flakes on top before baking.

