My New Cookbook is Out! Check Out Now!
20 Camping Lunches That Are Easy, Tasty, and Perfect for the Outdoors
Did you know that over 40 million Americans go camping each year, with food being one of the biggest highlights of the trip?
If you’re looking to elevate your outdoor meals, this blog has got you covered with 20 easy and delicious camping lunches that will make your taste buds dance.
From Trailblazer Wraps to Smoky BBQ Jackfruit Sliders, we’ll explore a variety of tasty recipes that are simple to prepare and perfect for enjoying amidst nature’s beauty!
Trailblazer Wraps
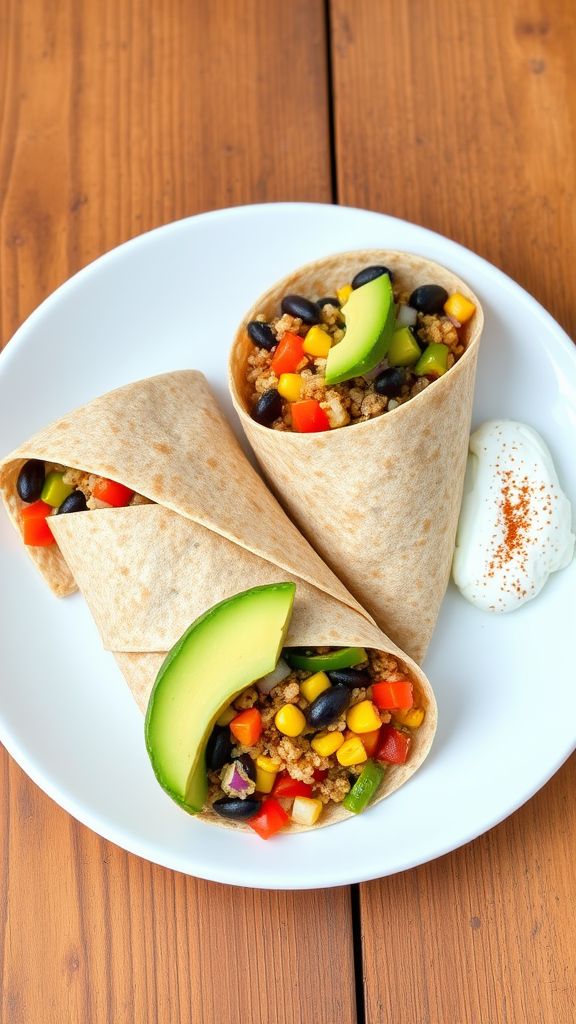
These Trailblazer Wraps are a delightful fusion of fresh veggies, zesty spices, and protein-rich options that make a perfect on-the-go meal.
Ingredients:
- 2 large whole grain tortillas
- 1 cup cooked quinoa
- 1/2 cup black beans, drained and rinsed
- 1/2 cup diced bell peppers
- 1/4 cup corn kernels
- 1/4 cup diced red onion
- 1 avocado, sliced
- 1/4 cup Greek yogurt or sour cream
- 2 tablespoons lime juice
- 1 teaspoon cumin
- 1 teaspoon chili powder
- Salt and pepper to taste
Preparation Time: 10 minutes
Cooking Time: 0 minutes
Total Time: 10 minutes
Instructions:
1. Begin by mixing the cooked quinoa, black beans, diced bell peppers, corn, diced red onion, lime juice, cumin, chili powder, salt, and pepper in a large bowl.
2. Lay out the whole grain tortillas on a clean surface.
3. Spread a layer of Greek yogurt or sour cream onto each tortilla.
4. Spoon the quinoa mixture evenly onto the center of each tortilla.
5. Add slices of avocado on top of the quinoa mixture.
6. Roll the tortillas tightly, tucking in the sides as you go.
7. Slice the wraps in half and serve immediately or wrap them in foil for later.
Tips:
- Feel free to customize the veggies based on what you have available.
- For added flavor, consider marinating the black beans in lime juice and spices beforehand.
- These wraps can be made a day in advance; just keep them wrapped tightly in the fridge.
Campfire Veggie Quesadillas
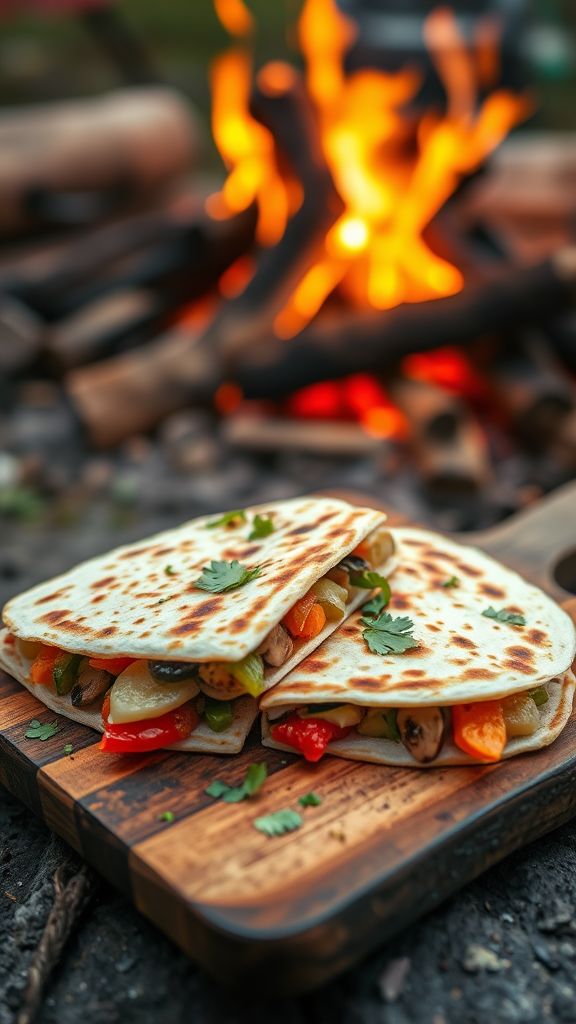
These Campfire Veggie Quesadillas are a delightful blend of smoky flavors and fresh vegetables, making them the perfect meal for outdoor gatherings.
Ingredients:
- 4 flour tortillas
- 1 cup shredded cheese (cheddar or mozzarella)
- 1 cup bell peppers, sliced
- 1 cup zucchini, sliced
- 1 cup mushrooms, sliced
- 1 tablespoon olive oil
- 1 teaspoon garlic powder
- 1 teaspoon onion powder
- Salt and pepper to taste
- Fresh cilantro for garnish (optional)
Preparation Time: 15 minutes
Cooking Time: 10 minutes
Total Time: 25 minutes
Instructions:
1. In a skillet over medium heat, add olive oil and sauté the bell peppers, zucchini, and mushrooms for about 5 minutes or until tender.
2. Sprinkle garlic powder, onion powder, salt, and pepper over the sautéed vegetables and mix well.
3. Lay two tortillas on a flat surface and distribute the sautéed veggie mixture evenly over each.
4. Sprinkle the shredded cheese evenly over the veggies, then top with the remaining tortillas.
5. Place the quesadillas on a grill or flat surface over the campfire and cook for about 3-4 minutes on each side, or until golden brown and the cheese is melted.
6. Remove from heat, allow to cool slightly, then cut into wedges and serve with fresh cilantro if desired.
Tips:
- Feel free to customize the veggies based on your preference or availability.
- Pre-chop the vegetables at home for easier preparation at the campsite.
- If you have a cast iron skillet, it’s perfect for cooking these quesadillas over the fire.
- Serve with salsa, guacamole, or sour cream for extra flavor.
One-Pan Picnic Pasta
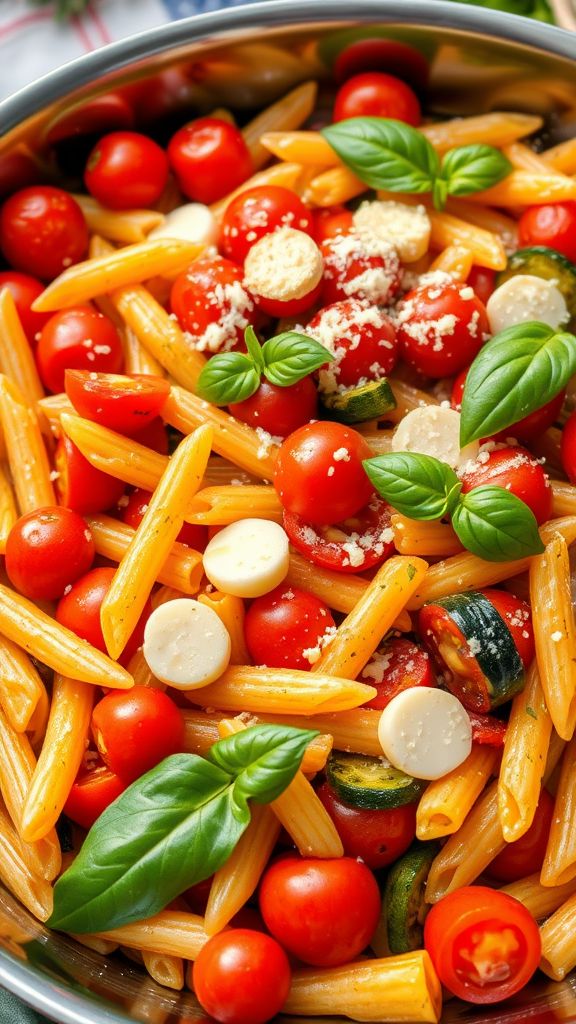
This One-Pan Picnic Pasta is special for its vibrant blend of fresh vegetables and herbs, creating a delightful meal perfect for outdoor gatherings.
Ingredients:
- 8 ounces pasta (penne or rotini)
- 1 tablespoon olive oil
- 1 cup cherry tomatoes, halved
- 1 cup bell pepper, diced
- 1 cup zucchini, diced
- 2 cloves garlic, minced
- 2 cups vegetable broth
- 1 teaspoon Italian seasoning
- Salt and pepper to taste
- 1/4 cup fresh basil, chopped
- 1/4 cup grated Parmesan cheese (optional)
Preparation Time: 10 minutes
Cooking Time: 20 minutes
Total Time: 30 minutes
Instructions:
1. In a large pan, heat the olive oil over medium heat.
2. Add the minced garlic and sauté for about 1 minute, until fragrant.
3. Add the cherry tomatoes, bell pepper, and zucchini to the pan, cooking for 5 minutes until they begin to soften.
4. Stir in the uncooked pasta, vegetable broth, Italian seasoning, salt, and pepper.
5. Bring the mixture to a boil, then reduce the heat, cover, and let simmer for 15 minutes or until the pasta is cooked and liquid is absorbed.
6. Remove from heat, stir in fresh basil and Parmesan cheese, if using.
7. Serve warm or let cool and pack for your picnic.
Tips:
- For added protein, toss in some cooked chicken or chickpeas.
- You can customize the vegetables based on your preferences or seasonal availability.
- For a kick, add a pinch of red pepper flakes while cooking.
Rustic Roasted Tomato Sandwiches
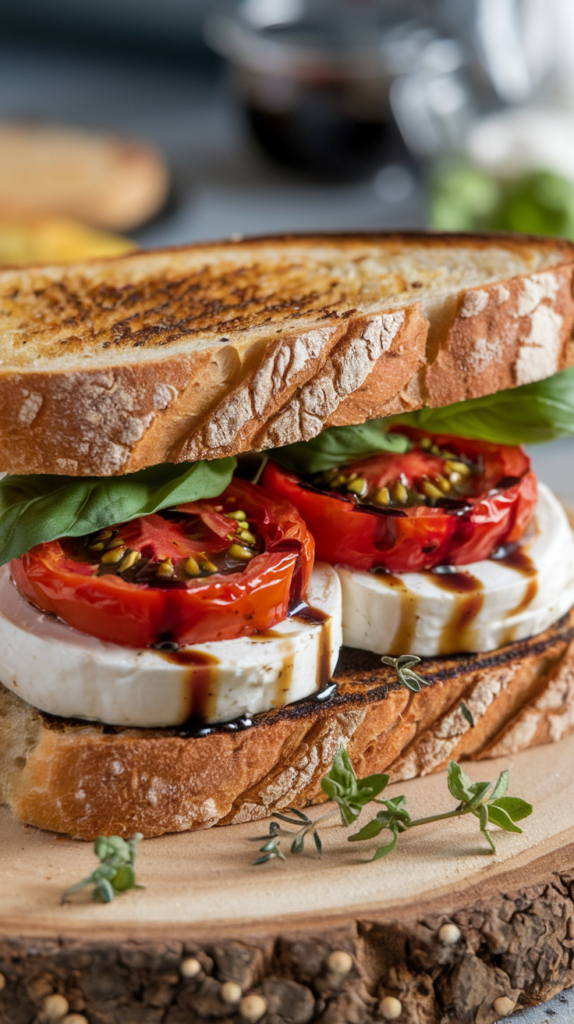
This Rustic Roasted Tomato Sandwich recipe is special for its rich, caramelized flavors and the delightful combination of fresh herbs and creamy cheese.
Ingredients:
- 4 large ripe tomatoes
- 3 tablespoons olive oil
- 1 teaspoon sea salt
- 1/2 teaspoon freshly ground black pepper
- 1 tablespoon balsamic vinegar
- 1 teaspoon fresh thyme leaves
- 1/2 cup fresh basil leaves
- 8 slices rustic bread
- 1 cup fresh mozzarella cheese, sliced
- 1/4 cup pesto sauce
Preparation Time: 10 minutes
Cooking Time: 30 minutes
Total Time: 40 minutes
Instructions:
1. Preheat your oven to 400°F (200°C).
2. Slice the tomatoes in half and place them cut side up on a baking sheet.
3. Drizzle the tomatoes with olive oil and sprinkle with sea salt, black pepper, balsamic vinegar, and thyme leaves.
4. Roast the tomatoes in the oven for about 25-30 minutes, or until they are soft and caramelized.
5. While the tomatoes are roasting, toast the slices of rustic bread until golden brown.
6. Spread pesto sauce on each slice of toasted bread.
7. Once the tomatoes are done, layer them on top of the pesto-covered bread, followed by slices of fresh mozzarella and basil leaves.
8. Serve the sandwiches warm and enjoy!
Tips:
- For added flavor, try using heirloom tomatoes.
- Feel free to add a drizzle of balsamic glaze on top for extra sweetness.
- These sandwiches pair perfectly with a light salad or a bowl of soup.
Savory S’mores Turkey Melts

This Savory S’mores Turkey Melts recipe combines the delightful flavors of turkey, gooey cheese, and a hint of sweetness from marshmallow for a unique twist on a classic favorite.
Ingredients:
- 4 slices whole grain bread
- 8 ounces sliced turkey breast
- 4 slices mozzarella cheese
- 4 tablespoons chocolate hazelnut spread
- 1 cup mini marshmallows
- 2 tablespoons butter
Preparation Time: 10 minutes
Cooking Time: 10 minutes
Total Time: 20 minutes
Instructions:
1. Preheat your skillet over medium heat and melt 1 tablespoon of butter in it.
2. Spread 1 tablespoon of chocolate hazelnut spread on one side of each slice of bread.
3. On two slices of bread, layer the sliced turkey breast and top with a slice of mozzarella cheese.
4. Add 1/2 cup of mini marshmallows on top of the cheese, then cover with the other slice of bread, chocolate side down.
5. Grill the sandwiches for 3-4 minutes on one side until golden brown, then flip and add the remaining butter to the skillet.
6. Cook for another 3-4 minutes or until the cheese has melted and the marshmallows are gooey.
7. Remove from skillet, cut in half, and serve warm.
Tips:
- For a richer flavor, use thick-cut turkey breast.
- Experiment with different types of cheese for a unique taste.
- Serve with fresh fruit for a balanced meal.
Easy Pesto Chicken Pitas

This Easy Pesto Chicken Pitas recipe combines vibrant pesto, tender chicken, and fresh veggies for a quick and flavorful meal that’s perfect for any day of the week.
Ingredients:
- 2 pitas
- 1 cup cooked chicken, shredded
- 1/4 cup pesto sauce
- 1/2 cup cherry tomatoes, halved
- 1/4 cup cucumber, diced
- 1/4 cup feta cheese, crumbled
- 1 tablespoon olive oil
- Salt and pepper to taste
Preparation Time: 10 minutes
Cooking Time: 0 minutes
Total Time: 10 minutes
Instructions:
1. In a mixing bowl, combine the shredded chicken with the pesto sauce and olive oil, mixing well to coat the chicken.
2. Take the pitas and gently open them up to create pockets.
3. Stuff each pita with the pesto chicken mixture, cherry tomatoes, cucumber, and feta cheese.
4. Season with salt and pepper to taste, then serve immediately.
Tips:
- For extra flavor, toast the pitas in a skillet for a few minutes before filling.
- Feel free to customize the veggies with your favorites like spinach or bell peppers.
- This recipe can be made ahead of time; just store the components separately until ready to serve.
Camping Caprese Skewers
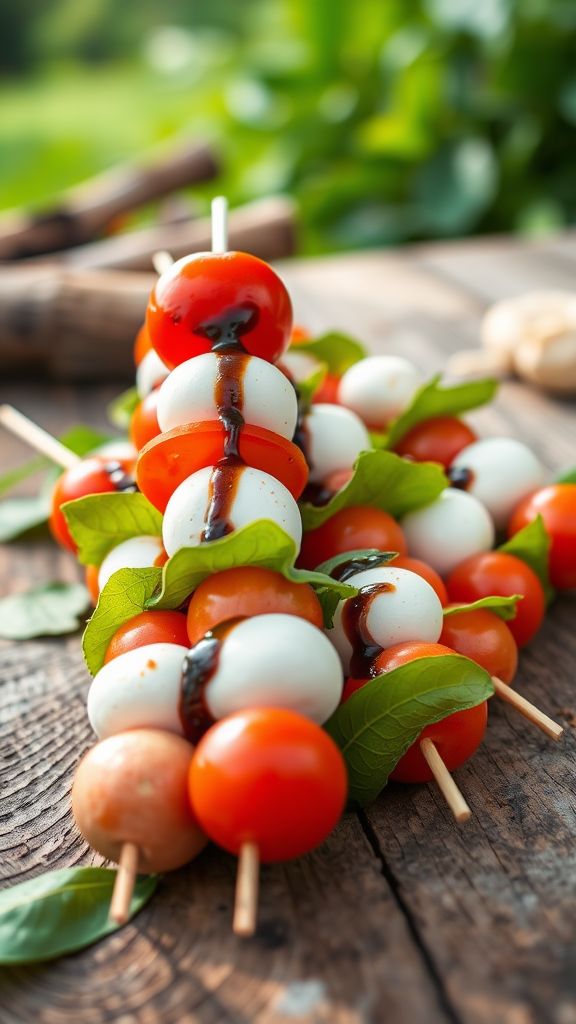
These Camping Caprese Skewers combine the fresh flavors of ripe tomatoes, creamy mozzarella, and fragrant basil, making them a delightful and easy-to-make outdoor snack.
Ingredients:
- 1 pint cherry tomatoes
- 8 ounces fresh mozzarella balls
- 1 bunch fresh basil leaves
- 2 tablespoons balsamic glaze
- salt to taste
- pepper to taste
- 6 wooden skewers
Preparation Time: 10 minutes
Cooking Time: 0 minutes
Total Time: 10 minutes
Instructions:
1. Start by rinsing the cherry tomatoes and basil leaves under cold water.
2. Thread one cherry tomato onto the skewer, followed by a basil leaf, and then a mozzarella ball.
3. Repeat the process until the skewer is filled, leaving some space at the ends for handling.
4. Drizzle the assembled skewers with balsamic glaze, and season with salt and pepper to taste.
5. Serve the skewers immediately, or pack them for your camping trip for a refreshing snack.
Tips:
- For added flavor, marinate the mozzarella in olive oil with herbs before skewering.
- Use colorful tomatoes for a vibrant presentation.
- Consider packing the balsamic glaze separately to drizzle just before serving.
- These can also be made ahead of time and stored in a cooler.
Grilled Bacon and Cheese Bites

These Grilled Bacon and Cheese Bites are a delightful fusion of crispy bacon and melty cheese, perfect for a savory snack that satisfies all your cravings.
Ingredients:
- 8 slices bacon
- 1 cup shredded cheddar cheese
- 1 cup shredded mozzarella cheese
- 1/2 cup cream cheese, softened
- 1/2 teaspoon garlic powder
- 1/4 teaspoon black pepper
- 1/4 teaspoon salt
- 8 slices bread
- 2 tablespoons butter, softened
Preparation Time: 15 minutes
Cooking Time: 10 minutes
Total Time: 25 minutes
Instructions:
1. Preheat your grill to medium heat.
2. Cook the bacon in a skillet over medium heat until crispy, then drain and crumble.
3. In a mixing bowl, combine shredded cheddar, mozzarella, cream cheese, garlic powder, black pepper, and salt. Stir in the crumbled bacon.
4. Spread butter on one side of each bread slice. Place half of the slices butter-side down on a clean surface.
5. Generously fill each slice with the cheese and bacon mixture, then top with the remaining bread slices, butter-side up.
6. Grill the sandwiches for about 4-5 minutes on each side, until golden brown and the cheese is melted.
7. Remove from the grill and let cool for a minute before slicing into bite-sized pieces.
Tips:
- For extra flavor, try adding chopped jalapeños or your favorite herbs to the cheese mixture.
- Make sure to press the sandwiches slightly while grilling for an even golden crust.
- These bites can be prepared ahead of time and grilled just before serving.
Trail Mix and Avocado Toast
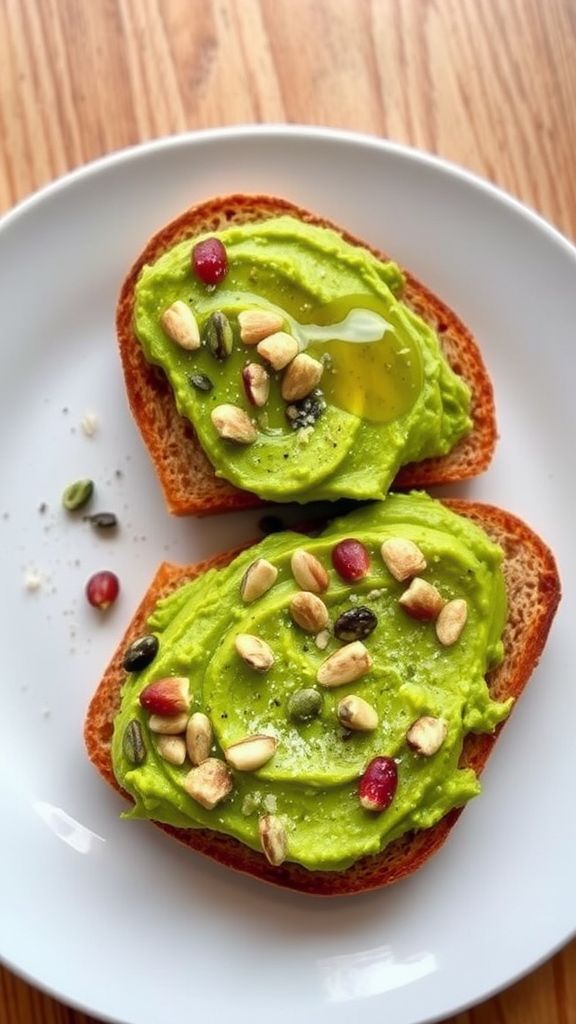
This Trail Mix and Avocado Toast recipe combines creamy avocado with crunchy nuts and seeds, creating a delightful blend of flavors that is both nutritious and satisfying.
Ingredients:
- 2 slices whole grain bread
- 1 ripe avocado
- 1 tablespoon lemon juice
- 1/4 teaspoon salt
- 1/4 teaspoon black pepper
- 1/2 cup trail mix (your choice)
- 1 tablespoon olive oil (optional)
Preparation Time: 5 minutes
Cooking Time: 5 minutes
Total Time: 10 minutes
Instructions:
1. Toast the whole grain bread until golden brown.
2. In a bowl, mash the ripe avocado with lemon juice, salt, and black pepper until smooth.
3. Spread the smashed avocado evenly on the toasted bread.
4. Top each slice of avocado toast with the trail mix, pressing it down slightly to adhere.
5. Drizzle with olive oil if desired, and serve immediately.
Tips:
- For added flavor, include chili flakes or everything bagel seasoning on top.
- Use your favorite nuts or dried fruits in the trail mix for a personal touch.
- Avocado toast is best enjoyed fresh, but you can prepare the avocado mixture ahead of time and store it in the fridge.
Quick and Hearty Chili Bowls
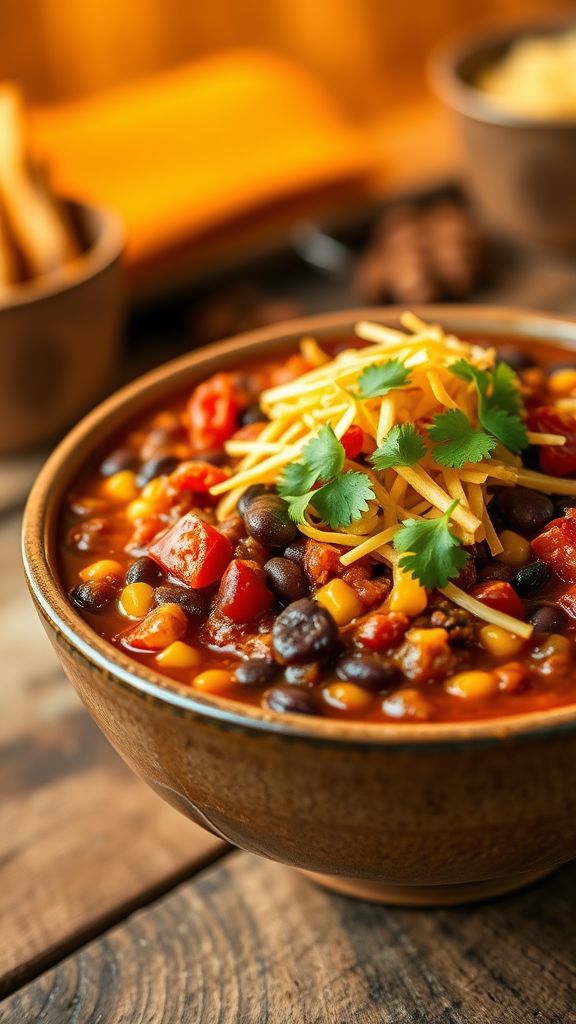
This Quick and Hearty Chili Bowl offers a delicious blend of bold spices and rich ingredients that come together for a satisfying meal in no time.
Ingredients:
- 1 pound ground beef
- 1 can (15 oz) black beans, drained and rinsed
- 1 can (15 oz) kidney beans, drained and rinsed
- 1 can (14.5 oz) diced tomatoes with green chilies
- 1 tablespoon chili powder
- 1 teaspoon cumin
- ½ teaspoon garlic powder
- ½ teaspoon onion powder
- 1 cup corn kernels (fresh or frozen)
- 2 cups beef broth
- Salt and pepper to taste
- 1 cup shredded cheese (for topping)
- Fresh cilantro for garnish (optional)
Preparation Time: 10 minutes
Cooking Time: 20 minutes
Total Time: 30 minutes
Instructions:
1. In a large pot over medium heat, brown the ground beef, breaking it apart until fully cooked.
2. Drain any excess fat, then stir in the black beans, kidney beans, and diced tomatoes.
3. Add the chili powder, cumin, garlic powder, onion powder, corn, and beef broth to the pot.
4. Bring the mixture to a simmer, then reduce heat to low and let it cook for 15 minutes, stirring occasionally.
5. Season with salt and pepper to taste.
6. Serve hot in bowls, topped with shredded cheese and fresh cilantro if desired.
Tips:
- For a spicier kick, add chopped jalapeños or a dash of hot sauce.
- Serve with crusty bread or over rice for a more filling meal.
- Make it vegetarian by substituting ground beef with lentils or textured vegetable protein.
Buttery Garlic Campfire Corn
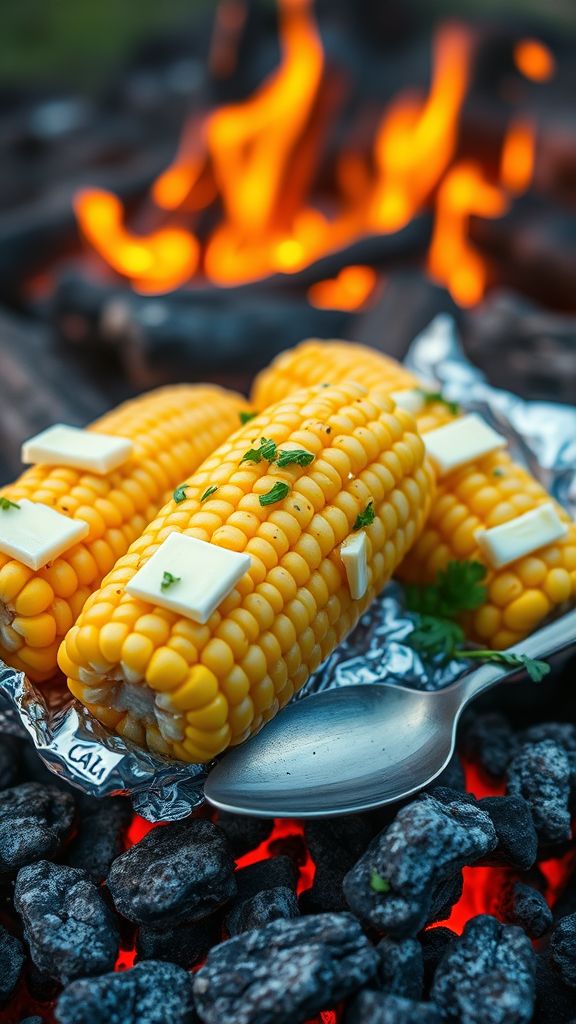
This Buttery Garlic Campfire Corn recipe is special for its rich combination of buttery flavor and garlicky goodness, making it a perfect side dish for any outdoor gathering.
Ingredients:
- 4 ears fresh corn on the cob
- 1/2 cup unsalted butter
- 4 cloves garlic, minced
- 1 teaspoon salt
- 1/2 teaspoon black pepper
- 1 tablespoon fresh parsley, chopped (optional)
Preparation Time: 10 minutes
Cooking Time: 15 minutes
Total Time: 25 minutes
Instructions:
1. Preheat your campfire or grill to medium heat.
2. Peel back the husks of the corn without removing them entirely, and remove the silk. Then fold the husks back in place.
3. In a small saucepan, melt the butter over medium heat and add the minced garlic. Sauté until fragrant, about 2 minutes.
4. Brush the melted garlic butter mixture over the corn, then sprinkle with salt and black pepper.
5. Wrap each ear of corn in aluminum foil, making sure it’s sealed tightly.
6. Place the wrapped corn directly onto the campfire coals or on the grill grates.
7. Cook for about 15 minutes, turning occasionally to ensure even cooking.
8. Carefully unwrap the corn from the foil, and if desired, sprinkle with fresh parsley before serving.
Tips:
- For extra flavor, add a pinch of cayenne pepper to the butter mixture.
- Feel free to experiment with different herbs like thyme or rosemary.
- Always be cautious when unwrapping the foil as steam will escape.
Outdoor Breakfast Burritos
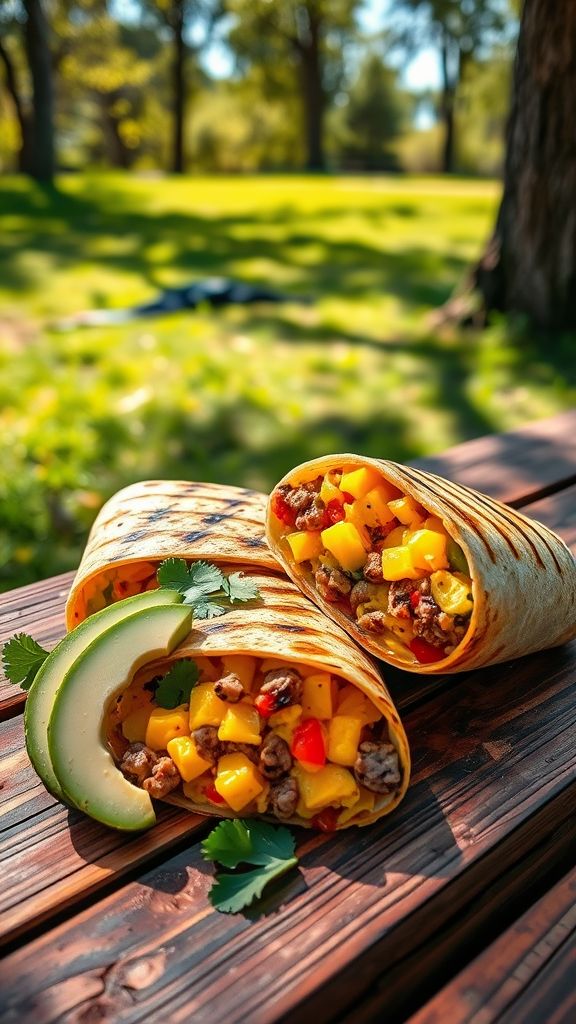
These Outdoor Breakfast Burritos are special for their smoky flavor from the grilled ingredients and the hearty mix of eggs, cheese, and fresh veggies that make them perfect for a morning adventure.
Ingredients:
- 6 large eggs
- 1 cup shredded cheddar cheese
- 1 medium bell pepper, diced
- 1 small onion, diced
- 1 cup cooked and crumbled breakfast sausage
- 4 large flour tortillas
- 2 tablespoons olive oil
- 1 teaspoon salt
- 1/2 teaspoon black pepper
- 1/4 teaspoon chili powder
- 1/4 cup fresh cilantro, chopped (optional)
- 1 avocado, sliced (optional)
Preparation Time: 15 minutes
Cooking Time: 10 minutes
Total Time: 25 minutes
Instructions:
1. Preheat your outdoor grill to medium heat.
2. In a skillet, heat the olive oil over medium heat, then add the diced onion and bell pepper, cooking until softened, about 5 minutes.
3. In a bowl, whisk together the eggs, salt, black pepper, and chili powder.
4. Pour the egg mixture into the skillet with the vegetables, add the cooked sausage, and cook until the eggs are set, stirring occasionally.
5. Remove the skillet from the grill and stir in the cheddar cheese until melted.
6. Warm the tortillas on the grill for about 30 seconds on each side.
7. Spoon the egg mixture onto the center of each tortilla, and add sliced avocado and cilantro if desired.
8. Roll the tortillas tightly, folding in the sides, and grill the burritos seam-side down for another 1-2 minutes until crispy.
9. Serve warm and enjoy your outdoor breakfast burritos!
Tips:
- Prepare ingredients in advance to save time at the grill.
- Add your favorite hot sauce for an extra kick.
- Feel free to customize by adding other vegetables or meats.
- Use a cast-iron skillet for even cooking on the grill.
Chipotle Chicken Salad Fold-Ups
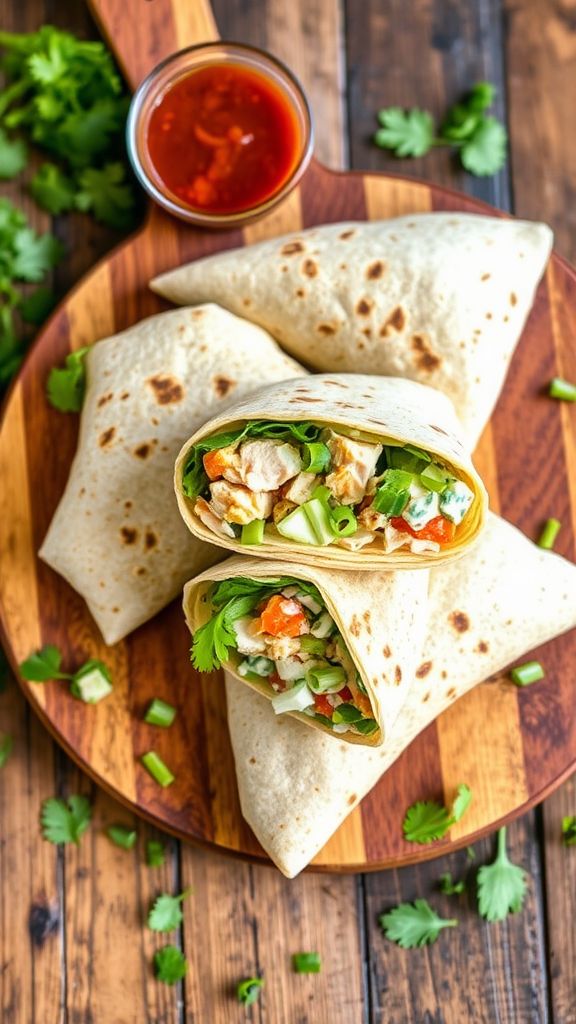
These Chipotle Chicken Salad Fold-Ups are special for their smoky chipotle flavor combined with fresh vegetables, making them a delicious and healthy meal option.
Ingredients:
- 2 cups cooked, shredded chicken
- 1/2 cup Greek yogurt
- 1/4 cup chipotle sauce
- 1/2 cup diced celery
- 1/4 cup chopped green onions
- 1/4 cup chopped cilantro
- 1/2 tsp garlic powder
- 1/4 tsp salt
- 1/4 tsp black pepper
- 4 whole wheat tortillas
- 1 cup mixed greens
Preparation Time: 15 minutes
Cooking Time: 0 minutes
Total Time: 15 minutes
Instructions:
1. In a large bowl, combine the shredded chicken, Greek yogurt, chipotle sauce, diced celery, green onions, cilantro, garlic powder, salt, and black pepper.
2. Mix well until all ingredients are evenly coated with the dressing.
3. Lay the whole wheat tortillas flat on a clean surface.
4. Place a generous amount of the chicken salad mixture in the center of each tortilla, then top with mixed greens.
5. Fold in the sides of the tortilla and then roll it up tightly from the bottom to the top.
6. Cut in half and serve immediately, or wrap in foil for an on-the-go meal.
Tips:
- For added crunch, include chopped bell peppers or cucumbers.
- Adjust the chipotle sauce to your heat preference.
- These fold-ups can be made ahead of time and stored in the refrigerator for up to 2 days.
Backpacker’s Veggie Rice Bowl
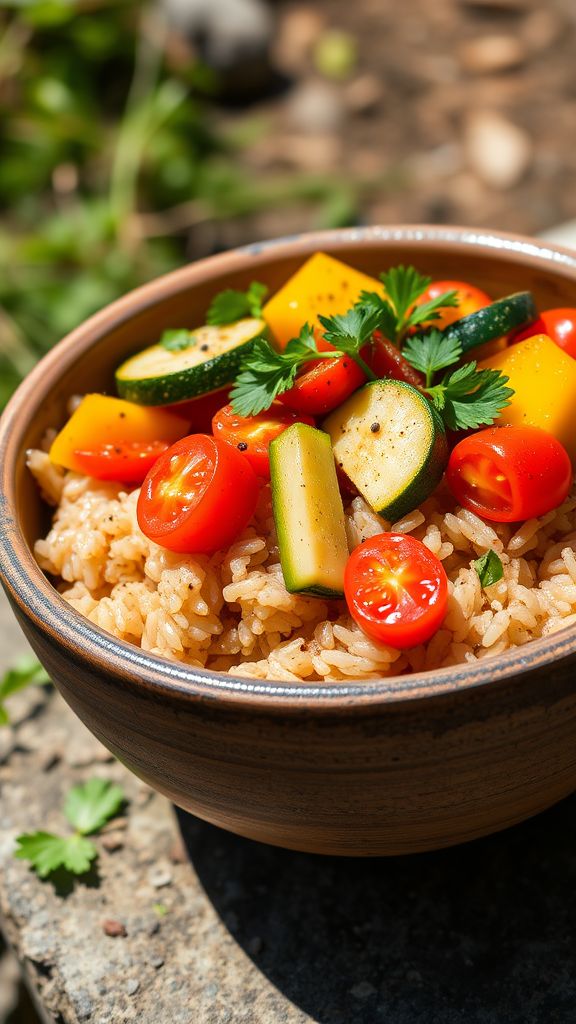
This Backpacker’s Veggie Rice Bowl is special for its vibrant blend of fresh vegetables and savory spices, packed into a nutritious and delicious meal perfect for any outdoor adventure.
Ingredients:
- 1 cup uncooked brown rice
- 2 cups water
- 1 tablespoon olive oil
- 1 bell pepper, diced
- 1 zucchini, diced
- 1 cup cherry tomatoes, halved
- 1 teaspoon garlic powder
- 1 teaspoon onion powder
- 1 teaspoon smoked paprika
- 1 teaspoon salt
- 1/2 teaspoon black pepper
- 1 tablespoon soy sauce (optional)
- 1/4 cup fresh parsley, chopped
Preparation Time: 10 minutes
Cooking Time: 30 minutes
Total Time: 40 minutes
Instructions:
1. Rinse the brown rice under cold water until the water runs clear.
2. In a pot, combine the rinsed rice and 2 cups of water, bring to a boil, then reduce to a simmer, cover, and cook for about 30 minutes or until the water is absorbed and the rice is tender.
3. While the rice is cooking, heat the olive oil in a skillet over medium heat.
4. Add the diced bell pepper and zucchini to the skillet and sauté for about 5-7 minutes or until they are tender.
5. Stir in the cherry tomatoes, garlic powder, onion powder, smoked paprika, salt, and black pepper, cooking for an additional 3-4 minutes.
6. Once the rice is ready, fluff it with a fork and mix in the sautéed vegetables and soy sauce if using.
7. Garnish with fresh parsley before serving.
Tips:
- You can customize this dish with your favorite vegetables or whatever you have on hand.
- For added protein, consider adding some cooked beans or chickpeas.
- Store leftovers in an airtight container in the refrigerator for up to 3 days.
- This recipe can be easily doubled for larger groups or meal prep.
Smoky BBQ Jackfruit Sliders
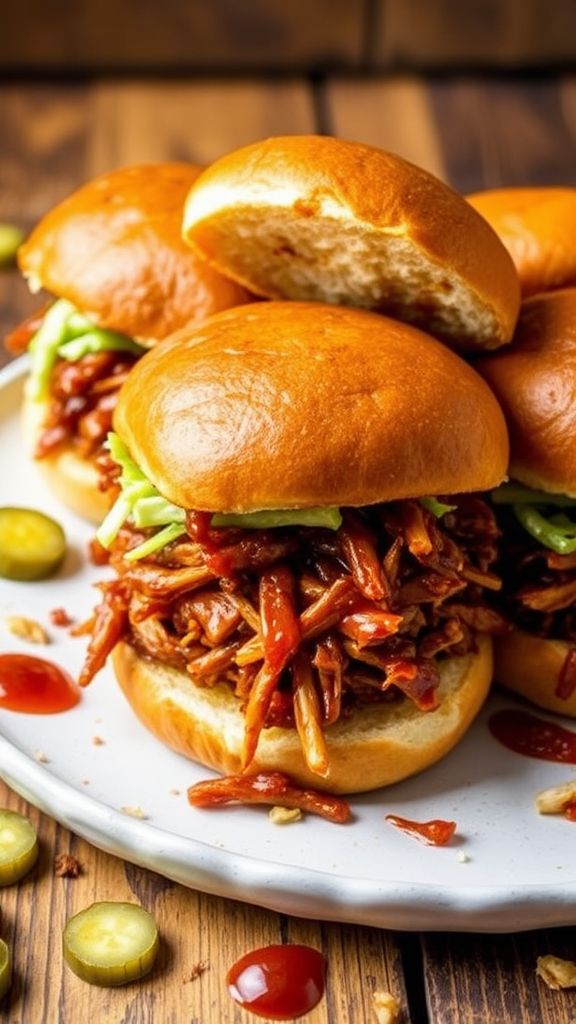
This Smoky BBQ Jackfruit Sliders recipe stands out with its bold flavors of smoky barbecue and tender jackfruit, making it a delicious and satisfying plant-based option.
Ingredients:
- 2 cans young green jackfruit in water or brine, drained and rinsed
- 1 tablespoon olive oil
- 1 large onion, diced
- 3 cloves garlic, minced
- 1 cup barbecue sauce
- 1 teaspoon smoked paprika
- 1/2 teaspoon cumin
- 1 teaspoon salt
- 1/2 teaspoon black pepper
- 12 slider buns
- 1 cup coleslaw (optional, for topping)
Preparation Time: 10 minutes
Cooking Time: 30 minutes
Total Time: 40 minutes
Instructions:
1. In a large skillet, heat the olive oil over medium heat and sauté the diced onion until translucent.
2. Add the minced garlic and cook for an additional minute until fragrant.
3. Use your hands or forks to shred the jackfruit into smaller pieces, resembling pulled meat.
4. Add the shredded jackfruit to the skillet along with smoked paprika, cumin, salt, and black pepper, stirring to combine.
5. Pour in the barbecue sauce and mix well, cooking for about 20 minutes until everything is heated through and the jackfruit is tender.
6. While the jackfruit cooks, prepare the slider buns and toast them if desired.
7. Assemble the sliders by placing a generous amount of the smoky jackfruit mixture on each bun, topping with coleslaw if using.
Tips:
- For extra flavor, try adding additional spices like cayenne pepper or chili powder.
- Serve with pickles or extra barbecue sauce on the side for an added kick.
- These sliders can be made ahead of time and reheated for quick meals.
Picnic-Friendly Potato Salad
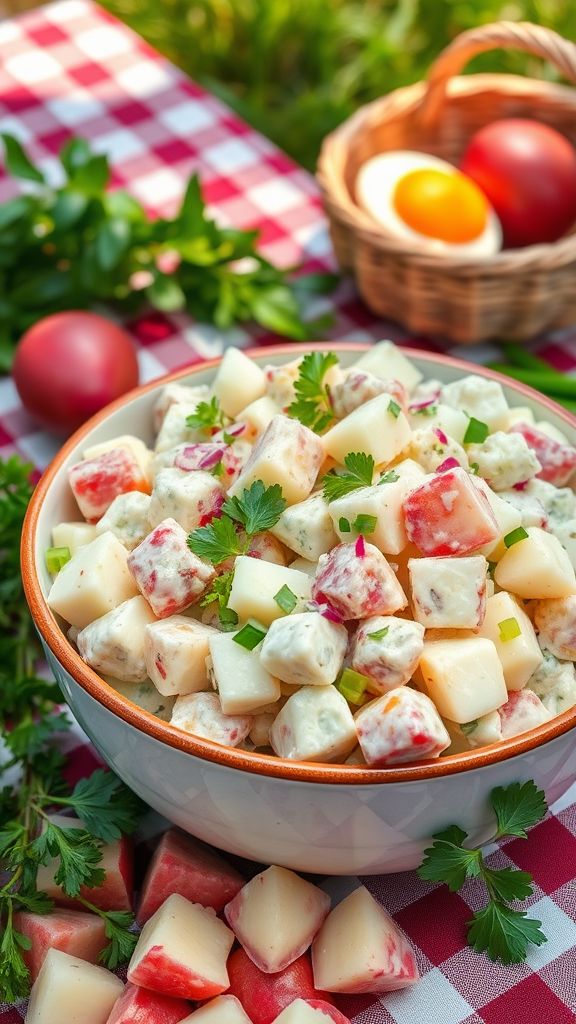
This Picnic-Friendly Potato Salad is special for its creamy texture and zesty flavor, making it the perfect side dish for outdoor gatherings.
Ingredients:
- 2 pounds red potatoes, diced
- 1 cup mayonnaise
- 2 tablespoons apple cider vinegar
- 1 teaspoon Dijon mustard
- 1/2 teaspoon garlic powder
- 1/4 teaspoon onion powder
- 1/4 teaspoon salt
- 1/4 teaspoon black pepper
- 1 cup celery, chopped
- 1/2 cup red onion, finely chopped
- 1/4 cup fresh parsley, chopped
- 3 hard-boiled eggs, chopped
Preparation Time: 15 minutes
Cooking Time: 20 minutes
Total Time: 35 minutes
Instructions:
1. In a large pot, cover the diced potatoes with water and bring to a boil. Cook until tender, about 15 minutes.
2. Drain the potatoes and let them cool for a few minutes.
3. In a large mixing bowl, combine mayonnaise, apple cider vinegar, Dijon mustard, garlic powder, onion powder, salt, and black pepper.
4. Add the cooled potatoes, celery, red onion, parsley, and chopped hard-boiled eggs to the bowl. Gently mix to combine everything.
5. Cover and refrigerate for at least 1 hour before serving to allow the flavors to meld.
Tips:
- Try adding chopped pickles or relish for an extra tangy flavor.
- For a lighter version, substitute Greek yogurt for half of the mayonnaise.
- Make the salad a day ahead for best flavor.
Campfire Grilled Cheese and Soup
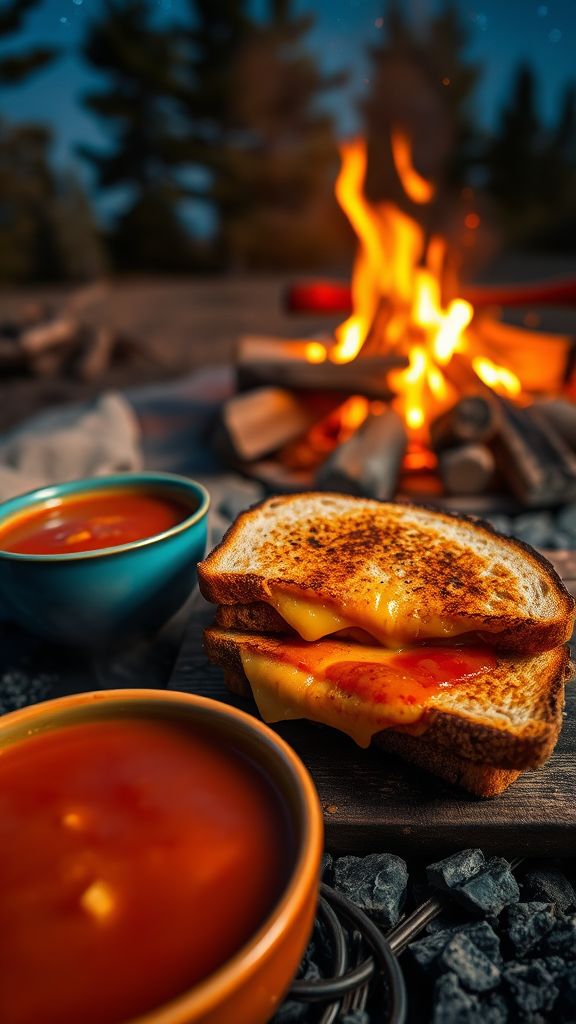
This Campfire Grilled Cheese and Soup recipe brings together the comforting flavors of melty cheese and rich, warm soup, perfect for enjoying outdoors.
Ingredients:
- 4 slices bread
- 4 slices cheddar cheese
- 2 tablespoons butter
- 2 cups vegetable broth
- 1 cup diced tomatoes
- 1 teaspoon dried basil
- 1 teaspoon salt
- 1/2 teaspoon black pepper
Preparation Time: 10 minutes
Cooking Time: 15 minutes
Total Time: 25 minutes
Instructions:
1. Start by heating a medium pot over the campfire, then add the vegetable broth, diced tomatoes, basil, salt, and pepper. Bring to a simmer.
2. While the soup simmers, spread butter on one side of each slice of bread, placing cheese in between two slices to create two sandwiches.
3. Place the sandwiches on a grill over the campfire, grilled until the bread is golden brown and the cheese is melted, about 2-3 minutes per side.
4. Once the soup is heated through, pour it into bowls and serve alongside the hot grilled cheese sandwiches.
Tips:
- Use a cast-iron skillet for even cooking over the campfire.
- Feel free to mix different types of cheese for added flavor.
- Add fresh herbs or croutons to the soup for extra texture.
Zesty Tuna Salad Lettuce Wraps
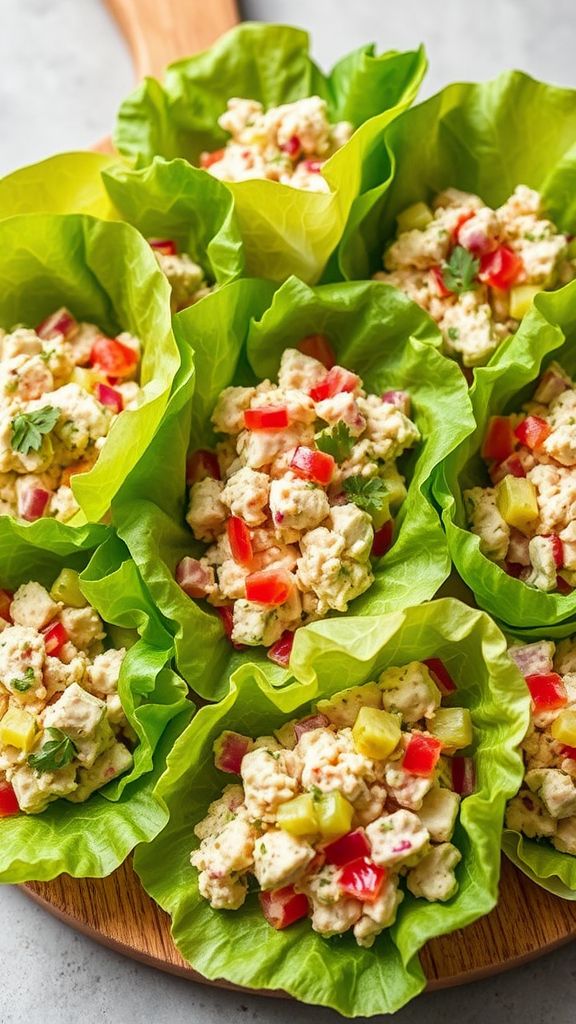
This Zesty Tuna Salad Lettuce Wraps recipe is special for its refreshing combination of tangy flavors and crunchy textures that make for a deliciously light meal.
Ingredients:
- 2 cans tuna, drained
- 1/4 cup mayonnaise
- 2 tablespoons Dijon mustard
- 1 tablespoon lemon juice
- 1/4 cup celery, finely chopped
- 1/4 cup red onion, finely chopped
- 1/4 cup pickles, chopped
- 1 teaspoon garlic powder
- Salt and pepper to taste
- 1 head lettuce, leaves separated
Preparation Time: 10 minutes
Cooking Time: 0 minutes
Total Time: 10 minutes
Instructions:
1. In a mixing bowl, combine the drained tuna, mayonnaise, Dijon mustard, and lemon juice.
2. Add the chopped celery, red onion, pickles, and garlic powder to the bowl.
3. Mix all ingredients together until well combined and season with salt and pepper to taste.
4. Take a lettuce leaf and spoon a generous amount of the tuna salad into the center.
5. Fold the lettuce wrap over the filling and enjoy!
Tips:
- For added crunch, include diced bell peppers in the salad.
- Experiment with different types of lettuce for variety.
- This salad can be made in advance; store in the fridge for up to 2 days.
Sweet and Savory Nut Butter Bananas
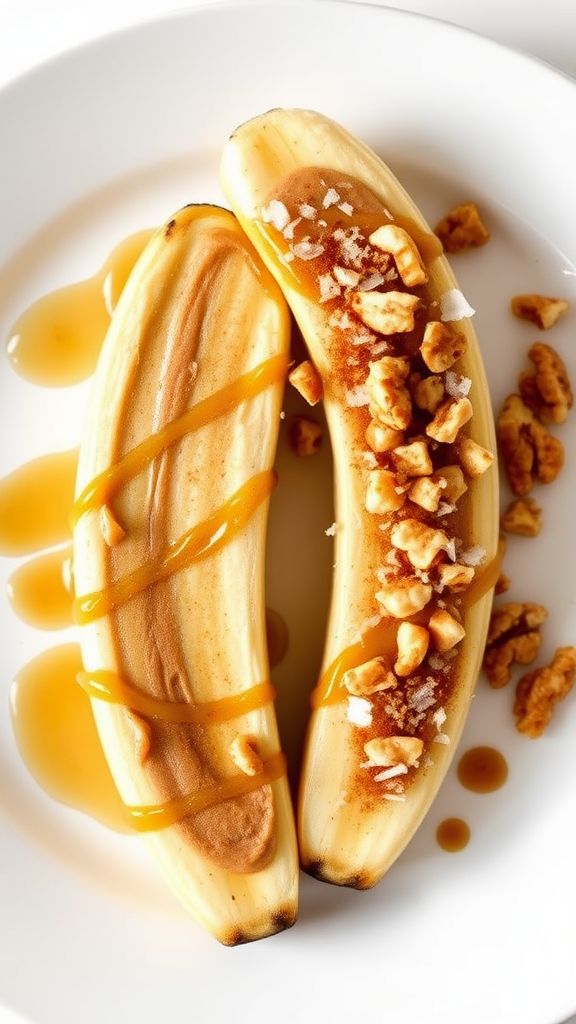
This recipe for Sweet and Savory Nut Butter Bananas perfectly combines the creamy richness of nut butter with the natural sweetness of ripe bananas, offering a delightful snack that’s both satisfying and energizing.
Ingredients:
- 2 ripe bananas
- 1/2 cup nut butter (almond, peanut, or your favorite)
- 2 tablespoons honey or maple syrup
- 1/4 teaspoon cinnamon
- 1/4 cup chopped nuts (e.g., walnuts or pecans)
- 1/4 cup shredded coconut (optional)
Preparation Time: 5 minutes
Cooking Time: 0 minutes
Total Time: 5 minutes
Instructions:
1. Peel the bananas and slice them in half lengthwise.
2. Spread a generous layer of nut butter over the cut sides of the banana halves.
3. Drizzle honey or maple syrup over the nut butter.
4. Sprinkle cinnamon, chopped nuts, and shredded coconut (if using) on top.
5. Serve immediately and enjoy your sweet and savory snack!
Tips:
- For added flavor, try using flavored nut butters like cinnamon or vanilla.
- Make it gluten-free by ensuring the nut butter is free of additives.
- Feel free to mix in your favorite toppings such as chocolate chips or seeds.
Classic Hummus and Flatbread Platter
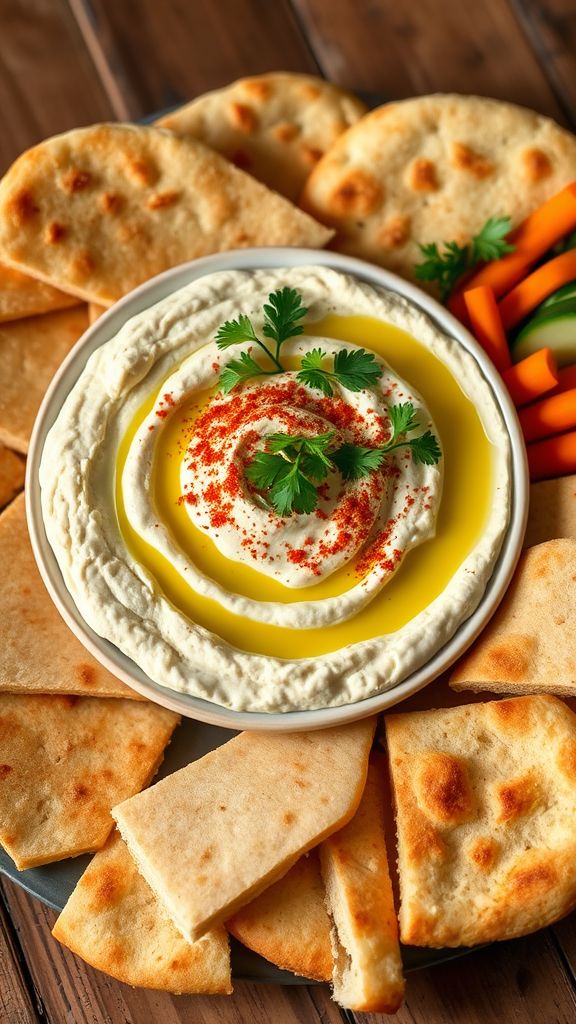
This Classic Hummus and Flatbread Platter is special for its rich, creamy texture and the vibrant flavors of garlic and lemon, making it a delightful appetizer or snack.
Ingredients:
- 1 can (15 oz) chickpeas
- 1/4 cup tahini
- 2 tablespoons olive oil
- 2 tablespoons lemon juice
- 2 cloves garlic, minced
- 1/2 teaspoon ground cumin
- Salt to taste
- Water as needed
- 4 flatbreads
- 1 teaspoon paprika (for garnish)
- Fresh parsley for garnish
Preparation Time: 10 minutes
Cooking Time: 0 minutes
Total Time: 10 minutes
Instructions:
1. Drain and rinse the chickpeas under cold water.
2. In a food processor, combine chickpeas, tahini, olive oil, lemon juice, garlic, and cumin.
3. Blend until smooth, adding water a little at a time until you reach the desired consistency.
4. Season with salt to taste and blend again.
5. Transfer the hummus to a serving bowl and drizzle with olive oil; sprinkle paprika and fresh parsley on top.
6. Warm the flatbreads in a skillet or microwave just before serving.
Tips:
- For extra creaminess, peel the skins off the chickpeas before blending.
- Feel free to experiment with additional flavors by adding roasted red peppers or fresh herbs into the hummus.
- Serve with fresh vegetables like carrots and cucumbers for added crunch.

