My New Cookbook is Out! Check Out Now!
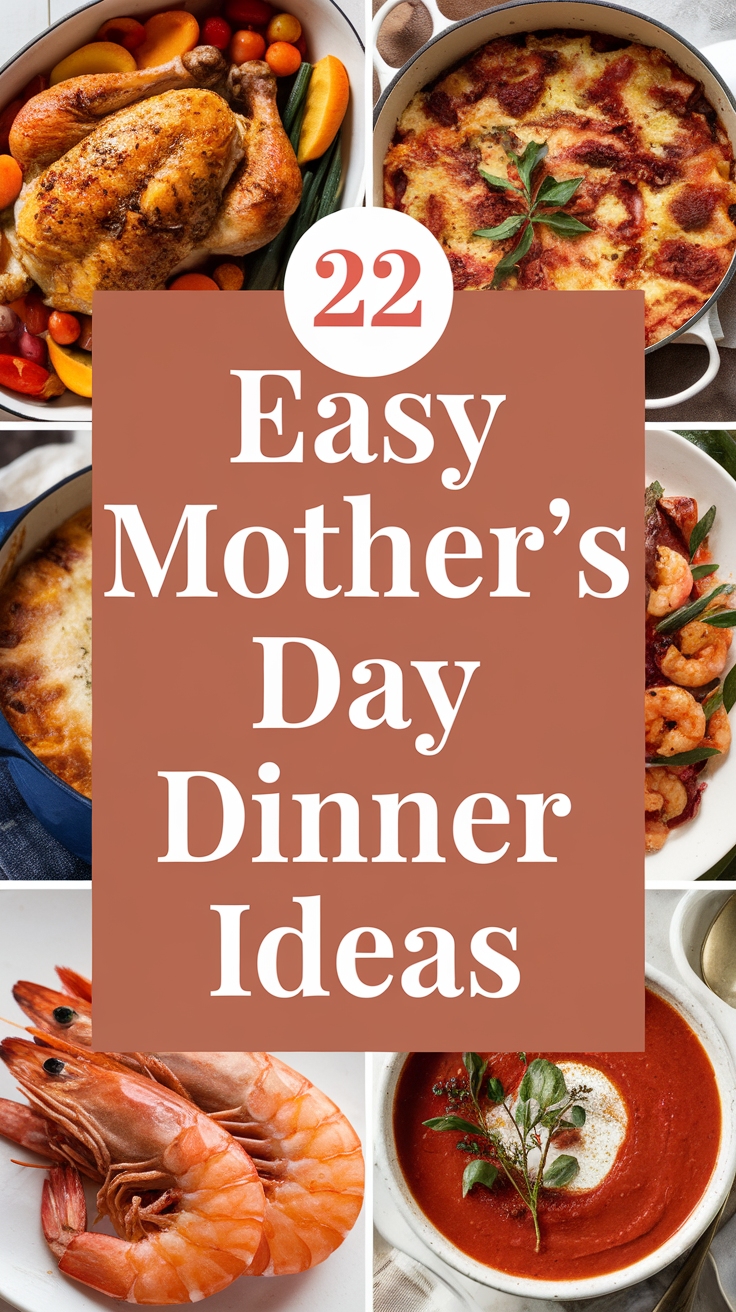
12 Fancy Appetizers for Mother’s Day
This page contains affiliate links and I earn a commission if you make a purchase through one of the links, at no cost to you.
Mother’s Day is just around the corner, and you want to make it extra special, right? You may feel the pressure to wow your mom with a fancy meal that shows how much you care. Don’t worry—you’ll discover 12 delightful appetizers that look impressive but are simple to make! Let’s make this Mother’s Day unforgettable together!
Shop Our Must-Haves


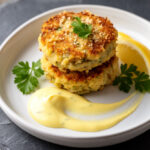
1 Truffle-infused Mushroom Crostini
This Truffle-infused Mushroom Crostini is a delightful appetizer that brings a touch of elegance to any gathering. With the rich flavor of mushrooms combined with the luxurious essence of truffle oil, these crostinis will impress your guests and leave them wanting more. They are easy to make and perfect for any occasion!
Prep Time: 15 minutes
Cook Time: 10 minutes
Total Time: 25 minutes
Servings: 8
Ingredients:
- 1 baguette, sliced into 1/2-inch thick pieces
- 2 tablespoons olive oil
- 1 pound mixed mushrooms (such as cremini, shiitake, and button), finely chopped
- 2 cloves garlic, minced
- 1/2 teaspoon salt
- 1/4 teaspoon black pepper
- 1 tablespoon truffle oil
- 1/4 cup grated Parmesan cheese
- Fresh parsley, chopped (for garnish)
Instructions:
Start by preheating your oven to 400°F (200°C). Arrange the baguette slices on a baking sheet and brush them lightly with the olive oil. Bake in the oven for about 5 minutes or until the bread is lightly toasted.
While the bread is toasting, heat a skillet over medium heat. Add the finely chopped mushrooms and let them cook for about 5 minutes, stirring occasionally. The mushrooms should start to soften and release their moisture.
Next, add the minced garlic to the skillet along with the salt and black pepper. Cook for another 2 minutes, allowing the garlic to become fragrant while the mushrooms continue to cook down.
Remove the skillet from the heat and stir in the truffle oil and grated Parmesan cheese. Mix everything well until the cheese is evenly distributed and melted with the warm mushrooms.
Take the toasted baguette slices out of the oven and spoon a generous amount of the mushroom mixture onto each slice. Make sure to spread it evenly.
Finally, garnish the crostinis with a sprinkle of fresh parsley for color and an extra pop of flavor. Serve immediately while they are warm.
Tips:
- For extra flavor, consider using wild mushrooms if you can find them at your local market.
- If you want more crunch, add some toasted pine nuts on top of the mushroom mixture before serving.
- Ensure you don’t overcook the mushrooms to retain their texture and flavor.
Nutrition Facts:
- Calories: 180 per serving
- Protein: 5g
- Carbohydrates: 22g
- Fat: 8g
- Fiber: 2g
- Sugar: 1g
2 Lobster and Avocado Tartlets

Lobster and Avocado Tartlets are a fancy and delicious bite-sized treat that can impress any guest. These little tartlets are filled with creamy avocado and tender lobster, all nestled in a crunchy shell. Perfect for parties or special occasions!
Prep Time: 20 minutes
Total Time: 20 minutes
Servings: 12 tartlets
Ingredients:
- 1 cup cooked lobster meat, chopped
- 1 ripe avocado, mashed
- 2 tablespoons mayonnaise
- 1 tablespoon lime juice
- 1 tablespoon finely chopped chives
- 1/4 teaspoon salt
- 1/4 teaspoon black pepper
- 12 mini phyllo pastry cups (store-bought)
Instructions:
Start by preheating your oven to 350°F (175°C) if you want to warm the tartlet shells. Place the mini phyllo pastry cups on a baking sheet.
In a mixing bowl, combine the mashed avocado, mayonnaise, and lime juice. Stir until it’s smooth and creamy.
Next, add the chopped lobster meat, chives, salt, and pepper to the bowl. Gently mix everything together without smashing the lobster too much.
Spoon the lobster and avocado mixture into each phyllo cup, filling them generously. If you’re warming the tartlets, pop them in the oven for about 5 minutes or until they are just heated through.
Remove from the oven and serve the tartlets warm, or let them cool slightly and serve at room temperature.
Tips:
- For extra flavor, add a pinch of cayenne pepper to the mixture.
- You can substitute lobster with cooked shrimp if desired.
- Garnish each tartlet with a small sprig of cilantro for a fresh touch.
Nutrition Facts:
- Calories: 120 per tartlet
- Protein: 6g
- Fat: 8g
- Carbohydrates: 7g
- Fiber: 1g
- Sugar: 0g
3 Mini Beef Wellington Bites

These Mini Beef Wellington Bites are a delicious twist on the classic dish, perfect for parties and gatherings. They are packed with flavor and easy to serve. Get ready to impress your guests with these tasty bites!
Prep Time: 20 minutes
Total Time: 50 minutes
Servings: 24 bites
Ingredients:
- 1 lb beef tenderloin, trimmed and cut into small cubes
- 1 tbsp olive oil
- 1/2 cup mushrooms, finely chopped
- 2 tbsp Dijon mustard
- 1/2 cup pâté (optional)
- 1 sheet puff pastry, thawed
- 1 egg, beaten (for egg wash)
- Salt and pepper, to taste
- Fresh thyme, for garnish (optional)
Instructions:
Start by preheating your oven to 400°F (200°C). This will ensure your bites bake evenly and become nice and golden brown.
In a skillet, heat olive oil over medium heat. Add the beef cubes and season with salt and pepper. Sear the beef for about 3 minutes until it’s browned. Remove the beef from the skillet and let it cool.
In the same skillet, add finely chopped mushrooms. Cook for about 5 minutes until the moisture has evaporated. Remove them from heat and let them cool alongside the beef.
In a bowl, combine the cooled beef, mushrooms, and Dijon mustard. Mix well. If you’re using pâté, add it to the mixture and combine all the ingredients thoroughly.
Roll out the puff pastry on a lightly floured surface. Cut it into 3-inch squares. Place a spoonful of the beef mixture in the center of each square.
Fold the corners of the pastry over the filling and pinch to seal. Place the bites seam-side down on a baking sheet lined with parchment paper.
Brush the tops of the bites with beaten egg to give them a beautiful golden color when they bake.
Bake in the preheated oven for 20-25 minutes, or until golden brown and puffed. Once baked, let them cool slightly before serving. Garnish with fresh thyme if desired.
Tips:
- For more flavor, add a splash of Worcestershire sauce to the beef mixture.
- You can prepare the filling ahead of time and assemble the bites just before baking.
- Serve with a side of garlic aioli or horseradish sauce for dipping.
Nutrition Facts:
- Calories: 150 per bite
- Protein: 7g
- Carbohydrates: 10g
- Fat: 8g
- Sodium: 200mg
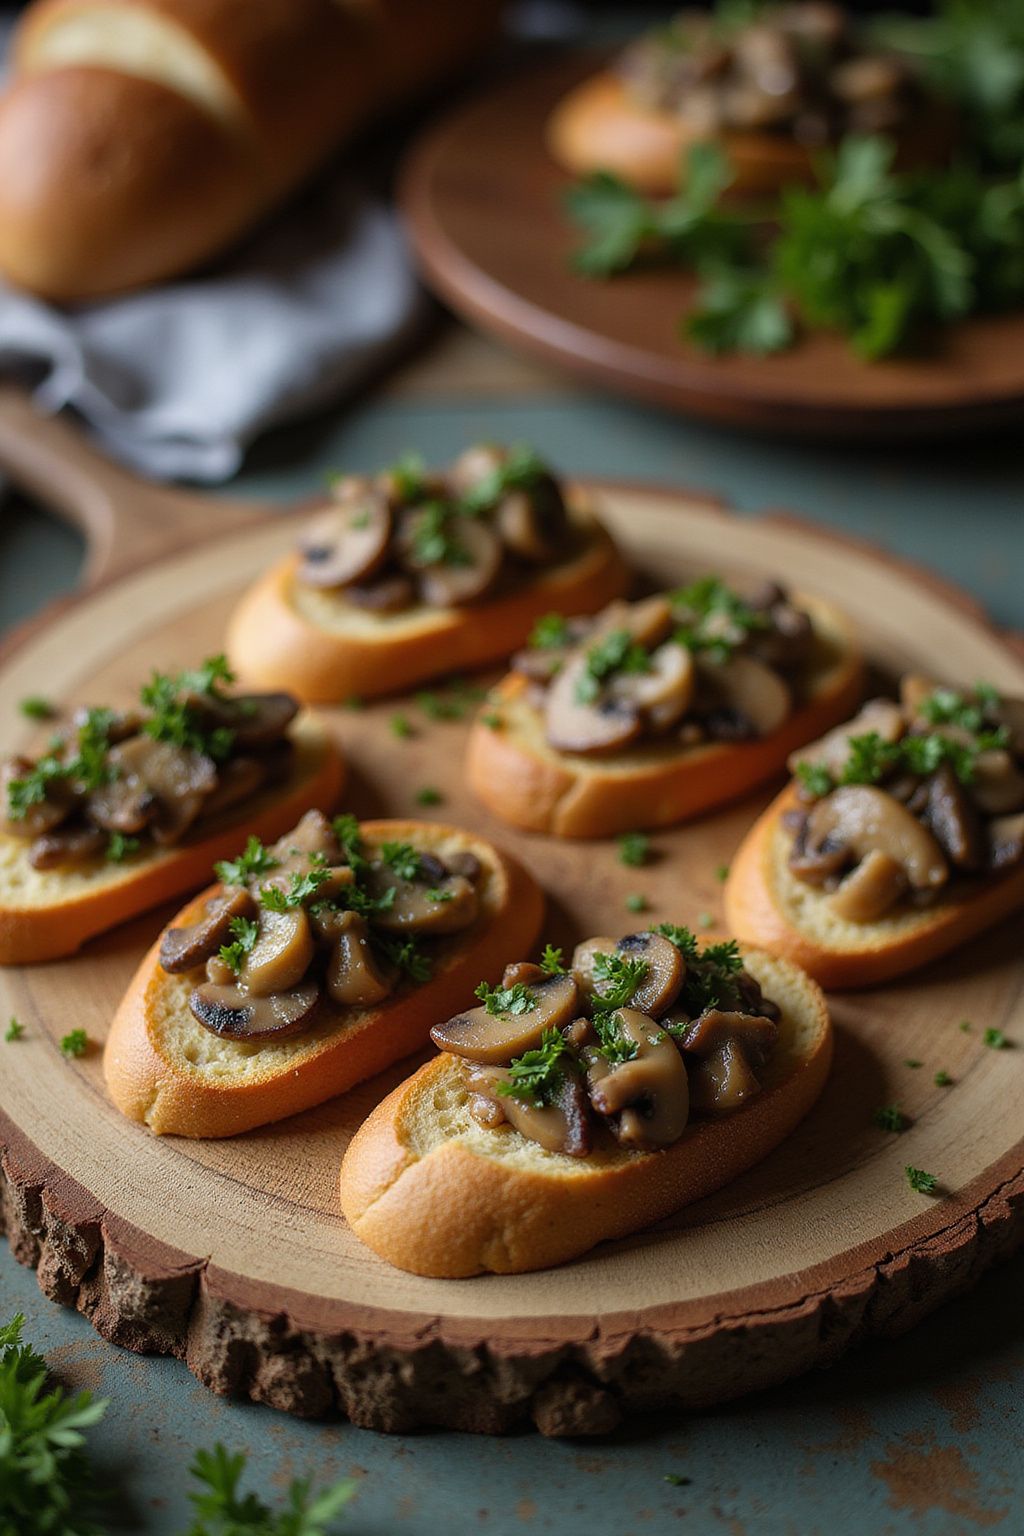
4 Prosciutto-wrapped Asparagus Bundles
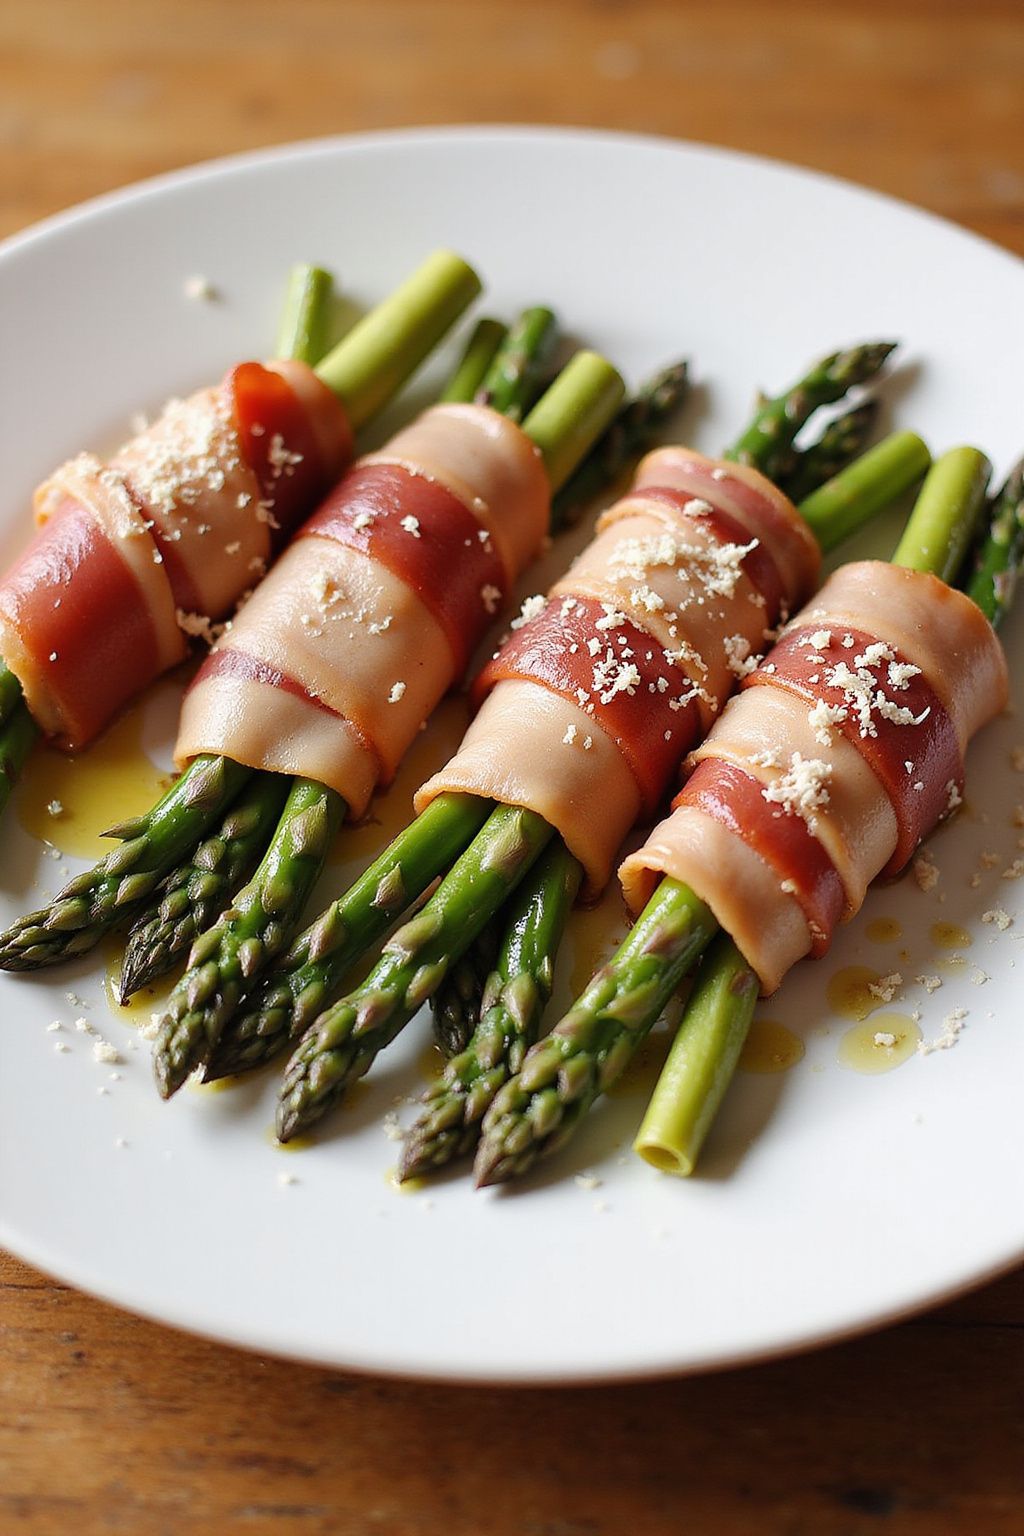
Prosciutto-wrapped asparagus bundles are a delicious and elegant appetizer that is simple to make. This perfect blend of salty prosciutto and fresh asparagus delivers great flavors that everyone will love. Perfect for parties or family dinners, these bundles will impress your guests!
Prep Time: 15 minutes
Cook Time: 10 minutes
Total Time: 25 minutes
Servings: 4
Ingredients:
- 1 pound fresh asparagus, trimmed
- 8 slices prosciutto
- 1 tablespoon olive oil
- 1 tablespoon balsamic vinegar
- Salt and pepper, to taste
- Parmesan cheese, grated (optional)
Instructions:
Start by preheating your oven to 400°F (200°C). While the oven is heating, take a baking sheet and line it with parchment paper for easier cleanup. Next, prepare the asparagus by snapping off the woody ends.
Once your asparagus is ready, take a slice of prosciutto and wrap it around each asparagus spear. Make sure that the prosciutto overlaps a little for full coverage. This will give you the saltiness and flavor you need.
Arrange the wrapped asparagus bundles on the baking sheet. Drizzle with olive oil and balsamic vinegar, then sprinkle with a pinch of salt and pepper. These seasonings will enhance the delicious flavors even more.
Now, it’s time to bake! Place the baking sheet in your preheated oven and roast the bundles for about 10 minutes. You will know they are done when the prosciutto is crispy and the asparagus is tender.
Once out of the oven, you can sprinkle some grated Parmesan cheese on top if desired. Serve them warm as a tasty appetizer that your family and friends will talk about long after the meal!
Tips:
- For a twist, try adding some lemon zest to brighten the flavors.
- You can also grill the bundles instead of roasting them for a smoky flavor.
- Serve with a dipping sauce like aioli for an extra treat!
Nutrition Facts:
- Calories: 200 per serving
- Protein: 10g
- Fat: 15g
- Carbohydrates: 5g
- Fiber: 2g
5 Spinach and Feta Puff Pastry Twists
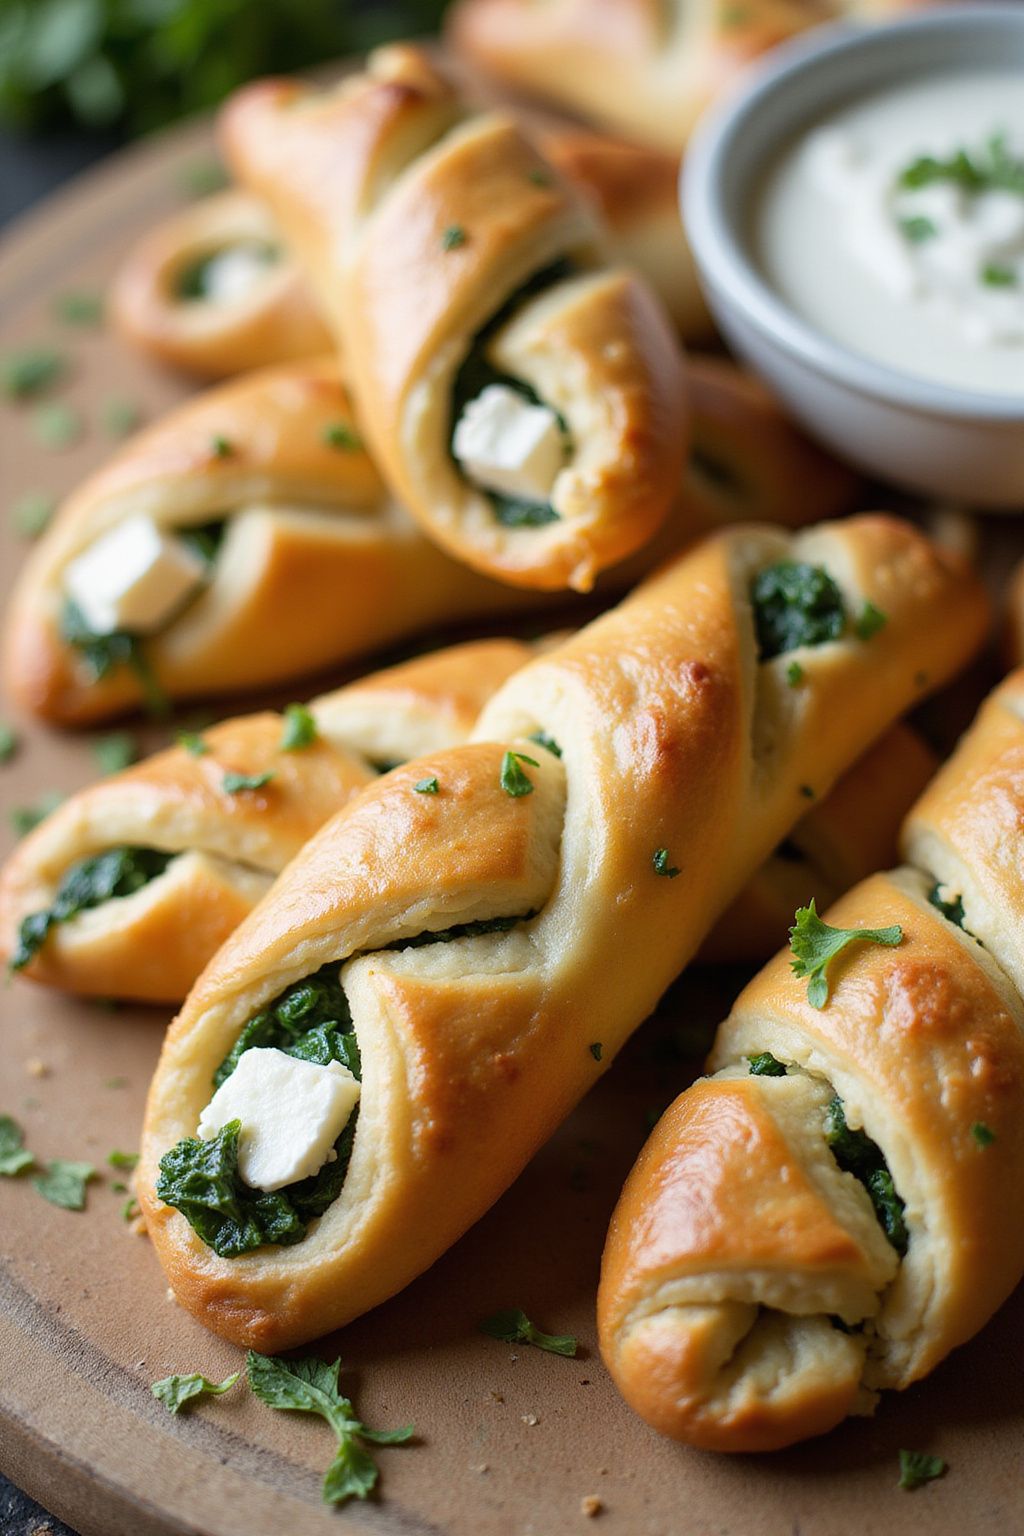
These Spinach and Feta Puff Pastry Twists are a delicious and easy appetizer that everyone will love. Flaky puff pastry filled with creamy feta cheese and fresh spinach makes a perfect snack for parties or just a cozy night in. Plus, they are quick to make and impress your guests!
Prep Time: 15 minutes
Cook Time: 20 minutes
Total Time: 35 minutes
Servings: 12 twists
Ingredients:
- 1 sheet of puff pastry, thawed
- 1 cup fresh spinach, chopped
- 1/2 cup crumbled feta cheese
- 1/4 cup cream cheese, softened
- 1 clove of garlic, minced
- 1 egg, beaten (for egg wash)
- 1 teaspoon dried oregano
- Salt and pepper, to taste
Instructions:
Start by preheating your oven to 400°F (200°C). Line a baking sheet with parchment paper to prevent sticking and make cleanup easier.
In a mixing bowl, combine the chopped spinach, feta cheese, cream cheese, minced garlic, dried oregano, and season with salt and pepper. Mix everything well until all the ingredients are nicely blended.
Unroll the puff pastry on a floured surface. Cut the pastry into 6 strips, each about 1.5 inches wide. Spoon a bit of the spinach and feta mixture along the center of each strip.
Twist each strip of pastry several times to create a spiral shape. Place the twisted pastries on the prepared baking sheet. Brush the tops with the beaten egg to give them a nice golden color while baking.
Bake in the preheated oven for 15-20 minutes or until the twists are golden brown and puffed up. Once done, remove them from the oven and let them cool slightly before serving.
Tips:
- Feel free to add other seasonings or ingredients, such as fresh herbs or a sprinkle of red pepper flakes for added flavor.
- Make sure the puff pastry is thawed but still cold when you work with it to keep it flaky.
- These twists are best served warm but can also be enjoyed at room temperature.
Nutrition Facts:
- Calories: 140 per twist
- Total Fat: 8g
- Saturated Fat: 4g
- Cholesterol: 25mg
- Sodium: 220mg
- Total Carbohydrates: 12g
- Dietary Fiber: 1g
- Sugars: 0g
- Protein: 4g
6 Caprese Skewers with Balsamic Drizzle
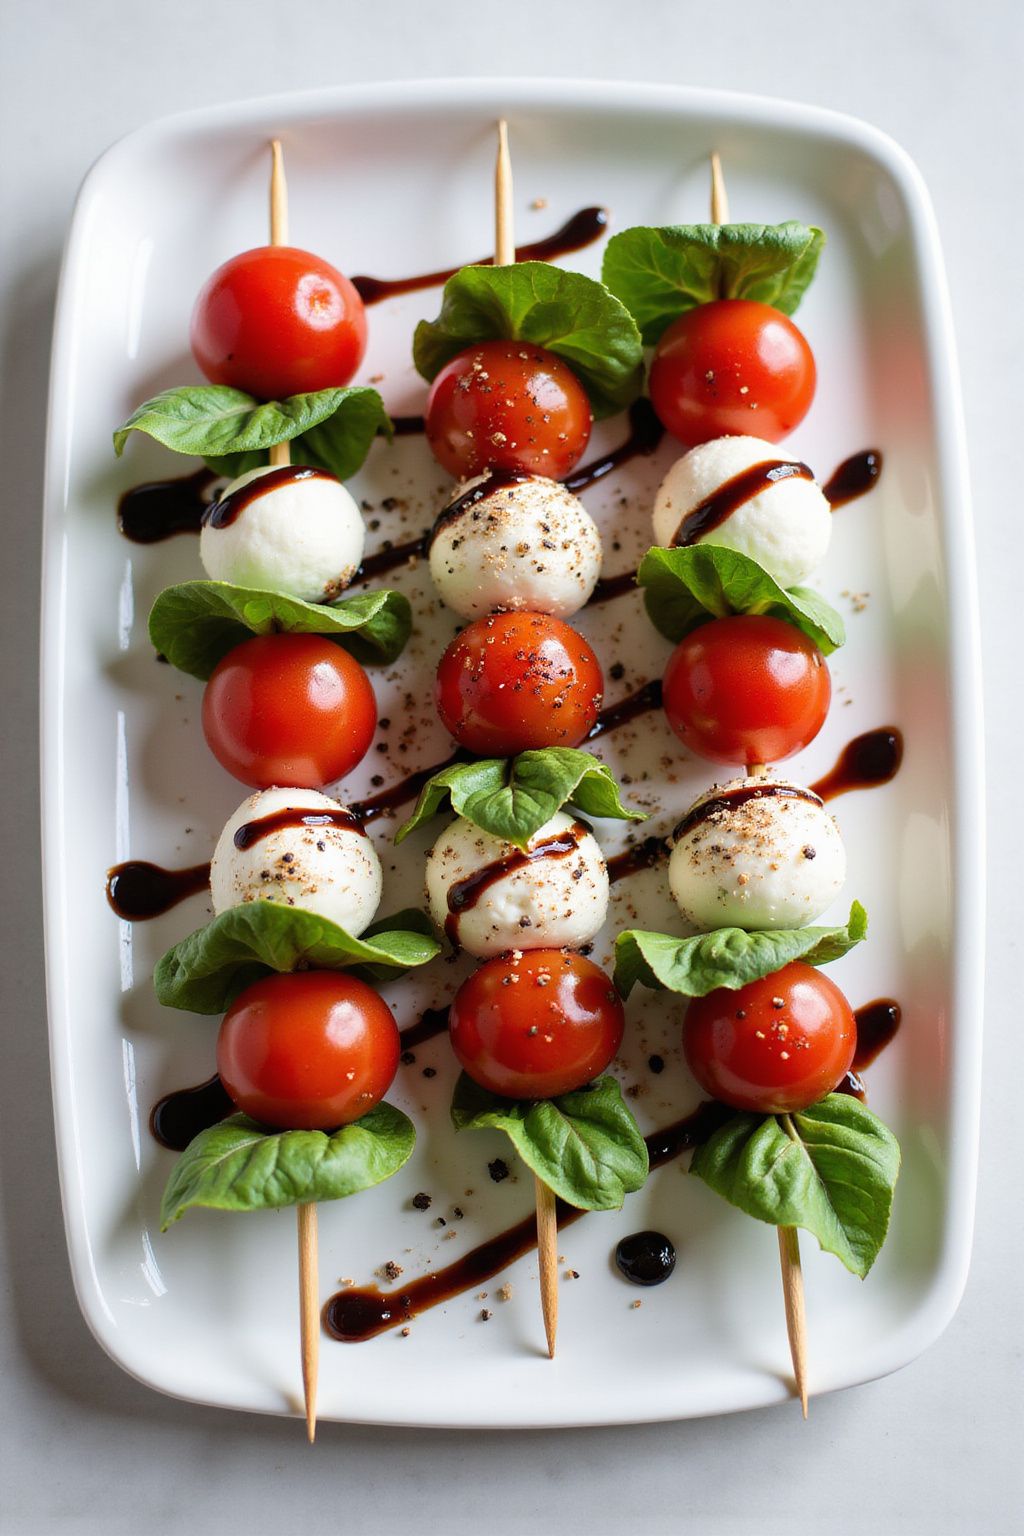
Caprese Skewers with Balsamic Drizzle are a delicious and fresh appetizer that is super easy to make. These bite-sized treats are perfect for parties or casual get-togethers. With juicy tomatoes, creamy mozzarella, and fragrant basil, they are always a hit!
Prep Time: 15 minutes
Total Time: 15 minutes
Servings: 12 skewers
Ingredients:
- 12 cherry tomatoes
- 12 small mozzarella balls (bocconcini)
- 12 fresh basil leaves
- 1/4 cup balsamic glaze
- Salt and pepper, to taste
- 12 wooden skewers or toothpicks
Instructions:
Start by washing the cherry tomatoes and basil leaves under cool water. Make sure to dry them gently with a paper towel. This helps keep everything fresh and clean for your skewers.
Next, take a wooden skewer or toothpick and start assembling the skewers. Begin by sliding a cherry tomato onto the skewer. Follow it with a mozzarella ball and then a basil leaf. Repeat this process until you’ve used all your ingredients. Each skewer should have one tomato, one mozzarella ball, and one basil leaf.
Once all the skewers are assembled, place them on a serving platter. Now, it’s time to add some flavor! Drizzle the balsamic glaze over the skewers. Make sure to cover them well for that sweet and tangy taste.
Finally, sprinkle a little salt and pepper to taste over the skewers to enhance the flavors. Serve them immediately or keep them in the fridge until you’re ready to enjoy!
Tips:
- For an extra kick, try adding a piece of prosciutto on the skewer.
- You can make the balsamic glaze yourself by simmering balsamic vinegar until it reduces and thickens.
- Make sure the mozzarella balls are well-drained to avoid extra moisture.
Nutrition Facts:
- Calories: 80
- Total Fat: 5g
- Saturated Fat: 2g
- Cholesterol: 12mg
- Sodium: 100mg
- Total Carbohydrates: 5g
- Dietary Fiber: 0g
- Sugars: 3g
- Protein: 4g
7 Smoked Salmon Blinis with Dill Cream
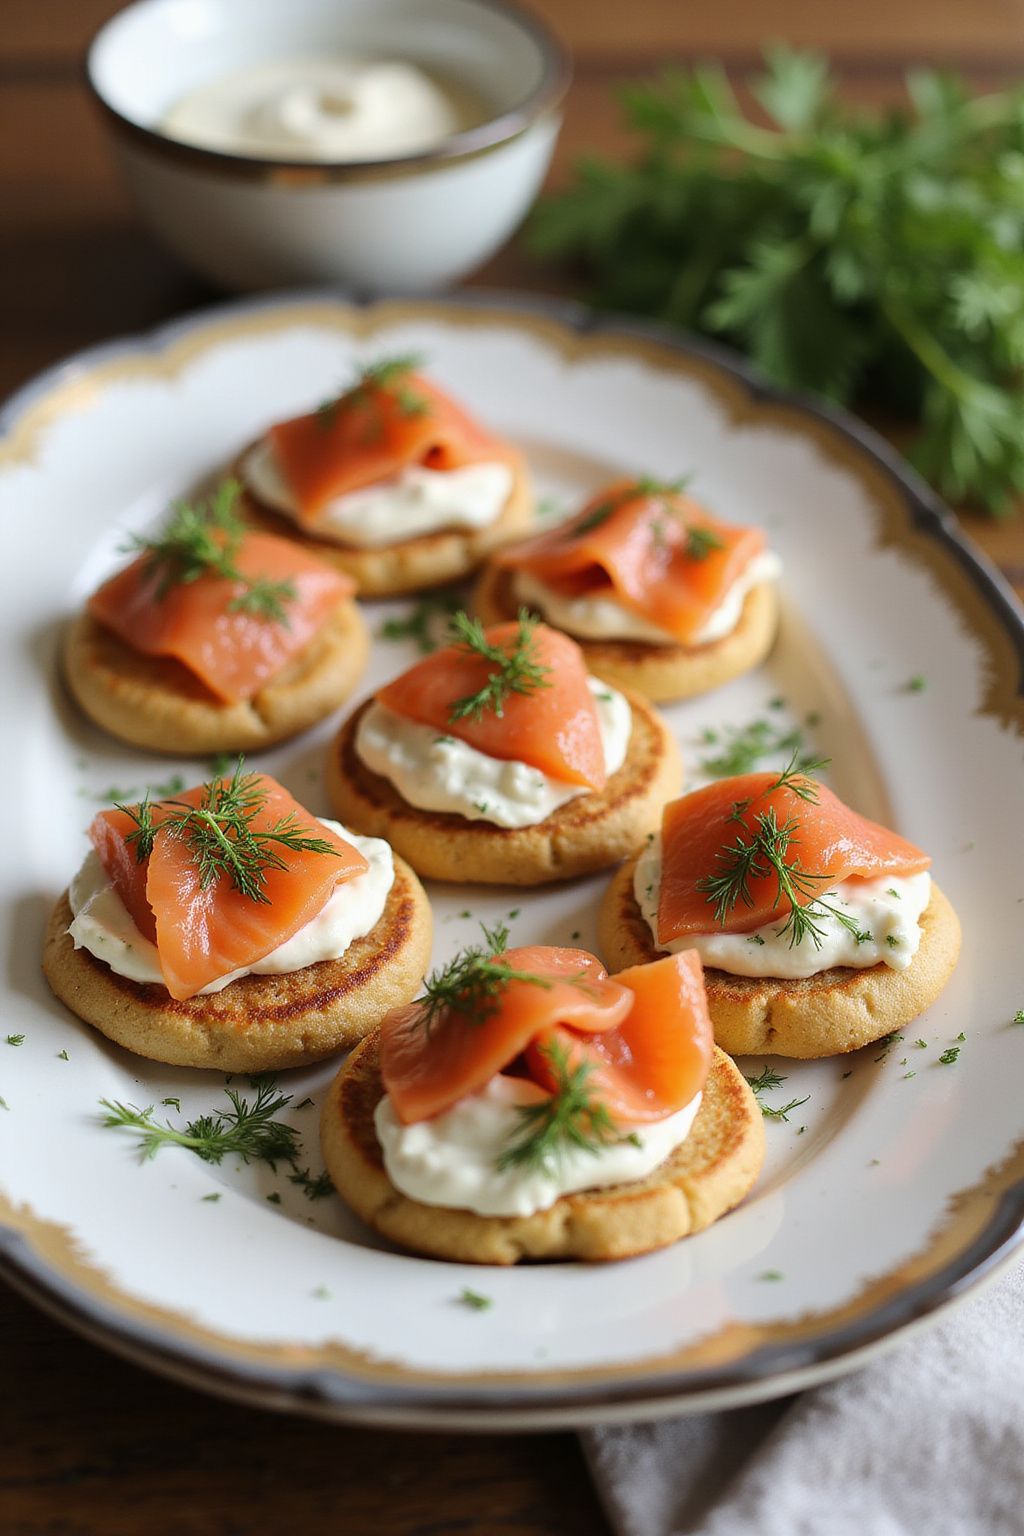
Smoked Salmon Blinis with Dill Cream is a delightful appetizer that combines rich flavors in a bite-sized treat. These tiny pancakes topped with creamy dill sauce and savory smoked salmon are perfect for any gathering. They’re easy to make and guaranteed to impress your guests!
Prep Time: 15 minutes
Total Time: 15 minutes
Servings: 12 blinis
Ingredients:
- 1 cup all-purpose flour
- 1 teaspoon baking powder
- ½ teaspoon salt
- 1 cup buttermilk
- 2 large eggs
- 2 tablespoons melted butter
- 4 ounces smoked salmon, cut into small pieces
- ½ cup sour cream
- 2 tablespoons fresh dill, chopped
- 1 teaspoon lemon juice
Instructions:
In a mixing bowl, whisk together the flour, baking powder, and salt. This will be the dry mix for your blinis.
Then, in another bowl, combine the buttermilk, eggs, and melted butter. Mix them well until they are smooth.
Pour the wet ingredients into the dry ingredients and stir until just combined. Don’t worry about lumps; it’s okay to have some!
Next, heat a non-stick skillet over medium heat. Add a small amount of butter, then pour spoonfuls of the batter onto the skillet to form small pancakes. Cook for about 2-3 minutes on each side until golden brown.
Once all blinis are cooked, let them cool on a plate.
For the dill cream, in a separate bowl, mix together the sour cream, chopped dill, and lemon juice. Stir until everything is combined.
To serve, place a spoonful of dill cream on each blini and top with a piece of smoked salmon. You can add extra dill on top for garnish if you like.
Tips:
- You can make the blinis a few hours ahead and store them in an airtight container.
- Fresh dill adds the best flavor, so use it if you can, but dried dill will work in a pinch.
- For a twist, try adding capers or a slice of cucumber on top of the salmon.
Nutrition Facts:
- Calories: 100
- Protein: 4g
- Fat: 6g
- Carbohydrates: 8g
- Fiber: 0g
- Sodium: 150mg
8 Fig and Goat Cheese Stuffed Endive

Fig and Goat Cheese Stuffed Endive is a delicious and elegant appetizer that’s perfect for any gathering. The combination of sweet figs and creamy goat cheese creates a delightful bite that your guests will love. Plus, it’s easy to prepare!
Prep Time: 15 minutes
Total Time: 15 minutes
Servings: 8
Ingredients:
- 8 large endive leaves
- 1 cup fresh figs, chopped
- 4 ounces goat cheese, softened
- 2 tablespoons honey
- 1 tablespoon lemon juice
- 1/4 cup walnuts, chopped
- Salt and pepper to taste
- Fresh thyme for garnish (optional)
Instructions:
Start by preparing the endive leaves. Carefully separate them from the head and rinse them under cold water. Pat them dry with a paper towel and place them on a serving platter.
In a mixing bowl, combine the chopped figs, softened goat cheese, honey, and lemon juice. Stir everything together until nicely blended. Don’t forget to season your mixture with a pinch of salt and pepper to taste.
Next, scoop the fig and goat cheese mixture into each endive leaf. Use a spoon to fill them generously, as they will make lovely little boats.
Sprinkle the chopped walnuts over the filled endive leaves for a nice crunch. If you like, add a few fresh thyme leaves on top for extra flavor and appeal.
Finally, serve the Fig and Goat Cheese Stuffed Endive fresh. They are best enjoyed right away, but can be stored in the fridge for a short while.
Tips:
- You can substitute figs with dried figs if fresh ones aren’t available.
- Drizzle extra honey on top before serving for added sweetness.
- Feel free to mix in other herbs like parsley or chives for different flavors.
Nutrition Facts:
- Calories: 110 per serving
- Total Fat: 8g
- Saturated Fat: 3g
- Cholesterol: 10mg
- Sodium: 60mg
- Total Carbohydrates: 9g
- Dietary Fiber: 1g
- Sugars: 5g
- Protein: 3g
9 Crab and Citrus Ceviche Cups
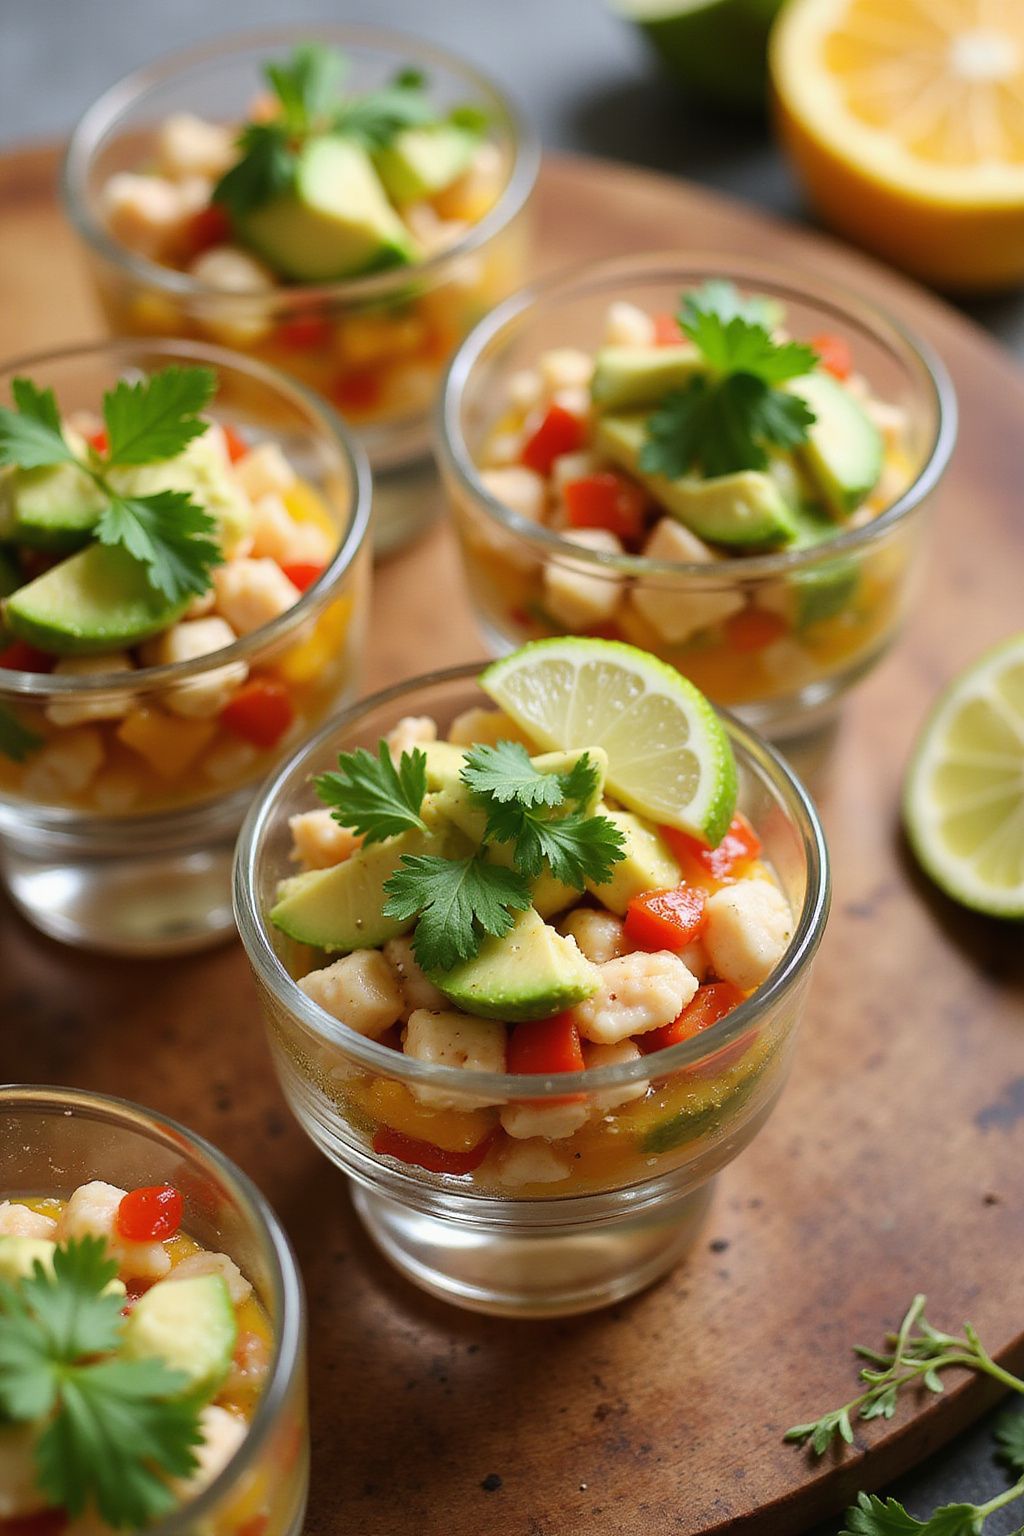
Crisp, refreshing, and packed with flavor, these Crab and Citrus Ceviche Cups are perfect for your next gathering. With the sweet taste of crab meat paired with zesty citrus, they are sure to impress your guests. They are easy to prepare and make a delightful appetizer.
Prep Time: 15 minutes
Additional Time: 30 minutes
Total Time: 45 minutes
Servings: 6
Ingredients:
- 1 cup fresh lump crab meat
- 1/2 cup diced cucumber
- 1/2 cup diced avocado
- 1/2 cup diced red bell pepper
- 1/4 cup finely chopped red onion
- 1/4 cup fresh lime juice
- 1/4 cup fresh orange juice
- 1 tablespoon chopped fresh cilantro
- Salt and pepper to taste
- 6 small cups or endive leaves for serving
Instructions:
Begin by gathering all your ingredients. This makes the cooking process smoother and more enjoyable. In a mixing bowl, combine the fresh lump crab meat, diced cucumber, diced avocado, diced red bell pepper, and finely chopped red onion.
Next, pour in the fresh lime juice and fresh orange juice. The citrus juices add a nice brightness to the dish. Gently stir everything to combine without breaking apart the avocado.
Add the chopped fresh cilantro, and season with salt and pepper to taste. Mix carefully to keep the ingredients intact. Cover the bowl with plastic wrap and let it sit in the refrigerator for about 30 minutes. This time helps the flavors blend beautifully.
When ready to serve, scoop the ceviche mixture into your small cups or endive leaves. Make each serving look pretty by topping it with a small sprig of cilantro. Your Crab and Citrus Ceviche Cups are now ready to impress!
Tips:
- Make sure to use fresh crab meat for the best flavor—either from the fish market or canned crab labeled "fresh."
- For added spice, consider mixing in some diced jalapeño or a few dashes of hot sauce.
- Serve immediately for the best taste and texture, or keep it chilled until serving.
Nutrition Facts:
- Calories: 150
- Protein: 10g
- Fat: 8g
- Carbohydrates: 12g
- Fiber: 3g
- Sodium: 200mg
10 Tomato Basil Bruschetta with Goat Cheese
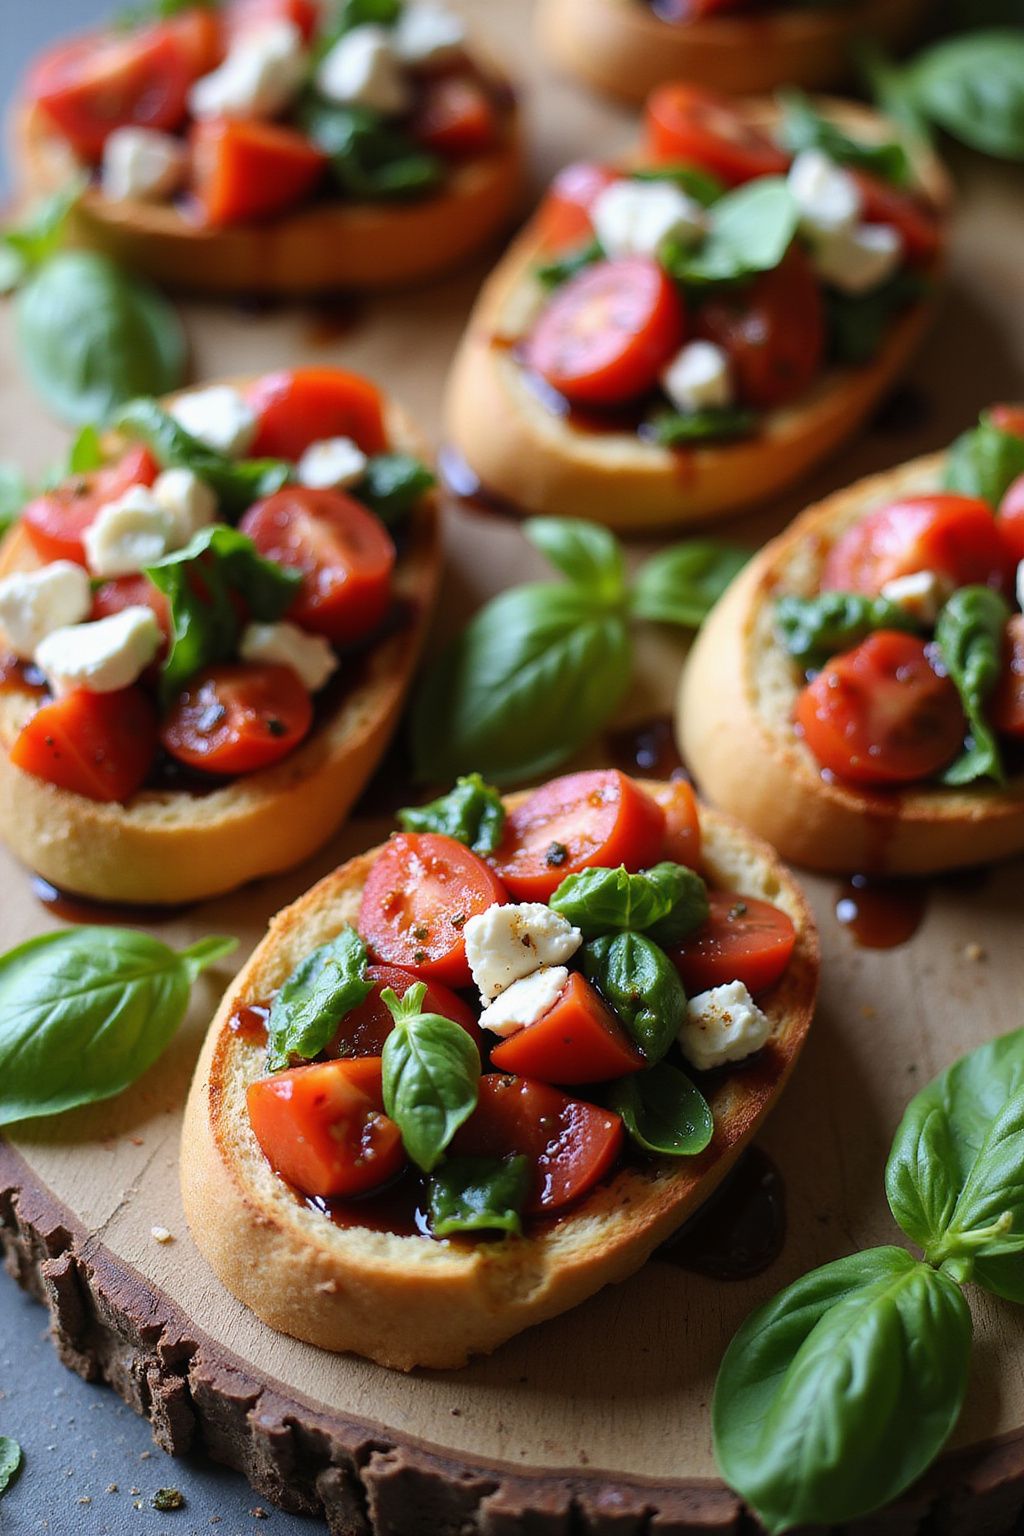
Enjoy a fresh and delicious bite with Tomato Basil Bruschetta with Goat Cheese. This appetizer is perfect for gatherings or a simple snack at home. The combination of ripe tomatoes, fragrant basil, and creamy goat cheese on crispy bread will delight everyone!
Prep Time: 15 minutes
Total Time: 15 minutes
Servings: 6
Ingredients:
- 1 French baguette, sliced into ½ inch pieces
- 2 cups ripe tomatoes, diced
- ¼ cup fresh basil leaves, chopped
- 1 garlic clove, minced
- 2 tablespoons balsamic vinegar
- 3 tablespoons olive oil
- 1 teaspoon salt
- ½ teaspoon black pepper
- 4 ounces goat cheese, crumbled
Instructions:
Start by preheating your oven to 400°F (200°C). Arrange the slices of baguette on a baking sheet. Brush each slice lightly with olive oil and bake them for about 5-7 minutes until they are golden brown.
In a mixing bowl, combine the diced tomatoes, chopped basil, and minced garlic. Next, stir in the balsamic vinegar, olive oil, salt, and black pepper. Gently mix everything together until well combined.
Remove the toasted baguette slices from the oven and allow them to cool slightly. Once cooled, spoon a generous amount of the tomato mixture onto each slice. Top each piece with a sprinkle of crumbled goat cheese.
Finally, serve the bruschetta immediately to enjoy the perfect balance of flavors. You can add a touch of extra basil or a drizzle of balsamic glaze on top for added flair!
Tips:
- For extra flavor, try rubbing a sliced garlic clove on the toasted bread before adding the tomato mixture.
- Use different types of tomatoes, such as cherry or heirloom, for a colorful presentation.
- If you make the tomato mixture ahead of time, keep it in the refrigerator to enhance the flavors, but avoid mixing it with the bread until you’re ready to serve.
Nutrition Facts:
- Calories: 210 per serving
- Total Fat: 12g
- Saturated Fat: 6g
- Sodium: 350mg
- Total Carbohydrates: 19g
- Dietary Fiber: 1g
- Sugars: 1g
- Protein: 6g
11 Herb-crusted Mini Quiche

Herb-crusted Mini Quiche are the perfect bite-sized treats for any gathering. They are creamy, flavorful, and packed with fresh herbs that really make them stand out. Plus, they’re easy to make and sure to impress your guests!
Prep Time: 15 minutes
Cook Time: 20 minutes
Additional Time: 10 minutes
Total Time: 45 minutes
Servings: 12 mini quiches
Ingredients:
- 1 pre-made pie crust
- 4 large eggs
- 1/2 cup heavy cream
- 1/2 cup milk
- 1 cup shredded cheese (cheddar or your choice)
- 1/2 cup diced fresh vegetables (bell peppers, spinach, or mushrooms)
- 1/4 cup fresh herbs (parsley, chives, or thyme)
- Salt and pepper to taste
- Olive oil for greasing the muffin tin
Instructions:
Start by preheating your oven to 375°F (190°C). While the oven heats up, grease a muffin tin with a little olive oil to prevent sticking.
Next, roll out the pre-made pie crust and cut it into small circles that fit the muffin tin cups. Gently press the crust pieces into each cup to form a little shell.
In a mixing bowl, crack the 4 large eggs. Add the heavy cream and milk, then whisk everything together until blended.
Now, stir in the shredded cheese, diced vegetables, and fresh herbs. Make sure to season with a pinch of salt and pepper. Mix until well combined.
Pour the egg mixture into each pie crust shell, filling them about three-quarters full. This will give them room to puff up while cooking.
Place the muffin tin in the preheated oven and bake for 20 minutes, or until the quiches are puffed and golden brown on top. After baking, let them cool in the pan for about 10 minutes before removing them.
Tips:
- Feel free to swap out the vegetables and herbs for your favorites. You can use anything from broccoli to basil!
- If you want a richer taste, consider adding some cooked bacon or sausage to the filling.
- These quiches can be made ahead of time and reheated for serving.
Nutrition Facts:
- Calories: 150 per quiche
- Total Fat: 10g
- Saturated Fat: 5g
- Cholesterol: 95mg
- Sodium: 200mg
- Total Carbohydrates: 10g
- Dietary Fiber: 0g
- Sugars: 0g
- Protein: 5g
12 Savory Cheese and Charcuterie Cones

Savory Cheese and Charcuterie Cones are a fun and delicious way to serve a variety of cheeses, meats, and extras. These delightful cones are perfect for gatherings and make snacking a breeze. You’ll love how easy they are to assemble!
Prep Time: 15 minutes
Additional Time: 10 minutes
Total Time: 25 minutes
Servings: 6 cones
Ingredients:
- 6 waffle cones
- 1 cup assorted cheese (cheddar, gouda, brie)
- 1 cup assorted charcuterie (salami, prosciutto, pepperoni)
- 1/2 cup nuts (almonds, walnuts, or pecans)
- 1/2 cup grapes or other fruits (for freshness)
- 1/4 cup olives or pickles (for a tangy bite)
- Fresh herbs (like rosemary or thyme, for garnish)
Instructions:
Start by gathering all your ingredients on a clean surface. This will make your assembly much easier.
Take each waffle cone and place it upright. Begin filling the cone with a mix of cheeses. You can cut them into small cubes or use slices; just ensure they fit well in the cone.
Next, layer in the charcuterie. Fold or roll the slices of meat before adding them to create a nice visual appeal as well as easy snacking.
Then, sprinkle in the nuts for some crunch. They not only add a delightful texture but also bring a hint of richness to the cone.
Add grapes or any other fresh fruit to balance the savory flavors. Their sweetness pairs excellently with cheese and meats.
Add olives or pickles for a tangy touch. They will enhance the flavor profile of the cones.
Finally, garnish the top with fresh herbs to add a pop of color and freshness.
Once you’ve filled all the cones, let them rest for about 10 minutes so everything settles nicely.
Tips:
- You can customize the cones with your favorite cheese and meat options for a personal touch.
- For a gluten-free option, try using paper cones and substitute with a gluten-free snack.
- Always keep leftovers in the fridge to enjoy later, but be sure to eat them within a day for the best taste.
Nutrition Facts:
- Calories: 350 per cone
- Total Fat: 22g
- Sodium: 600mg
- Carbohydrates: 30g
- Fiber: 3g
- Protein: 10g