My New Cookbook is Out! Check Out Now!
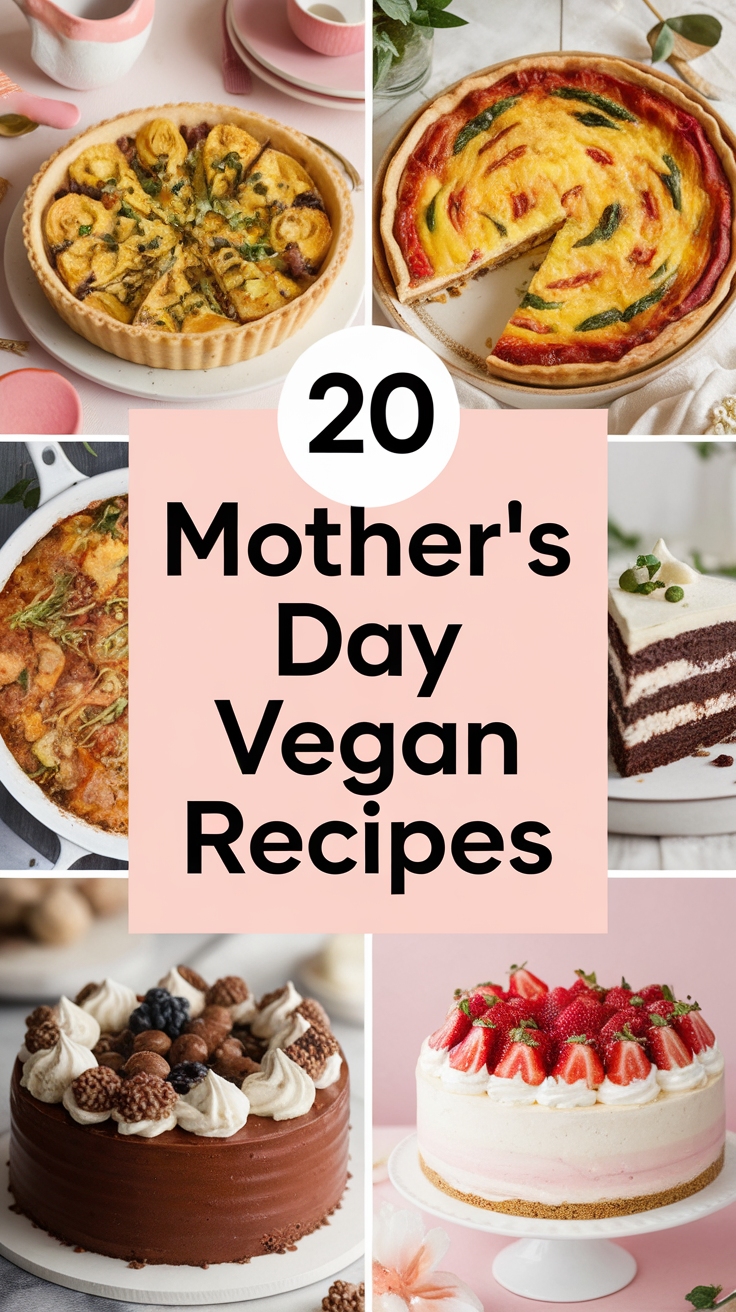
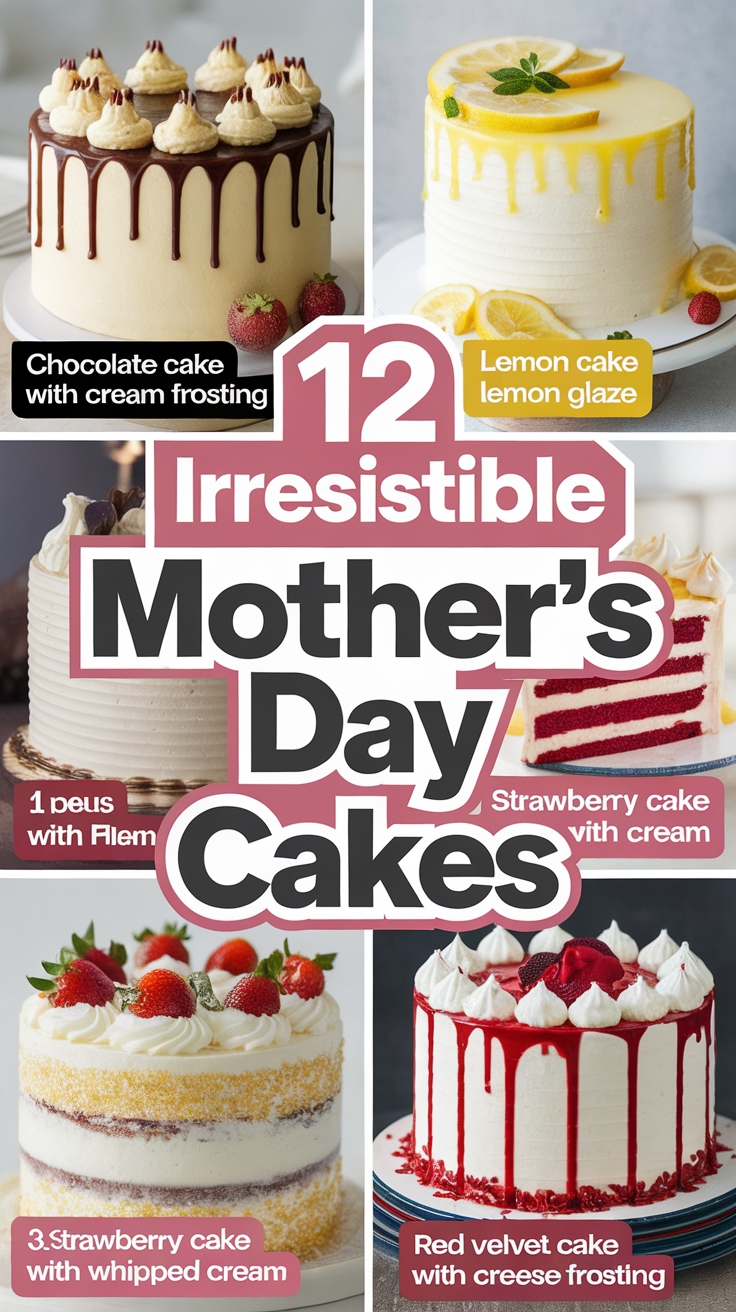
12 Delicious Cakes for Mother’s Day
This page contains affiliate links and I earn a commission if you make a purchase through one of the links, at no cost to you.
What if you could wow your mom with a homemade cake that speaks to her heart? Celebrating Mother’s Day with a special dessert can be a delightful yet daunting task, but fear not—you’re not alone! With these 12 delicious cakes, you’ll find the perfect way to show your love and appreciation. Each recipe is designed to be easy and satisfying, ensuring your Mother’s Day celebration is as sweet as your bond!
Shop Our Must-Haves
No products found.
1 Mother’s Day Citrus Blossom Cake
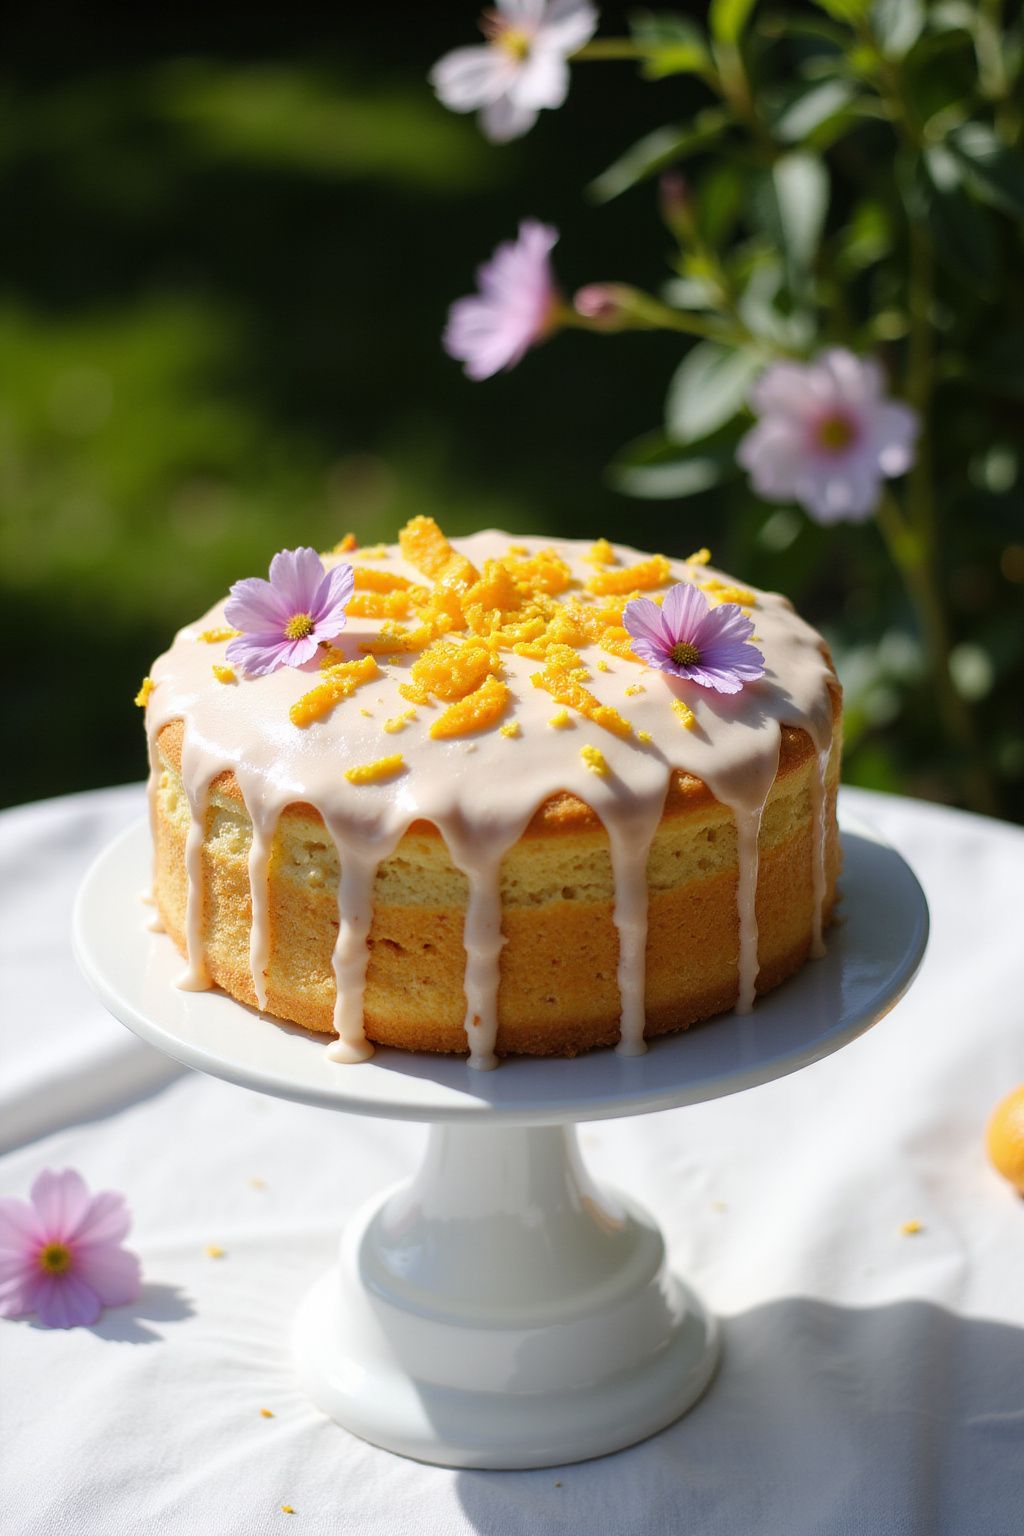
The Mother’s Day Citrus Blossom Cake is a delightful treat that brings sunny flavors and smiles on this special day. With hints of lemon and orange, this cake is a perfect way to say "I love you" to the moms in your life. Let’s get baking!
Prep Time: 20 minutes
Cook Time: 30 minutes
Additional Time: 15 minutes (cooling)
Total Time: 1 hour 5 minutes
Servings: 12
Ingredients:
- 2 cups all-purpose flour
- 1 ½ cups granulated sugar
- ½ cup unsalted butter, softened
- 1 cup milk
- 3 large eggs
- 2 teaspoons baking powder
- ½ teaspoon salt
- Zest of 1 lemon
- Zest of 1 orange
- Juice of 1 lemon
- Juice of 1 orange
- 1 teaspoon vanilla extract
Instructions:
Start by preheating your oven to 350°F (175°C). Grease and flour a 9×13 inch cake pan to prepare it for the batter.
In a large mixing bowl, cream together the softened butter and granulated sugar until it’s light and fluffy. This should take about 3-4 minutes with an electric mixer.
Next, add the eggs, vanilla extract, lemon juice, and orange juice to the bowl. Mix until all the ingredients are combined well.
In another bowl, sift together the flour, baking powder, and salt. Gradually add this dry mixture to the wet ingredients. Mix just until combined; avoid over-mixing.
Fold in the lemon and orange zest gently. This adds a wonderful citrus flavor to your cake. Pour the batter into the prepared pan and smooth the top with a spatula.
Bake in your preheated oven for 30 minutes or until a toothpick inserted in the center comes out clean. Once done, remove the cake from the oven and let it cool in the pan for about 15 minutes.
Finally, transfer the cake to a wire rack to cool completely. Once cooled, you can frost it or enjoy it plain!
Tips:
- For extra flavor, try adding a citrus glaze made from powdered sugar and citrus juice.
- Decorate the cake with fresh flowers or edible petals for a beautiful Mother’s Day presentation.
- Enjoy the cake with a scoop of vanilla ice cream for a delicious dessert treat!
Nutrition Facts:
- Calories: 350
- Protein: 5g
- Carbohydrates: 55g
- Fat: 14g
- Sugar: 30g
- Fiber: 1g
2 Velvet Rose Chocolate Cake
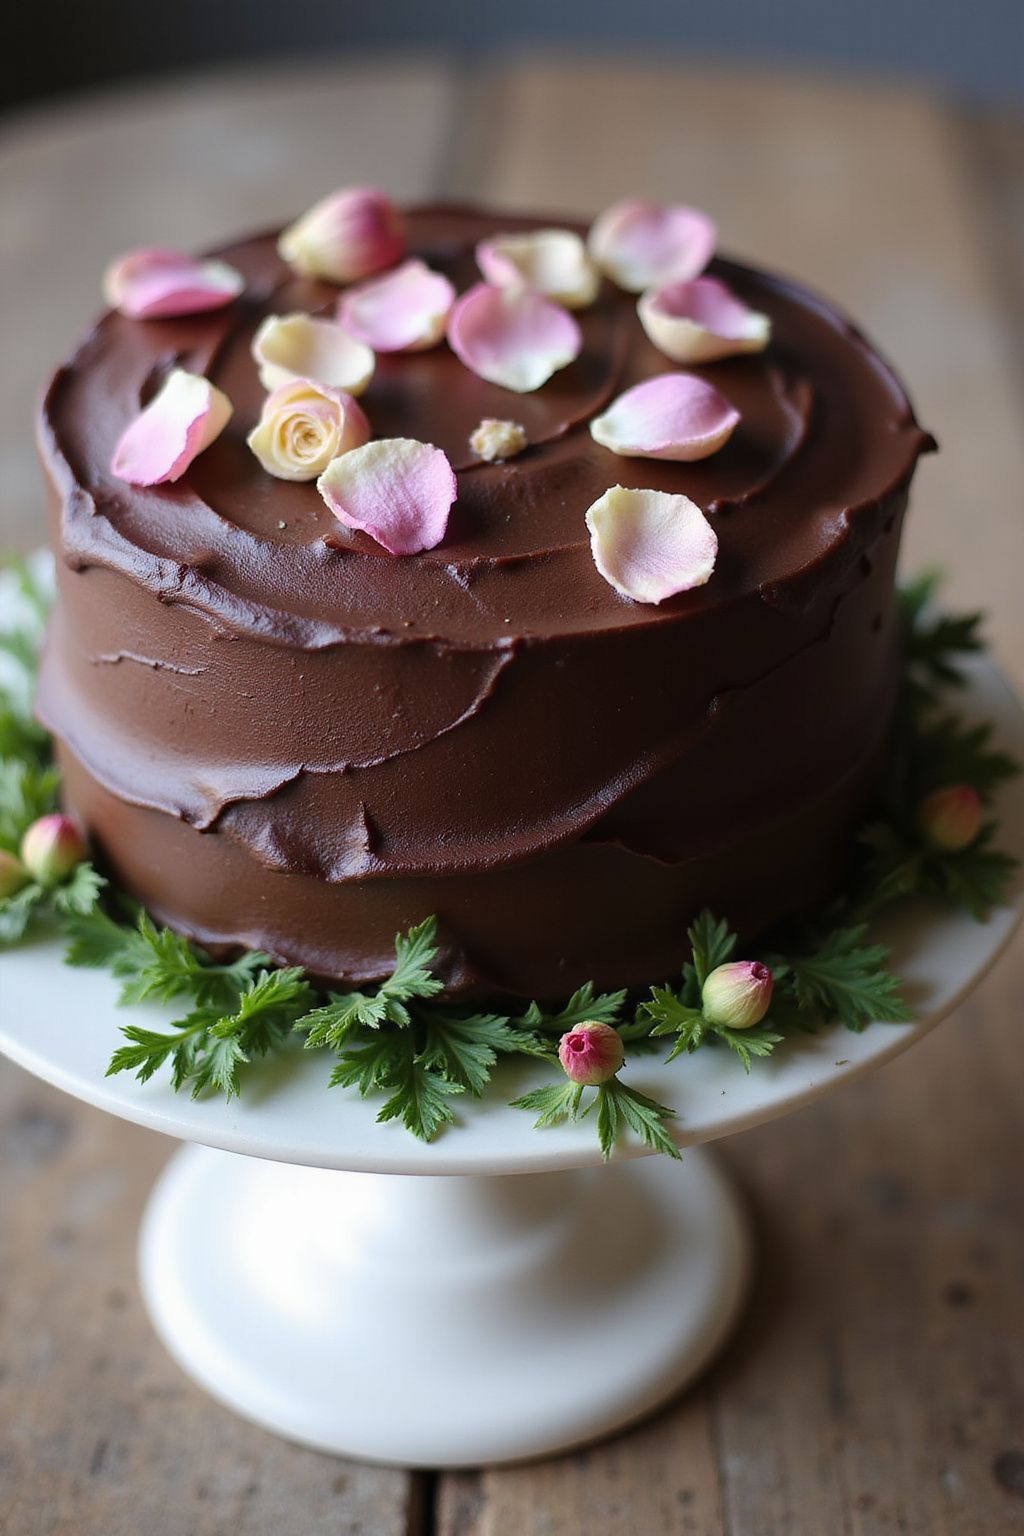
Indulge in the delightful taste of Velvet Rose Chocolate Cake! This rich, moist cake is perfect for any celebration or simply to enjoy with a cup of coffee. Adorned with velvety chocolate frosting and a touch of rose essence, it’s not just a treat for the taste buds but a feast for the eyes too.
Prep Time: 30 minutes
Cook Time: 25 minutes
Additional Time: 15 minutes (for cooling)
Total Time: 1 hour 10 minutes
Servings: 10
Ingredients:
- 1 ½ cups all-purpose flour
- 1 cup granulated sugar
- ½ cup unsweetened cocoa powder
- 1 tsp baking soda
- ½ tsp salt
- 1 cup buttermilk
- ½ cup vegetable oil
- 2 large eggs
- 1 tsp vanilla extract
- 1 tsp rose water
- ½ cup boiling water
Instructions:
Start by preheating your oven to 350°F (175°C). Grease and flour two 9-inch round cake pans to ensure the cakes come out easily.
In a large mixing bowl, combine flour, sugar, cocoa powder, baking soda, and salt. Whisk these dry ingredients together until they are well mixed.
Next, add in the buttermilk, vegetable oil, eggs, vanilla extract, and rose water. Beat everything together on medium speed for about 2 minutes until the mixture is smooth and well combined.
Carefully stir in the boiling water to the batter. This step makes the cake extra moist, so don’t skip it! The batter will look quite thin, but that’s normal.
Now, divide the batter evenly between the two prepared cake pans. Bake in the preheated oven for 25 minutes, or until a toothpick inserted in the center comes out clean.
Once baked, take the cakes out of the oven and let them cool in the pans for about 15 minutes. Then, transfer them to a wire rack to cool completely.
While the cakes are cooling, you can prepare your favorite chocolate frosting. Once the cakes are completely cool, spread a layer of frosting on top of one cake, place the second cake on top, and frost the top and sides.
Decorate with edible rose petals or chocolate shavings for an elegant touch. Enjoy your delicious Velvet Rose Chocolate Cake!
Tips:
- For a deeper chocolate flavor, consider adding chocolate chips to the batter.
- If you prefer a stronger rose flavor, increase the rose water slightly, but be careful not to overpower it.
- This cake pairs wonderfully with a dollop of whipped cream or a scoop of vanilla ice cream.
Nutrition Facts:
- Calories: 350 per serving
- Total Fat: 15g
- Saturated Fat: 3g
- Cholesterol: 45mg
- Sodium: 200mg
- Total Carbohydrates: 50g
- Dietary Fiber: 2g
- Sugars: 28g
- Protein: 6g
3 Strawberry Shortcake Delight
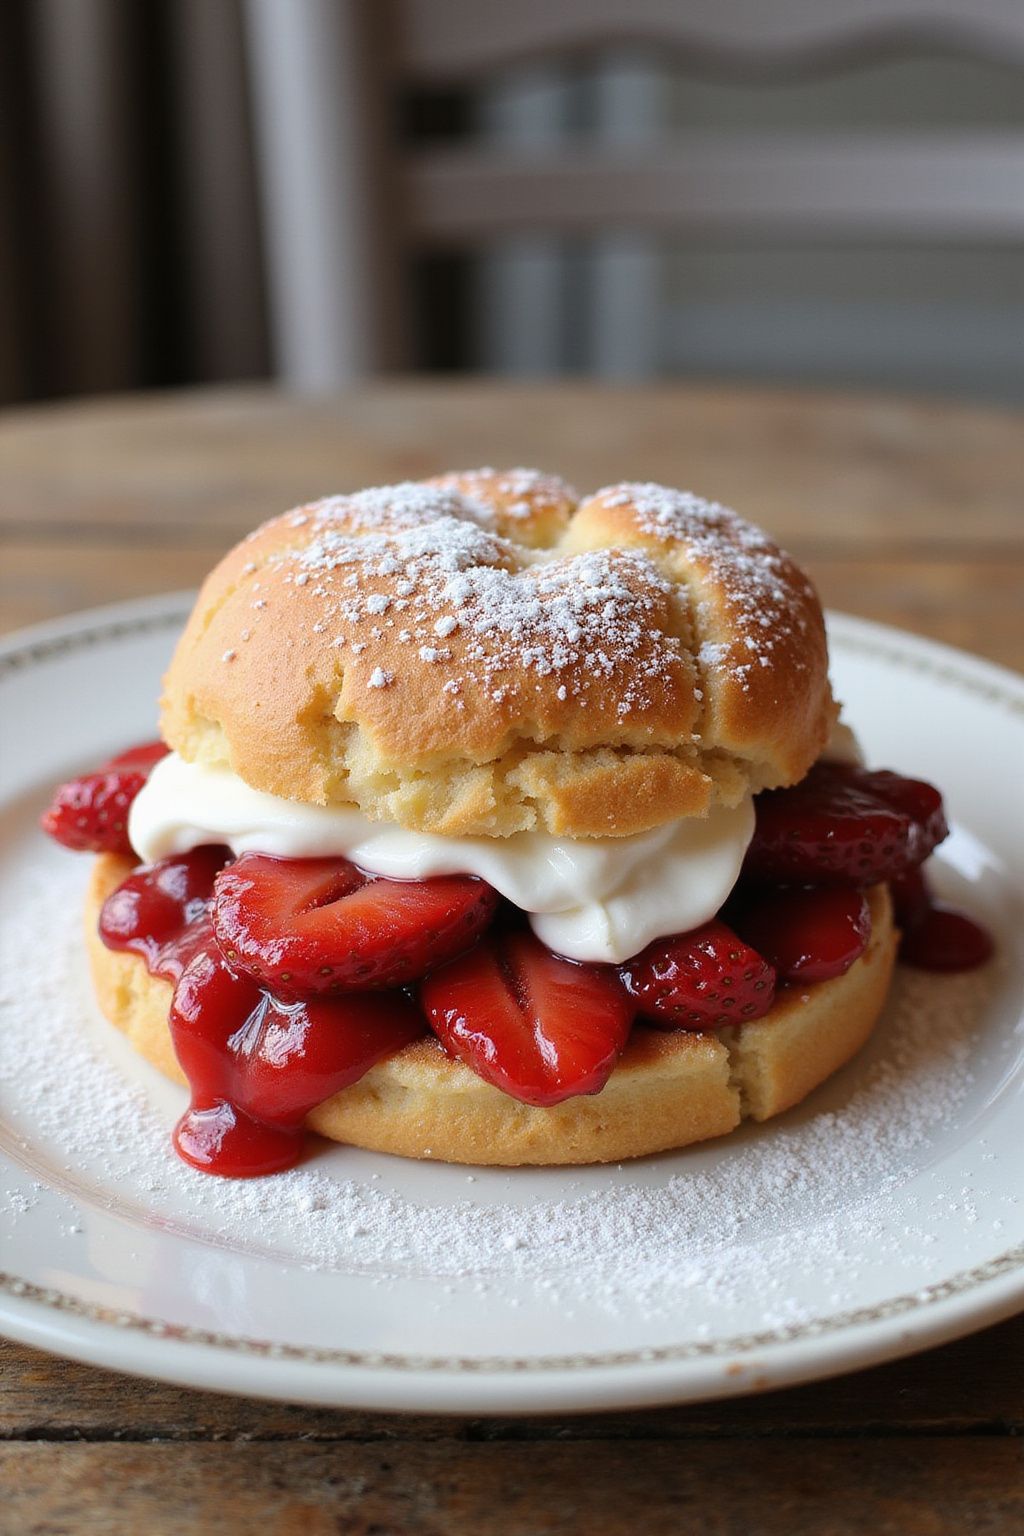
Strawberry Shortcake Delight is a bright and fresh dessert that’s perfect for any occasion. With fluffy whipped cream, sweet strawberries, and tender shortcake, it’s a crowd-pleaser that everyone will love. Get ready to impress your friends and family with this delightful treat!
Prep Time: 20 minutes
Additional Time: 30 minutes
Total Time: 50 minutes
Servings: 8
Ingredients:
- 2 cups fresh strawberries, hulled and sliced
- 1/4 cup granulated sugar
- 2 cups all-purpose flour
- 2 tsp baking powder
- 1/2 tsp baking soda
- 1/4 tsp salt
- 6 tbsp unsalted butter, cold and cubed
- 3/4 cup buttermilk
- 1 tsp vanilla extract
- 1 cup heavy whipping cream
- 1/4 cup powdered sugar
- 1 tsp vanilla extract
Instructions:
Start by preparing the strawberries. In a medium bowl, combine the sliced strawberries and granulated sugar. Toss them together and set aside for about 30 minutes to let the strawberries release their juices.
Next, preheat your oven to 425°F (220°C). In a large bowl, whisk together the flour, baking powder, baking soda, and salt. Cut in the cold butter using a pastry cutter or your fingers until the mixture resembles coarse crumbs.
Pour in the buttermilk and vanilla extract, and mix until just combined. Be careful not to overmix the batter. On a lightly floured surface, turn out the dough and knead it gently a few times. Pat it into a rectangle about 1 inch thick.
Using a biscuit cutter, cut out rounds of dough, and place them on a baking sheet lined with parchment paper. Bake for 12-15 minutes, or until lightly golden on top. Once done, let them cool completely.
While the shortcakes are baking, it’s time to whip the cream. In a large bowl, beat the heavy whipping cream with a mixer on medium speed. Add in the powdered sugar and vanilla extract, and continue to beat until you reach soft peaks.
To assemble the Strawberry Shortcake Delight, slice the cooled shortcakes in half horizontally. Layer the bottom half with a generous amount of strawberries and some of the juice. Top it with a dollop of whipped cream, then place the other half of the shortcake on top. Finish with more strawberries and whipped cream if you like.
Tips:
- For extra flavor, you can add a splash of lemon juice to the strawberries.
- Serve the shortcakes immediately after assembling to keep them fresh.
- If you want to make this ahead, store the whipped cream and strawberries separately until you’re ready to serve.
Nutrition Facts:
- Calories: 300
- Total Fat: 15g
- Saturated Fat: 9g
- Cholesterol: 45mg
- Sodium: 200mg
- Total Carbohydrates: 35g
- Dietary Fiber: 1g
- Sugars: 12g
- Protein: 4g
4 Lemon Lavender Bundt Cake
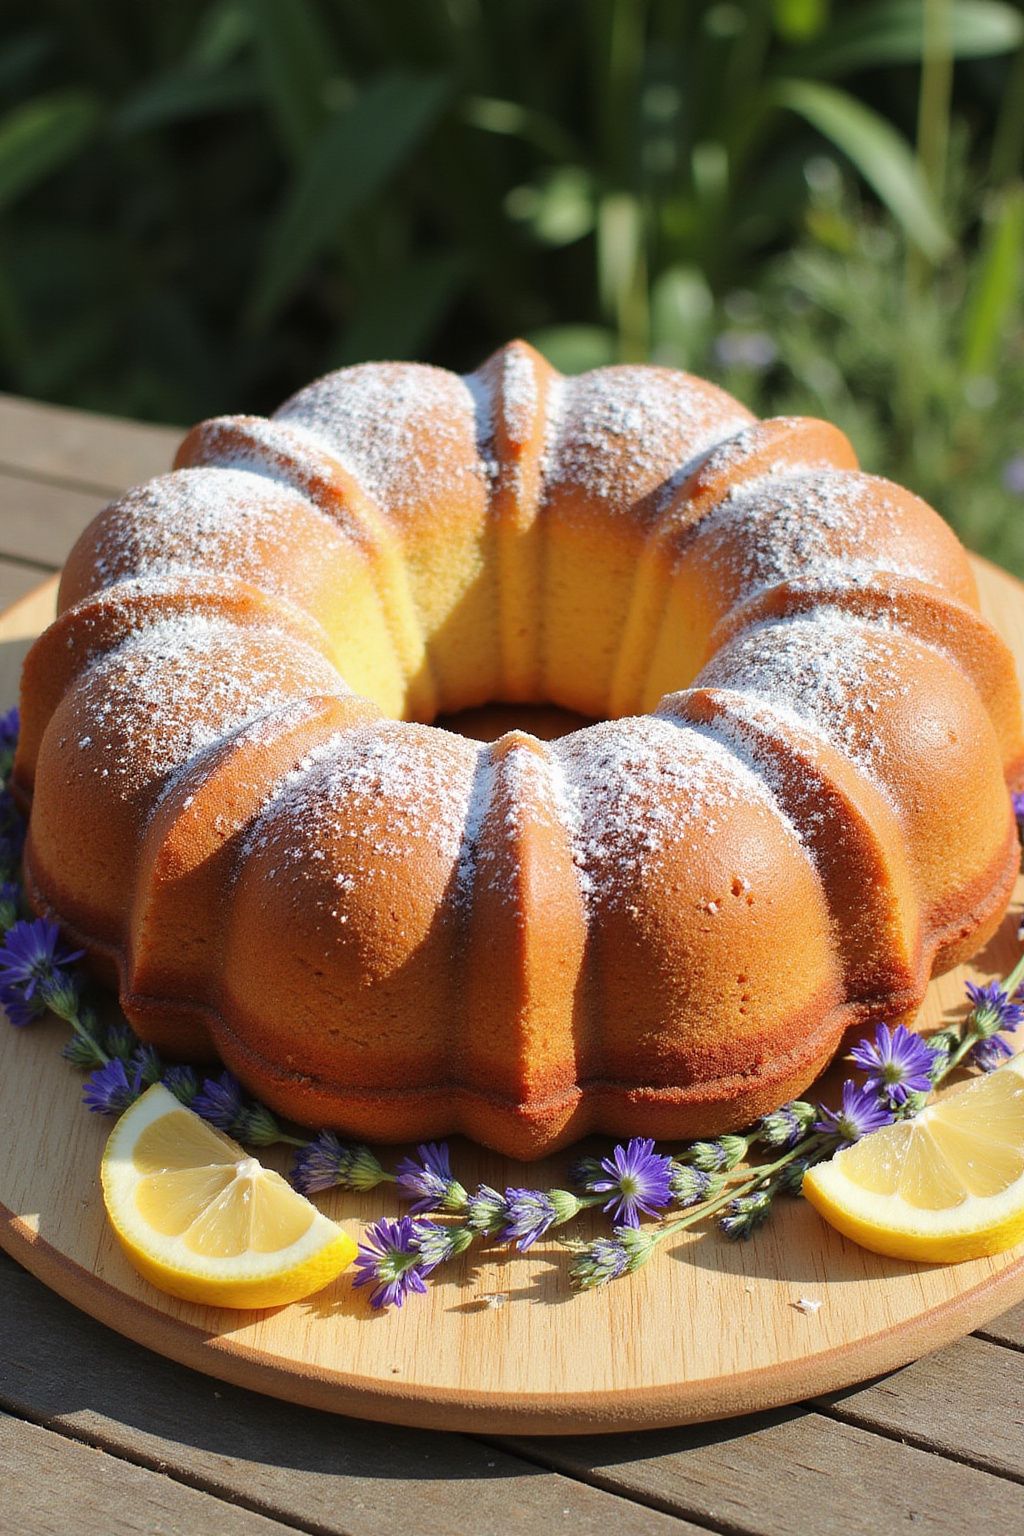
This Lemon Lavender Bundt Cake is a delightful combination of zesty lemon and fragrant lavender. It’s perfect for special occasions or a simple afternoon treat. The moist texture and bright flavor will leave you and your guests wanting more!
Prep Time: 20 minutes
Cook Time: 50 minutes
Additional Time: 10 minutes (for cooling)
Total Time: 1 hour and 20 minutes
Servings: 10
Ingredients:
- 2 cups all-purpose flour
- 1 cup granulated sugar
- 1/2 cup unsalted butter, softened
- 1 cup buttermilk
- 3 large eggs
- 1 tablespoon lemon zest
- 1/4 cup fresh lemon juice
- 1 tablespoon dried lavender
- 1 teaspoon vanilla extract
- 1 teaspoon baking powder
- 1/2 teaspoon baking soda
- 1/2 teaspoon salt
- Optional: Powdered sugar for dusting
Instructions:
Start by preheating your oven to 350°F (175°C). Grease and flour your bundt pan well to ensure the cake comes out easily after baking.
In a large mixing bowl, cream together the butter and granulated sugar until it’s light and fluffy. This should take about 3 to 4 minutes. Next, add the eggs, one at a time, beating well after each addition.
Now, mix in the lemon zest, lemon juice, vanilla extract, and dried lavender. Stir until everything is well combined. In a separate bowl, whisk together the flour, baking powder, baking soda, and salt.
Slowly add the dry ingredients to the wet mixture in three parts, alternating with the buttermilk. Start and end with the flour mixture. Mix until just combined, being careful not to overmix.
Pour the batter into the prepared bundt pan. Bake in the preheated oven for about 50 minutes, or until a toothpick inserted in the center comes out clean. Allow the cake to cool in the pan for 10 minutes before flipping it onto a wire rack.
Let the cake cool completely before dusting with powdered sugar, if desired.
Tips:
- Use fresh lemon juice for the best flavor in your cake.
- Make sure to measure the flour accurately; scooping directly from the bag can lead to too much flour.
- Store leftover cake in an airtight container at room temperature for a few days.
Nutrition Facts:
- Calories: 300 per serving
- Protein: 4g
- Carbohydrates: 45g
- Fat: 12g
- Fiber: 1g
- Sugar: 20g
5 Classic Vanilla Bean Layer Cake
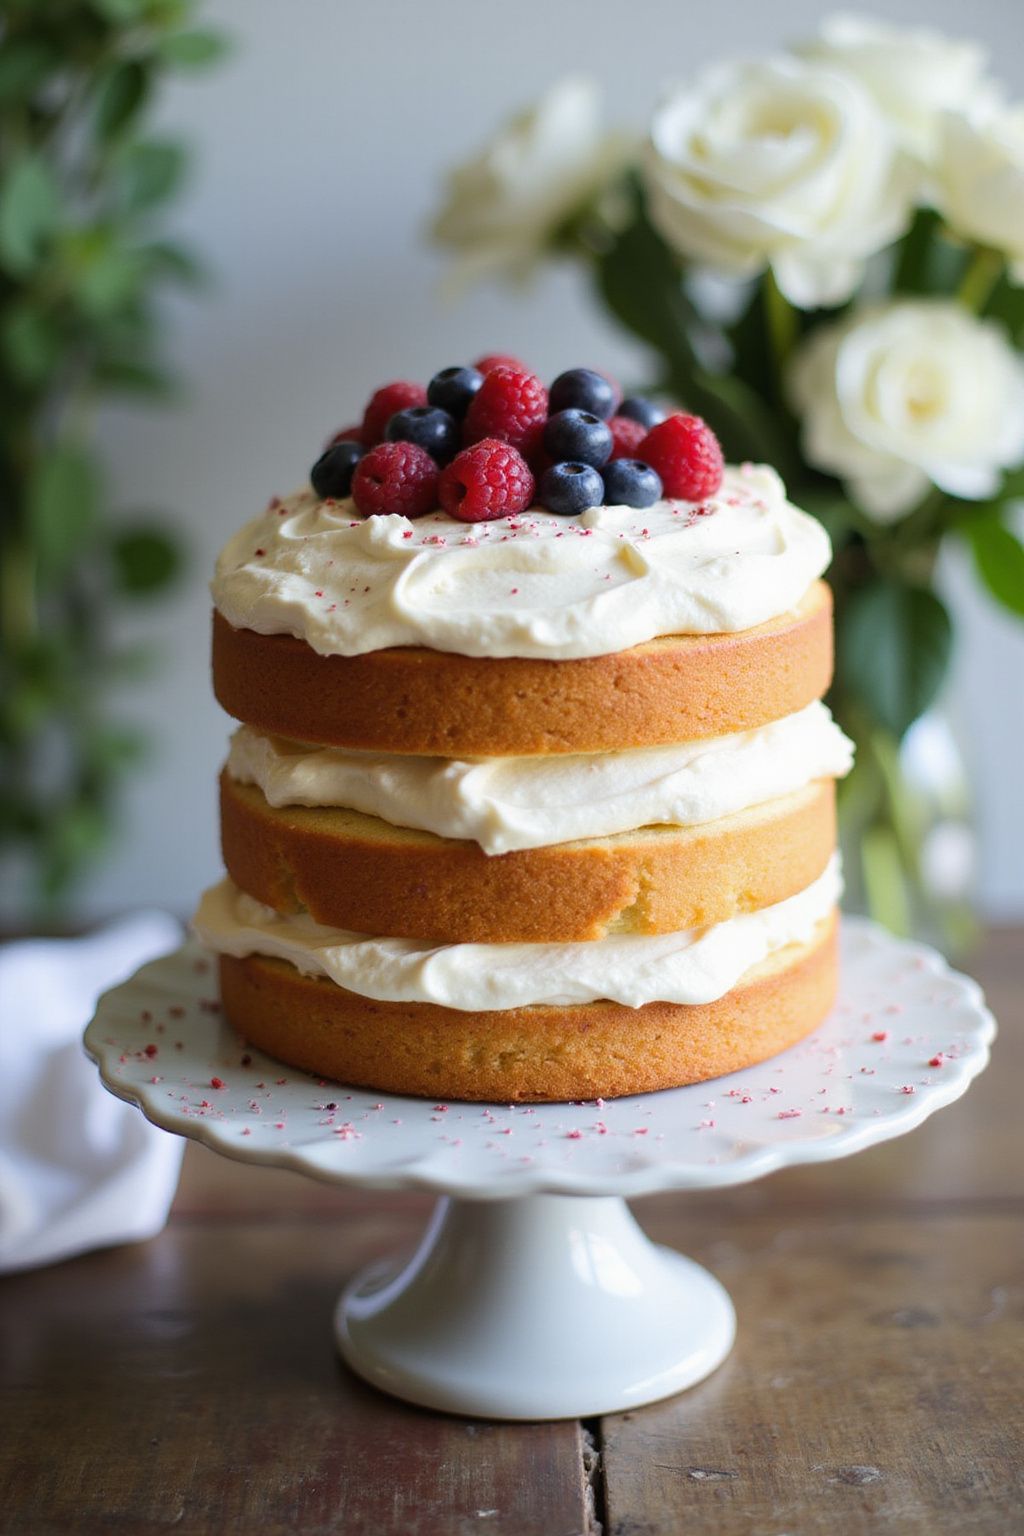
This Classic Vanilla Bean Layer Cake is a delightful treat that’s perfect for any occasion. With its light and fluffy texture, and the rich flavor of real vanilla beans, it’s sure to impress your family and friends. Let’s dive into this simple yet delicious recipe!
Prep Time: 30 minutes
Cook Time: 25 minutes
Additional Time: 1 hour (for cooling and frosting)
Total Time: 1 hour 55 minutes
Servings: 10
Ingredients:
- 2 ½ cups all-purpose flour
- 1 ½ cups granulated sugar
- 1 cup unsalted butter (softened)
- 1 cup whole milk
- 4 large eggs
- 1 tablespoon baking powder
- 1 teaspoon salt
- 1 tablespoon pure vanilla extract
- 1 vanilla bean (scraped)
- 2 cups vanilla buttercream frosting (for assembling and decorating)
Instructions:
Start by preheating your oven to 350°F (175°C). Grease and flour two 9-inch round cake pans to prevent sticking.
In a large bowl, cream together the butter and sugar until it’s light and fluffy. This process usually takes about 3-4 minutes.
Now, add the eggs, one at a time, mixing well after each addition. Scrape the sides of the bowl to ensure everything blends perfectly. Then, stir in the vanilla extract and the scraped seeds from the vanilla bean.
In a separate bowl, whisk together the flour, baking powder, and salt. Gradually add this dry mixture to the butter mixture, alternating with the milk. Start and end with the flour mixture, mixing just until combined.
Divide the batter evenly between the prepared cake pans. Bake for 20-25 minutes, or until a toothpick inserted in the center comes out clean. When done, remove the pans from the oven and let them cool for about 10 minutes before transferring them to a wire rack to cool completely.
Once the cakes are completely cool, take one layer and place it on your serving plate. Spread a generous amount of vanilla buttercream frosting on top. Place the second layer on top and frost the entire cake with the remaining frosting. Decorate as you wish!
Tips:
- Allow your eggs and butter to come to room temperature for better mixing.
- Substitute buttermilk for whole milk for an even richer flavor.
- For extra decoration, consider adding fresh berries or sprinkles on top of the frosting.
Nutrition Facts:
- Calories: 400 per slice
- Total Fat: 18g
- Saturated Fat: 11g
- Cholesterol: 85mg
- Sodium: 180mg
- Total Carbohydrates: 58g
- Dietary Fiber: 1g
- Sugars: 30g
- Protein: 5g
6 Raspberry Swirl Cheesecake
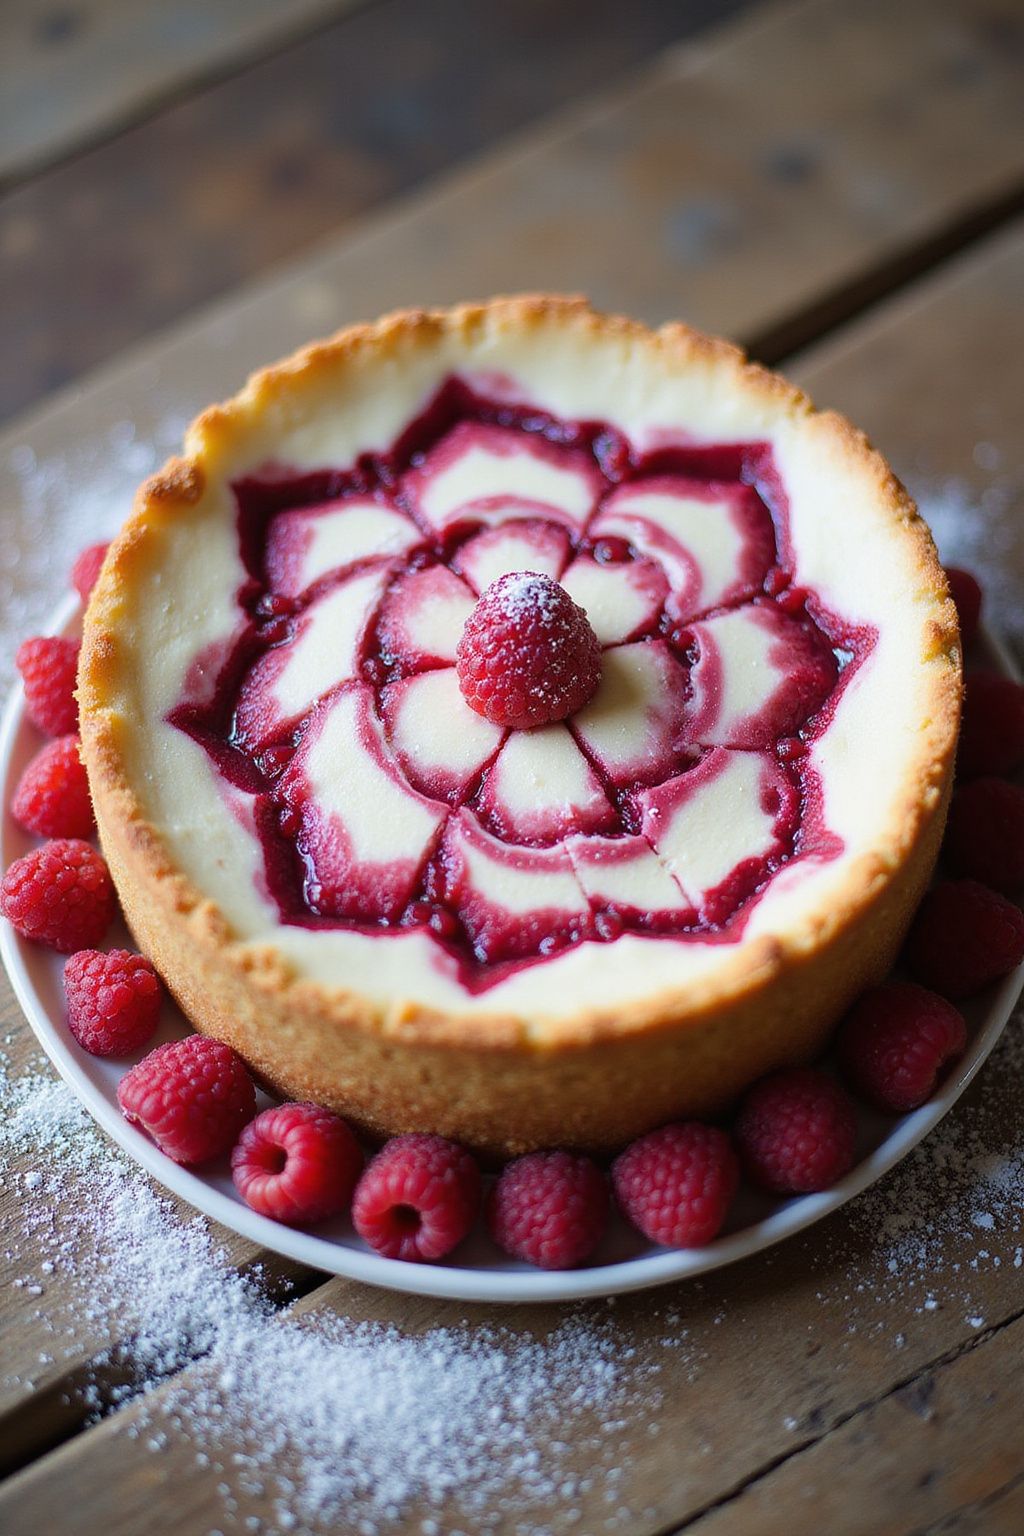
A Raspberry Swirl Cheesecake is a delicious dessert that combines creamy cheesecake with tangy raspberry flavor. It’s perfect for special occasions or just a treat at home. The vibrant purple swirls make it as beautiful as it is tasty!
Prep Time: 20 minutes
Cook Time: 1 hour
Additional Time: 4 hours (to chill)
Total Time: 5 hours 20 minutes
Servings: 12
Ingredients:
For the Crust:
- 1 ½ cups of graham cracker crumbs
- ⅓ cup of granulated sugar
- ½ cup of unsalted butter, melted
For the Cheesecake Filling:
- 4 (8 oz) packages of cream cheese, softened
- 1 cup of granulated sugar
- 1 teaspoon of vanilla extract
- 4 large eggs
- 1 cup of sour cream
For the Raspberry Swirl:
- 1 cup of fresh raspberries (or frozen, thawed)
- ½ cup of granulated sugar
- 1 tablespoon of lemon juice
Instructions:
To start, preheat your oven to 325°F (160°C). Next, in a bowl, mix the graham cracker crumbs, granulated sugar, and melted butter. Press this mixture into the bottom of a 9-inch springform pan to create the crust. Bake for about 10 minutes, then let it cool.
Now, prepare the cheesecake filling. In a large mixing bowl, beat the cream cheese until it’s smooth. Gradually add in the sugar and vanilla extract, mixing well. Next, add eggs one at a time, making sure to blend each one in completely before adding the next. Finally, mix in the sour cream until everything is smooth and creamy.
For the raspberry swirl, blend the raspberries, sugar, and lemon juice in a food processor until it becomes a smooth puree. Pour the cheesecake filling over the cooled crust. Then, drop spoonfuls of the raspberry puree on top of the cheesecake filling. Use a knife or a toothpick to create swirls in the cheesecake.
Bake the cheesecake in the oven for about 1 hour, or until it is set but still slightly jiggly in the center. After baking, turn off the oven and let the cheesecake cool inside for about 1 hour. Then, refrigerate for at least 4 hours, or overnight, to set completely.
When you’re ready to serve, remove the cheesecake from the springform pan and enjoy the beautiful raspberry swirls!
Tips:
- To keep the cheesecake from cracking, let it cool gradually in the oven after baking.
- You can use store-bought raspberry sauce if you’re short on time.
- Serve your cheesecake topped with extra raspberries for a fun presentation.
Nutrition Facts:
- Calories: 350 per slice
- Total Fat: 24g
- Saturated Fat: 14g
- Cholesterol: 85mg
- Carbohydrates: 28g
- Sugar: 20g
- Protein: 6g
7 Mocha Espresso Drip Cake
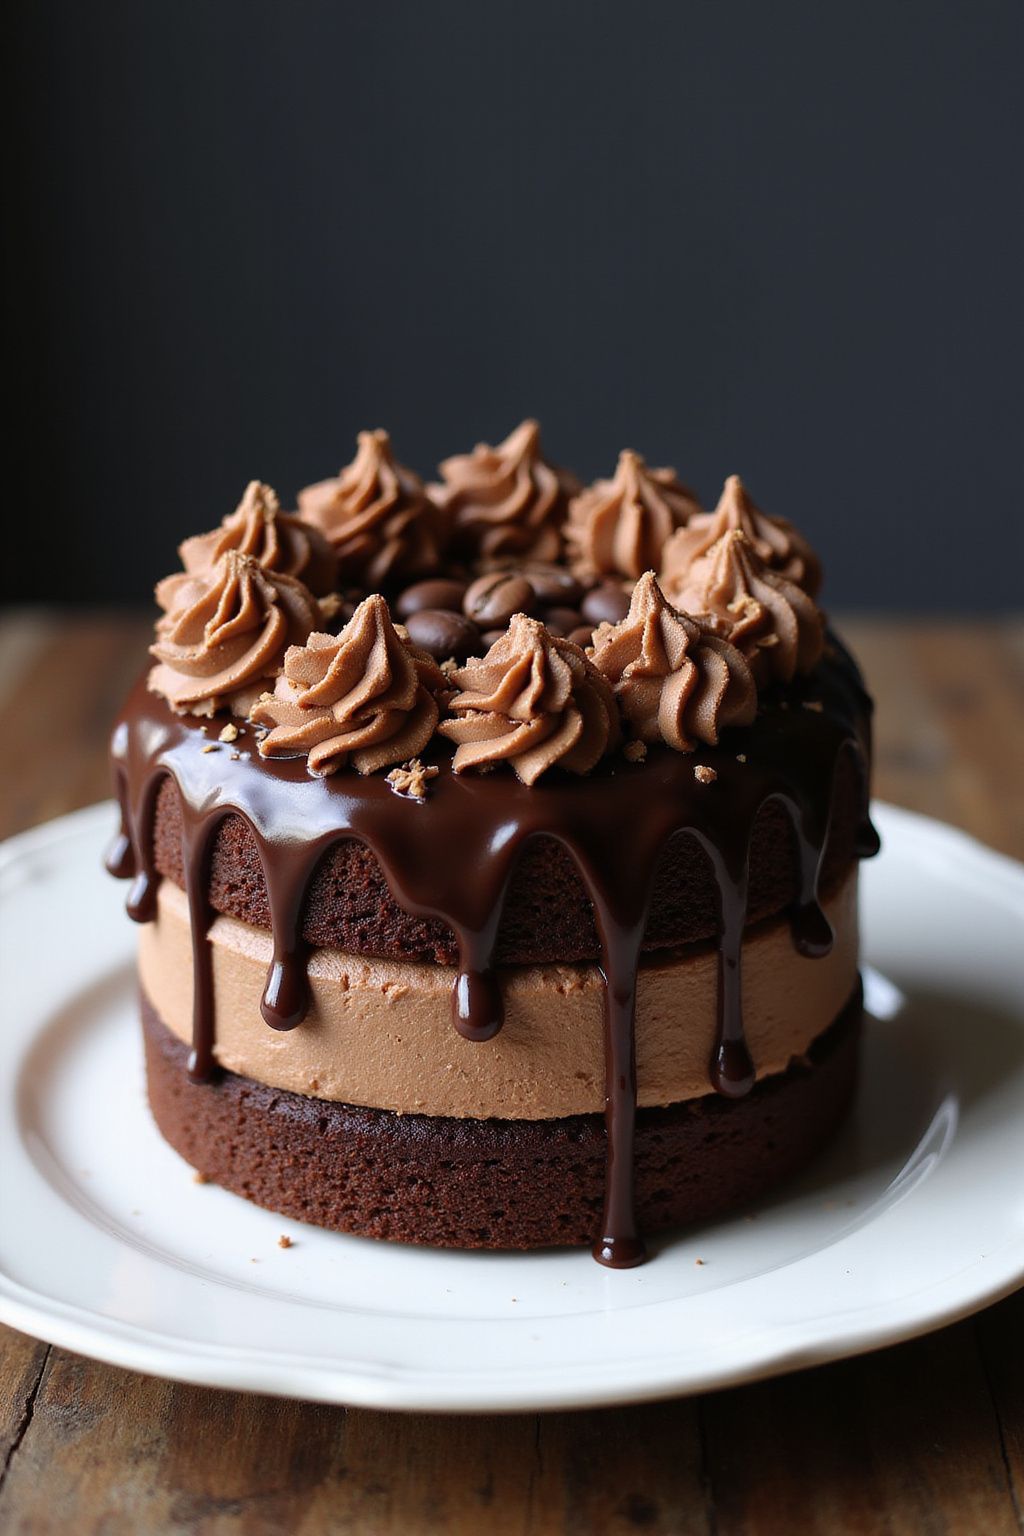
This Mocha Espresso Drip Cake is perfect for coffee lovers! It’s a delicious blend of rich chocolate, espresso, and creamy frosting. Every bite will leave you wanting more!
Prep Time: 30 minutes
Cook Time: 25 minutes
Additional Time: 1 hour (for cooling and decorating)
Total Time: 1 hour 55 minutes
Servings: 8-10
Ingredients:
- 1 ¾ cups all-purpose flour
- 1 ½ cups granulated sugar
- ¾ cup unsweetened cocoa powder
- 1 ½ teaspoons baking powder
- 1 ½ teaspoons baking soda
- ½ teaspoon salt
- 2 large eggs
- 1 cup whole milk
- ½ cup vegetable oil
- 2 teaspoons vanilla extract
- 1 cup boiling water
- 1 tablespoon instant espresso powder
Instructions:
Start by preheating your oven to 350°F (175°C). Grease and flour two 9-inch cake pans. This will help your cake come out easily once baked.
In a large bowl, combine flour, sugar, cocoa powder, baking powder, baking soda, and salt. Mix these dry ingredients together until well blended.
Add in the eggs, whole milk, vegetable oil, and vanilla extract to the dry mixture. Using a hand mixer, beat on medium speed for about 2 minutes. The batter will be smooth and thick.
Now, stir in the boiling water and instant espresso powder. Be careful, as the batter will be very thin at this point. Pour the batter evenly into the prepared cake pans.
Bake in the preheated oven for 25-30 minutes. You can check if they’re done by inserting a toothpick in the center. If it comes out clean, they’re ready!
Once baked, let the cakes cool in the pans for about 10 minutes. Then, transfer them to a wire rack to cool completely.
While the cakes cool, prepare a mocha frosting by mixing 1 cup softened butter with 3-4 cups powdered sugar, ½ cup cocoa powder, and 2 tablespoons brewed espresso. Beat until fluffy.
Frost the top of one cake layer, place the second layer on top, and frost the entire cake. For the drip, melt ½ cup chocolate and combine it with ¼ cup heavy cream until smooth. Drizzle this mixture over the top of the cake, letting it drip down the sides.
Tips:
- Make it Awesome – Add chocolate shavings or coffee beans on top for extra flair!
- Store it Right – Keep leftover cake in an airtight container at room temperature for up to 3 days.
- Flavor Boost – For a richer flavor, use dark chocolate cocoa powder.
Nutrition Facts:
- Calories: 400 per slice
- Total Fat: 18g
- Saturated Fat: 10g
- Cholesterol: 70mg
- Sodium: 180mg
- Total Carbohydrates: 58g
- Dietary Fiber: 3g
- Sugars: 35g
- Protein: 5g
8 Coconut Cream Paradise Cake

Get ready to indulge in a slice of heaven with this Coconut Cream Paradise Cake! Bursting with rich coconut flavors and a creamy texture, this cake is perfect for any celebration. Your taste buds are in for a treat!
Prep Time: 20 minutes
Cook Time: 30 minutes
Additional Time: 2 hours (for cooling and setting)
Total Time: 2 hours 50 minutes
Servings: 12
Ingredients:
For the Cake:
- 2 cups all-purpose flour
- 1 1/2 cups granulated sugar
- 1 cup unsweetened shredded coconut
- 1/2 cup unsalted butter, softened
- 1 cup coconut milk
- 3 1/2 teaspoons baking powder
- 1 teaspoon vanilla extract
- 1/2 teaspoon salt
- 4 large eggs
For the Coconut Cream Frosting:
- 1 cup heavy whipping cream
- 1 cup powdered sugar
- 1 teaspoon vanilla extract
- 1 cup cream of coconut
For Garnish:
- Additional shredded coconut
- Fresh cherries or pineapple slices (optional)
Instructions:
Begin by preheating your oven to 350°F (175°C). Grease and flour two 9-inch round cake pans to prevent sticking.
In a large bowl, mix together all-purpose flour, granulated sugar, shredded coconut, baking powder, and salt. Change the mixer speed to low and add in the softened butter, coconut milk, and vanilla extract. Mix until combined.
Now, add the eggs one at a time, beating well after each addition. Make sure the batter is smooth and well-blended. Pour the batter evenly into the prepared cake pans.
Bake in the preheated oven for about 30 minutes, or until a toothpick inserted in the center comes out clean. Remove the cakes from the oven and allow them to cool in the pans for about 10 minutes, then transfer them to wire racks to cool completely.
While the cakes are cooling, prepare the Coconut Cream Frosting. In a large bowl, beat the heavy whipping cream until soft peaks form. Gradually add the powdered sugar and continue beating until stiff peaks form. Carefully fold in the cream of coconut and vanilla extract until everything is well combined.
Once the cakes are cool, place one cake layer on a serving plate. Spread a generous amount of the frosting on top, then place the second cake layer on top of the frosting. Spread the frosting over the top and around the sides of the cake.
For the final touch, sprinkle additional shredded coconut on top and garnish with fresh cherries or pineapple slices, if desired. Chill the cake for at least 2 hours before serving to let the flavors meld.
Tips:
- For a more intense coconut flavor, you can toast the shredded coconut before adding it to the cake batter.
- If you want to make the cake ahead of time, it can be stored in the refrigerator for up to 5 days.
- Feel free to add a layer of pineapple between the cake layers for an extra tropical twist!
Nutrition Facts:
- Calories: 350 per serving
- Fat: 22g
- Carbohydrates: 37g
- Protein: 4g
- Sugar: 25g
9 Almond Joy Surprise Cake
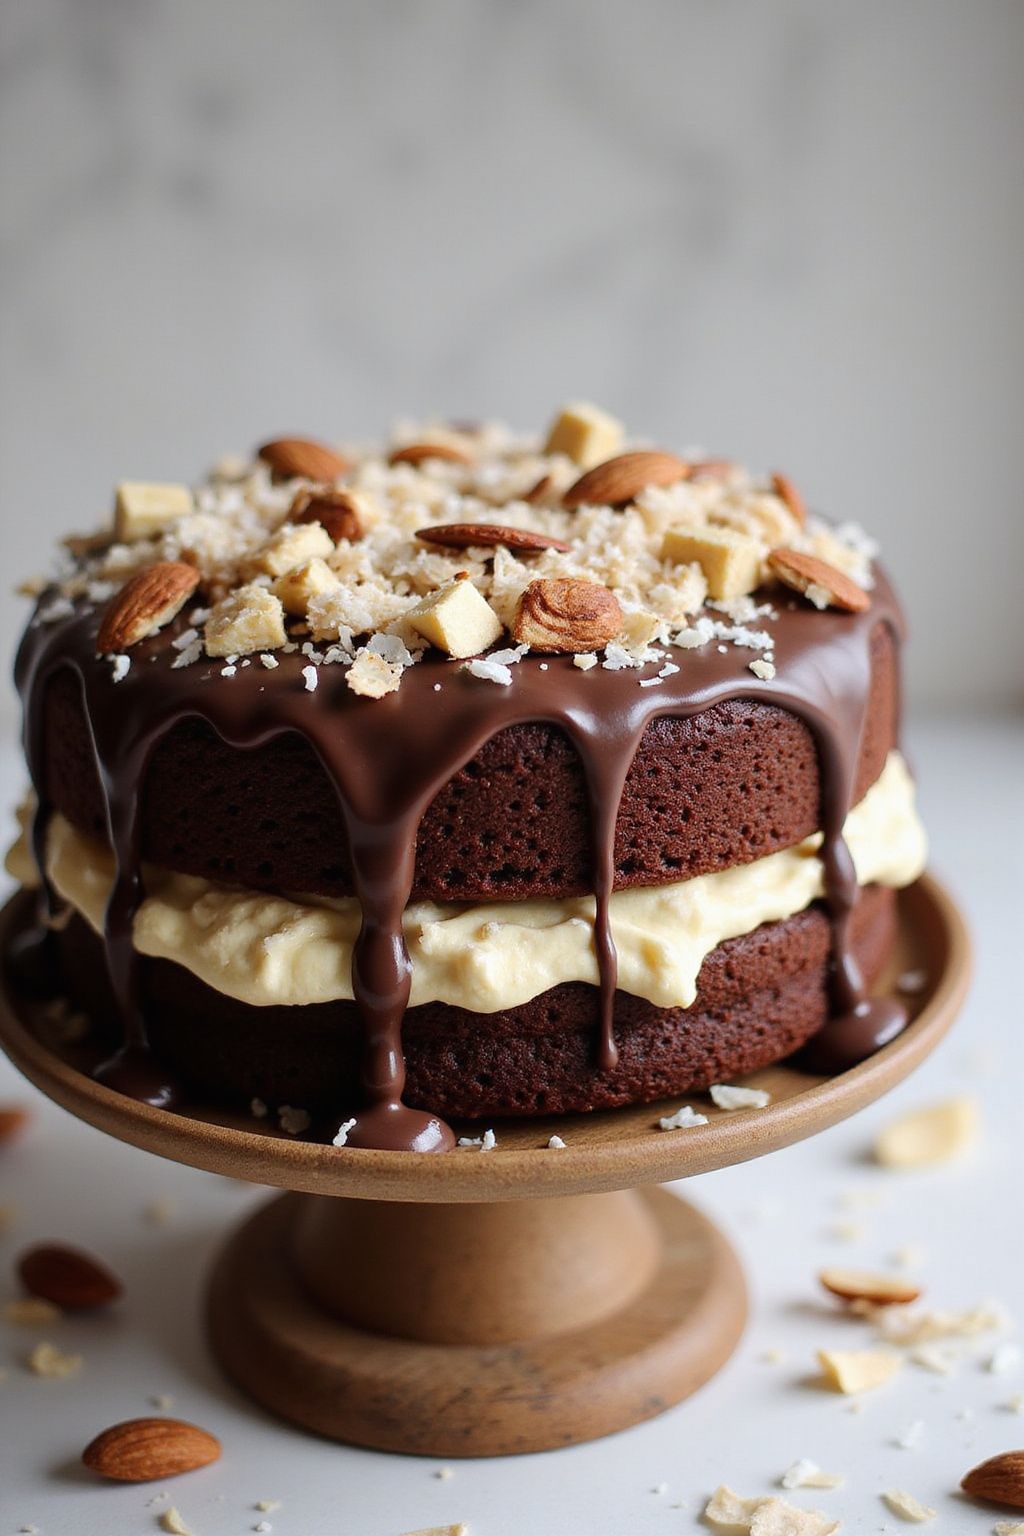
Indulge in the rich flavors of the Almond Joy Surprise Cake! This delightful cake captures the essence of the famous candy bar with layers of chocolate, coconut, and almond goodness. Perfect for birthday celebrations or just a sweet treat any day of the week!
Prep Time: 20 minutes
Cook Time: 30 minutes
Additional Time: 30 minutes
Total Time: 1 hour 20 minutes
Servings: 12
Ingredients:
- 1 ¾ cups all-purpose flour
- 1 ½ cups granulated sugar
- ½ cup unsweetened cocoa powder
- 1 ½ teaspoons baking powder
- 1 teaspoon baking soda
- ½ teaspoon salt
- 2 large eggs
- 1 cup whole milk
- ½ cup vegetable oil
- 2 teaspoons vanilla extract
- 1 cup boiling water
- 1 cup shredded coconut
- 1 cup chopped almonds
- 1 cup chocolate frosting (store-bought or homemade)
Instructions:
Start by preheating your oven to 350°F (175°C). Grease and flour two 9-inch round cake pans.
In a large mixing bowl, combine the flour, sugar, cocoa powder, baking powder, baking soda, and salt. Mix these dry ingredients well. Next, add the eggs, milk, vegetable oil, and vanilla extract. Beat on medium speed until the batter is smooth and well combined.
Now, gradually add the boiling water and mix until fully incorporated. The batter will be thin, but that’s okay! Pour the batter evenly into your prepared cake pans.
Bake the cakes in the preheated oven for about 30 minutes, or until a toothpick inserted into the center comes out clean. Once done, remove the cakes from the oven and let them cool in the pans for about 10 minutes. Then, transfer them to a wire rack to cool completely.
After the cakes are cooled, take one cake layer and spread a layer of chocolate frosting on top. Sprinkle shredded coconut and chopped almonds evenly over the frosting. Place the second cake layer on top and frost the entire cake with the remaining frosting. Decorate the top with more coconut and almonds for an extra touch!
Tips:
- For added flavor, toast the chopped almonds in a dry skillet before adding them to the frosting.
- If you want to make the cake ahead of time, bake the layers and store them in the refrigerator, wrapped tightly in plastic wrap.
- Use almond extract instead of vanilla for an even more intense almond flavor!
Nutrition Facts:
- Calories: 350 per serving
- Total Fat: 14g
- Saturated Fat: 6g
- Cholesterol: 50mg
- Sodium: 250mg
- Total Carbohydrates: 53g
- Dietary Fiber: 2g
- Sugars: 30g
- Protein: 5g
10 Honey Maple Pecan Cake
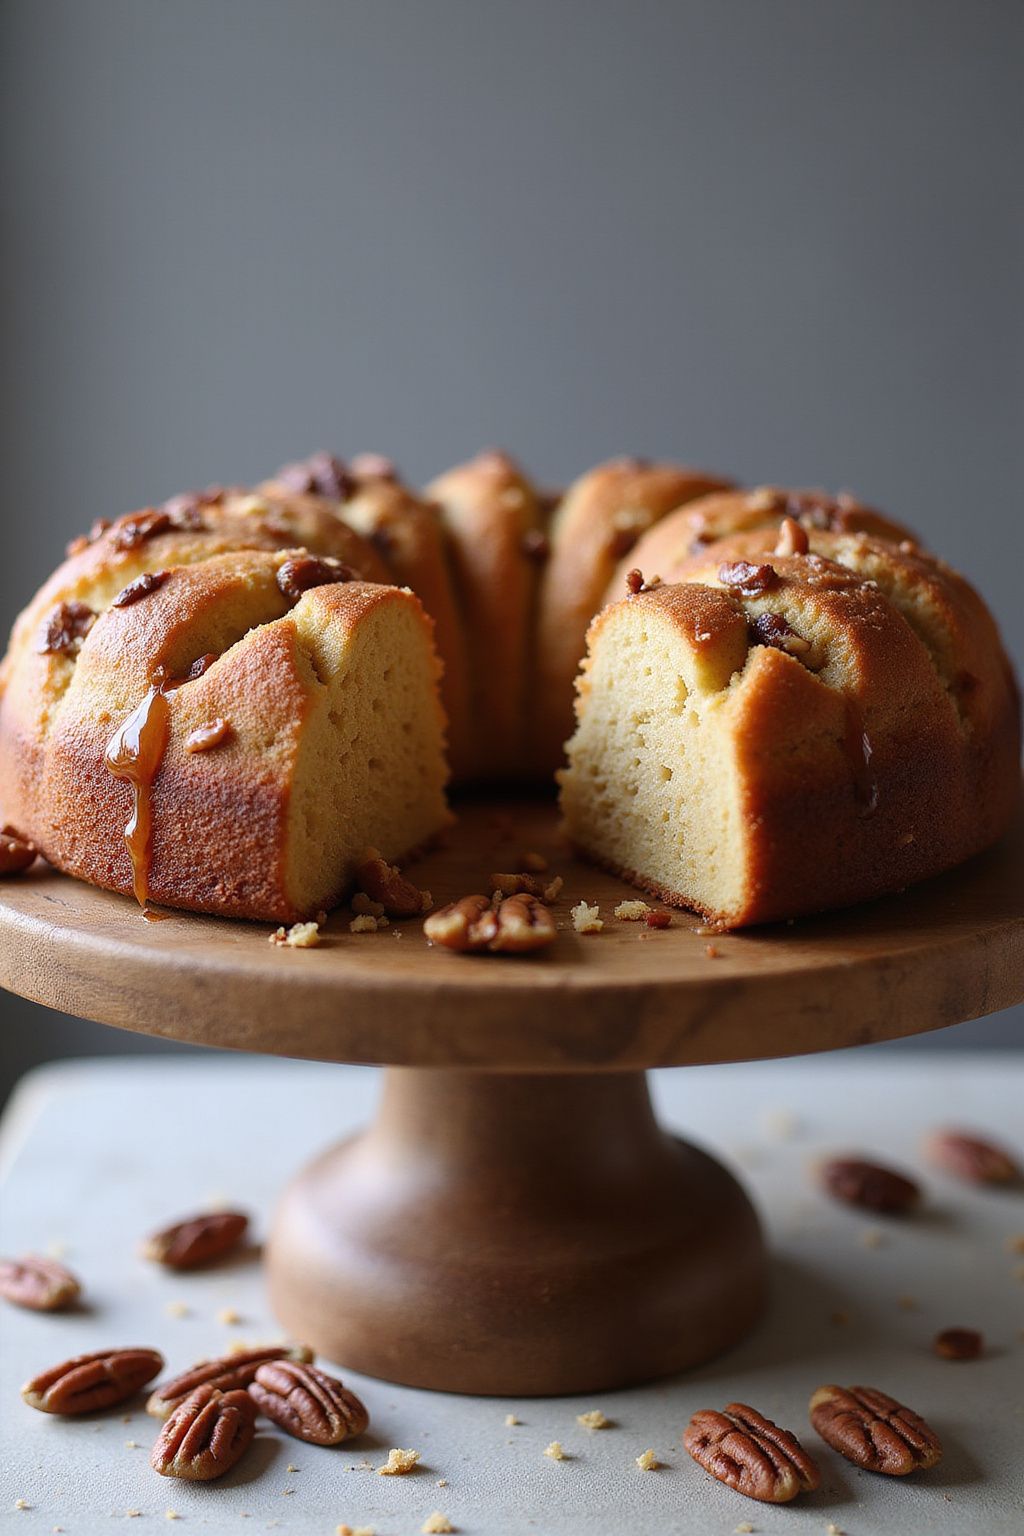
This Honey Maple Pecan Cake is a delightful treat that brings together the rich flavors of honey and maple syrup with crunchy pecans. It’s perfect for a family gathering or just a cozy weekend at home. You won’t believe how easy it is to whip up this delicious cake!
Prep Time: 20 minutes
Cook Time: 30 minutes
Additional Time: 10 minutes
Total Time: 1 hour
Servings: 8
Ingredients:
- 1 ½ cups all-purpose flour
- 1 teaspoon baking powder
- ½ teaspoon baking soda
- ¼ teaspoon salt
- ½ cup unsalted butter, softened
- ½ cup granulated sugar
- ½ cup honey
- ¼ cup pure maple syrup
- 3 large eggs
- 1 teaspoon vanilla extract
- 1 cup chopped pecans
Instructions:
Preheat your oven to 350°F (175°C). Grease a 9-inch round cake pan and line the bottom with parchment paper to prevent sticking.
In a medium bowl, whisk together the flour, baking powder, baking soda, and salt. Set this mixture aside for later use.
In a large bowl, beat the butter and sugar together until the mixture is light and fluffy. This usually takes about 3-5 minutes.
Add in the honey, maple syrup, eggs, and vanilla extract to the butter mixture. Mix everything until it’s smooth and well combined.
Gradually add the dry ingredients into the wet ingredients, mixing just until everything comes together. Make sure not to overmix!
Now, fold in the chopped pecans gently. This will add a lovely crunch to the cake.
Pour the batter into the prepared cake pan and spread it evenly. Bake for about 30 minutes or until a toothpick inserted in the center comes out clean.
Once it’s done, let the cake cool in the pan for 10 minutes, then transfer it to a wire rack to cool completely.
Tips:
- For extra flavor, toast the pecans in a dry skillet for a few minutes before adding them to the batter.
- Drizzle additional honey or maple syrup on top of the cooled cake for a sweet finish.
- Serve with whipped cream or vanilla ice cream for an extra treat!
Nutrition Facts:
- Calories: 350 per serving
- Total Fat: 15g
- Saturated Fat: 8g
- Cholesterol: 70mg
- Carbohydrates: 50g
- Fiber: 1g
- Sugar: 25g
- Protein: 6g
11 Red Velvet Love Cake

Red Velvet Love Cake is a delightful dessert that combines rich cocoa flavors with a touch of vanilla. This visually stunning cake has a beautiful red hue, making it perfect for special occasions or just to express your love for someone. Let’s get started!
Prep Time: 30 minutes
Cook Time: 25 minutes
Additional Time: 1 hour
Total Time: 1 hour 55 minutes
Servings: 12
Ingredients:
- 2 ½ cups all-purpose flour
- 2 tablespoons unsweetened cocoa powder
- 1 ½ cups sugar
- 1 teaspoon baking soda
- 1 teaspoon salt
- 1 ½ cups vegetable oil
- 1 cup buttermilk, room temperature
- 2 large eggs
- 2 tablespoons red food coloring
- 1 teaspoon vanilla extract
- 1 teaspoon white vinegar
- Cream cheese frosting (for layering and decorating, see below)
For Cream Cheese Frosting:
- 1 cup cream cheese, softened
- ½ cup unsalted butter, softened
- 4 cups powdered sugar
- 1 teaspoon vanilla extract
- 1-2 tablespoons milk (if needed for consistency)
Instructions:
First, preheat your oven to 350°F (175°C). Grease and flour two round 9-inch cake pans to prevent sticking.
In a large mixing bowl, whisk together 2 ½ cups flour, 2 tablespoons cocoa powder, 1 ½ cups sugar, 1 teaspoon baking soda, and 1 teaspoon salt. Mix well until the dry ingredients are fully combined.
In another bowl, combine 1 ½ cups oil, 1 cup buttermilk, and 2 large eggs. Then add 2 tablespoons red food coloring, 1 teaspoon vanilla extract, and 1 teaspoon white vinegar. Stir everything together until smooth.
Next, pour the wet ingredients into the dry ingredients. Mix until just combined, being careful not to over-mix the batter.
Divide the batter evenly between the two prepared cake pans. Bake for 25 minutes or until a toothpick inserted into the center comes out clean.
Once done, let the cakes cool in the pans for about 10 minutes, then transfer them to wire racks to cool completely, about 1 hour.
While the cakes cool, prepare the cream cheese frosting. In a bowl, beat 1 cup cream cheese and ½ cup butter together until creamy. Gradually add 4 cups powdered sugar and 1 teaspoon vanilla extract, mixing until smooth. Add 1-2 tablespoons milk if the frosting is too thick.
Once the cakes are cool, place one layer on a serving plate. Spread a generous amount of cream cheese frosting on top. Carefully place the second cake layer on top and frost the top and sides of the entire cake.
Decorate your Red Velvet Love Cake as desired, and enjoy sharing it with your loved ones!
Tips:
- For an extra special touch, add some chocolate shavings or sprinkles on top of the frosting.
- If you’re short on time, you can use a store-bought cream cheese frosting as a shortcut.
- You can store leftovers in an airtight container in the refrigerator for up to 3 days.
Nutrition Facts:
- Calories: 350 per serving
- Total Fat: 18g
- Saturated Fat: 8g
- Cholesterol: 55mg
- Sodium: 250mg
- Total Carbohydrates: 45g
- Dietary Fiber: 1g
- Sugars: 34g
- Protein: 3g
12 Tropical Mango Pineapple Upside-Down Cake
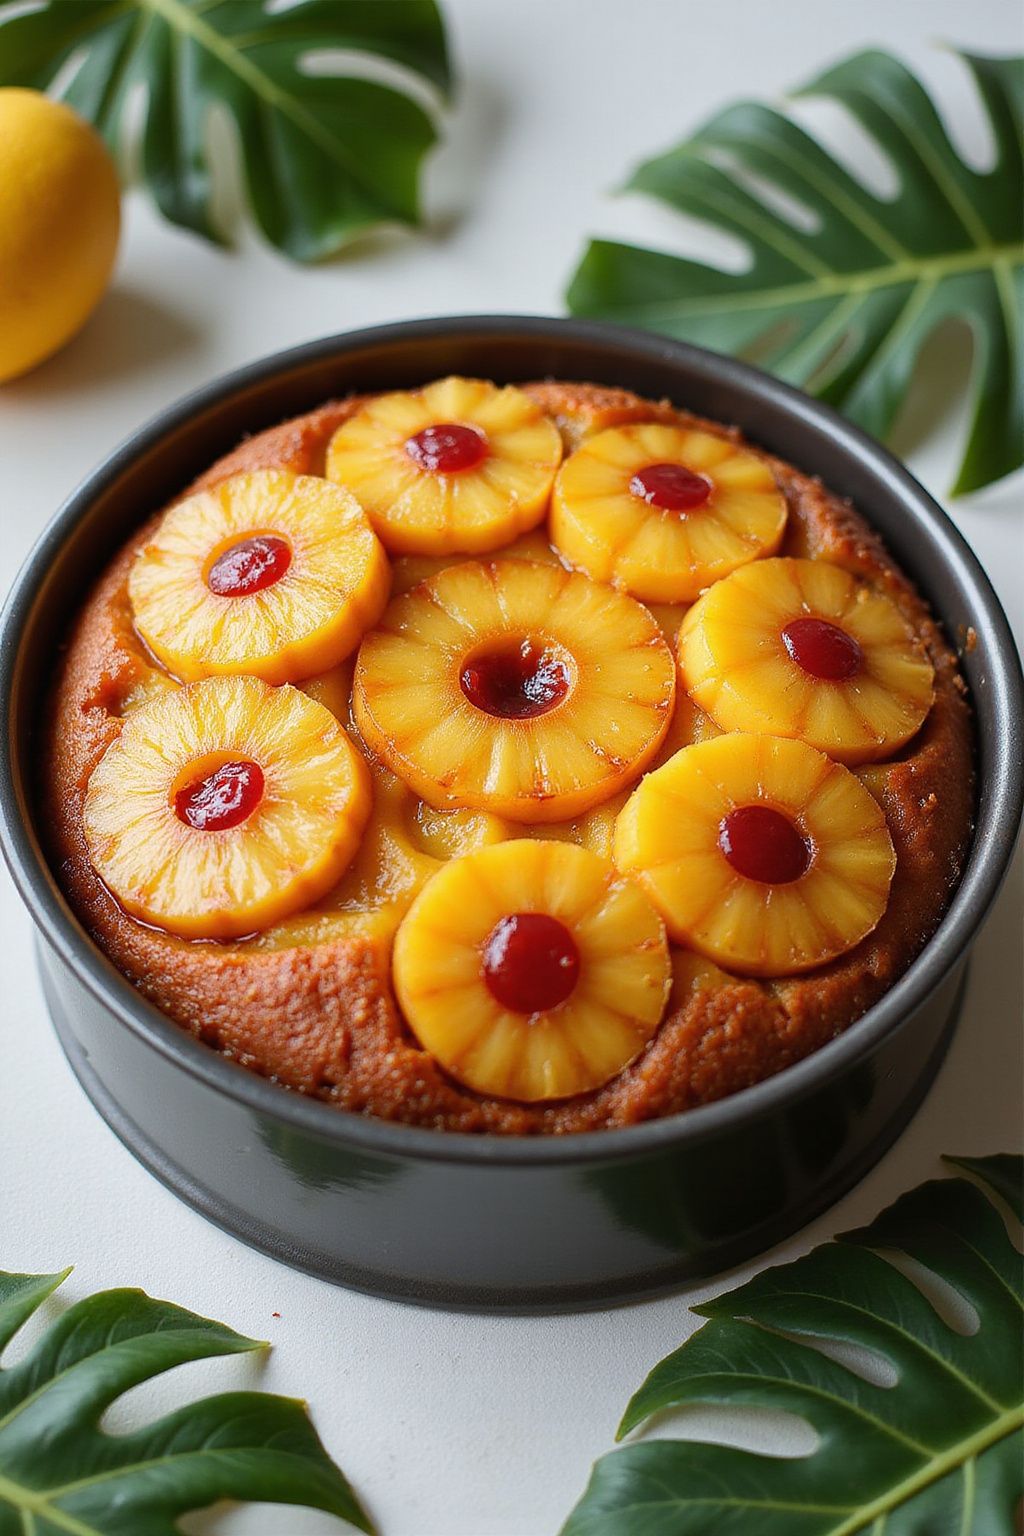
This Tropical Mango Pineapple Upside-Down Cake is a delightful twist on the classic dessert. Bursting with juicy fruits, it will transport your taste buds to a sunny paradise. Perfect for summer gatherings or a fresh treat anytime!
Prep Time: 15 minutes
Cook Time: 40 minutes
Additional Time: 10 minutes
Total Time: 1 hour 5 minutes
Servings: 8
Ingredients:
- 1 cup brown sugar
- 1/4 cup unsalted butter, melted
- 1 can (20 oz) pineapple slices in juice, drained
- 1 ripe mango, peeled, pitted, and sliced
- 1 1/2 cups all-purpose flour
- 1 cup granulated sugar
- 1/2 cup whole milk
- 1/2 cup unsalted butter, softened
- 3 large eggs
- 2 tsp baking powder
- 1/2 tsp vanilla extract
- 1/4 tsp salt
Instructions:
Preheat your oven to 350°F (175°C). In a mixing bowl, combine the brown sugar and melted butter. Stir well until the mixture is smooth. Pour this evenly into the bottom of a greased 9-inch round cake pan.
Next, arrange the pineapple slices on top of the brown sugar mixture. Place the mango slices in between the pineapple slices for a colorful look.
In another bowl, beat together the granulated sugar, softened butter, and eggs until creamy. Gradually add the milk, vanilla extract, baking powder, salt, and flour. Mix until just combined and pour the batter over the fruit layer in the cake pan.
Bake in the preheated oven for 35 to 40 minutes, or until a toothpick inserted in the center comes out clean. Once baked, remove from the oven and let it cool in the pan for about 10 minutes.
Carefully invert the cake onto a serving plate, letting the fruits sit on top. Serve warm or at room temperature. Enjoy the tropical flavors with each slice!
Tips:
- Make sure to slice the mango thinly so it cooks evenly.
- You can add a sprinkle of shredded coconut on top before baking for extra tropical flair!
- Serve with whipped cream or vanilla ice cream for extra sweetness.
Nutrition Facts:
- Calories: 320
- Fat: 12g
- Carbohydrates: 52g
- Fiber: 1g
- Sugar: 30g
- Protein: 4g