My New Cookbook is Out! Check Out Now!
20 Best Easter Finger Foods for Parties and Gatherings
This page contains affiliate links and I earn a commission if you make a purchase through one of the links, at no cost to you.
Did you know that Easter celebrations often include a variety of dishes that symbolize new beginnings and rebirth? This year, elevate your festivities with our collection of the 20 Best Easter Finger Foods that are perfect for parties and gatherings. From delightful Mini Carrot Cake Bites to vibrant Rainbow Veggie Pinwheels, get ready to impress your guests with delicious bites that capture the essence of the season!
Shop Our Must-Haves


1. Spring Herb Deviled Eggs
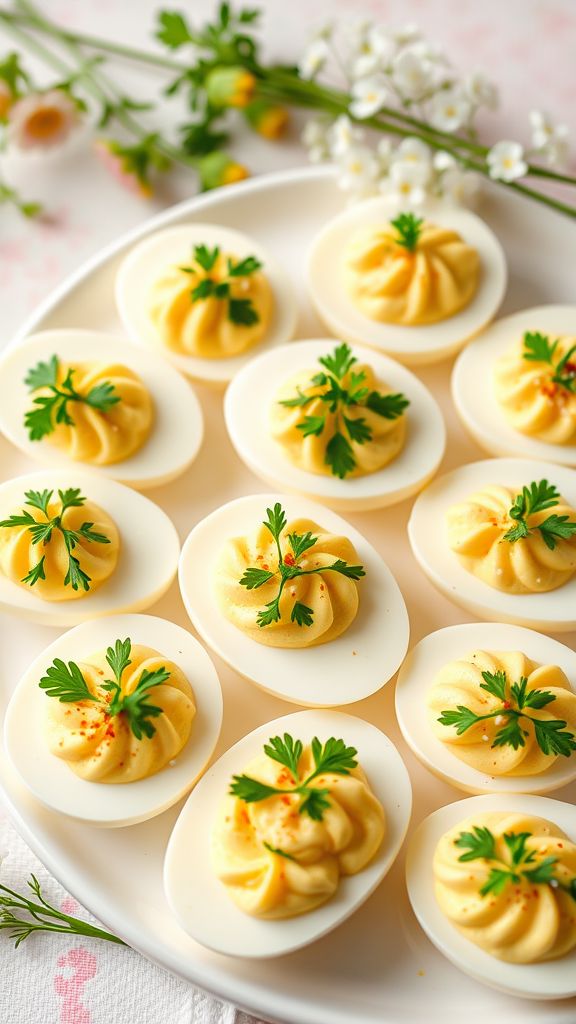
Celebrate the freshness of spring with these delightful Spring Herb Deviled Eggs. Packed with vibrant flavors and herbs, this twist on a classic appetizer is perfect for any Easter celebration or spring gathering. These eggs are not only tasty but also add a pop of color to your table!
Prep Time: 15 minutes
Additional Time: 30 minutes
Total Time: 45 minutes
Servings: 12 deviled eggs
Ingredients:
- 6 large eggs
- 2 tablespoons mayonnaise
- 1 teaspoon Dijon mustard
- 1 tablespoon fresh parsley, finely chopped
- 1 tablespoon fresh chives, finely chopped
- 1 tablespoon fresh dill, finely chopped
- Salt and pepper, to taste
- Paprika, for garnish
Instructions:
Start by boiling the eggs. Place them in a pot and cover with water. Bring the water to a boil over medium-high heat. Once boiling, cover the pot and remove it from heat. Let the eggs sit for 12 minutes.
After the time is up, transfer the eggs to an ice bath to stop the cooking process. Let them cool for about 10 minutes before peeling. Once the eggs are cool, gently tap them on a hard surface and peel away the shell under running water for ease.
Cut each egg in half lengthwise. Carefully scoop out the yolks and place them in a mixing bowl. Add mayonnaise, Dijon mustard, and the chopped herbs to the yolks. Season with salt and pepper to taste. Mash the mixture until smooth and creamy.
Spoon or pipe the yolk mixture back into the egg whites. Sprinkle a little paprika on top for an extra touch of flavor and color. Arrange the filled deviled eggs on a serving platter and refrigerate for 30 minutes before serving to allow the flavors to meld.
Extra Tips:
- For a touch of kick, consider adding a dash of hot sauce to the yolk filling.
- Experiment with other herbs like basil or cilantro for unique flavor combinations.
- These deviled eggs can be made a day ahead; just cover tightly and refrigerate until service.
Nutrition Facts:
- Calories: 60 per egg half
- Protein: 5g
- Fat: 4g
- Carbohydrates: 1g
- Cholesterol: 186mg
- Sodium: 50mg
2. Mini Carrot Cake Bites

These Mini Carrot Cake Bites are the perfect sweet treats to celebrate any occasion, especially Easter. They’re moist, flavorful, and topped with a creamy frosting that will leave everyone wanting more. Make them for gatherings or just to enjoy with a cup of tea!
Prep Time: 20 minutes
Total Time: 20 minutes
Servings: 24 bites
Ingredients:
- 1 cup finely grated carrots
- 1/2 cup all-purpose flour
- 1/2 teaspoon baking powder
- 1/2 teaspoon baking soda
- 1/2 teaspoon ground cinnamon
- 1/4 teaspoon salt
- 1/3 cup granulated sugar
- 1/4 cup brown sugar
- 1/4 cup vegetable oil
- 1 large egg
- 1 teaspoon vanilla extract
- 1/2 cup crushed pineapple, drained
- 1/2 cup chopped walnuts (optional)
Instructions:
Begin by preheating your oven to 350°F (175°C) and lining a mini muffin tin with paper liners. This will ensure that your carrot cake bites don’t stick to the pan while baking.
In a large bowl, combine the flour, baking powder, baking soda, cinnamon, and salt. Mix everything well until evenly distributed.
In another mixing bowl, whisk together the granulated sugar, brown sugar, vegetable oil, egg, and vanilla extract until the mixture is smooth. Then, fold in the finely grated carrots and the drained pineapple until well combined.
Next, gradually add the dry ingredients into the wet ingredients. Stir until just combined to ensure that you don’t overmix. If you’re adding them, fold in the walnuts next.
Spoon the batter into the prepared mini muffin tin, filling each cup about two-thirds full. Bake in the preheated oven for about 12-15 minutes, or until a toothpick inserted into the center of a bite comes out clean. Be careful not to overbake.
Once done, let the mini carrot cake bites cool in the tin for about 5 minutes, then transfer them to a wire rack to cool completely before frosting.
Extra Tips:
- For a festive touch, top each bite with a sprinkle of coconut flakes or a candied carrot garnish.
- You can substitute walnuts with raisins or cranberries for a different flavor profile.
- Make sure to check the bites for doneness, as ovens can vary.
Nutrition Facts:
- Calories: 80 per bite
- Total Fat: 4g
- Saturated Fat: 0.5g
- Cholesterol: 15mg
- Sodium: 50mg
- Total Carbohydrates: 10g
- Dietary Fiber: 0.5g
- Sugars: 5g
- Protein: 1g
3. Cheesy Easter Bunny Breadsticks

These adorable Cheesy Easter Bunny Breadsticks are not only fun to make, but they also make for a delightful addition to your Easter celebration. Shaped like bunnies, these breadsticks are cheesy, fluffy, and perfect for dipping into marinara or your favorite sauce. Get ready to impress your family and friends this holiday!
Prep Time: 20 minutes
Cook Time: 15 minutes
Additional Time: 30 minutes (for rising)
Total Time: 1 hour 5 minutes
Servings: 12 breadsticks
Ingredients:
- 2 cups all-purpose flour
- 1 packet (2 ¼ teaspoons) active dry yeast
- 1 cup warm water (110°F)
- 1 teaspoon sugar
- 1 teaspoon salt
- 2 tablespoons olive oil
- 1 cup shredded mozzarella cheese
- 1 egg (for egg wash)
- Sesame seeds (for decoration)
Instructions:
In a small bowl, dissolve sugar in warm water and then sprinkle the yeast on top. Let it sit for about 5 minutes until it becomes frothy. This activates the yeast.
In a large mixing bowl, combine flour, salt, and olive oil. Make a well in the center and pour in the activated yeast mixture. Stir until a dough begins to form, then knead the dough on a floured surface for about 5-7 minutes until smooth and elastic.
Place the kneaded dough in a greased bowl, cover it with a damp cloth, and let it rise in a warm place for about 30 minutes or until it doubles in size.
Once risen, punch down the dough to release air, then divide it into 12 equal pieces. Roll each piece into a long, thin rope. For each breadstick, twist the rope into a bunny shape, forming ears at the top.
Before baking, insert small pieces of mozzarella cheese into the center of each bunny. Beat the egg in a small bowl and brush it over the shaped breadsticks for a glossy finish. Sprinkle sesame seeds on top for extra texture.
Preheat your oven to 375°F (190°C). Place the bunny breadsticks on a parchment-lined baking sheet. Bake for 12-15 minutes or until they are golden brown. Remove them from the oven and let them cool slightly before serving.
Extra Tips:
- For an extra kick, add garlic powder to the dough for flavored bunny breadsticks.
- Serve with marinara sauce or ranch dressing for dipping.
- These breadsticks can be made ahead of time and baked just before serving for the best freshness.
Nutrition Facts:
- Calories: 180 per breadstick
- Protein: 6g
- Carbohydrates: 25g
- Fat: 6g
- Sodium: 150mg
4. Stuffed Pea Pod Poppers

Stuffed Pea Pod Poppers are a delightful, healthy appetizer perfect for any gathering or celebration. These vibrant snacks are bursting with flavor and are sure to impress your guests. Plus, they are quick and easy to make!
Prep Time: 15 minutes
Total Time: 15 minutes
Servings: 4
Ingredients:
- 8 fresh pea pods
- 1/2 cup cream cheese, softened
- 1/4 cup feta cheese, crumbled
- 1 clove garlic, minced
- 1 tablespoon fresh dill, chopped
- Salt and pepper to taste
- 1 tablespoon lemon juice
- Red pepper flakes (optional, for a kick)
Instructions:
Begin by rinsing the pea pods under cold water and patting them dry with a paper towel. Carefully slice one side of each pea pod to create an opening for stuffing. Be gentle to avoid tearing the pod.
In a mixing bowl, combine the cream cheese, feta cheese, minced garlic, fresh dill, salt, pepper, and lemon juice. Mix until all ingredients are well incorporated and a creamy filling forms.
Using a small spoon or piping bag, fill each pea pod with the cream cheese mixture. Ensure to pack the filling generously for maximum flavor in every bite.
If you like a bit of heat, sprinkle some red pepper flakes on top of filled pea pods for added spice. Arrange the stuffed pea pods on a serving platter and serve immediately for the best taste and texture.
Extra Tips:
- You can substitute feta cheese with goat cheese for a different flavor profile.
- For a vegetarian option, you can add chopped sun-dried tomatoes or olives to the filling.
- Allow the stuffed pods to chill in the refrigerator for about 10 minutes if you prefer a cooler snack.
Nutrition Facts:
- Calories: 120 kcal per serving
- Protein: 5g
- Total Fat: 10g
- Carbohydrates: 7g
- Fiber: 2g
- Sugar: 1g
5. Rainbow Veggie Pinwheels

Rainbow Veggie Pinwheels are a delicious and colorful treat that make for perfect finger foods at any gathering, especially during Easter festivities. Packed with fresh vegetables and a creamy spread, these pinwheels are not only visually appealing but also healthy and easy to make. Get ready to impress your guests with this vibrant snack!
Prep Time: 15 minutes
Total Time: 15 minutes
Servings: 8 pinwheels
Ingredients:
- 4 large flour tortillas
- 8 oz cream cheese, softened
- 1/2 cup Greek yogurt
- 1 cup spinach, chopped
- 1 carrot, grated
- 1 bell pepper, finely diced (red, yellow, or orange)
- 1/2 cucumber, thinly sliced
- 1/4 cup purple cabbage, shredded
- Salt and pepper to taste
Instructions:
Start by mixing the softened cream cheese and Greek yogurt in a medium bowl. Stir until it reaches a smooth and creamy consistency. This will be your flavorful base spread.
Next, lay out one tortilla on a clean surface. Spread a generous layer of the cream cheese mixture evenly over the tortilla, making sure to cover the entire surface for maximum flavor.
Once the tortilla is coated, start layering your veggies. Begin with the chopped spinach, followed by the grated carrot, then add the diced bell pepper. Next, add a layer of thinly sliced cucumber and finish with the shredded purple cabbage. Feel free to sprinkle a little salt and pepper for extra taste.
Now it’s time to roll! Carefully roll the tortilla tightly from one end to the other, ensuring that all the veggies stay inside. Once you reach the other end, you can secure the roll with a toothpick if needed.
After rolling all tortillas, use a sharp knife to slice each roll into 1-inch pinwheels. Arrange these vibrant rolls on a platter, and they’re ready to serve!
Extra Tips:
- You can substitute any of the vegetables for your personal favorites to customize the pinwheels.
- For added flavor, consider mixing herbs or spices into the cream cheese spread.
- These pinwheels can be made a few hours ahead; just cover them with plastic wrap and keep them in the fridge until serving.
Nutrition Facts:
- Calories: 140 per pinwheel
- Protein: 4g
- Carbohydrates: 15g
- Fat: 7g
- Fiber: 2g
- Sugar: 1g
6. Honey-Glazed Ham Sliders

Honey-Glazed Ham Sliders are the perfect bite-sized treat to serve at your Easter gathering. With a sweet and savory glaze, these sliders will impress your guests and keep them coming back for more. Easy to prepare, they’re a delightful addition to any buffet or picnic spread.
Prep Time: 15 minutes
Cook Time: 20 minutes
Additional Time: 5 minutes
Total Time: 40 minutes
Servings: 12 sliders
Ingredients:
- 12 slider buns
- 1 lb sliced ham
- 1 cup shredded cheddar cheese
- 1/2 cup honey
- 1/4 cup unsalted butter, melted
- 2 tbsp Dijon mustard
- 1/4 tsp garlic powder
- 1/4 tsp black pepper
- 1/4 tsp onion powder
- 2 tbsp finely chopped fresh parsley (for garnish)
Instructions:
Preheat your oven to 350°F (175°C). Start by greasing a baking dish that will hold all the sliders comfortably.
In a mixing bowl, combine the honey, melted butter, Dijon mustard, garlic powder, black pepper, and onion powder. Whisk until the mixture is smooth and well combined.
Slice the slider buns horizontally, keeping them connected at the hinges. Place the bottom half of the buns in the greased baking dish. Layer the sliced ham evenly on top of the buns, followed by a generous portion of shredded cheddar cheese.
Drizzle half of the honey glaze over the cheese and ham. Place the top half of the buns on the assembled sliders, then brush the remaining glaze over the top of the buns for added flavor.
Cover the baking dish with foil and bake in the preheated oven for 15 minutes. After that, remove the foil and bake for an additional 5-10 minutes until the cheese is melted and the tops are golden brown.
Once done, remove the sliders from the oven and let them sit for about 5 minutes. Garnish with freshly chopped parsley before slicing into individual sliders. Serve warm and enjoy!
Extra Tips:
- For an extra kick, add sliced jalapeños between the ham and cheese layers.
- You can make the honey glaze ahead of time and store it in the refrigerator until you’re ready to assemble the sliders.
- These sliders are also great for a picnic; just wrap them in foil and serve cool or at room temperature.
Nutrition Facts:
- Calories: 250 per slider
- Protein: 10g
- Total Fat: 12g
- Carbohydrates: 28g
- Fiber: 1g
- Sugars: 6g
- Sodium: 650mg
7. Cute Cucumber Easter Cups

Enjoy a fresh and delightful twist on your Easter celebrations with these Cute Cucumber Easter Cups. These bite-sized delights are not only visually appealing but also bursting with flavor. They make the perfect healthy finger food to impress your guests!
Prep Time: 15 minutes
Total Time: 15 minutes
Servings: 12 cups
Ingredients:
- 2 large cucumbers
- 1 cup cream cheese, softened
- 1 tablespoon fresh dill, chopped
- 1 tablespoon lemon juice
- **Salt and pepper to taste
- Cherry tomatoes, halved (for garnish)
- Edible flowers or microgreens (for garnish)
Instructions:
Start by washing the cucumbers thoroughly. Slice off both ends and then cut each cucumber into 1 to 1.5-inch thick rounds. This will create your cups.
Using a small spoon or melon baller, gently scoop out the center of each cucumber slice to form a cup. Be careful not to go all the way through the bottom. Set them aside on a serving platter.
In a mixing bowl, combine the softened cream cheese, dill, lemon juice, salt, and pepper. Mix until smooth and creamy. This will be the filling for your cucumber cups.
Spoon or pipe the cream cheese mixture into each cucumber cup until it is generously filled.
For the finishing touch, top each filled cucumber cup with a half cherry tomato and your choice of garnishing with edible flowers or microgreens.
Serve immediately and enjoy these refreshing finger foods!
Extra Tips:
- Opt for flavored cream cheese, such as chive or garlic, for an added layer of taste.
- You can prepare the cucumber cups ahead of time but fill them just before serving to keep them crisp.
- Feel free to experiment with other toppings such as diced olives or radishes for a fun twist.
Nutrition Facts:
- Calories: 45 per cup
- Protein: 2g
- Carbohydrates: 4g
- Fat: 3g
- Fiber: 1g
- Sugar: 1g
8. Sweet Potato and Goat Cheese Crostini
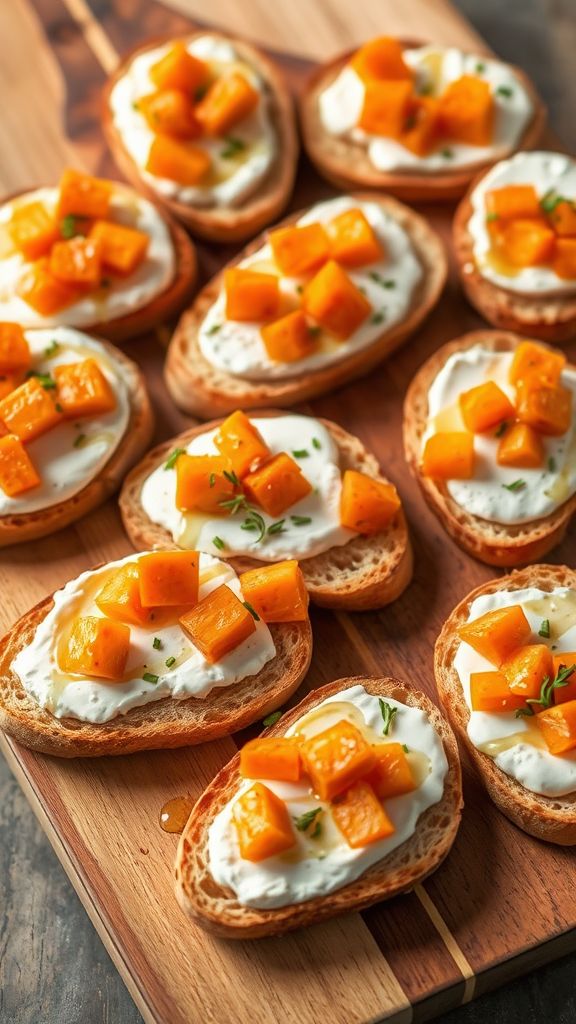
Sweet Potato and Goat Cheese Crostini is a delightful appetizer that combines the earthy sweetness of roasted sweet potatoes with the creamy tang of goat cheese. Perfect for gatherings or a cozy night in, these crostinis are sure to impress your guests!
Prep Time: 15 minutes
Cook Time: 25 minutes
Total Time: 40 minutes
Servings: 8
Ingredients:
- 1 medium sweet potato, peeled and diced
- 1 tablespoon olive oil
- Salt and pepper, to taste
- 1 baguette, sliced into 1/2-inch pieces
- 4 oz goat cheese, softened
- 2 tablespoons honey
- Fresh thyme or chives, for garnish
Instructions:
Start by preheating your oven to 400°F (200°C). On a baking sheet, toss the diced sweet potatoes with olive oil, salt, and pepper. Spread them out in an even layer and roast for about 20 minutes, or until tender and slightly caramelized.
While the sweet potatoes are roasting, arrange the baguette slices on another baking sheet. Optionally, brush them lightly with olive oil and toast them in the oven for about 5-7 minutes, until golden brown.
Once the sweet potatoes are done, remove them from the oven and let them cool for a few minutes. In a bowl, mix the softened goat cheese with honey until creamy and smooth.
To assemble the crostini, spread a generous amount of the goat cheese mixture on each toasted baguette slice. Top with a few pieces of roasted sweet potato. For a finishing touch, sprinkle fresh thyme or chives on top to add a bright flavor and vibrant color.
Extra Tips:
- For an added crunch, you can drizzle the crostini with balsamic glaze before serving.
- Feel free to mix in additional spices or herbs like cinnamon or rosemary into the sweet potatoes for a flavor twist.
- These crostinis can be made ahead by roasting the sweet potatoes and preparing the goat cheese mixture. Assemble right before serving.
Nutrition Facts:
- Calories: 150 per serving
- Total Fat: 7g
- Saturated Fat: 4g
- Cholesterol: 16mg
- Sodium: 160mg
- Total Carbohydrates: 20g
- Dietary Fiber: 3g
- Sugars: 5g
- Protein: 4g
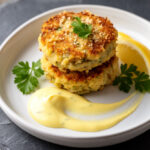
9. Mini Quiche Lorraine Bites

These Mini Quiche Lorraine Bites are the perfect finger food for your Easter celebrations. They are flaky, filled with savory ingredients, and easy to pop in your mouth. These delightful bites are sure to impress your guests and elevate your holiday spread!
Prep Time: 15 minutes
Cook Time: 20 minutes
Additional Time: 5 minutes
Total Time: 40 minutes
Servings: 24 bites
Ingredients:
- 1 package of ready-made puff pastry (thawed)
- 6 large eggs
- 1/2 cup heavy cream
- 1/2 cup milk
- 1 cup cooked and crumbled bacon
- 1 cup shredded Swiss cheese
- 1/4 cup chopped green onions
- Salt and pepper to taste
Instructions:
Begin by preheating your oven to 375°F (190°C). While the oven warms up, roll out the puff pastry on a lightly floured surface. Then cut the pastry into 3-inch squares. Gently press these squares into the wells of a mini muffin tin, ensuring they fill the bottom and sides.
In a large bowl, whisk together the eggs, heavy cream, and milk until fully combined. Next, season the mixture with salt and pepper according to your preference. Once seasoned, fold in the cooked bacon, shredded Swiss cheese, and chopped green onions.
Carefully pour the egg mixture into each puff pastry cup, filling them about three-quarters full. It’s essential to leave some space for the filling to puff up while baking. Place the muffin tin in the preheated oven and bake for 20 minutes or until the quiches are set and golden brown.
After baking, allow the mini quiches to cool in the tin for about 5 minutes before transferring them to a wire rack. Serve warm or at room temperature for your guests to enjoy.
Extra Tips:
- For a twist on the classic recipe, consider adding mushrooms or spinach for extra flavor and nutrition.
- You can prepare the pastry and filling ahead of time and store them separately in the refrigerator until ready to bake.
- Feel free to experiment with different types of cheese, like cheddar or Gruyère, for a unique taste.
Nutrition Facts:
- Calories: 120
- Protein: 4g
- Fat: 9g
- Carbohydrates: 7g
- Fiber: 0g
- Sodium: 180mg
10. Spinach and Feta Puff Pastry Twists
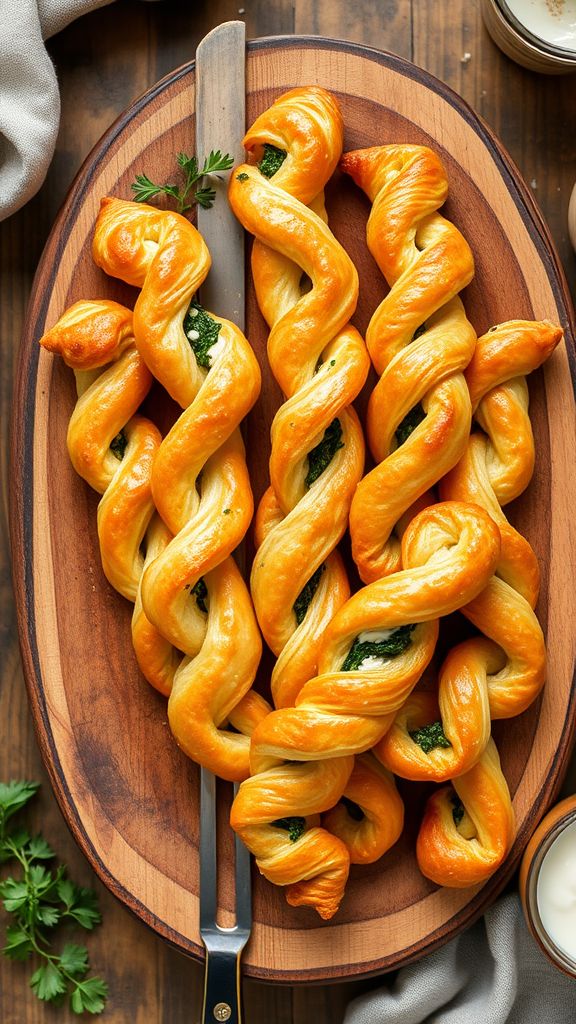
These Spinach and Feta Puff Pastry Twists are a delightful combination of flaky pastry, savory spinach, and tangy feta cheese. Perfect for entertaining guests during festive gatherings, these twists are easy to make and even easier to devour!
Prep Time: 15 minutes
Cook Time: 20 minutes
Additional Time: 5 minutes
Total Time: 40 minutes
Servings: 12 twists
Ingredients:
- 1 sheet of puff pastry, thawed
- 2 cups fresh spinach, chopped
- 1 cup feta cheese, crumbled
- 1 egg, beaten (for egg wash)
- 1 tablespoon olive oil
- 1 clove garlic, minced
- 1/2 teaspoon black pepper
- 1/4 teaspoon salt
- 1/4 teaspoon paprika
Instructions:
Start by preheating your oven to 400°F (200°C). Line a baking sheet with parchment paper to ensure the twists don’t stick.
In a skillet over medium heat, add olive oil and sauté the minced garlic for about a minute until fragrant. Then, add the chopped spinach and cook until wilted, approximately 3-4 minutes. Remove from heat and let it cool slightly.
In a mixing bowl, combine the sautéed spinach, feta cheese, black pepper, salt, and paprika. Mix well until all ingredients are evenly integrated.
Roll out the puff pastry on a lightly floured surface until it’s about 1/8 inch thick. Cut the sheet into 12 rectangles. Spoon some of the spinach and feta mixture along the center of each rectangle.
Fold each pastry rectangle over to enclose the filling, and press the edges with a fork to seal. Then, twist each pastry gently to create a twist shape. Place the twists on the prepared baking sheet.
Brush the tops of the twists with the beaten egg to give them a golden color while baking. Bake them in the preheated oven for about 20 minutes, or until they are puffed and golden brown.
Once finished, let the twists cool for a few minutes before serving. Enjoy your delicious spinach and feta twists warm or at room temperature!
Extra Tips:
- Feel free to add herbs like dill or parsley for an extra flavor boost.
- These twists can be made ahead of time and frozen before baking; just add a few extra minutes to the baking time when cooking from frozen.
- Serve with a yogurt dip for a refreshing complement.
Nutrition Facts:
- Calories: 180
- Total Fat: 11g
- Saturated Fat: 5g
- Cholesterol: 45mg
- Sodium: 250mg
- Total Carbohydrates: 16g
- Dietary Fiber: 1g
- Sugars: 1g
- Protein: 5g
11. Cranberry-Orange Meatballs

These delicious Cranberry-Orange Meatballs are the perfect blend of sweet and savory, making them an excellent choice for any gathering or holiday celebration. The tangy cranberry sauce paired with zesty orange gives these meatballs a unique twist that is sure to delight your guests.
Prep Time: 15 minutes
Cook Time: 25 minutes
Total Time: 40 minutes
Servings: 12 meatballs
Ingredients:
- 1 pound ground turkey or beef
- 1/2 cup breadcrumbs
- 1/4 cup finely chopped onion
- 1/4 cup fresh parsley, chopped
- 1 large egg
- 1 teaspoon garlic powder
- 1 teaspoon salt
- 1/2 teaspoon black pepper
- 1 cup cranberry sauce
- 1/4 cup orange juice
- 1 tablespoon soy sauce
- 1 tablespoon orange zest
Instructions:
Start by preheating your oven to 400°F (200°C). In a large mixing bowl, combine the ground turkey or beef, breadcrumbs, chopped onion, parsley, egg, garlic powder, salt, and black pepper. Mix everything well until fully combined.
Next, gently shape the mixture into 1-inch meatballs and place them on a baking sheet lined with parchment paper. Make sure to space them about 1 inch apart to ensure even cooking.
In a separate bowl, mix together the cranberry sauce, orange juice, soy sauce, and orange zest. Once the meatballs are formed, pour this mixture over them, ensuring they are evenly coated.
Bake the meatballs in the preheated oven for 20-25 minutes, or until they are fully cooked and have reached an internal temperature of 165°F (74°C). While baking, you can occasionally baste the meatballs with the sauce to enhance the flavor.
Once cooked, remove the meatballs from the oven and let them rest for a couple of minutes before serving. You can serve them warm, drizzled with the remaining sauce, alongside toothpicks for easy snacking.
Extra Tips:
- For added flavor, consider using fresh herbs like thyme or rosemary in your meatball mixture.
- Serve these meatballs with toothpicks on a platter for an easy-to-eat appetizer.
- You can also prepare the meatballs ahead of time and freeze them. Just reheat in the oven when ready to serve.
Nutrition Facts:
- Calories: 200 per meatball
- Protein: 15g
- Carbohydrates: 14g
- Fat: 8g
- Fiber: 1g
- Sugar: 4g
12. Caprese Skewers with Balsamic Drizzle
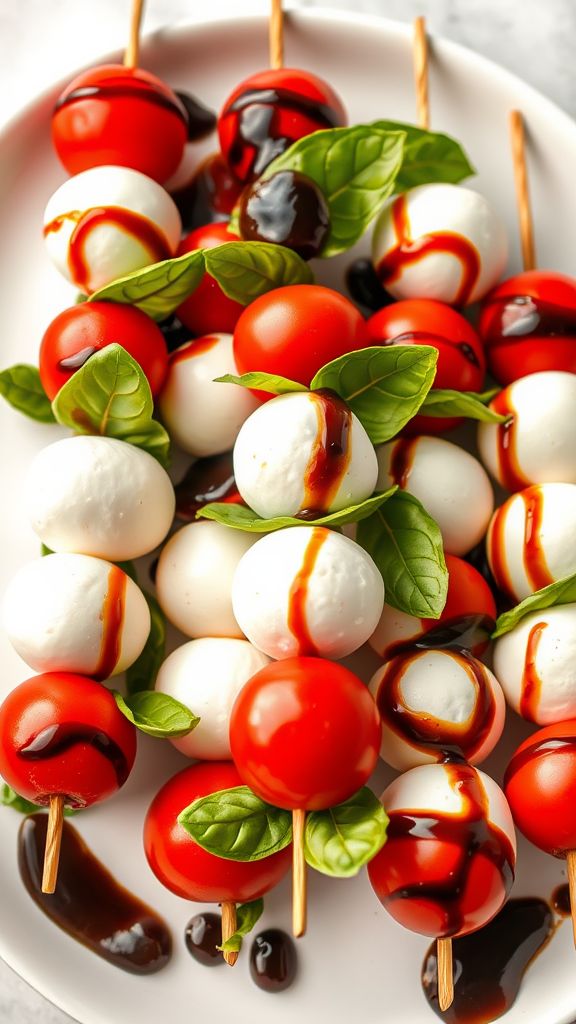
An easy and delightful appetizer, Caprese Skewers with Balsamic Drizzle bring the fresh flavors of Italy to your table. These skewers are not only visually appealing, but they also offer a savory combination of mozzarella, tomatoes, and basil. Drizzled with balsamic reduction, they make for the perfect finger food at any gathering!
Prep Time: 15 minutes
Total Time: 15 minutes
Servings: 12 skewers
Ingredients:
- 12 cherry tomatoes
- 12 fresh basil leaves
- 12 mozzarella balls (bocconcini)
- 1/4 cup balsamic vinegar
- 1 tablespoon olive oil
- Salt and pepper to taste
- Skewers (toothpicks or small skewers)
Instructions:
Begin by preparing the balsamic drizzle. In a small saucepan, bring the balsamic vinegar to a gentle simmer over medium heat. Allow it to reduce for about 5-10 minutes, or until it thickens slightly. Remove from heat and let it cool.
While the balsamic is reducing, assemble your skewers. Take a skewer and thread one cherry tomato, followed by a basil leaf, and a mozzarella ball. Repeat the process until all ingredients are used.
Once your skewers are assembled, drizzle them with olive oil and season with salt and pepper to enhance the flavors. Finally, drizzle the cooled balsamic reduction over the skewers for that perfect finishing touch.
Extra Tips:
- For added flavor, marinate the mozzarella balls in olive oil, garlic, and herbs for a few hours before assembly.
- Use a variety of colored tomatoes for a more vibrant presentation.
- If you prefer a sweeter drizzle, you can add a touch of honey to the balsamic reduction while it simmers.
Nutrition Facts:
- Calories: 80 per skewer
- Protein: 4g
- Fat: 4g
- Carbohydrates: 5g
- Fiber: 0g
- Sugar: 3g
13. Bacon-Wrapped Asparagus Bundles
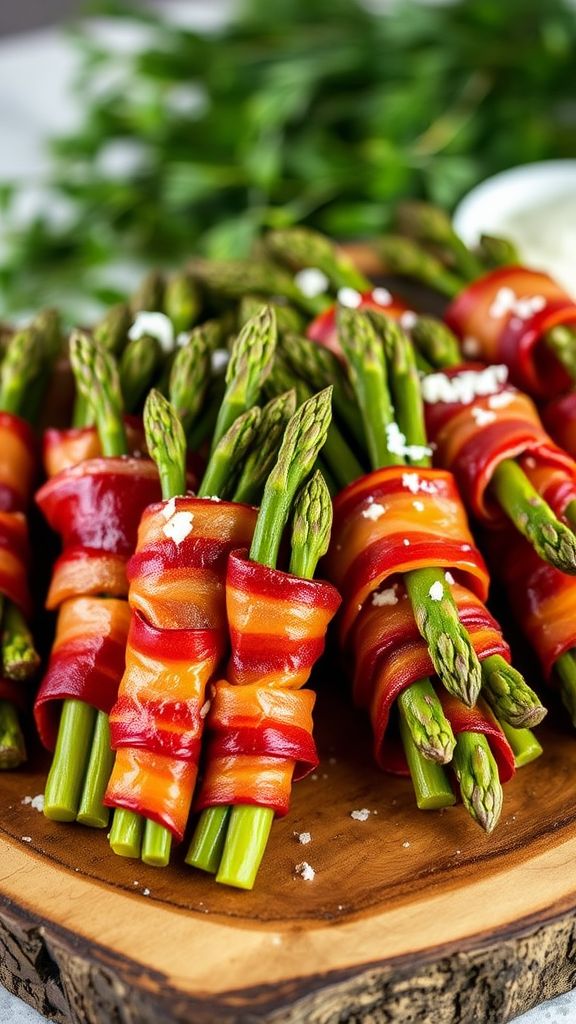
Bacon-Wrapped Asparagus Bundles are the perfect finger food for your Easter celebration! This delicious combination of crispy bacon and tender asparagus is sure to impress your guests. They are simple to make and can be served as an appetizer or a side dish.
Prep Time: 10 minutes
Cook Time: 20 minutes
Additional Time: 0 minutes
Total Time: 30 minutes
Servings: 4
Ingredients:
- 1 pound fresh asparagus, trimmed
- 8 slices of bacon
- 1 tablespoon olive oil
- 1/2 teaspoon garlic powder
- 1/4 teaspoon black pepper
- 1/4 teaspoon salt
- 2 tablespoons grated Parmesan cheese (optional)
Instructions:
Start by preheating your oven to 400°F (200°C). This will create the perfect environment for crispy bacon and tender asparagus.
Next, in a bowl, toss the trimmed asparagus with olive oil, garlic powder, black pepper, and salt. Make sure each asparagus stalk is well-coated with the mixture to enhance the flavor.
Now, take one slice of bacon and wrap it around each asparagus stalk, starting at the bottom and spiraling upward. Ensure the bacon overlaps slightly as you wrap to prevent any gaps.
Arrange the bacon-wrapped asparagus bundles on a baking sheet lined with parchment paper. This will help with easy cleanup and prevent sticking.
For extra flavor, sprinkle the optional grated Parmesan cheese over the bundles before placing them in the oven.
Bake the asparagus bundles in the preheated oven for about 20 minutes or until the bacon is crispy and browned. Flip them halfway through for even cooking.
Once done, remove from the oven and let them cool slightly before serving. Enjoy your delicious Bacon-Wrapped Asparagus Bundles warm!
Extra Tips:
- For a spicy kick, consider adding red pepper flakes to the seasoning mix.
- If you prefer a sweeter flavor, glaze the bundles with a bit of balsamic vinegar before baking.
- Feel free to substitute turkey bacon if you’re looking for a lighter option.
Nutrition Facts:
- Calories: 150 per serving
- Fat: 10g
- Carbohydrates: 5g
- Protein: 10g
- Fiber: 2g
14. Lemon-Lavender Sugar Cookies

Delight your senses with these Lemon-Lavender Sugar Cookies! With the perfect balance of zesty lemon and aromatic lavender, these cookies are a unique treat that will impress your family and friends. Ideal for springtime gatherings or any occasion, they are sure to be a hit!
Prep Time: 20 minutes
Additional Time: 1 hour
Total Time: 1 hour 20 minutes
Servings: 24 cookies
Ingredients:
- 1 cup unsalted butter, softened
- 1 cup granulated sugar
- 1 large egg
- 2 teaspoons lemon zest
- 2 tablespoons fresh lemon juice
- 1 teaspoon culinary lavender (dried)
- 2½ cups all-purpose flour
- 1 teaspoon baking powder
- ¼ teaspoon salt
- 1/2 cup powdered sugar (for dusting)
Instructions:
Start by preheating your oven to 350°F (175°C). In a large mixing bowl, cream together the butter and granulated sugar until light and fluffy. This should take about 3-5 minutes by using an electric mixer on medium speed.
Next, beat in the egg, followed by the lemon zest, lemon juice, and the lavender. Mix well until everything is thoroughly combined. In another bowl, whisk together the flour, baking powder, and salt, then gradually add this mixture to the wet ingredients. Stir until just combined, making sure not to overmix.
Once the dough is ready, wrap it in plastic wrap and refrigerate for at least 1 hour to firm up. This helps the cookies maintain their shape while baking. After chilling, scoop out tablespoon-sized portions of the dough and roll them into balls. Place the balls on a baking sheet lined with parchment paper, leaving some space between each one.
Bake in the preheated oven for about 10-12 minutes, or until the edges are lightly golden. Remove them from the oven and let them cool on the baking sheet for 5 minutes, then transfer them to a wire rack to cool completely. Finally, dust the cooled cookies with powdered sugar for an elegant finish.
Extra Tips:
- For a more intense lavender flavor, you can infuse the butter with lavender before making the cookies.
- Ensure you use culinary-grade lavender; not all lavender is safe for consumption!
- Store cookies in an airtight container to keep them fresh for up to a week.
Nutrition Facts:
- Calories: 120 per cookie
- Total Fat: 7g
- Saturated Fat: 4g
- Cholesterol: 25mg
- Sodium: 55mg
- Total Carbohydrates: 14g
- Dietary Fiber: 0g
- Sugars: 6g
- Protein: 1g
15. Egg Salad Tartlets

These delightful Egg Salad Tartlets are a perfect addition to your Easter celebrations or any spring gathering. They are bite-sized, easy to prepare, and packed with flavor, making them an ideal finger food that will leave everyone wanting more. Enjoy the creamy goodness of egg salad nestled in a crispy pastry shell!
Prep Time: 15 minutes
Total Time: 15 minutes
Servings: 12 tartlets
Ingredients:
- 6 large hard-boiled eggs, chopped
- 1/4 cup mayonnaise
- 1 tablespoon Dijon mustard
- 1 tablespoon fresh chives, chopped
- 1 tablespoon fresh dill, chopped
- Salt and pepper to taste
- 12 mini phyllo pastry cups or tartlet shells
Instructions:
Start by chopping the hard-boiled eggs into small pieces and place them in a mixing bowl. Add the mayonnaise, Dijon mustard, and the chopped chives and dill. Stir the mixture gently to combine all the ingredients.
Next, season the egg mixture with a pinch of salt and pepper according to your taste preference. Mix it again until the seasoning is evenly distributed throughout.
Now, take the mini phyllo pastry cups and fill each one generously with the egg salad mixture. Ensure that you fill them to the top for a delightful burst of flavor in every bite.
Once all tartlets are filled, they are ready to serve. These are best enjoyed immediately, but you can also refrigerate them for a short period before serving if needed.
Extra Tips:
- For an added crunch, sprinkle some paprika or crushed red pepper on top of the egg salad before serving.
- If you’re not a fan of dill, you can substitute it with parsley or thyme for a different flavor profile.
- You can also customize the filling by adding diced celery or pickles for extra texture.
Nutrition Facts:
- Calories: 100 per tartlet
- Protein: 4g
- Fat: 7g
- Carbohydrates: 6g
- Fiber: 0g
- Sodium: 130mg
16. Grilled Vegetable Skewers
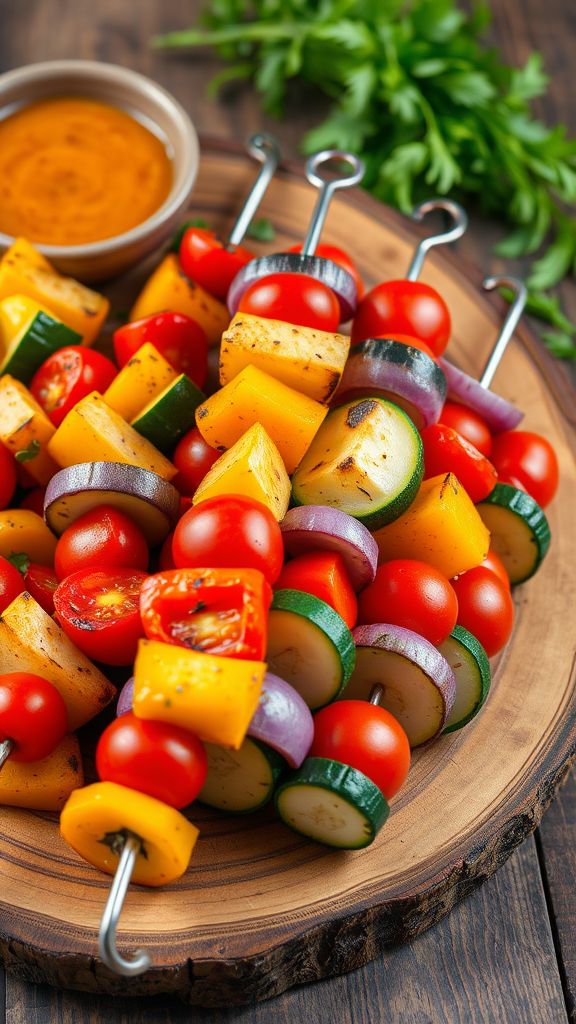
Grilled Vegetable Skewers are a delightful and colorful dish perfect for any gathering. They’re easy to make, packed with flavor, and offer a healthy option for your guests. With just a few fresh ingredients, you’ll have a vibrant and tasty appetizer in no time.
Prep Time: 15 minutes
Cook Time: 10 minutes
Additional Time: 30 minutes (for marinating)
Total Time: 55 minutes
Servings: 4
Ingredients:
- 1 cup bell peppers, cut into chunks (red, yellow, green)
- 1 cup zucchini, sliced into rounds
- 1 cup cherry tomatoes
- 1 cup red onion, cut into chunks
- 1/4 cup olive oil
- 2 tablespoons balsamic vinegar
- 2 cloves garlic, minced
- 1 teaspoon dried oregano
- 1 teaspoon salt
- 1/2 teaspoon black pepper
- Wooden skewers (soaked in water for 30 minutes) or metal skewers
Instructions:
Start by preparing your vegetables. Wash and cut the bell peppers, zucchini, red onion, and cherry tomatoes. Combine them in a large bowl.
Next, prepare the marinade. In a separate bowl, whisk together the olive oil, balsamic vinegar, minced garlic, dried oregano, salt, and black pepper. Pour this marinade over your vegetables, making sure to coat them evenly. Allow the vegetables to marinate for at least 30 minutes for the best flavor.
While the vegetables are marinating, preheat your grill to medium-high heat. If you are using wooden skewers, make sure they have been soaked to prevent burning.
Once the marinating time is up, take the vegetables and thread them onto the skewers, alternating between the different varieties for a colorful presentation.
Place the skewers on the preheated grill. Cook them for about 10 minutes total, turning occasionally until they are tender and have nice grill marks.
When done, remove the skewers from the grill and let them cool slightly before serving. Enjoy your delicious Grilled Vegetable Skewers!
Extra Tips:
- Feel free to mix and match your favorite vegetables such as mushrooms, eggplant, or asparagus.
- For added flavor, consider sprinkling some feta cheese or fresh herbs on top right before serving.
- Serve with a side of hummus or yogurt dip for a tasty accompaniment.
Nutrition Facts:
- Calories: 150 per serving
- Protein: 2g
- Carbohydrates: 10g
- Fat: 13g
- Fiber: 3g
- Sodium: 300mg
17. Roasted Beet and Goat Cheese Bites

Roasted Beet and Goat Cheese Bites are the perfect festive appetizer, combining the earthy sweetness of roasted beets with the creamy tang of goat cheese. These vibrant bites are not only delicious but also add a pop of color to your Easter spread. Easy to assemble, they’re sure to impress your guests!
Prep Time: 15 minutes
Cook Time: 30 minutes
Additional Time: 10 minutes (for cooling)
Total Time: 55 minutes
Servings: 12 bites
Ingredients:
- 2 medium-sized beets
- 4 ounces goat cheese
- 1 tablespoon olive oil
- 1 tablespoon balsamic vinegar
- Salt and pepper to taste
- Fresh thyme leaves for garnish
- 12 small toasted baguette slices or crackers
Instructions:
First, begin by preheating your oven to 400°F (200°C). While the oven is heating, wash the beets thoroughly to remove any dirt. Once clean, wrap each beet in aluminum foil, drizzling a little olive oil over them before sealing the foil.
Place the wrapped beets on a baking sheet and roast them in the oven for about 30 minutes, or until they are fork-tender. After roasting, take them out and allow them to cool for about 10 minutes before unwrapping, as they will be very hot.
Once cool enough to handle, peel the beets by rubbing the skin off with your fingers or using a paper towel. Cut the beets into thin rounds. Next, prepare the goat cheese by placing it in a bowl and mixing in a bit of salt and pepper to taste.
To assemble the bites, take a toasted baguette slice or cracker, and spread a generous amount of goat cheese on top. Place a round of roasted beet on the cheese and finish off with a drizzle of balsamic vinegar and a sprinkle of fresh thyme leaves for garnish.
Serve immediately and enjoy these beautifully colorful bites!
Extra Tips:
- Opt for golden beets for a different flavor and color.
- You can make the roasted beets ahead of time and store them in the refrigerator for up to 3 days.
- For a more indulgent bite, top with a sprinkle of crushed walnuts or pecans.
Nutrition Facts:
- Calories: 120 per serving
- Total Fat: 6g
- Saturated Fat: 3g
- Cholesterol: 15mg
- Sodium: 80mg
- Carbohydrates: 15g
- Fiber: 2g
- Sugar: 2g
- Protein: 3g
18. Chocolate-Dipped Fruit Kebabs

Chocolate-Dipped Fruit Kebabs are a fun and fruity treat, perfect for any occasion! These delightful skewers, featuring fresh fruit dipped in rich chocolate, are sure to please both kids and adults alike. Easy to prepare, they make a colorful addition to your dessert table.
Prep Time: 15 minutes
Total Time: 15 minutes
Servings: 6
Ingredients:
- 1 cup strawberries, hulled and halved
- 1 cup pineapple chunks
- 1 cup banana slices
- 1 cup grapes (red or green)
- 1 cup chocolate chips (dark or milk chocolate)
- 1 tablespoon coconut oil (optional, for smoother chocolate)
- Wooden skewers or toothpicks
Instructions:
Start by preparing your fruit. Rinse the strawberries and grapes under cold water, hull and halve the strawberries, and cut the pineapple into chunks. Slice the bananas into thick pieces.
Next, take the wooden skewers and begin threading the fruit onto them. Alternate the fruit for a colorful effect, and make sure to leave some space at the ends of the skewer for holding.
Now, it’s time to melt the chocolate. In a microwave-safe bowl, combine the chocolate chips and coconut oil, if using. Heat in the microwave in 30-second intervals, stirring in between, until the chocolate is completely melted and smooth.
Once melted, dip the fruit kebabs into the chocolate, allowing any excess chocolate to drip off. Place the dipped kebabs on a parchment-lined tray.
Finally, let the chocolate set at room temperature for a few minutes, or place them in the refrigerator for about 10 minutes to firm up quicker. Serve the Chocolate-Dipped Fruit Kebabs chilled or at room temperature for a delicious treat!
Extra Tips:
- For a fun twist, sprinkle some chopped nuts or shredded coconut on the chocolate before it hardens.
- You can also use other fruits like kiwi or melons for variety!
- Feel free to customize your kebabs by using different types of chocolate, like white or ruby chocolate.
Nutrition Facts:
- Calories: 150 per serving
- Protein: 2g
- Fat: 7g
- Carbohydrates: 22g
- Fiber: 2g
- Sugar: 16g
19. Miniature Spinach Frittatas

These Miniature Spinach Frittatas are a delightful and healthy finger food perfect for any gathering, especially Easter. Packed with flavor and nutrients, they’re easy to prepare and can be enjoyed warm or at room temperature.
Prep Time: 15 minutes
Cook Time: 20 minutes
Total Time: 35 minutes
Servings: 12 mini frittatas
Ingredients:
- 6 large eggs
- 1 cup fresh spinach, chopped
- 1/2 cup cherry tomatoes, halved
- 1/2 cup shredded cheese (cheddar or feta)
- 1/4 cup milk
- 1/4 teaspoon salt
- 1/4 teaspoon black pepper
- 1/4 teaspoon garlic powder
- 1 tablespoon olive oil
- Cooking spray (for greasing)
Instructions:
Begin by preheating your oven to 350°F (175°C). Next, grease a mini muffin tin with cooking spray or brush it lightly with olive oil to prevent sticking.
In a mixing bowl, crack the 6 large eggs and whisk them together. Gradually add in the 1/4 cup milk, mixing well until the mixture is smooth. Then, season with salt, black pepper, and garlic powder for added flavor.
Fold in the chopped spinach, halved cherry tomatoes, and shredded cheese into the egg mixture, ensuring that all ingredients are well combined.
Pour the egg mixture evenly into the prepared mini muffin tin, filling each cup about three-quarters full. Bake in the preheated oven for about 15-20 minutes, or until the frittatas are puffed up and a toothpick inserted in the center comes out clean.
Once done, remove the mini frittatas from the oven and let them cool in the tin for a few minutes. Then, carefully run a knife around the edges and pop them out of the tin. Serve warm or at room temperature, and enjoy!
Extra Tips:
- Feel free to add other vegetables like bell peppers or mushrooms for variation.
- For a gluten-free option, ensure your cheese is certified gluten-free.
- These frittatas can be made ahead of time and stored in the refrigerator for up to three days.
Nutrition Facts:
- Calories: 100 per frittata
- Protein: 7g
- Fat: 6g
- Carbohydrates: 2g
- Fiber: 0.5g
- Sugar: 1g
20. Sweet Treat Bunny Popcorn Mix

Get ready to hop into the Easter spirit with this fun and delightful Sweet Treat Bunny Popcorn Mix! This charming snack blend features fluffy popcorn, sweet candies, and sprinkles, making it a perfect treat for any Easter celebration. Kids and adults alike will love munching on this whimsical mix that’s as festive as it is delicious.
Prep Time: 15 minutes
Total Time: 15 minutes
Servings: 8
Ingredients:
- 10 cups popped popcorn (about 1/2 cup unpopped kernels)
- 1 cup white chocolate chips
- 1 cup Easter-themed candies (like jellybeans or chocolate eggs)
- 1/2 cup pastel sprinkles
- 1/2 cup mini marshmallows
- 1/4 cup edible confetti (optional)
Instructions:
Start by popping the popcorn according to your preferred method. Once popped, place it in a large mixing bowl, making sure to remove any unpopped kernels.
In a microwave-safe bowl, melt the white chocolate chips in 30-second intervals, stirring in between, until smooth and fully melted. Be careful not to overheat.
Pour the melted white chocolate over the popcorn. Gently toss the popcorn with a spatula or wooden spoon to coat evenly. You want every piece to get a sweet coating without crushing the popcorn.
Next, add in the Easter-themed candies, mini marshmallows, and pastel sprinkles. Fold these ingredients into the popcorn mixture for that colorful, festive look.
If you want an extra touch, sprinkle the edible confetti over the top before serving. Allow the mix to sit for a few minutes to set slightly before enjoying!
Extra Tips:
- Use air-popped popcorn for a healthier option.
- Customize your mix by incorporating your favorite candy or snacks.
- Store any leftovers in an airtight container to keep them fresh.
Nutrition Facts:
- Calories: 180 per serving
- Fat: 7g
- Carbohydrates: 29g
- Sugar: 15g
- Protein: 2g
- Sodium: 50mg