My New Cookbook is Out! Check Out Now!
20 Make-Ahead Camping Recipes That Save You Time Outdoors
Did you know that planning meals ahead can actually save you up to three hours during your camping trip? Camping doesn’t have to mean sacrificing good food or spending all your precious outdoor time in the kitchen. In this blog, we’ll explore 20 delicious make-ahead camping recipes that will leave you with more time to enjoy nature and less time worrying about what to eat!
Campfire Breakfast Burritos
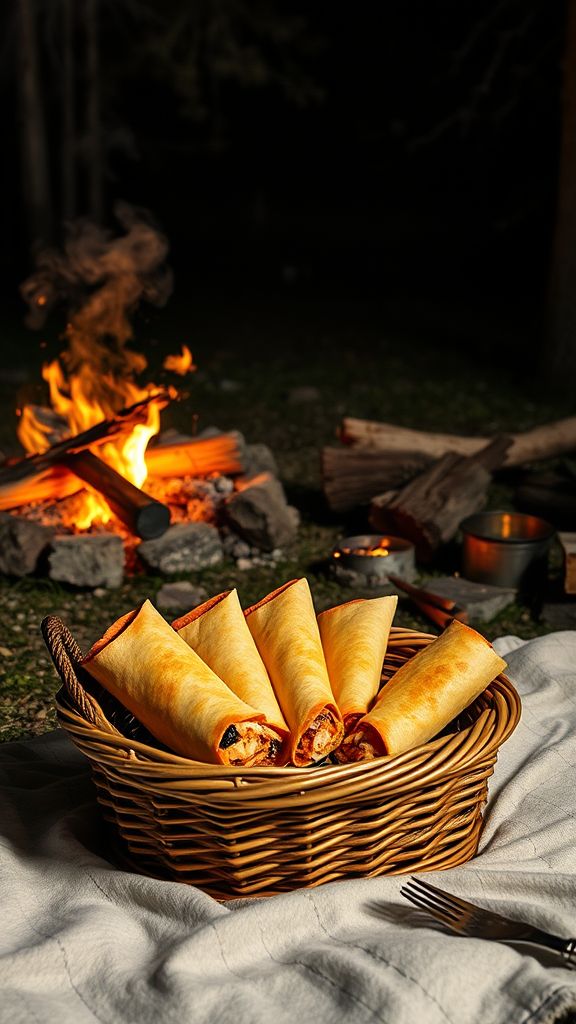
These Campfire Breakfast Burritos are special because they combine smoky flavors with hearty ingredients, perfect for starting your day outdoors.
Ingredients:
- 4 large flour tortillas
- 6 large eggs
- 1 cup shredded cheese (cheddar or your choice)
- 1/2 cup diced bell peppers
- 1/2 cup diced onions
- 1/2 cup cooked diced potatoes
- 1/4 cup cooked and crumbled sausage or bacon (optional)
- 1 tablespoon olive oil
- Salt and pepper to taste
Preparation Time: 10 minutes
Cooking Time: 15 minutes
Total Time: 25 minutes
Instructions:
1. In a skillet over the campfire, heat the olive oil.
2. Add the diced onions and bell peppers, cooking until softened.
3. In a bowl, whisk together the eggs with salt and pepper.
4. Pour the eggs into the skillet and cook, stirring gently until scrambled and cooked through.
5. Stir in the cooked potatoes and crumbled sausage or bacon, if using.
6. Remove the skillet from heat and set aside.
7. Place a tortilla flat on a clean surface and scoop a portion of the egg mixture onto the center.
8. Sprinkle shredded cheese on top of the mixture.
9. Fold in the sides of the tortilla and then roll it up tightly from the bottom.
10. Wrap the burrito in aluminum foil and place it on the campfire grill for about 5 minutes, turning occasionally until heated through.
11. Carefully unwrap and enjoy your campfire breakfast burrito!
Tips:
- Pre-cook your fillings at home to save time at the campsite.
- Customize your burrito by adding other ingredients like avocado or salsa.
- For extra flavor, use spices like cumin or paprika in the egg mixture.
One-Pot Chili for Campfire Nights
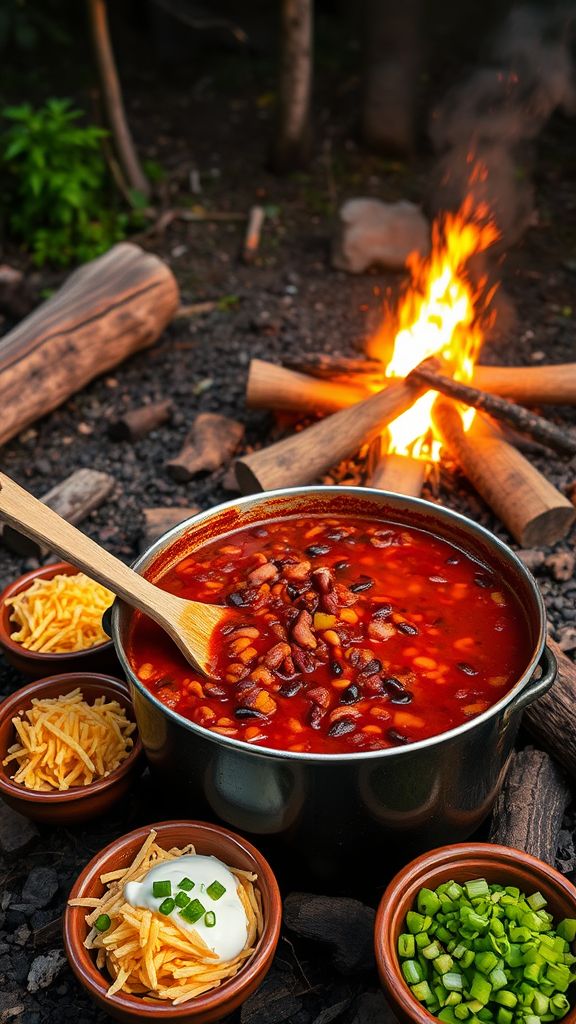
This One-Pot Chili for Campfire Nights delivers a hearty blend of spices, beans, and meat that warms you up under the stars.
Ingredients:
- 1 lb ground beef
- 1 cup chopped onion
- 1 cup chopped bell pepper
- 2 cloves garlic, minced
- 1 can (14.5 oz) diced tomatoes
- 1 can (15 oz) kidney beans, drained and rinsed
- 1 can (15 oz) black beans, drained and rinsed
- 2 tbsp chili powder
- 1 tsp cumin
- ½ tsp salt
- ½ tsp black pepper
- 1 cup beef broth
- 1 tbsp olive oil
- Optional: shredded cheese, sour cream, or chopped green onions for topping
Preparation Time: 10 minutes
Cooking Time: 30 minutes
Total Time: 40 minutes
Instructions:
1. In a large pot over the campfire, heat 1 tbsp olive oil and sauté the chopped onion and bell pepper until soft.
2. Add the minced garlic and ground beef, cooking until the beef is browned.
3. Stir in the chili powder, cumin, salt, and black pepper, cooking for another minute.
4. Add the diced tomatoes, kidney beans, black beans, and beef broth to the pot.
5. Bring the mixture to a boil, then reduce heat and let simmer for about 20 minutes, stirring occasionally.
6. Serve hot, adding optional toppings like cheese or sour cream as desired.
Tips:
- Make it spicier by adding diced jalapeños or hot sauce.
- For a vegetarian option, substitute ground beef with lentils or veggie crumbles.
- This chili can be prepared in advance and reheated over the campfire.
Grilled Veggie and Quinoa Salad
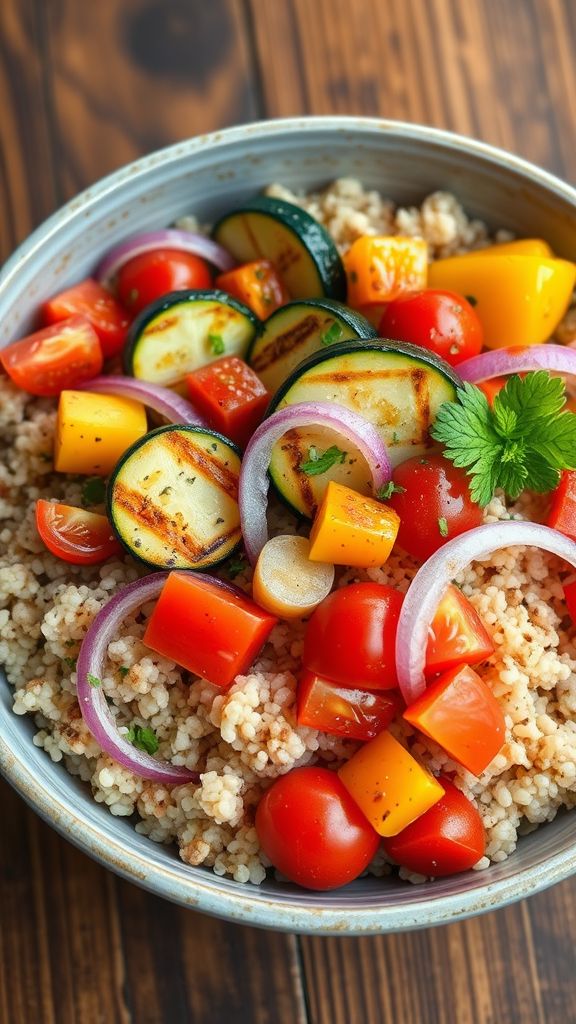
This Grilled Veggie and Quinoa Salad is special for its vibrant flavors of roasted vegetables and zesty dressing, making it a nutritious and satisfying dish.
Ingredients:
- 1 cup quinoa
- 2 cups water
- 1 zucchini, sliced
- 1 bell pepper, diced
- 1 red onion, cut into wedges
- 1 cup cherry tomatoes
- 2 tablespoons olive oil
- 1 teaspoon salt
- 1/2 teaspoon black pepper
- 1/4 cup fresh parsley, chopped
- 2 tablespoons balsamic vinegar
- 1 teaspoon Dijon mustard
Preparation Time: 15 minutes
Cooking Time: 20 minutes
Total Time: 35 minutes
Instructions:
1. Rinse the quinoa under cold water and combine it with 2 cups of water in a pot. Bring to a boil.
2. Once boiling, reduce the heat to low, cover, and let it simmer for about 15 minutes or until all the water is absorbed.
3. In the meantime, preheat your grill to medium heat.
4. Toss the zucchini, bell pepper, red onion, and cherry tomatoes with 2 tablespoons of olive oil, 1 teaspoon salt, and 1/2 teaspoon black pepper.
5. Grill the vegetables for 5-7 minutes until they are tender and have grill marks.
6. Once the quinoa is cooked, fluff it with a fork and transfer it to a large bowl.
7. Add the grilled vegetables to the quinoa and mix well.
8. In a small bowl, whisk together the balsamic vinegar and Dijon mustard, then pour it over the salad.
9. Garnish with fresh parsley and serve warm or at room temperature.
Tips:
- Feel free to substitute any of the vegetables based on your preference or seasonal availability.
- For added protein, consider mixing in chickpeas or feta cheese.
- This salad can be made ahead of time and stored in the refrigerator for up to 3 days.
Mason Jar Trail Mix Treats
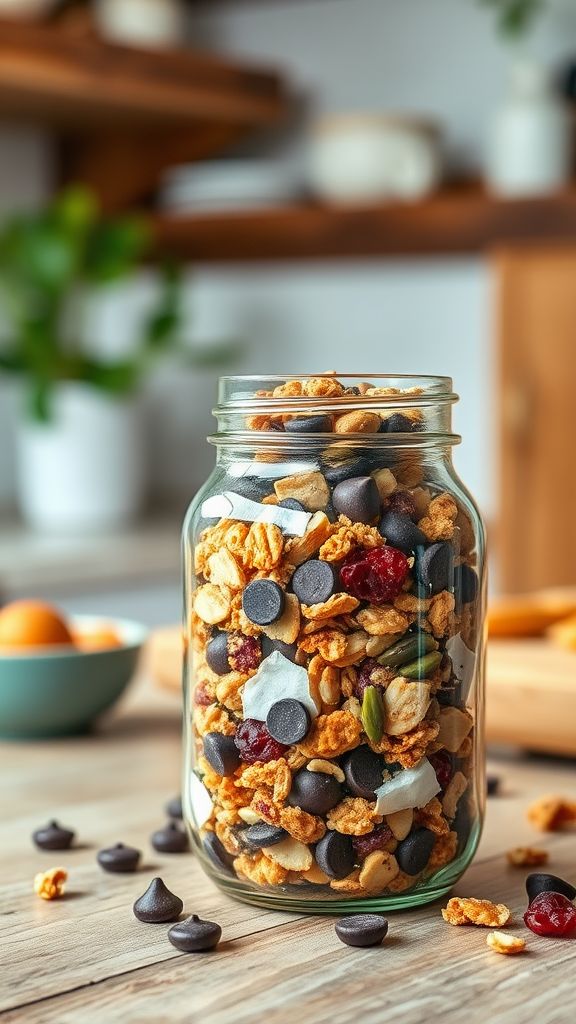
This Mason Jar Trail Mix Treats recipe is special for its delightful combination of sweet and savory flavors, making it the perfect snack for any adventure.
Ingredients:
- 1 cup mixed nuts
- 1 cup dark chocolate chips
- 1 cup dried cranberries
- 1 cup sunflower seeds
- 1 cup granola
- 1/2 cup coconut flakes
Preparation Time: 10 minutes
Cooking Time: 0 minutes
Total Time: 10 minutes
Instructions:
1. In a large mixing bowl, combine the mixed nuts, dark chocolate chips, dried cranberries, sunflower seeds, granola, and coconut flakes.
2. Gently stir the mixture until everything is evenly distributed.
3. Pour the trail mix into mason jars, filling each jar to your desired level.
4. Seal the jars tightly with lids and label them if desired.
5. Store the mason jars in a cool, dry place for up to two weeks.
Tips:
- Feel free to customize the nuts and dried fruits based on your preferences.
- Add a pinch of sea salt for an extra kick of flavor.
- This makes a great homemade gift; just decorate the jar with a ribbon!
- For a healthier version, use unsweetened chocolate chips and skip the coconut flakes.
Instant Oatmeal Packets for the Trail
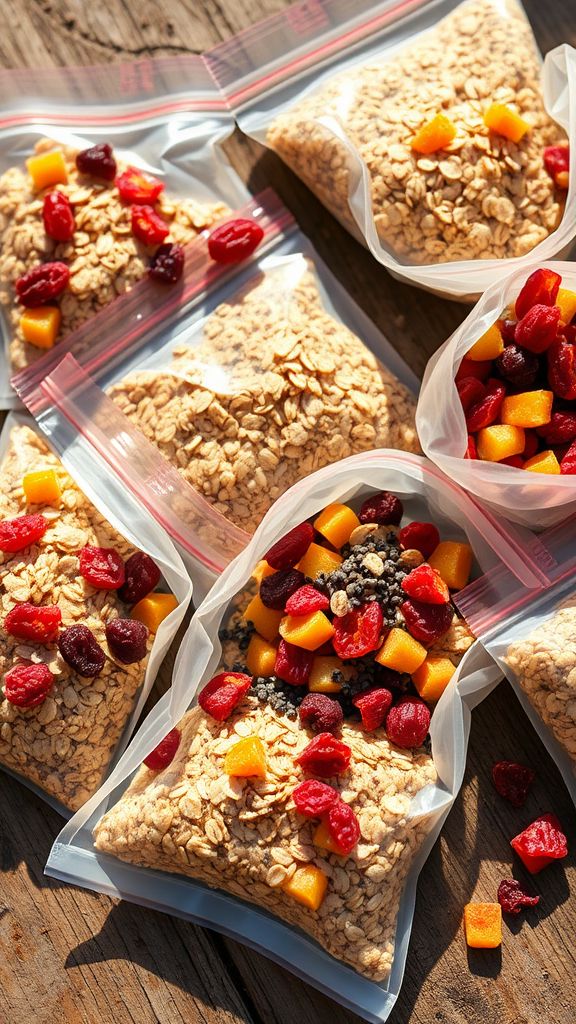
This recipe for Instant Oatmeal Packets for the Trail combines hearty oats with sweet and savory flavors, making it a perfect nutritious and convenient meal for outdoor adventures.
Ingredients:
- 1 cup rolled oats
- 1/4 cup dried fruit (e.g., cranberries, raisins, or apricots)
- 2 tablespoons brown sugar or maple syrup powder
- 1 tablespoon chia seeds
- 1/4 teaspoon cinnamon
- 1/8 teaspoon salt
- 2 tablespoons powdered milk (optional)
- 1/4 cup nuts or seeds (e.g., almonds, walnuts, or sunflower seeds)
Preparation Time: 10 minutes
Cooking Time: 0 minutes
Total Time: 10 minutes
Instructions:
1. In a bowl, combine the rolled oats, dried fruit, brown sugar, chia seeds, cinnamon, salt, powdered milk (if using), and nuts or seeds.
2. Mix all the dry ingredients thoroughly until evenly combined.
3. Portion out the mixture into individual resealable bags or containers, with each portion being roughly 1/2 cup.
4. When ready to eat, pour the contents of one packet into a bowl, add 1 cup of boiling water, stir, and let sit for about 5 minutes.
Tips:
- You can customize the flavor by adding different spices such as nutmeg or vanilla powder.
- For a protein boost, consider adding protein powder to the mixture before portioning.
- Store the packets in a cool, dry place or in a cooler to maintain freshness on long trips.
Savory Stuffed Peppers on the Go
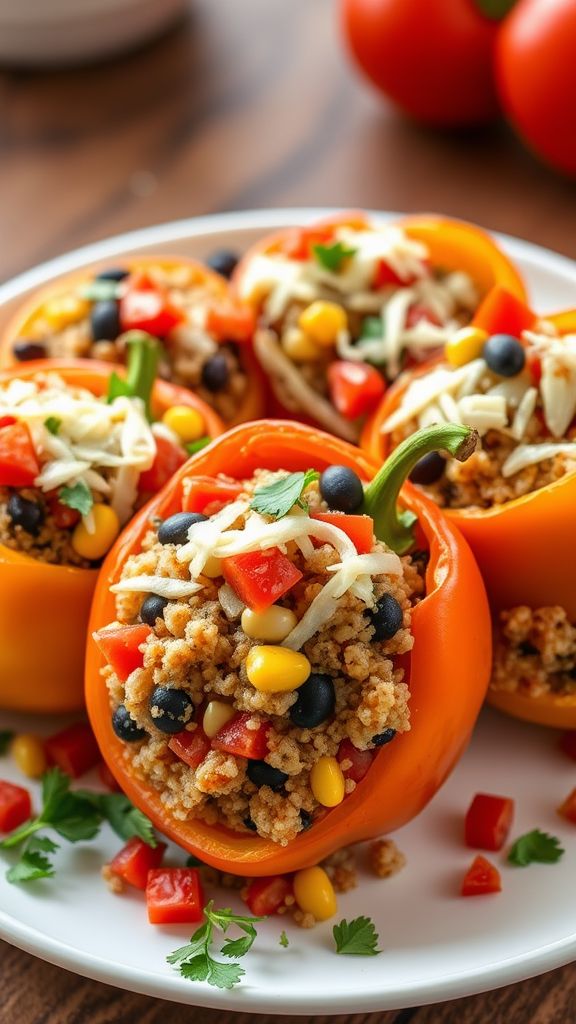
These Savory Stuffed Peppers on the Go combine wholesome ingredients with a burst of flavor, making them the perfect portable meal for busy days.
Ingredients:
- 4 bell peppers (any color)
- 1 cup cooked quinoa
- 1 cup black beans, drained and rinsed
- 1 cup corn, drained
- 1 cup diced tomatoes
- 1 teaspoon cumin
- 1 teaspoon chili powder
- 1/2 teaspoon garlic powder
- 1/4 teaspoon salt
- 1/4 teaspoon pepper
- 1 cup shredded cheese (optional)
- 1 tablespoon olive oil
Preparation Time: 15 minutes
Cooking Time: 30 minutes
Total Time: 45 minutes
Instructions:
1. Preheat your oven to 375°F (190°C).
2. Cut the tops off the bell peppers and remove the seeds and membranes.
3. In a large bowl, mix cooked quinoa, black beans, corn, diced tomatoes, cumin, chili powder, garlic powder, salt, and pepper until well combined.
4. Stuff each bell pepper generously with the quinoa mixture and place them upright in a baking dish.
5. Drizzle olive oil over the stuffed peppers and sprinkle with shredded cheese if using.
6. Cover the baking dish with foil and bake for 25 minutes, then remove the foil and bake for an additional 5 minutes.
7. Allow the stuffed peppers to cool slightly before serving.
Tips:
- Feel free to customize the stuffing by adding cooked chicken or turkey for extra protein.
- These stuffed peppers can be made ahead of time and stored in the fridge for up to 3 days.
- For a spicy kick, add diced jalapeños or a dash of hot sauce to the filling.
Portable Hummus and Veggie Dippers
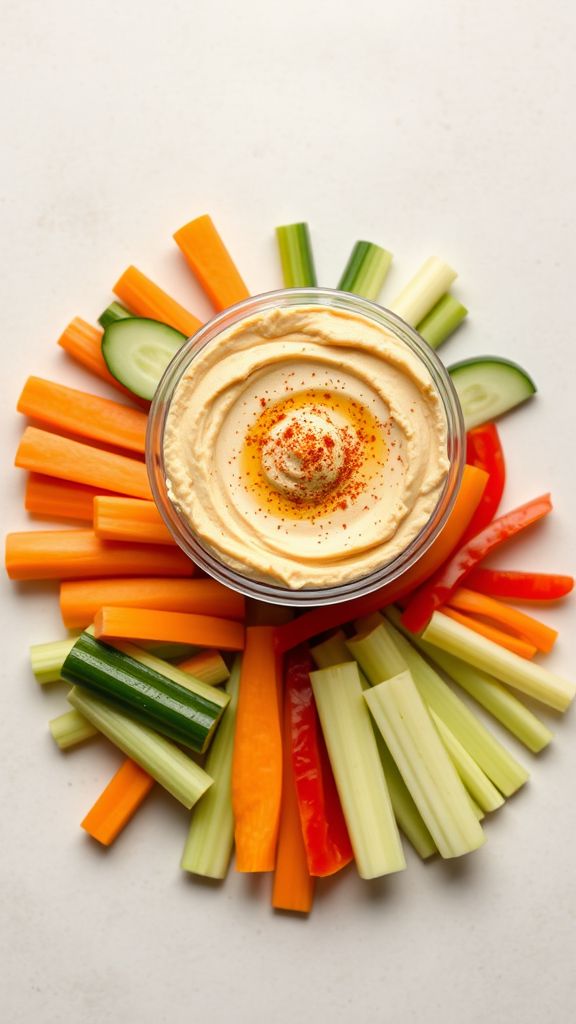
This Portable Hummus and Veggie Dippers recipe offers a delicious blend of creamy, zesty hummus paired with fresh, crunchy vegetables, perfect for on-the-go snacking.
Ingredients:
- 1 can (15 oz) chickpeas, drained and rinsed
- 1/4 cup tahini
- 2 tablespoons olive oil
- 2 tablespoons lemon juice
- 1 clove garlic, minced
- 1/2 teaspoon ground cumin
- Salt to taste
- 1/4 cup water (as needed for consistency)
- 1 cup carrot sticks
- 1 cup cucumber slices
- 1 cup bell pepper strips
- 1 cup celery sticks
Preparation Time: 10 minutes
Cooking Time: 0 minutes
Total Time: 10 minutes
Instructions:
1. In a food processor, combine the chickpeas, tahini, olive oil, lemon juice, garlic, cumin, and salt.
2. Blend until smooth, adding water gradually to achieve desired consistency.
3. Taste and adjust seasoning if necessary.
4. Transfer the hummus to a serving container.
5. Prepare the vegetable dippers by cutting them into sticks or slices.
6. Serve the hummus with an assortment of veggie dippers.
Tips:
- For added flavor, sprinkle paprika or herbs on top of the hummus before serving.
- Store leftover hummus in an airtight container in the refrigerator for up to a week.
- Feel free to mix and match any vegetables you like for dipping.
Prepped Pancake Mix for Easy Mornings
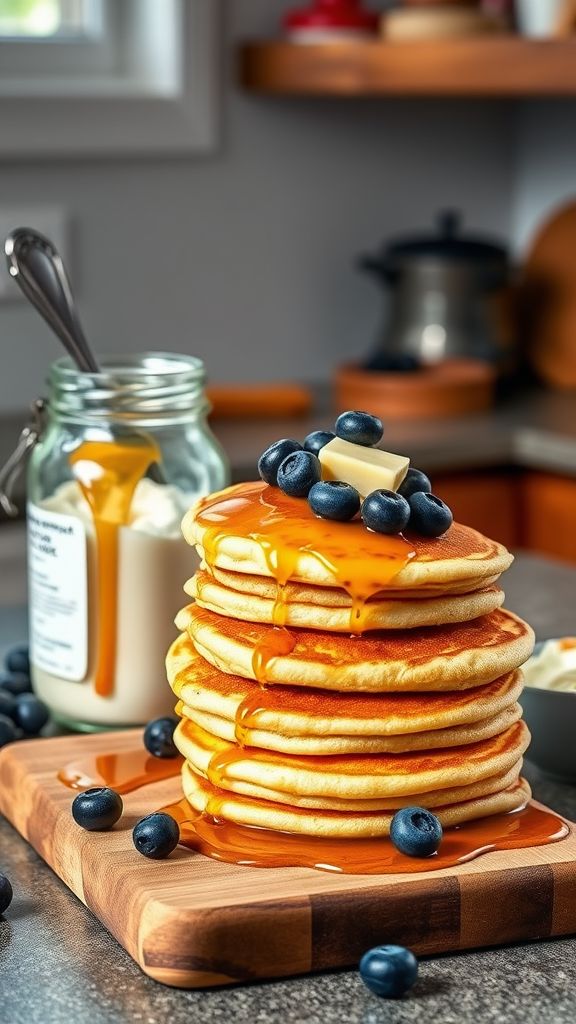
This Prepped Pancake Mix offers a delightful blend of fluffy texture and sweet vanilla flavor, making busy mornings a breeze.
Ingredients:
- 2 cups all-purpose flour
- 2 tablespoons baking powder
- 1 tablespoon granulated sugar
- 1 teaspoon salt
- 1 teaspoon vanilla extract
- 1 cup milk
- 2 large eggs
- 4 tablespoons melted butter
Preparation Time: 10 minutes
Cooking Time: 15 minutes
Total Time: 25 minutes
Instructions:
1. In a large bowl, combine the all-purpose flour, baking powder, sugar, and salt.
2. Whisk the dry ingredients together until well combined.
3. In a separate bowl, mix the milk, eggs, vanilla extract, and melted butter.
4. Pour the wet ingredients into the dry ingredients and stir until just combined; do not overmix.
5. Heat a non-stick skillet over medium heat and lightly grease if necessary.
6. Pour about 1/4 cup of batter for each pancake onto the skillet.
7. Cook until bubbles form on the surface, then flip and cook until golden brown on the other side.
8. Repeat with the remaining batter and serve warm with your favorite toppings.
Tips:
- For a fun twist, add chocolate chips or blueberries into the batter before cooking.
- Store any leftover pancake mix in an airtight container for up to a month.
- For fluffier pancakes, let the batter rest for 5 minutes before cooking.
Campfire Foil Pack Dinners
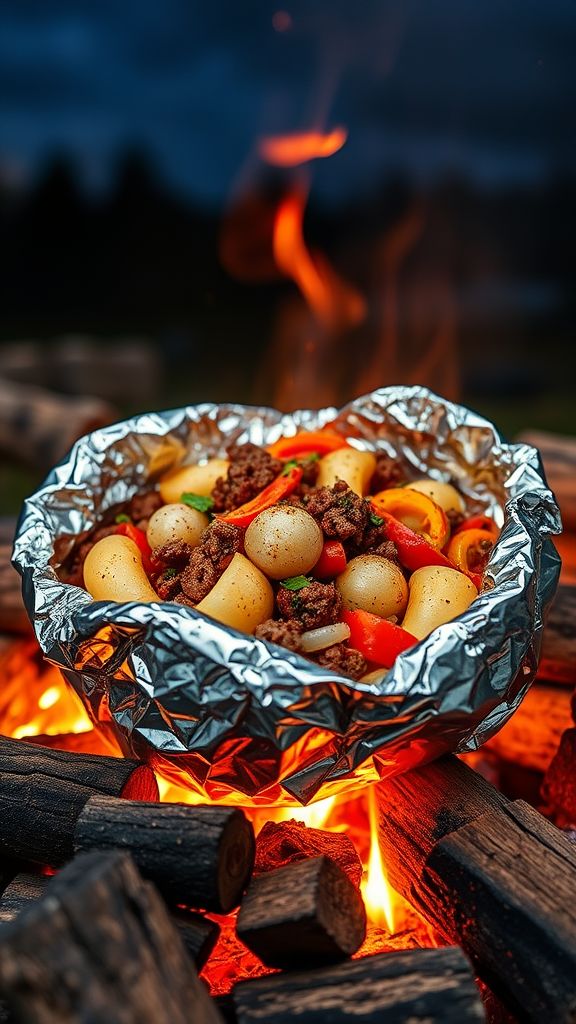
Campfire foil pack dinners are special because they combine the robust flavors of smoky meats, fresh vegetables, and savory seasonings, all cooked to perfection over an open flame.
Ingredients:
- 1 pound ground beef
- 2 cups chopped potatoes
- 1 cup sliced bell peppers
- 1 cup sliced onions
- 1 tablespoon olive oil
- 2 teaspoons garlic powder
- 1 teaspoon paprika
- Salt to taste
- Black pepper to taste
- Aluminum foil (for wrapping)
Preparation Time: 15 minutes
Cooking Time: 30 minutes
Total Time: 45 minutes
Instructions:
1. Preheat the campfire or grill to medium-high heat.
2. In a mixing bowl, combine ground beef, chopped potatoes, sliced bell peppers, sliced onions, olive oil, garlic powder, paprika, salt, and black pepper.
3. Cut squares of aluminum foil, approximately 12 inches in size.
4. Place an equal amount of the mixture in the center of each foil square.
5. Fold the foil around the mixture, creating a sealed packet.
6. Place the packets on the grill or campfire grate.
7. Cook for about 30 minutes, turning occasionally for even cooking.
8. Carefully remove the packets from the heat and let them sit for a few minutes before opening.
Tips:
- For added flavor, consider marinating the meat overnight before cooking.
- Experiment with different vegetables such as zucchini or corn for variety.
- Ensure the packets are tightly sealed to prevent leakage.
- Cooking times may vary based on heat intensity, so check for doneness when removing from the fire.
Zucchini and Cheese Fritters

These Zucchini and Cheese Fritters are a delightful way to enjoy the fresh flavors of summer with their crispy exterior and cheesy goodness.
Ingredients:
- 2 cups grated zucchini
- 1 cup shredded cheese (cheddar or mozzarella)
- 1/2 cup all-purpose flour
- 2 large eggs
- 1/4 cup chopped fresh herbs (such as parsley or basil)
- 1 teaspoon garlic powder
- 1/2 teaspoon salt
- 1/4 teaspoon black pepper
- 1/4 cup vegetable oil (for frying)
Preparation Time: 15 minutes
Cooking Time: 10 minutes
Total Time: 25 minutes
Instructions:
1. Begin by grating the zucchini and placing it in a clean kitchen towel. Squeeze out excess moisture to ensure the fritters are not soggy.
2. In a large mixing bowl, combine the grated zucchini, shredded cheese, flour, eggs, chopped herbs, garlic powder, salt, and black pepper. Stir until well combined.
3. Heat vegetable oil in a large skillet over medium heat. Once hot, scoop tablespoons of the mixture and shape them into patties.
4. Carefully place the patties in the skillet and cook for about 3-4 minutes on each side, or until golden brown and crispy.
5. Remove the fritters from the skillet and place them on a paper towel-lined plate to absorb excess oil. Serve warm and enjoy!
Tips:
- Try using different cheeses for varied flavor profiles.
- Make sure to squeeze out as much moisture from the zucchini as possible to enhance crispiness.
- These fritters can be served with a dipping sauce, such as tzatziki or marinara.
- Leftovers can be stored in the refrigerator and reheated in the oven for best results.
Homemade Granola Bars for Energy
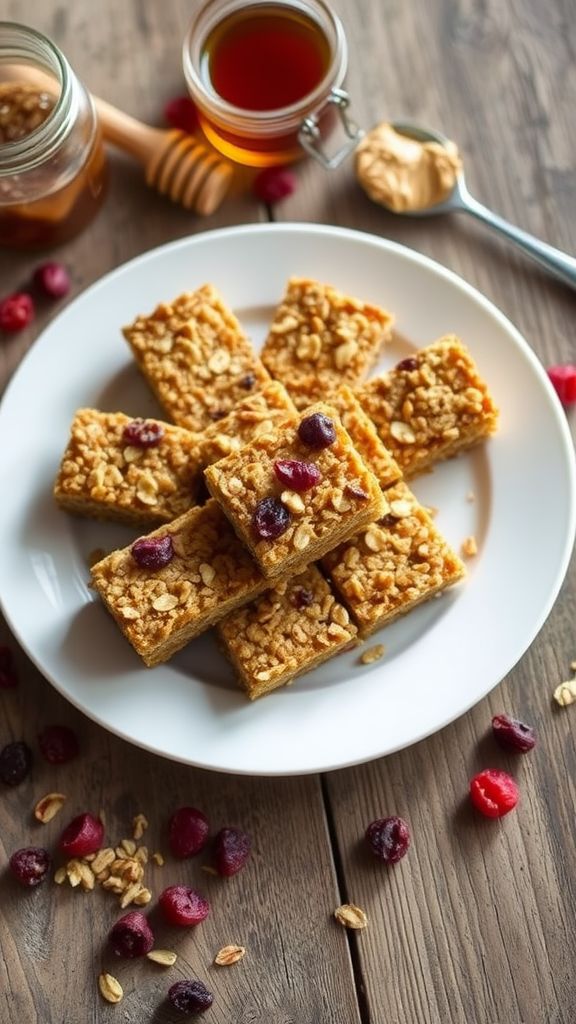
These Homemade Granola Bars for Energy are special because they combine the hearty flavors of oats, nuts, and honey with delicious dried fruits, providing a nutritious and tasty snack ideal for an energy boost.
Ingredients:
- 2 cups rolled oats
- 1 cup mixed nuts (chopped)
- 1/2 cup honey
- 1/4 cup peanut butter
- 1/2 cup dried fruits (like cranberries or raisins)
- 1/2 teaspoon vanilla extract
- 1/4 teaspoon salt
- 1/2 teaspoon cinnamon (optional)
Preparation Time: 10 minutes
Cooking Time: 20 minutes
Total Time: 30 minutes
Instructions:
1. Preheat your oven to 350°F (175°C) and line a baking pan with parchment paper.
2. In a large mixing bowl, combine the rolled oats, chopped nuts, dried fruits, salt, and cinnamon.
3. In a small saucepan, heat the honey and peanut butter over low heat until melted and smooth.
4. Remove the saucepan from the heat and stir in the vanilla extract.
5. Pour the honey mixture over the oat mixture and stir until well combined.
6. Transfer the mixture into the prepared baking pan, pressing it down firmly to create an even layer.
7. Bake for 20 minutes or until the edges are golden brown.
8. Remove from the oven and let it cool in the pan for at least 10 minutes before cutting into bars.
Tips:
- Feel free to customize the nuts and dried fruits based on your taste.
- For an extra chewy texture, add a tablespoon of chia seeds or flax seeds.
- Store leftovers in an airtight container for up to one week.
Freezer-Friendly Pasta Primavera
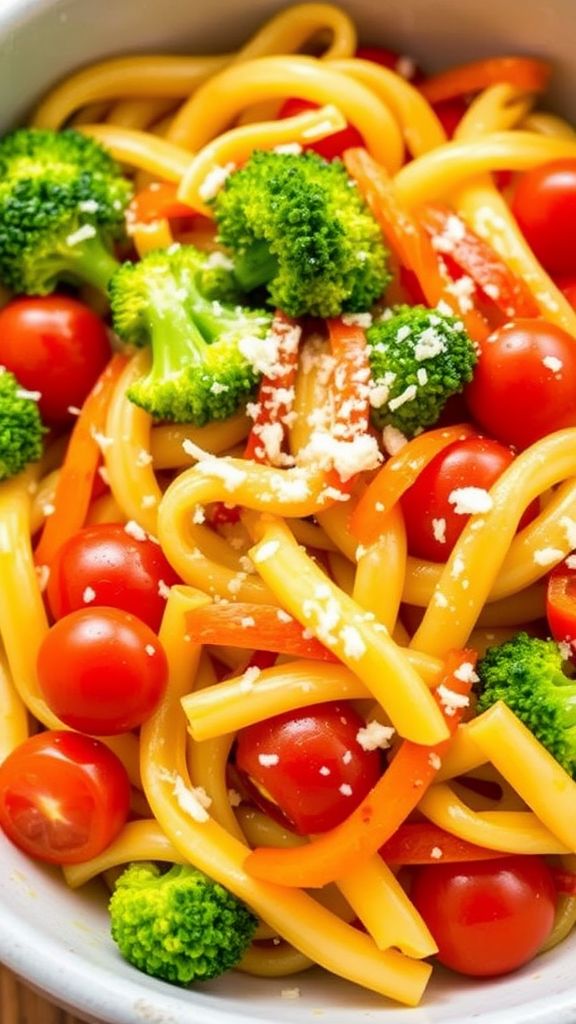
Introducing a delightful twist on a classic dish, this Freezer-Friendly Pasta Primavera bursts with vibrant vegetables and savory flavors, making it a perfect meal prep option.
Ingredients:
- 12 ounces pasta of your choice
- 2 cups broccoli florets
- 1 cup bell peppers, sliced
- 1 cup carrots, julienned
- 1 cup cherry tomatoes, halved
- 2 cloves garlic, minced
- 1/4 cup olive oil
- 1/2 teaspoon salt
- 1/4 teaspoon black pepper
- 1/2 teaspoon Italian seasoning
- 1/4 cup grated Parmesan cheese (optional)
Preparation Time: 15 minutes
Cooking Time: 15 minutes
Total Time: 30 minutes
Instructions:
1. Cook the pasta according to package instructions; drain and set aside.
2. In a large skillet, heat olive oil over medium heat.
3. Add minced garlic and sauté for about 1 minute until fragrant.
4. Add broccoli, bell peppers, and carrots; cook for approximately 5-7 minutes until vegetables are tender.
5. Stir in the cherry tomatoes, salt, black pepper, and Italian seasoning; cook for an additional 2 minutes.
6. Combine the cooked pasta with the vegetable mixture and toss to coat.
7. If desired, sprinkle with grated Parmesan cheese before serving.
Tips:
- Allow the dish to cool completely before freezing to preserve quality.
- Portion the pasta primavera into airtight containers for easy meal prep.
- Reheat from frozen in a microwave or on the stovetop with a splash of water for moisture.
Pre-marinated Chicken Skewers
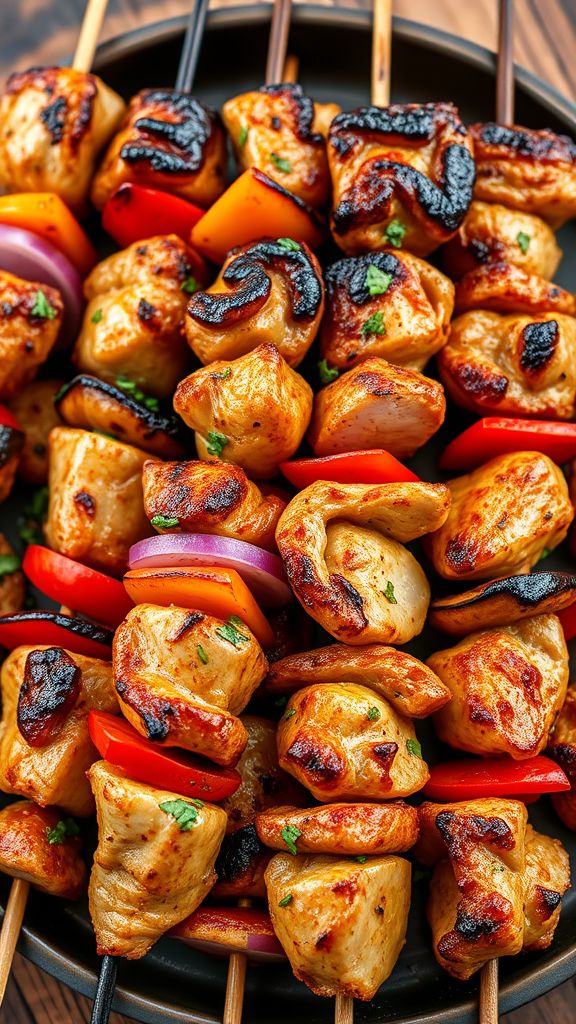
These Pre-marinated Chicken Skewers are a flavor-packed delight, combining the zesty tang of lemon and herbs with the smoky notes from grilling, making them perfect for any gathering.
Ingredients:
- 2 pounds chicken breast, cubed
- 1/4 cup olive oil
- 1/4 cup lemon juice
- 3 cloves garlic, minced
- 2 teaspoons dried oregano
- 2 teaspoons smoked paprika
- 1 teaspoon salt
- 1 teaspoon black pepper
- 8 wooden skewers, soaked in water
Preparation Time: 15 minutes
Cooking Time: 10 minutes
Total Time: 25 minutes
Instructions:
1. In a large bowl, combine olive oil, lemon juice, garlic, oregano, smoked paprika, salt, and pepper to create the marinade.
2. Add the cubed chicken breast to the marinade, ensuring all pieces are well-coated, and cover the bowl. Let it marinate in the refrigerator for at least 30 minutes, or up to 2 hours for more flavor.
3. Preheat your grill to medium-high heat and thread the marinated chicken onto the soaked wooden skewers.
4. Grill the skewers for about 10 minutes, turning occasionally, until the chicken is cooked through and has nice grill marks.
Tips:
- For extra flavor, add bell peppers, onions, or cherry tomatoes to your skewers.
- Let the skewers rest for a few minutes after grilling for juicier chicken.
- Serve with a side of tzatziki sauce or a fresh salad for a complete meal.
Overnight Berry Yogurt Parfaits
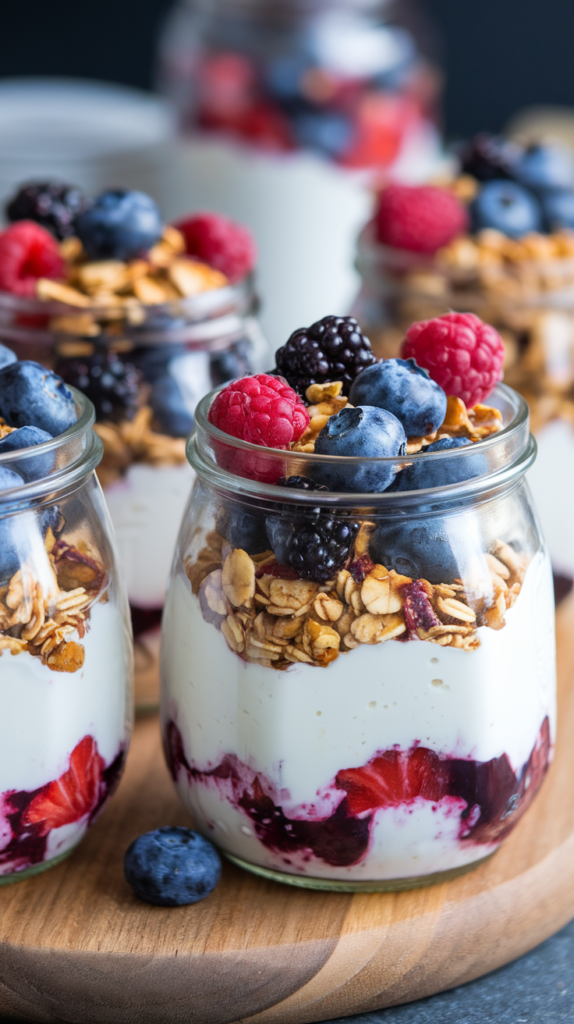
These Overnight Berry Yogurt Parfaits are a delightful blend of creamy yogurt, fresh berries, and crunchy granola, making them a perfect breakfast or snack option that is both nutritious and satisfying.
Ingredients:
- 2 cups Greek yogurt
- 2 cups mixed berries (strawberries, blueberries, raspberries)
- 1 cup granola
- 2 tablespoons honey or maple syrup
- 1 teaspoon vanilla extract
- ½ teaspoon cinnamon (optional)
Preparation Time: 10 minutes
Cooking Time: 0 minutes
Total Time: 10 minutes
Instructions:
1. In a bowl, mix the Greek yogurt, honey or maple syrup, vanilla extract, and cinnamon until well combined.
2. In a glass or jar, layer ½ cup of the yogurt mixture at the bottom.
3. Add a layer of mixed berries, followed by a layer of granola.
4. Repeat the layers until the glasses are full, finishing with a layer of berries on top.
5. Cover the parfaits with a lid or plastic wrap and refrigerate overnight.
6. Serve chilled and enjoy your delicious parfaits!
Tips:
- For added texture, use a mix of crunchy and chewy granolas.
- Prep your parfaits the night before for a quick grab-and-go breakfast.
- Feel free to substitute the berries with your favorite fruits.
- Use low-fat yogurt for a lighter version.
Trail-Friendly Peanut Butter Energy Bites
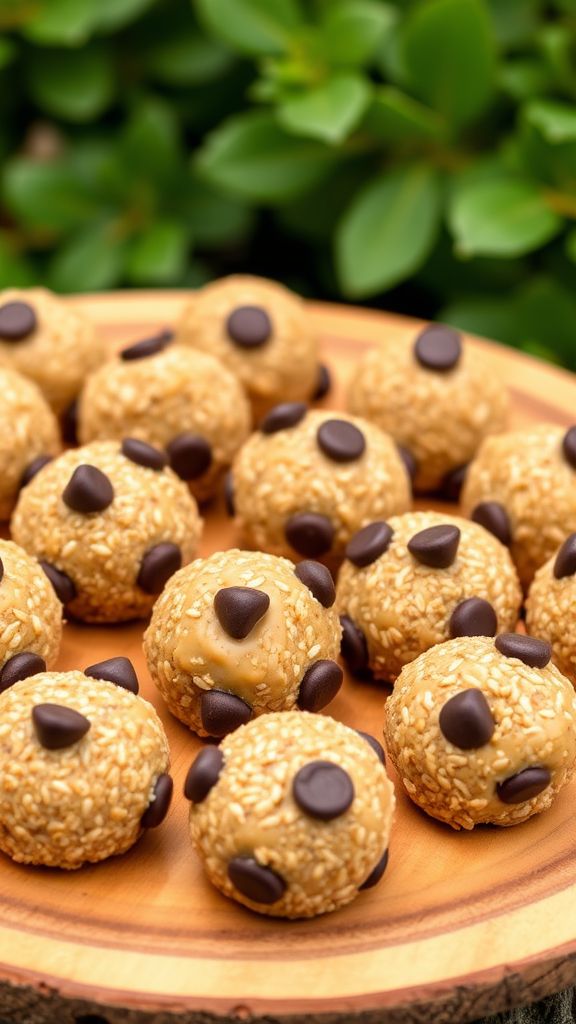
These Trail-Friendly Peanut Butter Energy Bites are packed with natural flavors and healthy ingredients, making them the perfect on-the-go snack for outdoor adventures.
Ingredients:
- 1 cup rolled oats
- 1/2 cup creamy peanut butter
- 1/4 cup honey or maple syrup
- 1/2 cup ground flaxseed
- 1/2 cup mini chocolate chips
- 1/4 cup chopped nuts or seeds (optional)
- 1 teaspoon vanilla extract
- 1/2 teaspoon cinnamon (optional)
Preparation Time: 10 minutes
Cooking Time: 0 minutes
Total Time: 10 minutes
Instructions:
1. Combine the rolled oats, ground flaxseed, and cinnamon (if using) in a large bowl.
2. Add the creamy peanut butter, honey or maple syrup, vanilla extract, and mix until well combined.
3. Fold in the mini chocolate chips and chopped nuts or seeds (if desired).
4. Roll the mixture into small balls, about 1 inch in diameter, and place them on a baking sheet lined with parchment paper.
5. Refrigerate for at least 30 minutes to firm up before enjoying.
Tips:
- Store in an airtight container in the fridge for up to one week.
- Experiment with different add-ins like dried fruit, coconut flakes, or protein powder for variety.
- For extra energy, consider adding a pinch of salt to enhance the flavors.
Baked Potato Bar for Campers

This Baked Potato Bar for Campers is special because it allows for endless customization with your favorite toppings, making it a hearty and satisfying meal after a day in the great outdoors.
Ingredients:
- 6 large baking potatoes
- 1 cup shredded cheese (cheddar or your choice)
- 1 cup sour cream
- 1 cup cooked and crumbled bacon
- 1 cup chives, chopped
- 1 cup butter, melted
- 1 teaspoon garlic powder
- Salt and pepper to taste
Preparation Time: 10 minutes
Cooking Time: 45 minutes
Total Time: 55 minutes
Instructions:
1. Preheat your oven to 425°F (220°C).
2. Scrub the baking potatoes under running water and pat them dry with a towel.
3. Poke several holes in each potato with a fork to allow steam to escape while baking.
4. Rub each potato with a little melted butter and sprinkle with salt for extra flavor.
5. Place the potatoes directly on the oven rack or on a baking sheet and bake for about 45 minutes, or until tender.
6. Once baked, remove the potatoes from the oven and let them cool slightly before cutting them open.
7. Set up a topping station with the shredded cheese, sour cream, bacon, chives, garlic powder, and any other toppings you desire.
8. Encourage everyone to load their baked potatoes with their favorite toppings and enjoy!
Tips:
- Wrap potatoes in aluminum foil before baking for easier cleanup and to keep them warm longer.
- Add other toppings like chili, broccoli, or jalapeños for extra flavor.
- Use a cooler to keep toppings fresh if you’re camping for several days.
S’mores-Stuffed Banana Boats
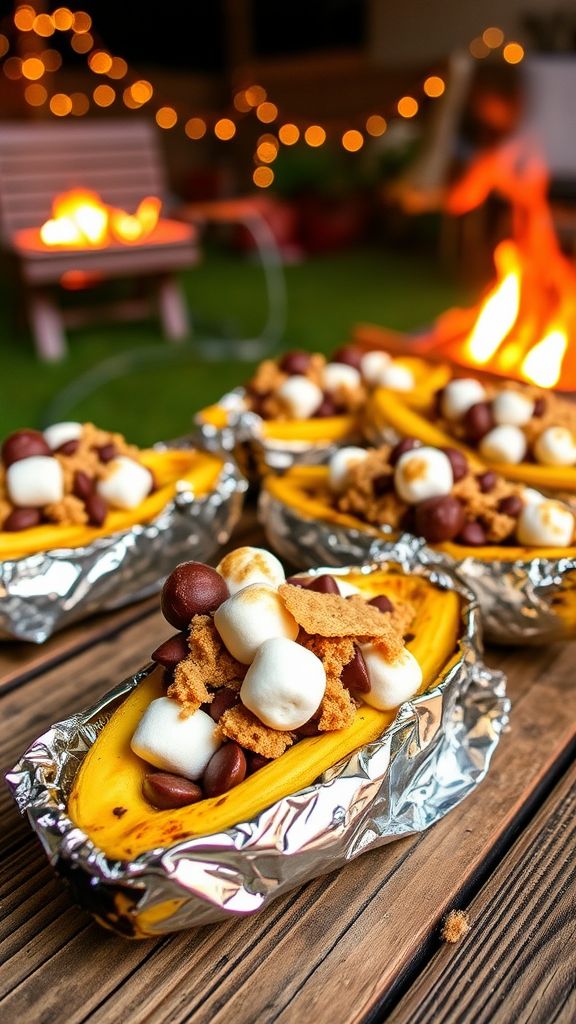
These S’mores-Stuffed Banana Boats combine the delicious flavors of chocolate, marshmallows, and graham crackers in a fun and easy-to-make dessert perfect for campfires or backyard barbecues.
Ingredients:
- 4 ripe bananas
- 1 cup mini marshmallows
- 1 cup chocolate chips
- 1 cup crushed graham crackers
- 4 aluminum foil sheets
- ¼ cup nut butter (optional)
Preparation Time: 10 minutes
Cooking Time: 10 minutes
Total Time: 20 minutes
Instructions:
1. Preheat your grill or prepare your campfire.
2. Slice each banana down the center lengthwise, leaving the peel on.
3. Gently push open the banana to create a boat shape.
4. Fill each banana with mini marshmallows, chocolate chips, and crushed graham crackers.
5. If using, spread a layer of nut butter on top of the fillings for extra flavor.
6. Wrap each stuffed banana in aluminum foil.
7. Place the foil-wrapped bananas on the grill or at the edge of the campfire and cook for about 10 minutes until everything is melted and gooey.
8. Carefully unwrap the foil and enjoy your delicious S’mores-Stuffed Banana Boats!
Tips:
- For a more intense chocolate flavor, try using dark chocolate chips.
- Experiment with different types of nut butter for unique flavors.
- Serve with a dollop of whipped cream or ice cream for an extra treat.
Ready-to-Grill Kebabs
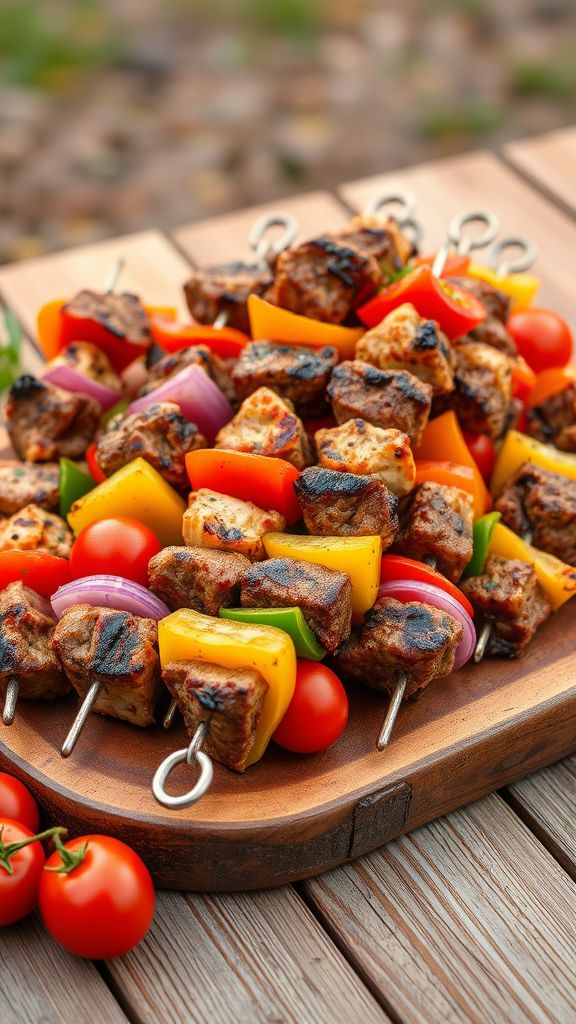
These Ready-to-Grill Kebabs are a perfect blend of marinated meats and vibrant vegetables, bursting with smoky flavors that elevate any outdoor gathering.
Ingredients:
- 1 pound chicken breast, cubed
- 1 pound beef sirloin, cubed
- 1 cup bell peppers, cut into chunks
- 1 cup red onion, cut into chunks
- 1/2 cup cherry tomatoes
- 1/4 cup olive oil
- 2 tablespoons soy sauce
- 2 tablespoons lemon juice
- 2 teaspoons garlic powder
- 1 teaspoon paprika
- Salt and pepper to taste
- Skewers (wooden or metal)
Preparation Time: 15 minutes
Cooking Time: 15 minutes
Total Time: 30 minutes
Instructions:
1. In a bowl, combine olive oil, soy sauce, lemon juice, garlic powder, paprika, salt, and pepper to make the marinade.
2. Add the cubed chicken and beef to the marinade, mixing well to coat all pieces. Cover and refrigerate for at least 30 minutes.
3. Preheat your grill to medium-high heat.
4. Thread the marinated meats and vegetables onto the skewers, alternating between the chicken, beef, and vegetables.
5. Place the skewers on the grill and cook for 12-15 minutes, turning occasionally until meats are cooked through and have nice char marks.
6. Remove from the grill and let rest for a few minutes before serving.
Tips:
- Soak wooden skewers in water for at least 30 minutes to prevent burning on the grill.
- Use any vegetables of your choice, like zucchini or mushrooms, for variety.
- Marinate overnight for even more intense flavors.
Campfire Mac and Cheese

This Campfire Mac and Cheese is a creamy, cheesy delight infused with smoky flavors that makes it a perfect dish to enjoy around the fire.
Ingredients:
- 1 cup elbow macaroni
- 2 cups sharp cheddar cheese, shredded
- 1 cup milk
- 2 tablespoons butter
- 1 tablespoon all-purpose flour
- 1/2 teaspoon garlic powder
- 1/2 teaspoon onion powder
- 1/4 teaspoon black pepper
- 1/4 teaspoon smoked paprika
- Salt to taste
Preparation Time: 10 minutes
Cooking Time: 20 minutes
Total Time: 30 minutes
Instructions:
1. Start by boiling water in a pot over the campfire and cook the macaroni according to package instructions until al dente.
2. In a separate small saucepan, melt the butter over low heat, then whisk in the flour to create a roux.
3. Gradually add the milk to the roux, whisking constantly until the mixture thickens.
4. Stir in the shredded cheddar cheese, garlic powder, onion powder, black pepper, smoked paprika, and salt until the cheese is melted and the sauce is smooth.
5. Drain the cooked macaroni and mix it into the cheese sauce until well combined.
6. Serve hot over the campfire, and enjoy your delicious Campfire Mac and Cheese!
Tips:
- For extra flavor, add cooked bacon or crispy breadcrumbs on top before serving.
- Keep the mac and cheese warm by placing it in a cast-iron skillet covered with foil.
- Adjust the cheese types for a unique twist; gouda or mozzarella can be great alternatives.
Cold Pasta Salad with Pesto and Veggies
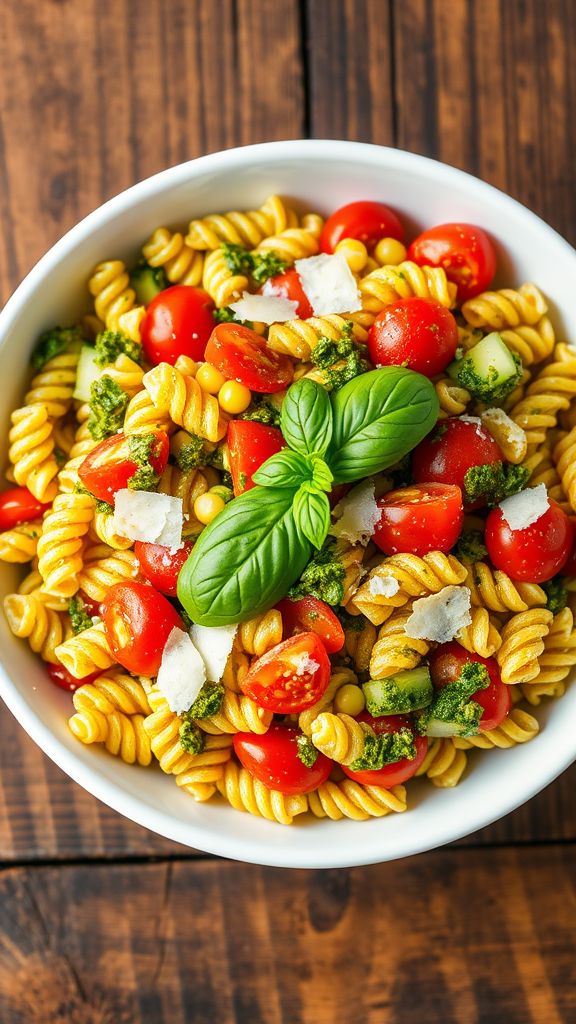
This Cold Pasta Salad with Pesto and Veggies is a refreshing dish bursting with vibrant flavors and perfect for any gathering.
Ingredients:
- 8 ounces uncooked pasta (such as rotini or penne)
- 1 cup cherry tomatoes, halved
- 1 cup cucumber, diced
- 1 cup bell pepper, diced
- 1 cup corn (fresh or frozen)
- 1/2 cup pesto sauce
- 1/4 cup olive oil
- 1/4 cup grated Parmesan cheese
- Salt and pepper to taste
Preparation Time: 10 minutes
Cooking Time: 10 minutes
Total Time: 20 minutes
Instructions:
1. Cook the pasta according to package instructions until al dente, then drain and rinse under cold water.
2. In a large bowl, combine the cooled pasta, cherry tomatoes, cucumber, bell pepper, and corn.
3. In a separate bowl, mix together the pesto sauce, olive oil, and grated Parmesan cheese until well combined.
4. Pour the pesto mixture over the pasta and vegetables, then toss gently to coat all ingredients evenly.
5. Season with salt and pepper to taste, and chill in the refrigerator for at least 30 minutes before serving.
Tips:
- Feel free to add other vegetables like spinach or artichokes for extra flavor and nutrition.
- For a creamy version, add a dollop of cream cheese or Greek yogurt to the pesto mixture.
- Garnish with additional Parmesan cheese and fresh basil leaves for a beautiful presentation.

